
Monte's 04 Build Thread
#2011
 12-27-2016, 09:18 PM

Call me crazy but after some reading and building on my last post could I install a commonrail head on my 1st gen block? I need to rebuild anyway and I could just use commonrail pistons and get a gear case. I'd get the cam and all that etc but I Was looking into all that for the 12v anyway and now the only cost difference is basically adding the electronics to run it and the ecm.
#2012
12-27-2016, 09:23 PM
Cargo Master
Can't really go by the cross hatch on these engines, A guy on Cummins Forum still had cross hatch in the cylinders after 800k miles but had enough taper in the bores that it needed a .020 overbore to get it back in spec.. You may get lucky and have it clean up with a good hone job, but your still going to need a set of pistons and the head will need reworked.
Common rail would be a good swap and be legal, I personally just wanted to get away from the electronics.
Common rail would be a good swap and be legal, I personally just wanted to get away from the electronics.
#2013
12-27-2016, 09:26 PM
#2014
12-27-2016, 09:29 PM
Elder User
#2015
12-27-2016, 09:44 PM
Cargo Master
To make it a common rail you'll need a crank, head, gear case, balancer and complete fuel system along with the electronics. By the time you piece everything together you can buy a complete engine cheaper.
I'd look for a complete engine with the electronics and save the 12v for another project.
If it was me I'd rebuild the 12v and stay on course with the conversion, but we don't have to deal with smog checks where I live.
I'd look for a complete engine with the electronics and save the 12v for another project.
If it was me I'd rebuild the 12v and stay on course with the conversion, but we don't have to deal with smog checks where I live.
#2016
01-04-2017, 09:10 AM
Cummins Tear Down
Well gents i got a boat load done last week but not as much as i had originally planned on doing, work called me in on Wednesday at 11am and i was in until 5am Thursday so i spent Wednesday at work and Thursday sleeping lol. Friday i spent working on the wife's BMW and then we had new years eve.
So as you all know my cummins is toast for now unfortunately but here what i was going through and doing until i fount my issue.
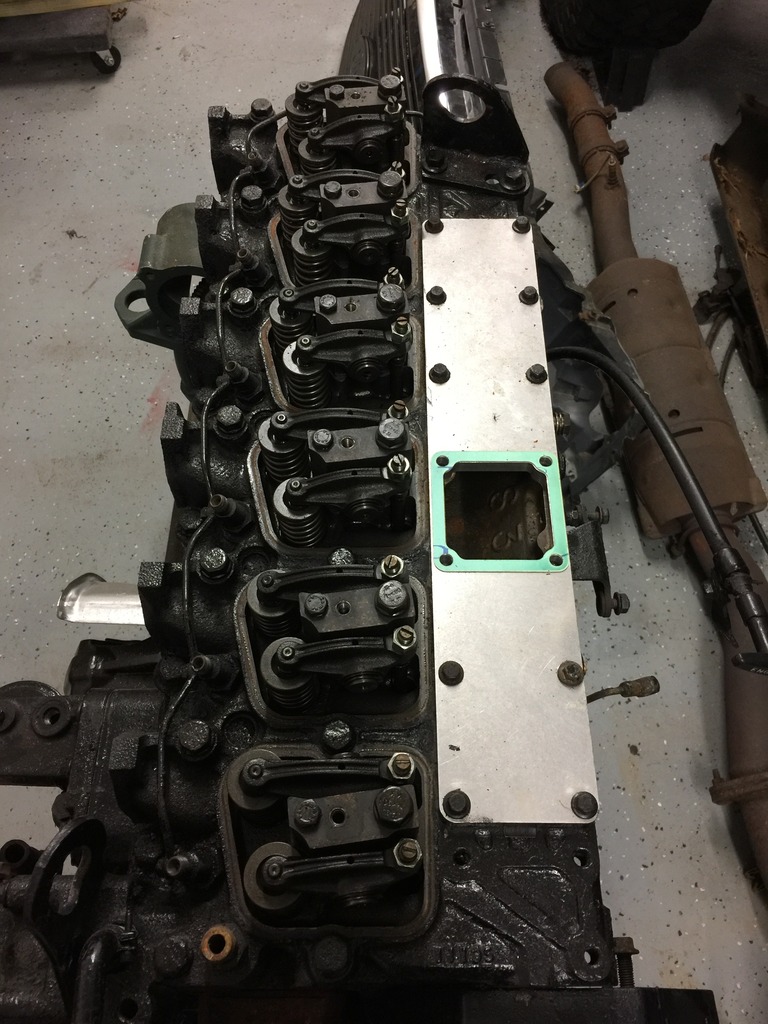
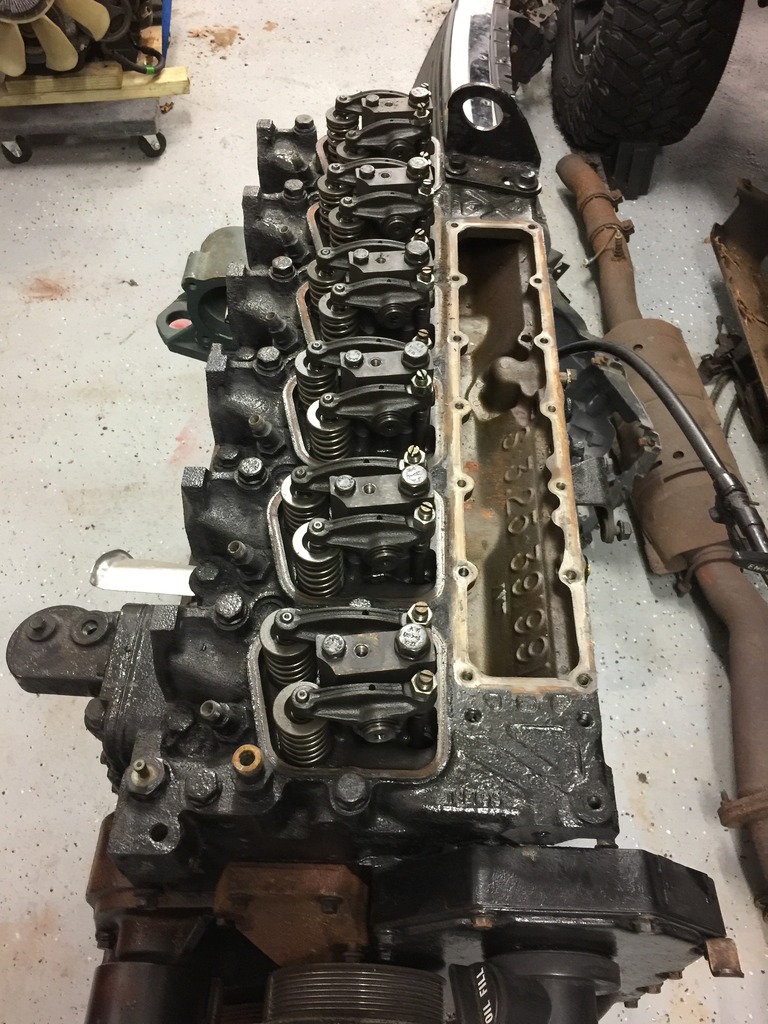
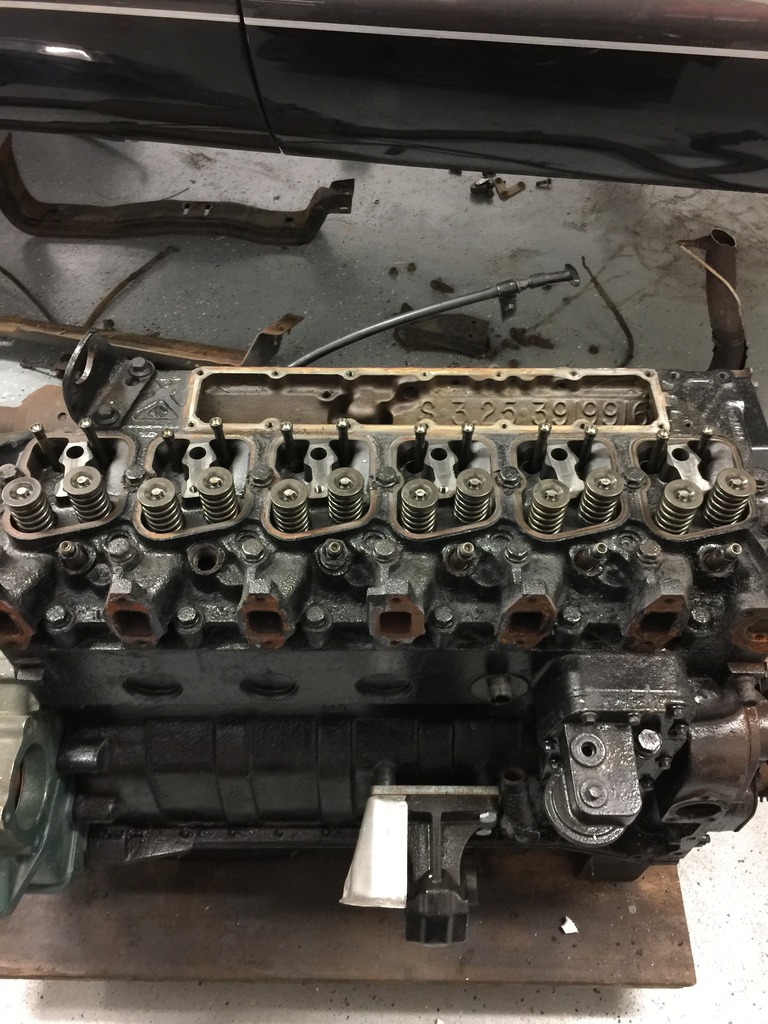
I had decided to remove the head to replace the head gasket and stud the motor for the compound turbos i was planning to run. The 12v ARP studs require some machine work on the rocker arm pedestals so i figured now is the perfect disassembly time since i can use works machine shop on my days off.
I rolled the motor out and started to disassemble:

Removed valve covers, manifold and turbo:

The part that gets milled down is just below the larger stud:

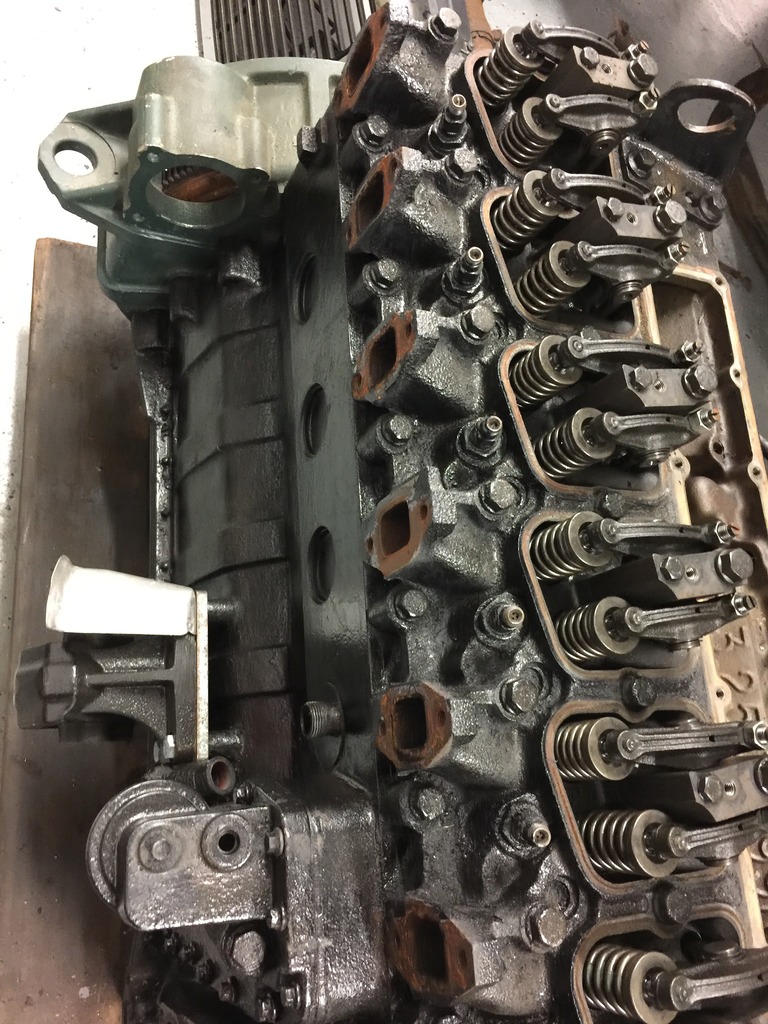
Intake horn removed:
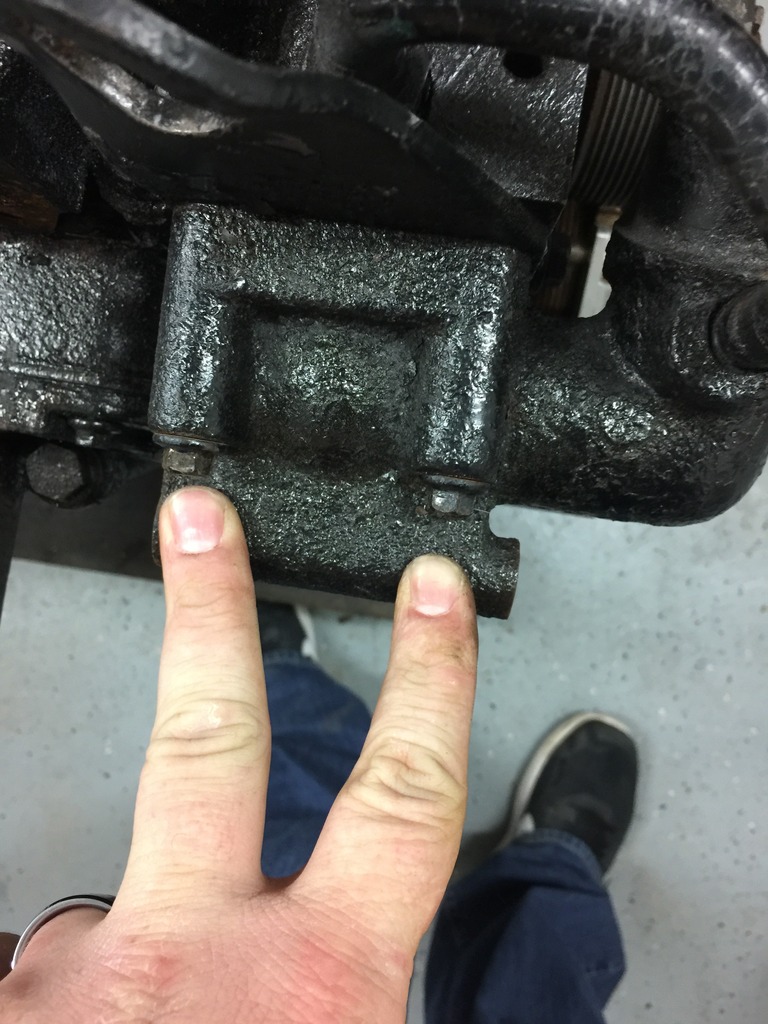
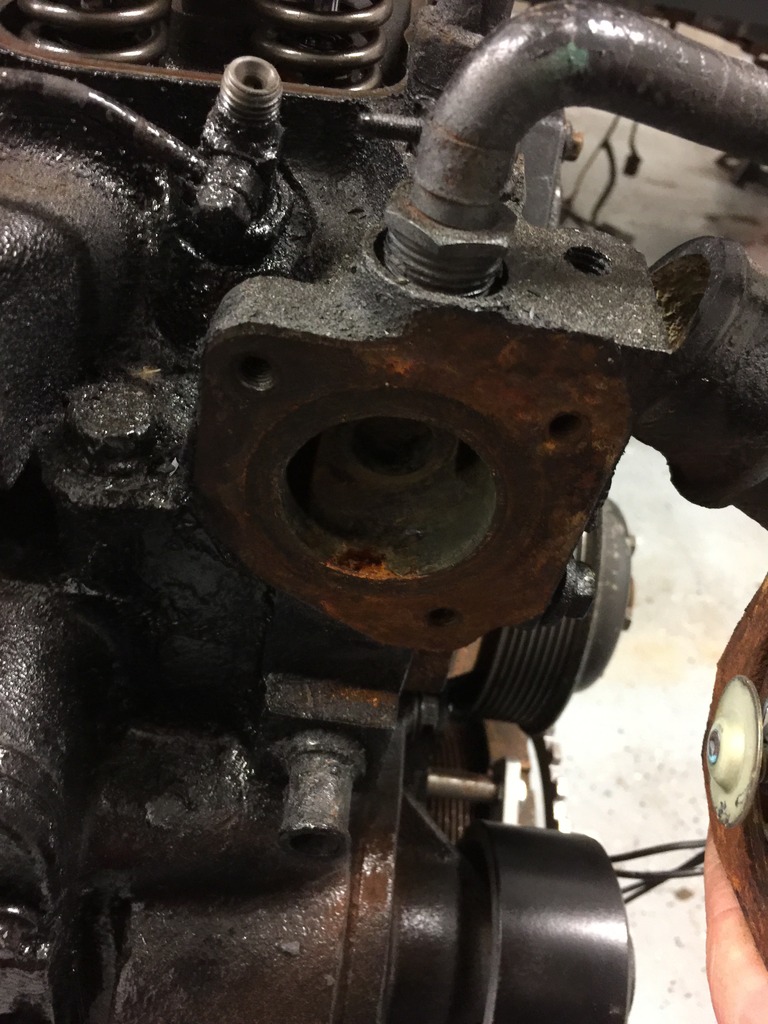
While doing all this disassembly i decided to finally swap in a new thermostat.
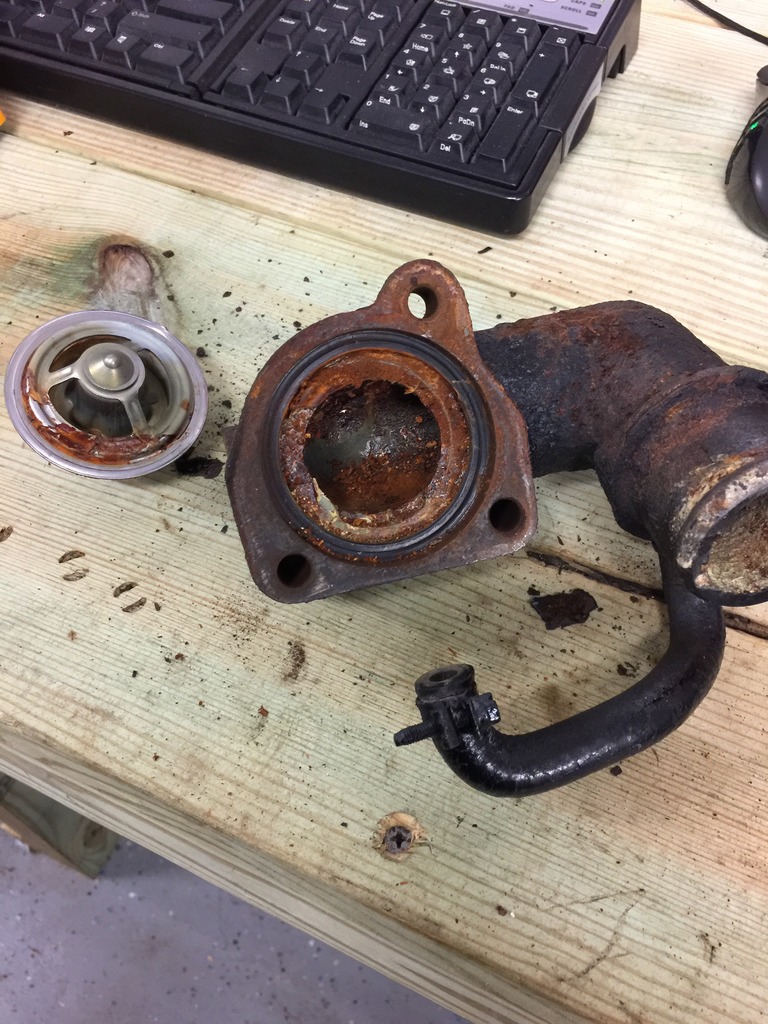
Housing:
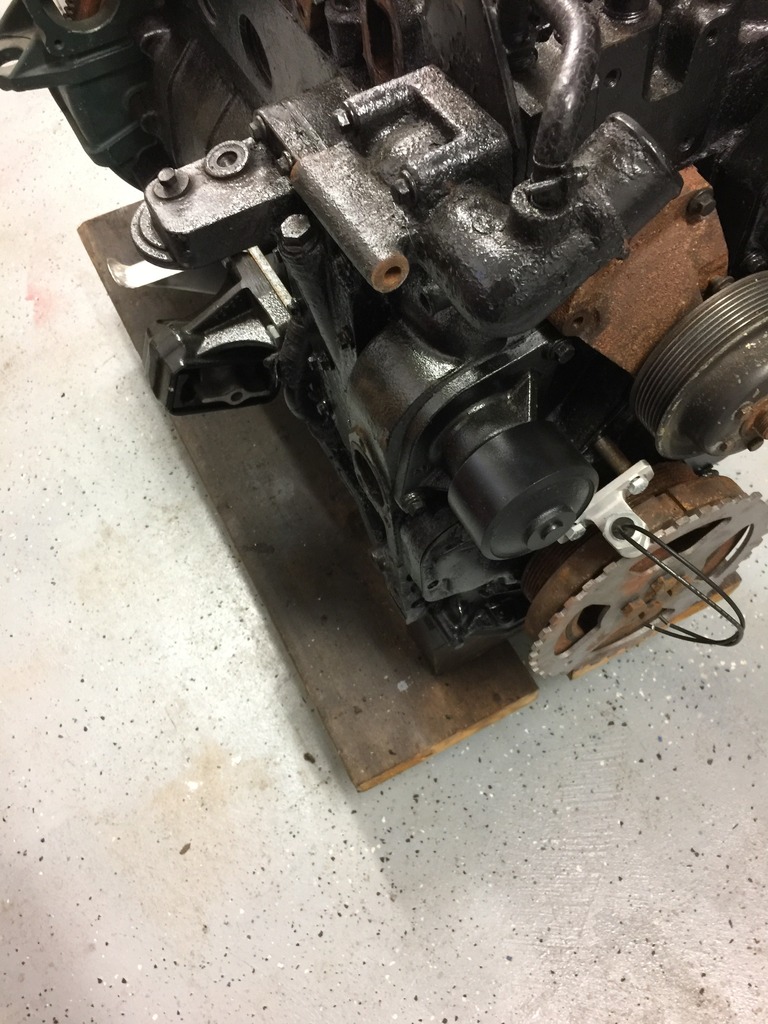
To do this you need to remove the top two housing bolts as well as a lower somewhat hidden bolt and then give the housing a good smack with your palm and it comes right off.
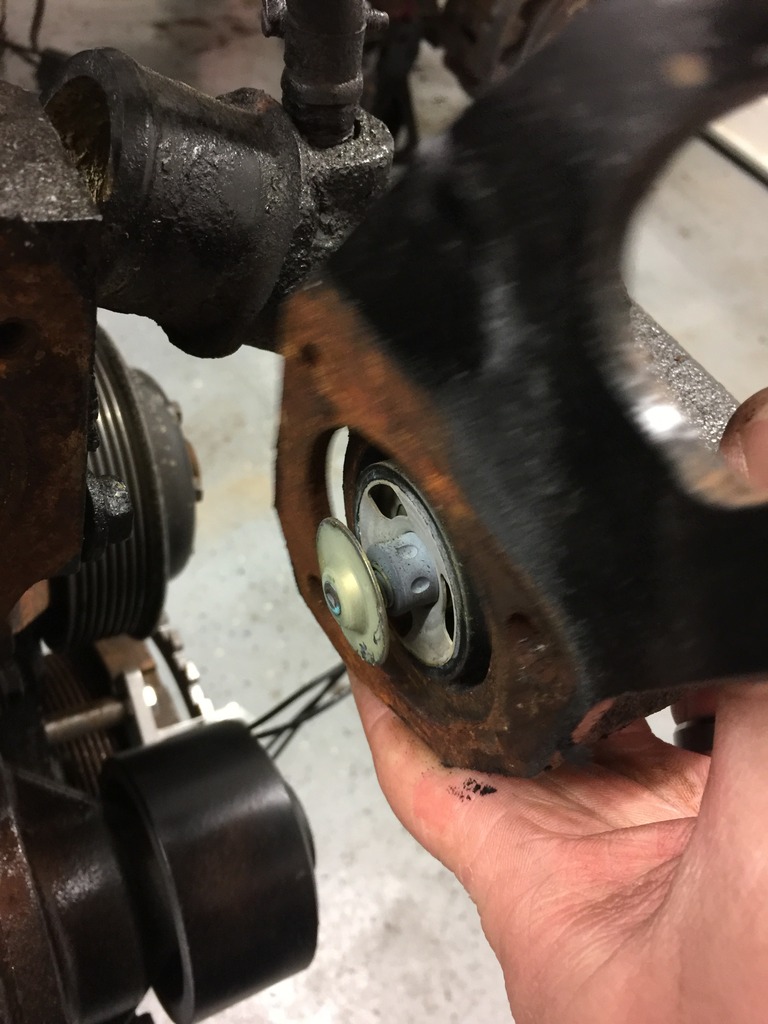
Also the front engine hoist point is separates from the housing...it hurts if it lands on your foot.

The old thermostat was somewhat of a pain to remove but it comes out after a while of wiggling it and using some needle nose pliers.
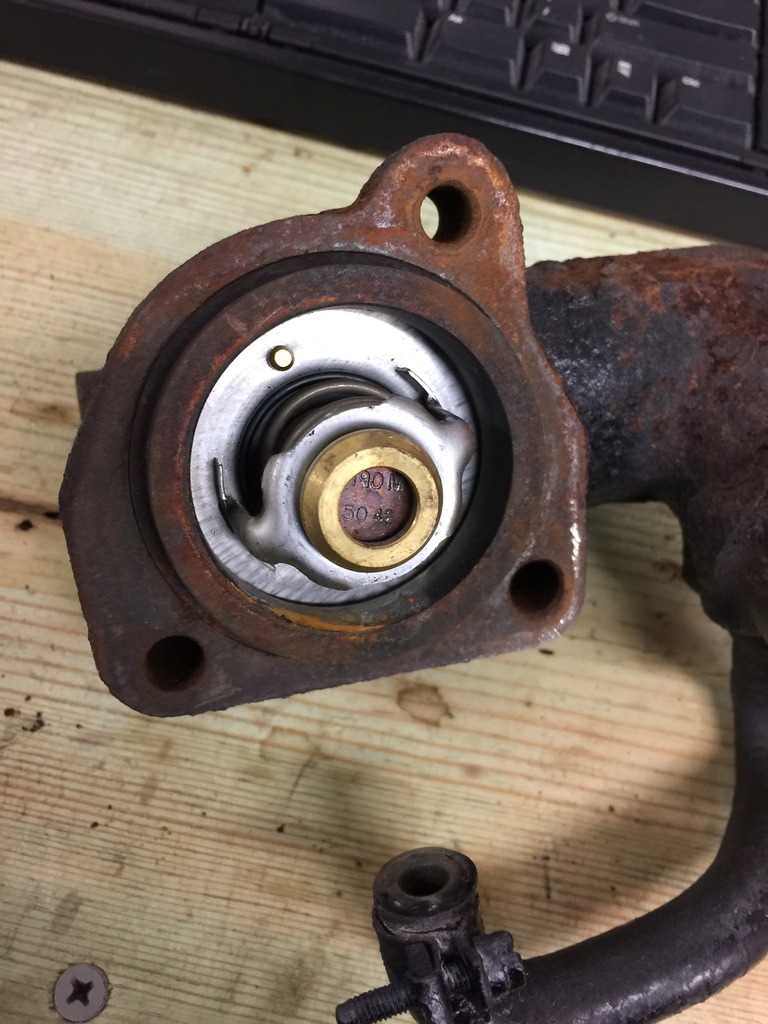
New thermostat in the housing:
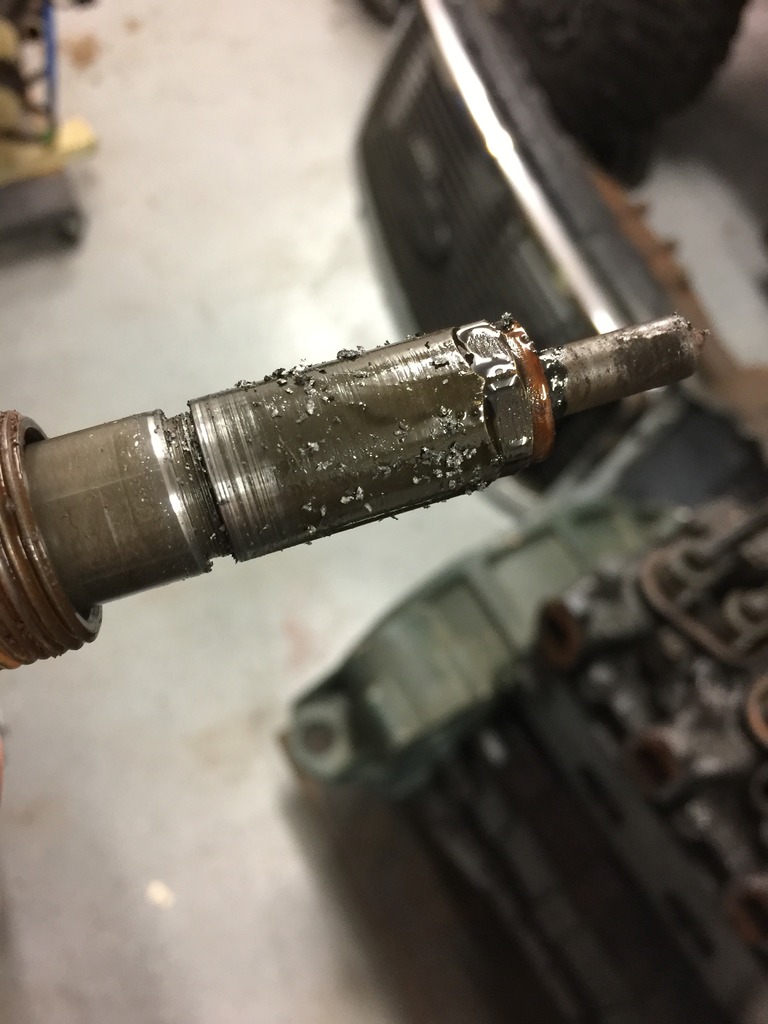
Back to the engine again! intake manifold removed followed by injector return lines:
I pulled one injector out since it came out with the retaining nut and either someone cross threaded it or there was just something going on...this is the worst cylinder and red flag number 1.
I continues to pull the studs and rocker arm pedestals, it is important to note to mark what bolts pedestals etc go where because they need to be reinstalled in the same locations.
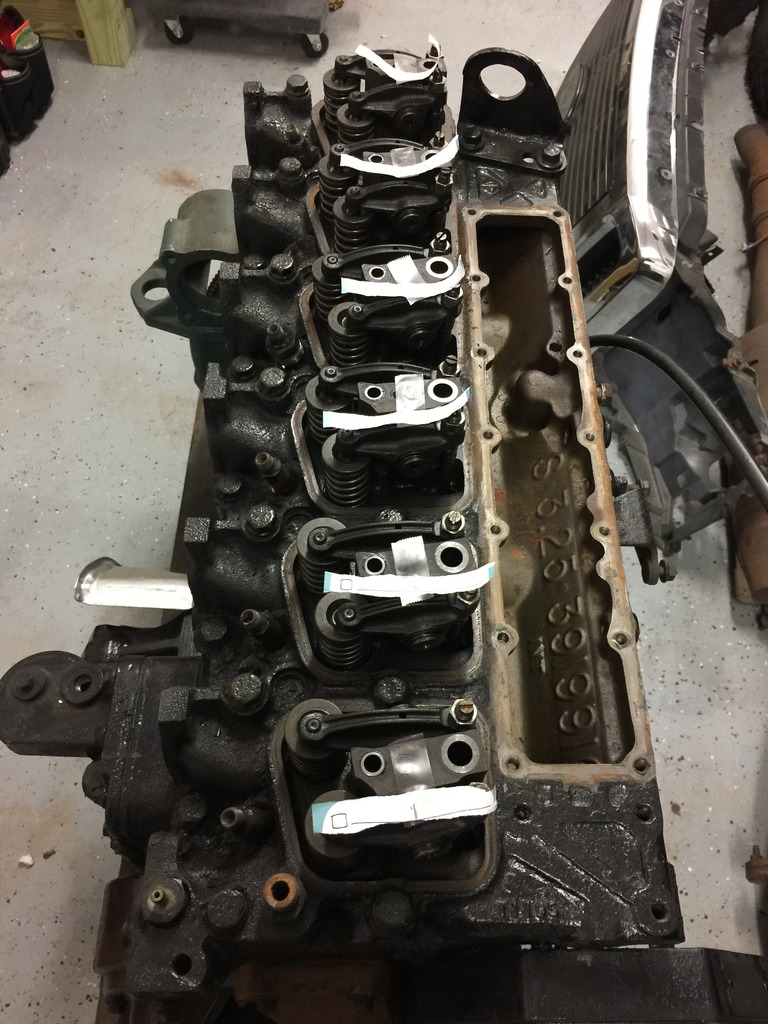
at this point i was super excited:
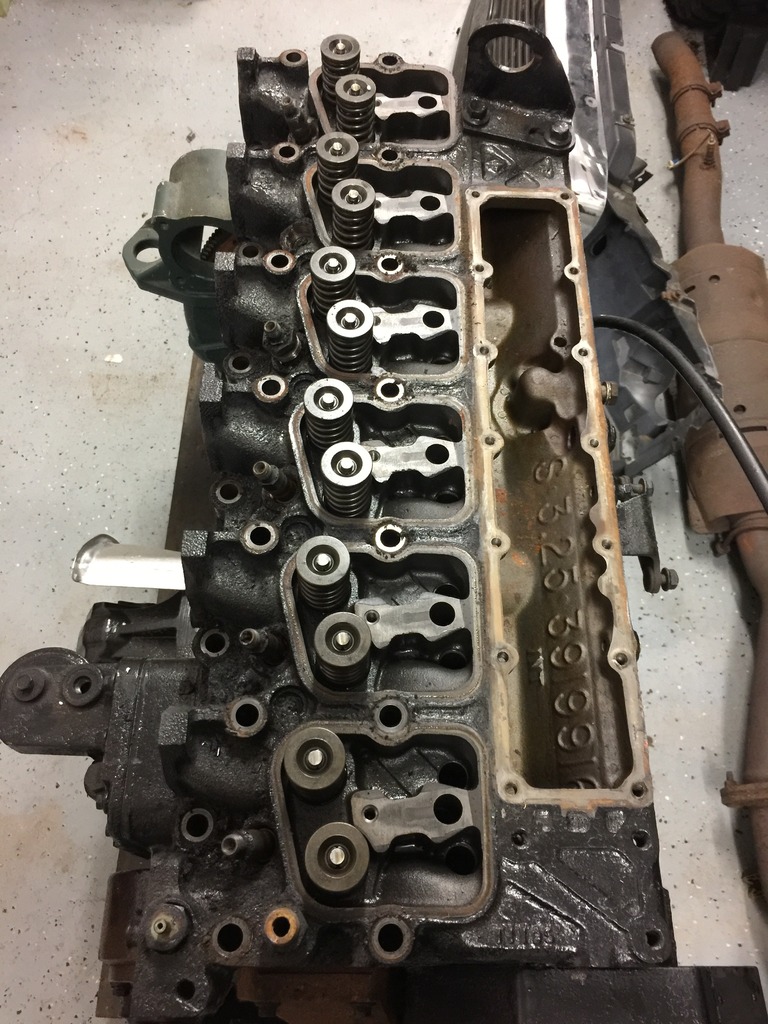
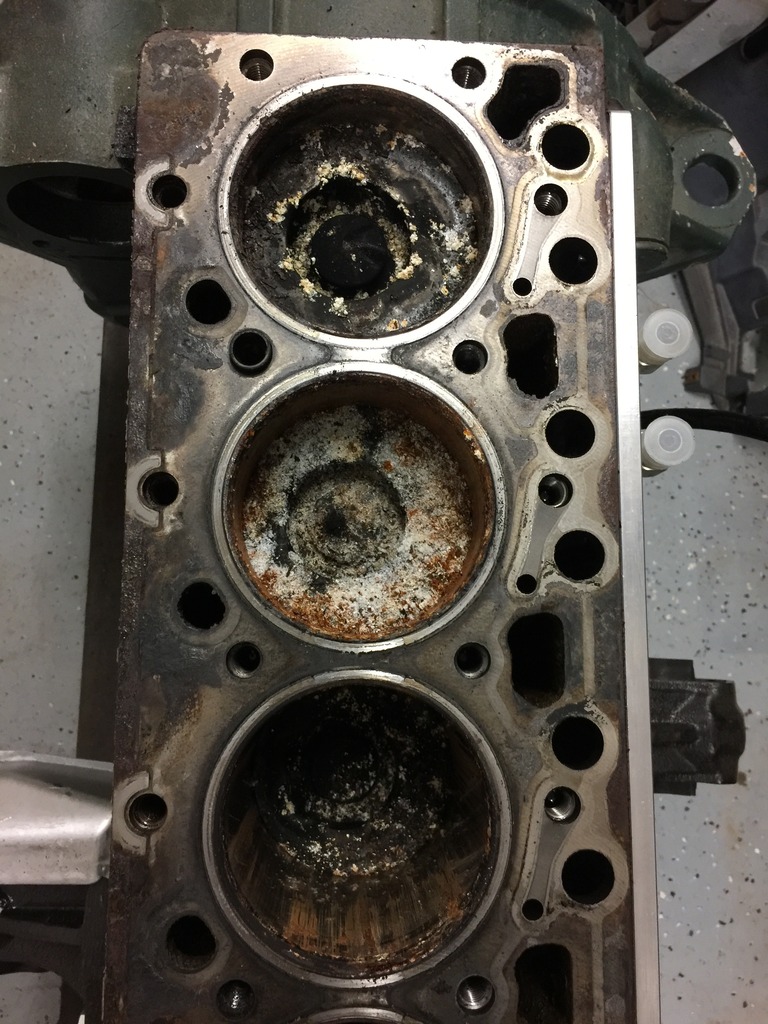
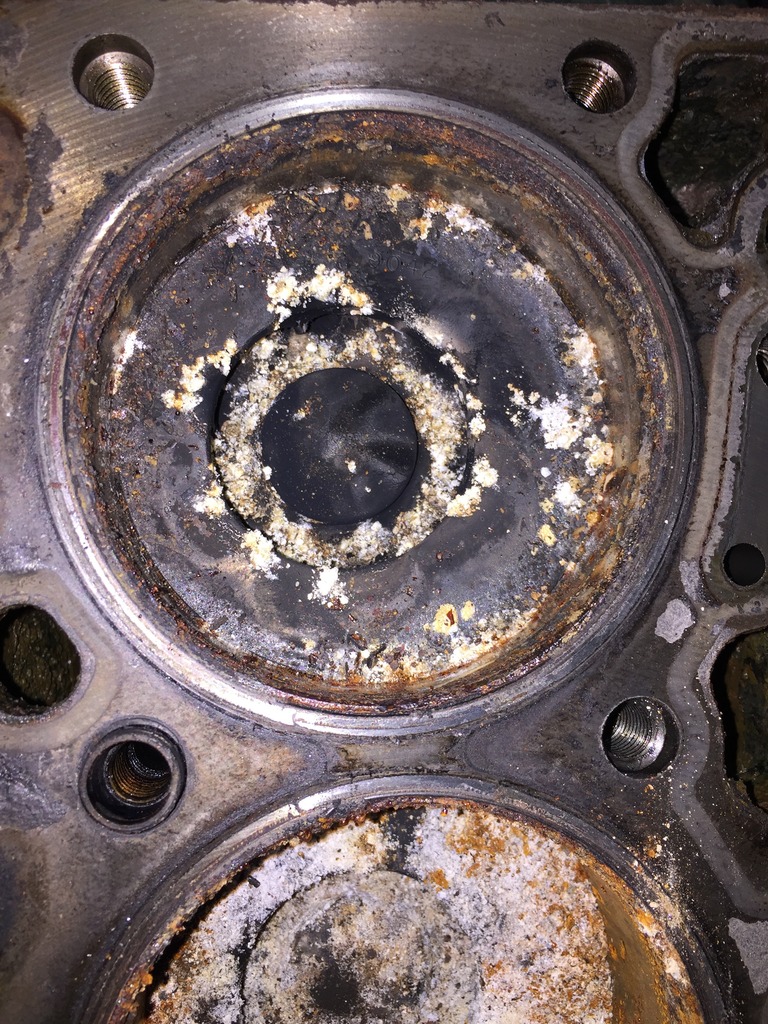
and then that excitement went out the window:
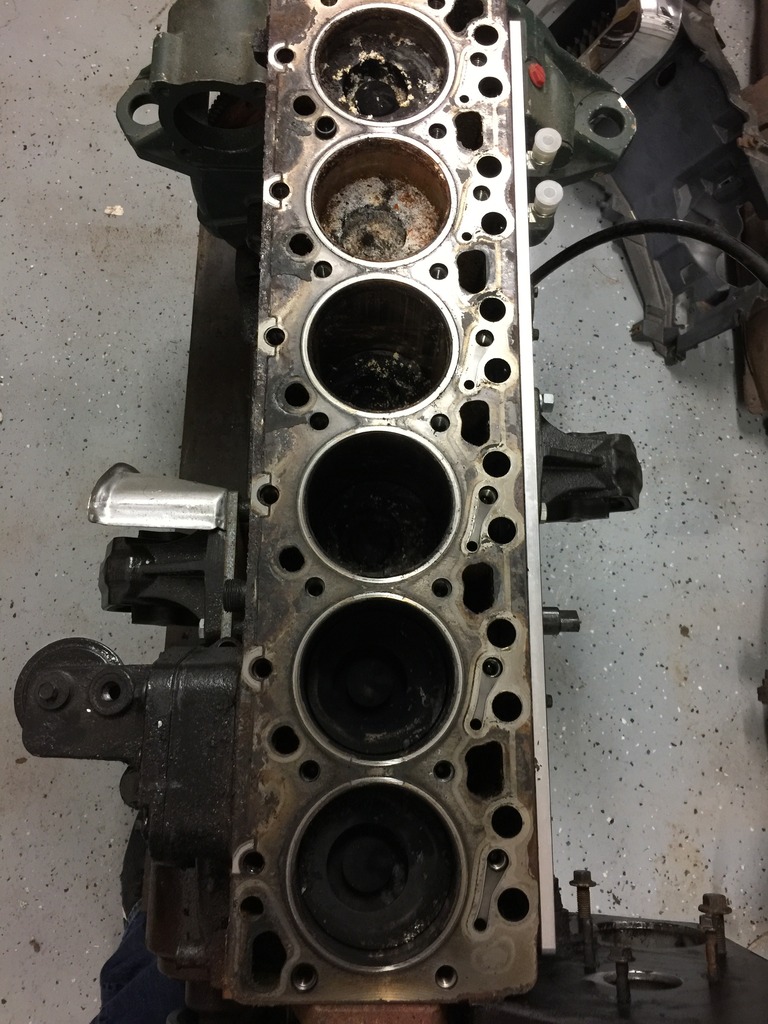
Front three:
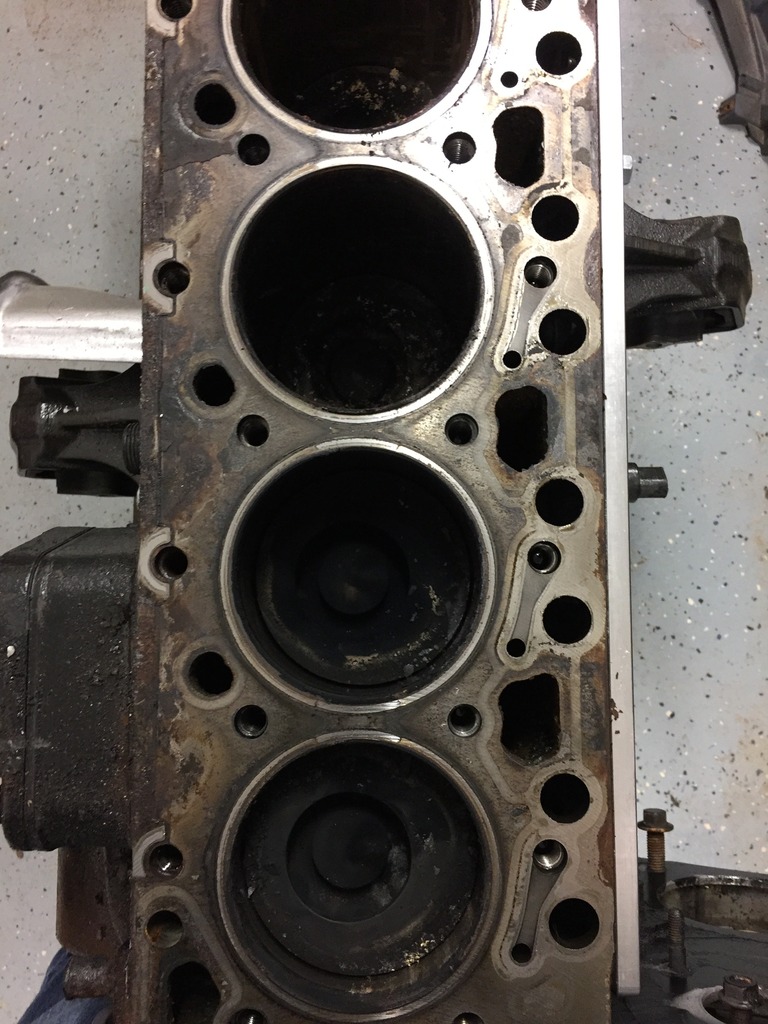
Back three:
Cylinder #1
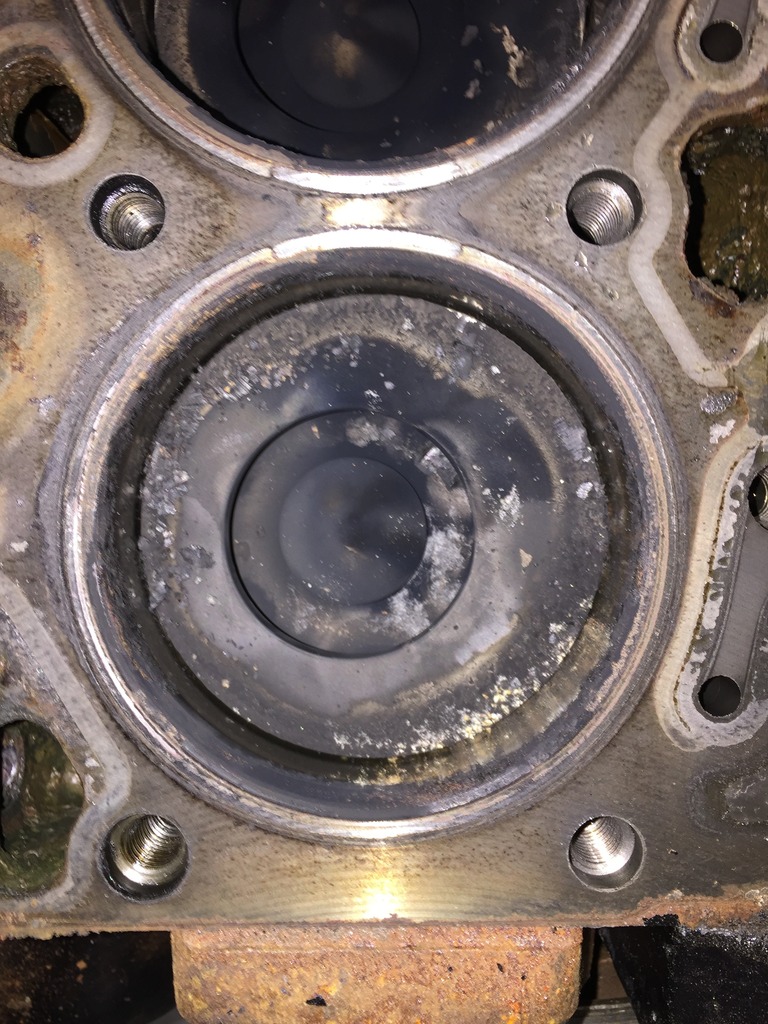
Cylinder #2
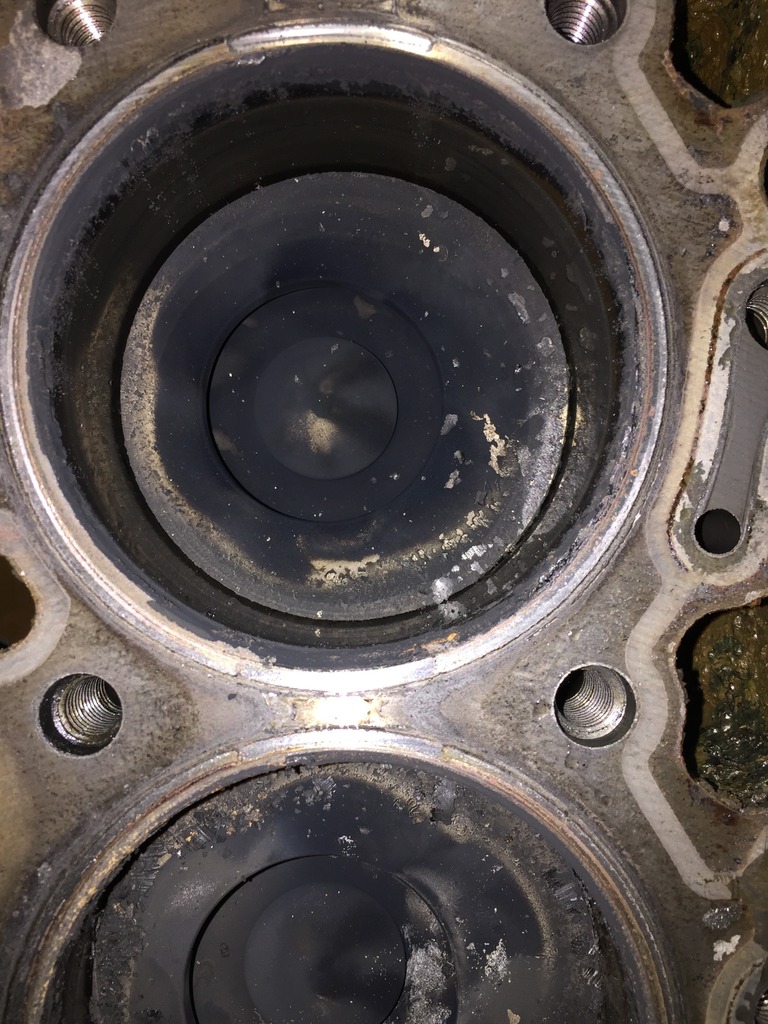
Cylinder #3
Cylinder #4
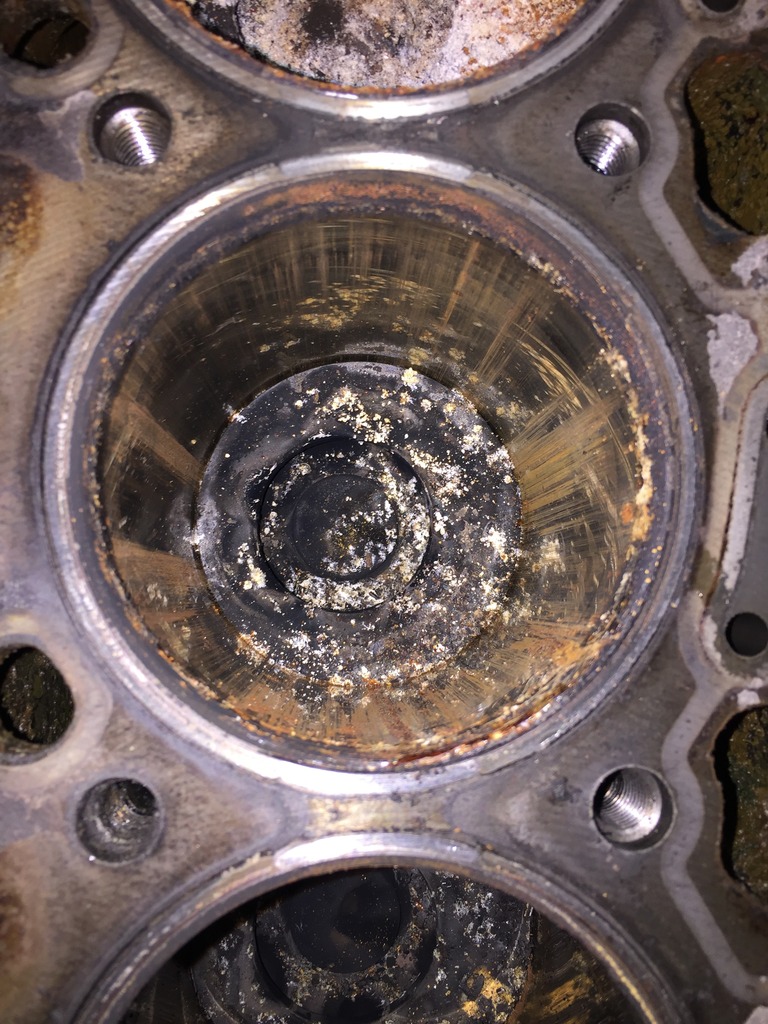
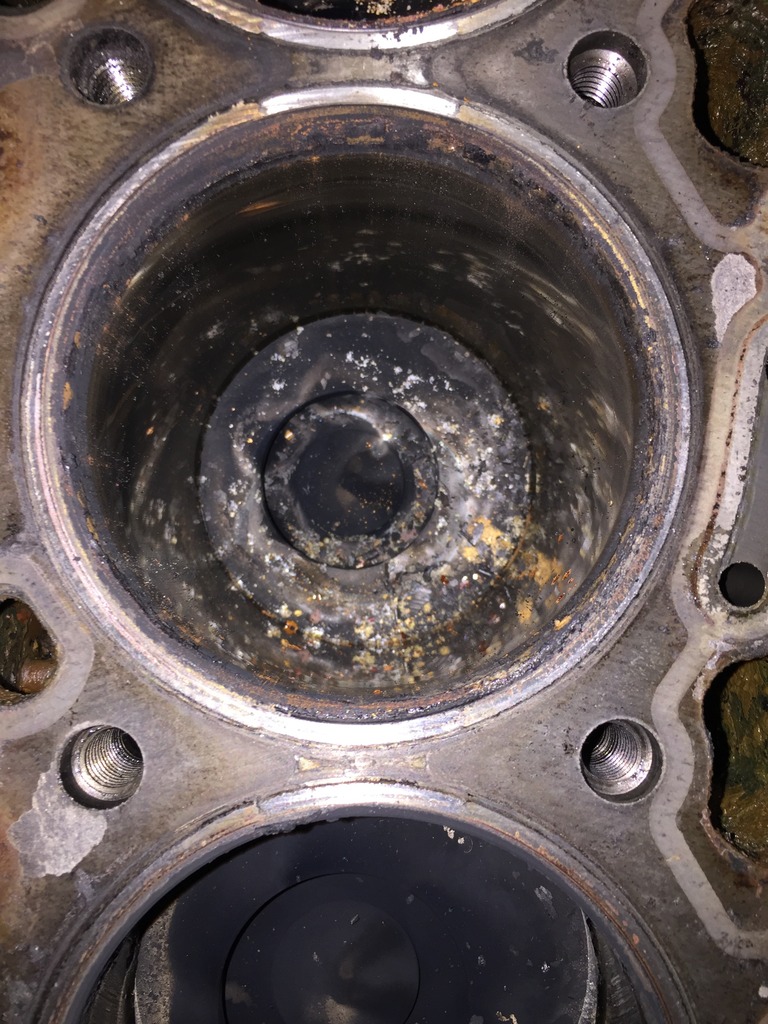
Cylinder #5 (worst)
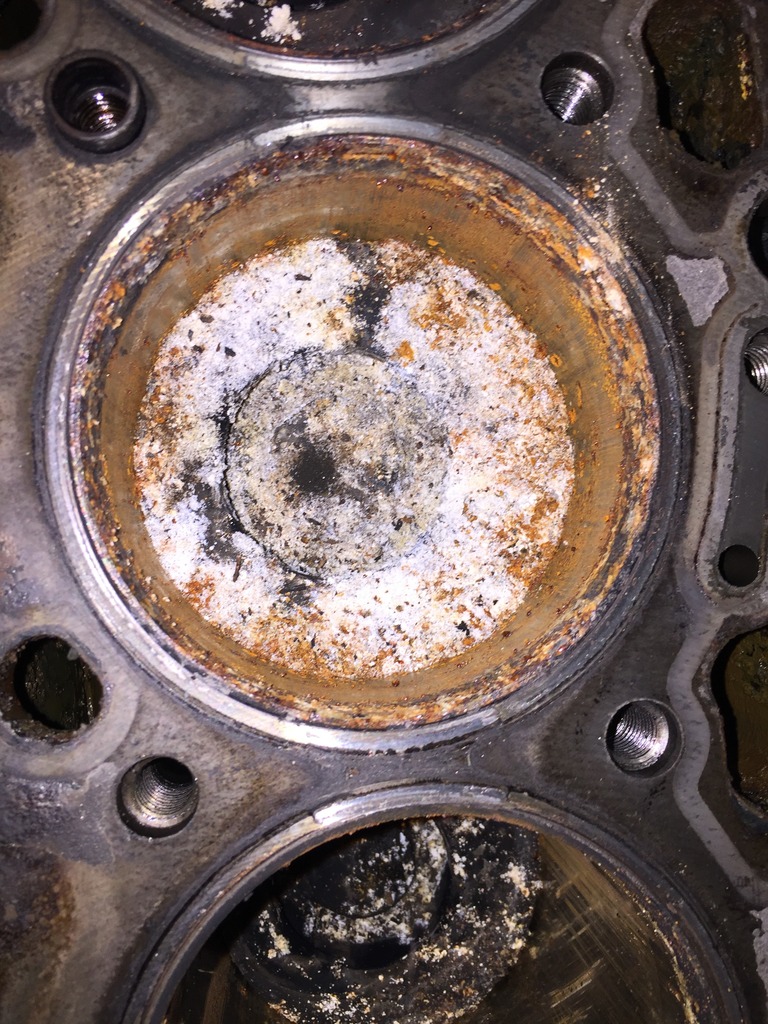
Cylinder #6
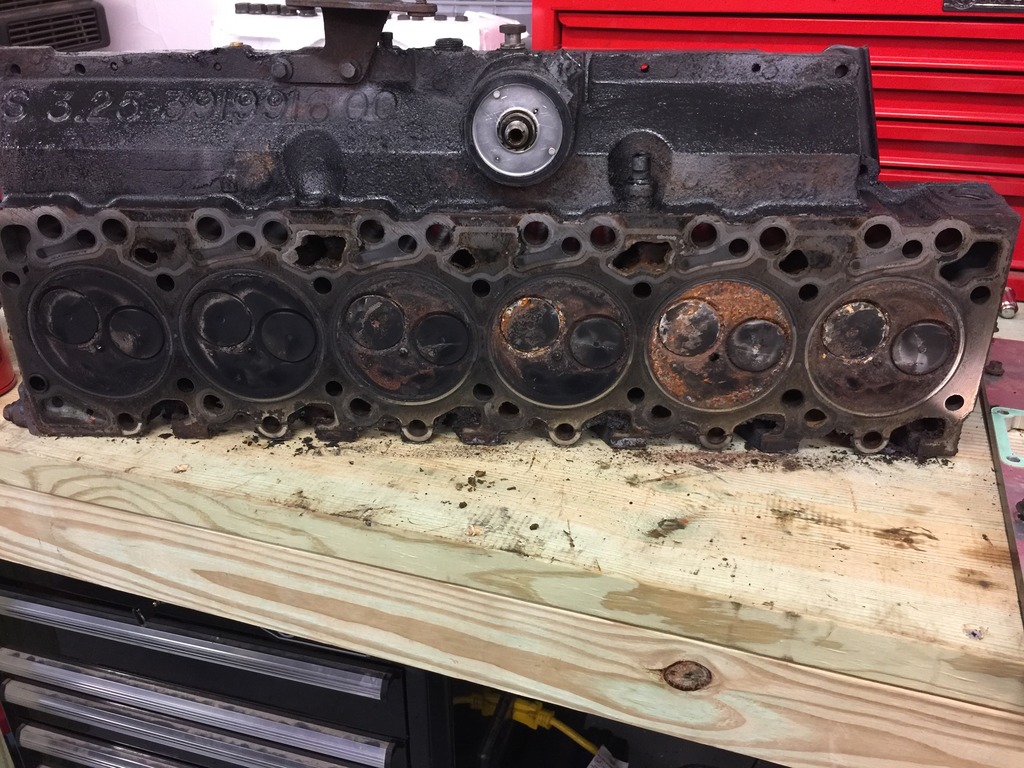
Head pics:
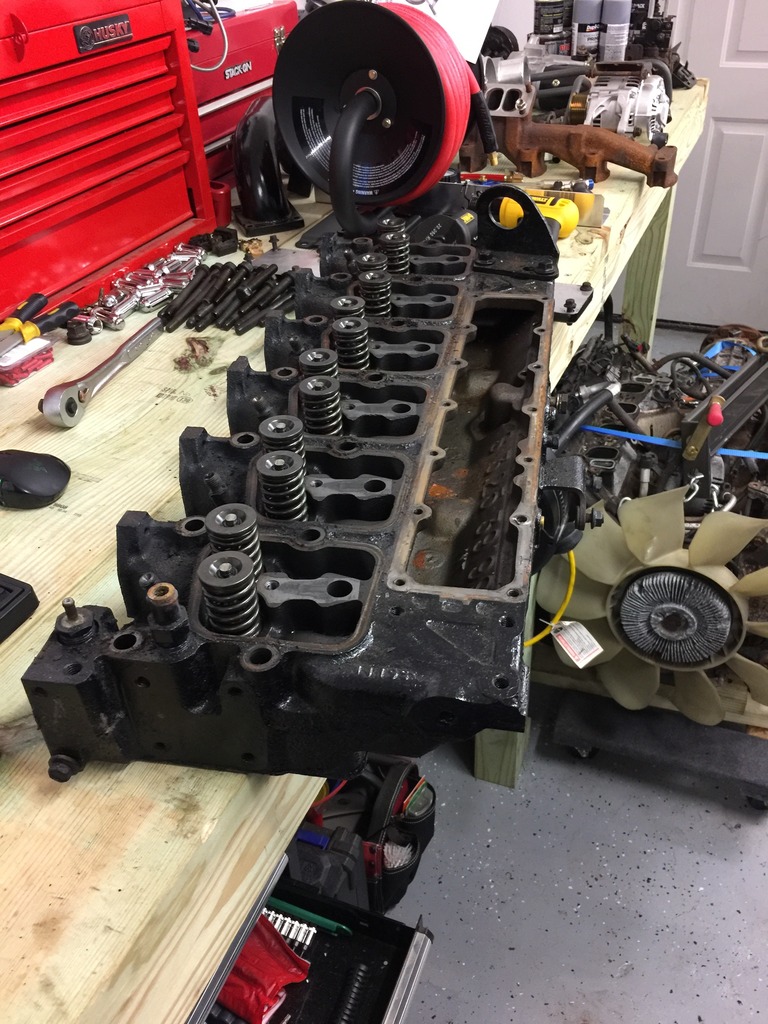
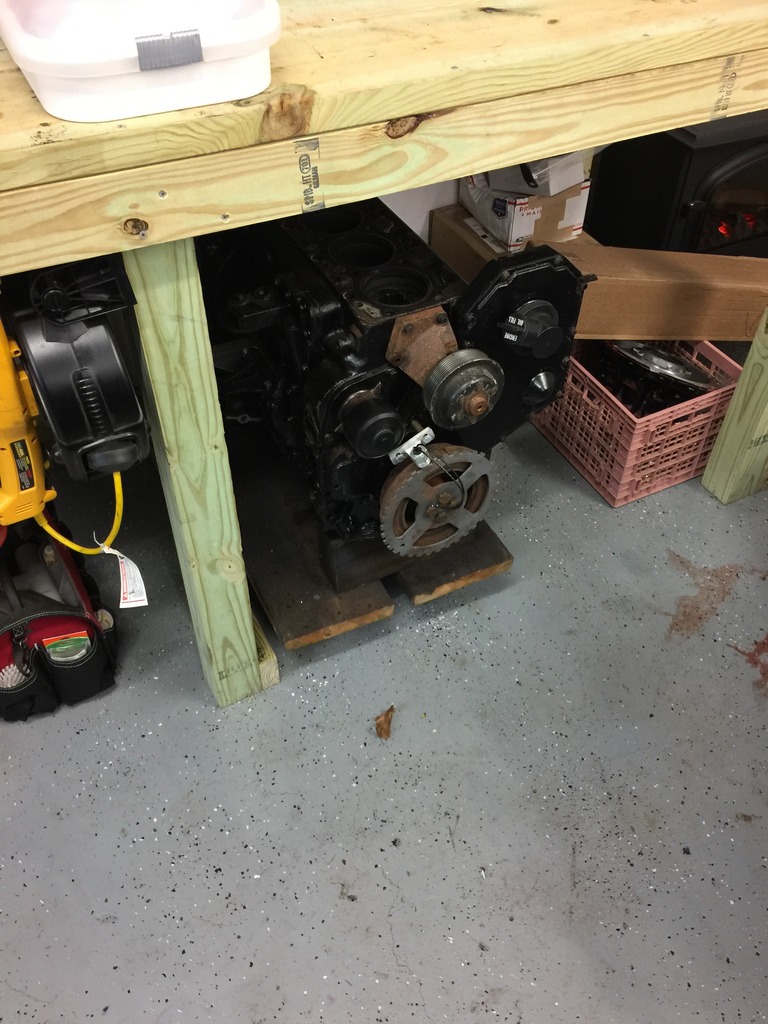
Motor put away for the night all depressed:
After all this and a whole lot of thought and calculating last week i have made my decision that i want to move forward with. Rebuilding this motor and then buying all the mods and performance pieces i want to do to it to get it where i want would put me at almost the same cost as a commonrail motor with far less miles and is actually a legal swap. One of the biggest factors i went with this motor was because of the lost swap cost between the $600 motor and $600 tranny, with my budget this would set me back years unfortunately with school, the house, student loans (biggest expense) and my companies current situation. My plan moving forward is to put the 5.4l back into the truck unless i come across something cheap enough for me to swing. I am NOT going to put the 5.4l back and return the truck to factory, instead i am going to utilize as many conversion parts as possible such as the battery tray, hydroboost, electric vac pump etc to make a future cummins swap a breeze. My plan is to swap over time and to basically once it comes down to it to get a commonrail (maybe cheaper by then) and just do the motor or motor and trans. Hopefully once i get our student loans paid off then i can move forward with a cummins swap but for now i think this is unfortunately off the table, if anythign changes i may shift my plan but this is the plan I'm moving forward with.
Also forgot to add if i eventually rebuild this motor ill likely put it in the F150 since thats a legal swap!
So as you all know my cummins is toast for now unfortunately but here what i was going through and doing until i fount my issue.
I had decided to remove the head to replace the head gasket and stud the motor for the compound turbos i was planning to run. The 12v ARP studs require some machine work on the rocker arm pedestals so i figured now is the perfect disassembly time since i can use works machine shop on my days off.
I rolled the motor out and started to disassemble:

Removed valve covers, manifold and turbo:

The part that gets milled down is just below the larger stud:

Intake horn removed:

While doing all this disassembly i decided to finally swap in a new thermostat.
Housing:

To do this you need to remove the top two housing bolts as well as a lower somewhat hidden bolt and then give the housing a good smack with your palm and it comes right off.


Also the front engine hoist point is separates from the housing...it hurts if it lands on your foot.

The old thermostat was somewhat of a pain to remove but it comes out after a while of wiggling it and using some needle nose pliers.

New thermostat in the housing:

Back to the engine again! intake manifold removed followed by injector return lines:


I pulled one injector out since it came out with the retaining nut and either someone cross threaded it or there was just something going on...this is the worst cylinder and red flag number 1.

I continues to pull the studs and rocker arm pedestals, it is important to note to mark what bolts pedestals etc go where because they need to be reinstalled in the same locations.


at this point i was super excited:

and then that excitement went out the window:

Front three:

Back three:

Cylinder #1

Cylinder #2

Cylinder #3

Cylinder #4

Cylinder #5 (worst)

Cylinder #6

Head pics:


Motor put away for the night all depressed:

After all this and a whole lot of thought and calculating last week i have made my decision that i want to move forward with. Rebuilding this motor and then buying all the mods and performance pieces i want to do to it to get it where i want would put me at almost the same cost as a commonrail motor with far less miles and is actually a legal swap. One of the biggest factors i went with this motor was because of the lost swap cost between the $600 motor and $600 tranny, with my budget this would set me back years unfortunately with school, the house, student loans (biggest expense) and my companies current situation. My plan moving forward is to put the 5.4l back into the truck unless i come across something cheap enough for me to swing. I am NOT going to put the 5.4l back and return the truck to factory, instead i am going to utilize as many conversion parts as possible such as the battery tray, hydroboost, electric vac pump etc to make a future cummins swap a breeze. My plan is to swap over time and to basically once it comes down to it to get a commonrail (maybe cheaper by then) and just do the motor or motor and trans. Hopefully once i get our student loans paid off then i can move forward with a cummins swap but for now i think this is unfortunately off the table, if anythign changes i may shift my plan but this is the plan I'm moving forward with.
Also forgot to add if i eventually rebuild this motor ill likely put it in the F150 since thats a legal swap!
#2017
01-04-2017, 09:20 AM
On a lighter note
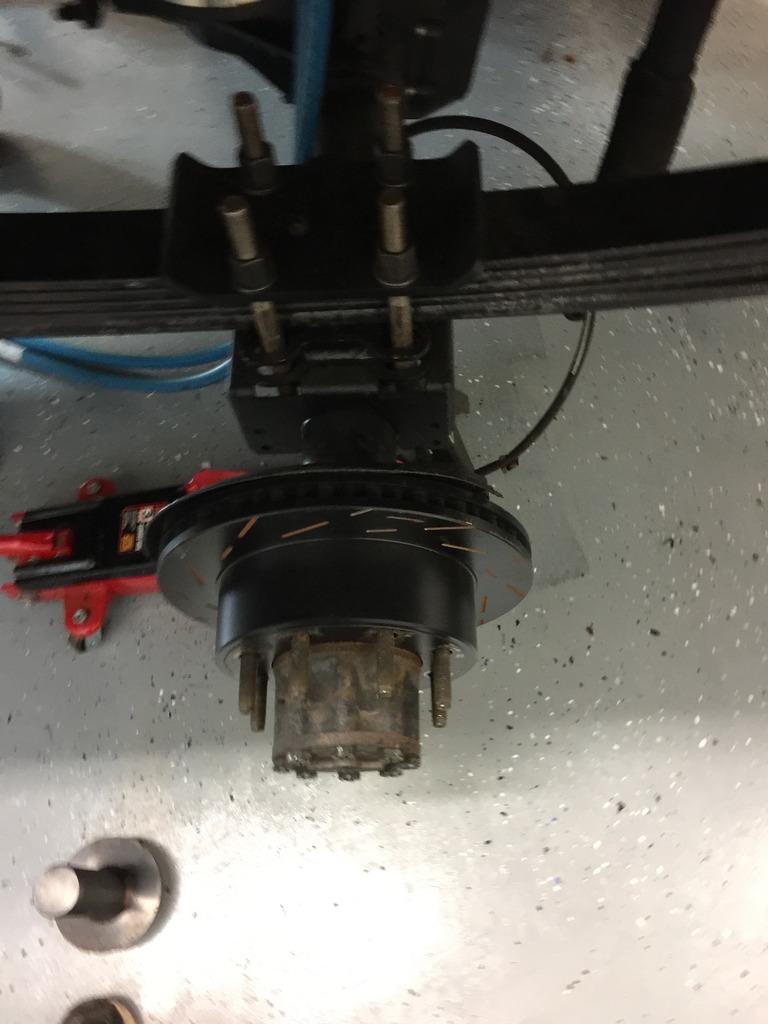
Moving forward on a much lighter note! I got my traction bars installed and my rear axle aligned. there will be much more of these posts going forward now with pictures and things actually getting done lol.
I have a 1" PMF block so i can adjust the axle rearward after the shackle flip and this gives me 4" of lift with the 3" lift springs and shackle combo.
rear axle is set almost all the way back and sits perfectly centered in each fenderwell. its kind of a PITA to do without a lift you need to get creative lol, i used the wheel to align the axle then proped it on a stand to lower it and used a jack to lift the spring and set it down on the right alignment hole.
On to the traction bars!
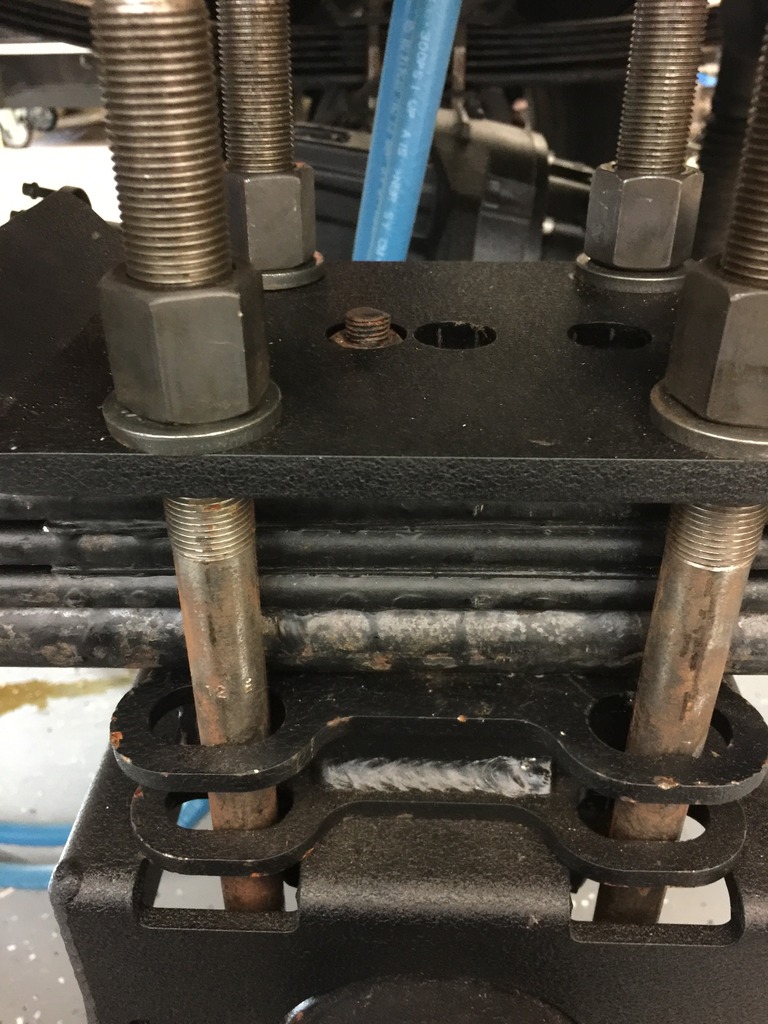
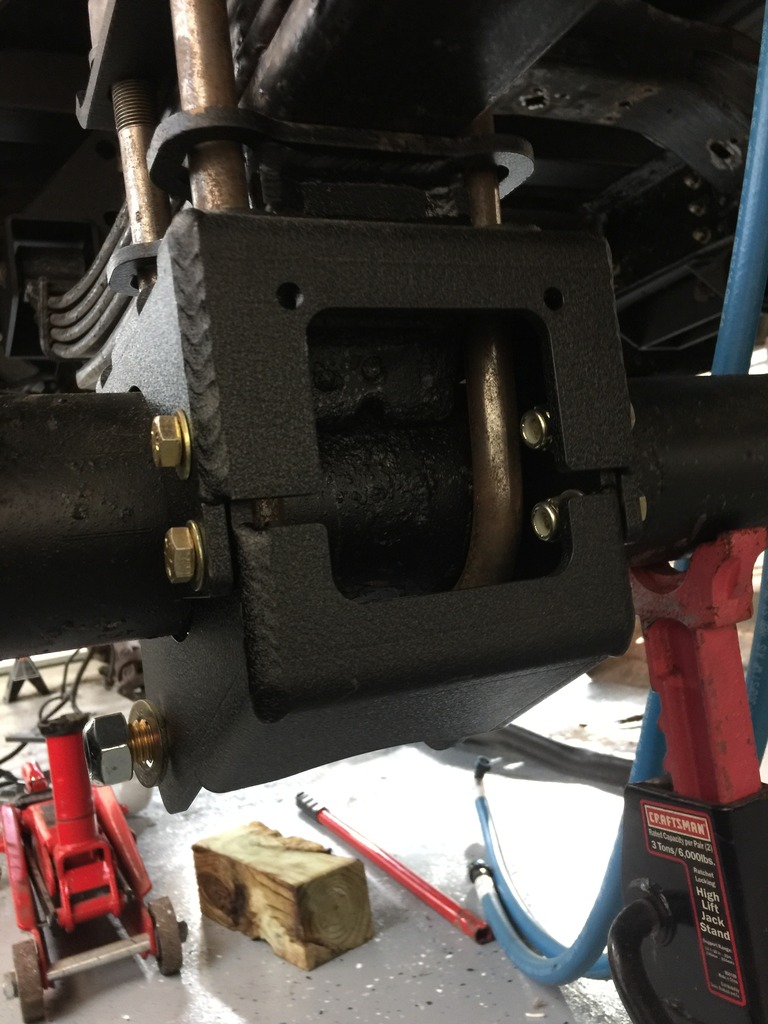
Top mount, sandwiched under block:
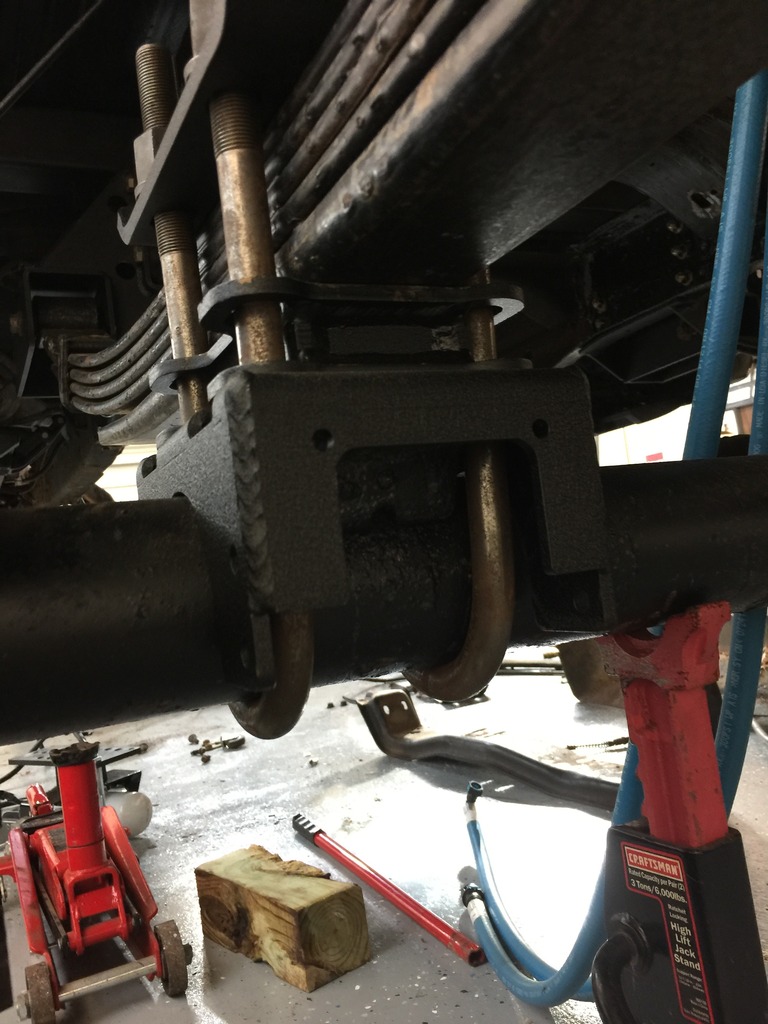
Lower mount:

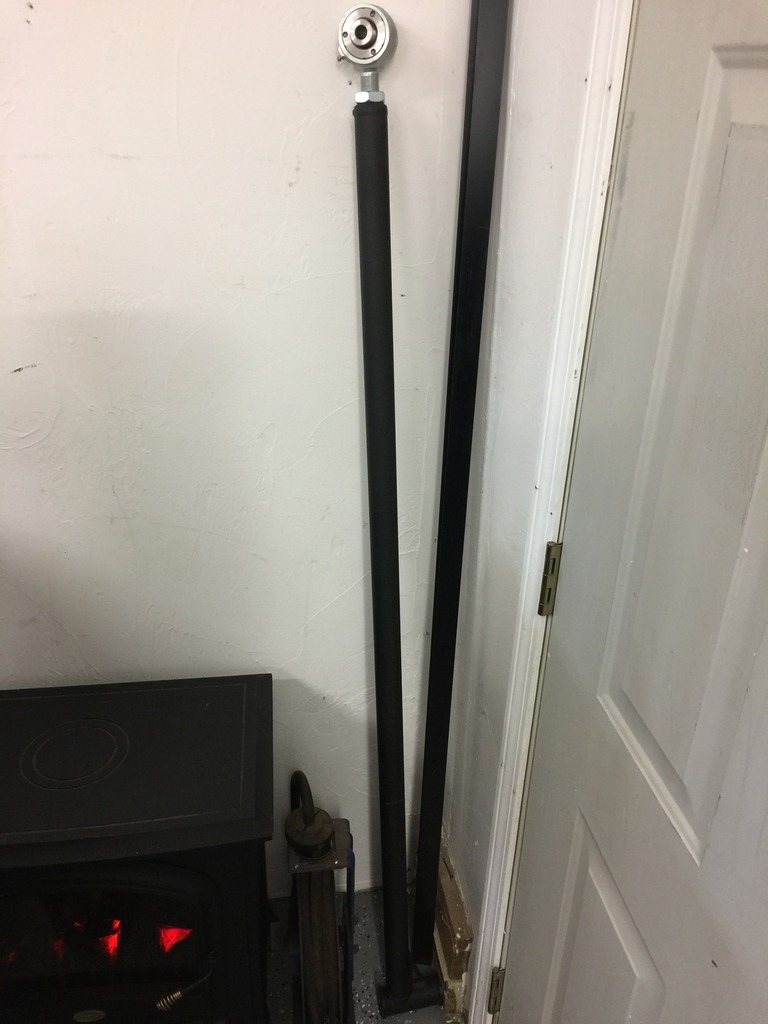
Traction bar:
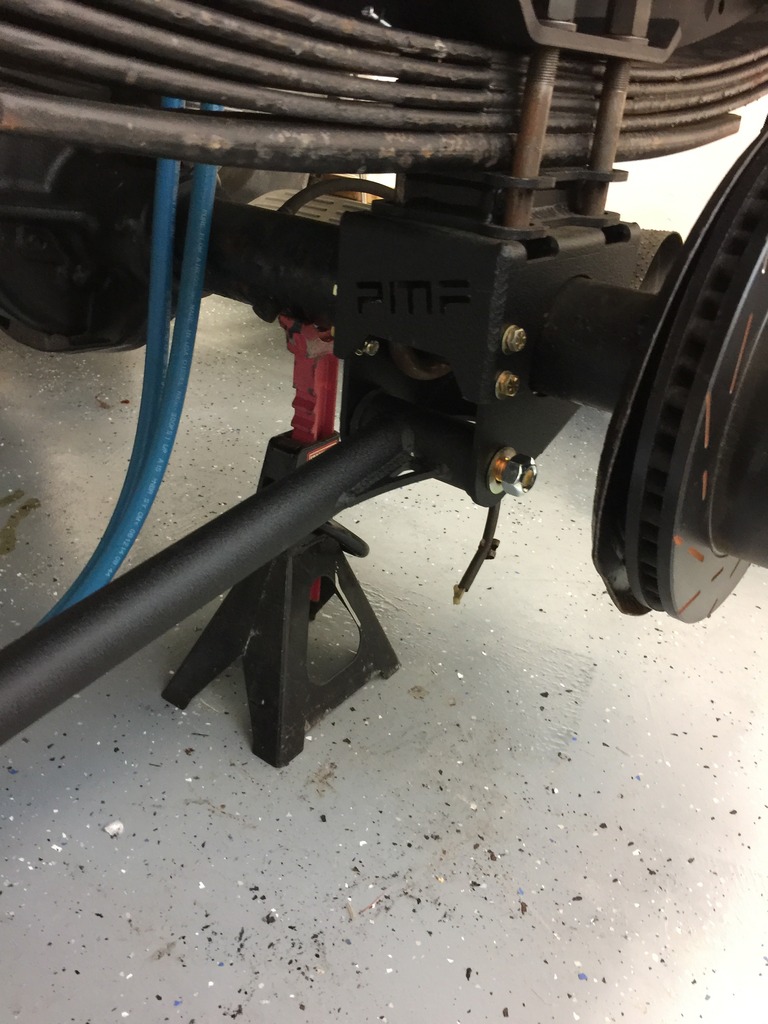
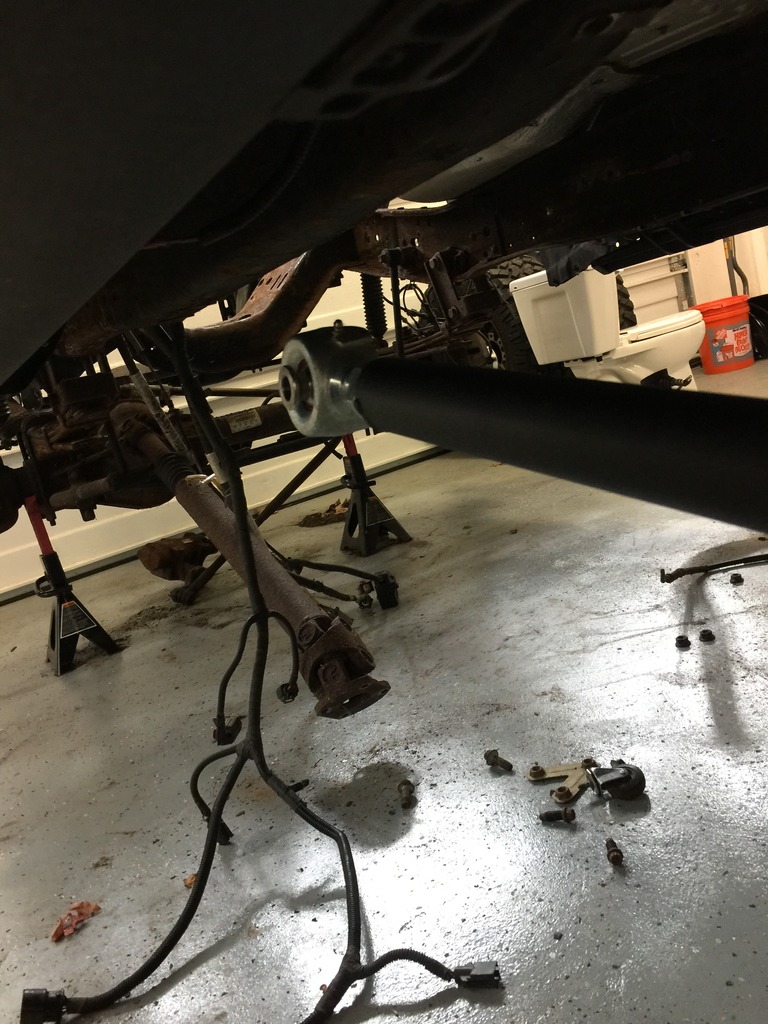
Front mount:
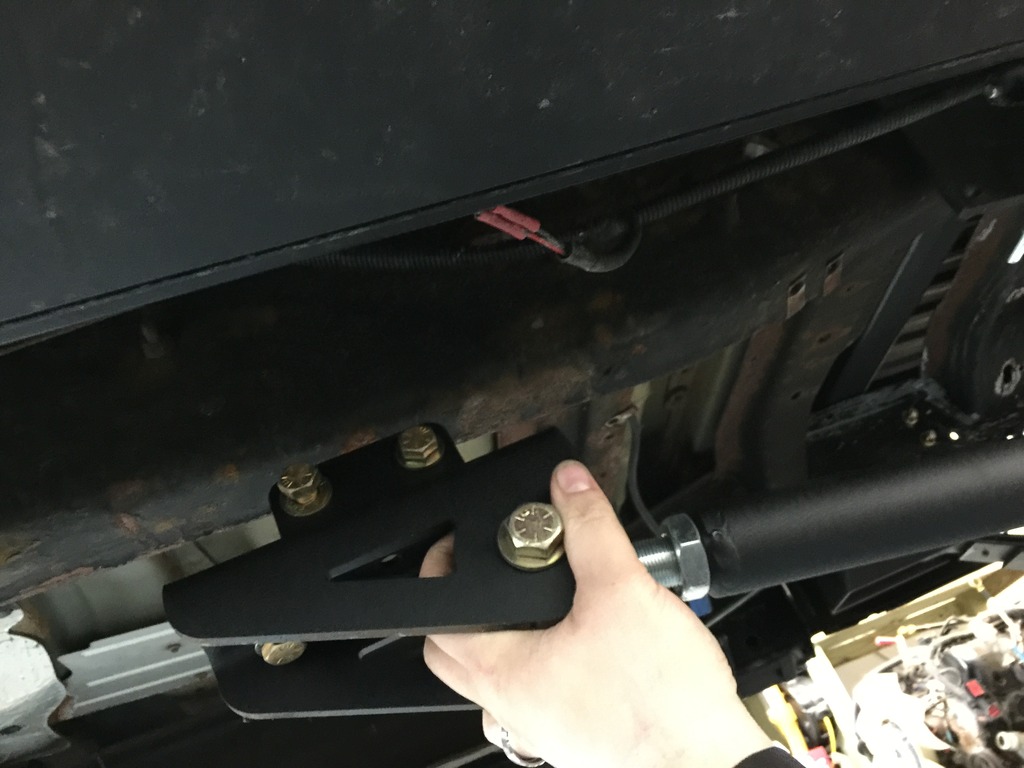
these line up (on Ex cabs) just infront of the rear suicide door under the main door, dont know what i was thinking taking this next pit but its directly above the front mount.
These bars are beefy! they are just the stage 1 bars from PMF but man they are heavy and sit at roughly 6' if i had to guess base don thier length compared to my height. dont know how much these will help with a 5.4l but hey i already bought them a few years ago so they are going in! lol
I have a 1" PMF block so i can adjust the axle rearward after the shackle flip and this gives me 4" of lift with the 3" lift springs and shackle combo.
rear axle is set almost all the way back and sits perfectly centered in each fenderwell. its kind of a PITA to do without a lift you need to get creative lol, i used the wheel to align the axle then proped it on a stand to lower it and used a jack to lift the spring and set it down on the right alignment hole.


On to the traction bars!
Top mount, sandwiched under block:

Lower mount:


Traction bar:


Front mount:

these line up (on Ex cabs) just infront of the rear suicide door under the main door, dont know what i was thinking taking this next pit but its directly above the front mount.

These bars are beefy! they are just the stage 1 bars from PMF but man they are heavy and sit at roughly 6' if i had to guess base don thier length compared to my height. dont know how much these will help with a 5.4l but hey i already bought them a few years ago so they are going in! lol

#2018
01-04-2017, 12:15 PM
Cargo Master

#2019
01-04-2017, 01:00 PM
Cargo Master
#2020
01-04-2017, 01:19 PM
My wife and i bought a 1999 BMW 328i (e46) for $800 that needed a motor about 2 months back so she currently has two and we are swapping the motor now its just about done and just needs to go back into the car. Kind of for the better financially becasue we were about to go get her a new car and she saw this at my father-in-laws shop and the guy said 1k and we talked him down lol. Got a new motor for $760 and she is as good as new. She wanted it more than her focus and there's no car payment and lower insurance so its a win win IMO lol.
Pics:


Lol i just saw that after i posted the pics and was waiting for a reply. I also remodeled our bathroom last week on top of the truck stuff lol.
#2021
01-08-2017, 01:21 PM
Question gents, can you run a diesel fuel pump with a gas motor specifically an airdog II? i know you can get by with a gas pump running a diesel motor. I want to tie up the Ex tank stuff soon.
Also good news, i scheduled everything out and if i get my list of stuff done every week between now and the last week of april the truck will be back together and running! I'm sure this may slide to the right a little bit but i gave myself a drop dead date of the last weekend in June to allow time for parts to ship and potentially budget issues lol.
This weekend i mocked up the rear airbags and installed my rear shocks, didn't take pictures because the airbags are not done so i would rather show the final products. I need longer ubolts. I also finished mocking up the Expedition console so i should be getting that done soon, pics are in my dash swap thread!

#2023
01-08-2017, 05:32 PM
Its so hard to find out! whenever i look it up since i already have my airdog I keep getting the opposite of what I'm looking for and people asking if their gas pumps will work with a conversion but I'm trying to use a diesel pump with my original engine now lol.
#2024
01-23-2017, 07:53 PM
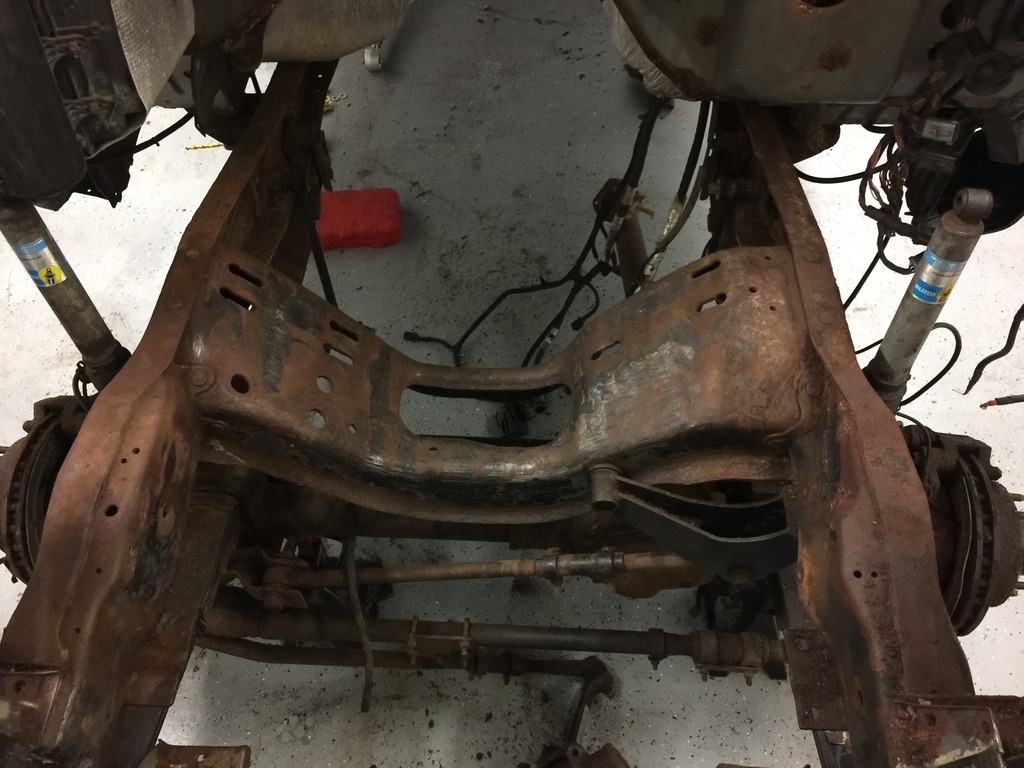
Hey guys, i am in Missouri currently again but i was able to get a decent amount done Saturday before i left Sunday morning. I spent a good 8 hours scraping the frame and i gotit all scraped and ready to be Painted with POR except for a few spots under the driver side door.
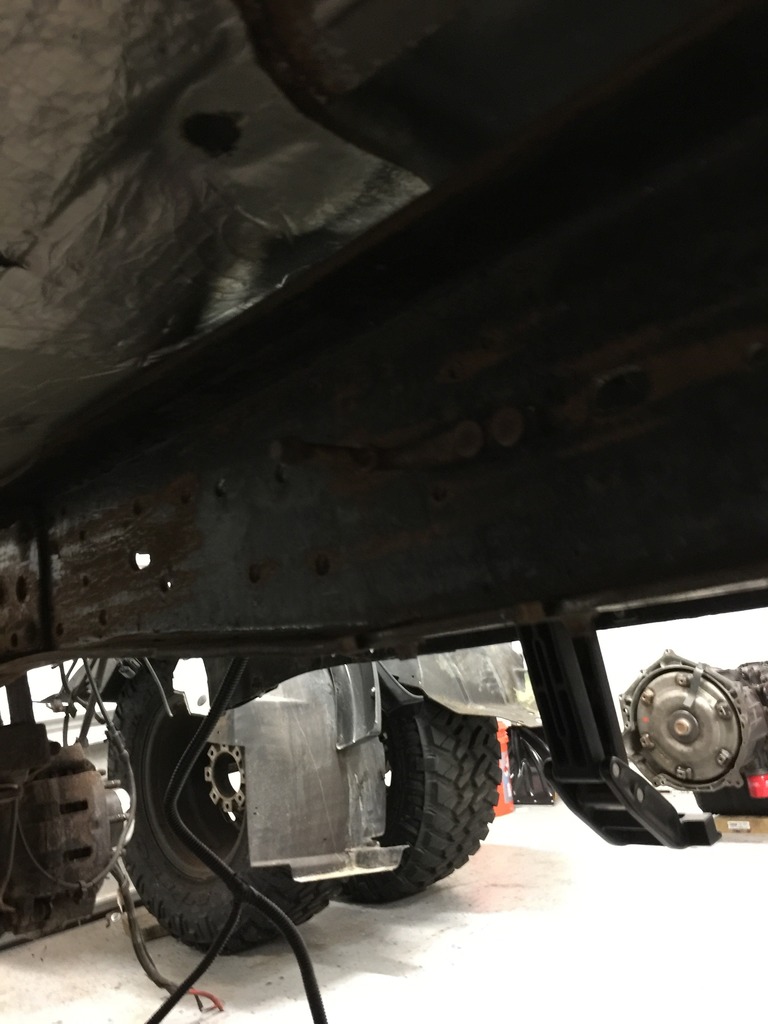
I was kind of shocked how good the frames condition was in other then the front end.
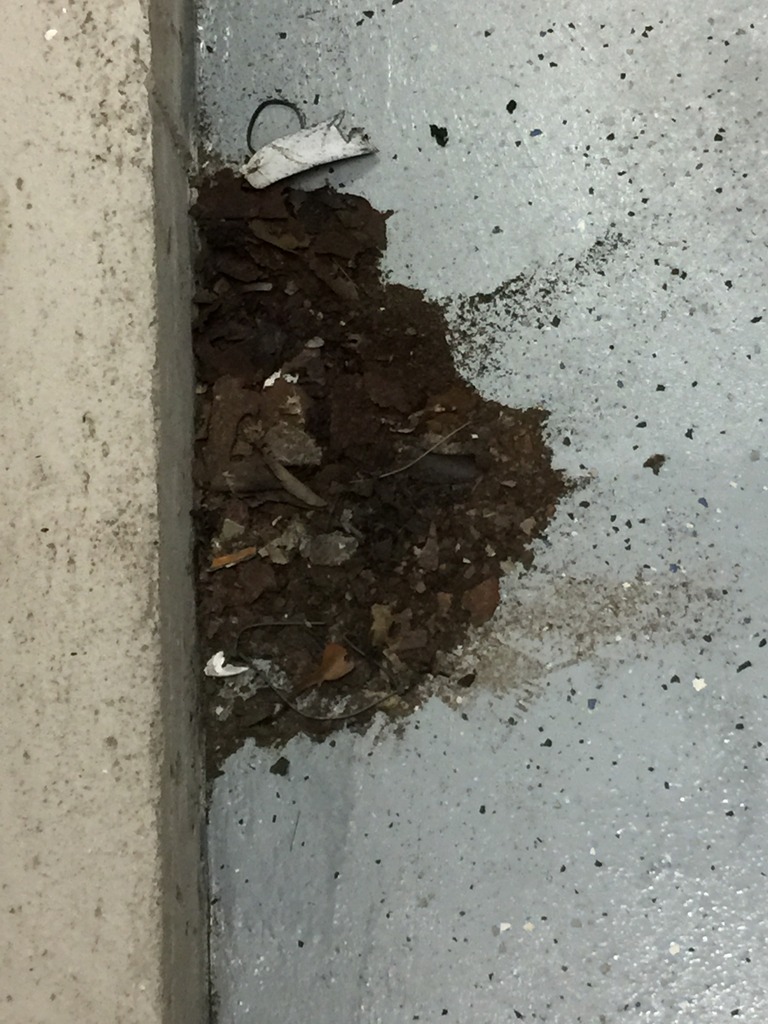
This is only 1/8th the stuff i scrapped off the frame it was part of the drivers side.
I had to remove my AMP steps since i cant fold them out of the way without power. I am thinking i am going to build an isolation box for the motors to keep them out of the elements and switch the passive and active mounts so i can shorten the wire harness on both sides by a good 4 feet.
I wiped down the entire truck and god damn it was dirty lol.
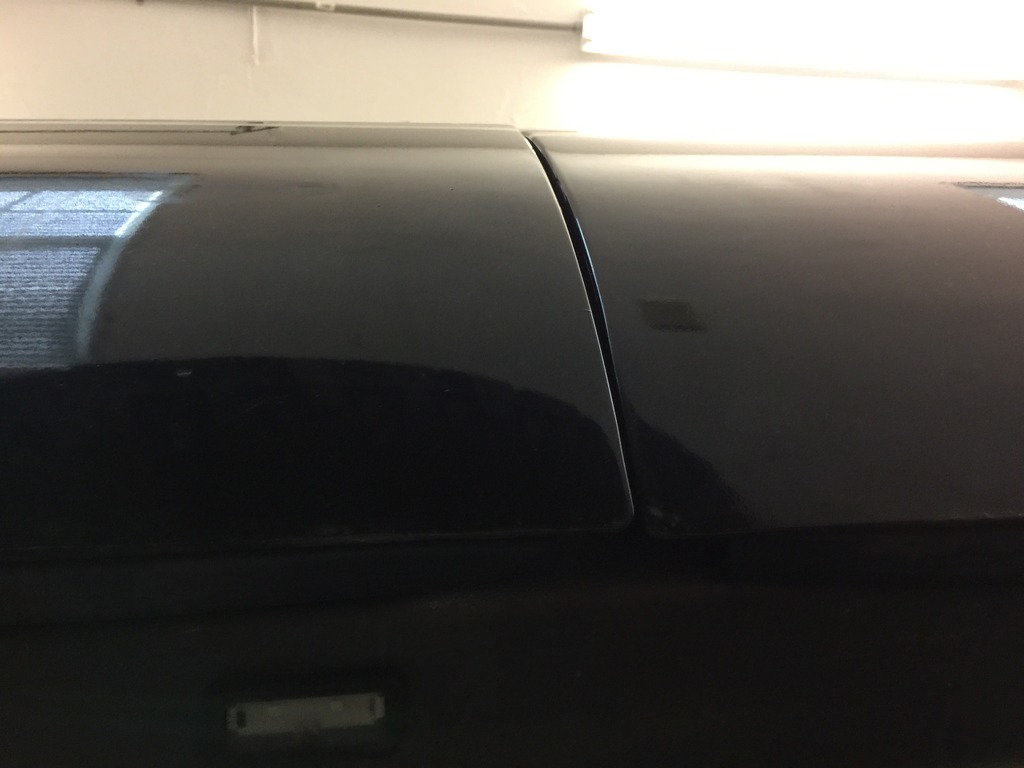
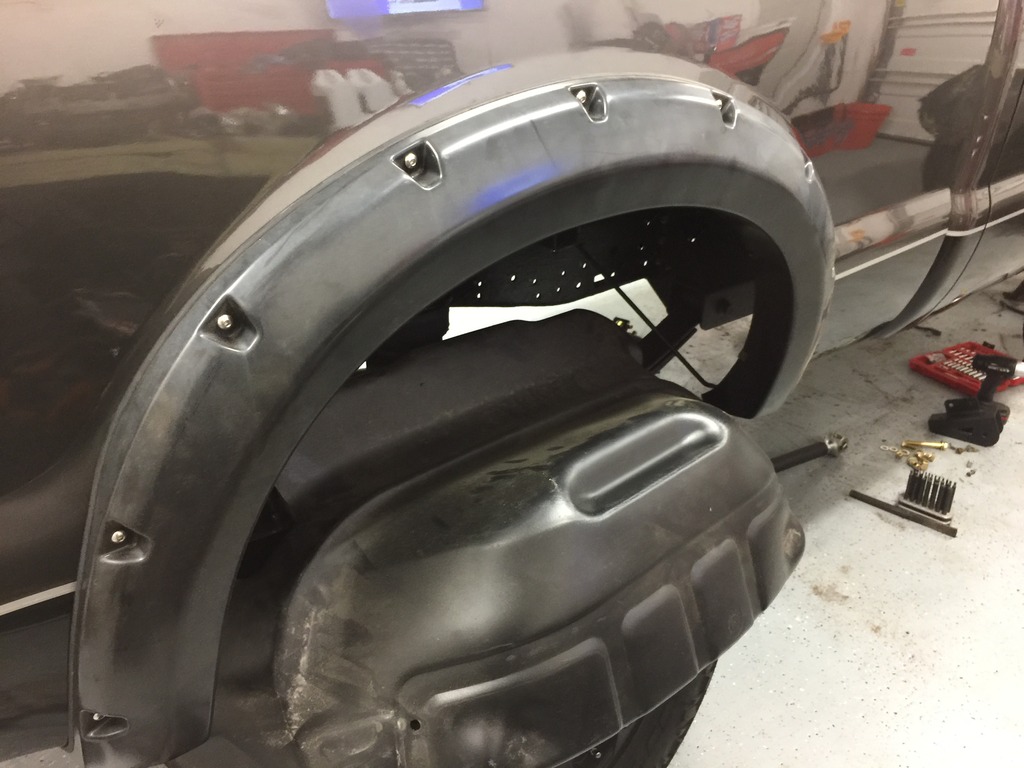
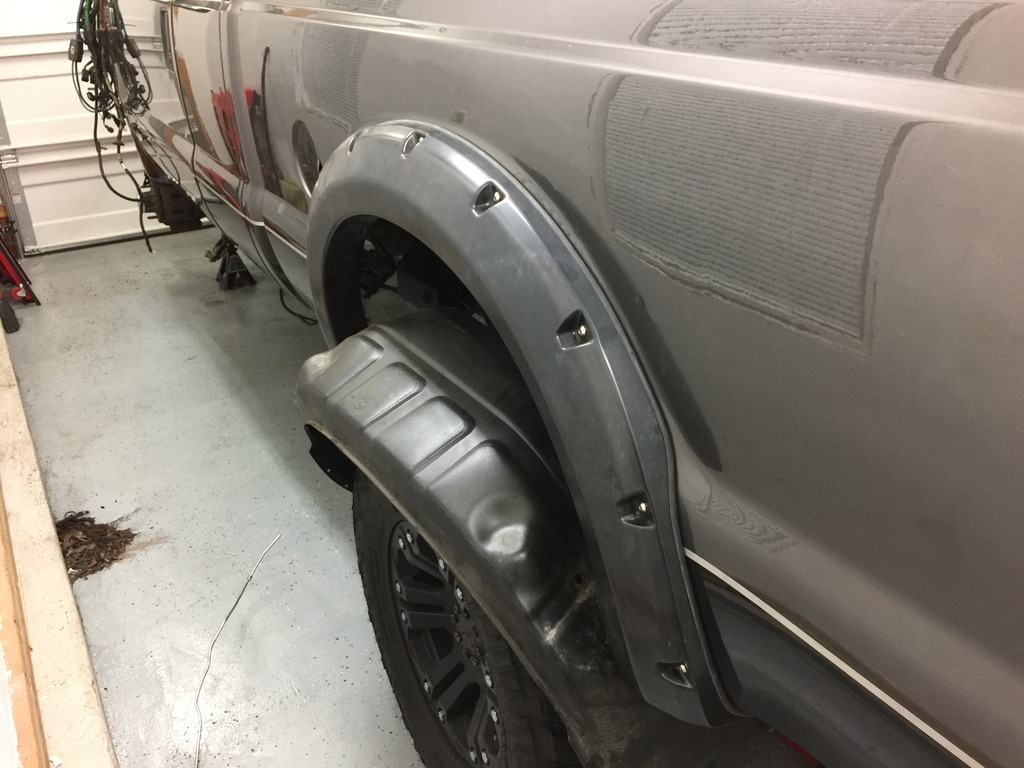
Also mounted my rear fender flares:, definitely need to get these painted with the hood.
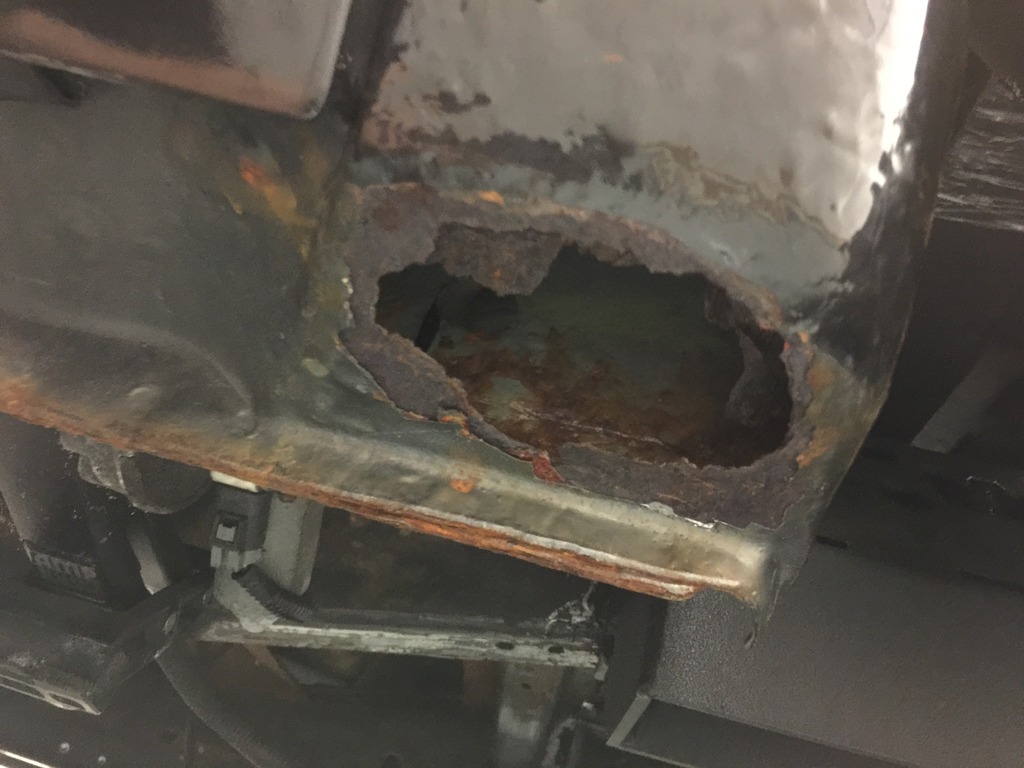
This is just very depressing: (drivers cab corner)
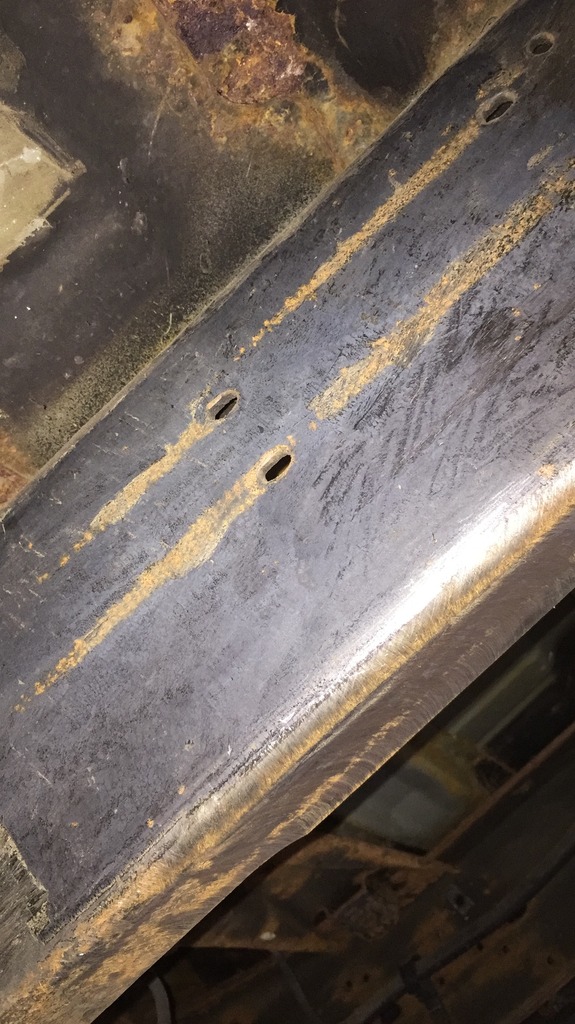
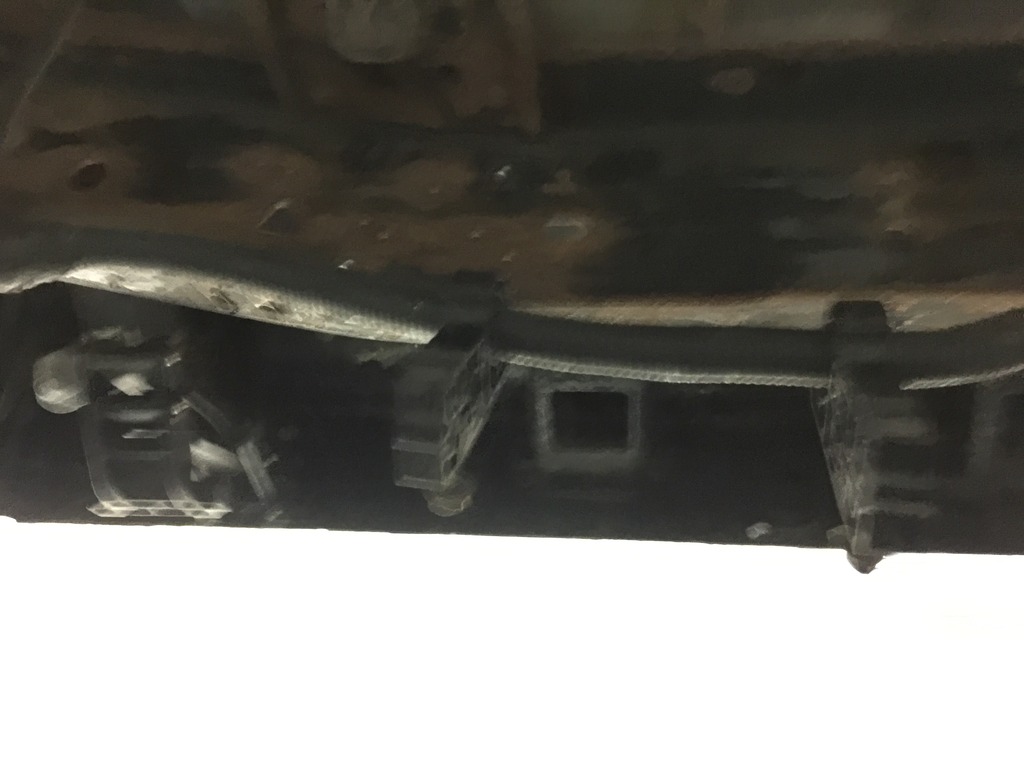
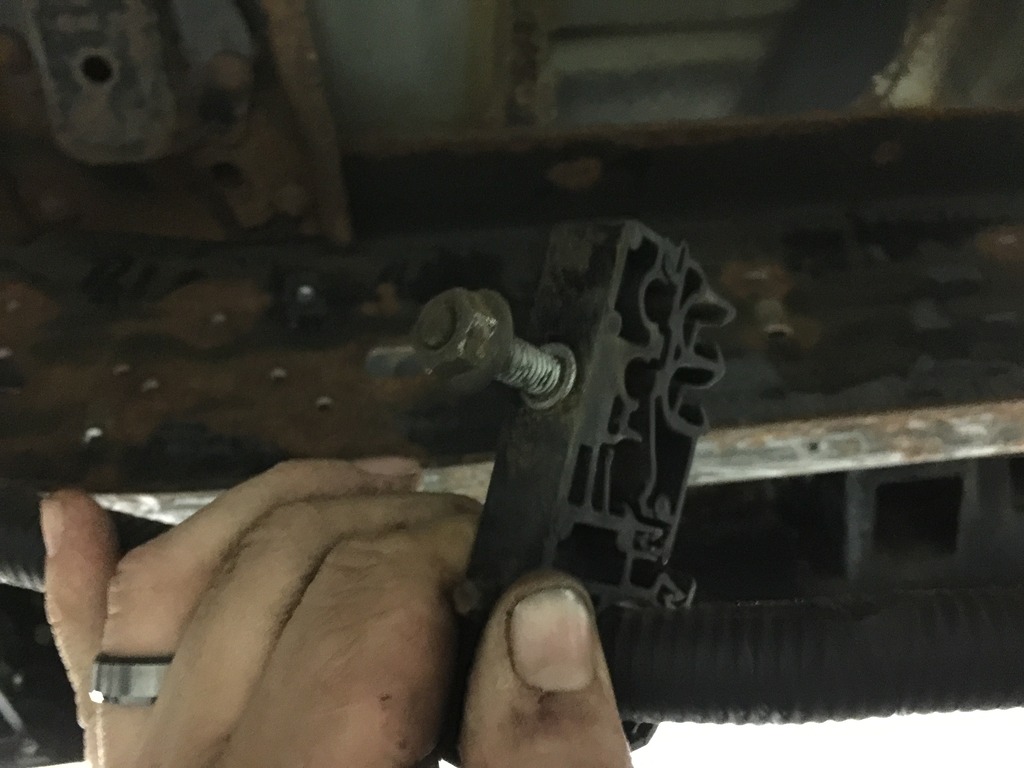
Also forgot to throw this in here i love these mounts ford used for the wire harness and fuel/brake lines, they are held on by nuts and are easy to remove.
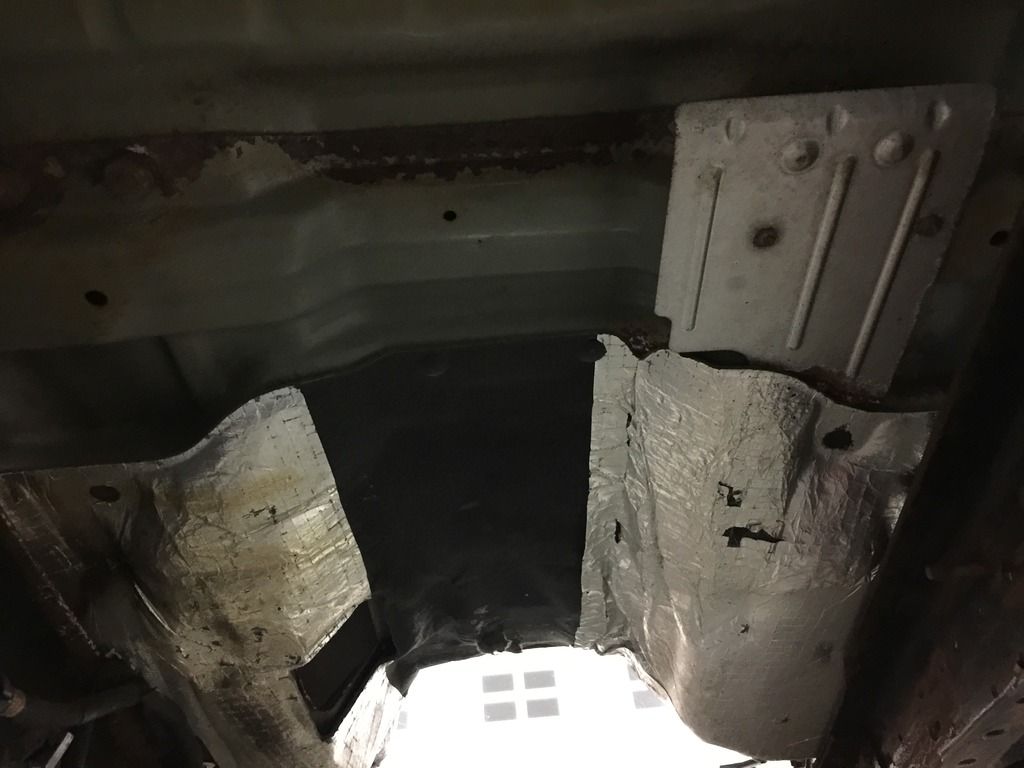
The floorpan is indecent shape but there are some spots mainly the pinch welds that are rusting but cleaning them up and using some POR should fix it up nicely. Next i have to remove the stock heat shields and then i can paint the floor pan.
Engine bay all cleaned up and marine cleaned. I will be painting it this weekend when i get home.
Also i may be getting my hands on a lift soon, my father in law has a spare one he needs to get rid of and the guy that was going to get it never bothered to get it so he offered it to me. Down side is it wont fit in my current garage becasue of the ceiling height but I am considering adding on to the rear of the garage so i if do get it that might turn into a summer project with my uncle (he is a carpenter) and my dad (electrician) to get a garage built for the F250 and charger. Then i could worj out of it and it will be larger then my current garage and the wife and i can actually park in the garage lol. my current space is 22'x24' and the addition will be 32'x25' which will give me much more space!
I was kind of shocked how good the frames condition was in other then the front end.

This is only 1/8th the stuff i scrapped off the frame it was part of the drivers side.

I had to remove my AMP steps since i cant fold them out of the way without power. I am thinking i am going to build an isolation box for the motors to keep them out of the elements and switch the passive and active mounts so i can shorten the wire harness on both sides by a good 4 feet.

I wiped down the entire truck and god damn it was dirty lol.

Also mounted my rear fender flares:, definitely need to get these painted with the hood.


This is just very depressing: (drivers cab corner)

Also forgot to throw this in here i love these mounts ford used for the wire harness and fuel/brake lines, they are held on by nuts and are easy to remove.


The floorpan is indecent shape but there are some spots mainly the pinch welds that are rusting but cleaning them up and using some POR should fix it up nicely. Next i have to remove the stock heat shields and then i can paint the floor pan.

Engine bay all cleaned up and marine cleaned. I will be painting it this weekend when i get home.

Also i may be getting my hands on a lift soon, my father in law has a spare one he needs to get rid of and the guy that was going to get it never bothered to get it so he offered it to me. Down side is it wont fit in my current garage becasue of the ceiling height but I am considering adding on to the rear of the garage so i if do get it that might turn into a summer project with my uncle (he is a carpenter) and my dad (electrician) to get a garage built for the F250 and charger. Then i could worj out of it and it will be larger then my current garage and the wife and i can actually park in the garage lol. my current space is 22'x24' and the addition will be 32'x25' which will give me much more space!

