Viair Install Complete with Pics...
#1
 11-24-2013, 03:27 AM

Viair Install Complete with Pics...
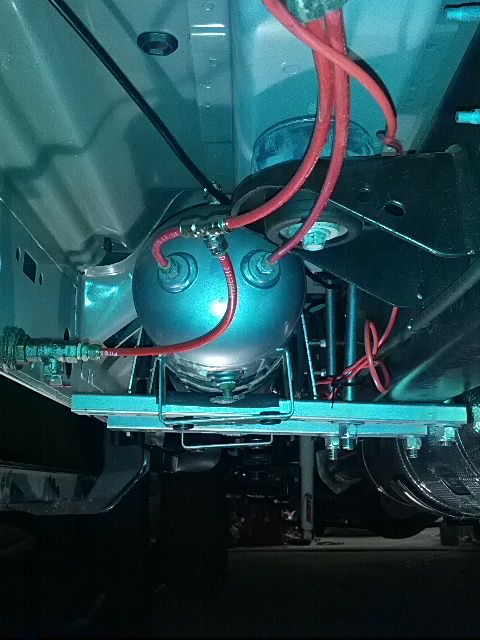
Here is the final outcome. On the 6.4 I had the tank hanging, on this truck, I couldn't make it work due to the new floor plan stamping and the extra sheet metal on the sides. So I just turned the tank around and set on 2 16" pieces of strut material and held in by 6" hangars. The only problem with the hangars is that they are made for PVC pipe that is 6" INSIDE diameter, not 6" outside diameter. I got to thinking about how to make the straps tighten up and then remembered that the strap is a different material than the tank and I didn't want them rubbing. I took a thick sided radiator hose and cut it in 2 lengths as wide as the straps and slid them between the tank and the straps.
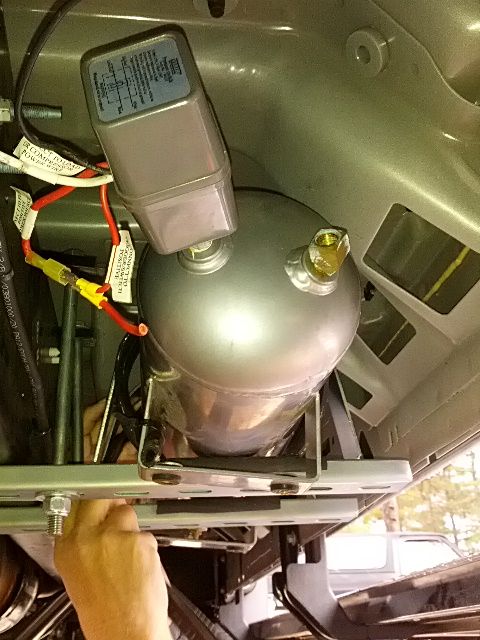
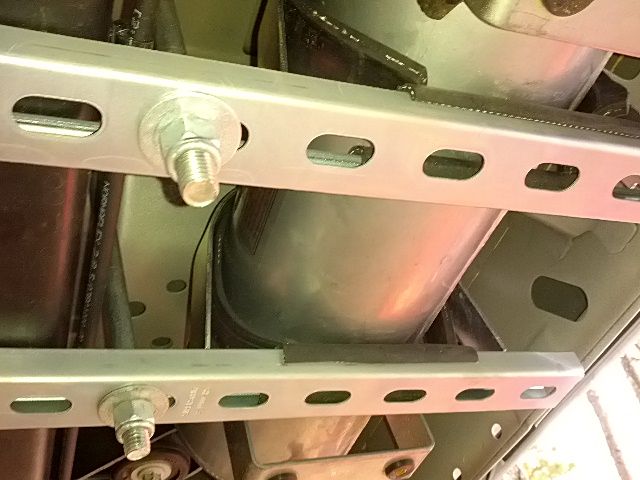
I used the same bolts as I did on the 6.4L to hold the brackets and strut in place. just bought new Nylock nuts for them. See how close it is on the outside?
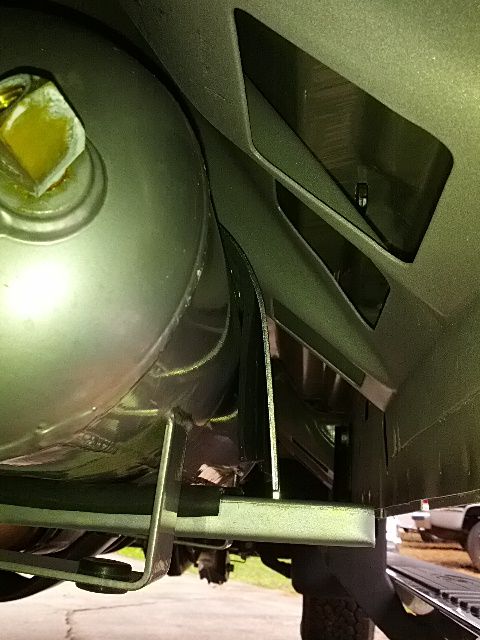
When installing the struts and lining them up, remember if you put the pop-off valve on top, that it has to have enough room to operate correctly. It will be close!!
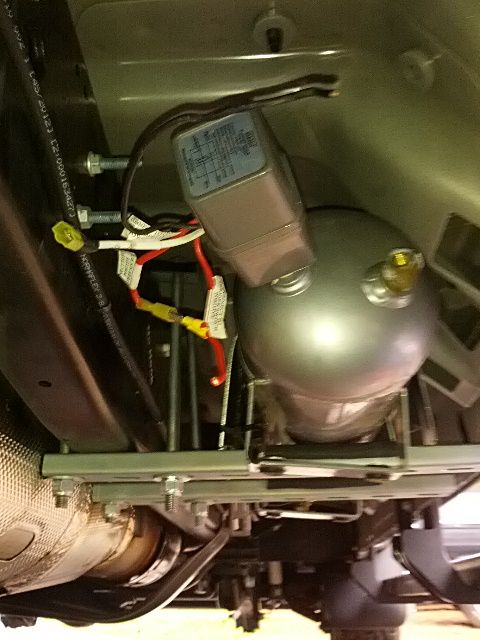
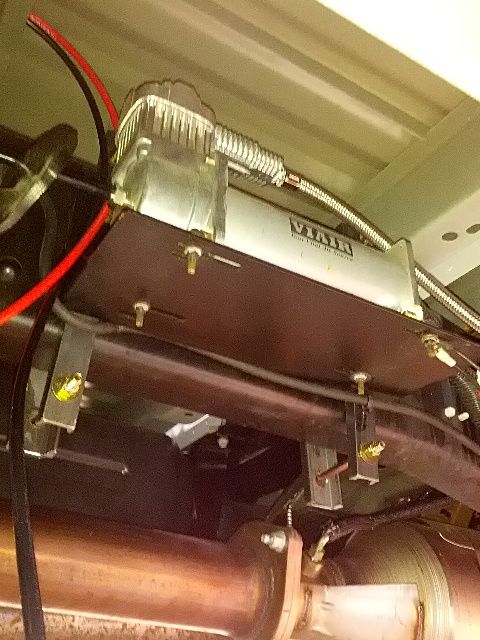
The 18" braided line that came on the compressor was not long enough for me to move the comressor on this truck, so I ordered a Viair 36" line off of Amazon that was delivered today.

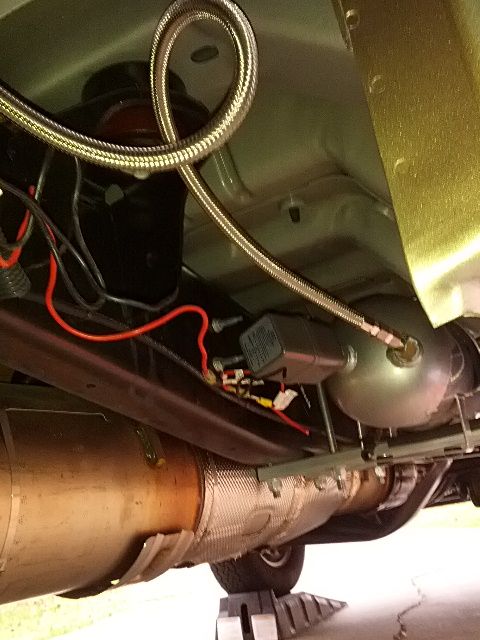
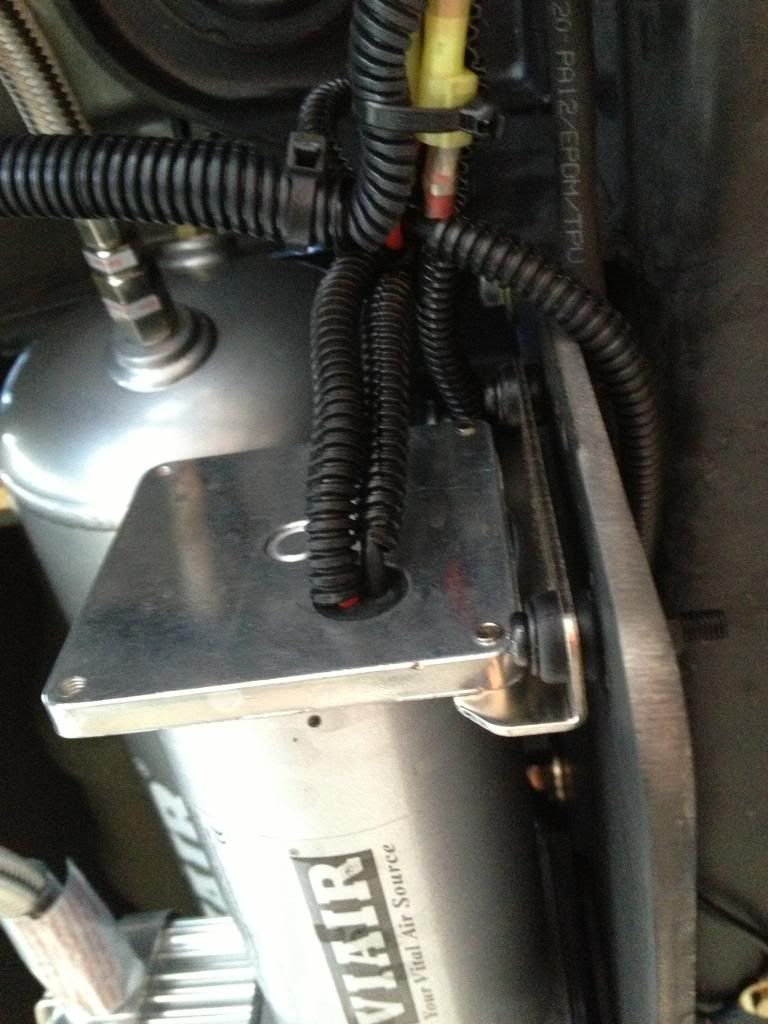
Notice how close the bracket is to the DPF? It won't touch I hope
I then mounted the compressor using the same Viair bracket I used in the other truck, but fabricated a bracket similar to the tank bracket but side to side instead of top to bottom. It is mounted in front of the right rear spring hanger.
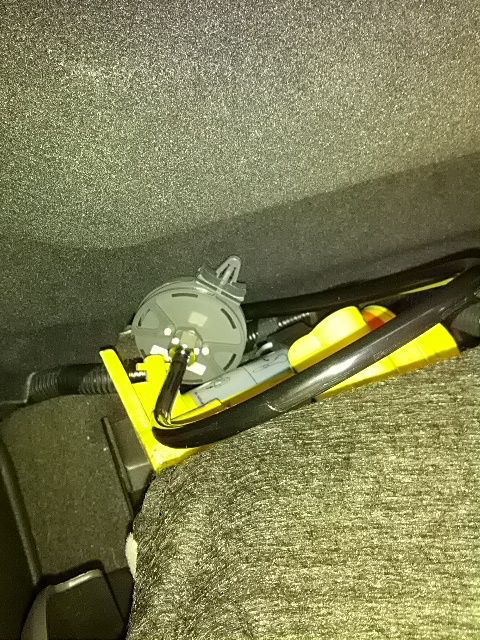
I then used the idea I had on the other truck and ran the breather tube in through the grommet on the right rear of the cab. Very difficult for large hands, but it can be done.
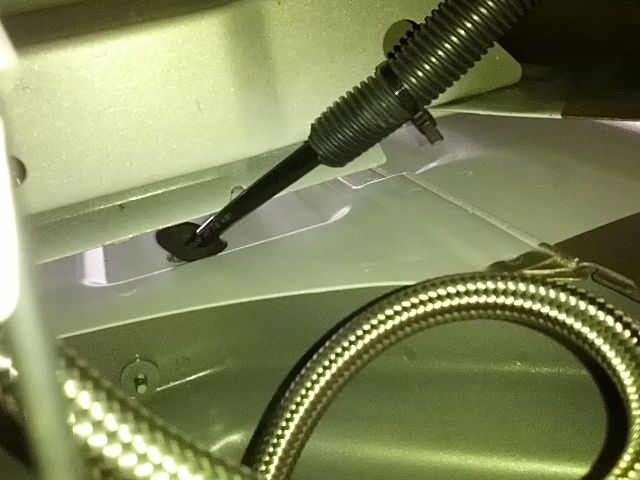
And then attached the filter on the inside behind the seat after cutting a slit in the sound proofing and carpet behind the right rear seat, above the jack.
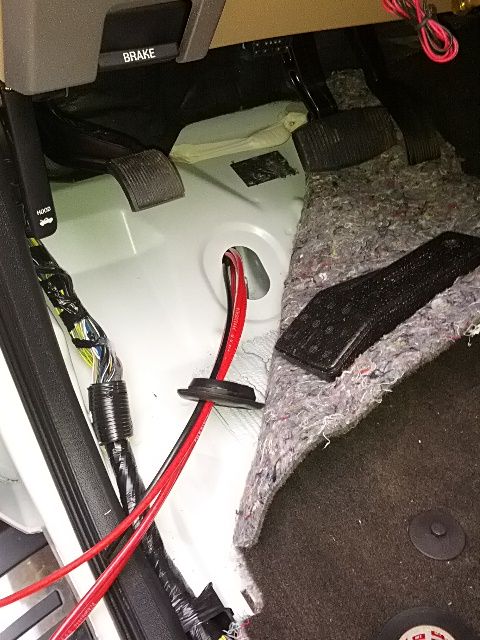
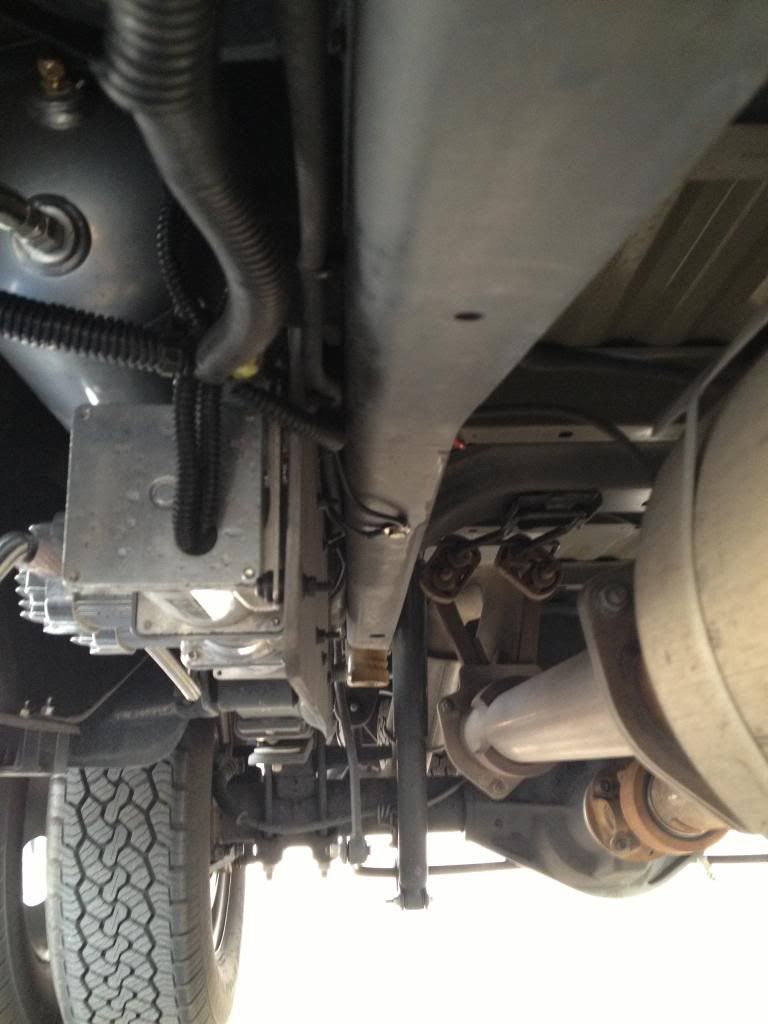
I then ran the lines along under the bed from the bags to the midway of the bed, then ran the along the frame away form any heat. I then used the grommet under the brake pedal as my entry point for all of my lines.
I don't think the line will kink due to the way they are coming through the bracket. Another member here has done similar.
Ran the other lines from the tank to the controls and this is what it looks like.
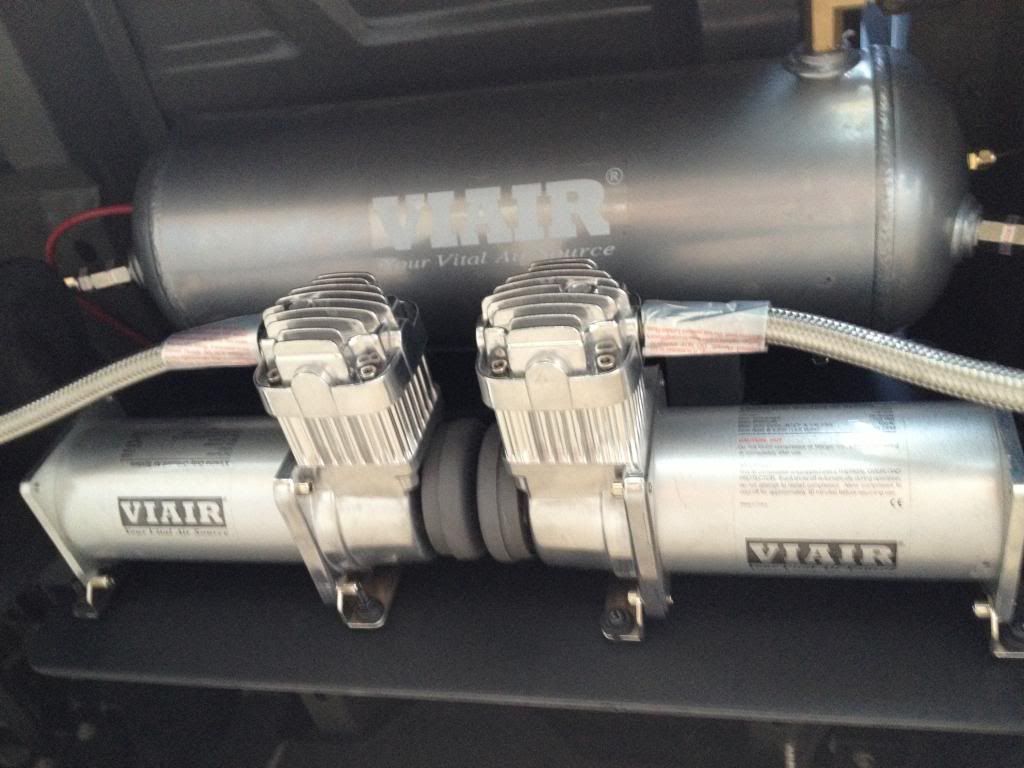
Here is a daytime pic of the compressor installed.
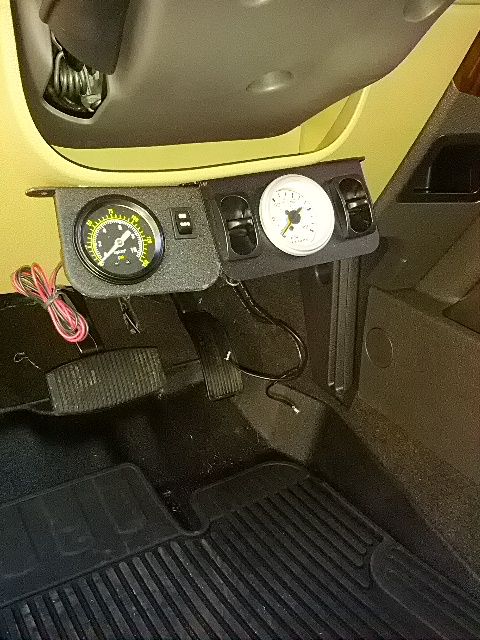
Here is what the gauges looked like after they were installed.
Almost completely done now. Just have to add more protectant wire loom and a few more zip ties and track down a small leak on the tank. The bags are holding pressure just fine, just a small leak in the tank. I could've drilled teh frame and maybe have been done quicker, but wanted to try a "no drill" approach in regards to the frame. Wired it into my #1 upfitter switch and tested it out. So far, working fine.
Sorry about the night time pics with the blue hue to them. I didn't realize the setting my phone was on and by that time I couldn't feel my hands to change it anyway!
Monty


I used the same bolts as I did on the 6.4L to hold the brackets and strut in place. just bought new Nylock nuts for them. See how close it is on the outside?

When installing the struts and lining them up, remember if you put the pop-off valve on top, that it has to have enough room to operate correctly. It will be close!!

The 18" braided line that came on the compressor was not long enough for me to move the comressor on this truck, so I ordered a Viair 36" line off of Amazon that was delivered today.


Notice how close the bracket is to the DPF? It won't touch I hope
I then mounted the compressor using the same Viair bracket I used in the other truck, but fabricated a bracket similar to the tank bracket but side to side instead of top to bottom. It is mounted in front of the right rear spring hanger.


I then used the idea I had on the other truck and ran the breather tube in through the grommet on the right rear of the cab. Very difficult for large hands, but it can be done.

And then attached the filter on the inside behind the seat after cutting a slit in the sound proofing and carpet behind the right rear seat, above the jack.

I then ran the lines along under the bed from the bags to the midway of the bed, then ran the along the frame away form any heat. I then used the grommet under the brake pedal as my entry point for all of my lines.

I don't think the line will kink due to the way they are coming through the bracket. Another member here has done similar.
Ran the other lines from the tank to the controls and this is what it looks like.

Here is a daytime pic of the compressor installed.

Here is what the gauges looked like after they were installed.

Almost completely done now. Just have to add more protectant wire loom and a few more zip ties and track down a small leak on the tank. The bags are holding pressure just fine, just a small leak in the tank. I could've drilled teh frame and maybe have been done quicker, but wanted to try a "no drill" approach in regards to the frame. Wired it into my #1 upfitter switch and tested it out. So far, working fine.
Sorry about the night time pics with the blue hue to them. I didn't realize the setting my phone was on and by that time I couldn't feel my hands to change it anyway!
Monty
#2
11-24-2013, 06:53 AM
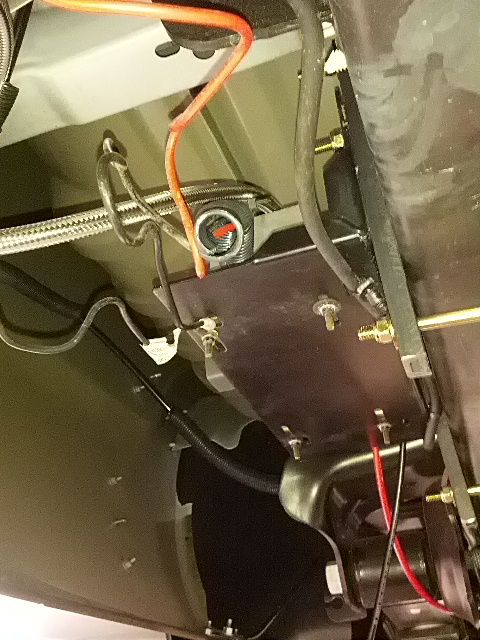
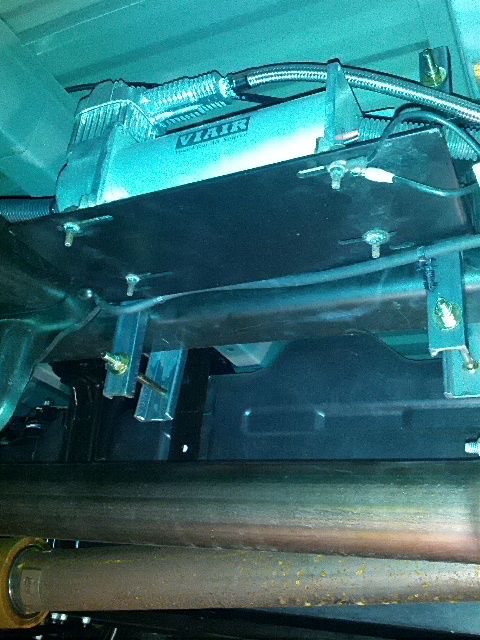
Nice looking job! I too installed a Viair system and like you I didn't want to drill into the frame. So I mounted the components onto a piece of plate first and then bolted the plate to existing holes in the frame. Here are a couple of pictures.
I have used my system quite a bit already and really like it. I hope that you enjoy your as well.
Randy


I have used my system quite a bit already and really like it. I hope that you enjoy your as well.
Randy

#4
11-24-2013, 07:00 AM
Nice looking job! I too installed a Viair system and like you I didn't want to drill into the frame. So I mounted the components onto a piece of plate first and then bolted the plate to existing holes in the frame. Here are a couple of pictures.
I have used my system quite a bit already and really like it. I hope that you enjoy your as well.
Randy
I have used my system quite a bit already and really like it. I hope that you enjoy your as well.
Randy
#6
11-24-2013, 07:49 AM

#7
11-24-2013, 08:30 AM
Trending Topics
#8
11-24-2013, 08:32 AM
I love being able to pump up bike tires, floats, 110psi camper tires, etc with that chuck. That way I have air everywhere I go. I am thinking about T-ing it off again and putting one on the driver's side. I mainly put it on the passenger side due to being away from traffic if I have to use it on the road.
#9
11-24-2013, 08:35 AM
Nice looking job! I too installed a Viair system and like you I didn't want to drill into the frame. So I mounted the components onto a piece of plate first and then bolted the plate to existing holes in the frame. Here are a couple of pictures.
I have used my system quite a bit already and really like it. I hope that you enjoy your as well.
Randy
I have used my system quite a bit already and really like it. I hope that you enjoy your as well.
Randy


#11
11-24-2013, 11:00 AM
I'm gonna use the AirLift Wireless One controller to adjust airbags. it has a minimum (5lb) and 3 presets as well as variable.
short term, I will use the airlift air compressor. I am about to start a new job which will provide more funds, but less free time (same old thing).
then when I add the OBA kit, I can free the airlift controller from there. (with a valve in between)
I'm gonna have more remotes than I know what to do with..
shocks, airbags, TPMS (truck systems two controllers cause of two trailers).

Thread
Thread Starter
Forum
Replies
Last Post
Hackster1
1967 - 1972 F-100 & Larger F-Series Trucks
77
02-15-2019 01:14 PM
jrockdiddy
1948 - 1956 F1, F100 & Larger F-Series Trucks
20
07-06-2013 05:41 PM

