When you click on links to various merchants on this site and make a purchase, this can result in this site earning a commission. Affiliate programs and affiliations include, but are not limited to, the eBay Partner Network.
"... I still think an Atlas 4 speed would be cool, but I'm sure glad I still have that extra $1,000!..."
I have an atlas cat. here somewhere (hard copy) I got 2 C if I could spie an adapter my buddy could machine up 4 the NV3550 swap-in (4 or 500 $ is 2 much for my income). I saw the X-cases U mention (again outta my price range). There seemed to B 4 or 5 models. Is yours a "4.3" or a "4" or sompin like that? Yours is one step away from the highest ratio?
Yeah, I have the 4.3:1. The lowest ratio (highest number) is 5:1. That seemed like it would be too slow in 5th gear (the 15 - 18 mph top speed in low range that I have now would be 12 - 15 mph with 5:1). And after a couple of trips I really can't say that I think lower gears than what I have would be any better for what I do with my Bronco. Really, even if I had taller tires and needed lower gears to get back to where I am now, I think I'd rather go with axle gears to not keep adding so much torque to my driveshafts. But as I said somewhere here before, there's no one right setup for everyone. I really like where I landed for a Bronco that needs to be good on the interstate and be good doing moderate rockcrawling, but that's me and my usage. "Your mileage may vary" as they say!
"...seemed like it would be too slow in 5th gear..."
You'd B 'free wheelin' wouldn't U - no X-case (2 WH 'Hi')?
When I'm on a trail I'm usually in low range. I'm going to need it on the roughest stuff, and it's often nice to have lower gearing when starting up (I don't have a granny gear in my NV3550). I could shift into high range when I'm on smoother sections, but it's nice to not have to bother. So usually I just use the higher trans gears while staying in low range. Once I get to the end of the trail and I'm going out on a road I'll obviously use high range. So that was my concern with a low range that's too low.
As it turns out with the Atlas, it isn't as big an issue as it seemed. The Dana 20 t.cases in my Jeep and in this Bronco both were a bear to get out of low range, and often a little balky going in. The Atlas shifts so much better that having to stop and shift into high range wouldn't be so bad. But it's still nice to have a LITTLE overlap in gearing. If my t.case had the 5:1 low range, 5th gear low range would be 3.9:1, almost the exact same as the 4.01:1 of 1st gear high range. As it is, 5-low is 3.35:1, still not a fast ratio, but at least it's not lower than a typical 1st gear.
Originally Posted by chrlsful
"...go with axle gears..."
I got 33" & was thinkin nxt gear up... 5.33 or whatever they R (or is it 4:88)?
There are a lot of options available. From my 10 year old research, assuming you have a Dana 44 front and 9" rear you can go 4.30, 4.56, 4.88, 5.13 or 5.38. But what's the rest of your setup, and what are you looking for? 5.38 gears with 33s and no overdrive would put you at about 3250 rpm at 60 mph, not very ideal if much highway driving is planned. But they would help you not slip the clutch much when starting with a load given your relatively tall 1st gear (3.01:1 according to your sig?). Still, regearing two axles isn't cheap. Unless you need to dig into them anyway, a better option might be to get a wider ratio trans, like a T-18 or NP435 4 speed. Their granny low 1st gears would make your 4.11 axle gears seem like 8:88(!) gears with your current trans. And you'd still be turning 2500 rpm at 60 mph.
Yes - 3.03 is the oem transmission the 170 came with when acquired in '83. After 30 yrs. ownership I've finally gotten enuff spare cash skiddin logs w/it to get a 250 machined up & installed. (W/my income everything is in it's own "box" and this 1's made enuff to contribute to that impending charge).
I need to get familiar w/the online app(s) for final ratios (?4.56, 4.88, 5.13?) after the engine comes back. I go out on the rd rarely (20 - 30% of the bronk's life) but haul a trailer of lumber from the mill to a home building site. Usually no rd there either, often backing in & to the foundation. I have an NP here (like that 6:1 1st gear) but don't need it. The NV you have is in my sights for low cost install and puttin one each of a lower low/higher hi on my original bronk trany. The other tweak to the FR I seek is '1tuns' w/lockers frnt & rear. I need to increase spline count to do both (I believe). Hope to have a 15 y/o dream of 16" Buds on both axles @ that point (w/tough guy accouterments - Ujoints, etc - the whole point anyway). It's slow goin ($) for a Scots bachelor sawyer but the economy's changin. (I hope it dont take nother 30 yrs!)...
Time for a little more work on the Bronco. Last summer my son, sitting in the back seat, asked why it looked like something sharp was trying to poke out of the back of my driver's seat. It seemed clear that something had broken with the lumbar support. So I cranked the lumbar support all the way down and whatever it was quite trying to cut through the seat cover.
I meant to fix it over the winter, but you know how plans like that go. All of a sudden it was spring, and almost time to pull the Bronco out of the garage! So I finally pulled the seat out and took the seat cover off.
I've got pretty nice MasterCraft seats in the front of my Bronco. They are suspension seats, so it turns out they come apart pretty easily. Everything is tied together.
Once I got the cover off I found the problem right away. The metal frame of the lumbar support was supported on some mesh fabric and the sharp edge had cut through. Then it cut the cords that were holding the tension in the seat fabric and was now supported just by the seat cover. You can see it poking through the big cut in the mesh fabric in the picture in the upper left.
Eventually I pulled the passenger seat out and took the cover off it. That seat had a thick piece of vinyl between the lumbar support and the mesh, so it seems like my driver's seat was a quality control problem, not a bad design. I did contact MasterCraft and, after some delays in the conversation (mostly due to me) they said that if I sent the 13 year old seat in to them they'd fix it for free.
That seemed fair, but I didn't want to wait that long. So I quilted some denim material over both sides of the cut in the mesh (upper right and lower left pictures), then I pop riveted a piece of plastic over it (I cut the plastic out of an old mini-boggan sled). The denim should hold the mesh together pretty well, and the lumbar support assembly will slide nicely on the plastic without cutting anything. After lacing it back up with some new cord and putting the seat cover back on it's as good as new!
Another repair project. Driving home from work in the rain last week I ran out of gas in the aux tank. When I switched to the main it wouldn't start. So I got to take a walk in the rain and then come back with my truck and tow bar to hook it up on the shoulder (in rush hour) and tow it back home.
Turned out to be the fuel pump (no surprise). When I had the EFI on it I needed a high pressure electric pump. Which worked out well because with the serpentine belt system it had then it didn't have a provision for the mechanical fuel pump. When I switched back to a carb I had to go with a low pressure electric pump because of the serp system. I put it right after the tank switching valve, so it wasn't as close to the tank(s) as would be ideal, but it seemed like the best bet.
That fuel pump actually died very early, so I replaced it with another (but different brand). That's the one that died on me now after maybe 5 - 6 years.
But now I don't have the serp system anymore, so I'm back to a timing cover for a standard rotation water pump which has a provision for a fuel pump. And I verified that my rebuilt engine has the fuel pump eccentric when I replaced the timing cover.
So this weeks project was to put a mechanical fuel pump back on it. Finished that up this evening and took it for a test drive. It runs fine (as expected), and the fuel pressure stays rock-steady at 3.5 psi rather than wandering around between 2 and 4 psi like the electric did. This should be a lot more reliable than the electric!
Edit: After a little more driving, I think the electric fuel pump might have been causing some drivability problems that now seem to be gone! The first one makes some sense to me. Before the engine was really touchy about how much choke I gave it (manual choke) while warming up. Now it seems a lot more tolerant of a little more or a little less choke. The higher fuel pressure effectively gives a higher float level, and I know from my putzing with the Holley I had on my old Jeep that a low float level could give some annoying drivability issues, especially when cold.
The second has me a little confused (but I'll take it anyway). Before, after heat-soaking a while when shut down after it was up to temperature, it would typically act like it was flooded. It didn't want to start without holding the throttle open, and there'd be a gassy smell to the exhaust right away. I always figured that the carb was heating up, so the gasoline expanded and pushed its way into the throat, puddling in the intake manifold and leading to the flood. I could prevent that from happening by shutting off the electric pump a little while before I shut the engine off (reducing the amount of gas in the carb). But now it seems to start right up after a hot soak. If anything I think it ought to be worse now. The higher float level should mean more gas will push into the intake manifold. Maybe I just haven't heat-soaked it enough and I'll find this is still a problem. But I'm liking driving it a lot more now!
Over a year since the last update. I don't know if that's a bad thing or a good thing. Bad because I'm not doing any improvement projects or good because I'm just driving it. I guess I'll take the good!
This spring I finally did another fun project, adding a winch! I went with a receiver mount because I don't do a lot of 'wheeling and I didn't want the winch on for just driving around town. Plus I have receivers at both ends (planning on a receiver-mount winch some day) so this lets me pull it either direction.
I started off with a Warn M8000 winch. Looking at internet reviews of the less expensive brands it seemed like almost everybody loved them, except the few people that had them fail to work when they needed them. I don't know if the Warn will really be any better, but it seemed like it was worth spending a little more for the reputation.
I also didn't feel like going with Warn's cheapest line (VR series?) for the same reason, but also didn't want to spend the money for Warn's more expensive lines. So the M8000 seemed like about the right value point for me.
I thought about either buying a ready-made cradle, or going the opposite way and making it all from scratch, but I decided to take the middle route. I bought a mounting plate and made my own from that. I cut down the ends of the standard Warn mounting plate to be just long enough to protect the ends of the winch, but to keep them out of the way of my clevis mounts. I bolted it to a piece of 2" square tubing (using 1/2" grade 8 bolts) and also welded the plate to the tube. Belt and suspenders!
The result ends up tucked up pretty high and tight, better than I expected. I was afraid it would look vulnerable to trail obstacles, but I don't think it'll be a problem much of the time.
It does stick up too high to be able to ride in the rear receiver. I can't swing the spare tire carrier closed when the winch is there. But that seemed better than compromising the mount strength and approach angle by cutting and welding to drop the plate lower than the top of the receiver tube.
I mounted the solenoid box right on the motor and ran the cables as short and tight as I could, with a quick-connect for the main power feed also attached to the mount (so it won't be plugged in while driving). I put a quick connect under the hood, and another in the back, so I can plug in at both ends with a relatively short power cable. And I used an isolator relay so the power lines aren't always hot.
OK, enough talk. Here are pics of it mounted in front (without the power cable connected), the quick-connect in the back (with the power cable connected) and the winch mounted in the rear (with the power cable).
Now I'm looking forward to going 'wheeling a little harder, and still hoping I never have to use it!
Getting the winch finished was to have it ready for another trip to northern MN. We were mostly wanting to try out our new-to-us motorhome before the 30 day warrantee expired, but we were going to get some 'wheeling in as well.
My wife, younger son and I only had a 3 day weekend, and with travel time included we'd only have half days for 'wheeling on the first and third days. It happened to fall in a really rainy time (we've had over 5" of rain in the last week), so the trails were really wet. It rained on us both nights (the motorhome passed that test), but we got lucky and the first two days were dry. Then the third day promised to rain steadily, so we decided to just pack up and head home.
The Bronco sustained a fair amount of damage the first two days as well (which made it easier to call it quits). Both rockers got crunched, and a rock leaned / slid us into a tree which put a pretty big rip in the top (another reason to not go 'wheeling in the rain). Plus the grommet around the vacuum line running into the power brake booster ripped, giving me a pretty bad vacuum leak (which didn't seem to affect the engine 'wheeling anyway) and no power brakes (not much of an issue on the trail with a 71:1 crawl ratio, but a little disconcerting on the highway back to camp). I was able to create a make-shift grommet out of gorilla tape (which was also used to patch the top). So it was still drivable, but no one wanted to be getting out to spot or take pictures in the rain.
OK, enough talk, here are the pictures:
Here is one of the wetter sections of trail:
There were lots of opportunities to test the flex...:
... but early Broncos only flex so well:
Sidehill is never fun:
And we did have one opportunity to use the new winch. I probably could have got over this ledge without the winch (and almost certainly could have with more aggressive tires). But it is steeper than it looks in the picture, and I couldn't back up to reposition without maybe dropping the left rear off the trail. And besides, there was a new winch to try out!:
I've really got no complaint about the BFG A/Ts. That was the only place I tried that I didn't drive up. I know more aggressive tires would have made a few places (including that one) a little easier. But these are a lot better for the street driving that my Bronco mostly sees. Even this weekend it saw over 400 miles of highway (flat towing) vs about 10 miles of 'wheeling. With the A/Ts I don't have to listen to or wear out mud tires.
Two years ago (in post #73 on page 5 of this thread) I noted that the transfer case levers had jammed up, likely due to a trans or engine mount letting it move. I had looked at the mounts at the time and didn't see any issues, and it was driving fine, so I didn't do anything.
Then this May we finally got it out on the trails again (post #85, above). When climbing hills in low range, fairly frequently the shift levers (transfer case and transmission) would move to the right and the gas pedal would move down (without the engine changing speed, I was using the hand throttle to keep it steady). So now I knew what my problem was: a torn left motor mount.
After getting home I looked at it installed in the Bronco and thought maybe there was a little gap. But when I jacked up the engine to pull the mount out I found that it was in two convenient pieces!
Since the left motor mount is in tension to resist the engine torque multiplied by the trans and transfer case reduction I decided not to go with another stock mount. I looked at some aftermarket mounts that put the rubber (or urethane) in compression, but they were pricey, most said they raised the motor, and I didn't want urethane. I have some leftover spring bushings from my F-250, so I decided to make one myself using that.
I stayed with the stock mount on the right side. That one is in compression when you're going forward, so it should hold up a lot better than the left side, and I'm not looking to stiffen things up, just keep it from tearing again. If the 46 year old right side mount does fail I'll get another stock one.
It's been a busy summer, so I ended up only being able to work on it over lunch, or for brief bits in the evening. I'm not very proud of the end appearance as I rushed some of the fabricating and the welding. But no one sees it anyway, and once some oil leaks on it and it gets coated in dirt it'll look just fine!
Not much in the way of pictures on this project, just one of the finished mount (on the left) and the stock "2-piece" mount on the right.
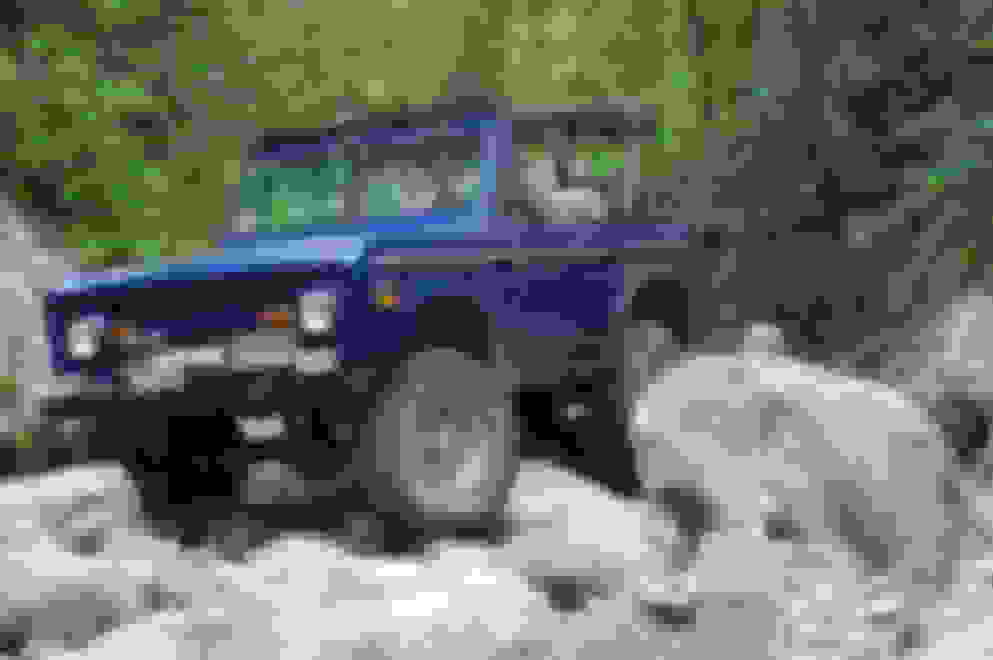
I got another chance to use the Bronco on the trails. We went out to the Black Hills again. My son is getting to be a good enough driver that we can tackle tougher trails. Before I had to drive and spot on the hardest stuff, now he drives and I spot. I just need to get him to be the spotter / rock stacker!
Of course, the result of tackling tougher trails is that you can do more damage! A bent front bumper, crunched hub cap and crushed rocker (that was already rusted out and dented) were the worst of it. Also I got an exhaust leak that kept getting worse to the point that it sounds like the Harleys driving around there!
Now I need to get more serious about what I'm going to do with this Bronco. The body is getting bent up enough that I should do something about it. I'm trying to decide if I should put rock rails on this body, or put a new (fiberglass) body on it and put armor on that.
Enough talk... pictures!
A tight squeeze, with no way to get a straight approach. We bent the driver's end of the front bumper, and did the final line-up by tipping the back end off the jack to move it over.
Crunched one of my hub caps. This is actually the damage that bothers me the most. I should have taken the 'caps off before going 'wheeling.
Oops, not paying close enough attention! The rock the right rear is sitting on took a bite out of the already dented and rusted out rocker.
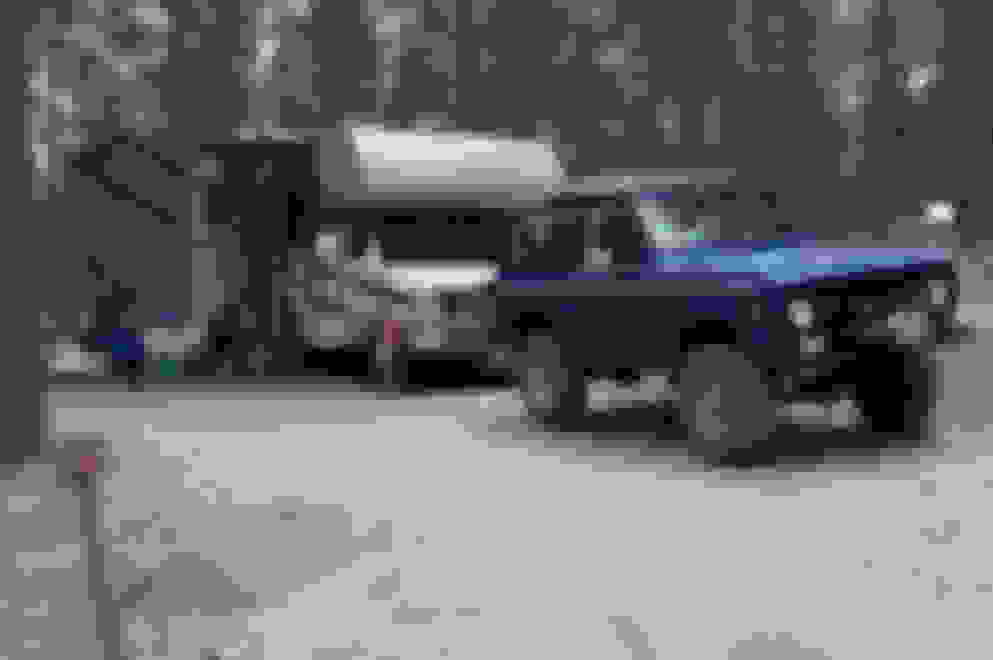
And just for fun, here are pictures of our camps in the Badlands (when we never unhooked the Bronco) and the Black Hills (Mystery Mountain Resort, south of Rapid City, I highly recommend it!)
More repair work (and no pictures). Driving about 8 blocks from home I was letting out the clutch in 2nd after turning a corner. There was a sharp "crack" and the clutch pedal dropped to the floor. Turned out that the clutch rod, from the pedal down to the bell-crank, had snapped. There wasn't much clean metal in the break, mostly rusty, so it'd been cracked most of the way through for a long time.
By the way, driving the NV3550 without a clutch was almost impossible. I've shifted quite a few manuals without using the clutch, but the synchros in this one fought me too much. I ended up having to stop, shut the engine off and start it in 1st gear because I couldn't get it into 3rd or back into 2nd. I was able to fight it into 2nd and then just drove the rest of the way home in 2nd.
So I ordered a new clutch rod and decided to replace the right side motor mount while I was at it. Turned out it was tearing quite a bit (but not in two pieces like the left had been). So along with the clutch rod I ordered a pair of motor mounts.
The first disappointment came because one of the mounting holes in the new motor mounts was in the wrong place. It was about 1.25" away from the inside edge of the mount compared to 1" for the stock one. I couldn't get the bolt through it and into the block. I had to quit for the night and bring it in to work to mill the offending hole into a slot. That problem solved.
Then I found out that the clutch rod was a little over an inch too short. After sending a slightly frustrated e-mail to the retailer I realized that one was my fault. I forgot that my Bronco has a body lift and that a stock clutch rod wouldn't be long enough. So back to work where I cut it and welded in a chunk of steel rod. And looking at the old rod I realized that it had been cut and welded as well (but probably not welded very well since it broke).
So now it's back together and back on the road after 2 weeks of putzing around.

 08-22-2015, 07:52 AM