
My EB, it's journey and its new 4x4 trailer
#1
 10-28-2013, 03:46 PM


Join Date: Jan 2008
Posts: 90
Likes: 0
Received 0 Likes
on
0 Posts
My EB, it's journey and its new 4x4 trailer
A long long time ago I posted quaetions about buying an EB and replacing my X. Well I bought the Bronco and kept the X. I have been away from the interwebs here for some time but as I was looking around for some info to do some stuff to my Excursion I stopped here.
I have don tonms of things to my Bronco and even have a 4x4 trailer in use now.
I will need to take some time to gather all the pics and the full spec sheet of everything done. it will be long and heavy with pics. i will begin with the old post about deciding what i wanted to do with the X or EB.
And then you can see the craziness that happened
here is the old tread... https://www.ford-trucks.com/forums/9...e-eb-guys.html
Stay tuned.
It's nice to be back.
#2
10-29-2013, 03:59 PM
Join Date: Jan 2008
Posts: 90
Likes: 0
Received 0 Likes
on
0 Posts
So to continue I will give the full list of everything I remember as it happened and where it stands now then will post a bunch of pictures.
It started out as a 74 with a 2" unknown coil in the front, late model f150 steel wheels, 33x10.5x15 BFG At's, 4.11 gears and a factory LS up front. It is a Ranger but all haas been stripped from it.
3 spd moved to floor, front cage welded in, 302 in good health maybe slightly tweaked and a carter afb 4b. All the rockers and front and rear fenders have been replaced, in a mediocre fashion but it looked good and was a good starting point for the price.
now what to do?
was going to try and do it right the first time seeing as this was my fourth EB and wanted to only do things once. Had plans to take it slow and keep it basic but kinda went crazy.
so where is it now.......
get a drink and a snack this might take a while.
Wild horses 3.5 suspension lift.
coils,leafs double shocked up front with hoops and stock mounts in the rear.
I found some late model Bronco/F150 alum wheels for cheap, finished stripping the clear and polished out and mounted the 33x10.5 BFG AT's it came with on the new wheels.
Installed a disk brake kit up front, Hydroboost brake booster off a JY astrovan.
Upgraded to a new mustang high amperage alternator and threw in an Optima Yellow top when my battery promptly died the first winter.
It now is running a canned ham steering pump as the stocker just wouldnt hold up to the extra duty running the hydro boost.
It originally was going to get cut from the get go but after the Wild Horses lift decided to leave it for the time and it hasn't changed yet, the tires have just cleared their own path off road.
Converted the wiper arms to the Jeep Cherokee rear setup so I can now run any modern wiper blade(huge improvement).
I started working on the inside as it needed a bit of help.
Installed a twin stick on the Xcase and for now am running the stock 3 spd manual, that is on its last legs,
However there is a ZF5 sitting on my side yard waiting for me to install when time permits this winter, that should be awesome.
I extended the cage to complete the family kit and go to the complete rear so my kiddos are protected, found a hard top for a decent price and ran that for awhile but decided that it was cooking my kids on the trail in the summer.
Bought a Rampage soft top from WH and installed that,liked it so much I sold the hard top.
Then realized the tired dual exhaust was putting my kids to sleep as it was seeping into the passenger area and when quoted to repair the existing duals, said F it and went for a new custom bent manifold back 2-1 and have been very pleased with it.
Next on the list was to reconfigure the dash.
Cut and relocated the the glove box door and added a pocket for my CB.
then added some space under the radio area for some gauges.
In that slot sits some pro comp ultra lites that keep track of volts,oil pressure and water temp.
while it was apart I piulled the stock speedo and polished the face and added a fresh coat of flouro orange paint to the needles.
Next I installed a new stereo in the dash some side rear speakers in the 1/4 panel diamond plate(it came with) and in the doors in some awesome 1st run door panels from a local bronco guy, JGZ,that has been making awesome stuff out of fiberglass.
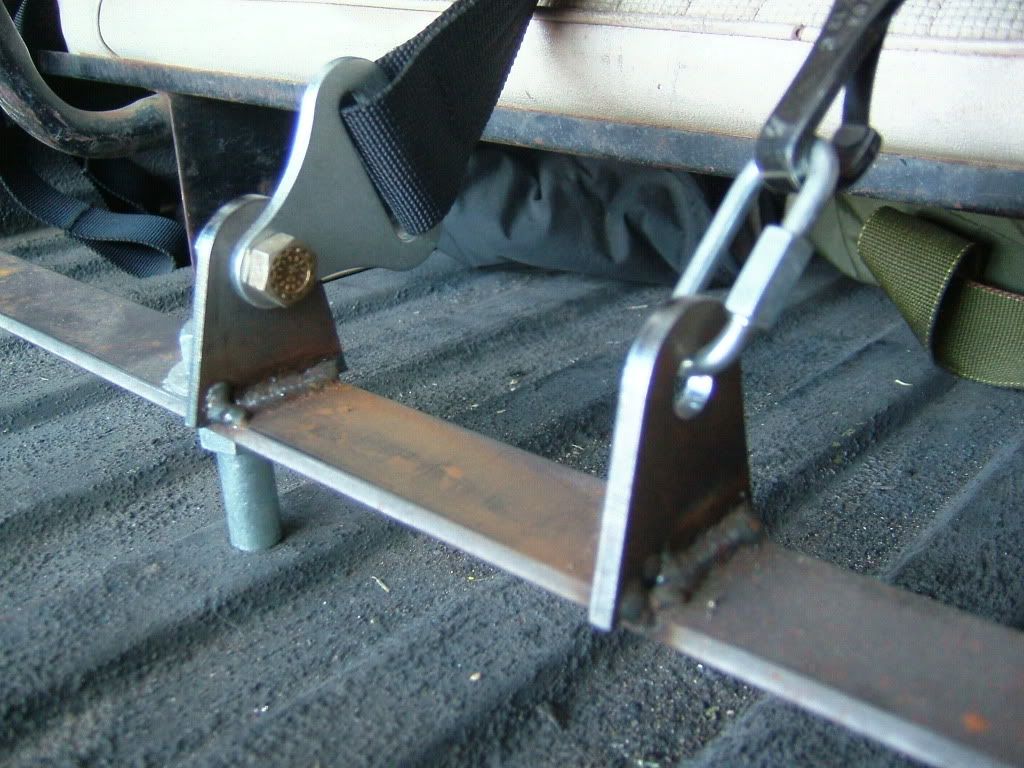
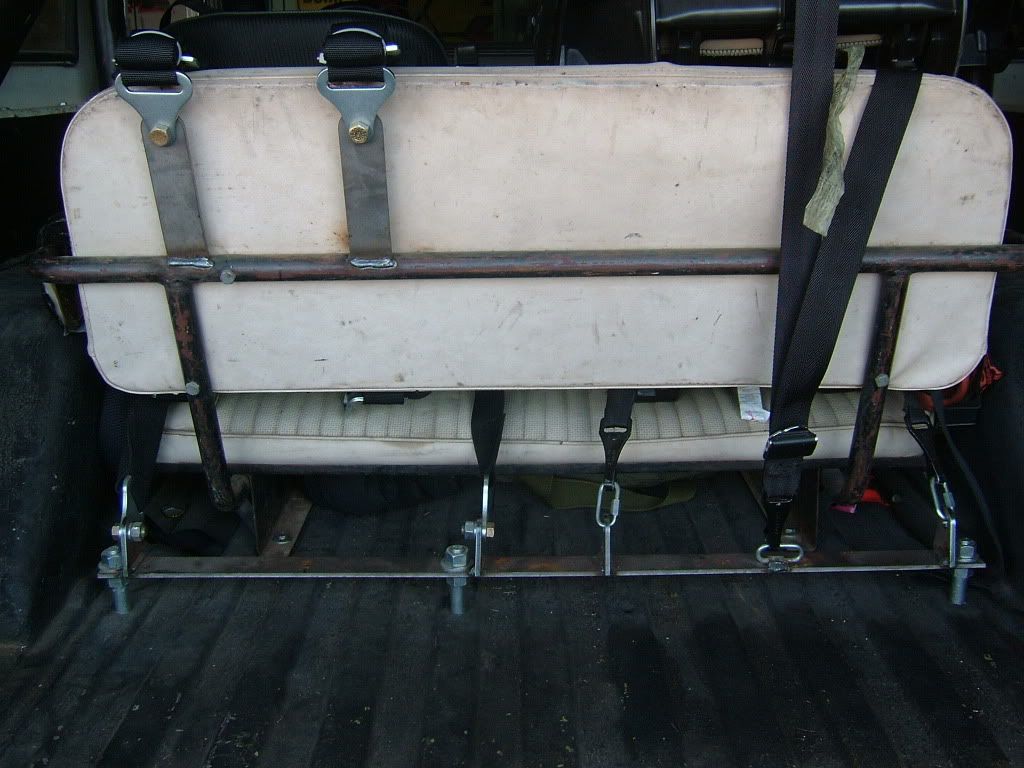
I ran the stock seats for awhile and modded a stock rear bench to accomodate some harness mounts for my kids by welding shock tabs to the top rear frame rail of the seat and a flat bar across the bottom that used the stock seatbelt holes, turns out leftover shock mount bolts from my 92 bronco I sold years ago thread perfect into those, sometimes it pays to be a packrat.
I decided I needed better seats and my kids grew up a bit so I placed an order for a full set of beard seats and harnesses.
This did however bring up the problem with the rear harness mounts for the kids so I fabbed me a frame and added a bit of Bronco customization too it just because I could. Its amazing what can be done with a welder and a pile of steel.
made mounts and installed them, these turned out really slick.
The door panels were in rough shape so I recovered them in a seat cover material (motorcycle) that I aquired from a local upholstery shop and it has the appearance of a carbon fiber weave.(matches the new seats on the backs)
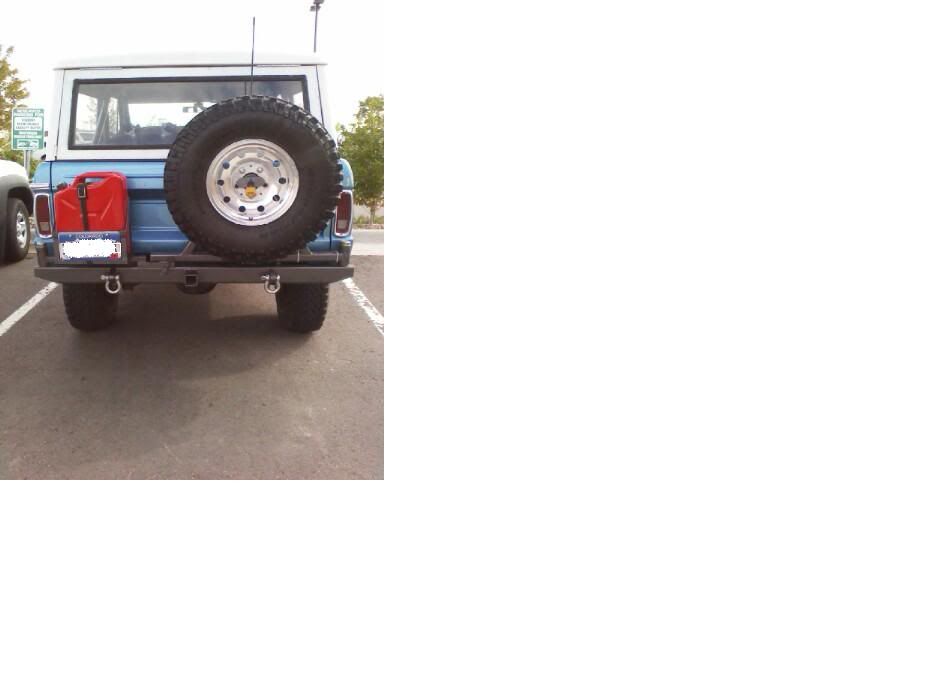
After some time I got the idea I needed a rear bumper to carry a fullsize spare and a gas can, since I cant justify the cost to buy a bumper I built one.
turned out pretty good and was exactly what I wanted.
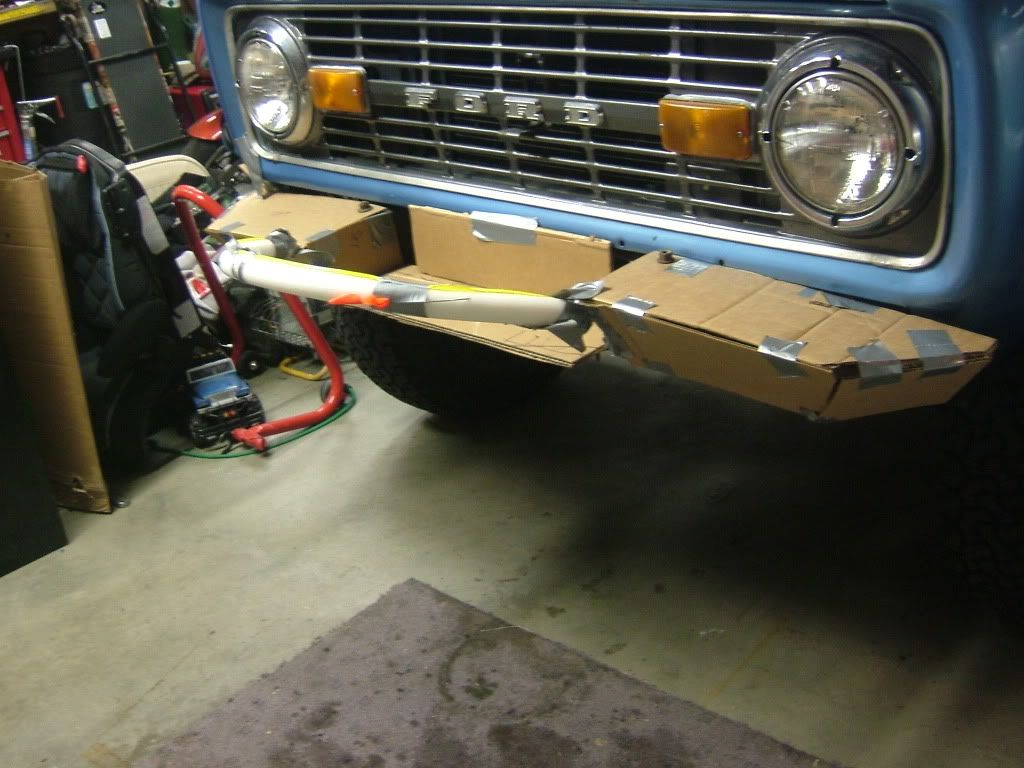
now the front bumper didnt match the rear and I wanted more protection as well as the ability to mount a winch and some light mounts so I built me a front. the rear was made out of tube but the front I went more of a plate design with a tube light bar.
The cool thing about building my own I was able to mount the winch really low between the frame rails to keep the radiator from being blocked off and potentially overheating the Bronco.
Some time passed and my hobby OCD kicked in and I went away for awhile and played with building motorcycles, but got a message from one of the local CCB (coloradoclassicbroncos.com) guys asking where I was and if all was well. it was and I pulled back into the bronco a bit and found some guys were starting to consider doing 1 ton chebby tie rod setups.
Well seeing as how I had the space and the equipment I volunteered my place and some of the local gurus came over and we knocked out I think 6 or 7 front ends that day. twas a long day but we made it happen.
Couple of them guys are pretty involved with Broncos and without their help it would have been a bit slower or even a no go.
I have been stuffing fenders on this thing and couldnt be happier.
I will likely cut it one day but the BFG's have a fair bit of life left and I will run them until they are gone and then who knows if the fenders get cut? if they do I might go nuts and bump the lift and go 37"tires or just cut deep with 35's. You just never know with these things.
Now to continue, the 4x4 trailer.
For a family of four to go camping in an early bronco it is tough to pack everything you need. There are companies that make trailers(that I can't afford) and i can build one so I set out to start with the plans.
All the while my mrs was scouring craigslist to see if anything turned up reasonably priced.
She calls me one day and tells me to check an ad she found.
Did some research and called the guy nonstop til he finally called back.
drove the hour and 1/4, pulled in the guys driveway and knew I would be going home with the trailer.
we talked price, shook hands and we were headed home.
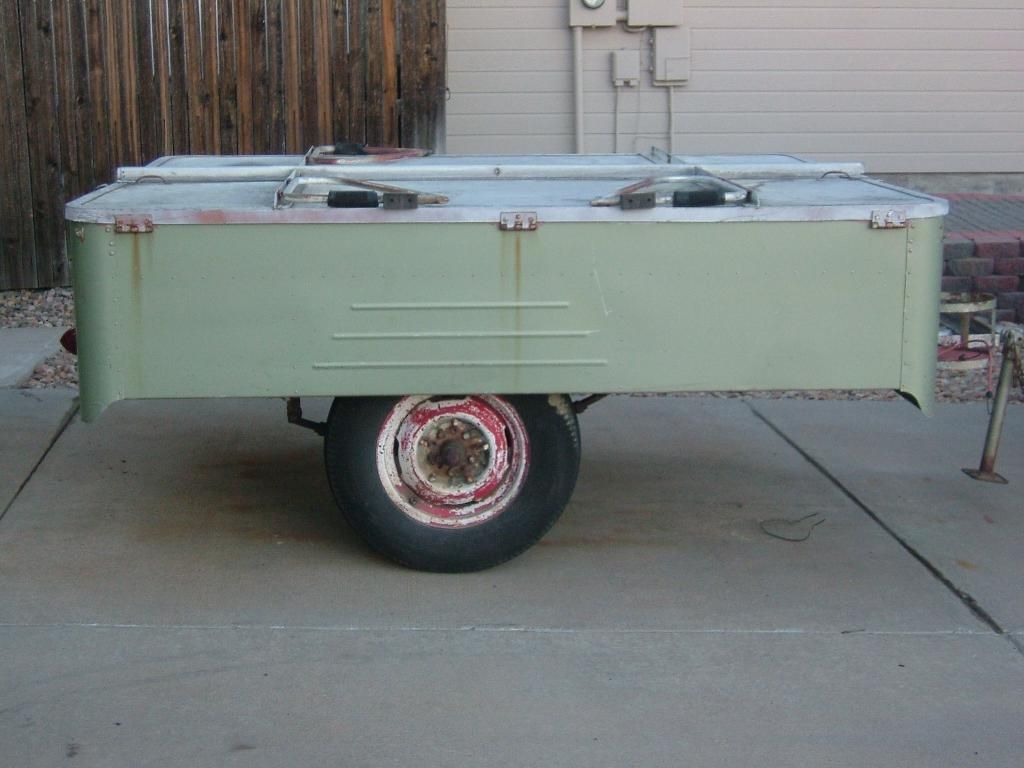
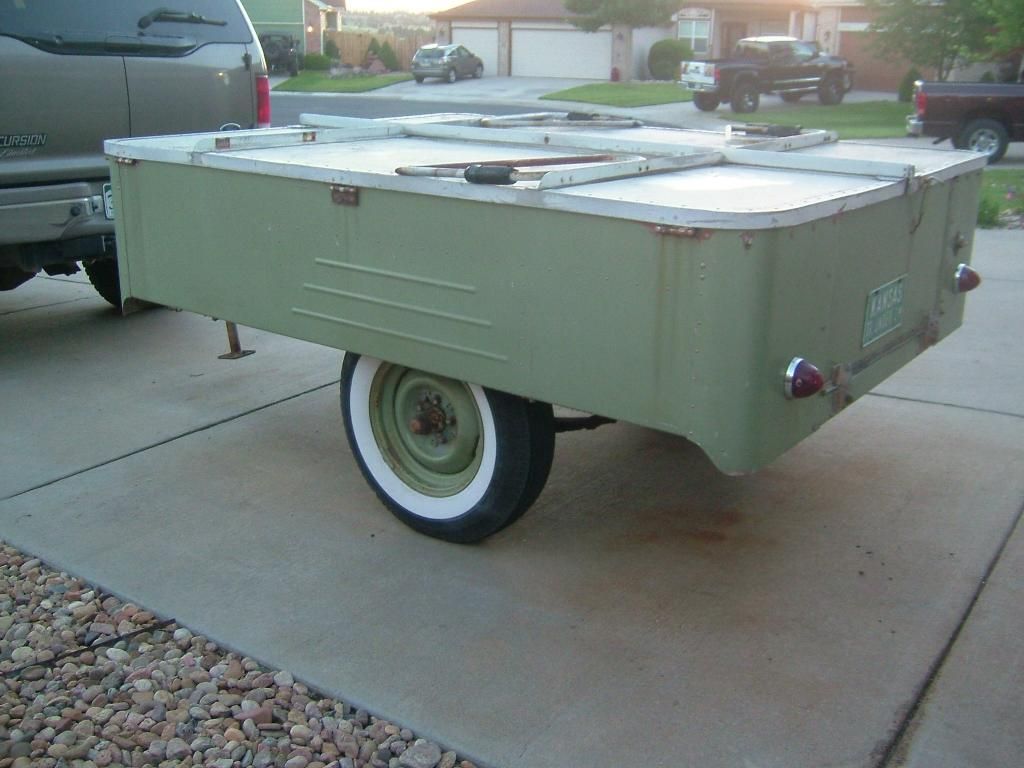
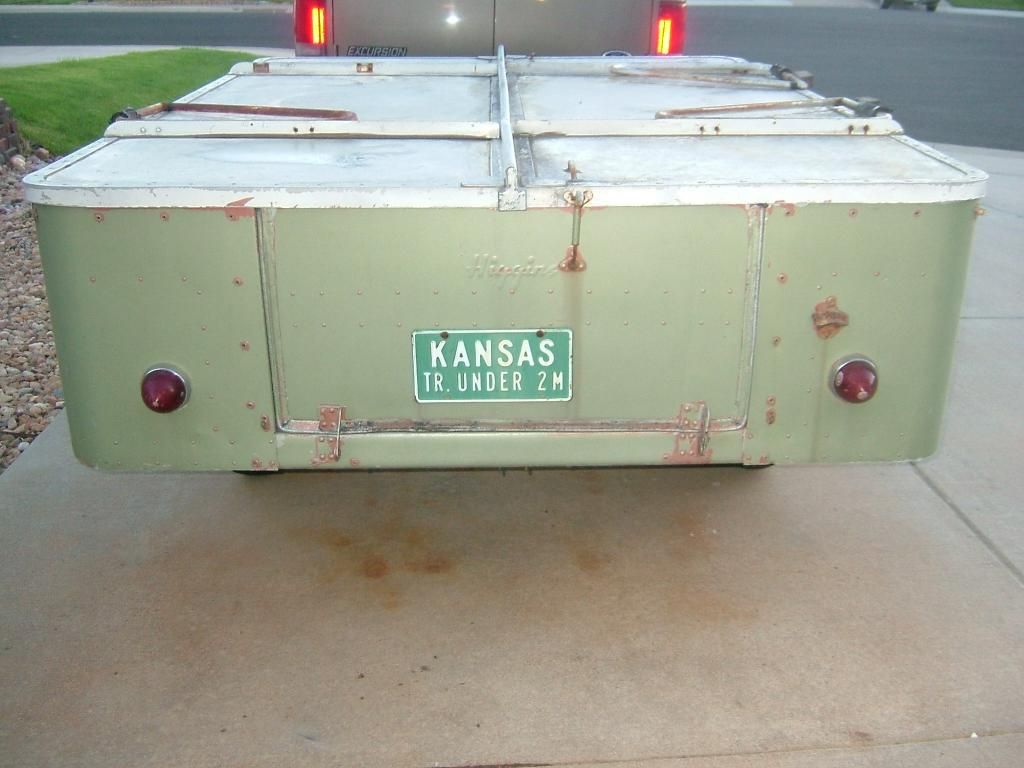
It is a 1950 Higgins tent trailer.
all aluminum,15"wheels, high ground clearance looks freakin cool.
The canvas for the tent portion is in very rough shape but overall the trailer was great. we opted to ,for now, use it to haul out camp gear, as replacement canvas is custom and lotsa $$$$.
The factory specs show it weighing in at 750 lbs, we removed the canvas and frame and now it cant weigh more than 500lbs, that canvas is heavy.
We couldn't decide if we wanted to leave it all original or paint it its original color(had been painted a few times) or paint to match my Bronco.
It was decided to paint it to match.
So it matchs my Blue and the top and wheels are Wimbleton White.
it has an aftermarket cooler and propane rack on the front and those are white as well. We replaced all the damaged rivets with stanless steel hardware and welded new hinges to the support bars for the beds.
Made a paint booth out of plastic in my garage and went to town.
I put the same size tires on it that it had, but went BFG AT and because of the profile could not get them to remount, they were more square then the trailer tires on it. They wouldn't get into the skirts on the trailer.
Uh oh.
Not really, just busted out a quick axle flip and they went right in and now there is even more clearance on the trailer than my Bronco.....;D
Oh and they did stuff right back when this thing was built,
solid 2" steel axle on that thing.
My wife and I worked our tails off and had it done in 10 days.
I still need to make a mount for the spare but time has been thin lately, it will hopefully be done by next spring for wheeling and camping.
Stay tuned for tons of posts of pics.
Hope I didnt bore with all the details.
It started out as a 74 with a 2" unknown coil in the front, late model f150 steel wheels, 33x10.5x15 BFG At's, 4.11 gears and a factory LS up front. It is a Ranger but all haas been stripped from it.
3 spd moved to floor, front cage welded in, 302 in good health maybe slightly tweaked and a carter afb 4b. All the rockers and front and rear fenders have been replaced, in a mediocre fashion but it looked good and was a good starting point for the price.
now what to do?
was going to try and do it right the first time seeing as this was my fourth EB and wanted to only do things once. Had plans to take it slow and keep it basic but kinda went crazy.
so where is it now.......
get a drink and a snack this might take a while.
Wild horses 3.5 suspension lift.
coils,leafs double shocked up front with hoops and stock mounts in the rear.
I found some late model Bronco/F150 alum wheels for cheap, finished stripping the clear and polished out and mounted the 33x10.5 BFG AT's it came with on the new wheels.
Installed a disk brake kit up front, Hydroboost brake booster off a JY astrovan.
Upgraded to a new mustang high amperage alternator and threw in an Optima Yellow top when my battery promptly died the first winter.
It now is running a canned ham steering pump as the stocker just wouldnt hold up to the extra duty running the hydro boost.
It originally was going to get cut from the get go but after the Wild Horses lift decided to leave it for the time and it hasn't changed yet, the tires have just cleared their own path off road.
Converted the wiper arms to the Jeep Cherokee rear setup so I can now run any modern wiper blade(huge improvement).
I started working on the inside as it needed a bit of help.
Installed a twin stick on the Xcase and for now am running the stock 3 spd manual, that is on its last legs,
However there is a ZF5 sitting on my side yard waiting for me to install when time permits this winter, that should be awesome.
I extended the cage to complete the family kit and go to the complete rear so my kiddos are protected, found a hard top for a decent price and ran that for awhile but decided that it was cooking my kids on the trail in the summer.
Bought a Rampage soft top from WH and installed that,liked it so much I sold the hard top.
Then realized the tired dual exhaust was putting my kids to sleep as it was seeping into the passenger area and when quoted to repair the existing duals, said F it and went for a new custom bent manifold back 2-1 and have been very pleased with it.
Next on the list was to reconfigure the dash.
Cut and relocated the the glove box door and added a pocket for my CB.
then added some space under the radio area for some gauges.
In that slot sits some pro comp ultra lites that keep track of volts,oil pressure and water temp.
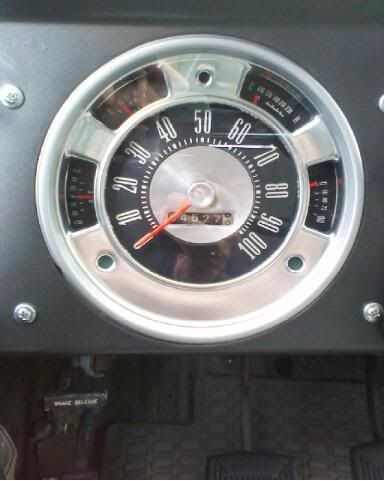
while it was apart I piulled the stock speedo and polished the face and added a fresh coat of flouro orange paint to the needles.
Next I installed a new stereo in the dash some side rear speakers in the 1/4 panel diamond plate(it came with) and in the doors in some awesome 1st run door panels from a local bronco guy, JGZ,that has been making awesome stuff out of fiberglass.
I ran the stock seats for awhile and modded a stock rear bench to accomodate some harness mounts for my kids by welding shock tabs to the top rear frame rail of the seat and a flat bar across the bottom that used the stock seatbelt holes, turns out leftover shock mount bolts from my 92 bronco I sold years ago thread perfect into those, sometimes it pays to be a packrat.
I decided I needed better seats and my kids grew up a bit so I placed an order for a full set of beard seats and harnesses.
This did however bring up the problem with the rear harness mounts for the kids so I fabbed me a frame and added a bit of Bronco customization too it just because I could. Its amazing what can be done with a welder and a pile of steel.
made mounts and installed them, these turned out really slick.
The door panels were in rough shape so I recovered them in a seat cover material (motorcycle) that I aquired from a local upholstery shop and it has the appearance of a carbon fiber weave.(matches the new seats on the backs)
After some time I got the idea I needed a rear bumper to carry a fullsize spare and a gas can, since I cant justify the cost to buy a bumper I built one.
turned out pretty good and was exactly what I wanted.
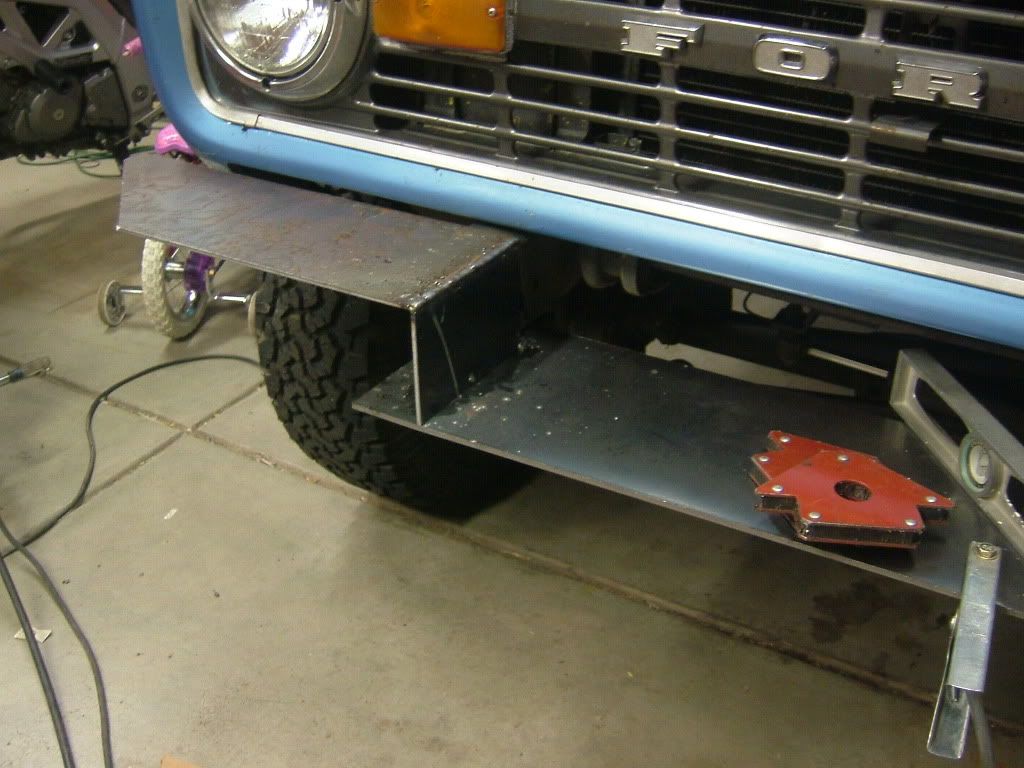
now the front bumper didnt match the rear and I wanted more protection as well as the ability to mount a winch and some light mounts so I built me a front. the rear was made out of tube but the front I went more of a plate design with a tube light bar.
The cool thing about building my own I was able to mount the winch really low between the frame rails to keep the radiator from being blocked off and potentially overheating the Bronco.
Some time passed and my hobby OCD kicked in and I went away for awhile and played with building motorcycles, but got a message from one of the local CCB (coloradoclassicbroncos.com) guys asking where I was and if all was well. it was and I pulled back into the bronco a bit and found some guys were starting to consider doing 1 ton chebby tie rod setups.
Well seeing as how I had the space and the equipment I volunteered my place and some of the local gurus came over and we knocked out I think 6 or 7 front ends that day. twas a long day but we made it happen.
Couple of them guys are pretty involved with Broncos and without their help it would have been a bit slower or even a no go.
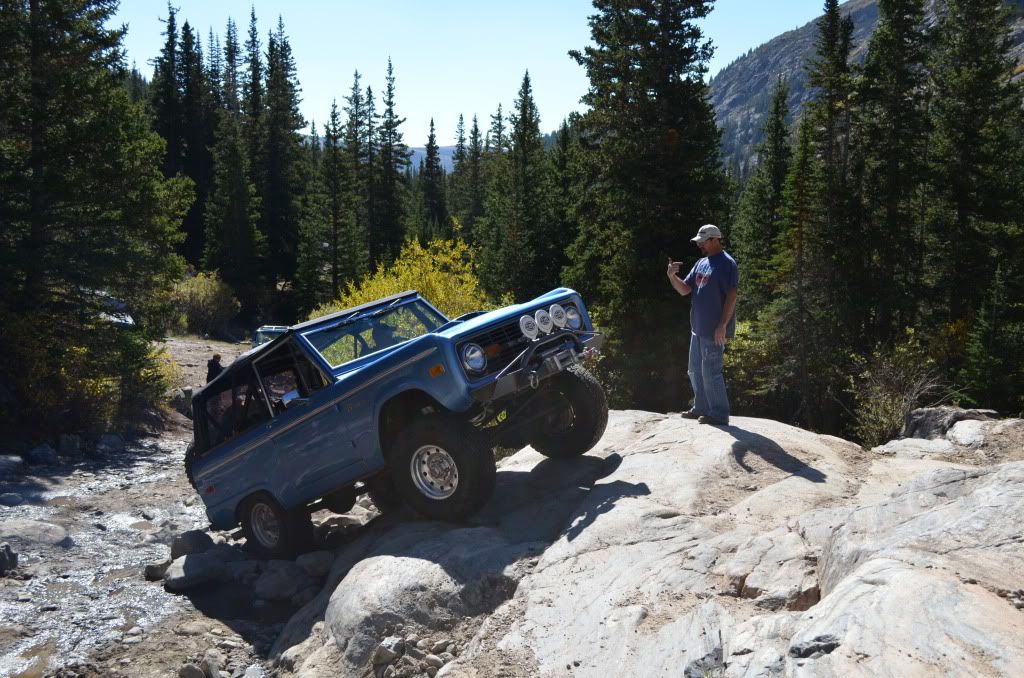
I have been stuffing fenders on this thing and couldnt be happier.
I will likely cut it one day but the BFG's have a fair bit of life left and I will run them until they are gone and then who knows if the fenders get cut? if they do I might go nuts and bump the lift and go 37"tires or just cut deep with 35's. You just never know with these things.
Now to continue, the 4x4 trailer.
For a family of four to go camping in an early bronco it is tough to pack everything you need. There are companies that make trailers(that I can't afford) and i can build one so I set out to start with the plans.
All the while my mrs was scouring craigslist to see if anything turned up reasonably priced.
She calls me one day and tells me to check an ad she found.
Did some research and called the guy nonstop til he finally called back.
drove the hour and 1/4, pulled in the guys driveway and knew I would be going home with the trailer.
we talked price, shook hands and we were headed home.
It is a 1950 Higgins tent trailer.
all aluminum,15"wheels, high ground clearance looks freakin cool.
The canvas for the tent portion is in very rough shape but overall the trailer was great. we opted to ,for now, use it to haul out camp gear, as replacement canvas is custom and lotsa $$$$.
The factory specs show it weighing in at 750 lbs, we removed the canvas and frame and now it cant weigh more than 500lbs, that canvas is heavy.
We couldn't decide if we wanted to leave it all original or paint it its original color(had been painted a few times) or paint to match my Bronco.
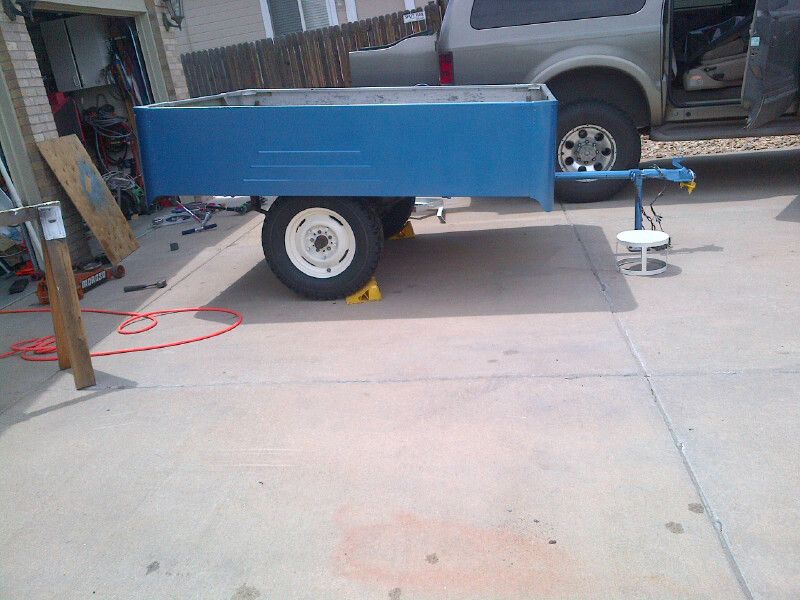
It was decided to paint it to match.
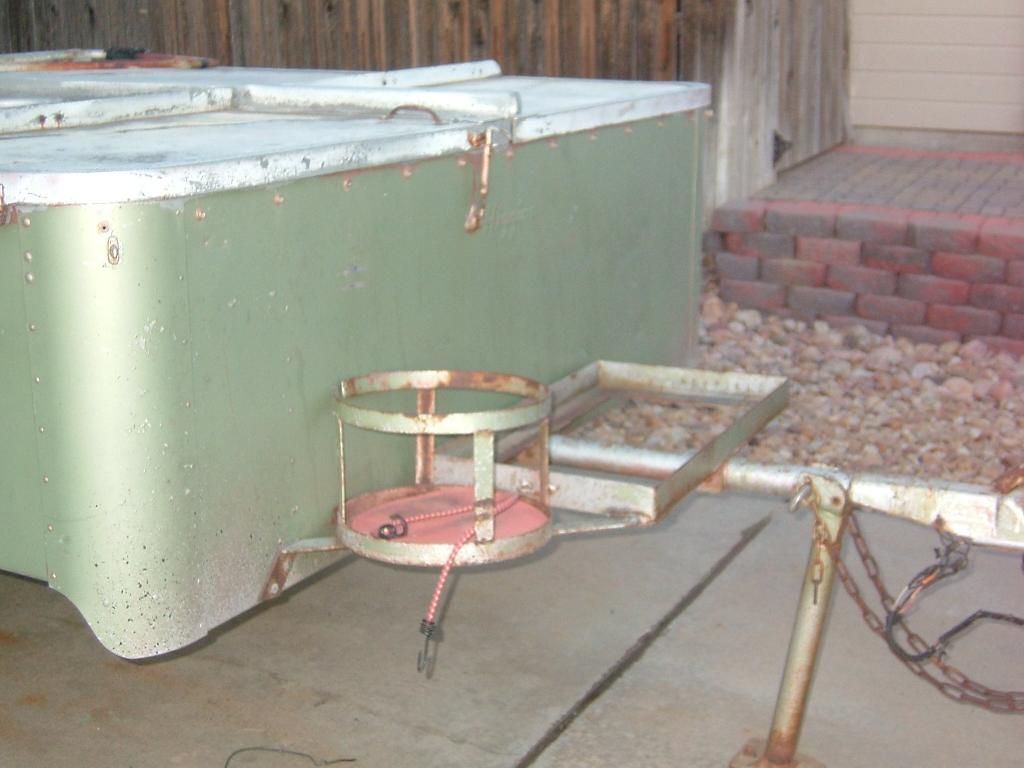
So it matchs my Blue and the top and wheels are Wimbleton White.
it has an aftermarket cooler and propane rack on the front and those are white as well. We replaced all the damaged rivets with stanless steel hardware and welded new hinges to the support bars for the beds.
Made a paint booth out of plastic in my garage and went to town.
I put the same size tires on it that it had, but went BFG AT and because of the profile could not get them to remount, they were more square then the trailer tires on it. They wouldn't get into the skirts on the trailer.
Uh oh.
Not really, just busted out a quick axle flip and they went right in and now there is even more clearance on the trailer than my Bronco.....;D
Oh and they did stuff right back when this thing was built,
solid 2" steel axle on that thing.
My wife and I worked our tails off and had it done in 10 days.
I still need to make a mount for the spare but time has been thin lately, it will hopefully be done by next spring for wheeling and camping.
Stay tuned for tons of posts of pics.
Hope I didnt bore with all the details.


#4
10-30-2013, 01:55 PM
Join Date: Jan 2008
Posts: 90
Likes: 0
Received 0 Likes
on
0 Posts
seat lower bars to attach kid seats
Seat frame upper for kid retention
Rear bumper done
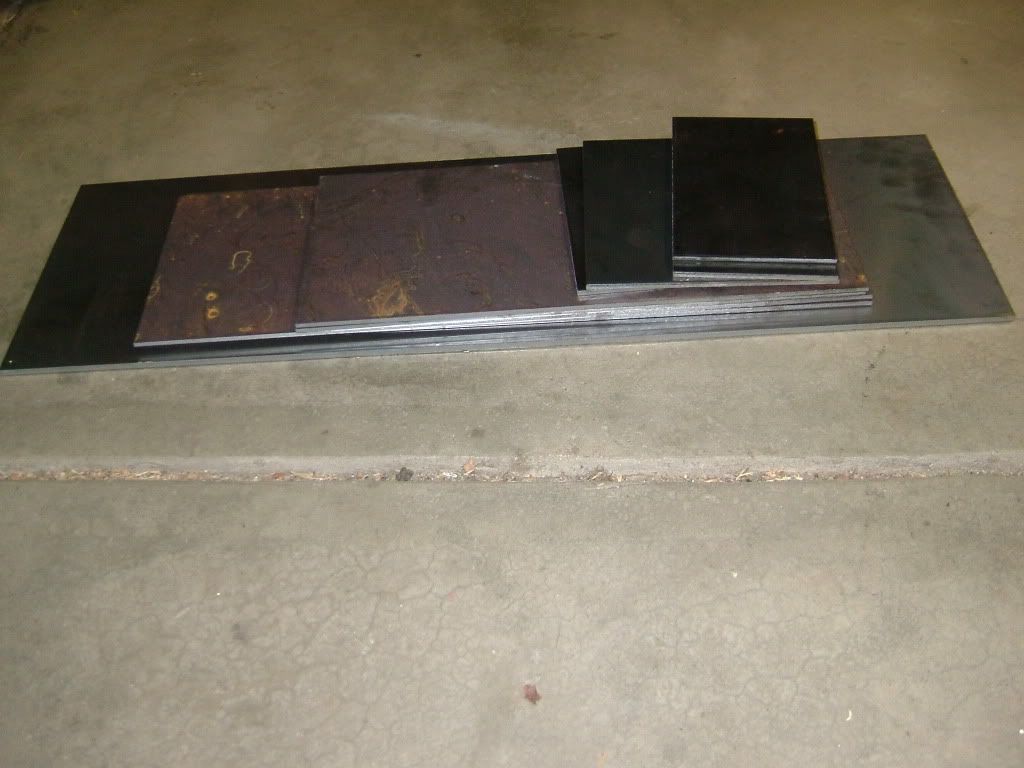
front bumper prototype
pile of steel with hours of labor yet to go
more time
finished
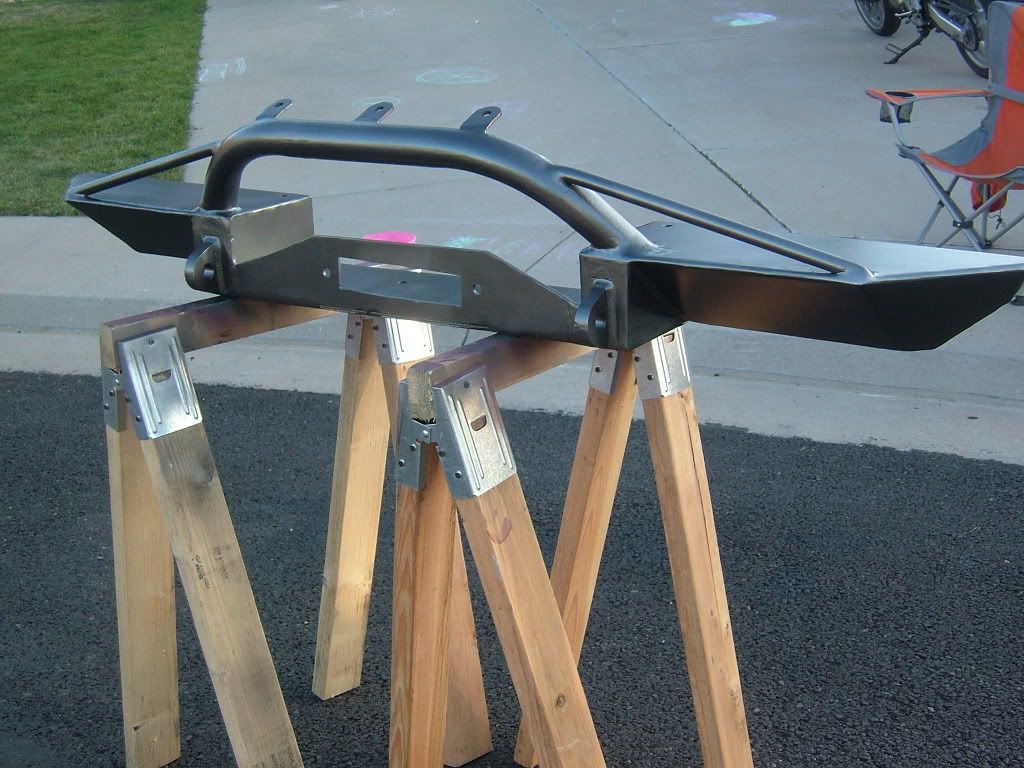
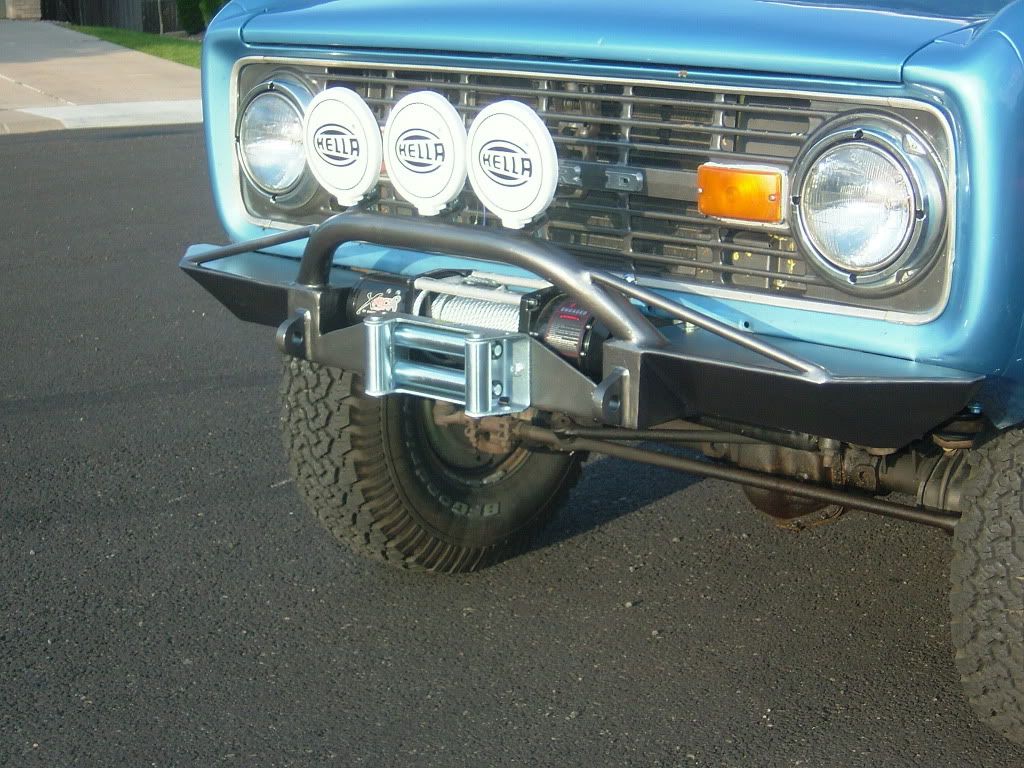
and installed with winch and "Mall" lights, they arent wonderfull but help.
new door coverings
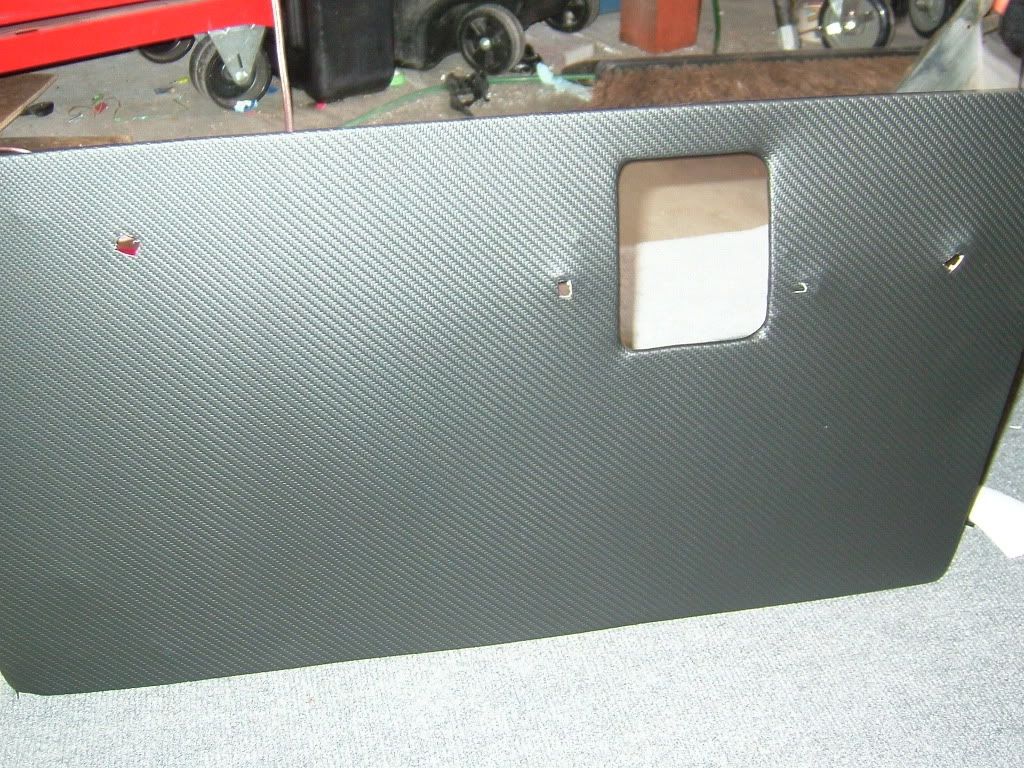
with JGZ speaker mounts installed
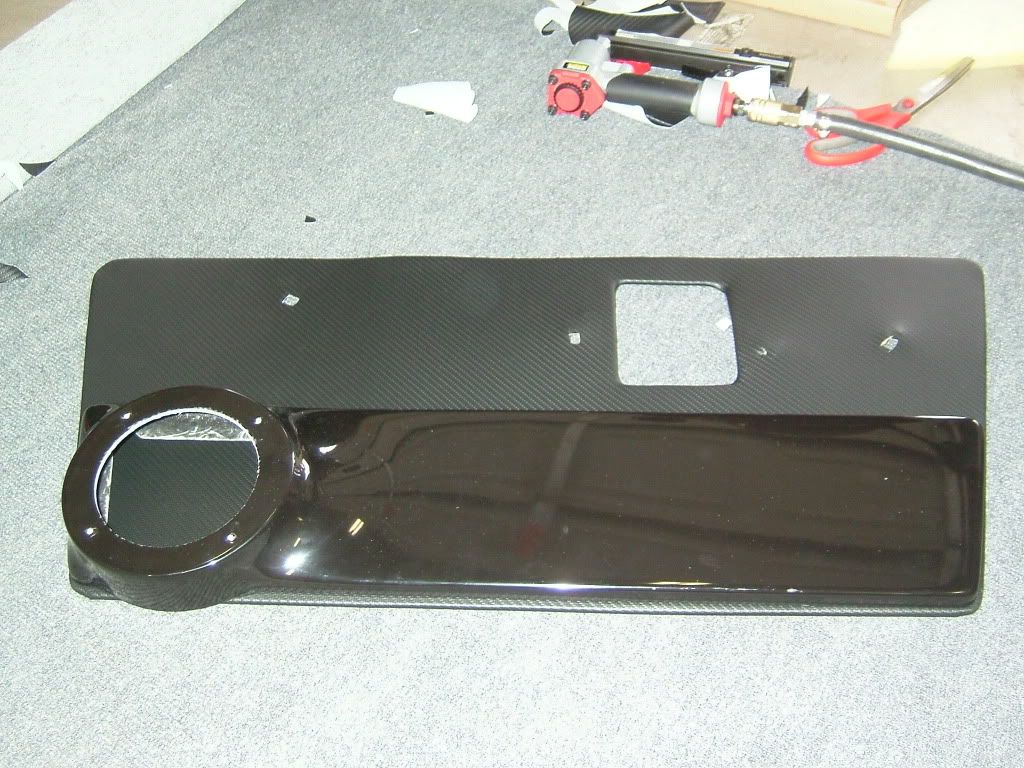
and finished


Seat frame upper for kid retention

Rear bumper done

front bumper prototype

pile of steel with hours of labor yet to go

more time

finished

and installed with winch and "Mall" lights, they arent wonderfull but help.

new door coverings

with JGZ speaker mounts installed

and finished

#5
10-30-2013, 01:56 PM
Join Date: Jan 2008
Posts: 90
Likes: 0
Received 0 Likes
on
0 Posts
new dash completed

polished speedo with fresh needles
I dont have any pics of the seats but you can kinda see them in the dash picture.
need to make that happen as well as my rear harness mounts for the kids.
I will get those added soon.
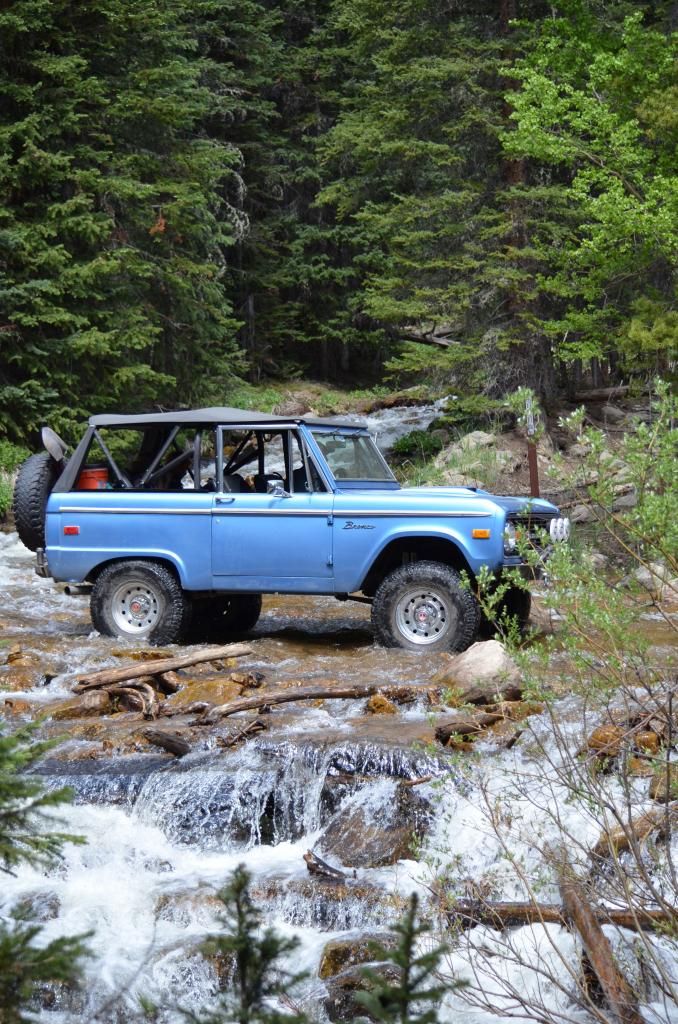
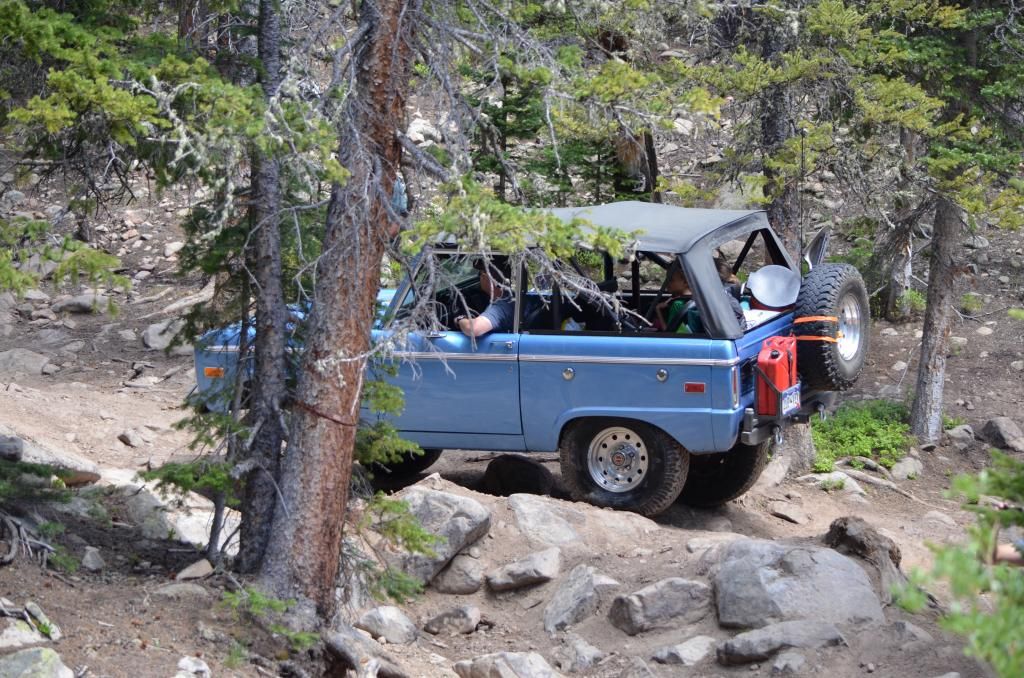
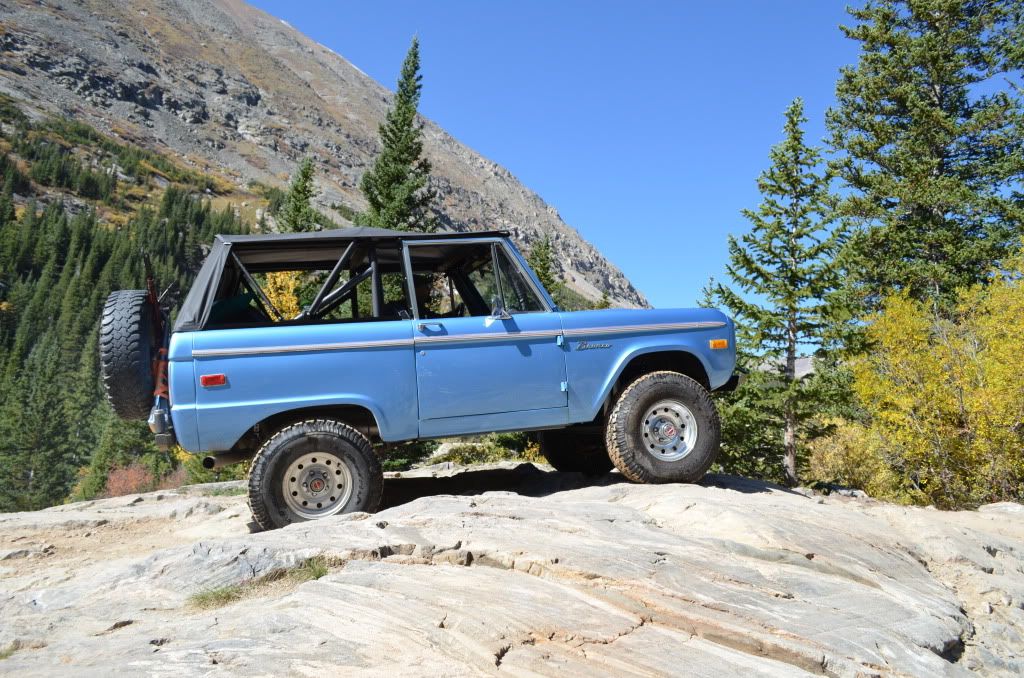
new soft top
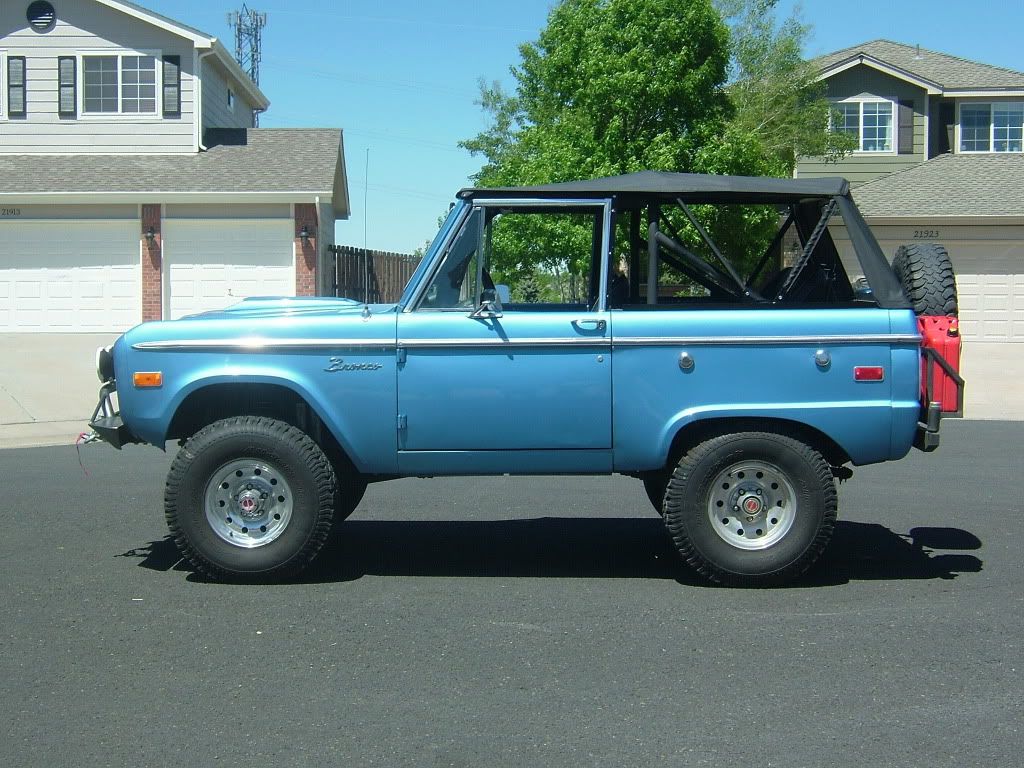
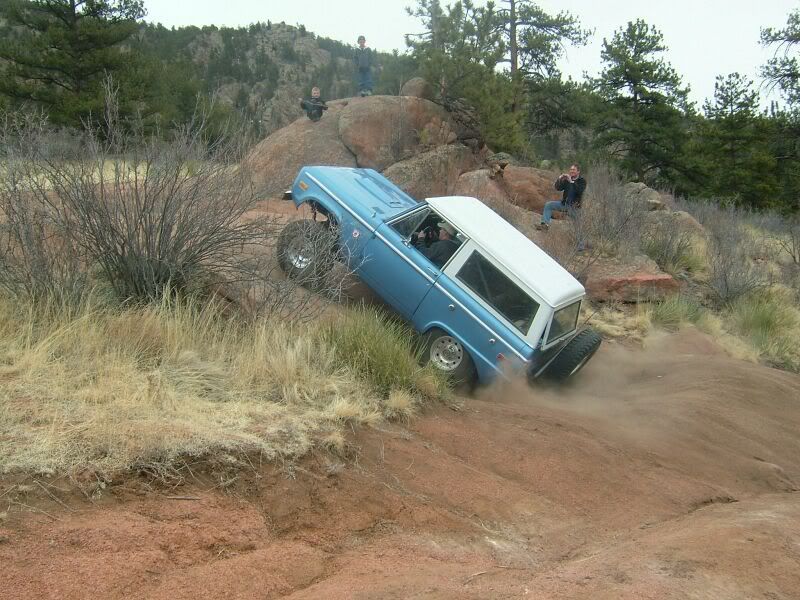
first wheelin trip stuffing fenders
some newer ones with the soft top


polished speedo with fresh needles

I dont have any pics of the seats but you can kinda see them in the dash picture.
need to make that happen as well as my rear harness mounts for the kids.
I will get those added soon.
new soft top

first wheelin trip stuffing fenders

some newer ones with the soft top


#6
10-30-2013, 01:57 PM
Join Date: Jan 2008
Posts: 90
Likes: 0
Received 0 Likes
on
0 Posts
Now for the trailer.
as stated before it is a 1950 Higgins tent trailer.
all alum and in my mind (nobody elses matters ;D ) pretty dang cool
Day one
and a DR Pepper bottle opener from who knows what year.
We cleaned and painted everything except the bottle opener. it went back on with all of its original look.

almost done, I do have some build pics somewhere but can't find them.
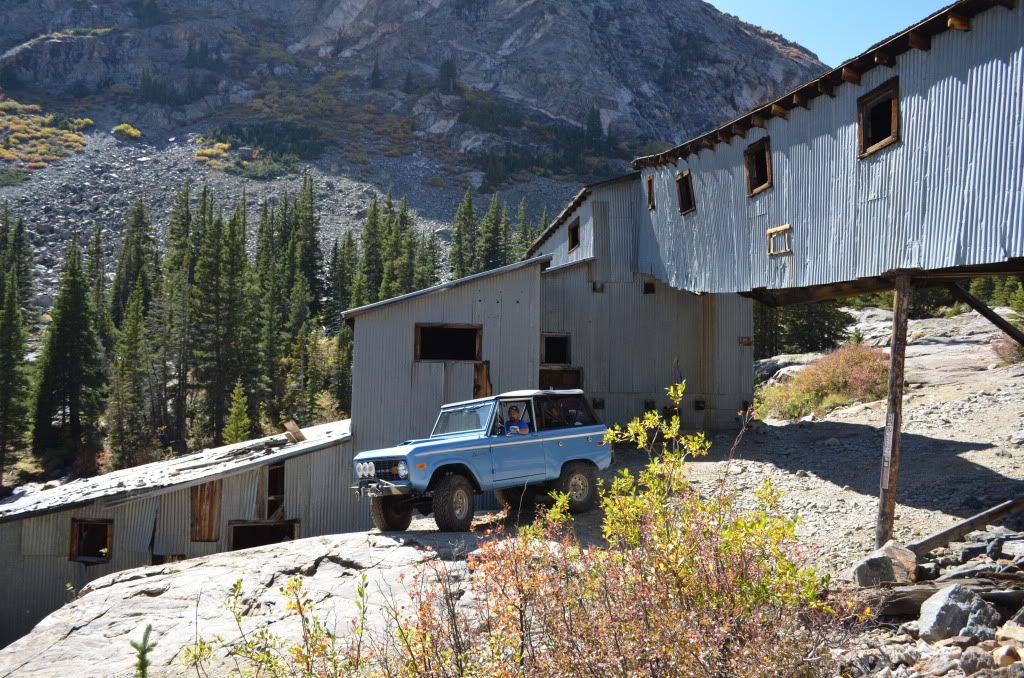
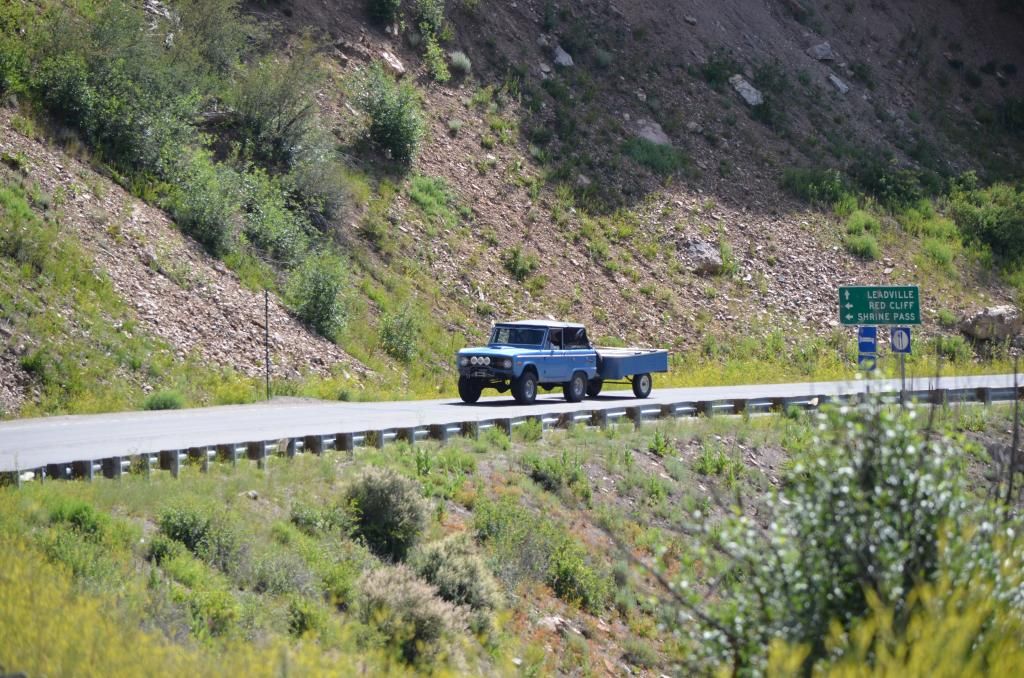
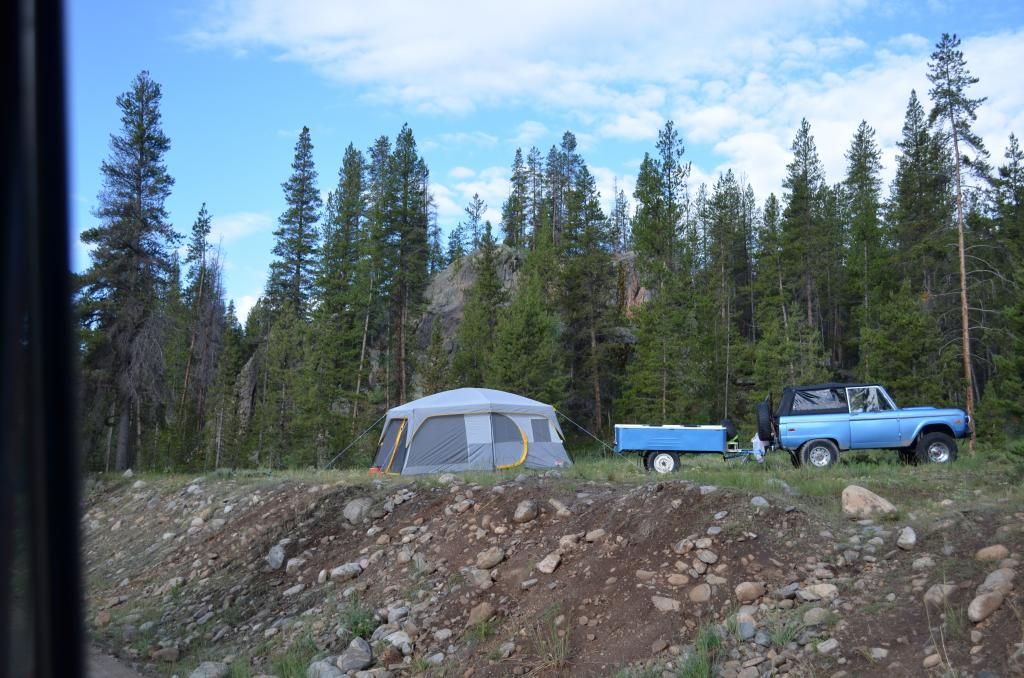
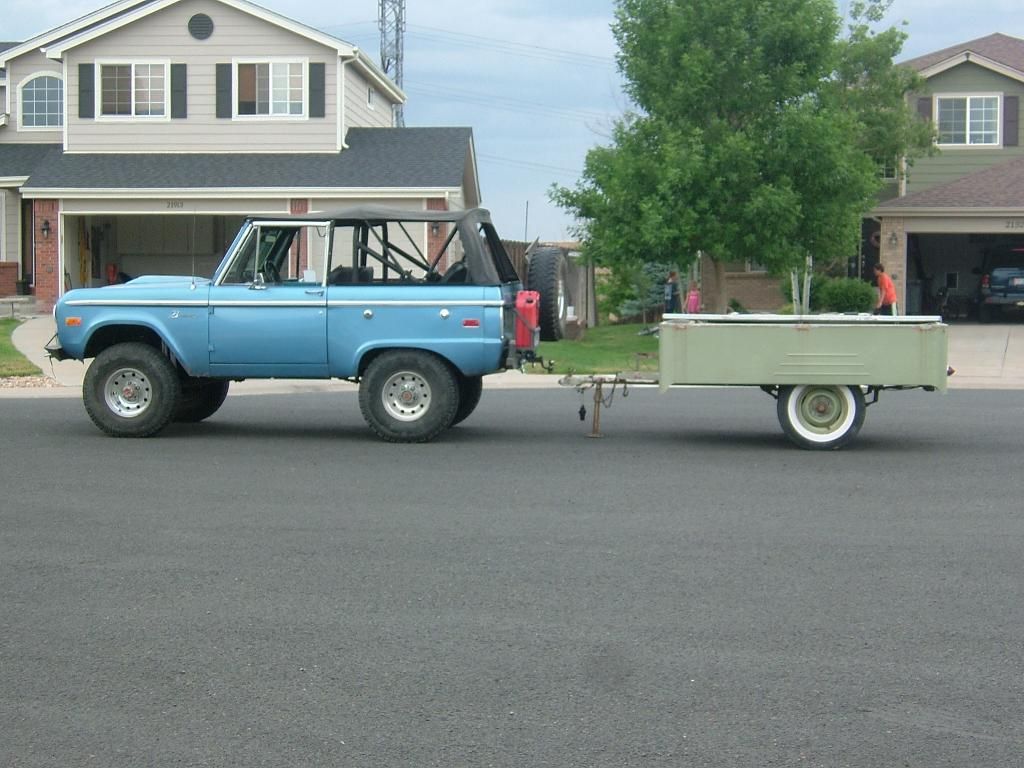
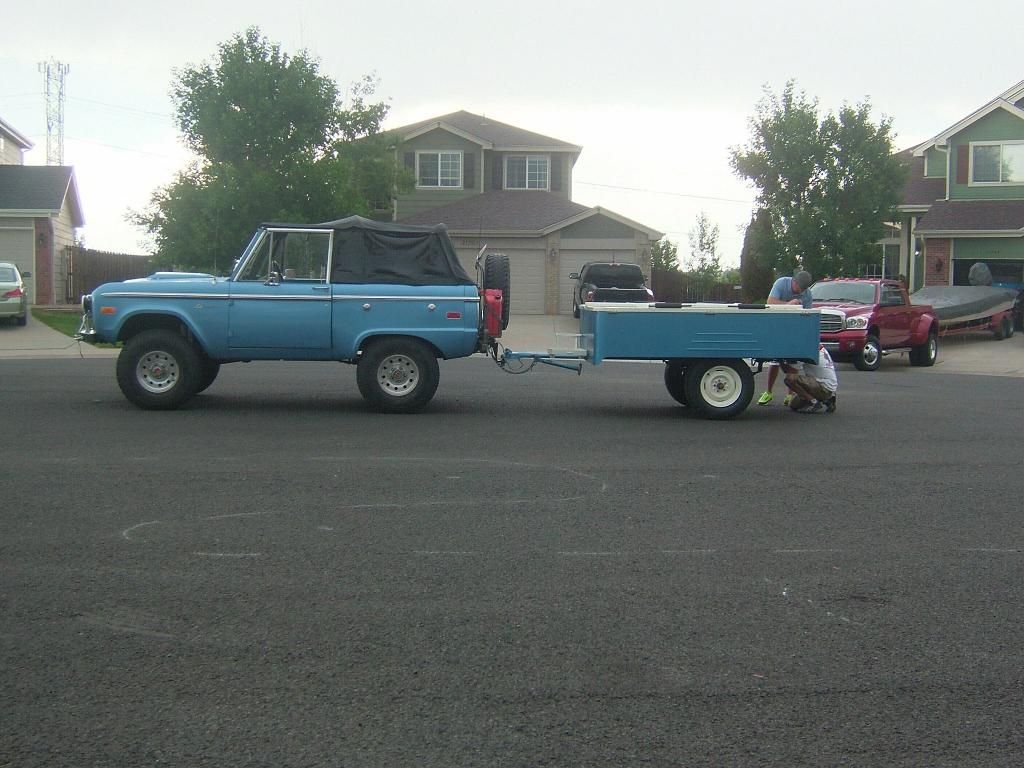
hooked up for its maiden voyage behind Bronco,just around town 10 days after bringing it home
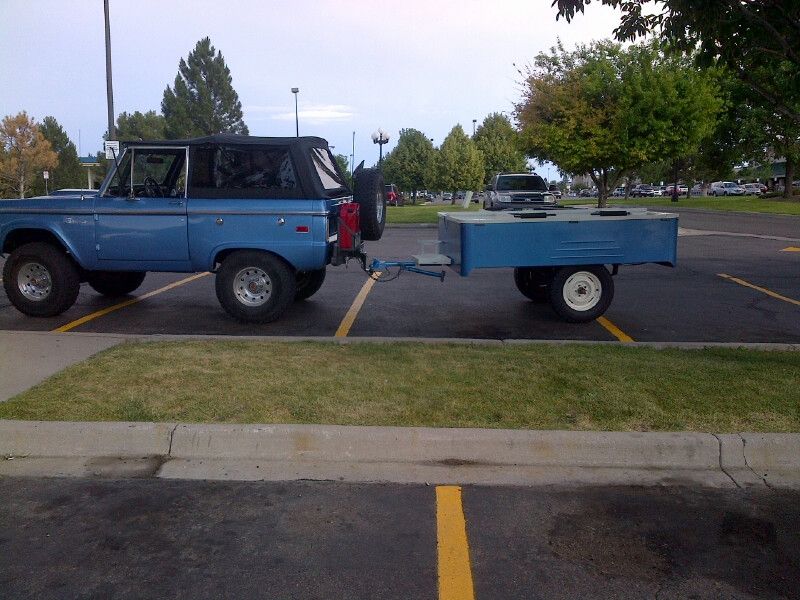
Its first real road test to Holy Cross trail
Hope you like the little history of my setup.
I wont take up any more space....continue as normal.
Bnut
as stated before it is a 1950 Higgins tent trailer.
all alum and in my mind (nobody elses matters ;D ) pretty dang cool
Day one


and a DR Pepper bottle opener from who knows what year.
We cleaned and painted everything except the bottle opener. it went back on with all of its original look.

almost done, I do have some build pics somewhere but can't find them.

hooked up for its maiden voyage behind Bronco,just around town 10 days after bringing it home

Its first real road test to Holy Cross trail


Hope you like the little history of my setup.
I wont take up any more space....continue as normal.
Bnut
#7
10-30-2013, 05:33 PM
Trending Topics
#8
10-31-2013, 10:57 AM
Join Date: Jan 2008
Posts: 90
Likes: 0
Received 0 Likes
on
0 Posts
Found some more pics.
Here are the seats that went in.
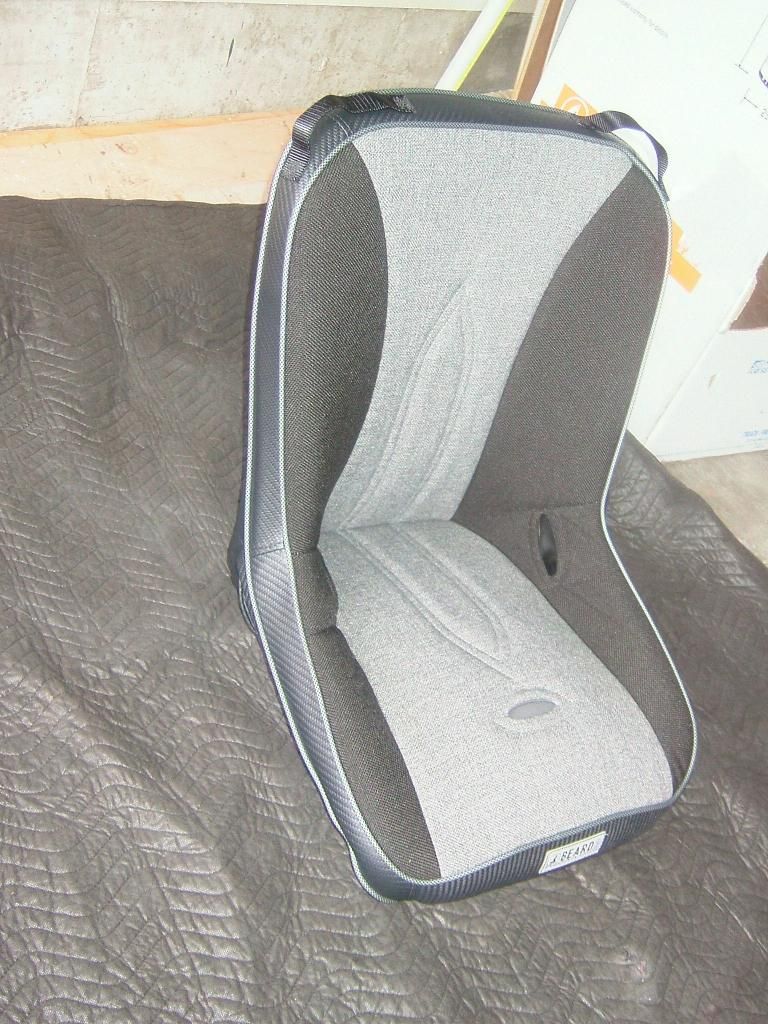
and installed, the first round I made sliders for the driver seat but it sat too high so i just mounted it in a fixed position. My wife and I can drive it and if anyone else has a true need to drive it they should be able to.

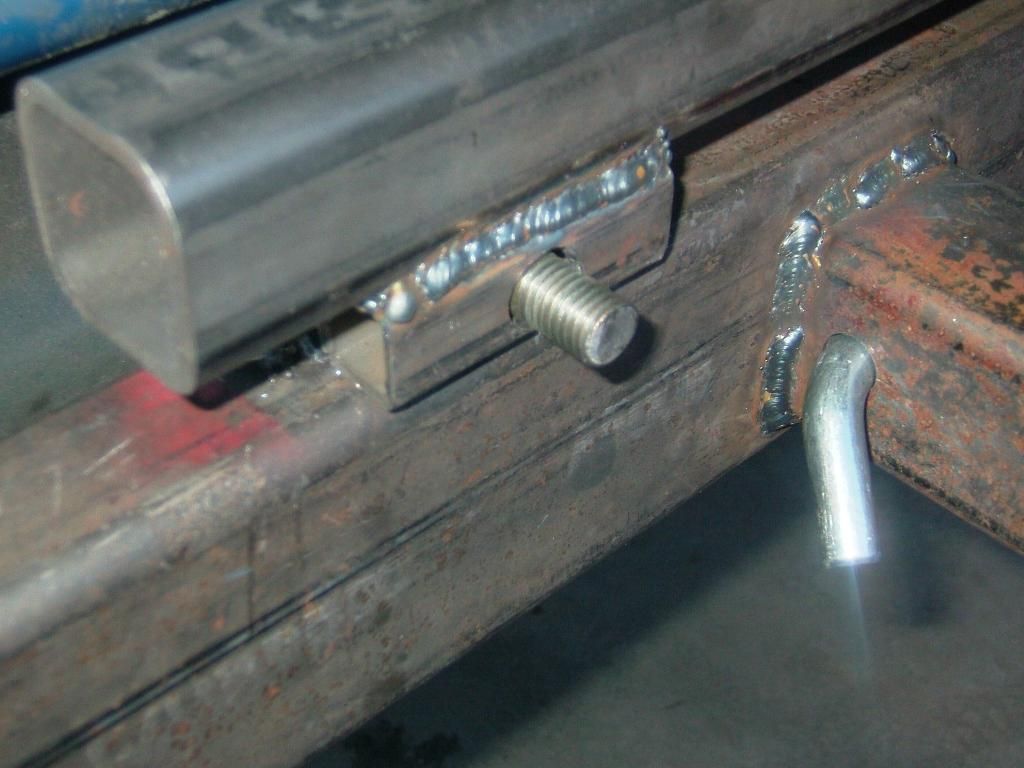
A better detail how I did the rear swing out mount.
just welded a bolt to the bumper and drilled both the gas carrier and tire mount swing over it then I thread on my "wing" nut.
Just a nut with long tabs welded to it.
not as quick as the cam release but if it ever gets loose i have lots of time to fix it before it ever started swinging around behind the truck.
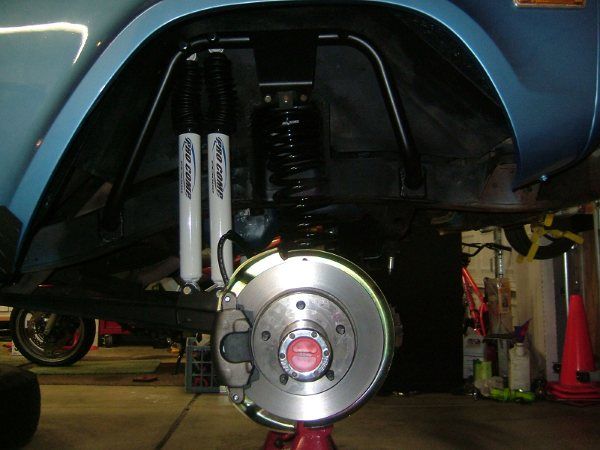
found one of my front disks and hoops too, all pretty and clean and new
couple more of the trailer and my paint booth design
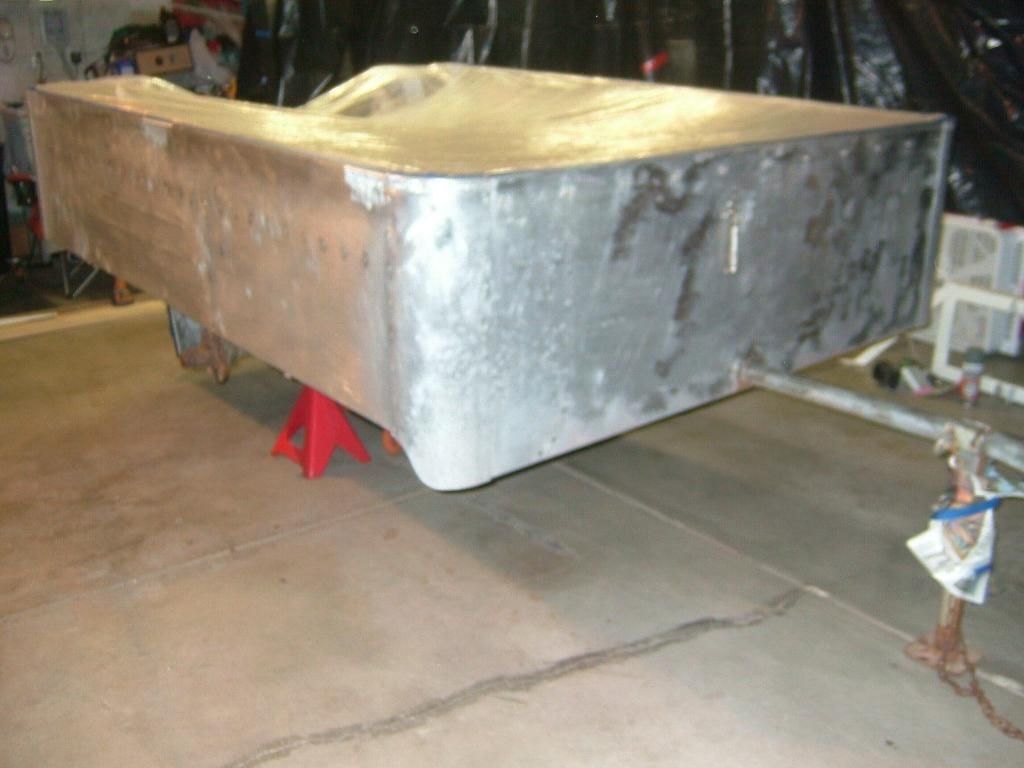
Before
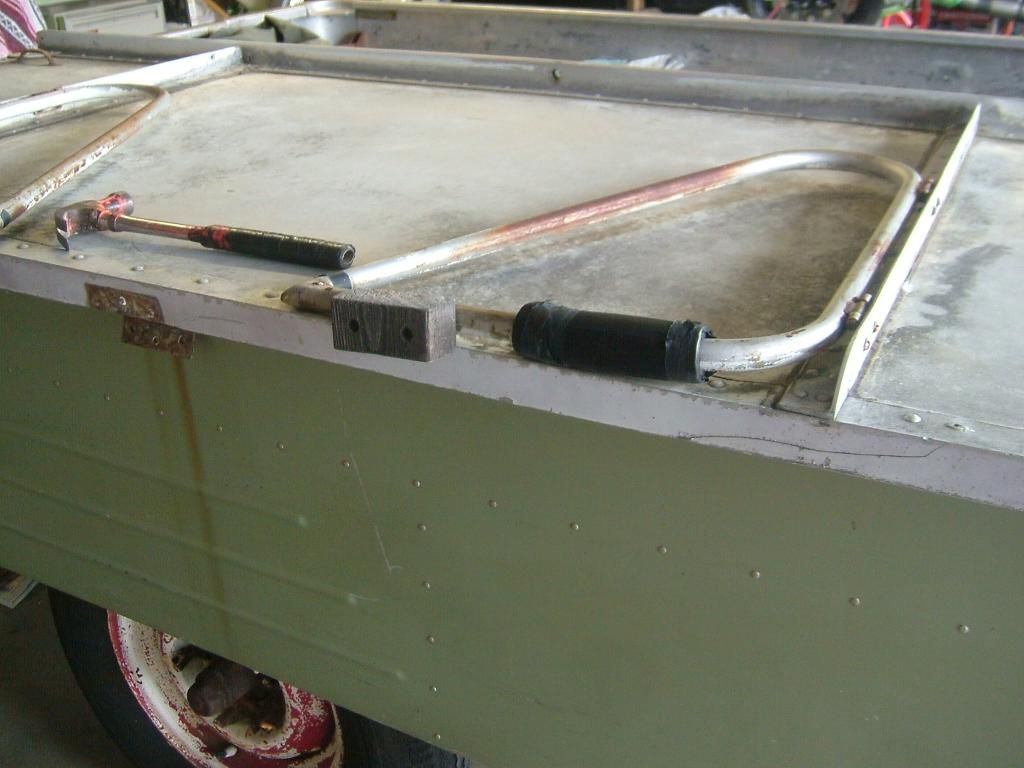
during stripping stage. Ignore the hack doing the work.

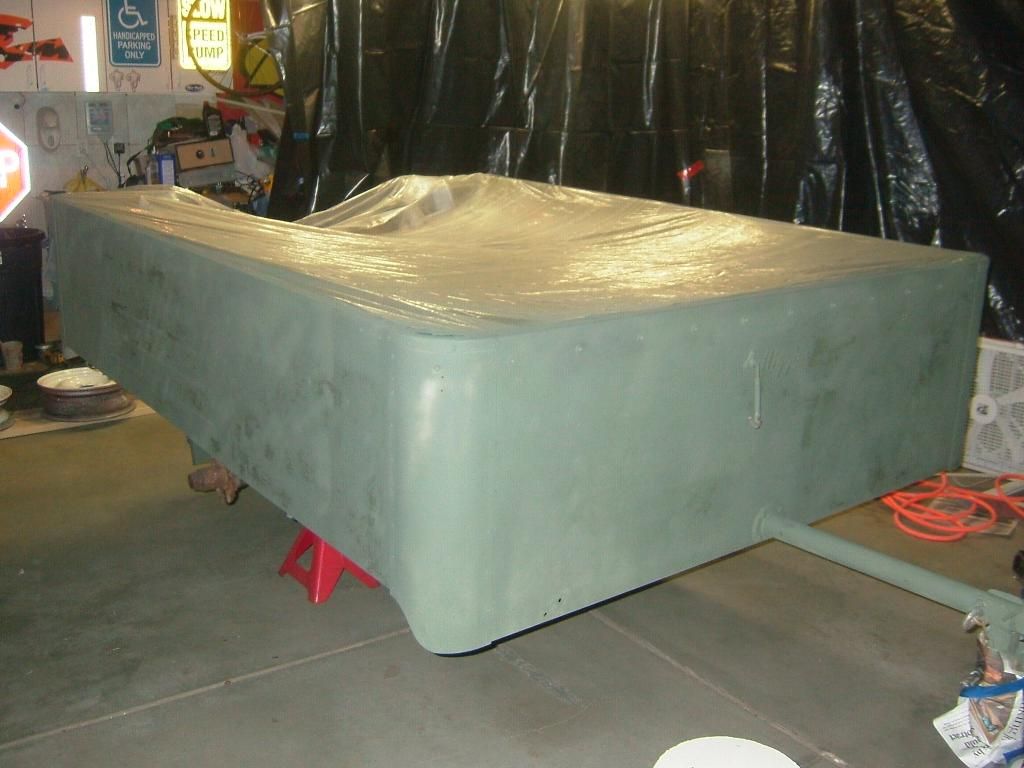
Mini paint booth for the small stuff.
Plastic to ceiling, small box fan with Hvac air filter on inlet to catch spray.
I had a respirator too, otherwise it would be deadly.

Wheels and cooler rack
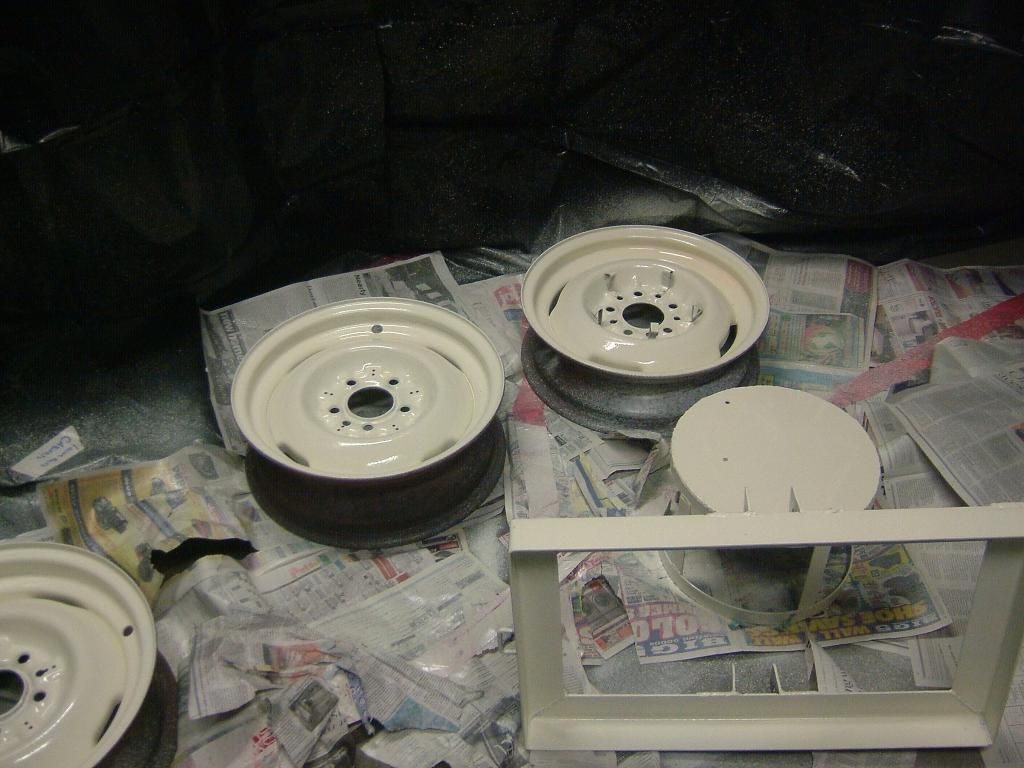
Done
Here are the seats that went in.

and installed, the first round I made sliders for the driver seat but it sat too high so i just mounted it in a fixed position. My wife and I can drive it and if anyone else has a true need to drive it they should be able to.

A better detail how I did the rear swing out mount.
just welded a bolt to the bumper and drilled both the gas carrier and tire mount swing over it then I thread on my "wing" nut.
Just a nut with long tabs welded to it.
not as quick as the cam release but if it ever gets loose i have lots of time to fix it before it ever started swinging around behind the truck.

found one of my front disks and hoops too, all pretty and clean and new

couple more of the trailer and my paint booth design
Before


during stripping stage. Ignore the hack doing the work.


Mini paint booth for the small stuff.
Plastic to ceiling, small box fan with Hvac air filter on inlet to catch spray.
I had a respirator too, otherwise it would be deadly.

Wheels and cooler rack

Done

#10
01-02-2014, 10:53 AM
yep, put alota time (&$) inta that rig, Bri.
"...My 68 is..."
I've seen yer M-715 (buncha PMs 2 me, I think). Love 2 C the '68 - I really like the patina of age on em (C my avatar), but this is Brian's "my years ago resto-mod thread". We started a pic thread while back but my search button found nuttin. If U find it put up a pic or 2 or start "dodmort's pic thread"!
#11
01-06-2014, 04:20 PM
Join Date: Jan 2008
Posts: 90
Likes: 0
Received 0 Likes
on
0 Posts
Thx Dodmort.
And even more money and time going into it as we speak.
My 3 rd gear was really starting to make a bunch of really awefull sounds last year and I decided it was time to replace it.
I am about a week or 2 away from being done, work and family time permitting.
There is a ZF 5, and an NP205 tht are going under it.
Had to do a 1" body lift to give me a bit of room for the hugeness of the ZF5 but it is minimal and you dont really notice it.
New cross memeber for the tranny and another mount to hold the piggishness of the NP205. The Zf also has a hydraulic clutch so I had to mount a master cyclinder and will be running a SS braided line to get down to the slave cylinder.
Also need to lengthen my front shaft as the setup put the front X case yoke about 5 inches back but that should fix my rear shaft that was too short.
I will also be building a twin stick for the 205, likely just modify my D20 sticks, and because my dash is soo low right where the shifter sticks up I may even be building a gear banger shifter for it, either that or cut my gauges out and I dont want to do that, just more time and money to build a banger but it should be cool when done.
I have a seal rebuild kit for the 205, and am just crossing my fingers on the ZF that everything is good with it.
Cant wait to have a granny first and also be able to grab a 5th gear overdrive when heading down the freeways around Denver.
i will link to som pics on our local Bronco site as I am at work and home time has been very scarce to post up pics.
Hopefully the pics work for non registered users
www.ColoradoClassicBroncos.com - View topic - It's time.........to get that chunk of a ZF 5 installed
If not I will get them transferred here when I get some time.
#12
01-06-2014, 05:36 PM
Logistics Pro
It told me I didn't have permissions to view the attachments.
I am very interested in this project. I'm hoping to start a trans / t.case swap in my Bronco within the next month or so. And along those lines, why did you choose the ZF / 205? Or what other trans and case did you consider and why did you not use them?
I am very interested in this project. I'm hoping to start a trans / t.case swap in my Bronco within the next month or so. And along those lines, why did you choose the ZF / 205? Or what other trans and case did you consider and why did you not use them?
#13
01-10-2014, 11:20 PM


Thread
Thread Starter
Forum
Replies
Last Post
Snowymountainman
1978 - 1996 Big Bronco
90
08-13-2020 01:52 PM
tpdaniels
1967 - 1972 F-100 & Larger F-Series Trucks
92
12-23-2016 08:56 PM
bgoodwin22
1967 - 1972 F-100 & Larger F-Series Trucks
57
09-03-2016 09:08 PM
SuperDuty93
1973 - 1979 F-100 & Larger F-Series Trucks
11
07-18-2013 07:53 PM
anotherhappycamper
1978 - 1996 Big Bronco
9
06-06-2013 08:17 AM