1951 Ford F1 resurrection, jag IFS LT1, EFI, T56, etc
#16
 10-08-2013, 03:07 PM

Where in NY are you? I have a CSB 400 with T56 in my panel. Which T56 do you have, single or double OD? Mine's a double (0.62 5th, 0.50 6th) with a 3.70 rear it's a perfect combo. Does yours have the relocatable shifter? mine does not, buckets were required so the shifter wasn't under the seat, still alongside my thigh.
Shifter is in the back, so plans are for bucket seats and a console for the most important part of the build, cupholders! Shifter will be far back as well but I think it will be tolerable.
#17
10-08-2013, 08:02 PM
well another update. I have decided to weld in the jag crossmember, I just dont see the need to make it removable. Using the crossmember to help stiffen the frame can't hurt either.
So these mounts wont be needed. Hopefully I dont regret this later!
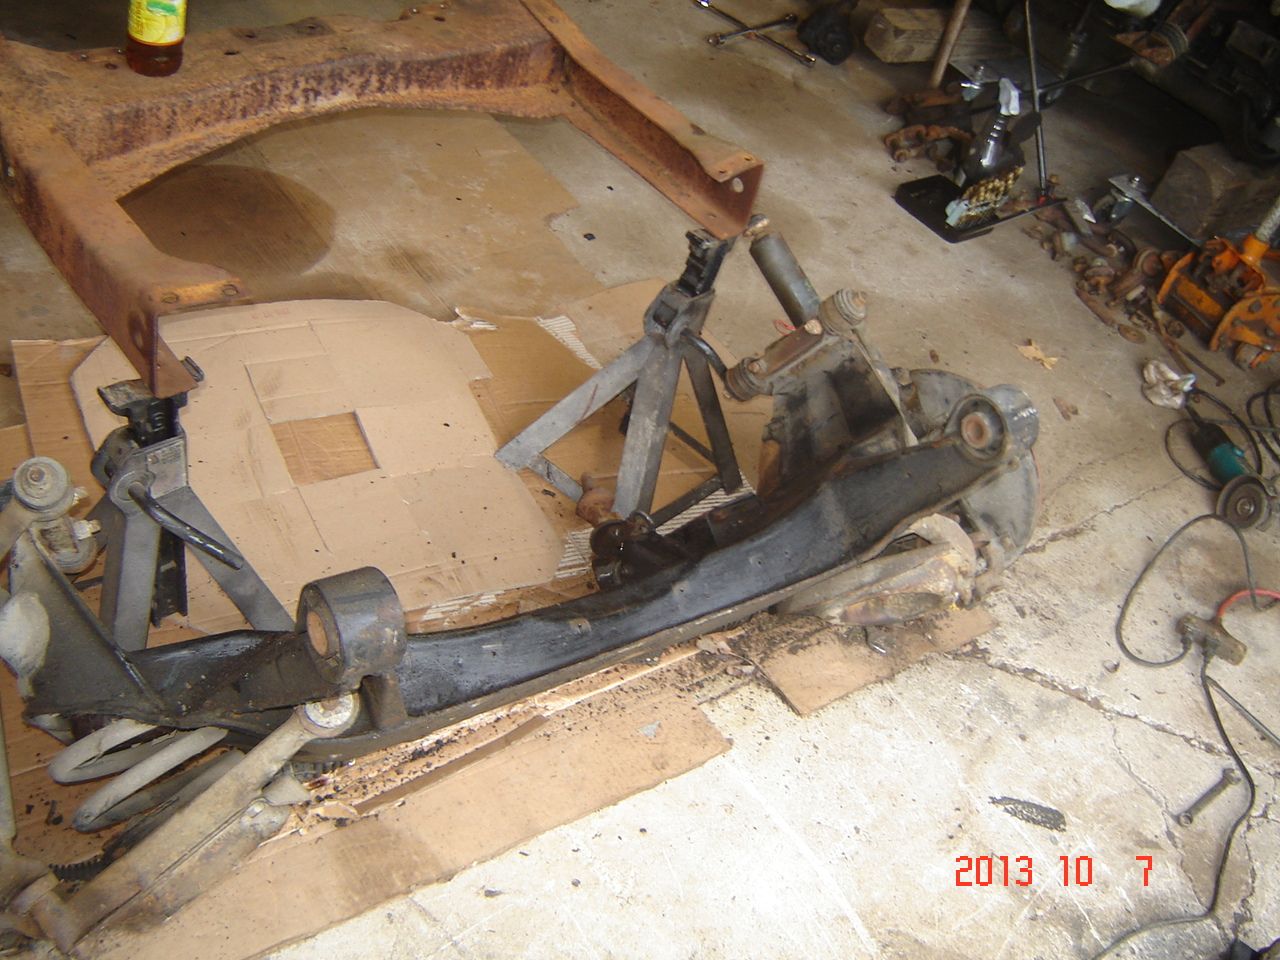
So off with em!
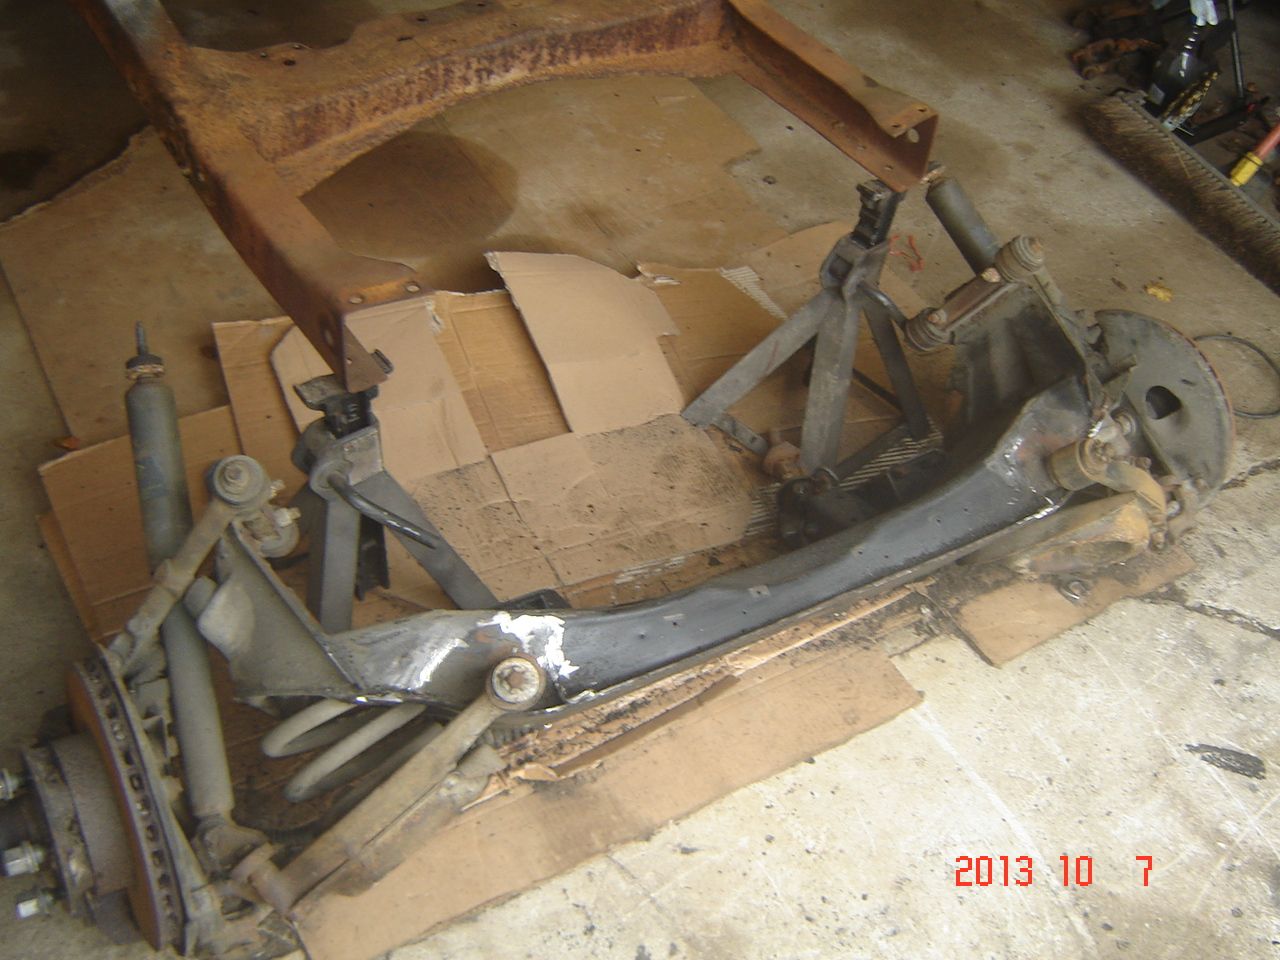
Raised up into position
So these mounts wont be needed. Hopefully I dont regret this later!

So off with em!

Raised up into position

#19
10-08-2013, 09:52 PM

New User
Join Date: Nov 2012
Location: Costa Mesa
Posts: 6
Likes: 0
Received 0 Likes
on
0 Posts
#20
10-08-2013, 10:01 PM
You know I really dont know, will be dependant on the wheel and tire combo as well..I shoot for 5"-7" clearance to the lowest point so there are no issues with speed bumps. I drive my cars and dont like worrying about road hazards.
Kevin all the pics are showing up for me, as soon as I hammer out locating the suspension I will post a ton of pics with measurements. As common as the jag swap seems to be I cant find a good step by step install with pics so I am going to make one. Will be awhile, leaving tomorrow for the Hershey swap meet.
Teaser mock up picture

#21
10-08-2013, 10:07 PM

New User
Join Date: Sep 2013
Location: Byfield, MA
Posts: 18
Likes: 0
Received 0 Likes
on
0 Posts
#22
10-09-2013, 02:21 PM
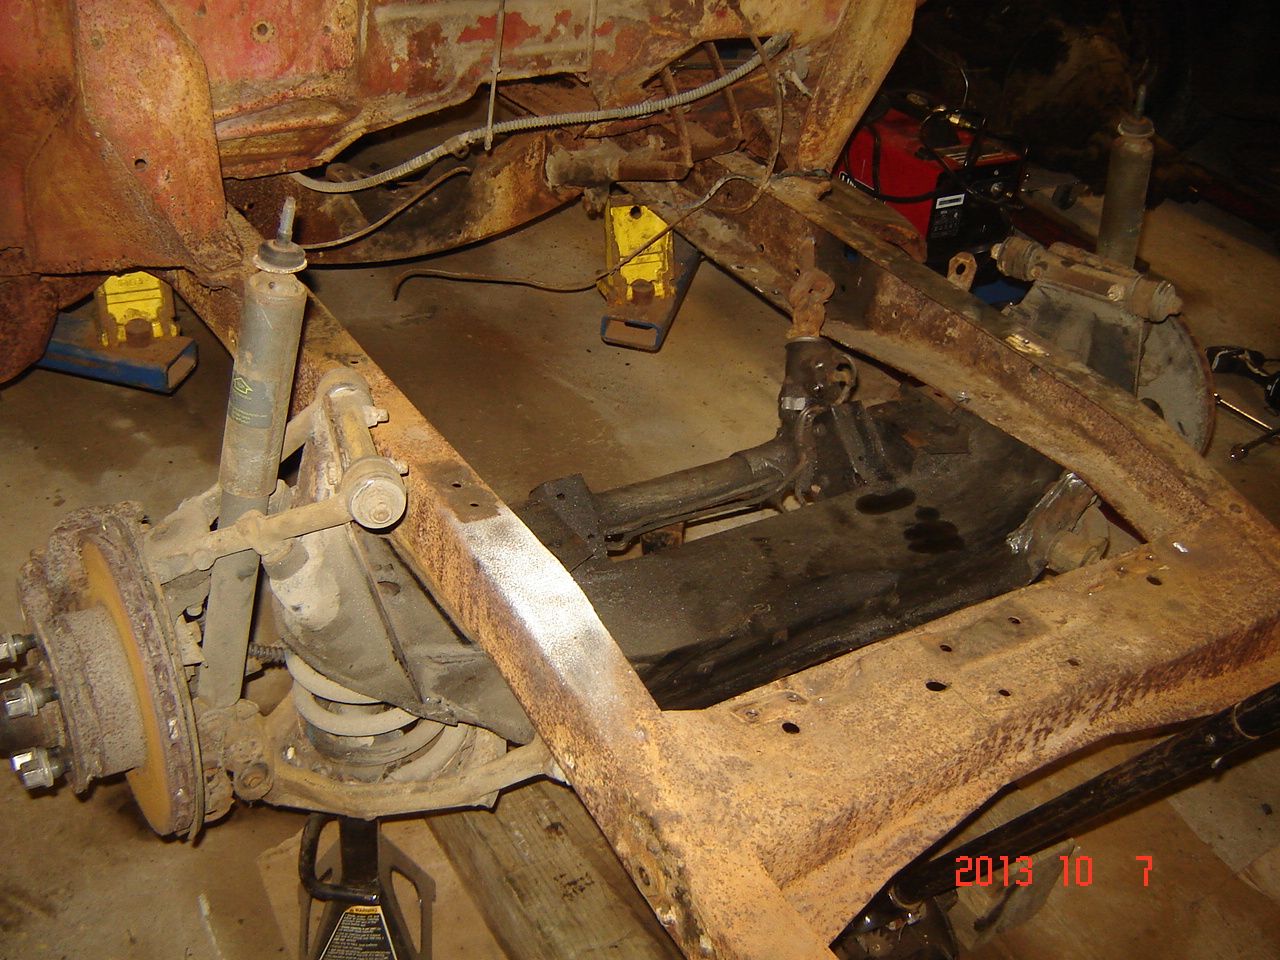
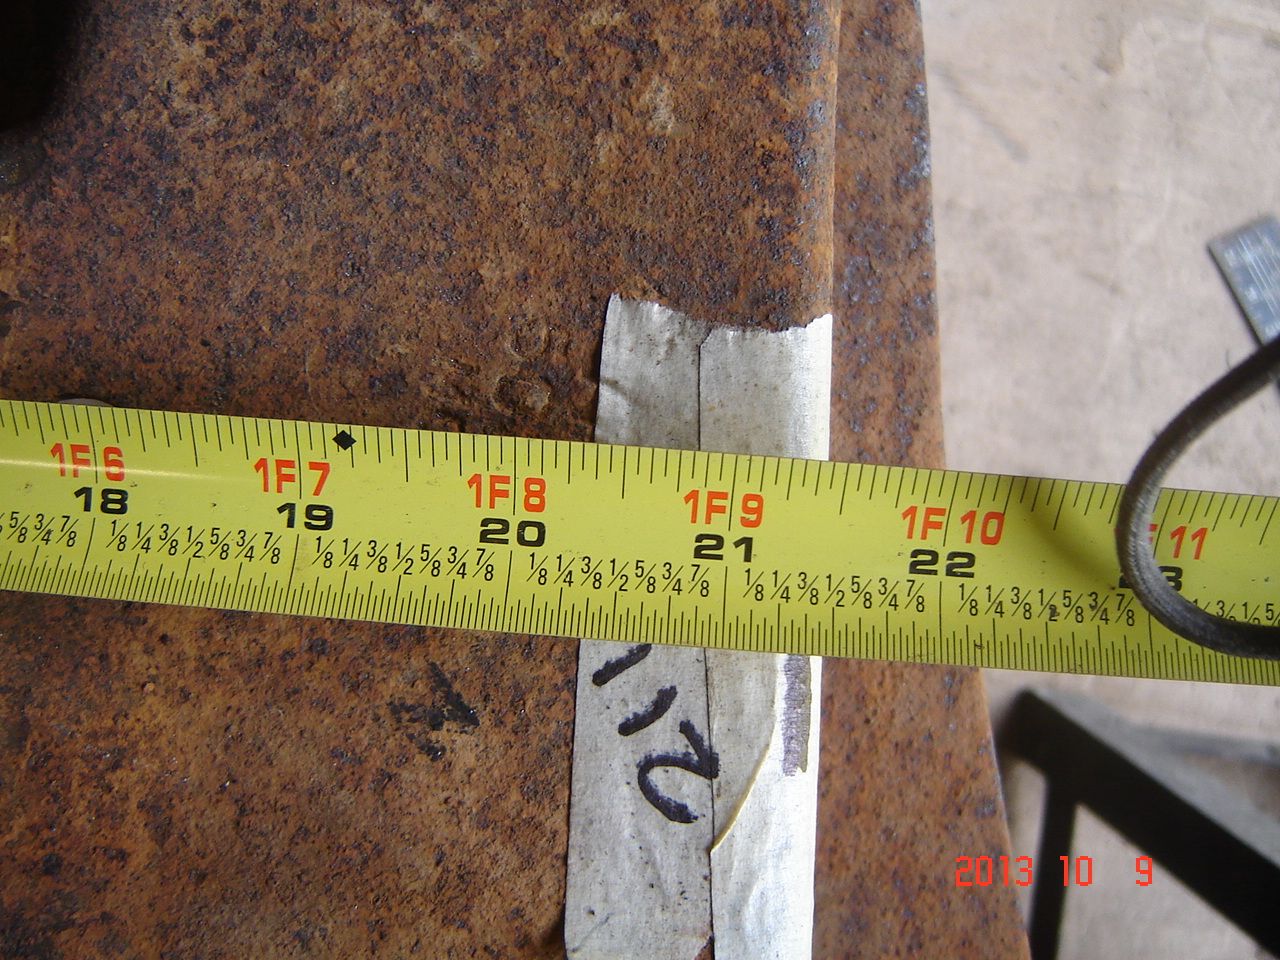
OK here are the measurments and how I got them, initially I used the original axle snubber mount holes as the center line of the IFS. This is actually about 1/2" forward of the true center line from what I can tell, but since it is a factory mounting point it was still a good reference to work off..or just take my measurements and run with em! I will be using them in the future as well, no sense doing the same work twice.
Anywho here is my backwoods method, made it up as I went along.
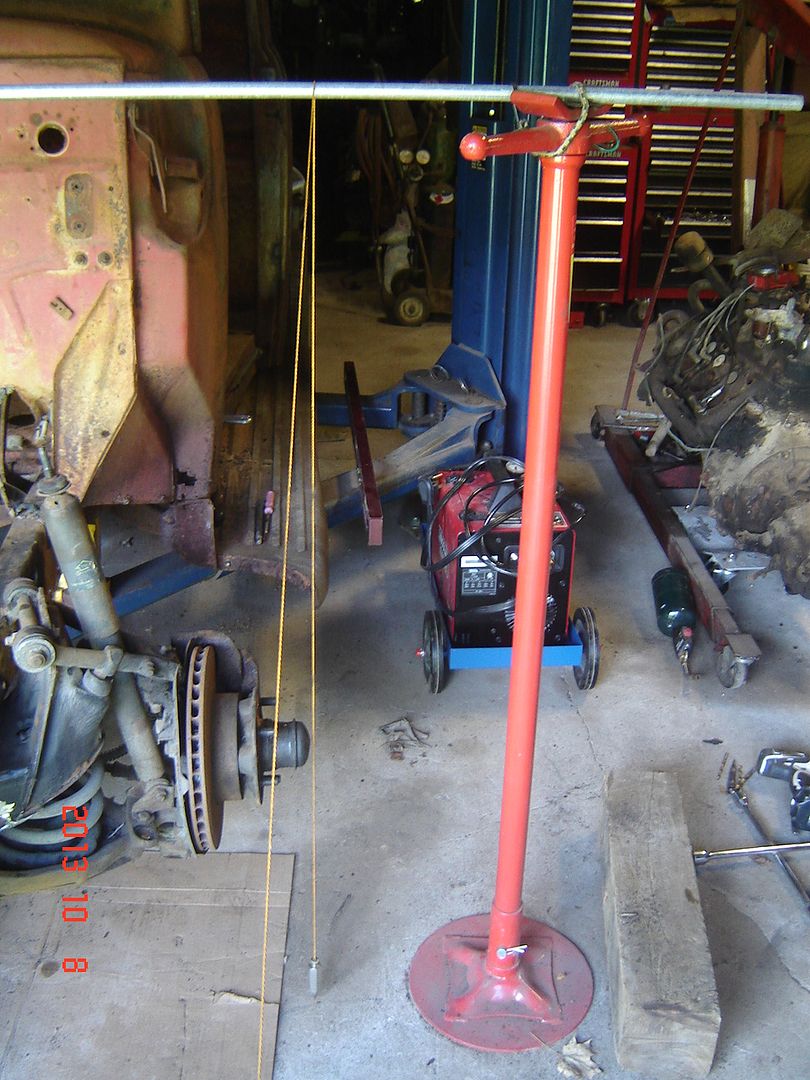
First thing I did was level the truck front to back because I want the truck level at the final ride height. I set up two stands with a piece of conduit and a plumb bob and I set the conduit so the plumb bob lined up with the snubber mounting hole. I used a speedsquare to transpose that mark to the top of the frame rail.


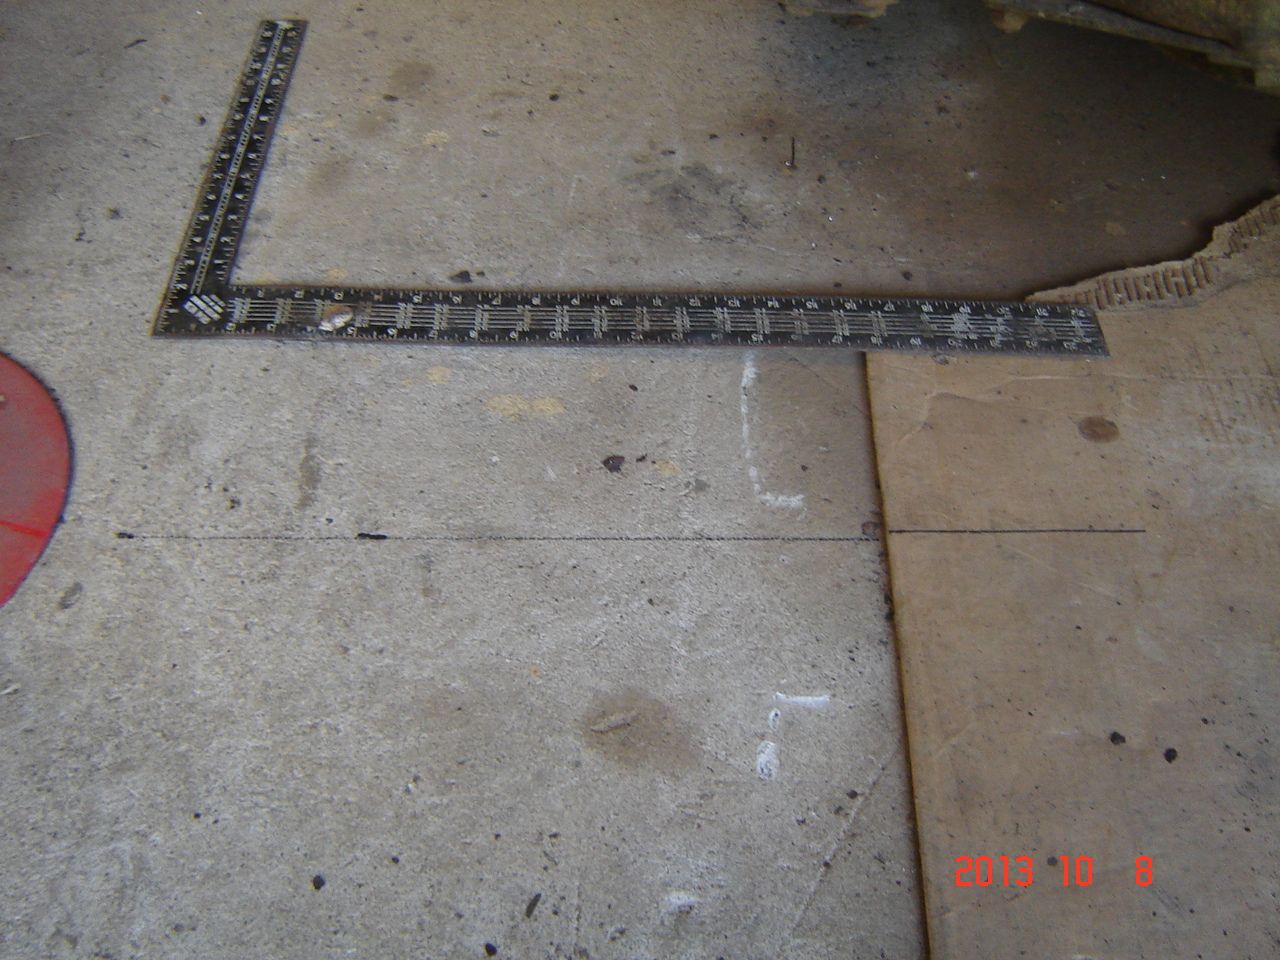
With the conduit set up I used it to mark the same spots on the floor in a couple places and drew a line connecting them

I couldnt get a picture since I was doing this alone, but I then held the plum bob string on the bottom center of the lower ball joint and moved the jag crossmember until the plumb bob lined up with the line on the floor. This was the jag suspension was centered on the original center line (actually 1/2" forward..so in the future you could mark the center line of the snubber holes on the frame like I did and then make a mark 1/2" towards the cab..then set the plumb bob stand up to match it)
Anywho here is my backwoods method, made it up as I went along.
First thing I did was level the truck front to back because I want the truck level at the final ride height. I set up two stands with a piece of conduit and a plumb bob and I set the conduit so the plumb bob lined up with the snubber mounting hole. I used a speedsquare to transpose that mark to the top of the frame rail.


With the conduit set up I used it to mark the same spots on the floor in a couple places and drew a line connecting them


I couldnt get a picture since I was doing this alone, but I then held the plum bob string on the bottom center of the lower ball joint and moved the jag crossmember until the plumb bob lined up with the line on the floor. This was the jag suspension was centered on the original center line (actually 1/2" forward..so in the future you could mark the center line of the snubber holes on the frame like I did and then make a mark 1/2" towards the cab..then set the plumb bob stand up to match it)
#23
10-09-2013, 02:25 PM
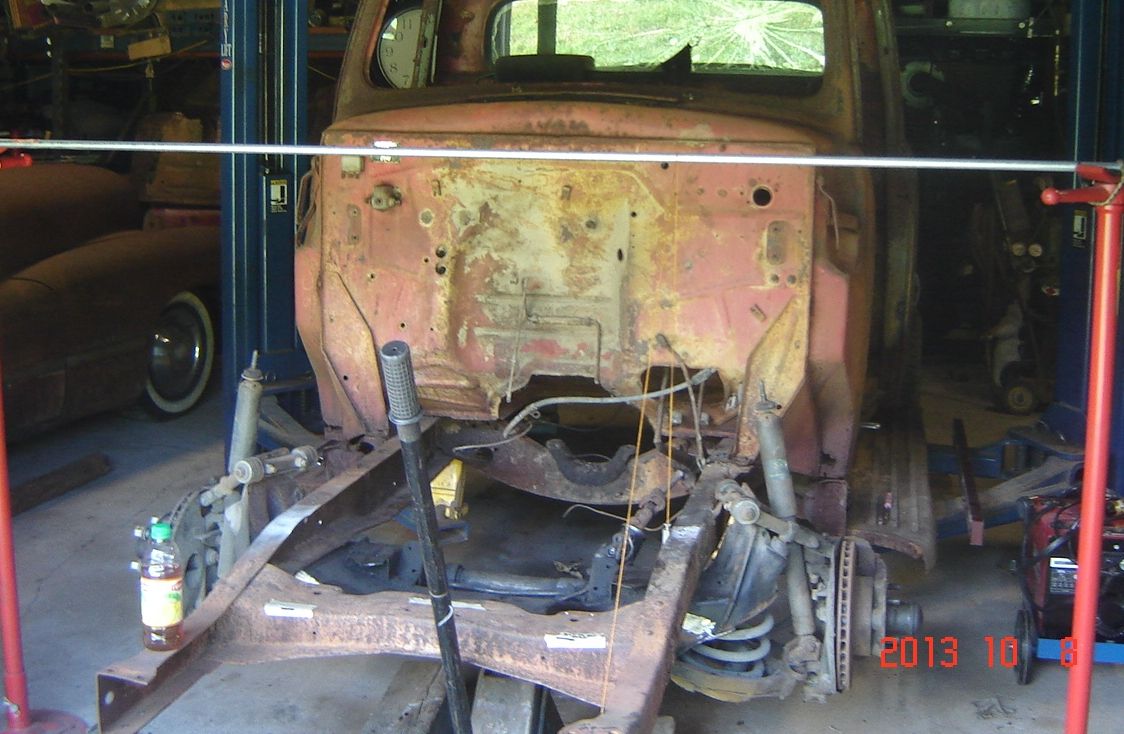
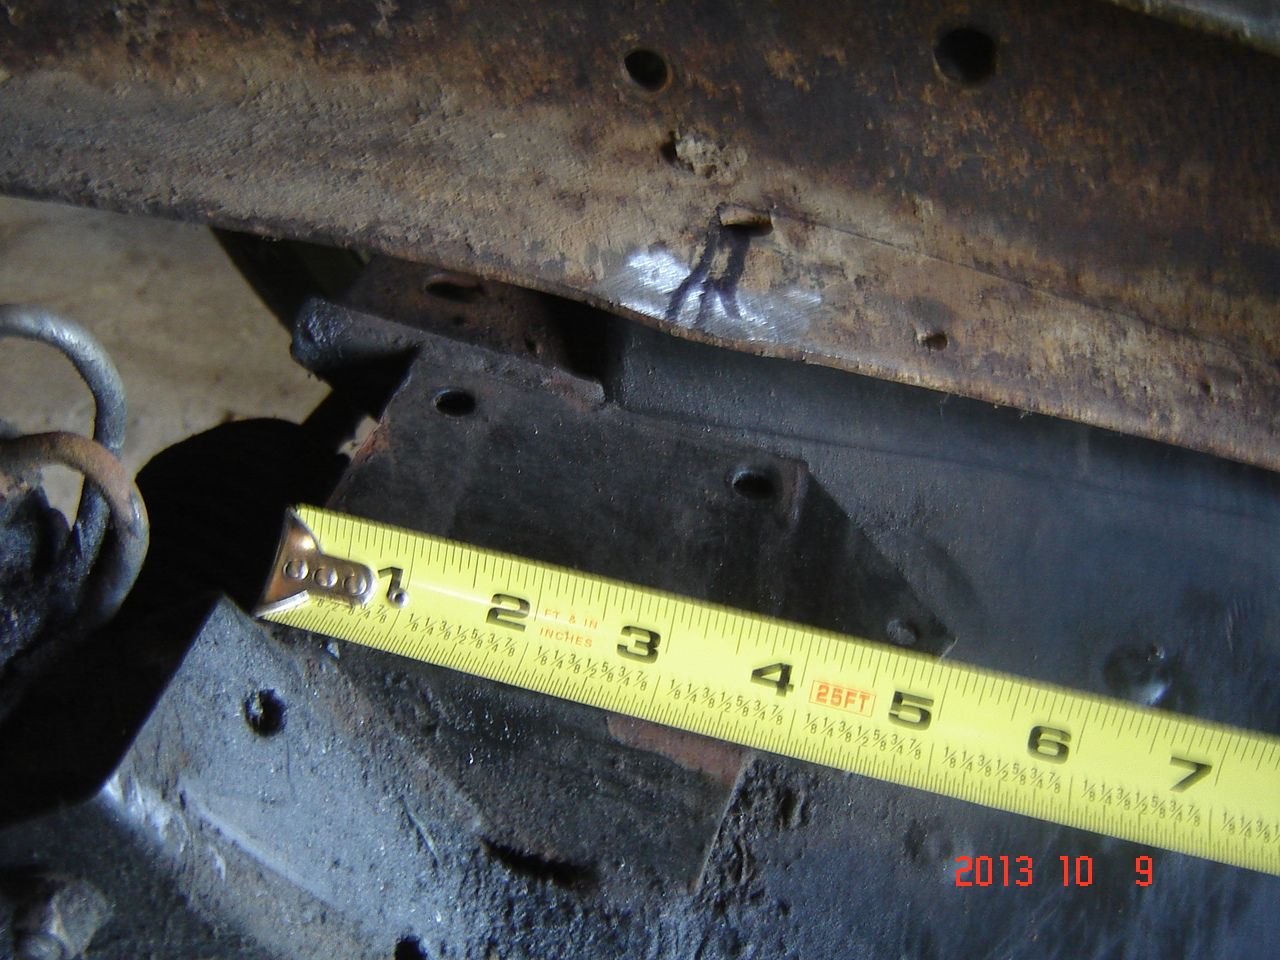
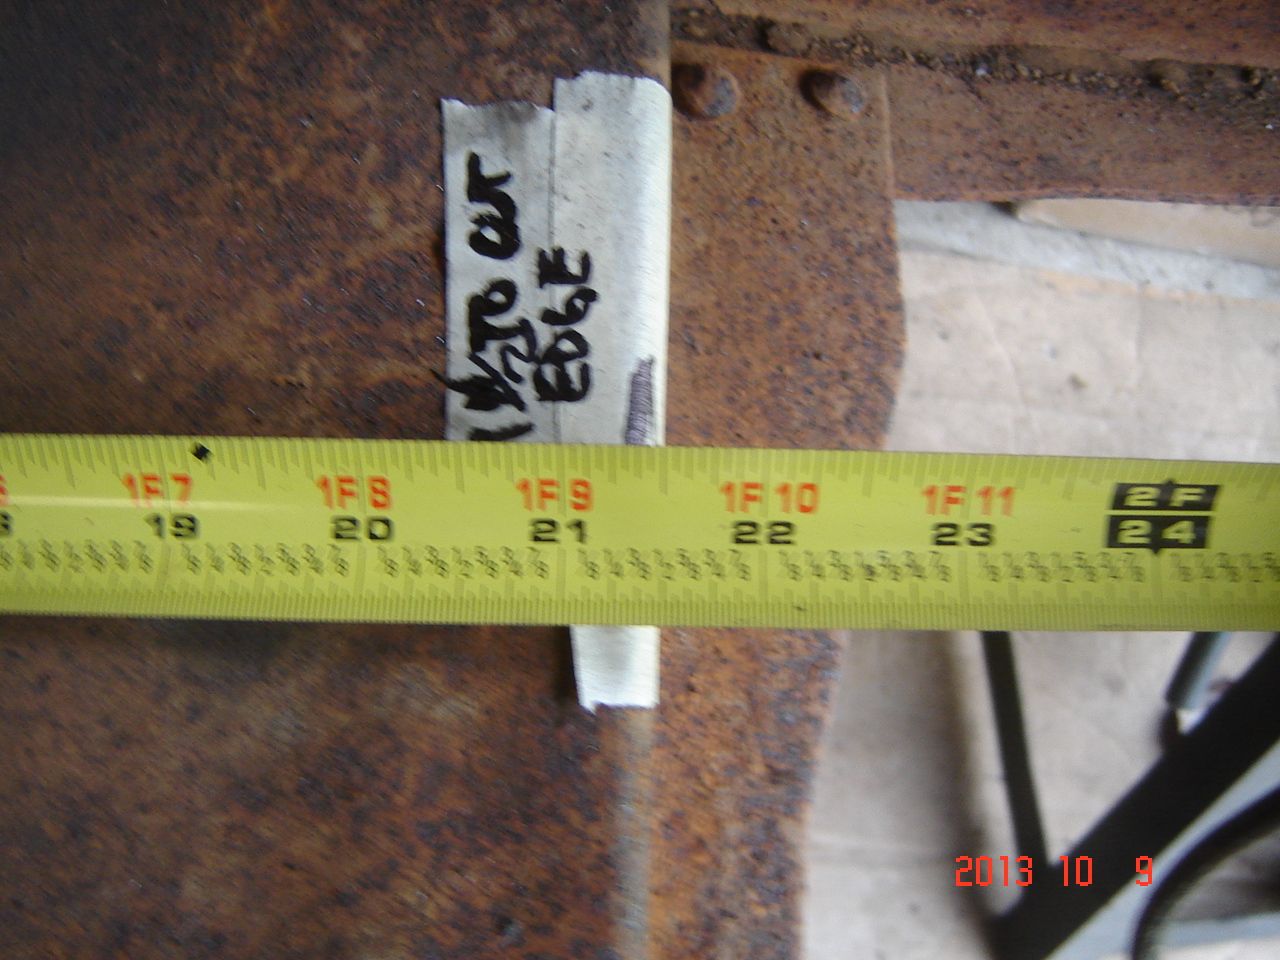
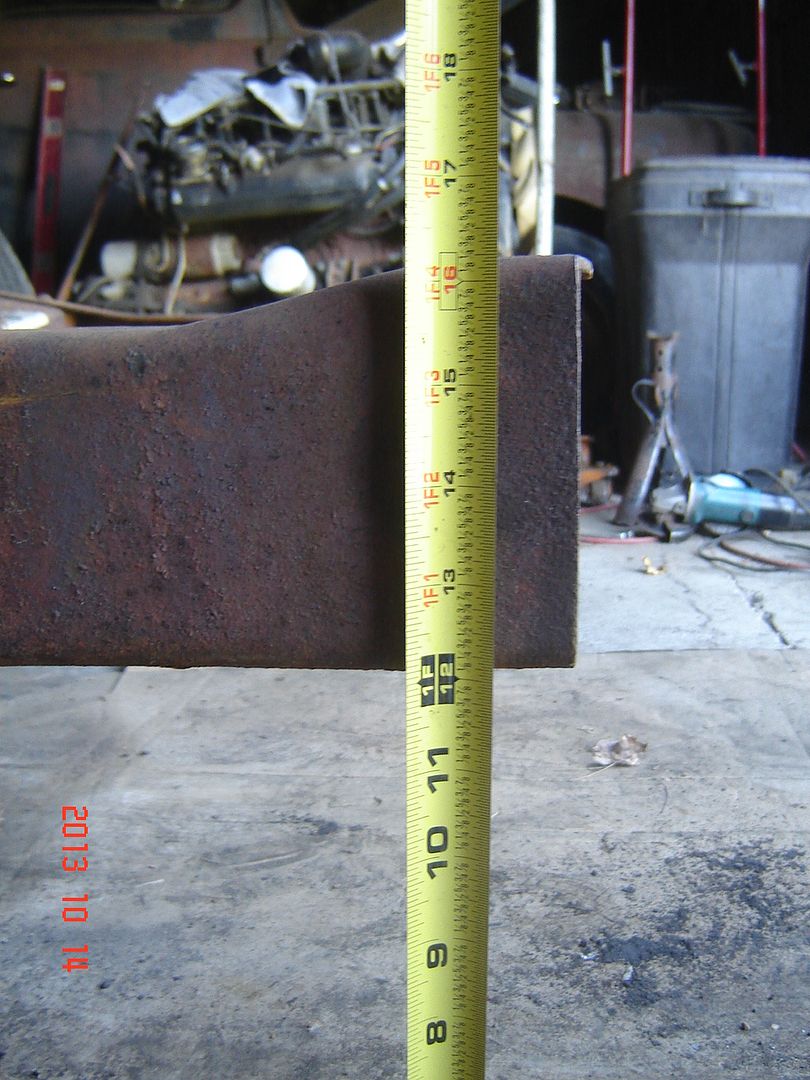
So after getting the suspension centered, which is 1/2" back from the snubber hole center line, these are the measurements I used. From the back inside edge of each jag mounting pad to the front of the Ford chassis crossmember is 21 1/2"


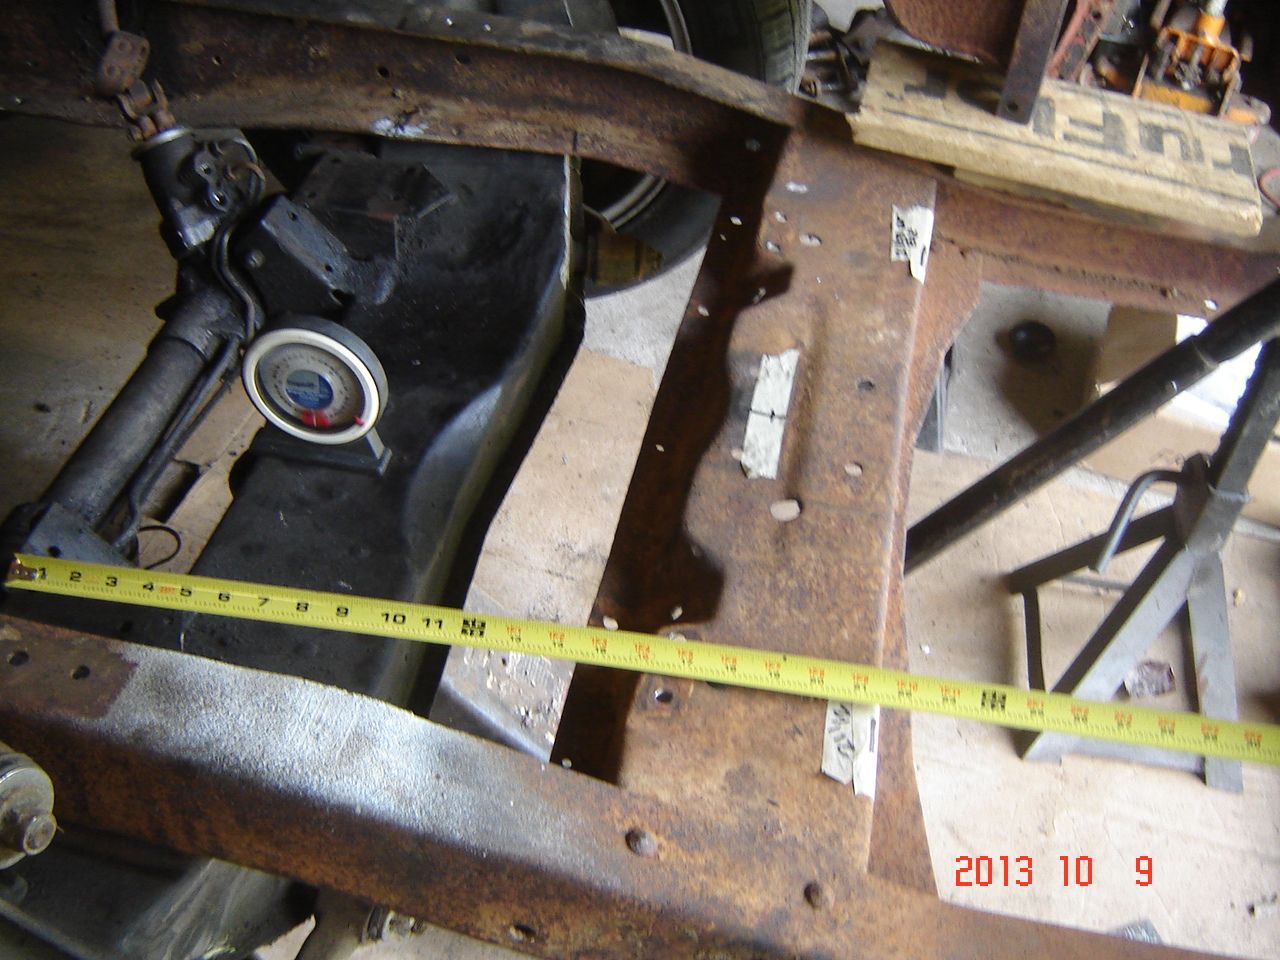
using these measurements I mocked up the fender, looks good.
sanity check with the truck level the crossmember is also level front to back.

Hope this helps!


using these measurements I mocked up the fender, looks good.
sanity check with the truck level the crossmember is also level front to back.

Hope this helps!

#28
10-09-2013, 02:46 PM
#29
10-14-2013, 06:02 PM
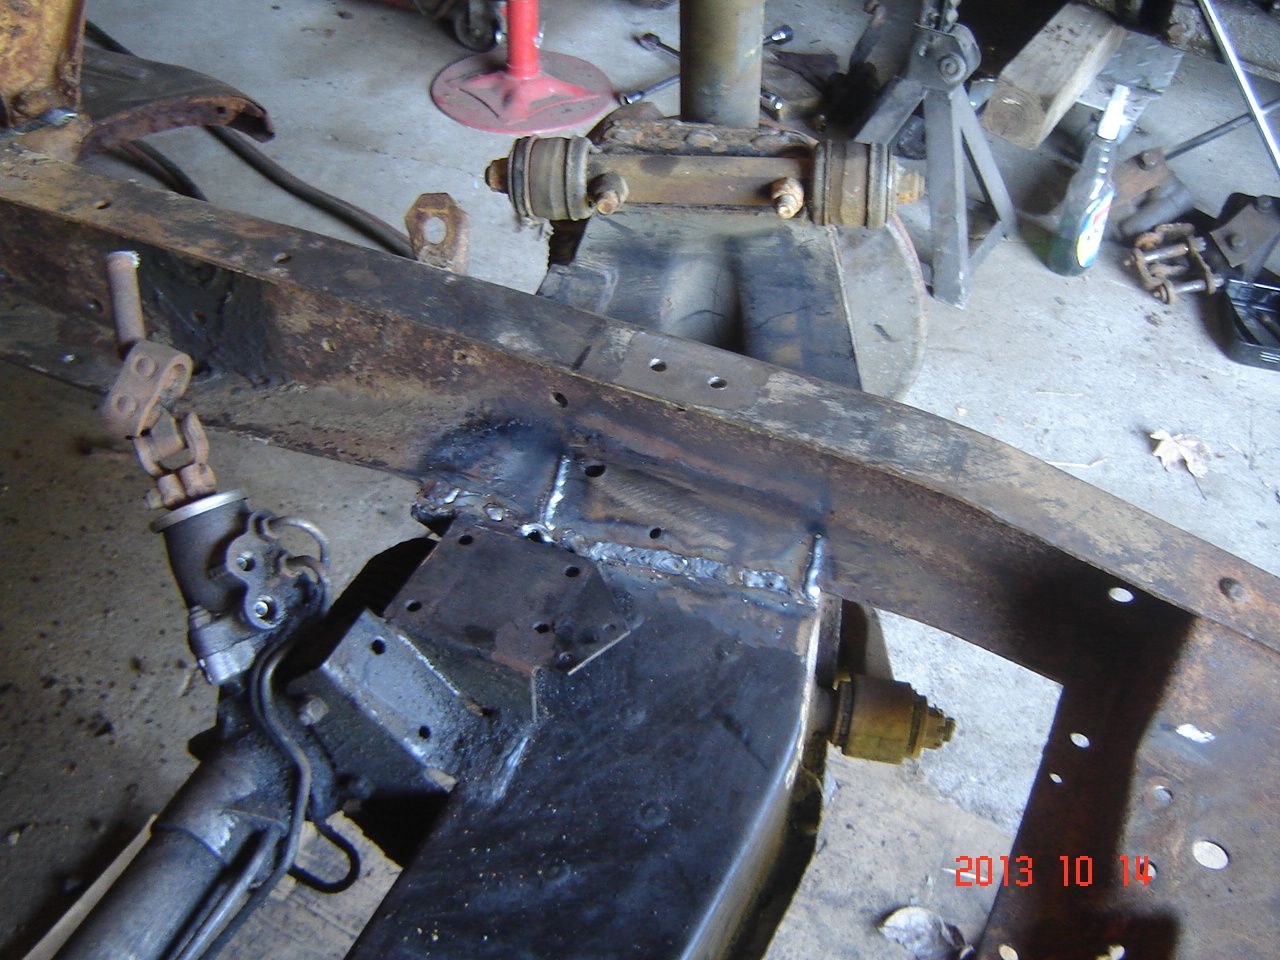
Finally got a few hours in the garage today and did the install.
Welded on the outsides, probably over did it with a few passes but hey I dont want this thing coming loose!
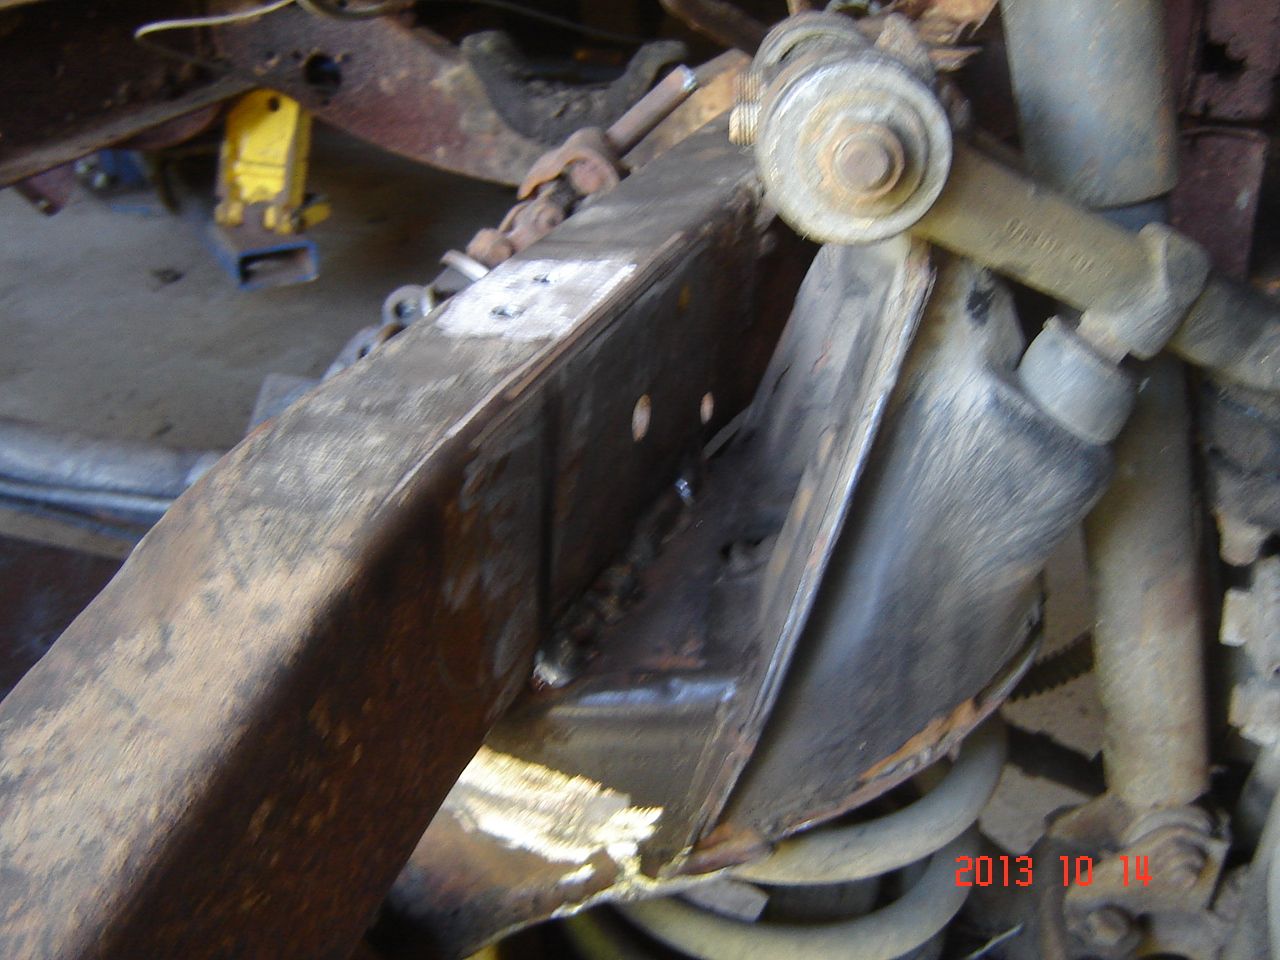
Notched the frame on both sides so I could bend the channel down to match the crossmember angle.
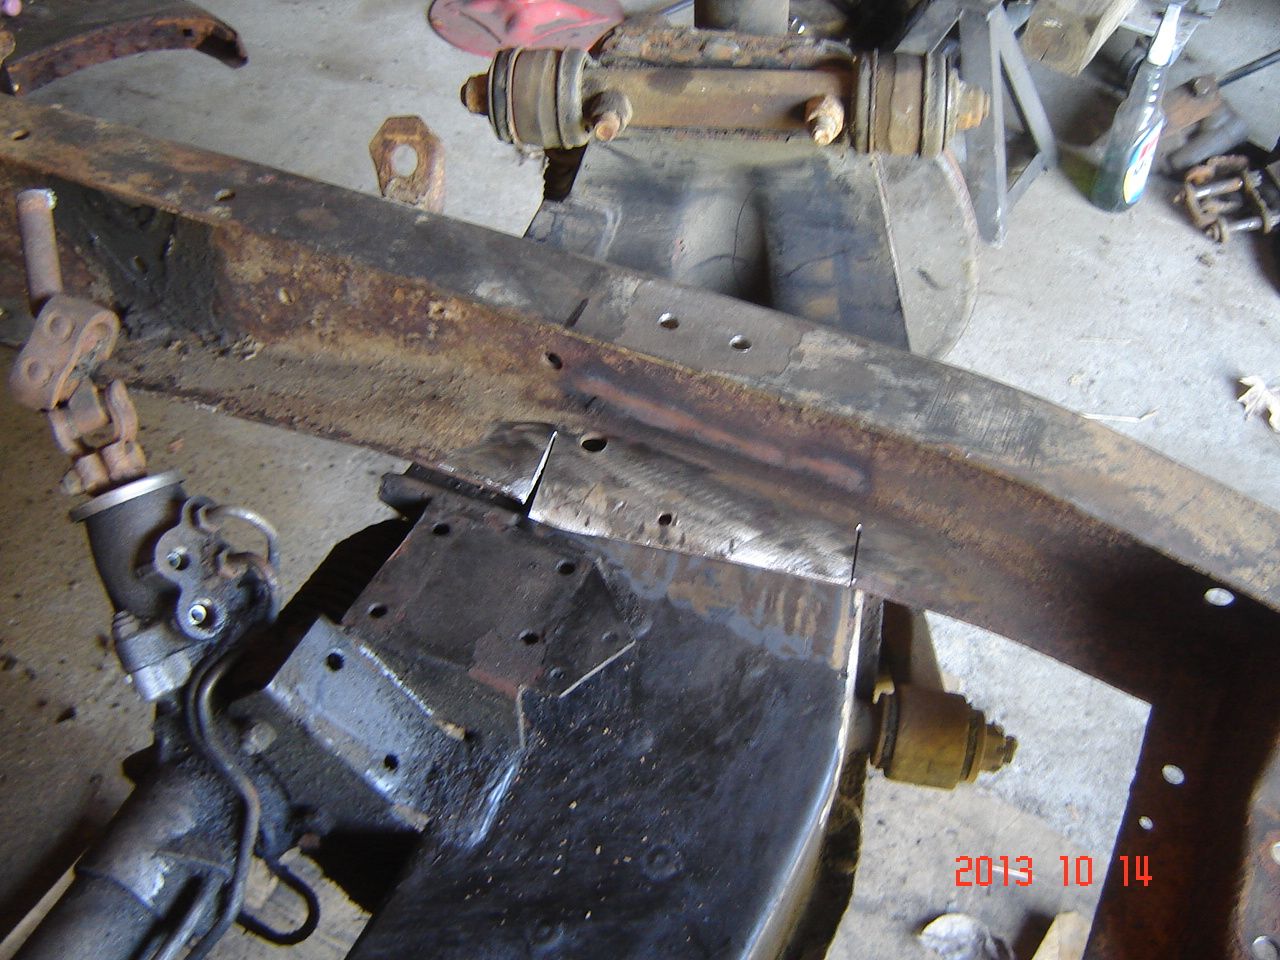
Lower flat of the C channel was heated up and knocked down into place and welded in. Also went back and plug welded the rivet holes in the frame.
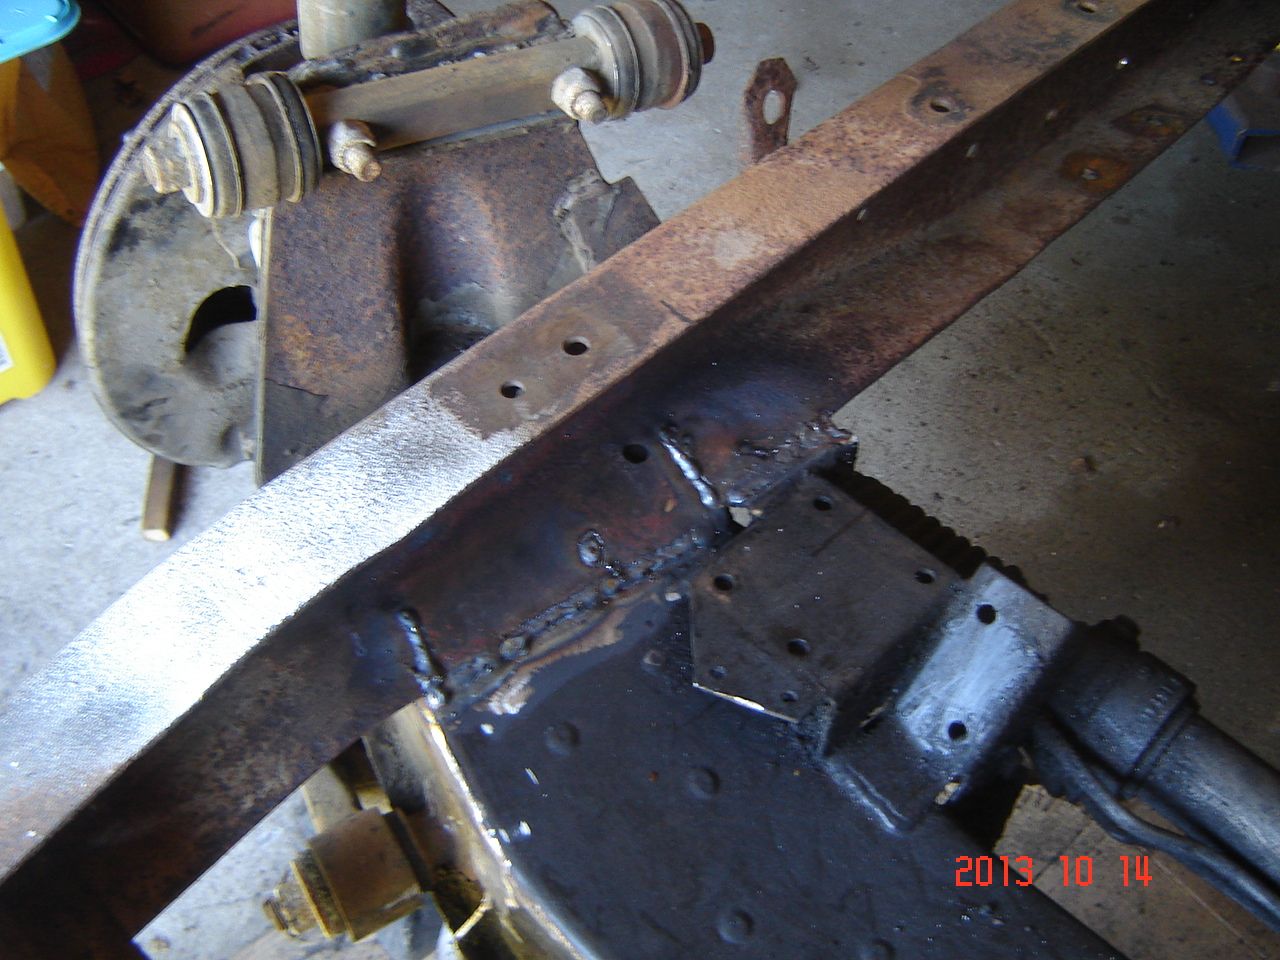
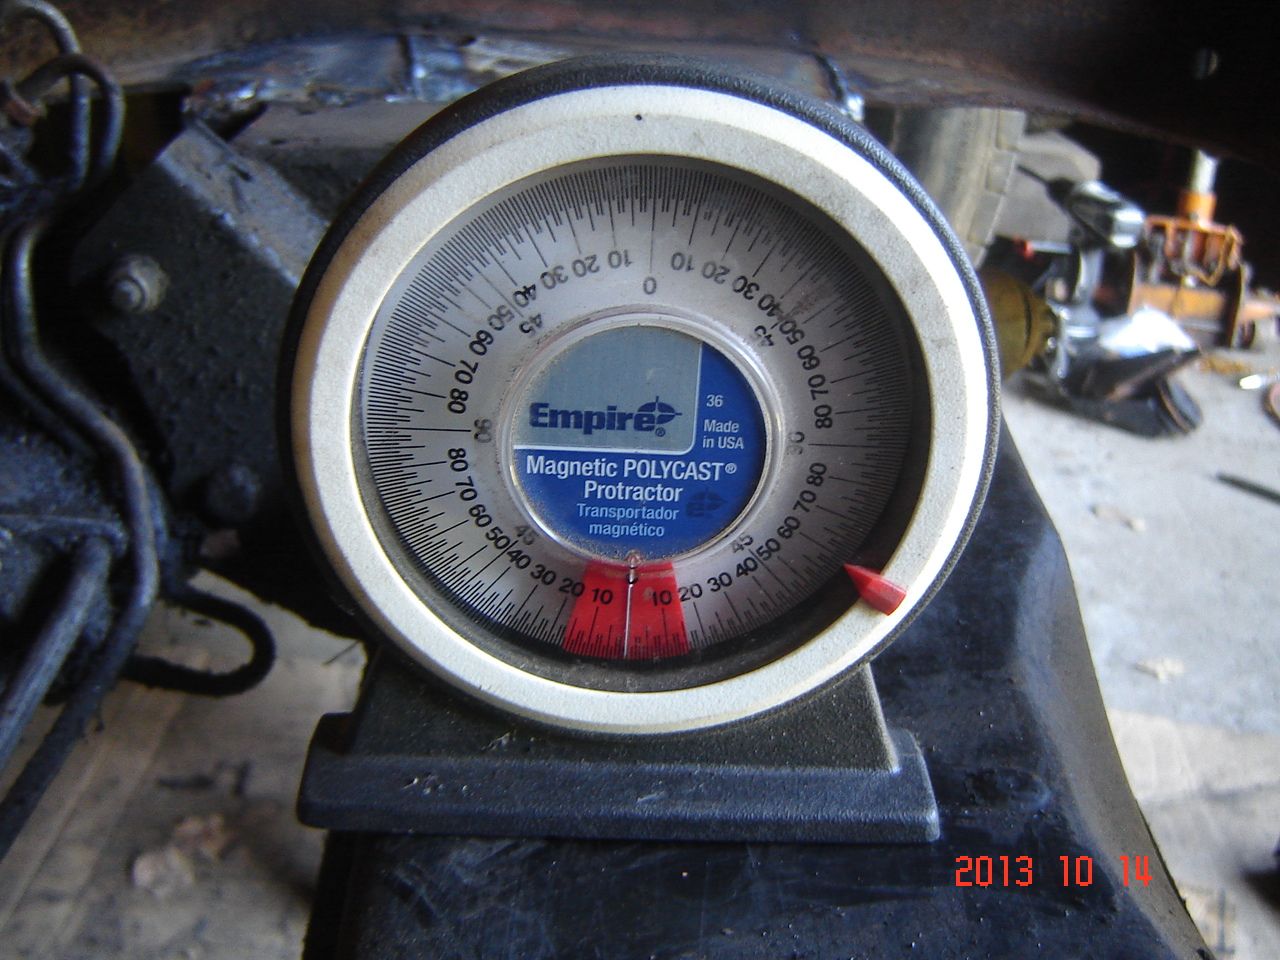
Frame and crossmember level

with the truck leveled the front end is now down 4" from where it was before, and it should come down 3 more inches at ride height. This will put the running board bottom about 6" off the ground for a nice lowered and "no speed bump worry" ride height.
Done other than boxing the front rails.

Welded on the outsides, probably over did it with a few passes but hey I dont want this thing coming loose!

Notched the frame on both sides so I could bend the channel down to match the crossmember angle.

Lower flat of the C channel was heated up and knocked down into place and welded in. Also went back and plug welded the rivet holes in the frame.


Frame and crossmember level


with the truck leveled the front end is now down 4" from where it was before, and it should come down 3 more inches at ride height. This will put the running board bottom about 6" off the ground for a nice lowered and "no speed bump worry" ride height.

Done other than boxing the front rails.

#30
10-14-2013, 10:15 PM
New User
Join Date: Nov 2012
Location: Costa Mesa
Posts: 6
Likes: 0
Received 0 Likes
on
0 Posts