late model electronically controlled drivetrain install
#1
 10-04-2013, 04:36 PM


Join Date: Jul 2013
Posts: 386
Likes: 0
Received 0 Likes
on
0 Posts
late model electronically controlled drivetrain install
Hi All,
Been working on my truck for about 6 weeks now. In the process of modernizing the drivetrain. I want to be able to rely on this vehicle and have plenty of power, AC, etc.
I bought an L92, all aluminum V-8 6.2L and 6L80e 6 speed autobox from a late model Escalade. Used and delivered with the harness, computer, all drive accessories was about $3000. From the factory, this engine is rated at 403HP and about 420 ft lbs. This is the truck version of the Corvette C6 LS3, but with variable valve timing.
I really wanted a Coyote motor, but just couldn't justify the extra $ - please don't chastise me for the fiscal prudence
I'm subbing out as little work as possible. I had Ken Wolkens (ex-GM powertrain engineer) do the standalone harness conversion. He is a wealth of knowledge and great guy! His partner re-programmed the computer for a bit more power, etc.
I bought a weld-it-yourself motor mount kit from scottshotrods.com
I bought Corvette C6 exhaust manifolds which are much narrower than the truck manifolds and am fabricating my own exhaust.
I used a pair of Bosch EFI - compatible pumps from a 1994 Mercedes E500 (I bought them as spares and decided to fabricate a mount and use them. One day, I'll build fabricate an aluminum fuel tank and will use the OEM in-tank pump which came with my engine. For now, this will work.
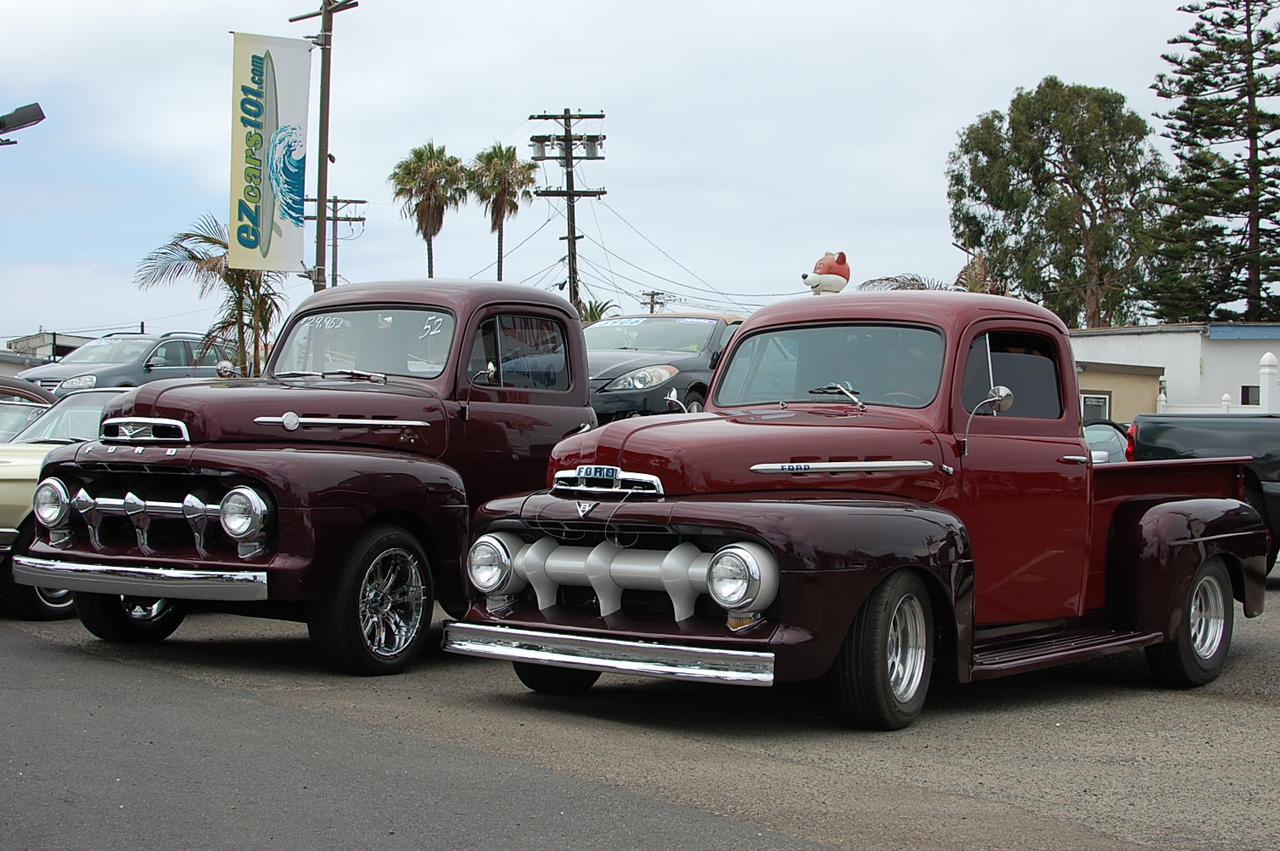
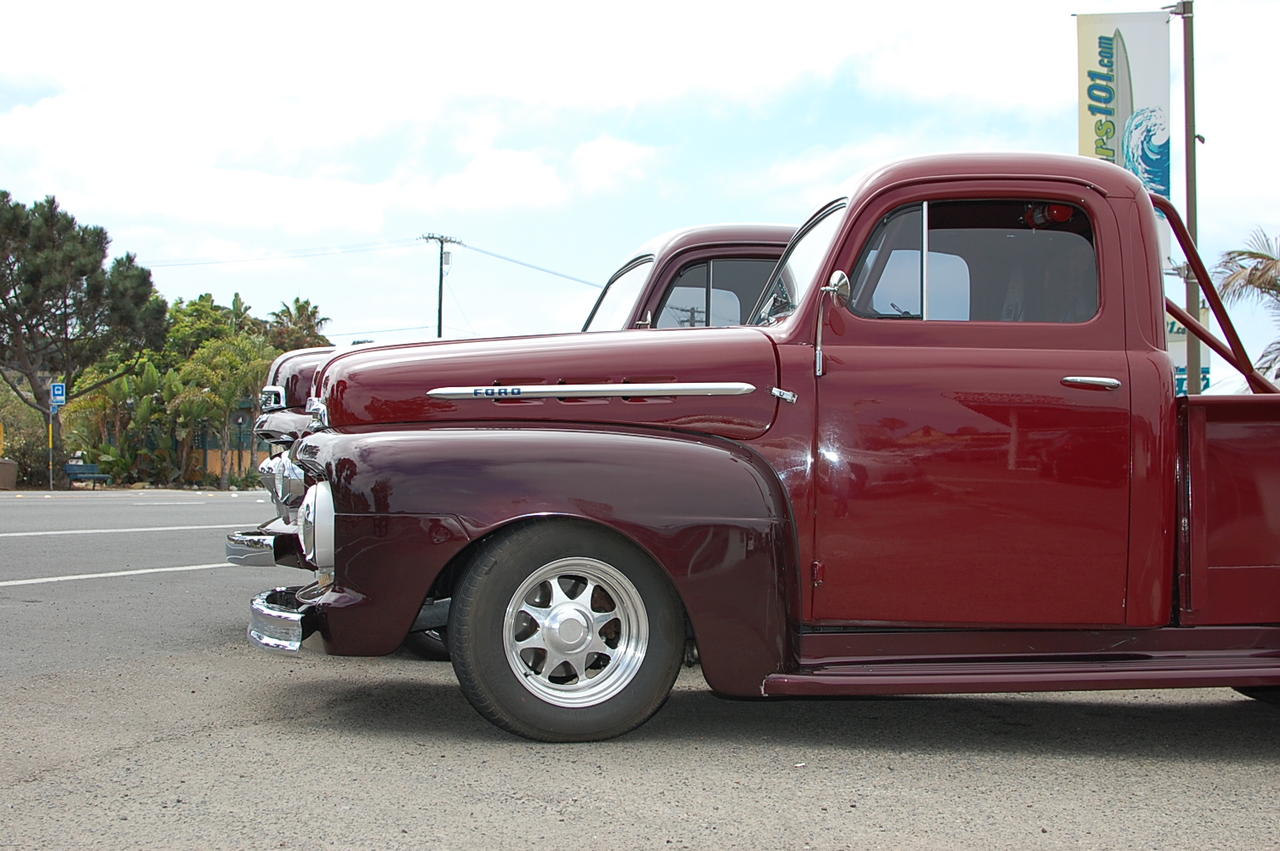
My truck is the one in the foreground on the right:
Will add more details and pictures.
Been working on my truck for about 6 weeks now. In the process of modernizing the drivetrain. I want to be able to rely on this vehicle and have plenty of power, AC, etc.
I bought an L92, all aluminum V-8 6.2L and 6L80e 6 speed autobox from a late model Escalade. Used and delivered with the harness, computer, all drive accessories was about $3000. From the factory, this engine is rated at 403HP and about 420 ft lbs. This is the truck version of the Corvette C6 LS3, but with variable valve timing.
I really wanted a Coyote motor, but just couldn't justify the extra $ - please don't chastise me for the fiscal prudence
I'm subbing out as little work as possible. I had Ken Wolkens (ex-GM powertrain engineer) do the standalone harness conversion. He is a wealth of knowledge and great guy! His partner re-programmed the computer for a bit more power, etc.
I bought a weld-it-yourself motor mount kit from scottshotrods.com
I bought Corvette C6 exhaust manifolds which are much narrower than the truck manifolds and am fabricating my own exhaust.
I used a pair of Bosch EFI - compatible pumps from a 1994 Mercedes E500 (I bought them as spares and decided to fabricate a mount and use them. One day, I'll build fabricate an aluminum fuel tank and will use the OEM in-tank pump which came with my engine. For now, this will work.
My truck is the one in the foreground on the right:
Will add more details and pictures.
#2
10-04-2013, 04:40 PM
Join Date: Jul 2013
Posts: 386
Likes: 0
Received 0 Likes
on
0 Posts
I'm running a large 16" 2200 CFM Spal fan, which the computer will turn on and off via relay. Still need to fabricate the fan shroud.
Pictures:
New engine going in for the first time.
Engine in, hard mounted. Beginning to wire in the harness. Intake manifold removed. Stripping out old wiring and cleaning up the firewall.
Engine mounts fabricated.
Starting to work on the exhaust fabrication. Notice the exhaust on the driver's side has to snake around the steering shaft. This old truck was modified with IFS - a Heidt's crossmember and Mustang II rack. Probably done about 10 years ago when it was restored.
#3
10-04-2013, 04:44 PM
Join Date: Jul 2013
Posts: 386
Likes: 0
Received 0 Likes
on
0 Posts
Here's a few pictures of the engine mounts. I bought the kit from scottshotrods.com but they needed to be welded together.
Clearance is real tight to the manifolds. Note, the washer stack is used so I can slide the engine / trans back in the chassis. Kind of an iterative process. I couldn't do it when it was hanging from the cherry picker as I couldn't attach the picker and the intake manifold at the same time. If I get bored one day, I'll have some large Aluminum donuts fabricated once I have the final installed location determined.
I will need to take everything apart to clean up and repaint the chassis when I'm done with fabrication as well as paint things like the motor mounts.
Doug
EDIT
*******NOTE 1 MONTH LATER....I've utilized the adjustability in the motor mounts I designed and now have about 3/4" between the manifolds and the mounts by sliding everything rearward. Not a lot of room, but can't do better without fabricating custom headers. I will use a heat shield to protect the rubber in the engine mounts. Later pictures show the washes now on the front side of the engine mount instead of the rear.
These exhaust manifolds are sourced from a C6 Corvette.
Doug*********
#4
10-04-2013, 04:49 PM
Join Date: Jul 2013
Posts: 386
Likes: 0
Received 0 Likes
on
0 Posts
#5
10-04-2013, 04:54 PM
Join Date: Jul 2013
Posts: 386
Likes: 0
Received 0 Likes
on
0 Posts
this is as far as I've gotten on the exhaust fabrication work. I'll have to build a heat shield to keep the vacuum booster and master cylinder temps down. You can also see the rear crossmember I (partially) fabricated. I used some of what was existing.
Note, clearances are tight, but not as bad as they appear in this picture.
Doug
Note, clearances are tight, but not as bad as they appear in this picture.
Doug
#7
10-04-2013, 05:30 PM
Trending Topics
#8
10-04-2013, 06:06 PM
Join Date: Jul 2013
Posts: 386
Likes: 0
Received 0 Likes
on
0 Posts
Thank you. I'm excited about this project. Really enjoying myself and learning too. I realize it bucks convention with my engine choice. Still, this truck is highly modified, already. Wouldn't do this to a virgin :-)
Doug

#10
10-04-2013, 07:01 PM
Join Date: Jul 2013
Posts: 386
Likes: 0
Received 0 Likes
on
0 Posts
I had to pay to swap the transmission from 4WD to 2WD and had two of the clutch packs (of six) changed out at the same time as they showed signs of wear.
The engine ran like a top. Trans shifted perfectly.
I resealed everything when I had it out. Front and rear main seals. Oil pan, valve covers, front and rear engine covers, etc.
Doug
#11
10-04-2013, 07:01 PM


#12
10-04-2013, 07:58 PM
Posting Guru
Join Date: Apr 2013
Location: Rimrock AZ
Posts: 1,170
Likes: 0
Received 0 Likes
on
0 Posts
#13
10-04-2013, 08:07 PM
Join Date: Jul 2013
Posts: 386
Likes: 0
Received 0 Likes
on
0 Posts
Thank you for the positive comments.
The pan is 5.5" from the ground at ride height. This is the truck / SUV oil pan which is 8.25" deep. The camaro / corvette pans are only 5.25". I wanted it as low as possible to keep center of gravity down. Not trying to build a nascar race truck, but this is a street truck that I don't need extra clearance.
I plan to buy one of those pans and to swap it over to gain clearance. If I run this for a bit, I'll build a steel skid that would protect the pan.
Doug
#14
10-05-2013, 12:05 AM

Very nice work, keep posting these photos, somewhere down the line not only are they impressive but they will save a lot of heart ache in another build by someone doing something really similar.
Good building'
Good building'
#15
10-05-2013, 02:09 PM
Join Date: Jul 2013
Posts: 386
Likes: 0
Received 0 Likes
on
0 Posts
Mike & Bob,
Appreciate your positive comments!
For someone with a more conventional build, I have some very original gauges for sale now on ebay. The speedo is stamped August 17, 1951. The combo gauge appears original, too, but the stamp isn't obvious.
1951 Ford F1 Truck Original Vintage Gauges Excellent Condition | eBay
I also have a set of 390 Ford headers that fit the very narrow frame rails of my 1951 F1. Those are also on ebay.
Ford 390 Block Hugger Headers | eBay
I have a set of Pro Comp Autometer gauges liquid filled temp and oil pressure, voltmeter and also one of their large 5" tachs. Those look brand new. That line is still in production.
Thanks a bunch,
Doug