Custom Gauges
#1
Custom Gauges
Well, since the pictures and information I found on herewere so helpful to me; I guess it’s my turn to make a thread showing off mycustom instrument cluster. I’ll try tobe as thorough as possible and pass along whatever knowledge I gainedthroughout the process. <o
 ></o
></o >
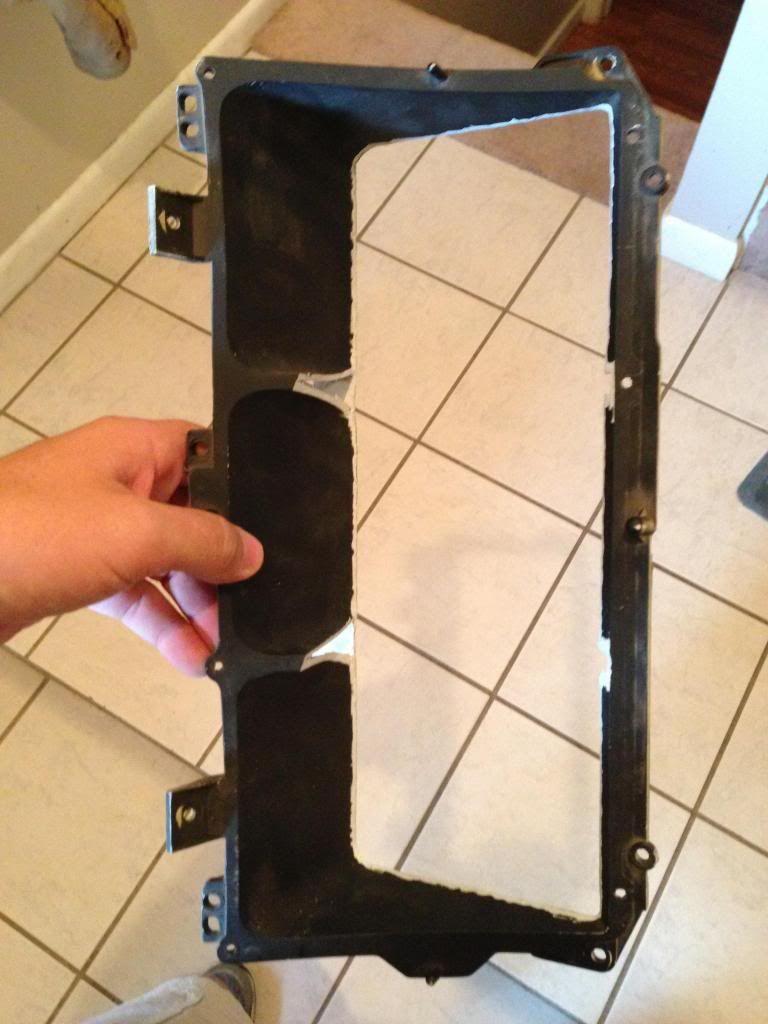
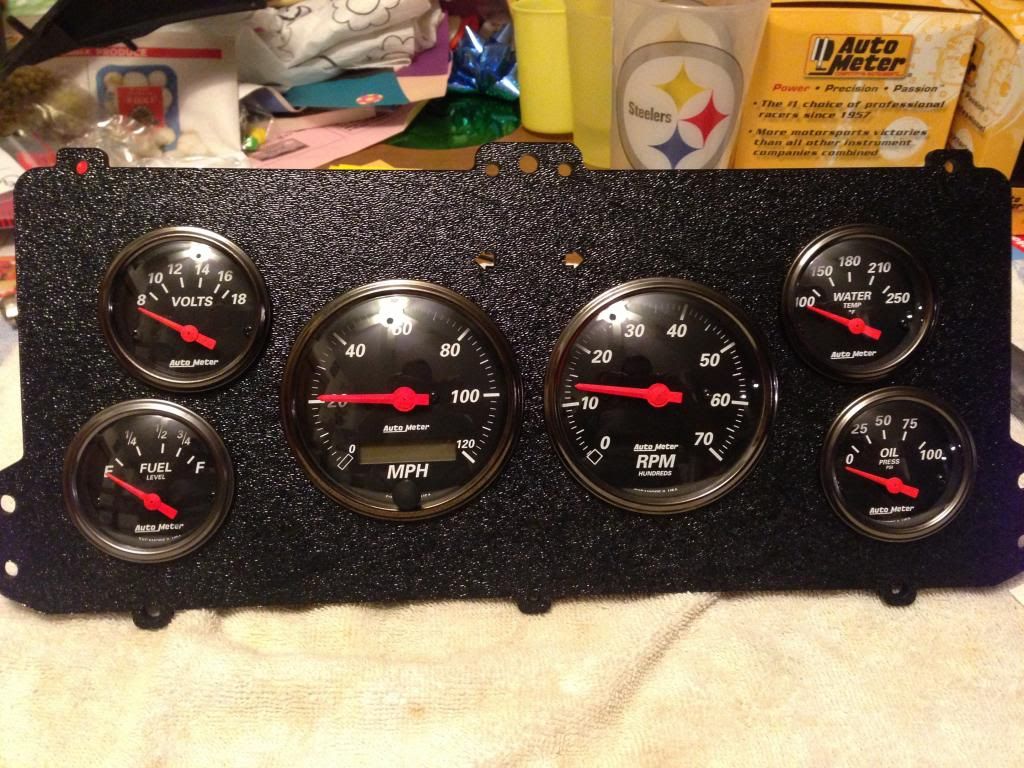
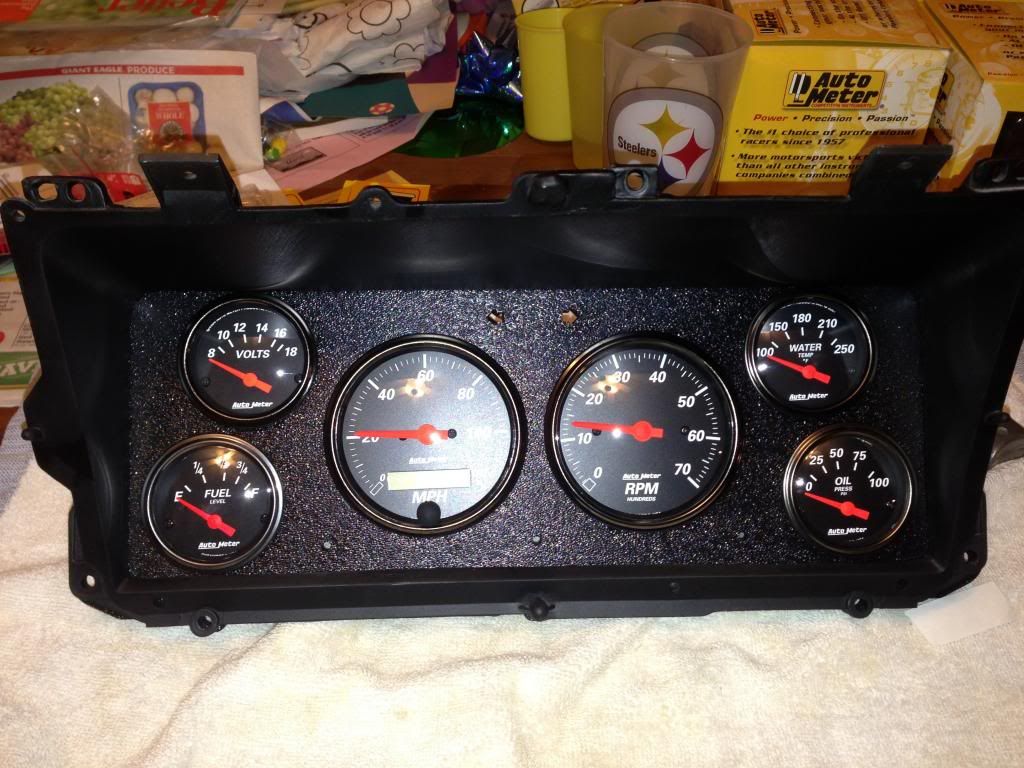
>I wanted the four auxiliary gauges plus the speedo and tachall centered so of course I had to cut out the center bars of the instrumentpanel holder. I did this using a copingsaw which worked out pretty well. I didn’thave a stock instrument panel to start with so after prepping the holder(bracket that tilts the panel in the dash) I took dimensions with a caliper andmade a CAD drawing of what the plate should look like. Layout of the gauges and how they look movedme towards the smaller 3 1/8” speedo and tach with the 2 1/6” auxiliarygauges. The 3 3/8” gauges just lookedreally tight in the available space. <o
 ></o
></o >
>I got the Autometer Designer Black gauges from www.egauges.com (for some reason if you ‘build your own kit’it was cheaper then buying a 5 gauge kit and adding a tach). Plus you can select which fuel gauge matchesyour sender. Found out later that thesegauges have really bad back lighting. Will purchase some replacement LED’s to see if that helps. May have gone with a different gauge if I hadthought about lighting.<o
 ></o
></o >
>The speedo is electric since I didn’t have a mechanical speedcable anyways (plus I hear of problems connecting between the stock cable andthe gauge) and the calibration feature of the electric is pretty sweet. Autometer sells a speed sender but the onefrom Dakota was cheaper and appears like it will work. It did mount in the T18 hole. We’ll find out once I wire the truck.<o
 ></o
></o >
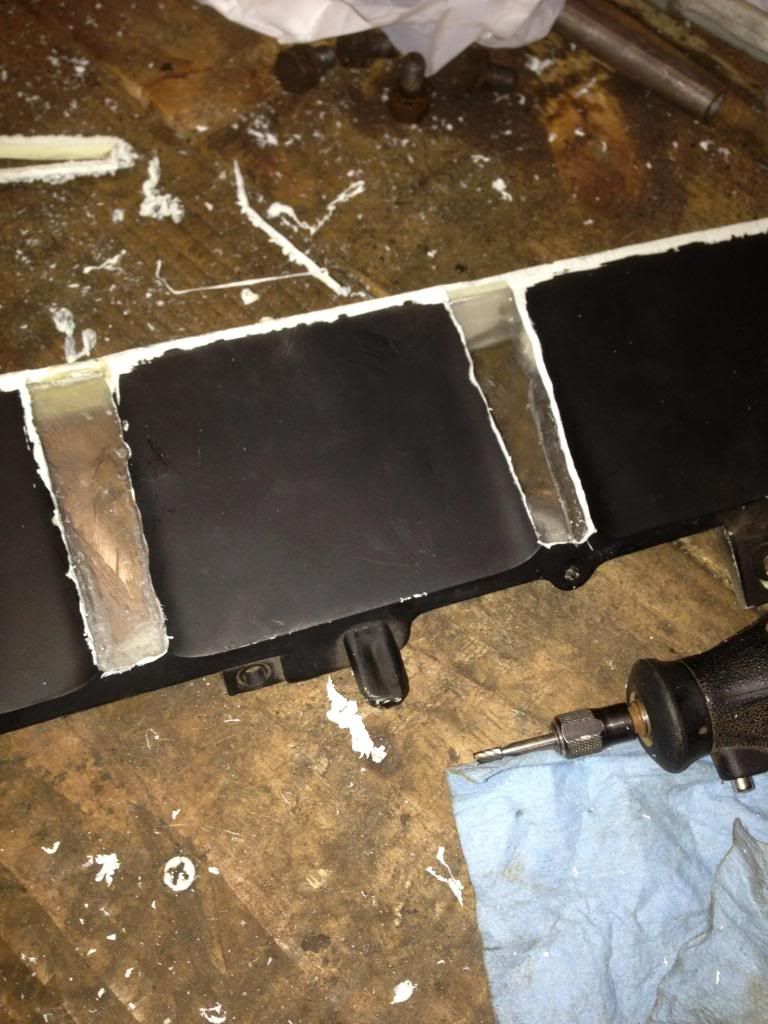
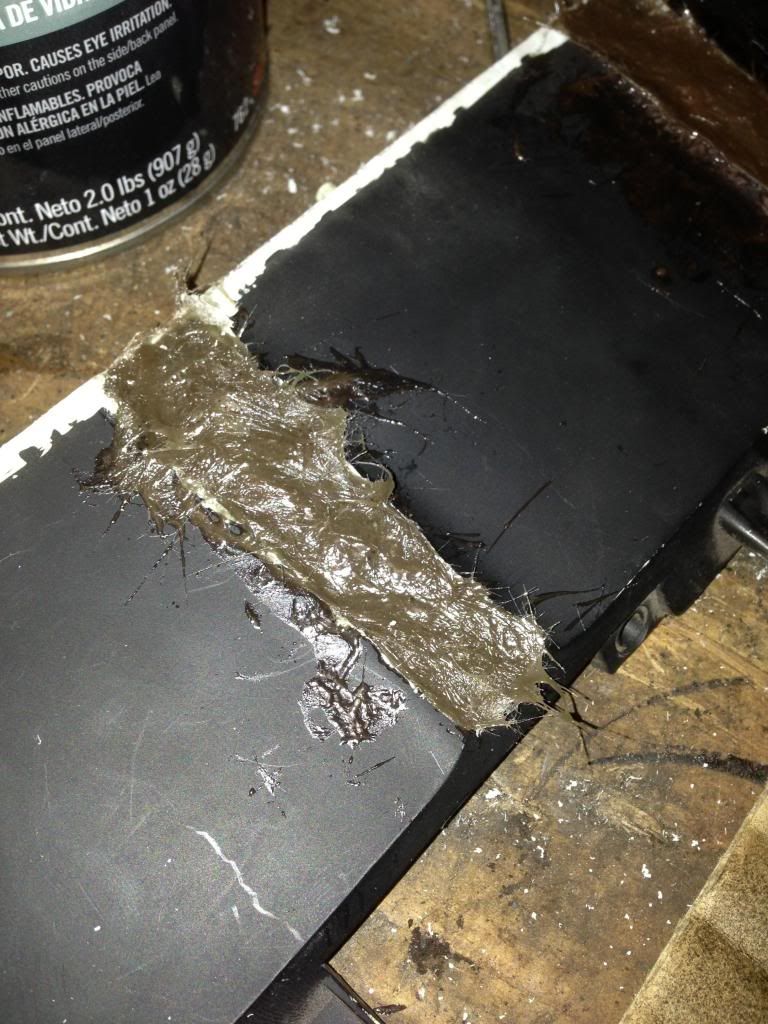
>Back to the holder bracket. I used plumbers glue (for PVC/ABS/CPVC) to addsupporting plastic to the back of the slots left after cutting out the centerbars. This way the fill material doesn’thave to be a strong and is easier to pack in there. Before I had this idea I bought some TigerHair Bondo (which looks like the mouse your cat eat the night before) to use tobridge the gap and went ahead and used it. Regular bondo probably would have worked but whatever. Used a dremel to clean up the edges and sanddown the rough spots. Used regular bondoto fill in any remaining low spots but forgot to take pictures of that part.<o
 ></o
></o >
>After looking at my CAD drawing and thinking about how tobuild the panel, I really didn’t have a good way to ensure that I got the gaugeholes in the exact places and the spacing was pretty tight. Did a bit of poking around on the interwebsand found a place that will laser cut stuff for you. Pretty cool. Plexiglass would have been a bit cheaper but the ABS is more flexibleand resists cracking when/if you have to drill it. Had them make it out of 3/16” black ABS (oneside is textured the other is smooth). Only cost $34 but the shipping bumped it up to $50. The best part about this was that when itcame in…it fit my gauges and lined up with the mounting posts/screw holes perfectly. Even got little arrows cut out for the turnsignals. I reused the stock greendiffuser to cover the turn signal lights but probably didn’t need to since Iused green LED’s. <o
 ></o
></o >
>The cluster has five LED’s (RT, LT, high beam, brakewarning, and a line lock). (Line lock isfor roll stop since I have four wheel discs and no parking brake). Side note: This is not to be used asan emergency brake, only for assurance when hoping out on level ground to getthe mail or close the garage door. Stillnot totally hooked on it but that’s the way it is for now.<o
 ></o
></o >
>To mount the LED’s I drilled a mounting hole in the back ofa CPVC cap and then glued the cap to the instrument panel. CPVC can be found in smaller diameters atmore stores than PVC. Before doing thatI was testing the wiring with a 9v battery and found that the LED’s were waytoo bright. I filled the 1/8” laser cutholes with hot glue and added a little puddle on the back of the instrumentplate to diffuse the LED light. It coolsto an opaque color and lets through just enough light. Didn't do this for the turn signals because Iused the stock green plastic piece. Theymay be too bright.<o
 ></o
></o >
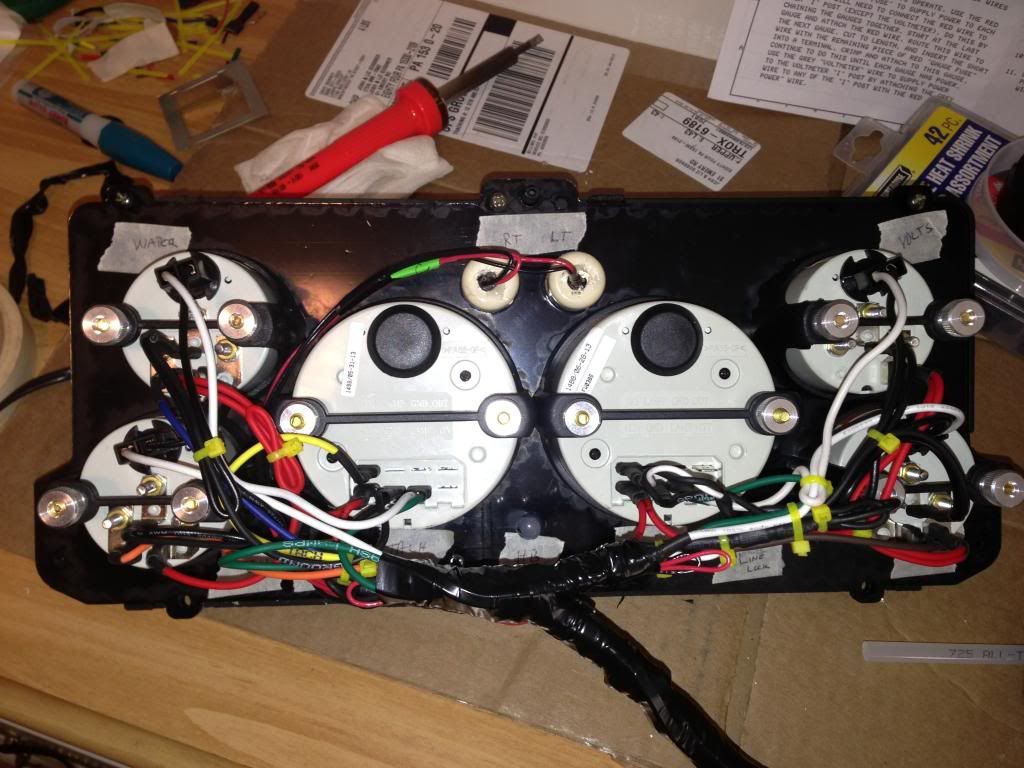
>Wiring was straight forward with a little forethought. Connected everything through a 15pin connector. Solder and heat shrink or open barrelconnectors and heat shrink…only way to go. <o
 ></o
></o >
><!--[if !supportLists]-->1) <!--[endif]-->Ground<o
 ></o
></o >
><!--[if !supportLists]-->2) <!--[endif]-->LampPower<o
 ></o
></o >
><!--[if !supportLists]-->3) <!--[endif]-->Gaugepower<o
 ></o
></o >
><!--[if !supportLists]-->4) <!--[endif]-->FuelSender<o
 ></o
></o >
><!--[if !supportLists]-->5) <!--[endif]-->OilPressure sender<o
 ></o
></o >
><!--[if !supportLists]-->6) <!--[endif]-->TempSender<o
 ></o
></o >
><!--[if !supportLists]-->7) <!--[endif]-->TachSender (coil or ignition box)<o
 ></o
></o >
><!--[if !supportLists]-->8) <!--[endif]-->SpeedSender ground (dedicated ground but coupled with gauge ground at gauge)<o
 ></o
></o >
><!--[if !supportLists]-->9) <!--[endif]-->SpeedSender signal (these should be twisted pair to prevent interference)<o
 ></o
></o >
><!--[if !supportLists]-->10) <!--[endif]-->LineLock (yellow) LED <o
 ></o
></o >
><!--[if !supportLists]-->11) <!--[endif]-->RT(green) LED (these two are reversed whenwiring from the back of the panel)<o
 ></o
></o >
><!--[if !supportLists]-->12) <!--[endif]-->LT(green) LED (lol didn’t think of thatone until testing)<o
 ></o
></o >
><!--[if !supportLists]-->13) <!--[endif]-->BrakeWarning Ground (this goes to the brake proportioning valve)<o
 ></o
></o >
><!--[if !supportLists]-->14) <!--[endif]-->BrakeWarning Positive (this comes from the back of the ignition switch)<o
 ></o
></o >
><!--[if !supportLists]-->15) <!--[endif]-->Highbeam (blue) LED<o
 ></o
></o >
>Will have to go back in and redo the grounding after talkingwith Autometer, they recommended having the lamps on a dedicated ground insteadof everything connected together. Thiswill add one loose wire for lamp grounding. <o
 ></o
></o >
>All in all I’m really happy with how it turned out. Still have to cut out the bars from thesurround bezel but will do that when I do the interior work.<o
 ></o
></o >
><o
 ></o
></o >
>Gauges $420 egauges.com<o
 ></o
></o >
>Speedo sender $50dakotadigital.com<o
 ></o
></o >
>Speed sender gear and clip $10 LMC<o
 ></o
></o >
>LED’s $10 ebay<o
 ></o
></o >
>Instrument panel $50 pololu.com<o
 ></o
></o >
>Bondo products $20 <o
 ></o
></o >
>Wiring – was part of the Centechharness but I had to buy some open barrel spade connectors fromrepairconnector.com $10<o
 ></o
></o >
>Open barrel crimpers $20 ebay<o
 ></o
></o >
>Replacement bulb LEDs - $10superbrightleds.com<o
 ></o
></o >
>Misc heat shrink and CPVC caps$15<o
 ></o
></o >
><o
 ></o
></o >
>All said and done - $615 (wow…sneaksup on ya $10-20 at a time.)
Also, wow at how long of a post this turned out to be. Sorry about that.
#7
Trending Topics
#10
#12
Thanks for the compliments. I'm hoping the truck will be driven daily through the non-salty months. You mean the size of the speedo? Or the large increments? It would have been better if it was only 0 to 100mph.
If I had access to a CNC I would have made the plate myself. Although I was pretty tickled when everything fit right up to the laser cut panel right out of the box.
My limited understanding of wiring is to think of it like water flowing in a pipeline. As long as a circuit is kept simple I can get there. Same goes for house wiring.
#13
Excellent job!! Looks awesome!! You should be very proud. That'll look sweet in your truck. More people should turn out their own gauge clusters because you never know what it could look like till you try. It's not all that hard.....
Here's a thread on how mine turned out from earlier this year.
https://www.ford-trucks.com/forums/1...ject-pics.html
Here's a thread on how mine turned out from earlier this year.
https://www.ford-trucks.com/forums/1...ject-pics.html
#15
Still one sharp looking cluster.


