New 1950 F1 Project! Workng title, "Henry"
#16
 08-21-2013, 10:21 PM


Join Date: May 2013
Location: Novi
Posts: 19
Likes: 0
Received 0 Likes
on
0 Posts
New album here: Photo Album - Imgur
For the seat belts, I want to weld the upper mount. Where is the gas tank vent, so I can block it off? Removing the tank seems tricky and the shops around here don't seem concerned as long as I'm more than a few inches away from the tank and it's full.
For the seat belts, I want to weld the upper mount. Where is the gas tank vent, so I can block it off? Removing the tank seems tricky and the shops around here don't seem concerned as long as I'm more than a few inches away from the tank and it's full.
#17
08-22-2013, 06:10 AM

New album here: Photo Album - Imgur
For the seat belts, I want to weld the upper mount. Where is the gas tank vent, so I can block it off? Removing the tank seems tricky and the shops around here don't seem concerned as long as I'm more than a few inches away from the tank and it's full.
For the seat belts, I want to weld the upper mount. Where is the gas tank vent, so I can block it off? Removing the tank seems tricky and the shops around here don't seem concerned as long as I'm more than a few inches away from the tank and it's full.
#18
08-22-2013, 06:52 AM

Hey J,
As Ray said the venting of the tank is built into the
fuel tube & back out through a vented gas cap. We've got a 1950
as well & we had to eventually remove our tank from the cab & put it out back under the bed. Our tank leaked from around the fuel sender on the top of the tank. Even a real small amount of gas stinks a lot & every time we filled the tank gas fumes entered the cab. We tried multiple times to seal that gasket - it worked but not well enough.
Removing the tank & relocating it out back has some work involved. Getting the tank out of the cab isn't too bad but it cascades from there. You will want to weld in patches to fill the spout & gas line holes. You then have to move a bracket or two out under the bed & relocate your shock perches - a little more welding. You have to mount the tank to the chassis which in our case entailed some grinding of the inner frame. You will need to cut a hole in your bed floor or elsewhere to give you access to put fuel in the tank. We also installed an electric fuel pump, ran new lines, etc. It's all doable but may take you a couple of weeks.
Good luck over there.
Ben in Austin
1950 F1
Last edited by ben73058; 08-22-2013 at 06:54 AM. Reason: Spelling
#19
08-22-2013, 09:33 AM
Fleet Owner
You're lucky that ignition switch didn't fall onto some metal behind the dash, it would have been a fire for sure!
What does the picture in your album mean, "Bolts kept the wheels from sitting flush"?!
You'll want the seat out of the cab for welding in the seat belt plates, and to install the anchors into the reinforcing beam in front of the gas tank. Taking the tank out for welding is not hard. Do you have the fiberboard interior pieces that fit behind the seat, and form a headliner? That all needs to come out too.
#20
08-22-2013, 04:24 PM
Join Date: May 2013
Location: Novi
Posts: 19
Likes: 0
Received 0 Likes
on
0 Posts
I do have some fiberboard and carpet in the interior I'll need to take out. The seat is a good idea, and shouldn't be too bad. The belts I bought have some pretty bulky retractors so I'll need to do a test-fit first.
#21
08-22-2013, 05:50 PM
Senior User
Join Date: Aug 2013
Location: Franklinton, NC
Posts: 108
Likes: 0
Received 0 Likes
on
0 Posts
I see you got the blue oval off the tailgate pretty fast. It's a nice emblem, but somehow Ford Ford seems redundant.
As others have already mentioned, you were fortunate to get such a nice (almost) daily driver right off the bat. I especially appreciate the color photos as this is a combination I've been thinking about for my '52 when the time comes.
Enjoy it! You don't even have to wait to do that part.
As others have already mentioned, you were fortunate to get such a nice (almost) daily driver right off the bat. I especially appreciate the color photos as this is a combination I've been thinking about for my '52 when the time comes.
Enjoy it! You don't even have to wait to do that part.
#22
08-23-2013, 06:31 AM

#23
08-29-2013, 06:14 PM
Join Date: May 2013
Location: Novi
Posts: 19
Likes: 0
Received 0 Likes
on
0 Posts
Guess I wasn't totally clear - we removed the bolts securing the drum temporarily, so the wheel cleared and the lugs held it flush.
I started tearing in to the truck more over the last few days. It looks really solid underneath and it looks like the previous owner did some work. The rear brake lines are new, but the front are old. I'll replace them when I convert to the 1968 Mustang master cylinder I purchased. The one big problem - or possible problem - is that the crookedness in the bed looks like it might be in the frame, not a problem with the leafs. Not sure if there's anything I can do to address that problem in the near future.
The engine continues to fire right up and has been very reliable - in fact, I jumped a new car the other day with it! I did a compression test and found what I suspected, 60 PSI on 6 cylinders, 30 on one, and 0 on another. I suspect valves still because I get a backfire and because the rings would (probably) wear more consistently. I'm going to see if I can clean up the valve easily in the parking lot but the backfire is intermittent so maybe running will clear it up (I'm ever the optimist).
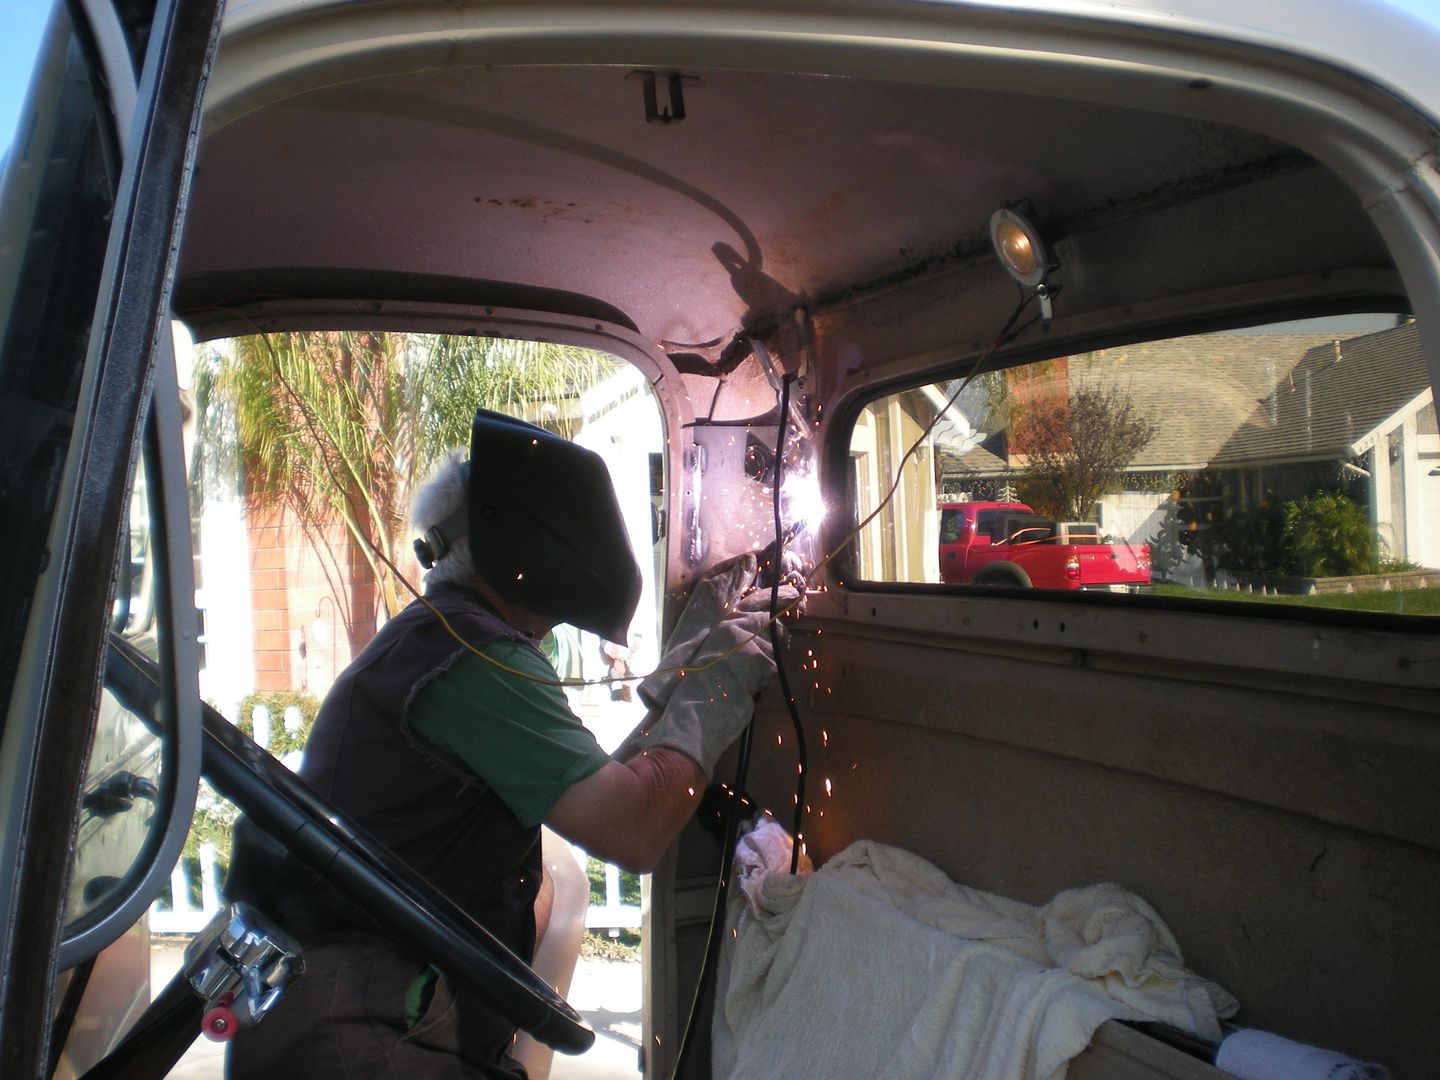
I got the old parking brake cable out today and have the new one in but not connected at the rear clevis - the pin is stuck. As soon as I get that out, I'll feel better about driving so I have SOME redundancy in my brakes! I also explored the rest of the truck, the wiring is rough (the owner installed an under-seat radio pretty poorly), the gauges need 6V conversion, and the passenger door doesn't have any lock assembly installed. Seat belts and ignition are next (have both, just need to mock up the location and do ignition swap). I have a 110 welder and a 220 I can use but no 220 outlet. Hopefully I can figure that situation out soon because I'd feel a lot safer driving with my 3-points installed! Worst case, I can see if an exhaust shop can do the deed, but I'm betting not because of liability.
Will post more pictures as I take them. I'm having a blast!
I started tearing in to the truck more over the last few days. It looks really solid underneath and it looks like the previous owner did some work. The rear brake lines are new, but the front are old. I'll replace them when I convert to the 1968 Mustang master cylinder I purchased. The one big problem - or possible problem - is that the crookedness in the bed looks like it might be in the frame, not a problem with the leafs. Not sure if there's anything I can do to address that problem in the near future.
The engine continues to fire right up and has been very reliable - in fact, I jumped a new car the other day with it! I did a compression test and found what I suspected, 60 PSI on 6 cylinders, 30 on one, and 0 on another. I suspect valves still because I get a backfire and because the rings would (probably) wear more consistently. I'm going to see if I can clean up the valve easily in the parking lot but the backfire is intermittent so maybe running will clear it up (I'm ever the optimist).
I got the old parking brake cable out today and have the new one in but not connected at the rear clevis - the pin is stuck. As soon as I get that out, I'll feel better about driving so I have SOME redundancy in my brakes! I also explored the rest of the truck, the wiring is rough (the owner installed an under-seat radio pretty poorly), the gauges need 6V conversion, and the passenger door doesn't have any lock assembly installed. Seat belts and ignition are next (have both, just need to mock up the location and do ignition swap). I have a 110 welder and a 220 I can use but no 220 outlet. Hopefully I can figure that situation out soon because I'd feel a lot safer driving with my 3-points installed! Worst case, I can see if an exhaust shop can do the deed, but I'm betting not because of liability.
Will post more pictures as I take them. I'm having a blast!
#24
08-29-2013, 07:02 PM
#26
09-01-2013, 08:30 AM

Lead Driver
#27
09-01-2013, 08:40 AM

#28
09-24-2013, 06:38 PM
Join Date: May 2013
Location: Novi
Posts: 19
Likes: 0
Received 0 Likes
on
0 Posts
Update, and sorry to disappear! Studying for the qualifying exams for my PhD program has taken 100% of my free time.
I'm still having a great time with Henry and have put on 1,000+ miles since getting him. I did a basic safety inspection and I got the wiper arm and hand brake cable installed and working and seatbelts installed to the upper cross member above the window. They're bolted for now, but I plan to weld the bolt in when I get access to 220V (and pictures, when I remember!). It's a nice three-point setup from TRW.
For now, the engine smokes like a chimney -- the rings are bad, but I don't have the funds for a rebuild. I've been driving as-is and Marvel Mystery Oil has helped with the backfiring (same with opening the choke or just plain driving in colder weather). I actually ran a can of seafoam through but I think I removed the deposits that were limiting the blowby! Now, every time I idle in traffic I'm stuck in a cloud of smoke. That didn't happen before. Compression is a few PSI lower, too.
On the paint front, I had some Behr Premium Ultra (paint + primer) mixed to match a chip that had flaked off. It's a pretty good match that seems reasonably durable. My goal at this point is to prevent the rust from getting worse.
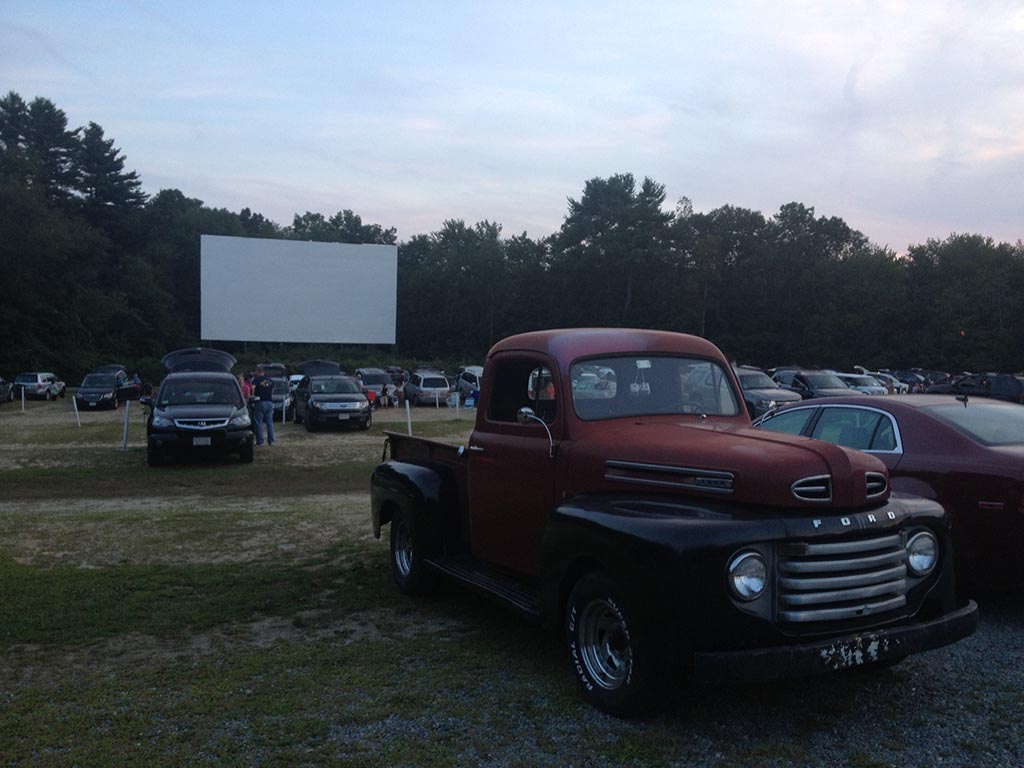
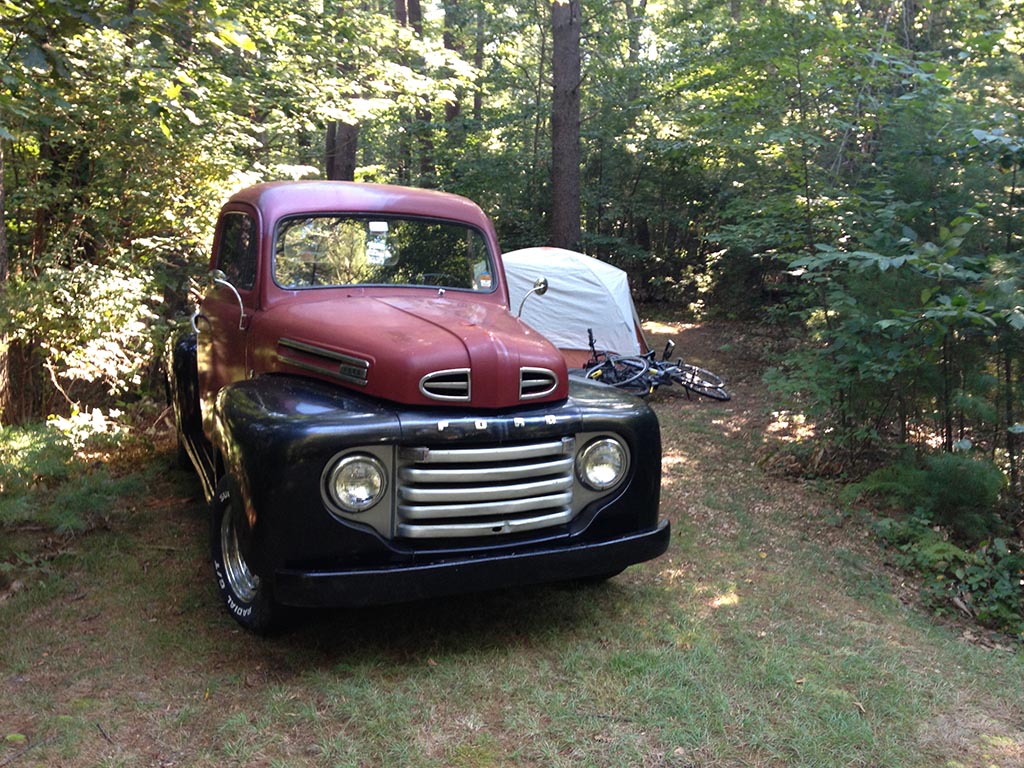
My parking garage kicked me out (no pickup trucks per the contract) so I don't have easy access right now, but I've still been going on all sorts of trips. We did a drive-in, cider mill, a camping trip, and more! Also loving that I can haul cargo and I've jumped a few people with the truck as well. I feel like I'm getting the hang of the 4-sp but still grind more than I'd care to. I hope the trans is durable; I forget how slow I have to take it with all the city traffic.
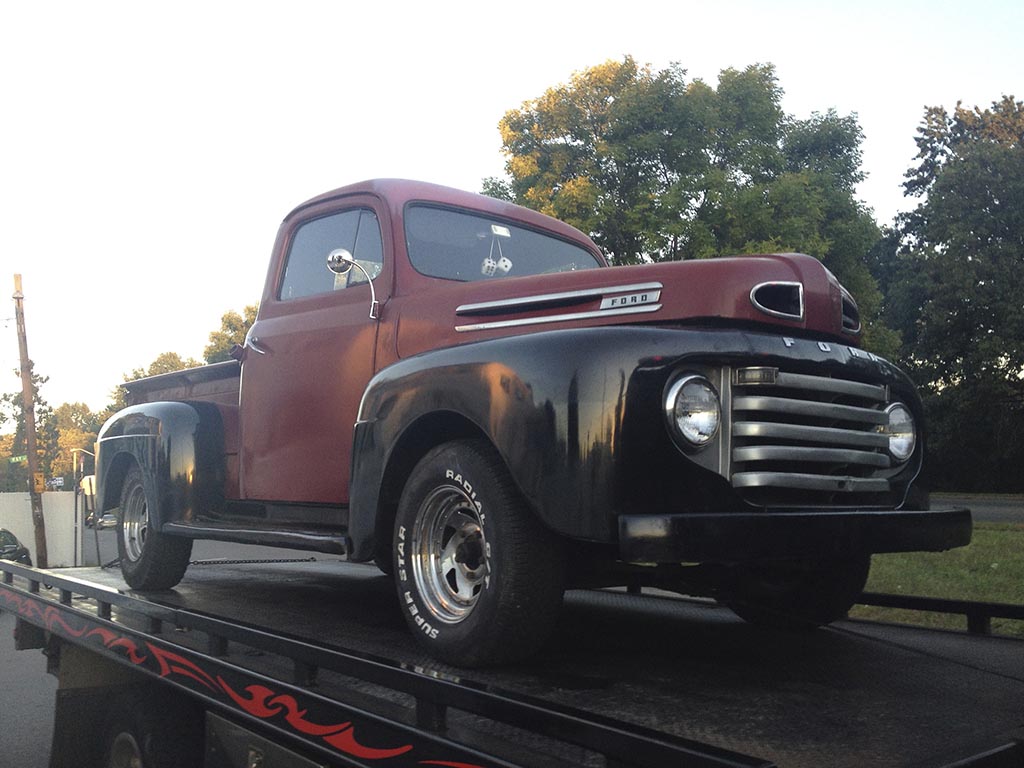
We had one problem -- someone siphoned our gas (and stole the cap!). That made the fuel pump pack up since my gauges don't work and I didn't catch it. I had to be towed home. New pump in and all's running great again, and my locking cap from Mac's is on the way.
A few questions from my first two months with the truck:
- I found (no pictures) a factory-looking switch to the left side of the dash, underneath. Is that a toggle for the dome light? I don't have one and don't know where I'd buy one. Similarly, there was a switch on the top of the steering column labeled "push" that was disconnected. Aftermarket? Something else?
- Where do I disconnect the wires to pull the cluster? I want to do the 12V conversion (have some 6V regulators) and get also my odometer turning again (gears?)
- How does the ignition pop into the dash? I don't have a bezel (yet), and my new cylinder doesn't seem to fit. It's the "spring" style
- Anything to be done (short of a rebuild) to stop the blowby? If it's anything like my Chevy 235, I could drop the pan, get the con-rods out, and do a rering without reboring.
Hope to be posting more pictures soon, but if I pay attention in school now I'll have a lot more time for trucks later!
( a few more pictures @ An F1 Fall - Imgur )
I'm still having a great time with Henry and have put on 1,000+ miles since getting him. I did a basic safety inspection and I got the wiper arm and hand brake cable installed and working and seatbelts installed to the upper cross member above the window. They're bolted for now, but I plan to weld the bolt in when I get access to 220V (and pictures, when I remember!). It's a nice three-point setup from TRW.
For now, the engine smokes like a chimney -- the rings are bad, but I don't have the funds for a rebuild. I've been driving as-is and Marvel Mystery Oil has helped with the backfiring (same with opening the choke or just plain driving in colder weather). I actually ran a can of seafoam through but I think I removed the deposits that were limiting the blowby! Now, every time I idle in traffic I'm stuck in a cloud of smoke. That didn't happen before. Compression is a few PSI lower, too.
On the paint front, I had some Behr Premium Ultra (paint + primer) mixed to match a chip that had flaked off. It's a pretty good match that seems reasonably durable. My goal at this point is to prevent the rust from getting worse.
My parking garage kicked me out (no pickup trucks per the contract) so I don't have easy access right now, but I've still been going on all sorts of trips. We did a drive-in, cider mill, a camping trip, and more! Also loving that I can haul cargo and I've jumped a few people with the truck as well. I feel like I'm getting the hang of the 4-sp but still grind more than I'd care to. I hope the trans is durable; I forget how slow I have to take it with all the city traffic.
We had one problem -- someone siphoned our gas (and stole the cap!). That made the fuel pump pack up since my gauges don't work and I didn't catch it. I had to be towed home. New pump in and all's running great again, and my locking cap from Mac's is on the way.
A few questions from my first two months with the truck:
- I found (no pictures) a factory-looking switch to the left side of the dash, underneath. Is that a toggle for the dome light? I don't have one and don't know where I'd buy one. Similarly, there was a switch on the top of the steering column labeled "push" that was disconnected. Aftermarket? Something else?
- Where do I disconnect the wires to pull the cluster? I want to do the 12V conversion (have some 6V regulators) and get also my odometer turning again (gears?)
- How does the ignition pop into the dash? I don't have a bezel (yet), and my new cylinder doesn't seem to fit. It's the "spring" style
- Anything to be done (short of a rebuild) to stop the blowby? If it's anything like my Chevy 235, I could drop the pan, get the con-rods out, and do a rering without reboring.
Hope to be posting more pictures soon, but if I pay attention in school now I'll have a lot more time for trucks later!
( a few more pictures @ An F1 Fall - Imgur )
#29
09-24-2013, 07:00 PM
Logistics Pro
You certainly have been busy and eventful.
The switch under the dash on the left is for the dash lights - is tied to the headlights so can only be on when they are lit.
Not sure what you have on the steering column - it certainly isn't stock.
The cluster wires can only be disconnected from the back of the cluster. The cluster itself is held by studs (two by the speedo and one by the breakers). Remove the nuts and push the cluster toward the firewall to clear the studs. There isn't much room to maneuver - taking out the seat does minimize the contortions.
The ignition switch is held in by an interference fit with slots that correspond to the teeth on the switch. With the bezel off, just a small counterclockwise turn will release it.
DW