WOOD FLATBED BUILD - 3D MODEL AND CONSTRUCTION PLANS
#1
 06-25-2013, 06:22 PM

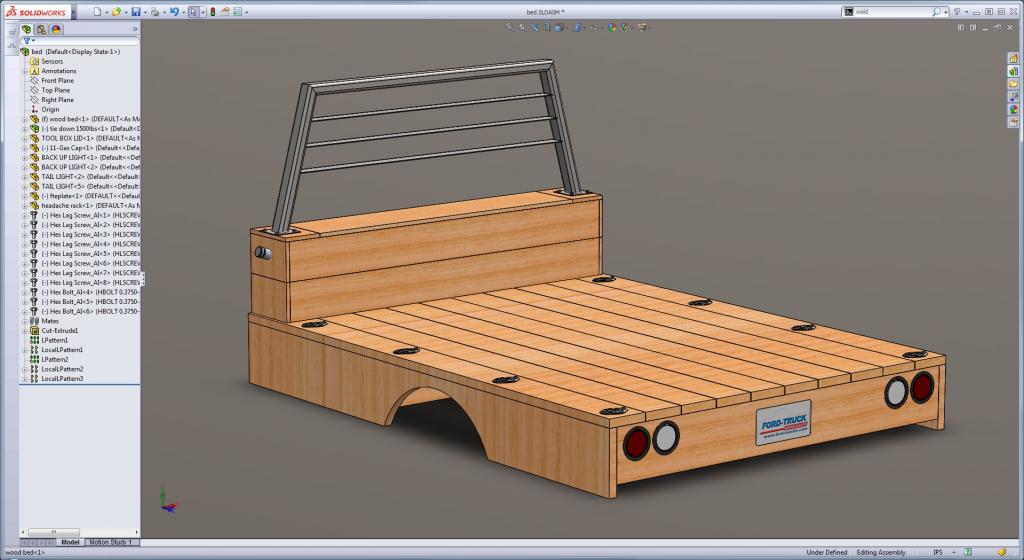
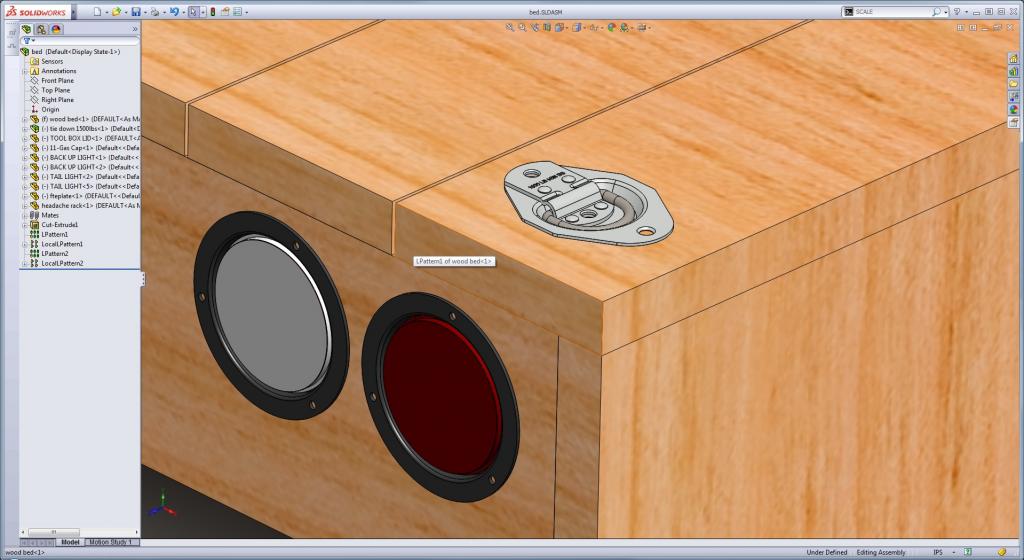
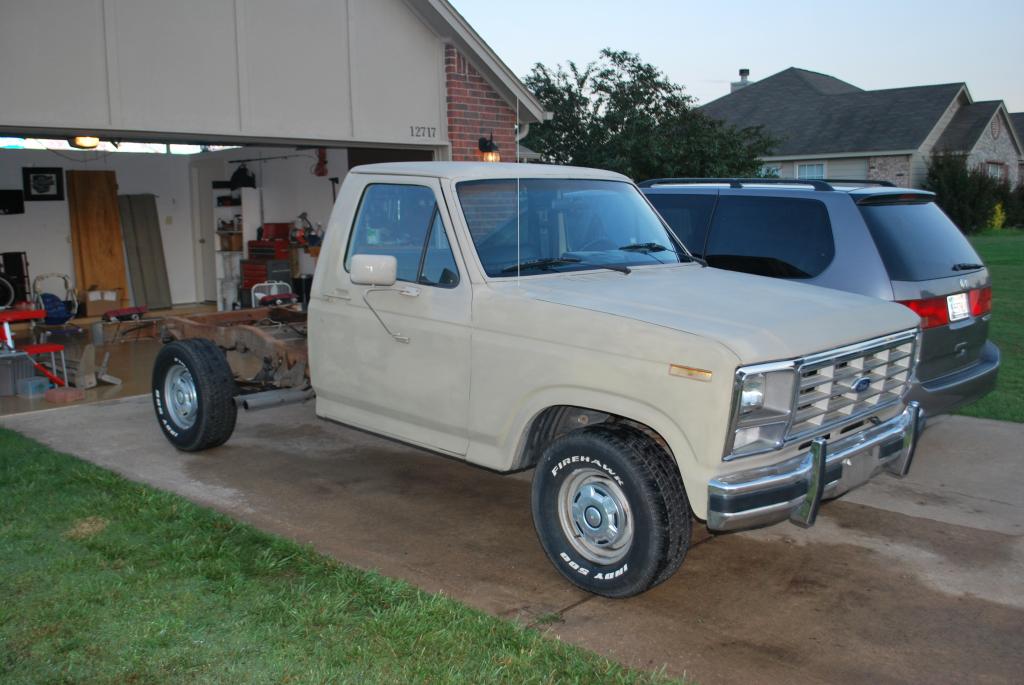
Its time to say good bye to the stock bed and do some DESIGNING!! This is the sort of thing I get paid to do so here we go. Everybody please post your opinions and ideas of features I should add, subtract or re-think. So far the frame, deck and toolbox are to scale. The headache rack will need some final dimensional adjustments. The gas tank filler is routed into the toolbox and out the side to allow a nice downhill slope for filling. The plan is to keep the stock bumper and fit this bed just behind or just on top of it.
Once the final design is done, I will make construction plans for the bed in the case anyone on here is interested in building one of their own.
NOTE: To give credit where credit is due, BLUEOVALBUD created a thread awhile back and his design has inspired this one. I've done things differently and used some different measurements, but I really like the look of his flatbed. See his thread here: https://www.ford-trucks.com/forums/9...-write-up.html
This is a budget build. I have a good solid bed that needs a little more body work, and a tailgate that can be saved but I have no desire at this point to fix them. I am buying a farm within the next couple years and this truck will be used as a farm truck. I am painting the cab and installing the bed and calling it done. The truck has had the engine, transmission, rear axle, brakes blah blah blah all done.....just ask Gary. Its been in his shop several times now.
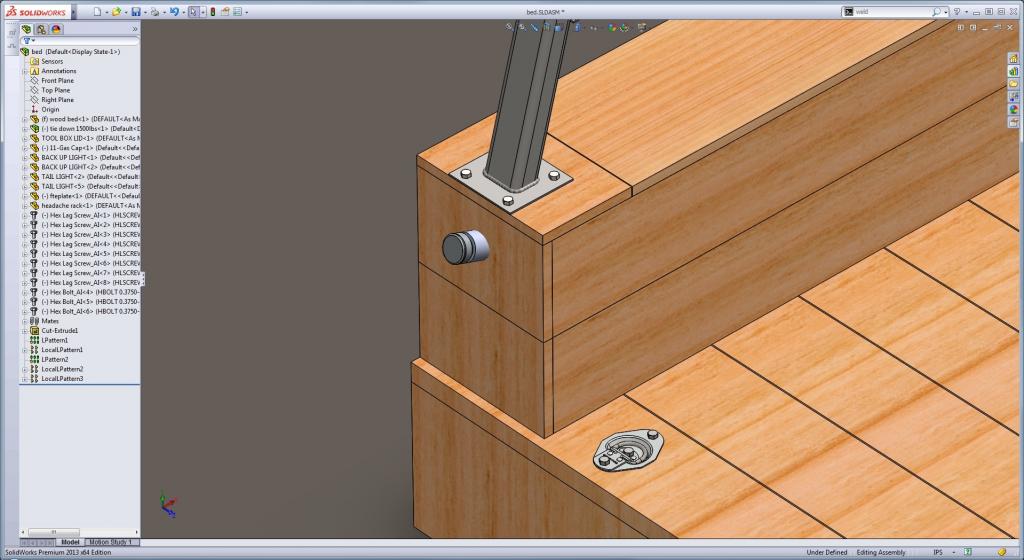
The cross members are 2 x 10's and the side boards are 2 x 12's. Deck boards are 2 x 8's. The suspension has room to travel to the bump stops. The toolbox uses a 2 x 4 frame and 1 x 8's around it. The lid is hinged and has room to open under the first bar of the headache rack.
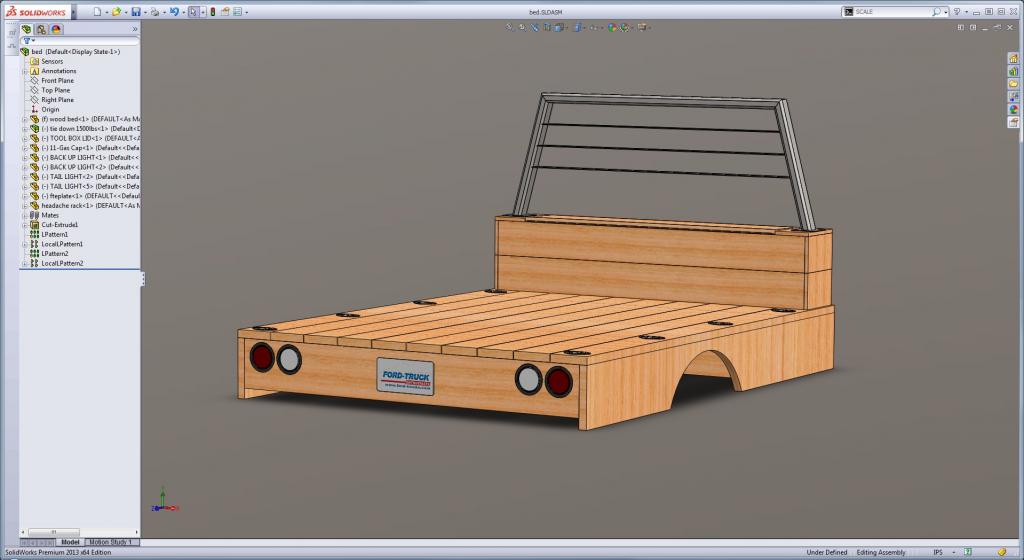
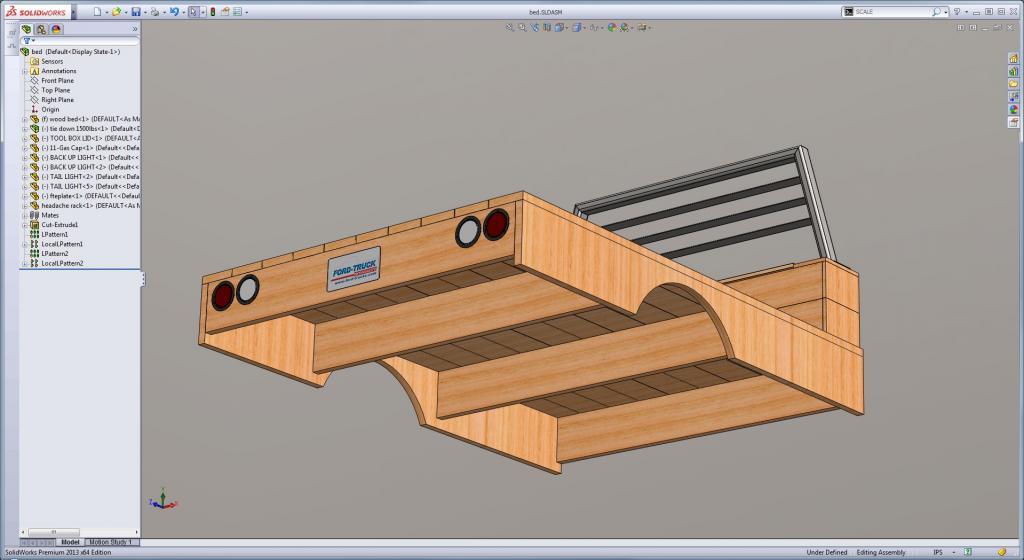
Now the pics of the flatbed concept

Once the final design is done, I will make construction plans for the bed in the case anyone on here is interested in building one of their own.
NOTE: To give credit where credit is due, BLUEOVALBUD created a thread awhile back and his design has inspired this one. I've done things differently and used some different measurements, but I really like the look of his flatbed. See his thread here: https://www.ford-trucks.com/forums/9...-write-up.html
This is a budget build. I have a good solid bed that needs a little more body work, and a tailgate that can be saved but I have no desire at this point to fix them. I am buying a farm within the next couple years and this truck will be used as a farm truck. I am painting the cab and installing the bed and calling it done. The truck has had the engine, transmission, rear axle, brakes blah blah blah all done.....just ask Gary. Its been in his shop several times now.
The cross members are 2 x 10's and the side boards are 2 x 12's. Deck boards are 2 x 8's. The suspension has room to travel to the bump stops. The toolbox uses a 2 x 4 frame and 1 x 8's around it. The lid is hinged and has room to open under the first bar of the headache rack.
Now the pics of the flatbed concept


#2
06-25-2013, 06:36 PM
Posting Legend
#3
06-25-2013, 06:39 PM


#4
06-25-2013, 06:40 PM
Thanks Gary. I've been designing using Solidworks for 3.5-4 years now. I was able to do all this from scratch in about 2 hours today. The Tie-downs were downloaded from Free 3D CAD Library and Collaboration Tools for Engineers - GrabCAD, and the tail lights are from Free 3D Models, Free CAD Models. Everything else is mine.
#5
06-25-2013, 07:28 PM
oops. I missed your post while I was responding to Gary. Let me think about how to incorporate these into the design, so they can easily be installed later. I'm thinking steel round tubing painted black would look nice. That would be super easy to install later by drilling holes in the deck for the tubes to drop into.
#6
06-25-2013, 07:49 PM
Posting Legend
#7
06-25-2013, 09:13 PM
Trending Topics
#8
06-26-2013, 08:35 AM


#9
06-26-2013, 08:47 AM
Posting Legend
Might look better if you incorporated the same angles as on the headache rack. Come up from the deck on the rearmost piece at the same angle and then go horizontal where it meets the current horizontal line. Similarly, on the top piece come up at the same angle to where it meets the horizontal line.
And, unless you are going to have a lot more wood underneath for the tubing to leverage against you could put similar plates to the headache rack's plates on the bottom of the tubing.
And, unless you are going to have a lot more wood underneath for the tubing to leverage against you could put similar plates to the headache rack's plates on the bottom of the tubing.
#10
06-26-2013, 08:58 AM
Might look better if you incorporated the same angles as on the headache rack. Come up from the deck on the rearmost piece at the same angle and then go horizontal where it meets the current horizontal line. Similarly, on the top piece come up at the same angle to where it meets the horizontal line.
And, unless you are going to have a lot more wood underneath for the tubing to leverage against you could put similar plates to the headache rack's plates on the bottom of the tubing.
And, unless you are going to have a lot more wood underneath for the tubing to leverage against you could put similar plates to the headache rack's plates on the bottom of the tubing.
I thought about the rails sliding down too far as well. I think another 2 x 4 screwed to the 2 x 12 on its backside would create a "shelf" for it to sit onto. I even thought about buying some sort of marine grade steel pocket for the tubing to slide into, but that is going to add too much cost. KISS (Keep It Simple Stupid) that's my motto for myself
#11
06-26-2013, 09:11 AM
Posting Legend


#13
06-26-2013, 12:43 PM
Posting Legend
#14
06-26-2013, 12:53 PM
Next up is the Wood sided railings. That might have to wait for later though.