'37 Pickup project

Thread Tools
 
Search this Thread
 
  #31  
Old 08-04-2013, 04:13 PM
Truckin23's Avatar
Truckin23
Truckin23 is offline
Freshman User
Join Date: Jul 2013
Posts: 39
Likes: 0
Received 0 Likes on 0 Posts
Sounds like you might be Irish like me if I didn't have bad luck I'd have no luck at all . I've had that happen and easiest way is to take wheel cylinder off to work on it or replace it then start the bleed process all over .
Good luck with it .

Bob
 
  #32  
Old 08-04-2013, 04:41 PM
91blaze's Avatar
91blaze
91blaze is offline
Freshman User
Thread Starter
Join Date: Dec 2012
Posts: 44
Likes: 0
Received 0 Likes on 0 Posts
It happened on the front drivers side disc brake so I'm taking it to my friend's shop since I don't have the tools to get the caliper off. I did get to drive the truck around the yard and the rear brakes worked to stop it since it wasn't going fast. I don't yet have the trans lockup wired so it had to work hard to get moving. Also for some reason the power steering doesn't work. I got some smoke off the exhaust manifolds, hopefully just burning off some coolant or something, and nothing worse.
 
  #33  
Old 08-30-2013, 12:46 PM
91blaze's Avatar
91blaze
91blaze is offline
Freshman User
Thread Starter
Join Date: Dec 2012
Posts: 44
Likes: 0
Received 0 Likes on 0 Posts
Got new tires put on today. The 235/75/r15 were too big and rubbed the front fenders. This is due to the fact that the front tires stick out further on a 4x4 s10. The new tires are 215/60/r15. They seem a little small at the moment but it should look better once I lower the front and back 2".
 
  #34  
Old 08-31-2013, 01:04 PM
91blaze's Avatar
91blaze
91blaze is offline
Freshman User
Thread Starter
Join Date: Dec 2012
Posts: 44
Likes: 0
Received 0 Likes on 0 Posts
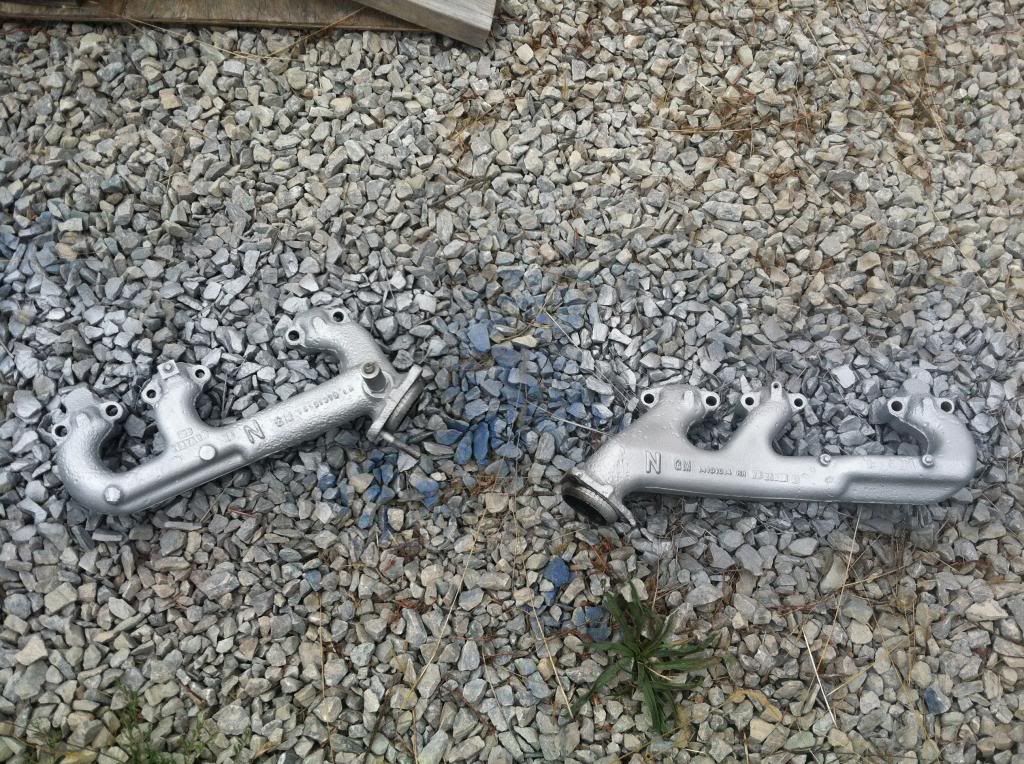
So the seemingly simple task of removing the oil dipstick tube turned into having to remove the exhaust manifold after the tube broke at the base. My usual luck. Might as well go ahead and remove the other and get them coated.
 
  #35  
Old 09-01-2013, 11:45 AM
91blaze's Avatar
91blaze
91blaze is offline
Freshman User
Thread Starter
Join Date: Dec 2012
Posts: 44
Likes: 0
Received 0 Likes on 0 Posts
Got some header paint, we will see how well it lasts.

 
  #36  
Old 09-03-2013, 03:24 PM
91blaze's Avatar
91blaze
91blaze is offline
Freshman User
Thread Starter
Join Date: Dec 2012
Posts: 44
Likes: 0
Received 0 Likes on 0 Posts
Replaced the old ac compressor with a bypass pulley to clean it up a bit. The new dipstick tube is in the mail. Once everything is complete, I'll get a few pics up.
 
  #37  
Old 09-10-2013, 01:43 PM
91blaze's Avatar
91blaze
91blaze is offline
Freshman User
Thread Starter
Join Date: Dec 2012
Posts: 44
Likes: 0
Received 0 Likes on 0 Posts
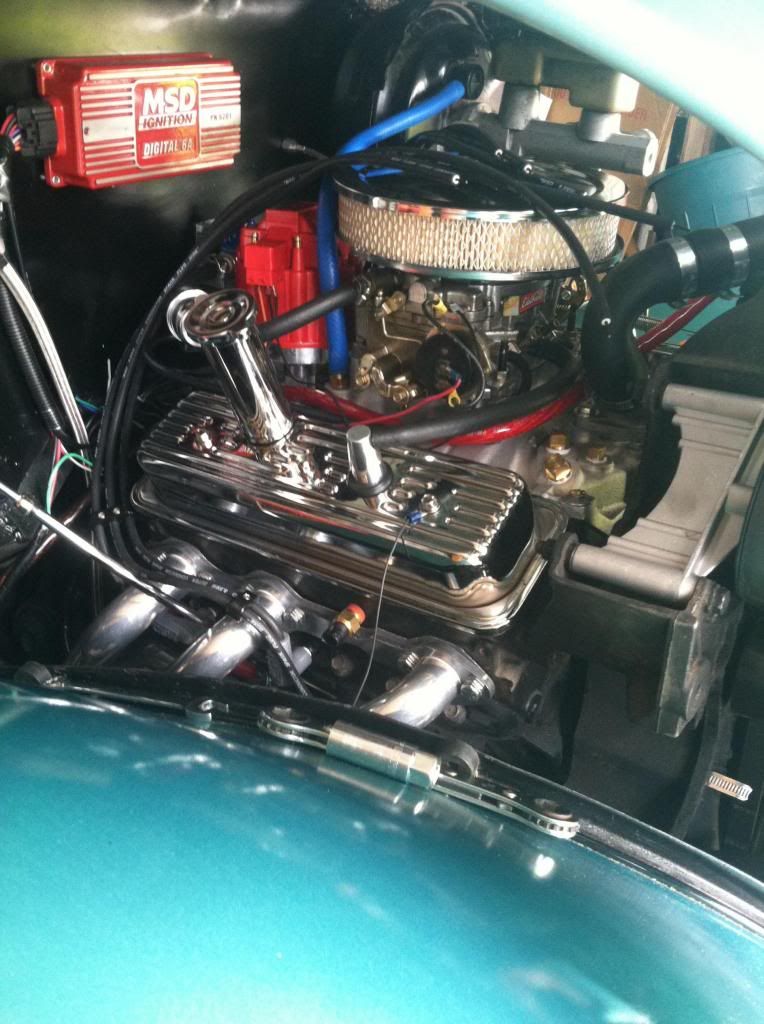
Have to modify the dipstick tube because its slightly larger in diameter than the stock one. Got my Heddman longtube headers today, will send them to get ceramic coated soon as possible. Exhaust will be duals with h crosspipe and exit before the rear wheels. Still not completely certain about the exit location though.
 
  #38  
Old 10-24-2013, 01:32 PM
91blaze's Avatar
91blaze
91blaze is offline
Freshman User
Thread Starter
Join Date: Dec 2012
Posts: 44
Likes: 0
Received 0 Likes on 0 Posts
Not alot to update yet. Got my headers coated and installed. Unfortunately I need to get a set of taps because one of the manifold bolts wont go all the way. Im guessing just some gunked up threads. Also made new plug wires so they are a little nicer looking and clear the headers. Plans are to move the fuse box to a new location and install a bulkhead connector to clean things up a bit.
 
  #39  
Old 11-03-2013, 09:01 AM
Corn Fed's Avatar
Corn Fed
Corn Fed is offline
5th Wheeling
Join Date: Oct 2013
Location: Iowa
Posts: 41
Likes: 0
Received 0 Likes on 0 Posts
It's good to see you're making progress.
 
  #40  
Old 11-05-2013, 12:39 PM
Flathead Red's Avatar
Flathead Red
Flathead Red is offline
Senior User
Join Date: Jan 2010
Location: Emerald Coast of Florida
Posts: 216
Likes: 0
Received 0 Likes on 0 Posts
Let's see some more pics!

Red
 
  #41  
Old 11-05-2013, 01:10 PM
1958 Ford F250's Avatar
1958 Ford F250
1958 Ford F250 is offline
Senior User
Join Date: Sep 2013
Location: Florida
Posts: 477
Likes: 0
Received 0 Likes on 0 Posts
Smile 1937

Hi, Nice 37... Looks like you are making progress on your own I also am restoring my 58 on my own SLOWLY for a year now and you do learn allot, as far as the header paint it will last awhile because I painted mine on 58 Ford F250 292 Y Block about 9 months ago and it still looks great and it has not burned off, so you should be fine. Sorry to hear your Father Passed away mine did too approx 1 1/2 years now and surely missed. Keep up the good work it will turn out Great....
 
  #42  
Old 11-05-2013, 01:47 PM
91blaze's Avatar
91blaze
91blaze is offline
Freshman User
Thread Starter
Join Date: Dec 2012
Posts: 44
Likes: 0
Received 0 Likes on 0 Posts
Picture of the new headers installed:


Mockup of my homemade wood bed.


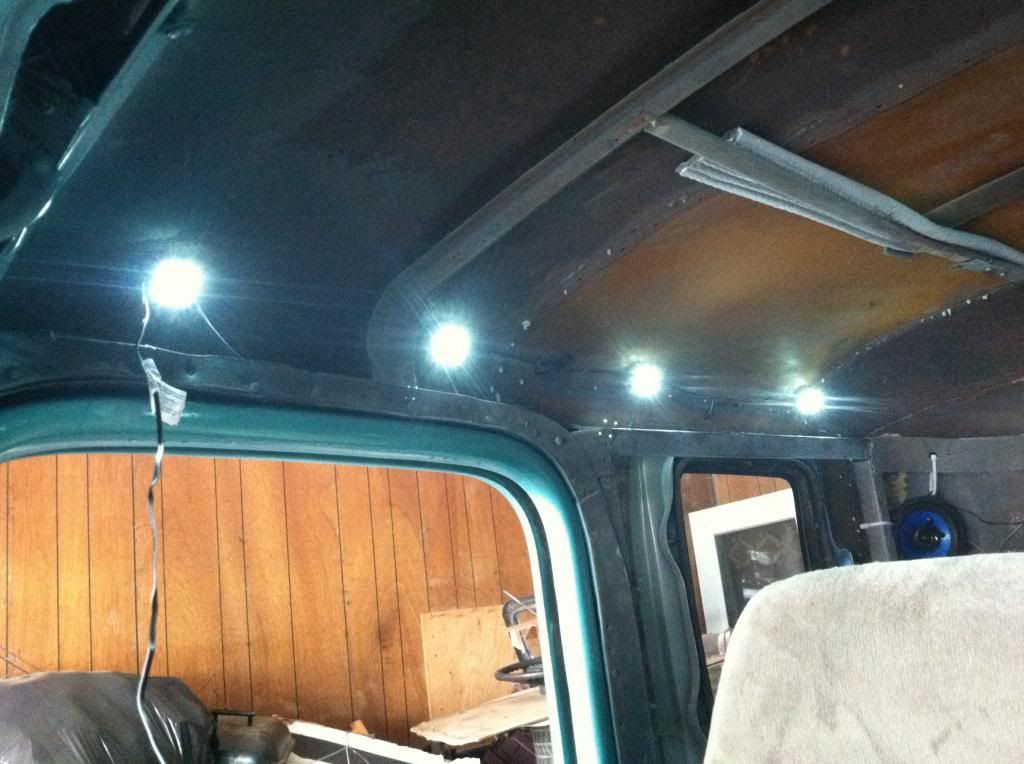
Interior LED lighting idea. Similar setup underhood as well.

 
  #43  
Old 11-05-2013, 02:31 PM
christurney77's Avatar
christurney77
christurney77 is offline
Elder User
Join Date: Oct 2011
Location: Neosho, MO
Posts: 777
Likes: 0
Received 0 Likes on 0 Posts
I like that wood bed!
 
  #44  
Old 11-05-2013, 02:44 PM
Flathead Red's Avatar
Flathead Red
Flathead Red is offline
Senior User
Join Date: Jan 2010
Location: Emerald Coast of Florida
Posts: 216
Likes: 0
Received 0 Likes on 0 Posts
Very Nice. I also like the wood bed.

Red
 
  #45  
Old 11-05-2013, 03:17 PM
91blaze's Avatar
91blaze
91blaze is offline
Freshman User
Thread Starter
Join Date: Dec 2012
Posts: 44
Likes: 0
Received 0 Likes on 0 Posts
Thanks guys. It's cherry wood and aluminum strips. Plan on welding a few braces under the bed and using carriage bolts through the aluminum. This is a show truck so it wont be hauling much more than a cooler. I also plan on making a hard bed cover so Im not too worried about damaging the bed.


Quick Reply: '37 Pickup project


All times are GMT -5. The time now is 06:01 AM.