
How To: tank and manual to electric tank switching valve
#1
 04-24-2013, 10:18 AM

How To: tank and manual to electric tank switching valve
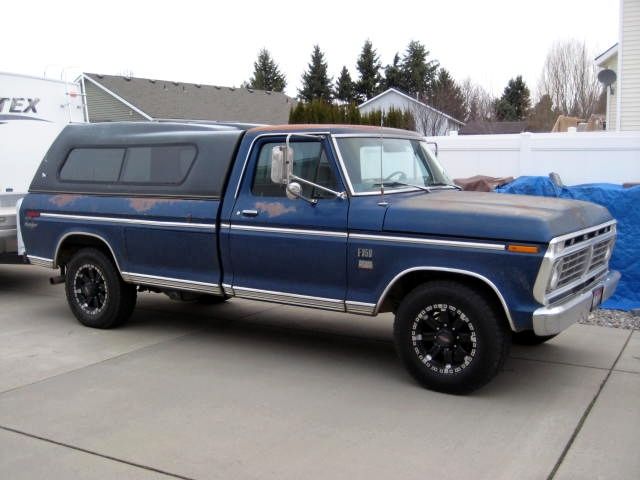
While cruising along in my beautiful 1973 Ford F350 with my wife in the truck I ran out of gas in the middle of no where when the tank wouldn't switch over, my wife well ...she told me I was a.... uhhh never mind that part but needless to say it was time to fix the gas tank problems. The manual switching valve was broke and the fuel gauge wasn't working, I also found out that on my year truck the factory switch on the dash only switched the sending units and not the tanks. I pulled the side tank and found the brass float was cracked open,the sending unit filter was deteriorated, sending unit pick up tube was corroded and the tank was rusted and filled with debris, I went online and ordered a new Polyethelyne gas tank from justgastanks.com for $159.00 which was the best price I could find, I then ordered two new sending units from LMC Truck along with a new filler and vent hose for the side tank as the old ones were rotting, I decided to change the manual valve to an electric valve with a new dash mounted switch. This is my story!
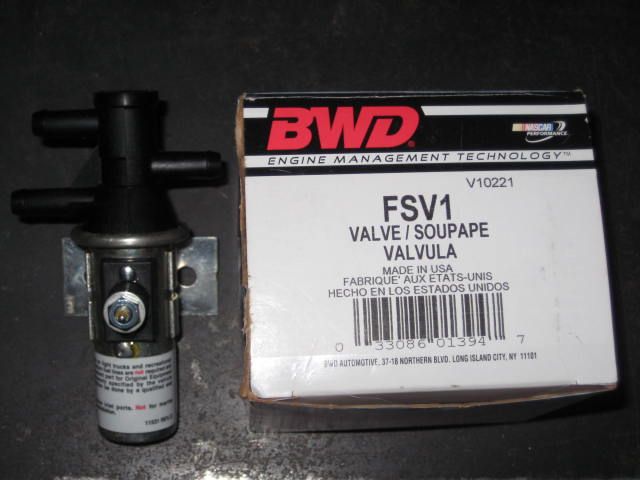
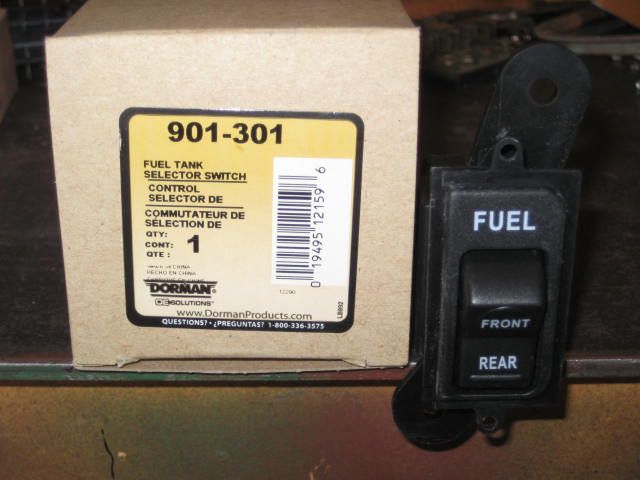
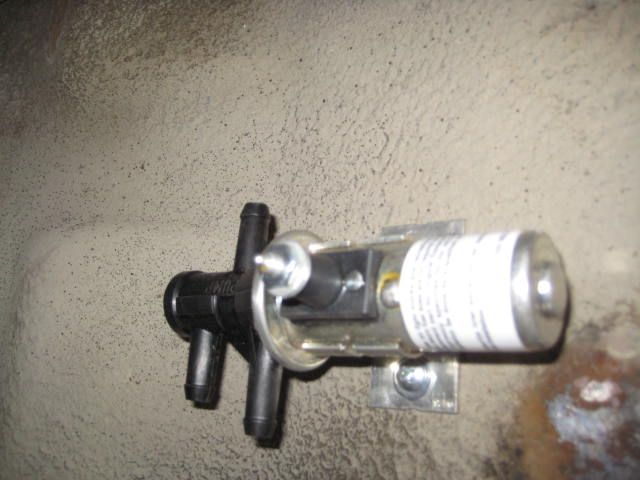
I ordered a new Borg Warner electric tank switching valve and a new Dorman tank switch from Oreillys auto parts, the switch is a factory replacement for a 1990s Ford truck, the part numbers are on the boxes in the photo below.
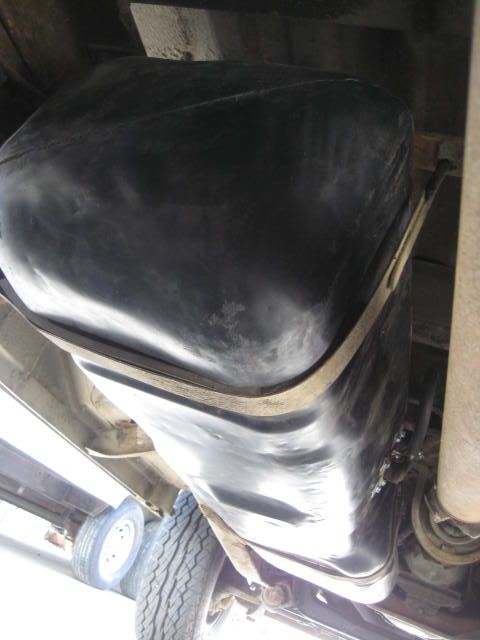
I installed the new side tank with a new sending unit and filler hose, I want to note that there is a 40 year old small rubber hose on the steel fuel line on the frame rail that is behind the gas tank and once the new tank is in, there is no way to get to it so now would be a good time to replace that hose, also the tank strap insulators were gone so I used thick rubber pieces cut into 2 inch strips between the tank and the straps. One of the things I like about the factory filler hose fron LMC Truck is the metal sleeve they put over the hose to keep it from rubbing on the frame.

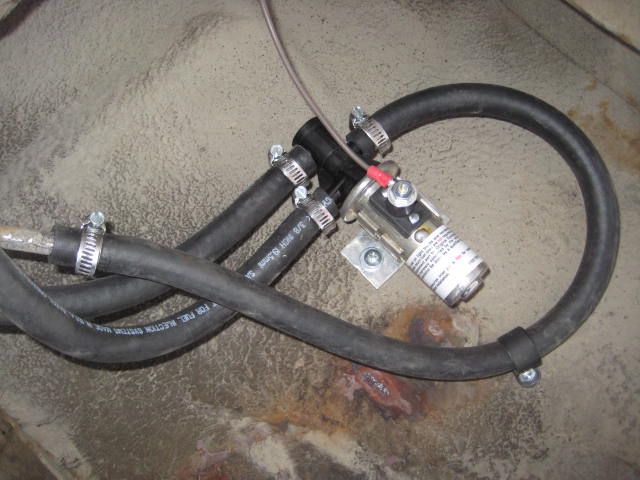
Once the tank was back in the truck I mounted the new switching valve underneath the truck where all the steel lines run together.
The connections were pretty simple, there are 3 outlets on the valve, one by it's self with two on the other side. The single one goes to the fuel pump and the two that are together go to the tanks, the short nipple to the front tank and the long nipple to the rear tank. I had to shorten one of the metal fuel lines for a clean looking install of the new 3/8th rubber fuel hoses. I then ran a single brown power wire up to the dash, (Brown is the factory color code). The valve gets it's ground from the mounting bracket so it's a one wire install.
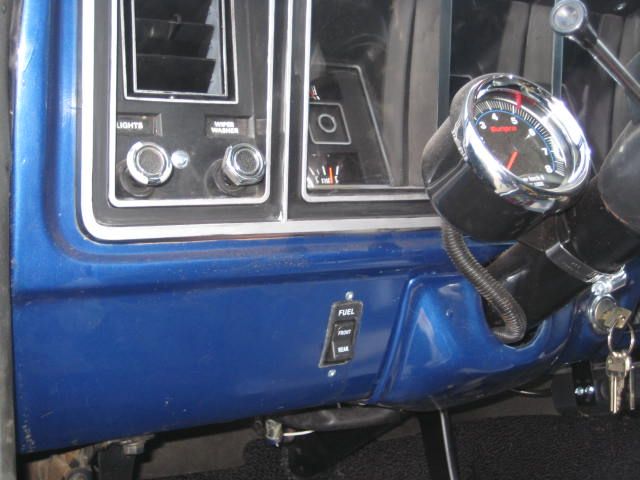
Up at the dash I made a template from thin cardboard of the switch and traced it onto the dash, the switch mounts from behind the dash so the hole had to be exact as there is no trim to cover any screw ups, this was the hardest part of the whole job as one side of the switch had squared corners and the other had rounded corners, I used a dremmel with thin cut off wheels and a round file to get an exact fit, take your time and go slow and it will turn out nice.

Mounting the switch was another issue, there are two small mounting tabs on the switch and you have to drill holes in the dash to match the tabs holes, I decided to use rivets instead of bolts as it was to hard to get to the back side of the switch, I found two things, I had to drill the tab holes one size larger and I needed to use small rivet washers as the tabs wanted to crack open from the pressure of the rivet install. I would highly recommend using the washers! also there are two plastic pieces on the switch behind the small mounting tabs and I had to cut them off to get the rivet washers on the rivets. Not a big deal really and I could of used a regular toggle switch but I wanted it to look like a factory install plus the switch is already marked front and rear on the rocker part of the switch which is what I wanted.
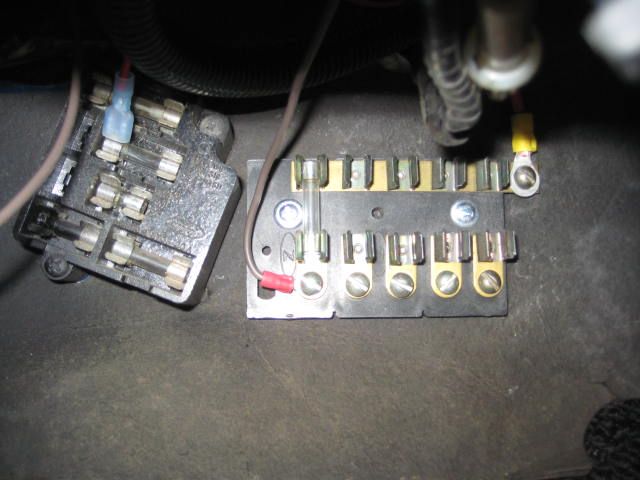
I found the factory fuse box had no extra spades so I installed another auxillery fuse panel next to the factory one and ran a single 10 gauge red wire directly to the battery, I decided to stay with old style glass fuses as thats what is original to the truck, I also installed an inline fuse holder with a 20 amp fuse on the main power wire for added protection as I will be running other accessories off the new fuse panel. I would also like to note that the new tank switching valve use's a 1 amp fuse and does not come with one!.
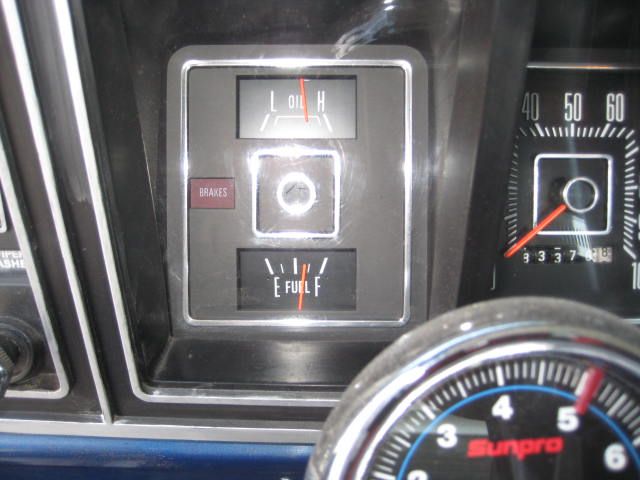
After everything was installed I filled the new tank with roughly 13 to 14 gallons of gas and started the truck, I switched the switch to the new front tank and the fuel gauge read 3/4 tank and the I let the truck run for 15 minutes to make sure the valve has switched over, it's nice to have a working fuel gauge again and my wife will be a lot happier. The rear tank is already a polyethylene tank so now I just need to replace the sender in it. Ps: The miles on the speedo are original and look at that Oil Pressure
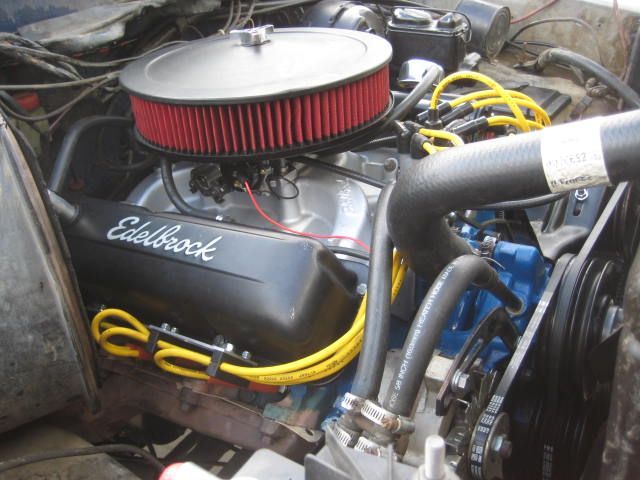
Been doing a little motor work too!

I ordered a new Borg Warner electric tank switching valve and a new Dorman tank switch from Oreillys auto parts, the switch is a factory replacement for a 1990s Ford truck, the part numbers are on the boxes in the photo below.


I installed the new side tank with a new sending unit and filler hose, I want to note that there is a 40 year old small rubber hose on the steel fuel line on the frame rail that is behind the gas tank and once the new tank is in, there is no way to get to it so now would be a good time to replace that hose, also the tank strap insulators were gone so I used thick rubber pieces cut into 2 inch strips between the tank and the straps. One of the things I like about the factory filler hose fron LMC Truck is the metal sleeve they put over the hose to keep it from rubbing on the frame.


Once the tank was back in the truck I mounted the new switching valve underneath the truck where all the steel lines run together.

The connections were pretty simple, there are 3 outlets on the valve, one by it's self with two on the other side. The single one goes to the fuel pump and the two that are together go to the tanks, the short nipple to the front tank and the long nipple to the rear tank. I had to shorten one of the metal fuel lines for a clean looking install of the new 3/8th rubber fuel hoses. I then ran a single brown power wire up to the dash, (Brown is the factory color code). The valve gets it's ground from the mounting bracket so it's a one wire install.

Up at the dash I made a template from thin cardboard of the switch and traced it onto the dash, the switch mounts from behind the dash so the hole had to be exact as there is no trim to cover any screw ups, this was the hardest part of the whole job as one side of the switch had squared corners and the other had rounded corners, I used a dremmel with thin cut off wheels and a round file to get an exact fit, take your time and go slow and it will turn out nice.

Mounting the switch was another issue, there are two small mounting tabs on the switch and you have to drill holes in the dash to match the tabs holes, I decided to use rivets instead of bolts as it was to hard to get to the back side of the switch, I found two things, I had to drill the tab holes one size larger and I needed to use small rivet washers as the tabs wanted to crack open from the pressure of the rivet install. I would highly recommend using the washers! also there are two plastic pieces on the switch behind the small mounting tabs and I had to cut them off to get the rivet washers on the rivets. Not a big deal really and I could of used a regular toggle switch but I wanted it to look like a factory install plus the switch is already marked front and rear on the rocker part of the switch which is what I wanted.

I found the factory fuse box had no extra spades so I installed another auxillery fuse panel next to the factory one and ran a single 10 gauge red wire directly to the battery, I decided to stay with old style glass fuses as thats what is original to the truck, I also installed an inline fuse holder with a 20 amp fuse on the main power wire for added protection as I will be running other accessories off the new fuse panel. I would also like to note that the new tank switching valve use's a 1 amp fuse and does not come with one!.

After everything was installed I filled the new tank with roughly 13 to 14 gallons of gas and started the truck, I switched the switch to the new front tank and the fuel gauge read 3/4 tank and the I let the truck run for 15 minutes to make sure the valve has switched over, it's nice to have a working fuel gauge again and my wife will be a lot happier. The rear tank is already a polyethylene tank so now I just need to replace the sender in it. Ps: The miles on the speedo are original and look at that Oil Pressure

Been doing a little motor work too!

#2
04-24-2013, 10:54 AM


#3
04-24-2013, 11:26 AM
I ran a new single brown wire from the switch to the solenoid, I used a meter to find the correct terminals on the switch although the instructions has a diagram that is straight forward and easy to follow that shows the correct wire connections. My dash switch only switches the sending units but if you wanted to spend the extra time you could route the wires to the new switch and it would do it all, I need to note that the Ford factory after 1973 or 1974 made the tanks and sending units all work off the original dash switch, so my application is just for the 1973 or 74 truck or if you are adding an additional gas tank to your truck. The Dorman switch has 6 spade terminals for both tank switching and sending unit switching so it will do it all off one switch if needed. Hope this helps!
#4
04-24-2013, 11:37 AM

#5
06-14-2013, 10:27 PM


Thread
Thread Starter
Forum
Replies
Last Post
mountainrev
1967 - 1972 F-100 & Larger F-Series Trucks
7
11-14-2017 07:25 PM
Neptunestriton
1973 - 1979 F-100 & Larger F-Series Trucks
2
03-14-2010 09:57 PM
Scrapiron66
1973 - 1979 F-100 & Larger F-Series Trucks
2
10-05-2005 02:38 AM