
This is NOT your typical overhead console thread...
#1
 04-18-2013, 10:05 PM

Join Date: Jun 2003
Location: Ohio
Posts: 929
Likes: 0
Received 0 Likes
on
0 Posts
This is NOT your typical overhead console thread...
Hey guys! Let me clarify that I have no intentions of asking how to retrofit an OEM overhead console and computer into my truck. We already have enough threads on that subject.
The factory one wouldn't have what I want anyway.
Instead this is a build thread for my custom overhead console. I have been working on this since I finished that sub box for my Supercab. if you missed that - YES, it's possible!!
Sub box behind rear seat of 2002 Supercab
I had full intentions of completing this build before posting b/c I feel too much pressure to make progress if I post before I am complete. But I am looking for some help on this one which is why I am posting it up now!
The purpose for this console is that my kids bought me a CB for Father's Day last year. While I don't chat on one often, it is an invaluable tool for traveling - better than any GPS b/c of the "live" feedback. I have thrown this on the front seat for our trips last summer but that's not very practical.
I also have some electrical accessories I want to add to the truck and wanted a place to mount the switches. This console has been back-burnered for a few years - I wanted to build one long before I even received the CB.
But enough of the boring stuff, let me get into the build, shall we??!!
#2
04-18-2013, 10:45 PM
Join Date: Jun 2003
Location: Ohio
Posts: 929
Likes: 0
Received 0 Likes
on
0 Posts
I "loosely" laid out this console in Unigraphics NX but because of the ceiling contour it made a 100% accurate model out of the question but it was enough to get me rolling.

I plotted out the pofile and traced that onto a template. This is the general profile of the sides. I took it and tested-fitted and then adjusted as necessary for a better fit.

I plotted out the pofile and traced that onto a template. This is the general profile of the sides. I took it and tested-fitted and then adjusted as necessary for a better fit.
#3
04-18-2013, 10:50 PM
Join Date: Jun 2003
Location: Ohio
Posts: 929
Likes: 0
Received 0 Likes
on
0 Posts

#4
04-18-2013, 11:00 PM
Join Date: Jun 2003
Location: Ohio
Posts: 929
Likes: 0
Received 0 Likes
on
0 Posts
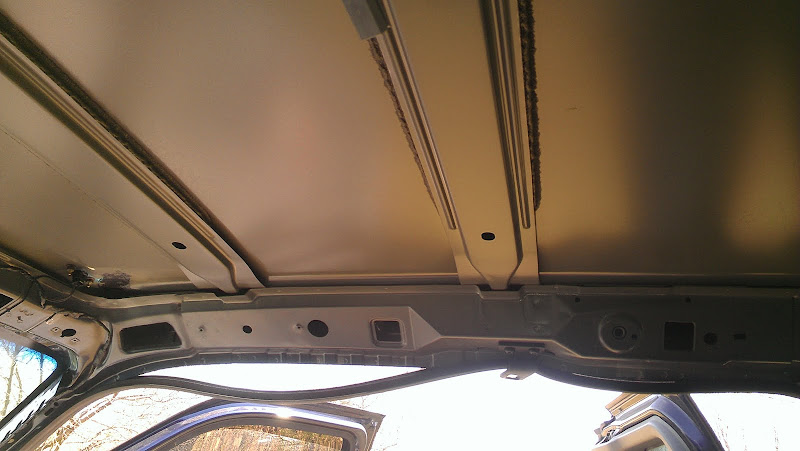
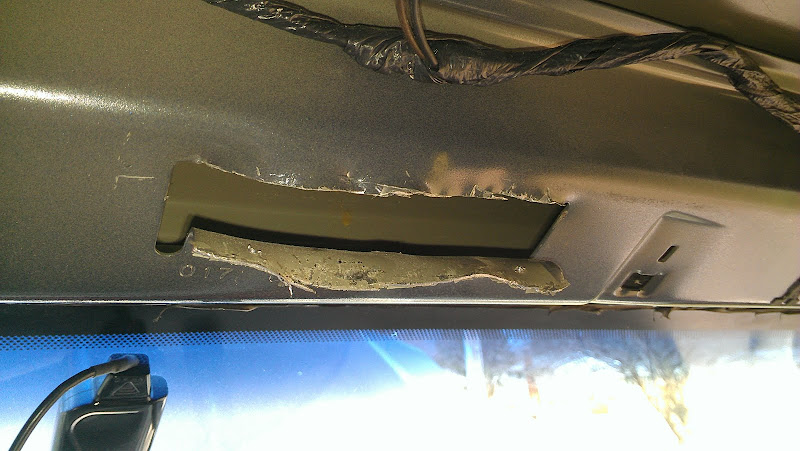
I needed a way to get the wiring for the CB and accessory switches up to the console. I chose to cut a slot in the front support bracket. They have holes stamped in other places so I don't feel this compromises the structural integrity. I could have used a die grinder but really didn't want all the slag ending up all over the truck! I actually used tin-snips to cut this and then pried it back into the slot.
I wanted to put the headliner back in but didn't want to have to remove it again everytime I wanted to add wires to the console!!
Anyone who has ever installed a Home Theater has heard of "smurf tube". I had some left over and thought it might work for this task! while it isn't very flexible, I was able to feed it across the support and down each A-pillar!!

A hole exists on the bottom of the driver's side but I had to drill one for the passenger side. I will feed a wire through the tube. At that point I can feed wires up to the console by simply removing the A-pillar!!
Passenger side:

I wanted to put the headliner back in but didn't want to have to remove it again everytime I wanted to add wires to the console!!
Anyone who has ever installed a Home Theater has heard of "smurf tube". I had some left over and thought it might work for this task! while it isn't very flexible, I was able to feed it across the support and down each A-pillar!!
A hole exists on the bottom of the driver's side but I had to drill one for the passenger side. I will feed a wire through the tube. At that point I can feed wires up to the console by simply removing the A-pillar!!
Passenger side:
#5
04-18-2013, 11:07 PM
Join Date: Jun 2003
Location: Ohio
Posts: 929
Likes: 0
Received 0 Likes
on
0 Posts
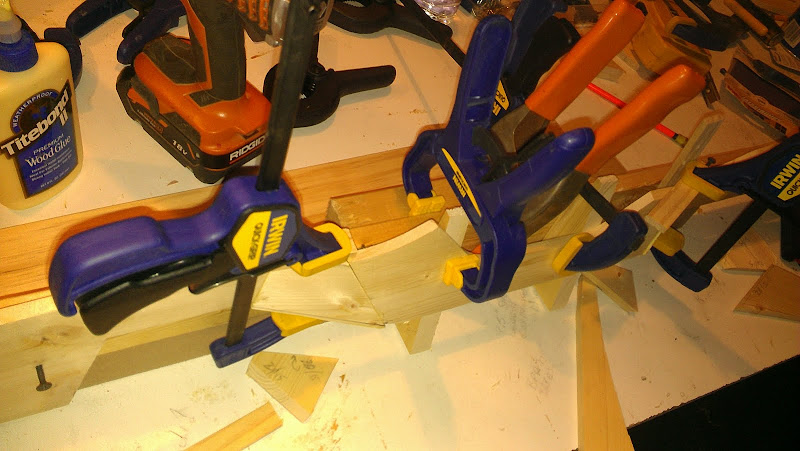
Sometimes I just can't take the easy route!! I could have left those sides as-is but wanted to make the console look a little better.
So, instead of flat, profiled sides, there is a "pinched-in" area in the center. That's not all; the center tilts at 15-degrees. PLUS, the section at the end is 1/2" narrower than the front end where the CB mounts!!
So, I had to make some fixtures and use a LOT of clamps to make this work!!

This shot shows the center section a little more clearly. I didn't do myself any favors making it this complex but I think the result is WAY worth it!!

The other side:
So, instead of flat, profiled sides, there is a "pinched-in" area in the center. That's not all; the center tilts at 15-degrees. PLUS, the section at the end is 1/2" narrower than the front end where the CB mounts!!
So, I had to make some fixtures and use a LOT of clamps to make this work!!
This shot shows the center section a little more clearly. I didn't do myself any favors making it this complex but I think the result is WAY worth it!!
The other side:


#7
04-18-2013, 11:36 PM
Junior User
Join Date: Aug 2010
Location: Seattle area
Posts: 91
Likes: 0
Received 0 Likes
on
0 Posts
Trending Topics
#8
04-19-2013, 07:07 AM
Postmaster
Join Date: Nov 2006
Location: The Woodlands, TX
Posts: 2,807
Likes: 0
Received 0 Likes
on
0 Posts
#9
04-19-2013, 08:24 AM
Join Date: Jun 2003
Location: Ohio
Posts: 929
Likes: 0
Received 0 Likes
on
0 Posts
Making sure the two sides are aligned. The sides here were 3/4" pine but I planed them down to 3/8" to be less bulky.
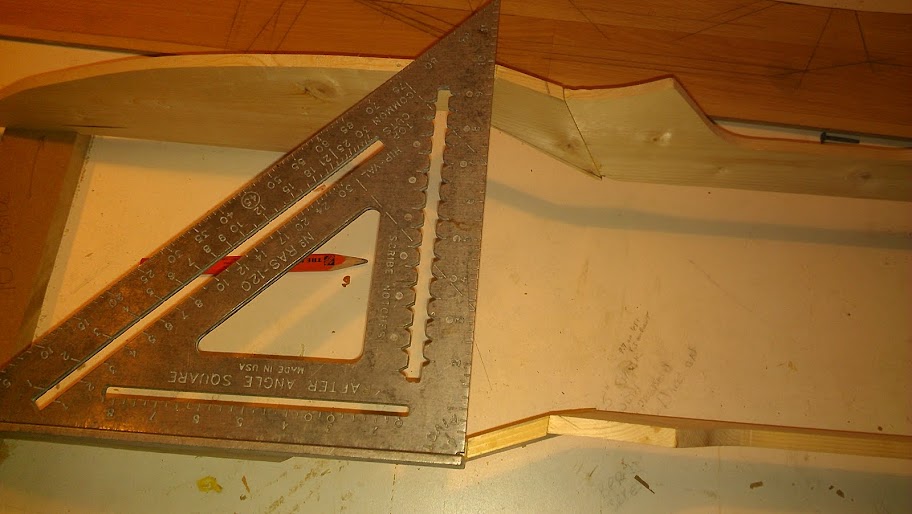
I have held this thing up in place a dozen times since I started this. Now that the structure is about finished I asked my son to hold it in place so I could check final fit. When I cut out the center section, I placed the template next to all the parts when I clamped it to the fixture so while I am confident it is "close" I doubt it fits as well as the template did.
Here, you can see the gap gets larger towards the rear.

In this shot you can see my new trace line where I will sand away material on the belt sander. Once this is removed, it should fit up nice and tight following the form of the roof!!

I have held this thing up in place a dozen times since I started this. Now that the structure is about finished I asked my son to hold it in place so I could check final fit. When I cut out the center section, I placed the template next to all the parts when I clamped it to the fixture so while I am confident it is "close" I doubt it fits as well as the template did.
Here, you can see the gap gets larger towards the rear.
In this shot you can see my new trace line where I will sand away material on the belt sander. Once this is removed, it should fit up nice and tight following the form of the roof!!
#10
04-19-2013, 11:18 AM
Join Date: Jun 2003
Location: Ohio
Posts: 929
Likes: 0
Received 0 Likes
on
0 Posts
So this is where the "help" comes in. I want to cover this with material - something I have never done. I have watched several videos showing guys covering sub boxes. They spray glue, put down piece, cut with SHARP blade, etc, etc.
If this were a box I would be able to follow that. However, with the angles and curves this console has, I don't see it being that straightforward.
I see issues wrapping the material around the gussets left by the sides along the edges. I don't know if the glue will stand up. I don't know if I will have to make relief cuts on exterior curves (radius) which will leave gaps in the material. Relief cuts on inner curves (fillets) should be able to be trimmed away to completely cover.
I really don't want to spay or use line-x or whatever. I want this to look factory. I also despise the stained wood like you would find in an RV - it looks CHEAP!! Not to mention, there are some imperfections here that I allowed since I was planning to cover them.
I have some material here that is really thick so I will use that for my sub box. Can you guys recommend any material (gray or dark gray, btw) for me? Something thin and easy to work with yet durable?
I will be ordering my Contura V switches this weekend. Anyone can recommend a good source? I would love to see all the possible texts and symbols available for those V-series switches. I was thinking of putting a piece of stainless steel where the switches go and for the face where the CB projects from. Any thoughts on that?
It will take a while for those switches to arrive. In the meantime I may take the plunge and start cutting holes in the headliner - GASP - for mounting this to the roof. Cutting the headliner is my biggest fear on this project. Once done, there is no going back!!!
#12
04-19-2013, 12:49 PM
Join Date: Jun 2003
Location: Ohio
Posts: 929
Likes: 0
Received 0 Likes
on
0 Posts
I could. But that puts holes in the headliner anyway. In addition, I need to be able to get the wires to the switches and the CB and the antenna, of course.
I am not going crazy, I am looking to cut a rectangle in the front a little larger than the area shown previously where the smurf tubes collect.
I don't need to cut it where the dome light is, either b/c there is already a hole there... I may need to extend the dome-light wire, though.
I am not going crazy, I am looking to cut a rectangle in the front a little larger than the area shown previously where the smurf tubes collect.
I don't need to cut it where the dome light is, either b/c there is already a hole there... I may need to extend the dome-light wire, though.
#13
04-19-2013, 02:29 PM
Cargo Master
I could. But that puts holes in the headliner anyway. In addition, I need to be able to get the wires to the switches and the CB and the antenna, of course.
I am not going crazy, I am looking to cut a rectangle in the front a little larger than the area shown previously where the smurf tubes collect.
I don't need to cut it where the dome light is, either b/c there is already a hole there... I may need to extend the dome-light wire, though.
I am not going crazy, I am looking to cut a rectangle in the front a little larger than the area shown previously where the smurf tubes collect.
I don't need to cut it where the dome light is, either b/c there is already a hole there... I may need to extend the dome-light wire, though.

#14
04-19-2013, 08:07 PM
Join Date: Jun 2003
Location: Ohio
Posts: 929
Likes: 0
Received 0 Likes
on
0 Posts
ouch!!
Thanks for the heads-up on that one!!!
Thanks for the heads-up on that one!!!
I only say that because I installed a drop down DVD player in my brand new truck and when cutting the headliner { Keep in mind the headliner is thick } I slipped with the knife and cut a nice slit in the fabric about 3" long. So if I were you I would do as little cutting as possible..
#15
04-19-2013, 08:31 PM

