
Banks Torque Tube headers V-10 install w/pics
#1
 03-19-2013, 10:03 AM


Banks Torque Tube headers V-10 install w/pics
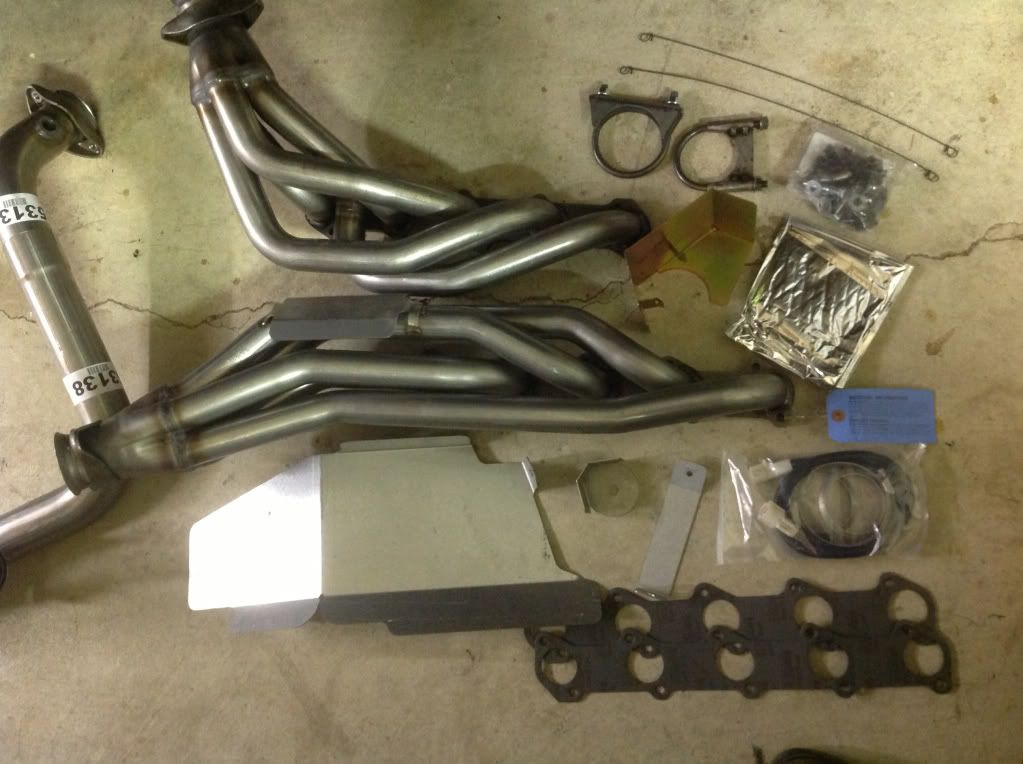
I just finished my installation of the Banks headers on my V-10, here's a walk through of the process.
What all comes in the kit. Sorry I somehow failed to get the Y pipe in the shot.
Included in the kit are some heat sheilds, this is the one for the right side swaybar link end.
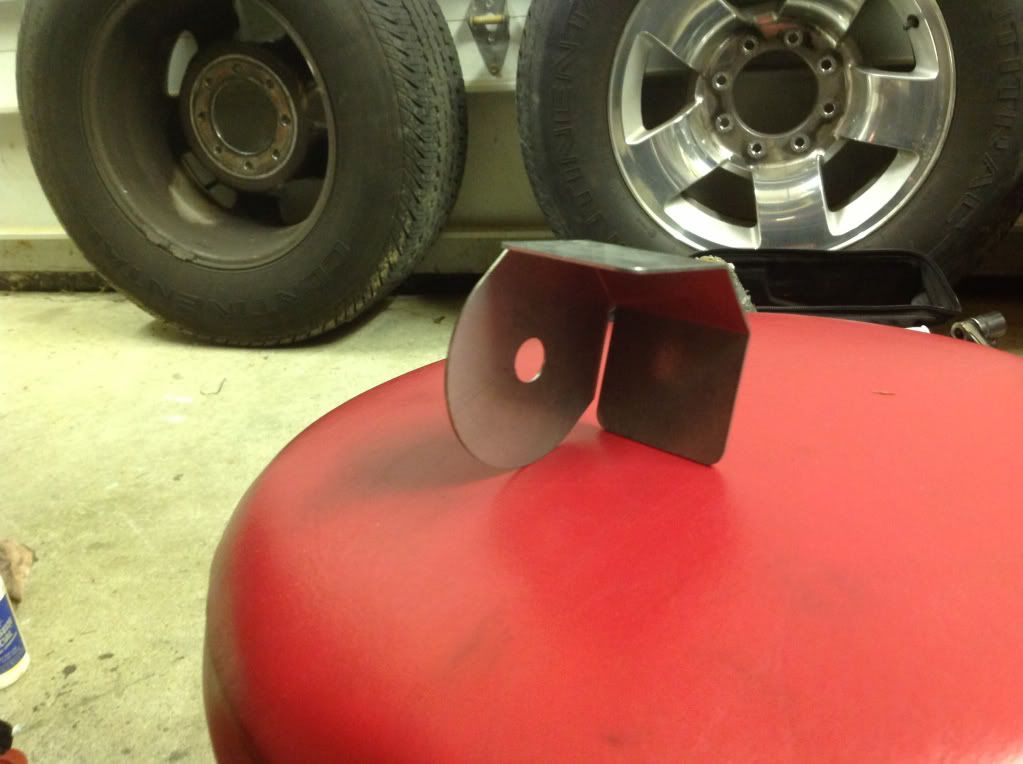
And it installed.
This large one sheilds the left end link as well as the fuel lines and some wiring.
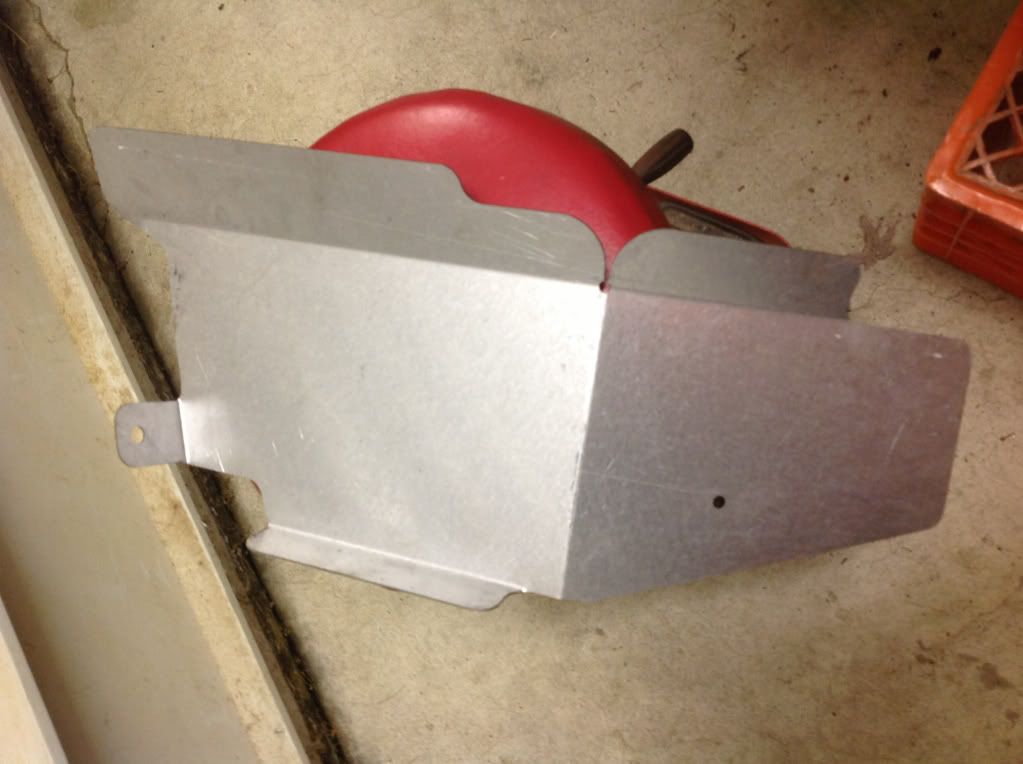
Here it is in place.
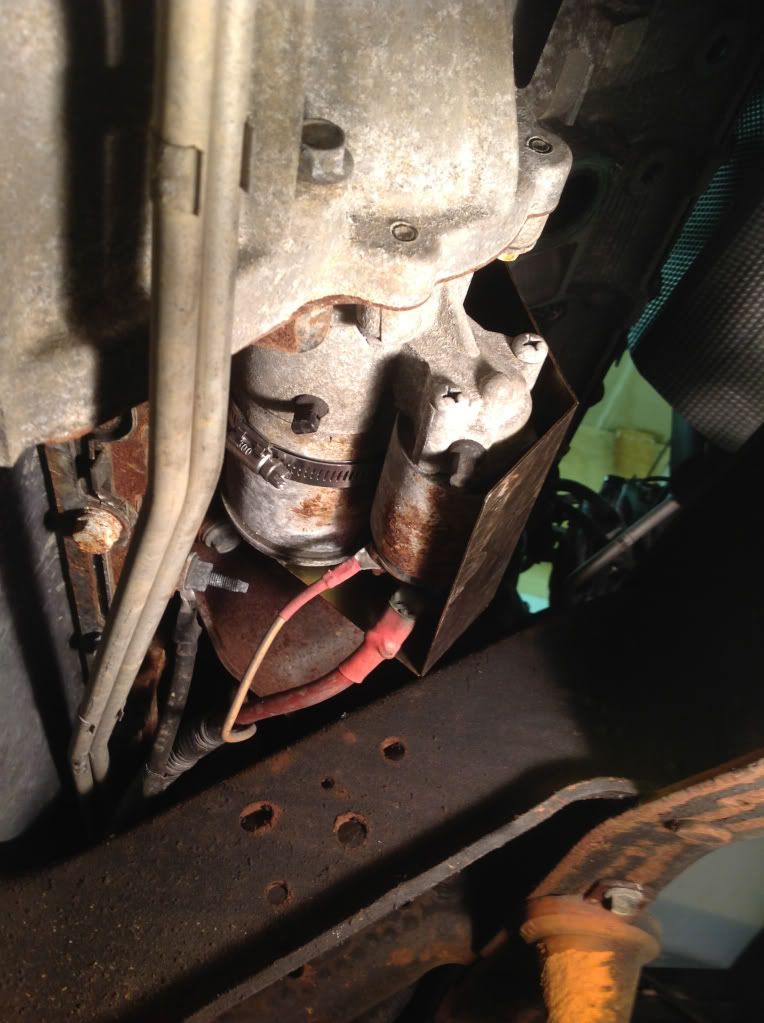
The starter sheild as seen from the top.

From the bottom you can see the hose clamp that secures it.
The included instructions are pretty good, they could use one or two more illustrated figures but overall the text explains the steps well. My kit had all the needed hardware plus a few extra nuts, bolts and washers. I substituted the supplied zinc plated bolts with stainless that I had on hand. I also used Never-Seize on every bolt handled.
I'll have more shortly, time to do some work stuff now.
What all comes in the kit. Sorry I somehow failed to get the Y pipe in the shot.
Included in the kit are some heat sheilds, this is the one for the right side swaybar link end.
And it installed.
This large one sheilds the left end link as well as the fuel lines and some wiring.
Here it is in place.
The starter sheild as seen from the top.
From the bottom you can see the hose clamp that secures it.
The included instructions are pretty good, they could use one or two more illustrated figures but overall the text explains the steps well. My kit had all the needed hardware plus a few extra nuts, bolts and washers. I substituted the supplied zinc plated bolts with stainless that I had on hand. I also used Never-Seize on every bolt handled.
I'll have more shortly, time to do some work stuff now.
The following users liked this post:
#3
03-19-2013, 01:51 PM
Out with the old........
OK, before the new stuff can go on the old stuff has to go away, so here we go!
The wheelwell liners fought me tooth and nail comming out, it was a little chilly in the garage and they didn't want to bend. I thought the sheetmetal was going to bend before the plastic. I found that preheating them over the electric space heater made a big difference when they went back on, maybe something to think about if you plan to pull them in colder weather.
Yay! The liners are finally out and my fender lip is still intact. But I still wanted a bit more room.
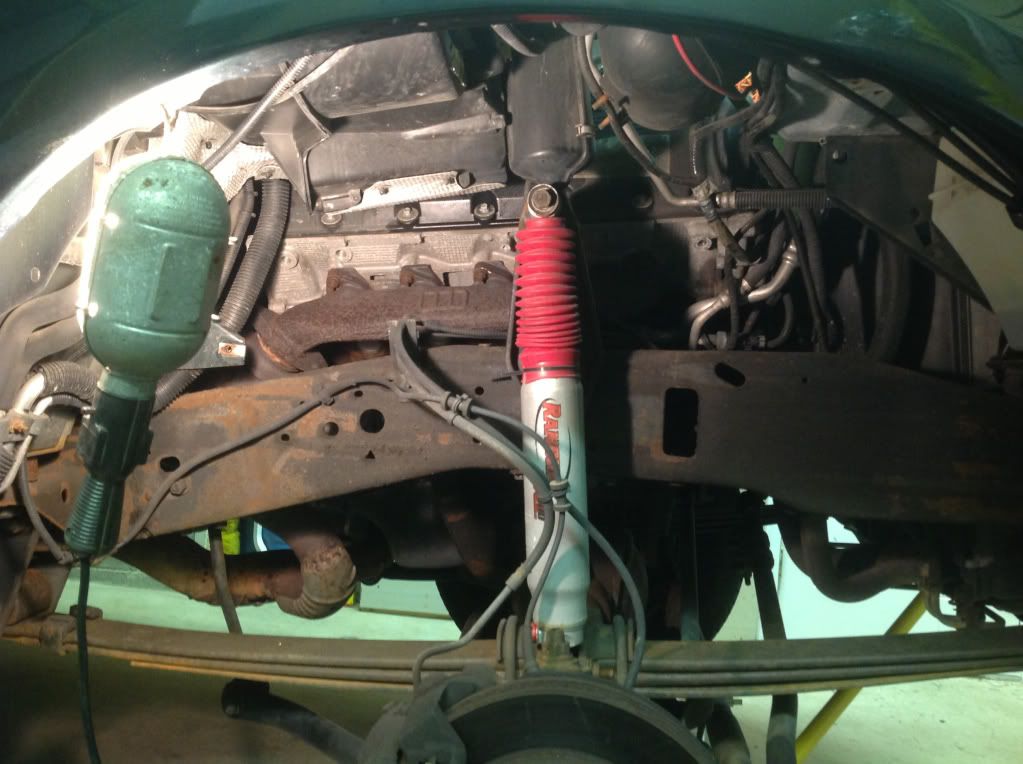
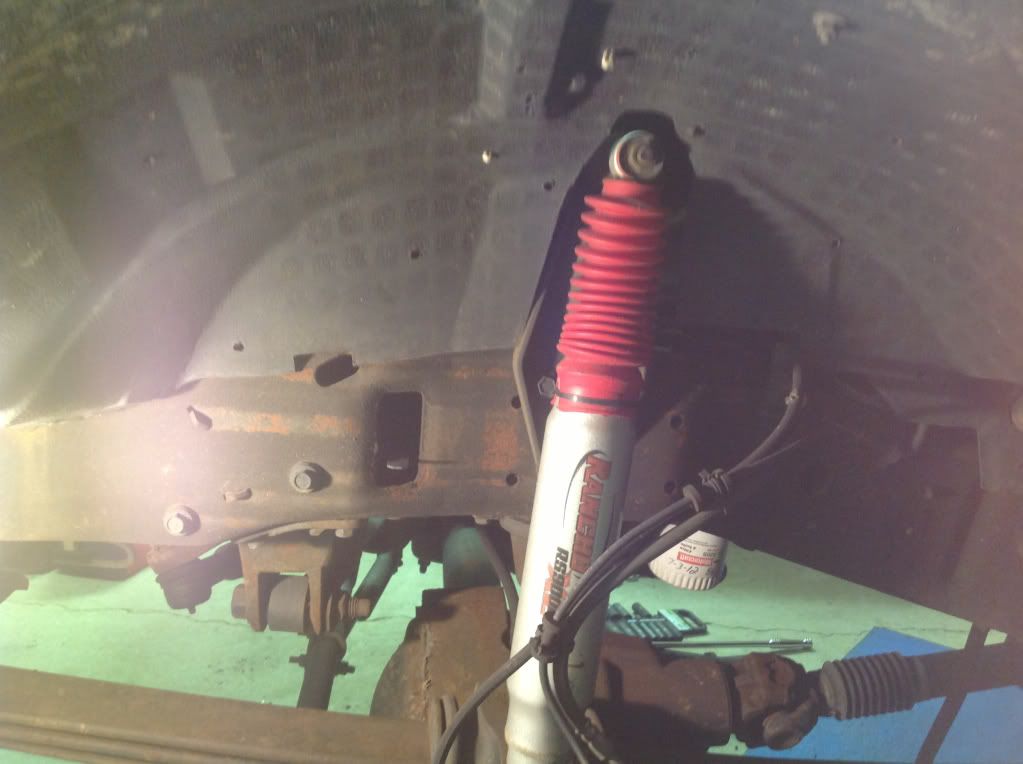
So I then pulled the shocks and upper mounts, the installation instructions don't include this step but it makes access much better.
Next up was to get the old restrictive "T" pipe out, a squirt or two of PB Blaster and both manifold joints and cat flange came apart without any drama. I was expecting to fight them but all nuts and studs spun out with just a ratchet.

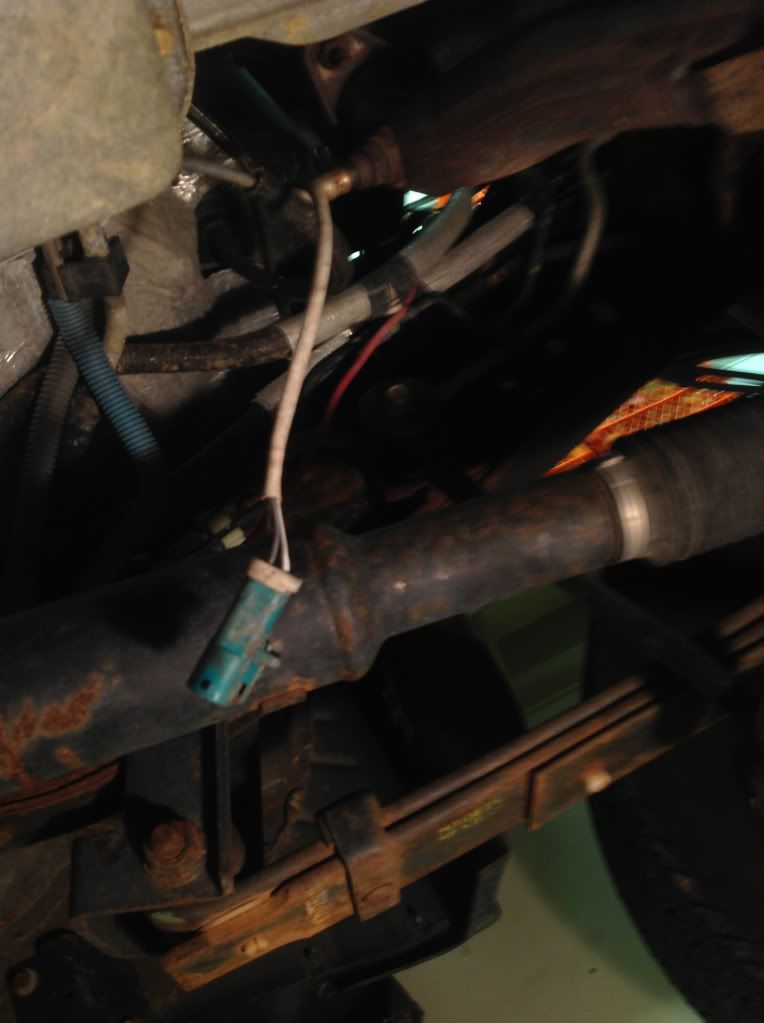
Before the "T" pipe section can come out both O2 sensors need to be unplugged from the truck's harness, right side was a tight squeeze for my fat hand, but I won!
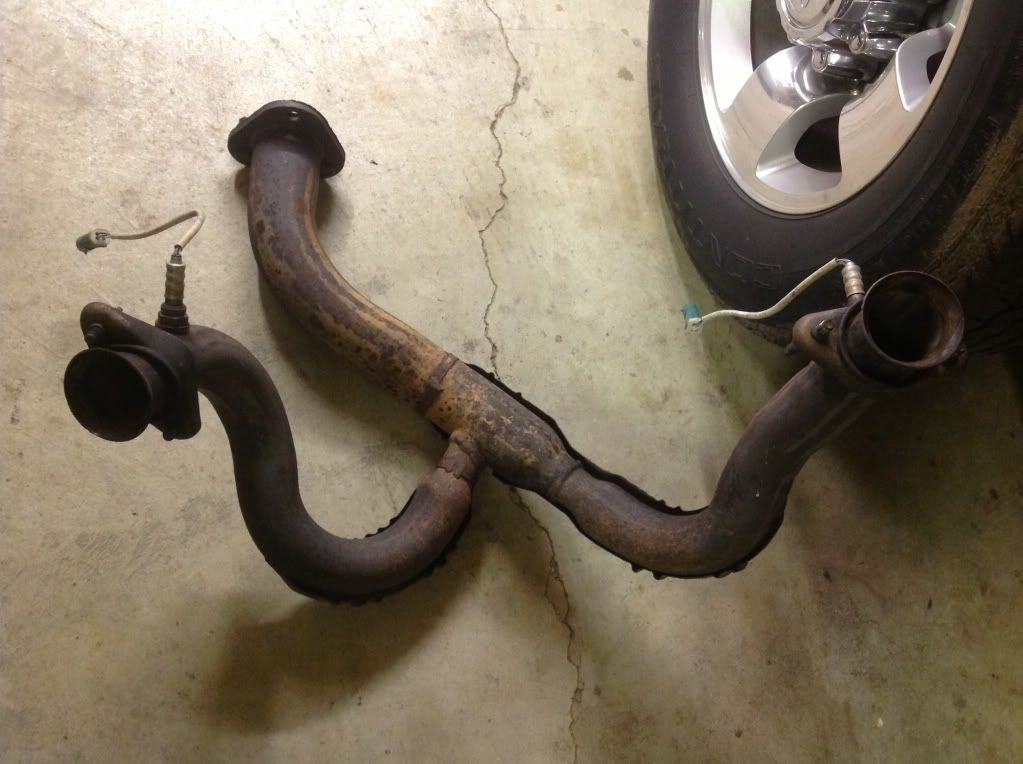
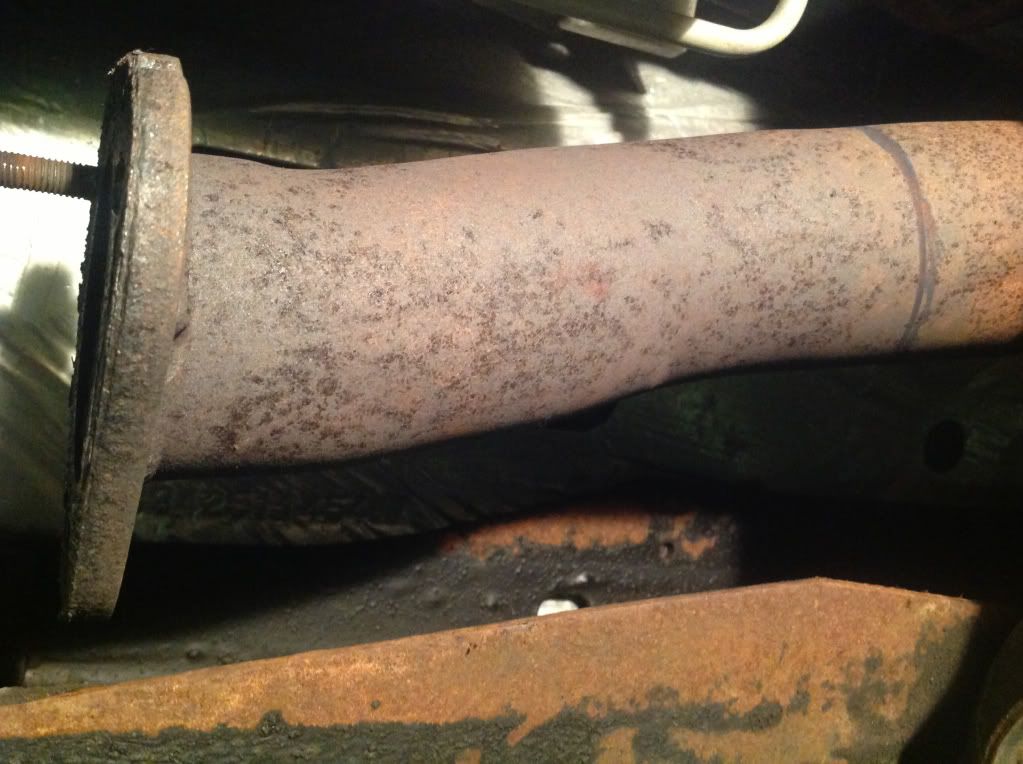
We won't be needing this anymore.......
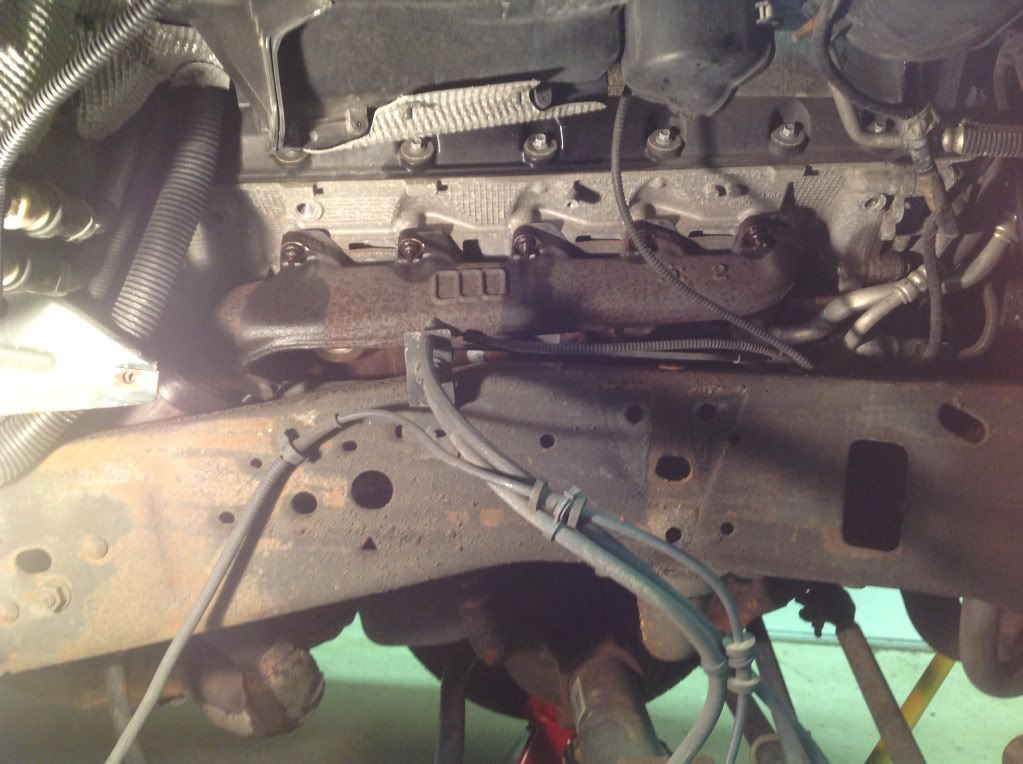
Now it was time to pull the factory logs. Again I expected drama but surprised to have all 18 surviving studs/nuts spin out easily!

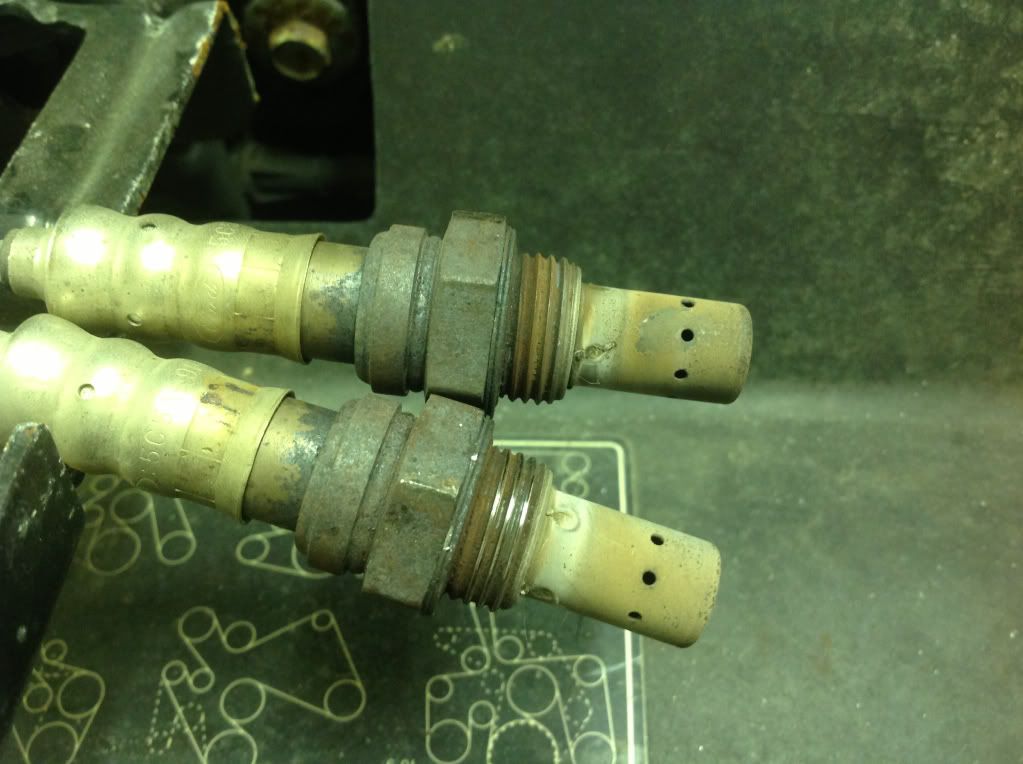
I reused my O2 sensors, so be sure to mark their side and remove from the "T".
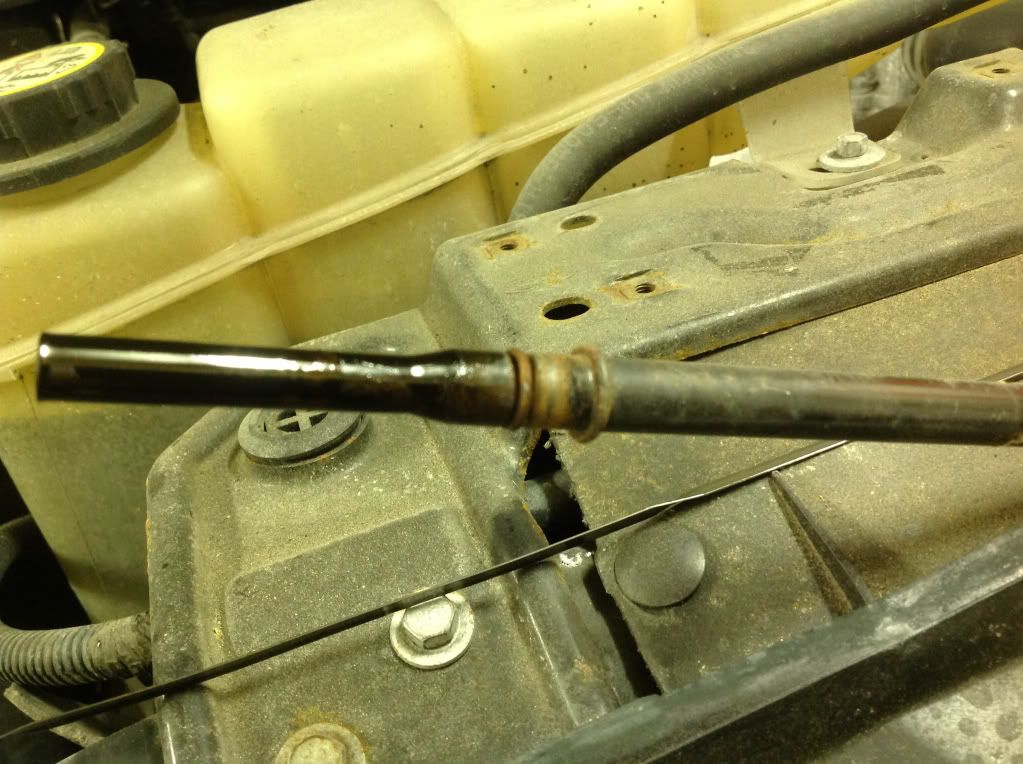
The dipstick and it's tube have to come out. That tube put up a good fight, my son moved the air inlet tube and worked on the dipstick tube from the top while I tapped at it from the bottom.
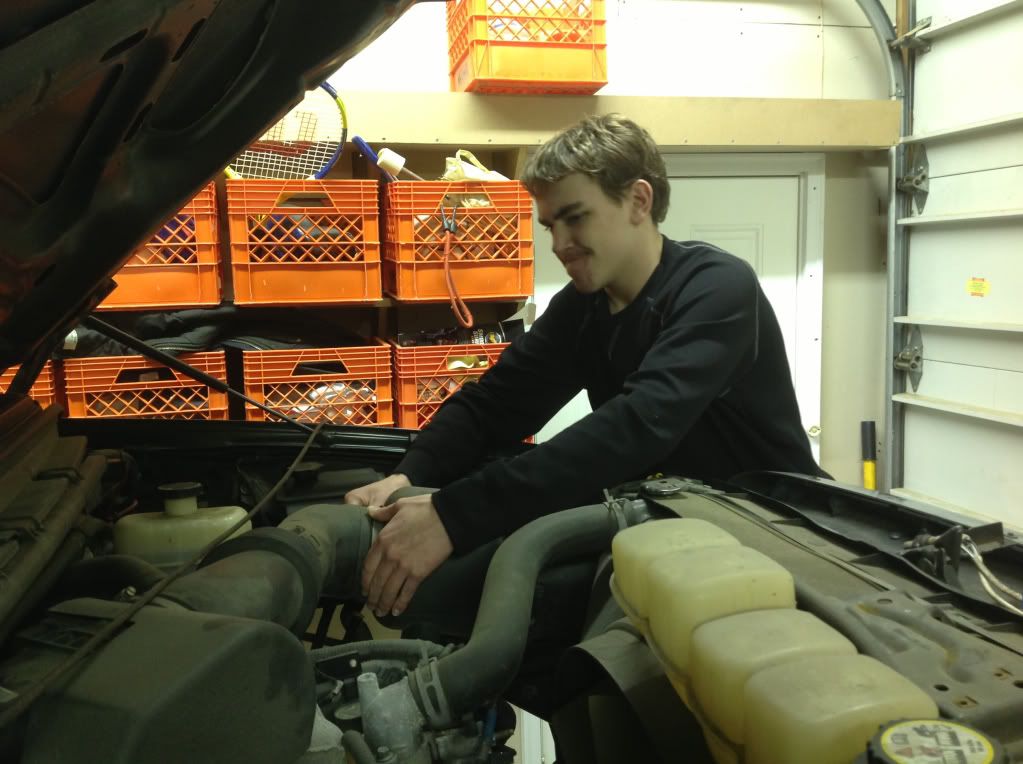
In the end the forces of good prevailed over the evil dipstick tube!
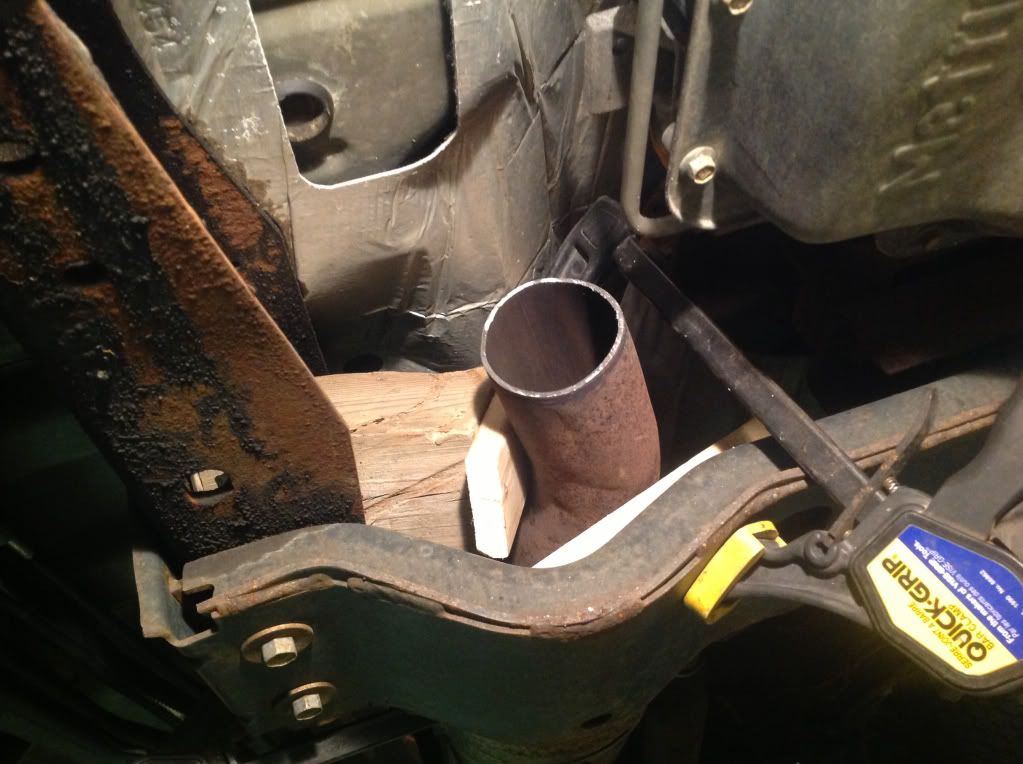
The instructions called for 8" to be removed from the cat inlet line, I cut 8" but 7" would have made for a better match on my EX, still had plenty of room in the slip joint for a good seal. I blocked the line and clamped it to prevent the sawsall from shaking the cat too bad.
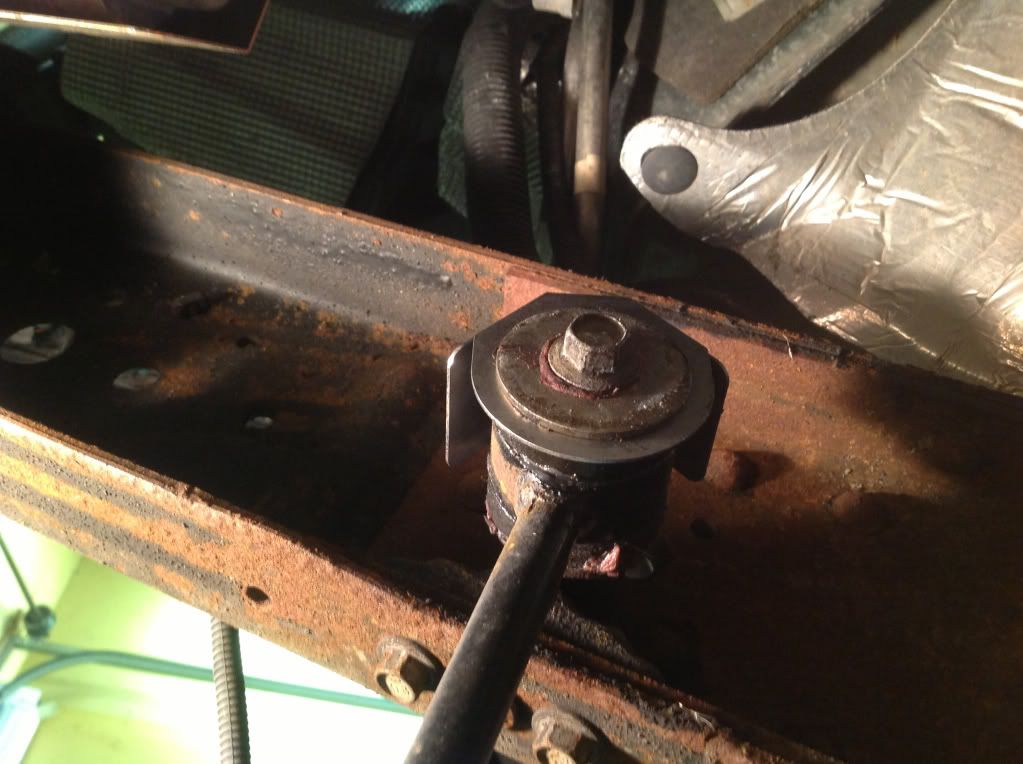
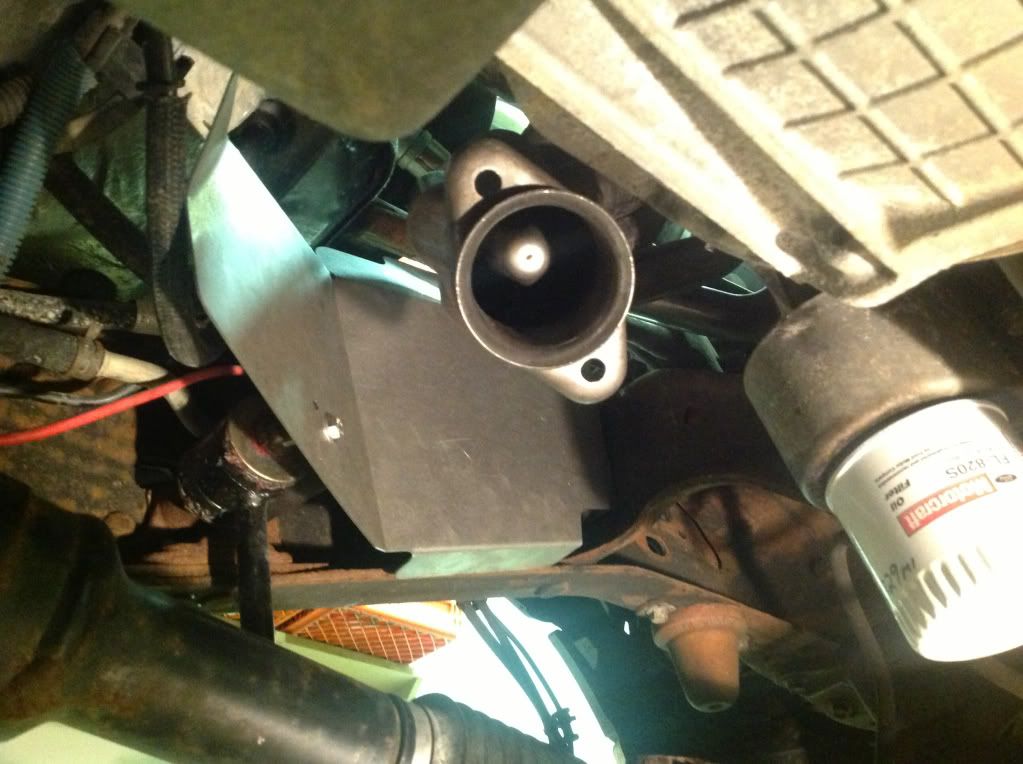
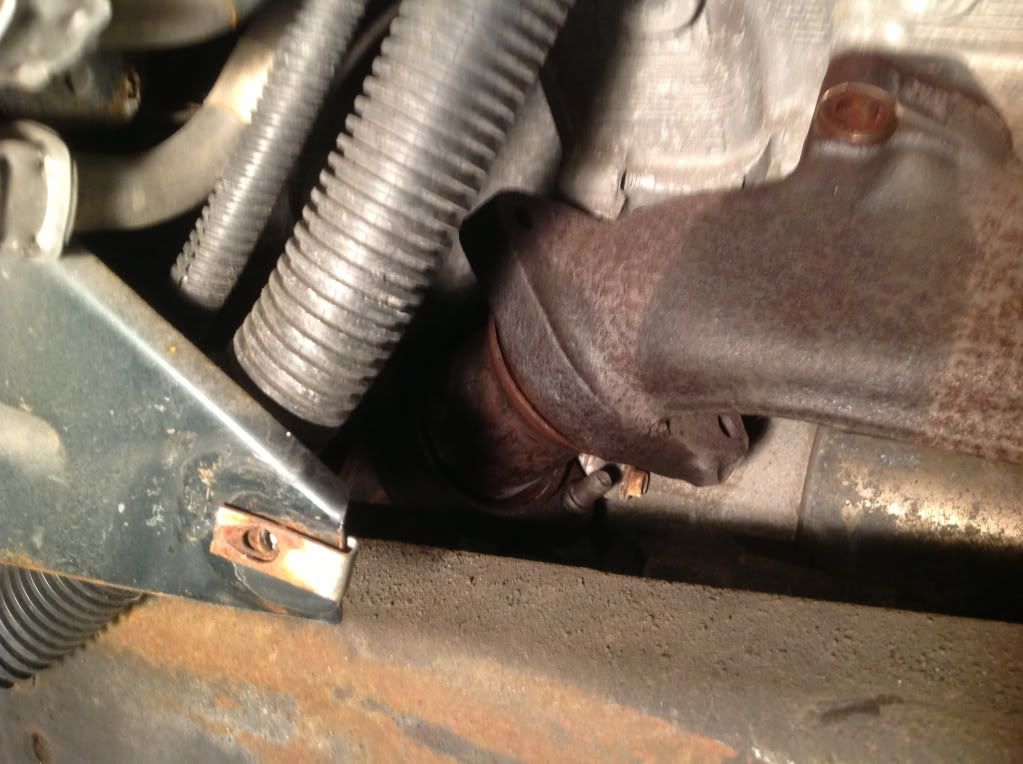
The last thing to remove is this rubber motor mount cover from the right side mount.
That's it for now, I have to look like I'm working for a little while. Next up will be my broken stud removal fun.
The wheelwell liners fought me tooth and nail comming out, it was a little chilly in the garage and they didn't want to bend. I thought the sheetmetal was going to bend before the plastic. I found that preheating them over the electric space heater made a big difference when they went back on, maybe something to think about if you plan to pull them in colder weather.
Yay! The liners are finally out and my fender lip is still intact. But I still wanted a bit more room.
So I then pulled the shocks and upper mounts, the installation instructions don't include this step but it makes access much better.
Next up was to get the old restrictive "T" pipe out, a squirt or two of PB Blaster and both manifold joints and cat flange came apart without any drama. I was expecting to fight them but all nuts and studs spun out with just a ratchet.
Before the "T" pipe section can come out both O2 sensors need to be unplugged from the truck's harness, right side was a tight squeeze for my fat hand, but I won!
We won't be needing this anymore.......
Now it was time to pull the factory logs. Again I expected drama but surprised to have all 18 surviving studs/nuts spin out easily!
I reused my O2 sensors, so be sure to mark their side and remove from the "T".
The dipstick and it's tube have to come out. That tube put up a good fight, my son moved the air inlet tube and worked on the dipstick tube from the top while I tapped at it from the bottom.
In the end the forces of good prevailed over the evil dipstick tube!
The instructions called for 8" to be removed from the cat inlet line, I cut 8" but 7" would have made for a better match on my EX, still had plenty of room in the slip joint for a good seal. I blocked the line and clamped it to prevent the sawsall from shaking the cat too bad.
The last thing to remove is this rubber motor mount cover from the right side mount.
That's it for now, I have to look like I'm working for a little while. Next up will be my broken stud removal fun.
#4
03-19-2013, 02:02 PM
#5
03-19-2013, 02:30 PM
#6
03-19-2013, 04:10 PM
A study in broken studs by a studly stud.
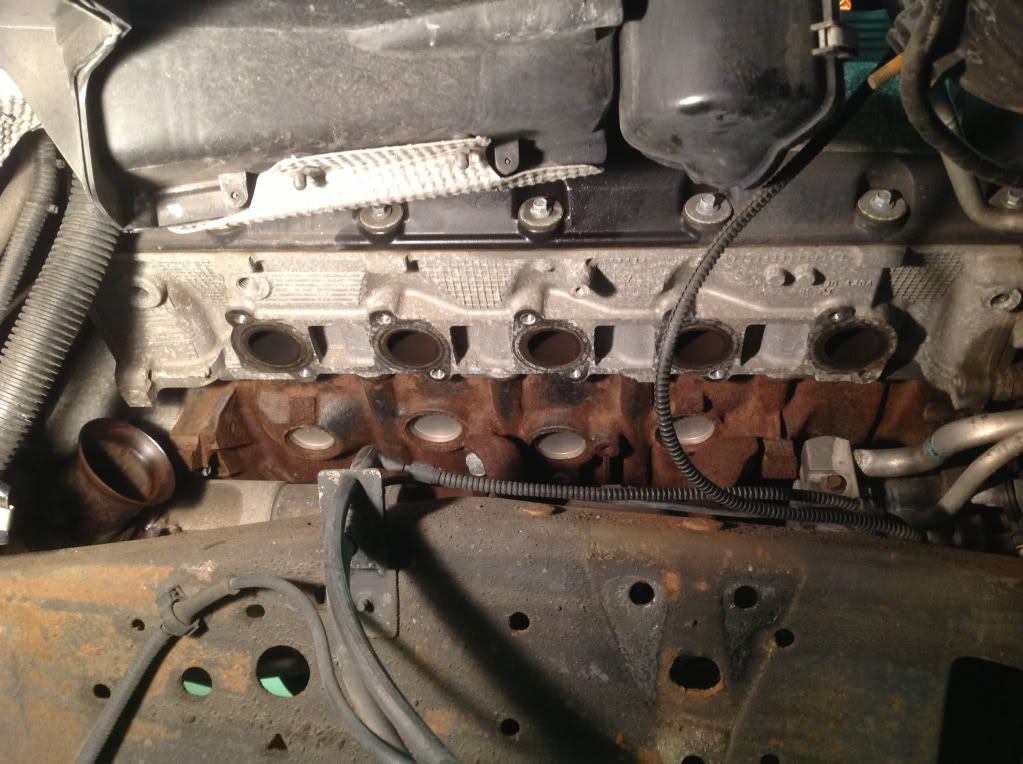
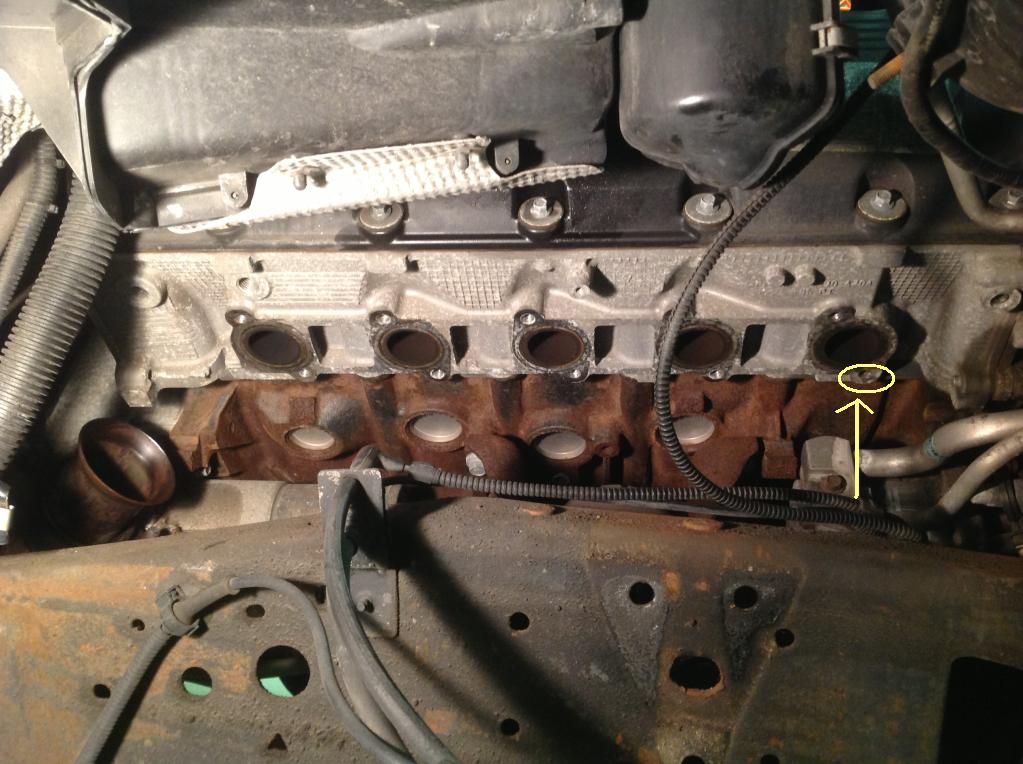
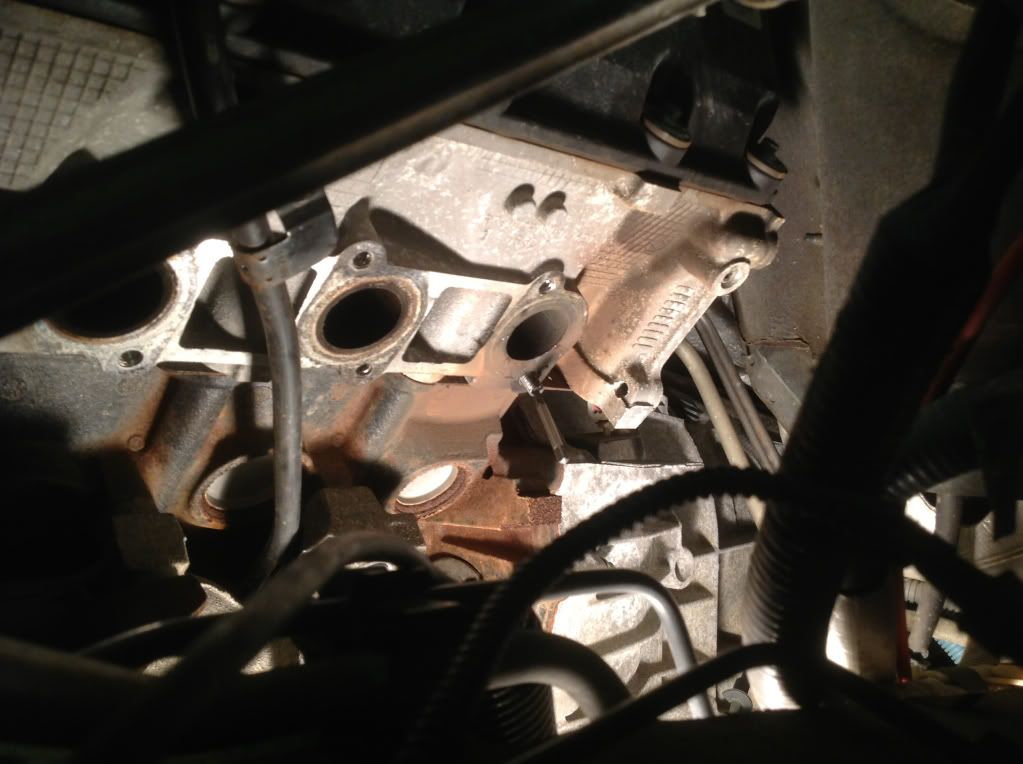
I was somewhat lucky to only have two broken studs, one on each bank. Actually both in the same holes, bottom front on the right and bottom rear on the left. Both were broken off below the head surface.
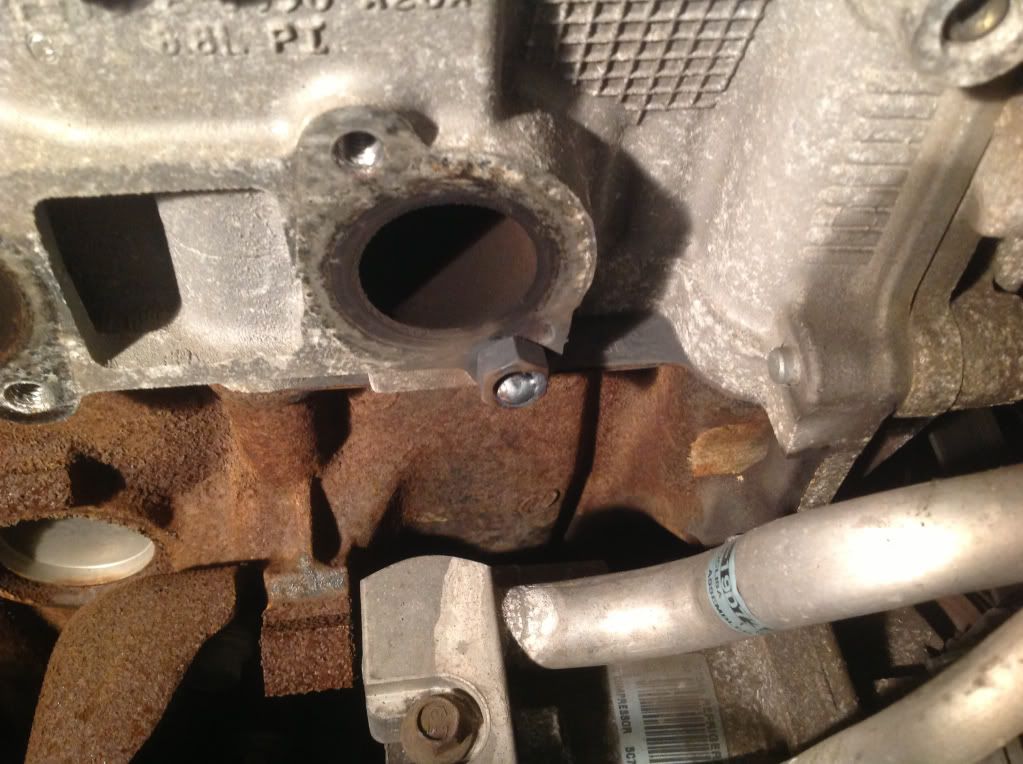
I couldn't get the ipad into position with enough light to get a shot of the left one in the hole, it was in about 3.5 threads. The right side one was only in about one thread and you can see it here.
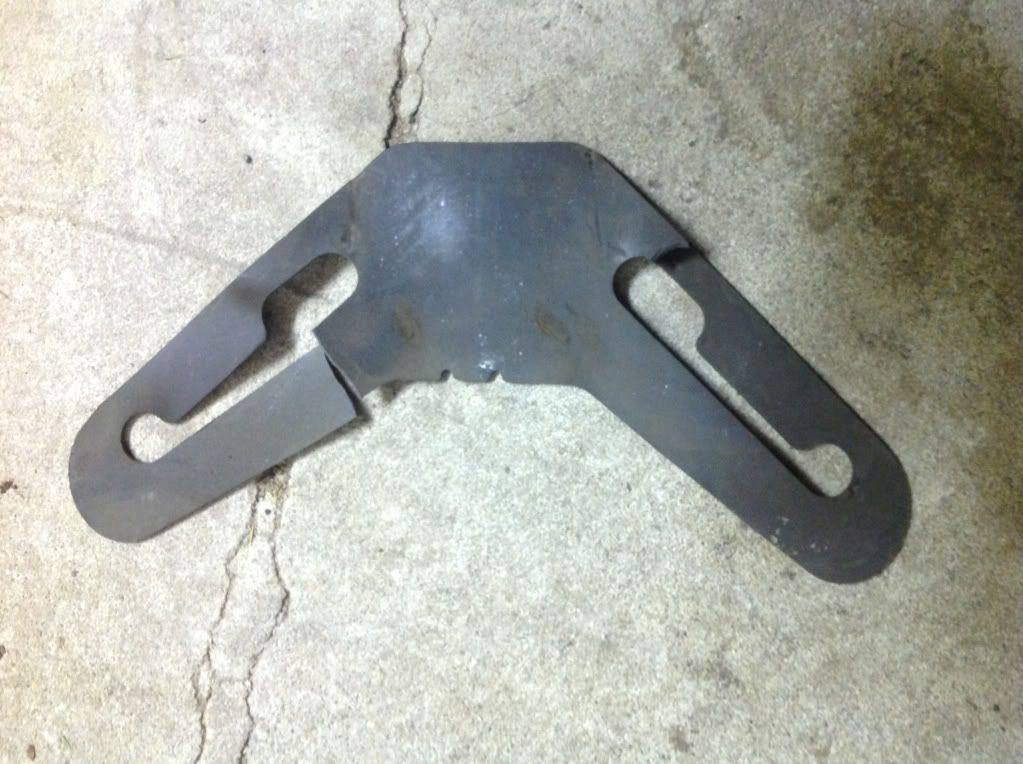
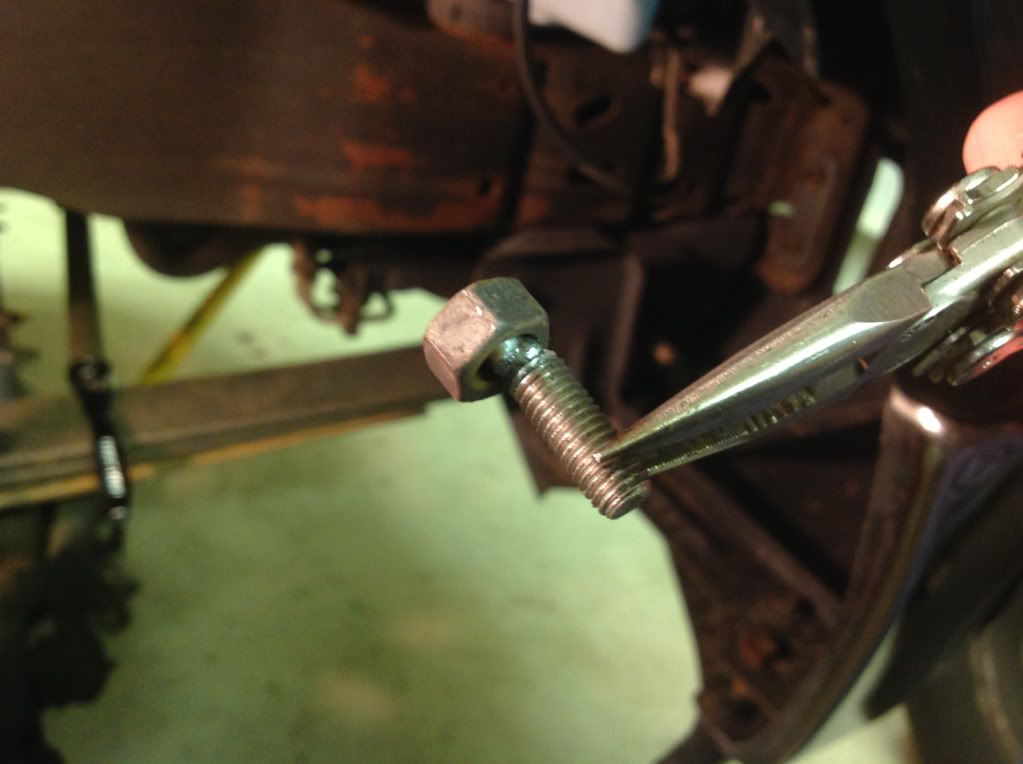
I fired up my little 110V MIG and dialed up the heat and slowed down the wire feed and had at it. Bingo! First try got good penetration, and here is my homemade "bolt".
Ta-Da! Here it comes! Had to give it a little nudge with a wrench to get it going but then it spun out very easy, I still used the wrench because it was pretty hot.
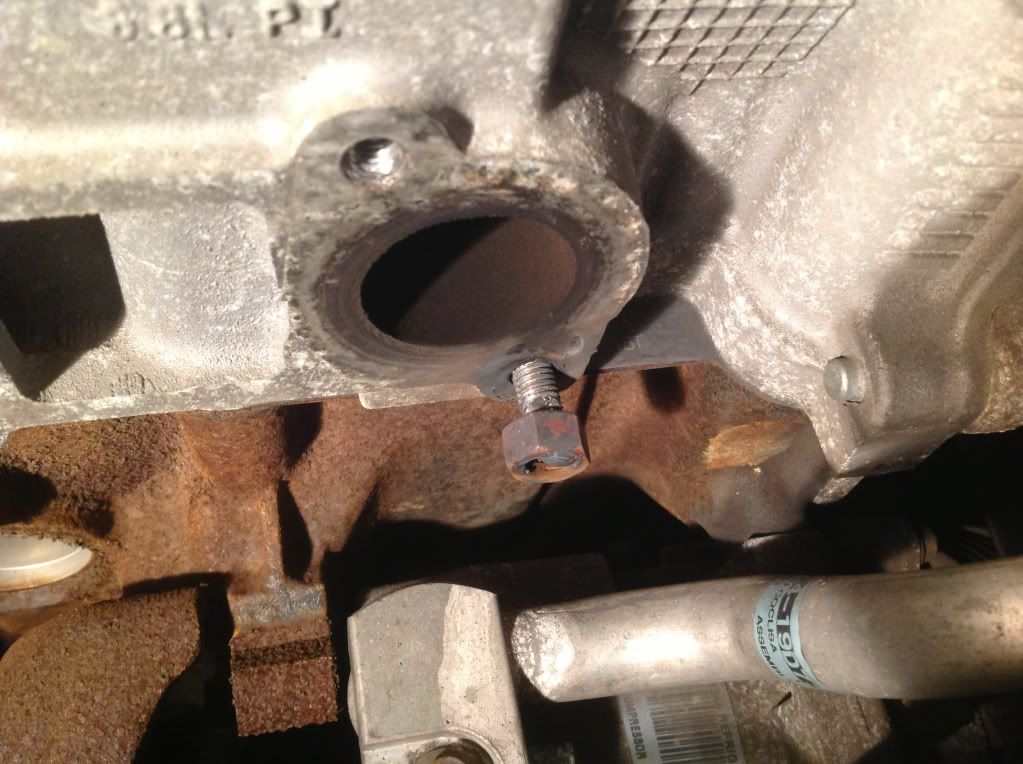
Not only saved the broken stud but also created a fine example of modern art too!
The left side stud was a different story, with it being buried deeper into the head my little MIG didn't have enough juice to get decent penetration into the stud stump. Oh, I tried and tried but had to resort to drilling it out. Using a cheap HF angle drill and a set of left hand twist bits I started small and worked up bit sizes till I got to a good size to twist in a bolt extractor. During the drilling as the new bigger bits dug in the stud did back out about a full thread, but got jammed up on some left over weld splatter that was stuck down in the threads. I knocked the splatter free with a small pick and the extractor did it's thing.
I know it's pretty crooked, I can not drill a straight hole in anything less than perfect conditions. This was far from perfect conditions.
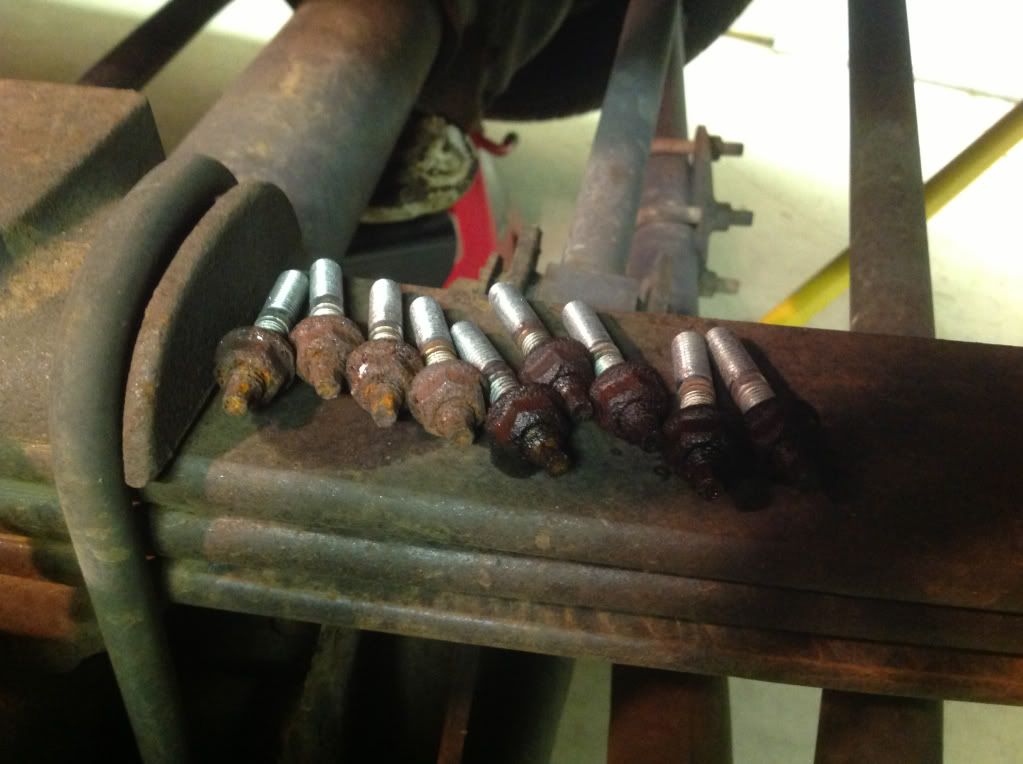
Here is the rescued stud with extractor and the remnants of my many failed MIG attempts.
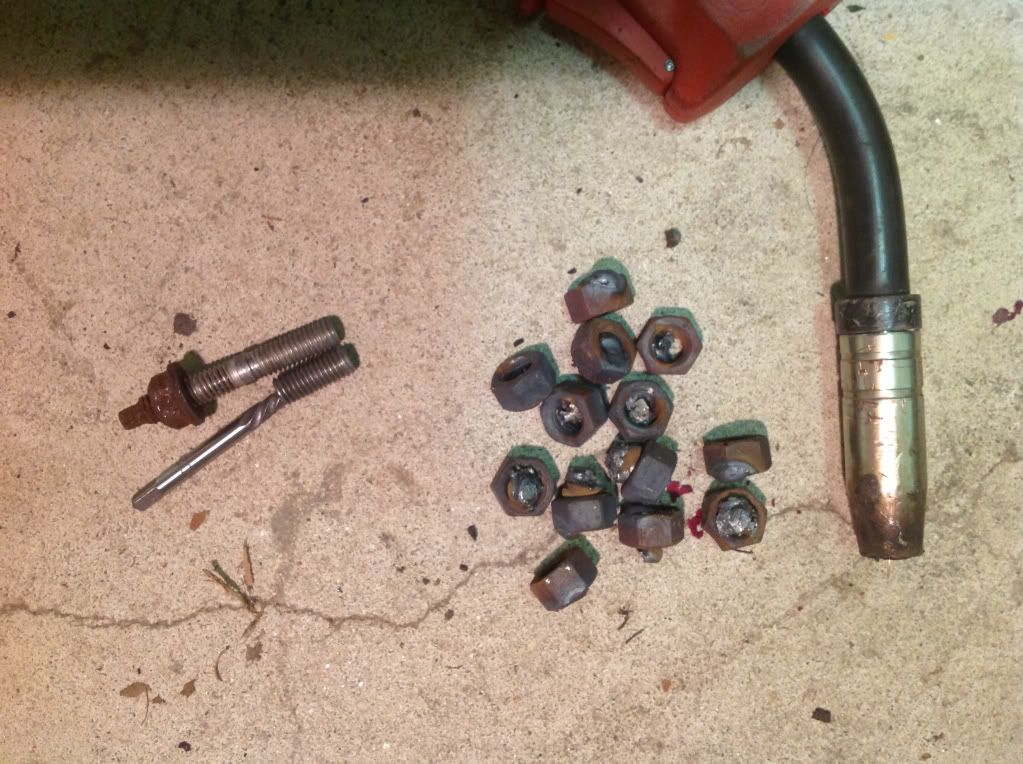
And another shot to show the differing depths that the studs were broken off at.

Time to make the boss happy again, I'll be back in the AM with some camparisons between the old parts and the new stuff.
I couldn't get the ipad into position with enough light to get a shot of the left one in the hole, it was in about 3.5 threads. The right side one was only in about one thread and you can see it here.
I fired up my little 110V MIG and dialed up the heat and slowed down the wire feed and had at it. Bingo! First try got good penetration, and here is my homemade "bolt".
Ta-Da! Here it comes! Had to give it a little nudge with a wrench to get it going but then it spun out very easy, I still used the wrench because it was pretty hot.
Not only saved the broken stud but also created a fine example of modern art too!
The left side stud was a different story, with it being buried deeper into the head my little MIG didn't have enough juice to get decent penetration into the stud stump. Oh, I tried and tried but had to resort to drilling it out. Using a cheap HF angle drill and a set of left hand twist bits I started small and worked up bit sizes till I got to a good size to twist in a bolt extractor. During the drilling as the new bigger bits dug in the stud did back out about a full thread, but got jammed up on some left over weld splatter that was stuck down in the threads. I knocked the splatter free with a small pick and the extractor did it's thing.
I know it's pretty crooked, I can not drill a straight hole in anything less than perfect conditions. This was far from perfect conditions.
Here is the rescued stud with extractor and the remnants of my many failed MIG attempts.
And another shot to show the differing depths that the studs were broken off at.
Time to make the boss happy again, I'll be back in the AM with some camparisons between the old parts and the new stuff.
#7
03-19-2013, 06:26 PM
Senior User
Join Date: Nov 2010
Location: jackson nj
Posts: 360
Likes: 0
Received 0 Likes
on
0 Posts
Trending Topics
#8
03-20-2013, 08:29 AM
Thanks Scott, I really like the heat sheilds too. I know you've done this header rodeo too, lots of tight spaces to work in! I'm very much looking forward to towing with these new tubes, the EX sure feels better running solo, can't wait to put it under a decent load!
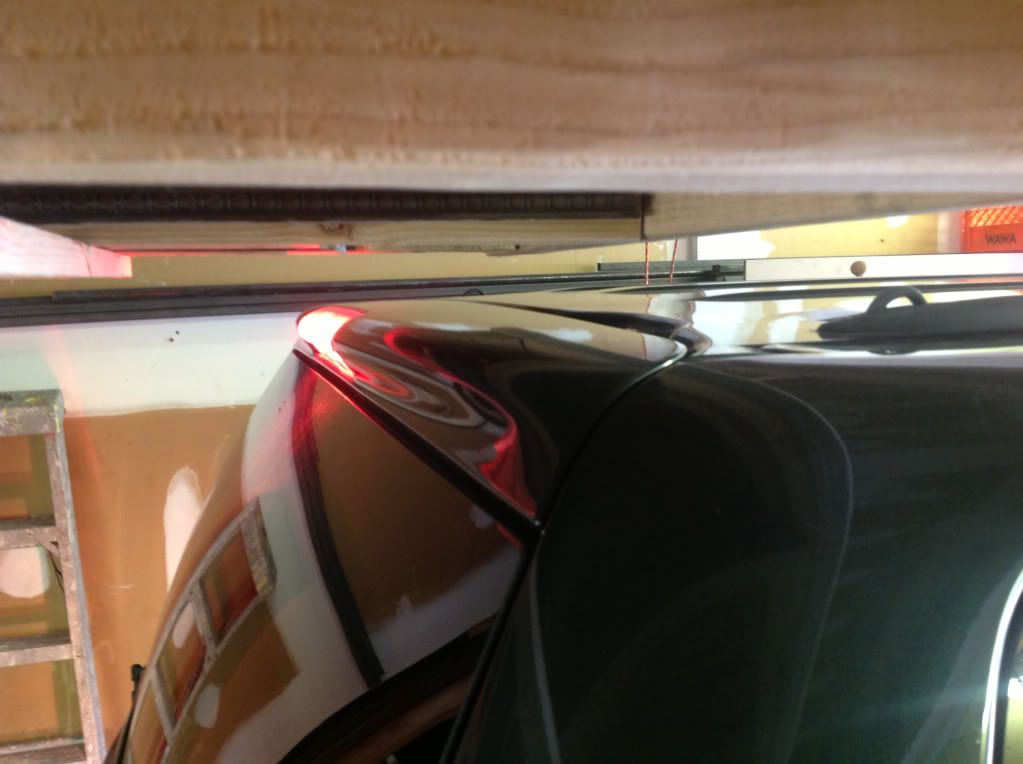
Fortunately the buggy still fits in the garage, currently there is less than an inch between the roof of the EX and the joists of a loft I built in the garage before I bought the EX. That loft will need to get jacked up a few inches once I upgrade to the 35" tires I want.
Looking at all the crap piled up on my '69 Trans-Am (under the cover) I think the loft should have been bigger!
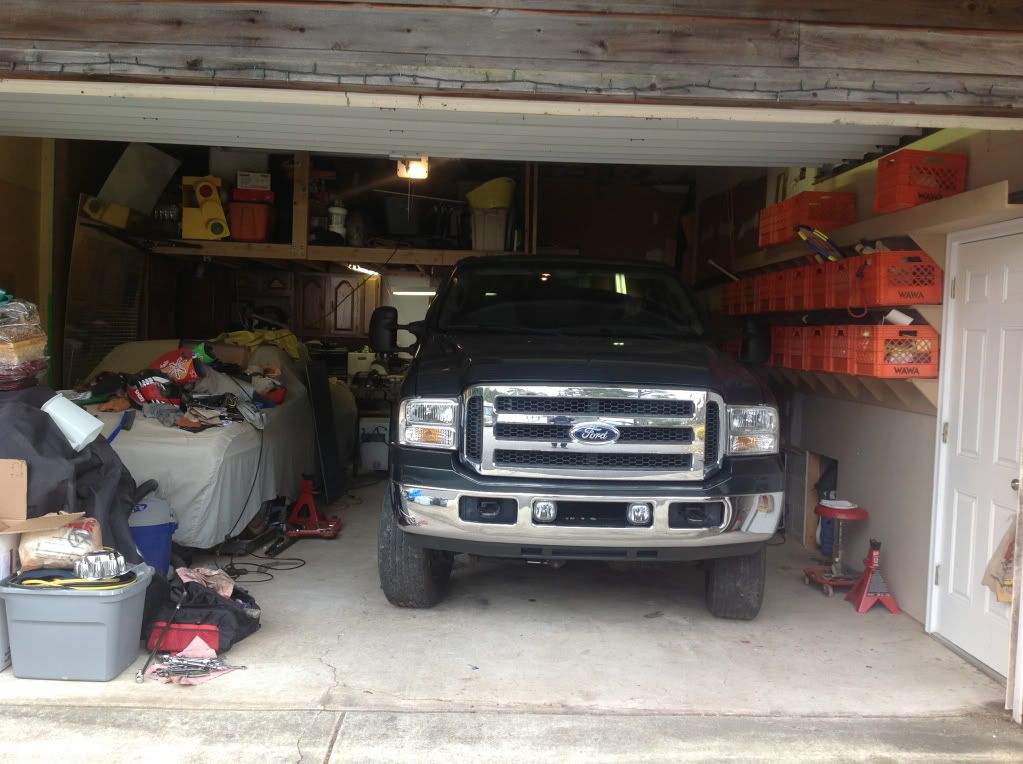
#9
03-20-2013, 10:03 AM
Old vs new comparisons.
Here are a few pictures that put the differences between the stock system and the torque Tubes into perspective.
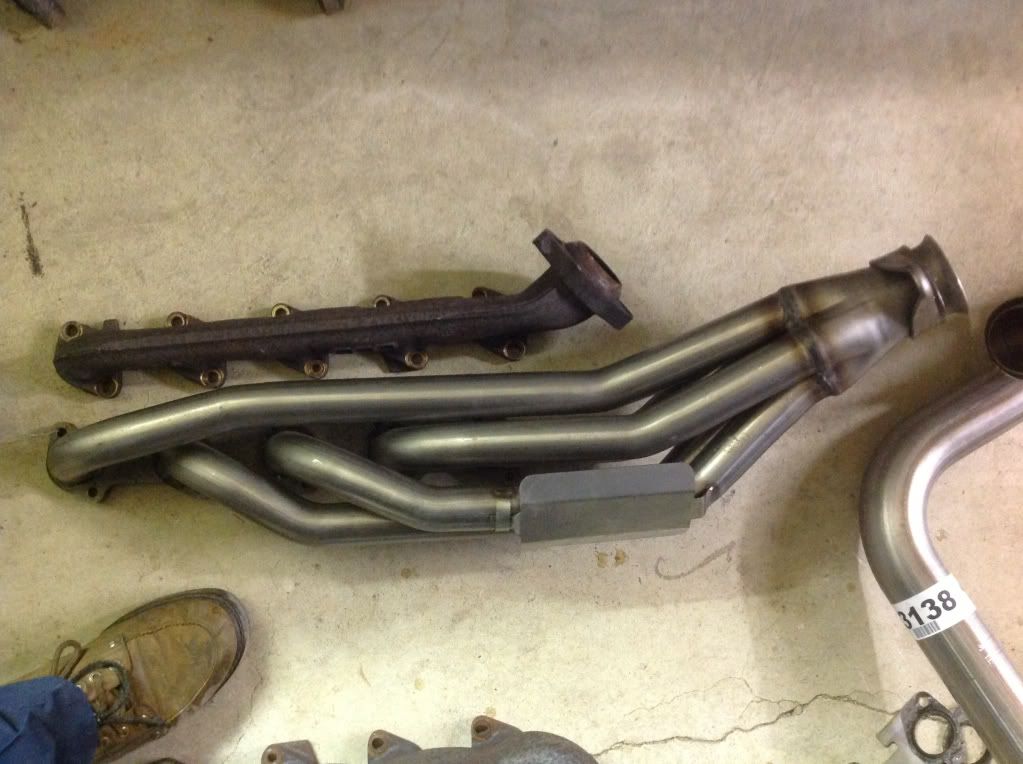
First up we have the left side manifolds.
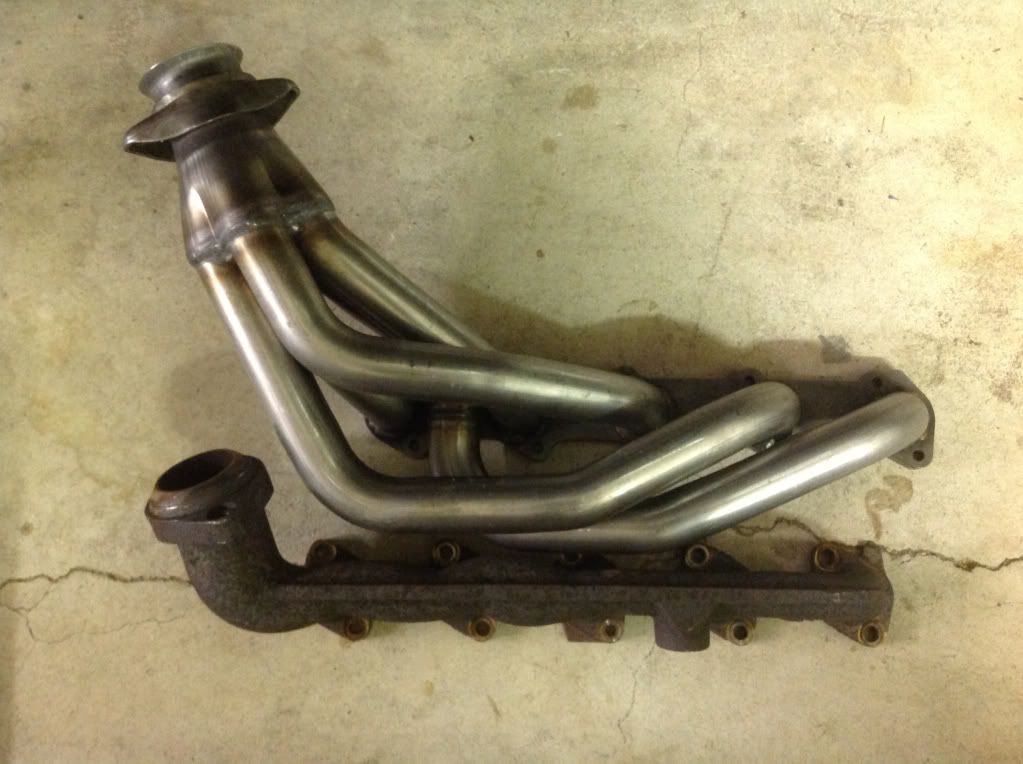
Now for a peek at the right side units.
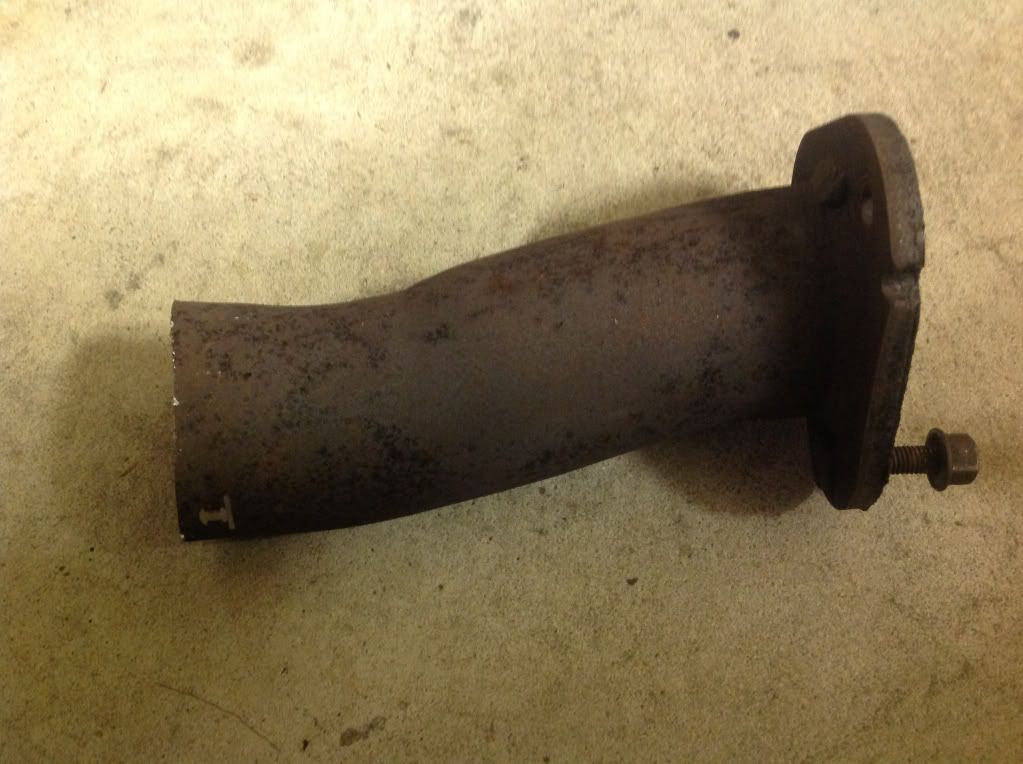
And now the big crowd pleaser, our old beloved stock "T" pipe and it's new replacement. I am a much bigger fan of a fat Y than a skinny T.
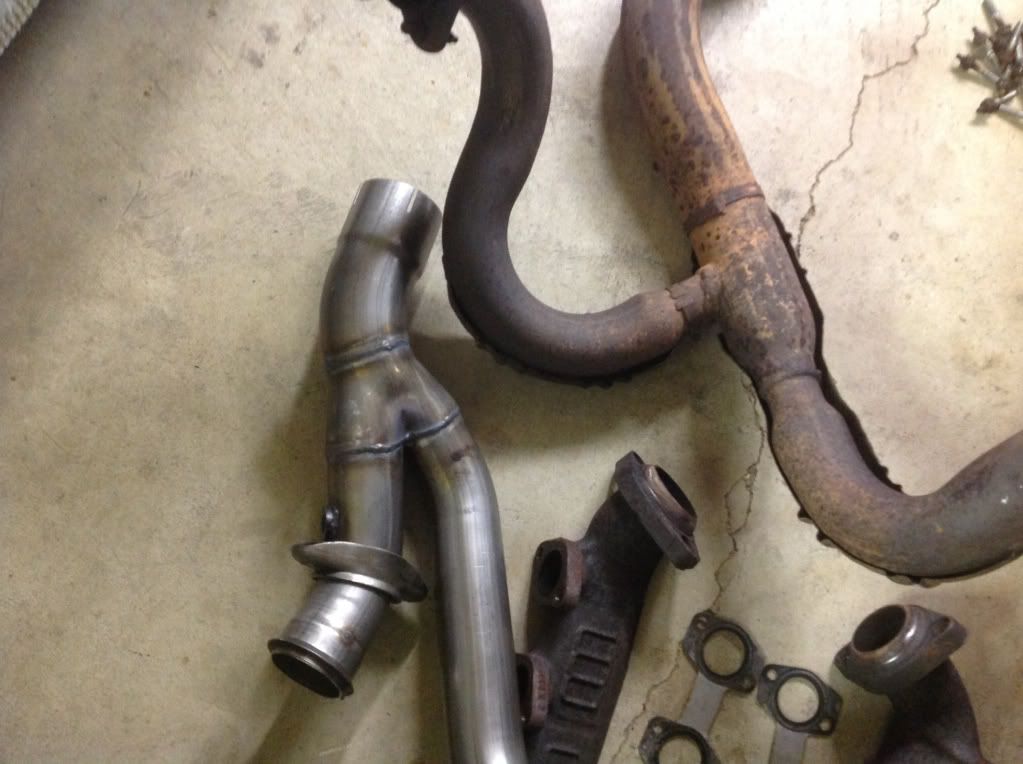
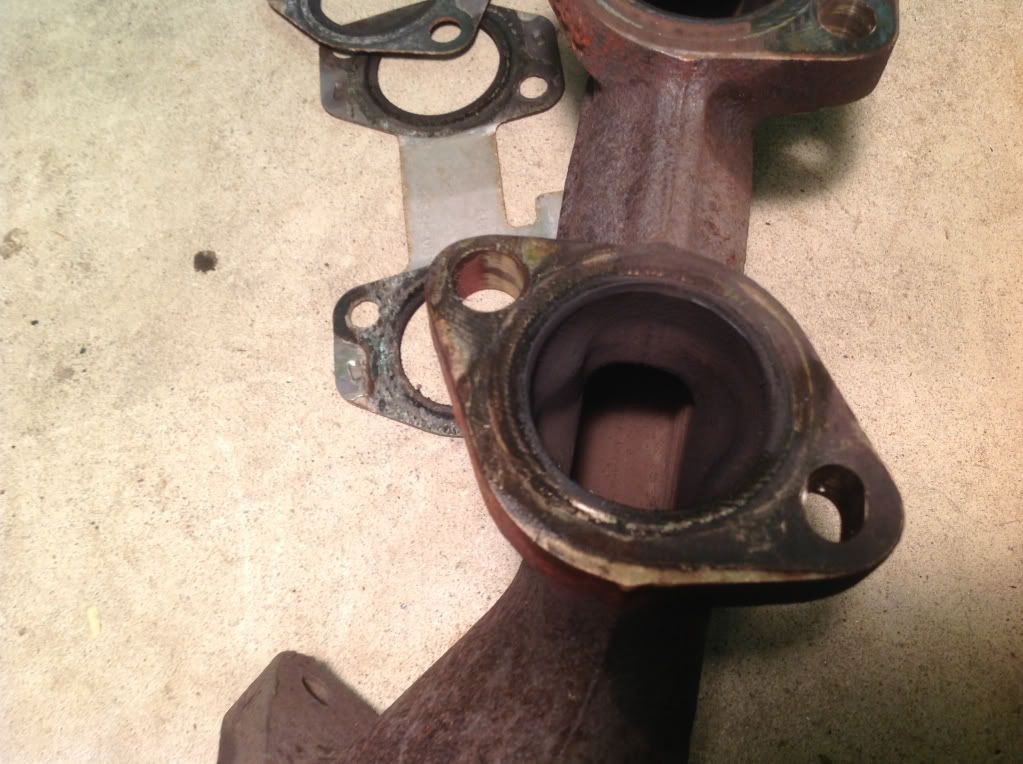
This shot shows the interior of a stock manifold at the fifth inlet port, the interior rectangular space gets incrimentally larger after each additional port joins the flow, so this spot is that area at it's largest dimension before it flares out to the outlet nozzle. The space here measures .75" x 2.5" or 1.87 sq/in of cross sectional area. The Torque Tubes have 5 primary tubes each with an interior diameter of 1.5" or a cross sectional area of 1.76 sq/in (5 x 1.76 = 8.8 sq/in). Granted they both dump into a 2.5" or 4.90 sq/in tube at their collectors then into a 3" or 7.06 sq/in main tube to the cat. I think the new tubes will let the motor breathe easier.
I now have to look busy for a while, I'll be back soon with the installation.
First up we have the left side manifolds.
Now for a peek at the right side units.
And now the big crowd pleaser, our old beloved stock "T" pipe and it's new replacement. I am a much bigger fan of a fat Y than a skinny T.
This shot shows the interior of a stock manifold at the fifth inlet port, the interior rectangular space gets incrimentally larger after each additional port joins the flow, so this spot is that area at it's largest dimension before it flares out to the outlet nozzle. The space here measures .75" x 2.5" or 1.87 sq/in of cross sectional area. The Torque Tubes have 5 primary tubes each with an interior diameter of 1.5" or a cross sectional area of 1.76 sq/in (5 x 1.76 = 8.8 sq/in). Granted they both dump into a 2.5" or 4.90 sq/in tube at their collectors then into a 3" or 7.06 sq/in main tube to the cat. I think the new tubes will let the motor breathe easier.
I now have to look busy for a while, I'll be back soon with the installation.
#10
03-20-2013, 03:23 PM
#11
03-20-2013, 04:45 PM
#12
03-20-2013, 05:42 PM

Elder User
Join Date: Jan 2013
Location: Parker, CO
Posts: 658
Likes: 0
Received 0 Likes
on
0 Posts
Oh the broken studs are heart breaking! That's where you sit there stunned for a few minutes, then start crying, then cursing, then figure out how to fix them! Been there, done that, but without the luxury of a welder. Nice work! 
That stock t pipe is ridiculous! What a constriction point... I have a 6.0l Diesel. I wonder what the exhaust system looks like.
Curious, are you doing or have you done any other power mods? Just doing headers on a normally aspirated motor reduces back pressure (obviously) but that can actually rob some power in the process.
BTW not being a smart *** or anything but its time to change your oil filter.
Good luck and thanks for the pics and the prose!
That stock t pipe is ridiculous! What a constriction point... I have a 6.0l Diesel. I wonder what the exhaust system looks like.
Curious, are you doing or have you done any other power mods? Just doing headers on a normally aspirated motor reduces back pressure (obviously) but that can actually rob some power in the process.
BTW not being a smart ***
or anything but its time to change your oil filter.Good luck and thanks for the pics and the prose!
#13
03-20-2013, 08:45 PM

Laughing Gas
#14
03-20-2013, 09:41 PM

The manifolds go into pipes up, into a y pipe (thats actually a y for the most part), into the turbo, then the exhaust goes straight down the down pipe.
