Excursion - King of SUVs 2000 - 2005 Ford Excursion
Sponsored by:
Sponsored by:

Banks Torque Tube headers V-10 install w/pics

Thread Tools
 
Search this Thread
 
  #61  
Old 04-22-2014, 06:00 PM
WE3ZS's Avatar
WE3ZS
WE3ZS is offline
World Famous Mod
Thread Starter
Join Date: Jul 2010
Location: Media PA
Posts: 11,375
Received 831 Likes on 571 Posts
Originally Posted by TIUSER
Great write up. I read this entire thread 3x and each time I get a little more brave and think of trying to tackle this project on my own also. I hope that feeling passes soon.

Which torque tubes are for the Excursions?
This is from Banks site;

Application---------------------------------------Year Range----------- Part #

TorqueTube system----------------------------------1999-04------------49133
Ford 6.8L Trk, W/egr Late Cat
Emissions compliant: CARB E.O. D-161-76


TorqueTube system----------------------------------1999-04------------49136
Ford 6.8L Trk, W/egr Erly Cat
Emissions compliant: CARB E.O. D-161-76


TorqueTube system----------------------------------1999-04------------49138
Ford 6.8L Trk No-Egr, Late Cat
Emissions compliant: CARB E.O. D-161-76

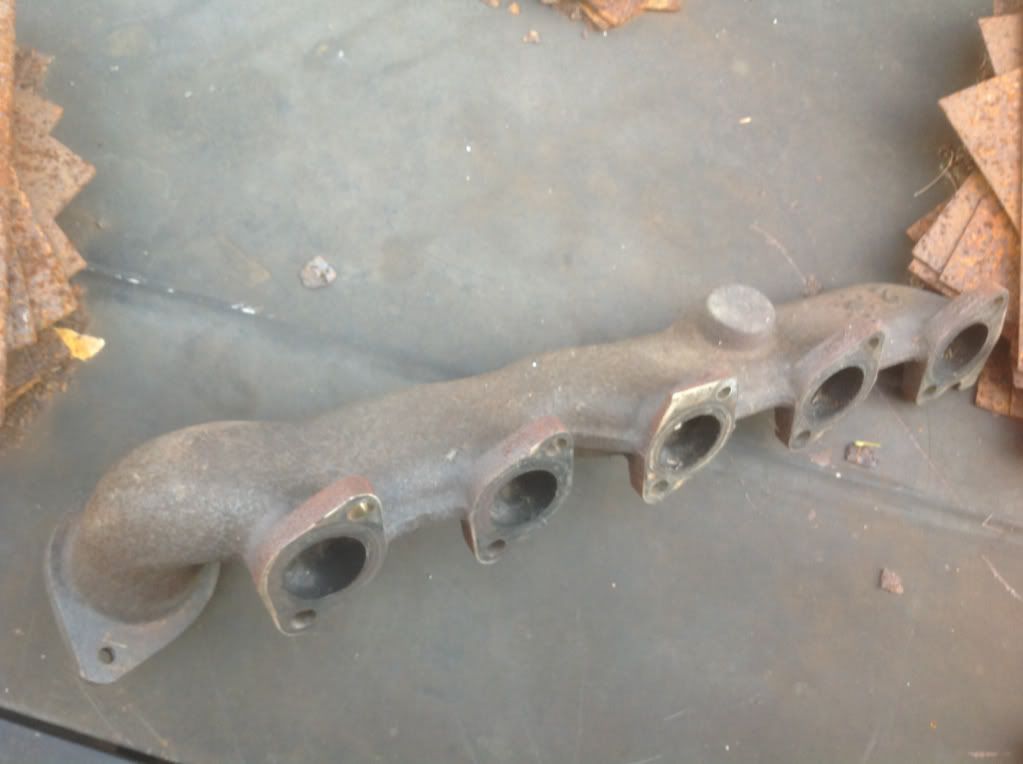
Does your EX have an EGR valve? Mine did not so I bought the #49138. If you do have an EGR it will be on the driver's side exhaust manifold, if not the manifold will just have the solid flat round boss where the valve would have been.
This is my non-EGR manifold.
 
  #62  
Old 04-22-2014, 06:11 PM
jayjjcc's Avatar
jayjjcc
jayjjcc is offline
Elder User
Join Date: Jan 2012
Posts: 777
Likes: 0
Received 2 Likes on 1 Post
As an FYI... I did my drivers side and only broke 1 stud. My biggest issue was removing the studs holding the manifold to the y pipe. I have the part number somewhere if anyone needs it. I had to cut mine, there was no head left on the nut.

Sidenote... I changed the studs and gasket and kept everything else stock for now.
 
  #63  
Old 04-22-2014, 08:55 PM
TIUSER's Avatar
TIUSER
TIUSER is offline
Senior User
Join Date: Dec 2013
Location: S.E. MI
Posts: 143
Likes: 0
Received 1 Like on 1 Post
Originally Posted by WE3ZS
Does your EX have an EGR valve? Mine did not so I bought the #49138. If you do have an EGR it will be on the driver's side exhaust manifold, if not the manifold will just have the solid flat round boss where the valve would have been.
This is my non-EGR manifold.
you simplified that great for me, the pic was a great help too.

Thanks
 
  #64  
Old 04-23-2014, 05:14 PM
TIUSER's Avatar
TIUSER
TIUSER is offline
Senior User
Join Date: Dec 2013
Location: S.E. MI
Posts: 143
Likes: 0
Received 1 Like on 1 Post
Well, I just checked mine and it looks just like the pic of yours. So, now I know which one to order.
 
  #65  
Old 04-23-2014, 05:28 PM
WE3ZS's Avatar
WE3ZS
WE3ZS is offline
World Famous Mod
Thread Starter
Join Date: Jul 2010
Location: Media PA
Posts: 11,375
Received 831 Likes on 571 Posts
I'm looking forward to following your install!
I held out and waited for a good sale at AutoAnything.com, they had a good price on them and the sale knocked off another 15% along with free shipping.
 
  #66  
Old 04-23-2014, 06:31 PM
TIUSER's Avatar
TIUSER
TIUSER is offline
Senior User
Join Date: Dec 2013
Location: S.E. MI
Posts: 143
Likes: 0
Received 1 Like on 1 Post
Originally Posted by WE3ZS
I'm looking forward to following your install!
I held out and waited for a good sale at AutoAnything.com, they had a good price on them and the sale knocked off another 15% along with free shipping.
Auto anything doesn't list the torque tubes on their site. I have not contacted them I just checked online.
 
  #67  
Old 04-23-2014, 06:37 PM
TIUSER's Avatar
TIUSER
TIUSER is offline
Senior User
Join Date: Dec 2013
Location: S.E. MI
Posts: 143
Likes: 0
Received 1 Like on 1 Post
Ok, they don't list them under Excursion, I found them by selecting f250 as my vehicle, then no EGR and then the correct part number "49138" showed up. So now I have to watch for a huge sale.
 
  #68  
Old 05-31-2014, 12:06 PM
AndersMatsson's Avatar
AndersMatsson
AndersMatsson is offline
New User
Join Date: May 2012
Location: Edmonton - Rural
Posts: 11
Likes: 0
Received 0 Likes on 0 Posts
I fired up my little 110V MIG and dialed up the heat and slowed down the wire feed and had at it. Bingo! First try got good penetration, and here is my homemade "bolt".
Out of curiosity, since I'm going to be tacking a similar project myself, what spec of mig wire did you use? I've read that the stock studs are stainless (not sure what type of stainless though). Did you use just mild carbon steel wire (ER70S-2 or ER70S-6) or did you use some sort of stainless wire?
 
  #69  
Old 05-31-2014, 02:25 PM
WE3ZS's Avatar
WE3ZS
WE3ZS is offline
World Famous Mod
Thread Starter
Join Date: Jul 2010
Location: Media PA
Posts: 11,375
Received 831 Likes on 571 Posts
Originally Posted by AndersMatsson
Out of curiosity, since I'm going to be tacking a similar project myself, what spec of mig wire did you use? I've read that the stock studs are stainless (not sure what type of stainless though). Did you use just mild carbon steel wire (ER70S-2 or ER70S-6) or did you use some sort of stainless wire?

Just plain old ER70S-2 (pretty sure thats it), same stuff thats in the machine 99% of the time for general fixxing/fabbing/playing in the garage. It worked well and the stud that was broken off almost flush with the head surface took the weld very well and spun right out, the other stud was too far inside the head and my little 110v machine couldn't get the weld hot enough in the deeper hole.
Good luck with your install, and stud extraction, it can be a pain but when it's done you will be smiling!
 
  #70  
Old 05-31-2014, 02:31 PM
hav24wheel's Avatar
hav24wheel
hav24wheel is offline
FTE Chapter Leader

Join Date: May 2006
Location: North Dakota
Posts: 11,269
Received 96 Likes on 78 Posts
To add, I used Lincoln .035 Flux Core wire when I did mine. One of the studs was 2-3 threads below the head, and got it welded up and turned out. But I did drill a hole in it first, than welded the hole shut, and continued to add weld tell I could weld a nut on. Than some taps with a hammer, some penetrating oil, and tighten, than loosen, wiggle back and forth n slowly turning it came out.
 
  #71  
Old 05-31-2014, 10:02 PM
Lance Helmert's Avatar
Lance Helmert
Lance Helmert is offline
Laughing Gas
Join Date: Sep 2012
Location: Northcentral Wisconsin
Posts: 880
Received 9 Likes on 8 Posts
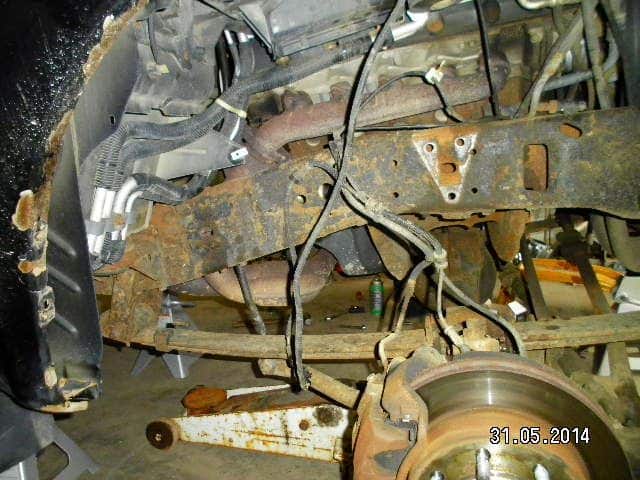
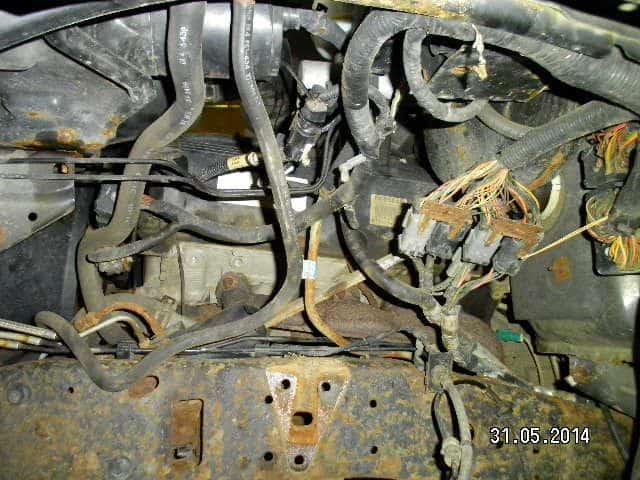
I started mine tonight. We got the inner fenders out and the shocks. Everything is sprayed with penetrating oil. I also cut the bolts off to the Y pipe. We're trying to figure out how to reach the O2 plug on the right side. We have 8 broken studs, 2 are flush with or below the head(maybe 3).
 
  #72  
Old 05-31-2014, 10:25 PM
Lance Helmert's Avatar
Lance Helmert
Lance Helmert is offline
Laughing Gas
Join Date: Sep 2012
Location: Northcentral Wisconsin
Posts: 880
Received 9 Likes on 8 Posts


Anyone know how to get the steering shaft off the firewall?

My wife and I will tackle the studs tomorrow. Prayers would be appreciated!
 
  #73  
Old 06-01-2014, 12:23 AM
hav24wheel's Avatar
hav24wheel
hav24wheel is offline
FTE Chapter Leader

Join Date: May 2006
Location: North Dakota
Posts: 11,269
Received 96 Likes on 78 Posts
Steering shaft shouldn't need to be moved. I didn't move it when I did my Hedmans. I even did all the install from the wheel wells
 
  #74  
Old 06-01-2014, 06:03 AM
WE3ZS's Avatar
WE3ZS
WE3ZS is offline
World Famous Mod
Thread Starter
Join Date: Jul 2010
Location: Media PA
Posts: 11,375
Received 831 Likes on 571 Posts
Originally Posted by hav24wheel
To add, I used Lincoln .035 Flux Core wire when I did mine. One of the studs was 2-3 threads below the head, and got it welded up and turned out. But I did drill a hole in it first, than welded the hole shut, and continued to add weld tell I could weld a nut on. Than some taps with a hammer, some penetrating oil, and tighten, than loosen, wiggle back and forth n slowly turning it came out.
Now I feel dumb Dave, that probabily would have worked for me too. But I was trying to shoot the wire from the MIG through the hole in the nut then into the stud hole in the head and couldn't get decent penetration. I should have done like you and built it up first then put the nut in place. Sometimes I can't see the forest for the trees!


Originally Posted by Lance Helmert
I started mine tonight. We got the inner fenders out and the shocks. Everything is sprayed with penetrating oil. I also cut the bolts off to the Y pipe. We're trying to figure out how to reach the O2 plug on the right side. We have 8 broken studs, 2 are flush with or below the head(maybe 3).
That one O2 plug is waaay up there, I had to squeeze my fat arm in pretty deep to get to it! Use Dave's welding method, don't be a dummy like me!


Originally Posted by Lance Helmert

Anyone know how to get the steering shaft off the firewall?

My wife and I will tackle the studs tomorrow. Prayers would be appreciated!
I didn't touch the steering shaft, I think that was Christina (Sammie).

Originally Posted by hav24wheel
Steering shaft shouldn't need to be moved. I didn't move it when I did my Hedmans. I even did all the install from the wheel wells
Yeah, I would leave the steering alone, the Banks seem like they are a little bigger than the Hedmans due to tube routing, I don't think you could put the Banks in through the wheelwells. Mine went in from below without much drama, the oil dipstick was the thing that fought me the hardest, it didn't want to come out of it's hole, lots of wiggling and twisting was needed. Some folks have had the dipstick tube break off if it's rusted, I got lucky and mine was rust free and eventually came out in one piece.
Good luck!
 
  #75  
Old 06-01-2014, 07:18 AM
Lance Helmert's Avatar
Lance Helmert
Lance Helmert is offline
Laughing Gas
Join Date: Sep 2012
Location: Northcentral Wisconsin
Posts: 880
Received 9 Likes on 8 Posts
Thanks for the help!


Quick Reply: Banks Torque Tube headers V-10 install w/pics


All times are GMT -5. The time now is 07:12 PM.