Aerostar windshield diy
#1
 02-28-2013, 12:01 PM

Aerostar windshield diy
The windshield on an Aerostar was re-installed. The windshield had been dripping occasionally for several years but suddenly became a big problem in a big storm.
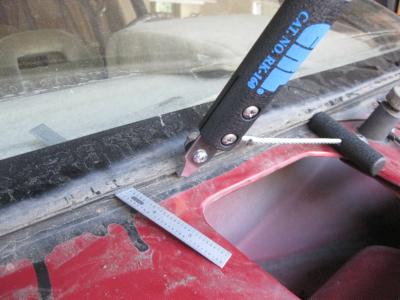
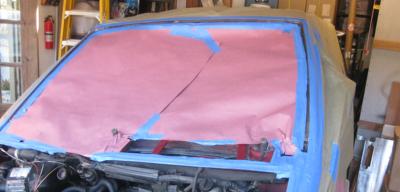
I was all set to cut out the windshield with an angle blade on a pull knife, but in many places the screen had already detached from the adhesive. A straight blade would have probably sufficed. Note that glass will have a black border that you don't want to scrap off, else you will see the adesive thru the glass.
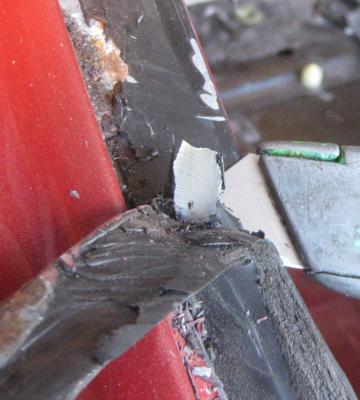
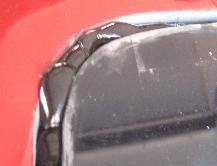
Here is the other set of trouble. The old adhesive was not bonded well to the sheet metal, instead creating a perfect habitat for rust.
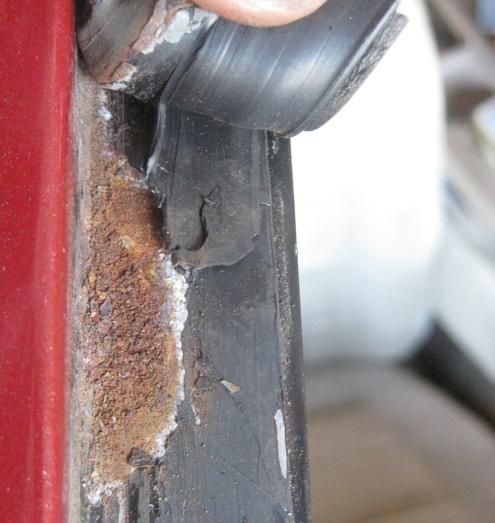
The rust was brushed down to metal and the van prepped for catalysed primer, the gray stuff in pics below.
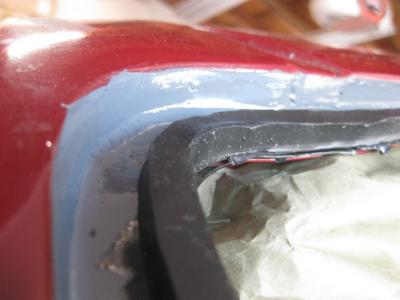
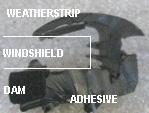
A square bead of double-sided butyl rubber creates a dam for the adhesive and positions the windshield at the correct level. The original install used 1/4 square, but I guessed correctly that 5/16 would be the better choice, placing the windshield either flush or just slightly proud. CRL FD312R.
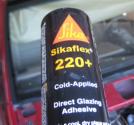
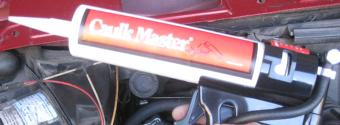
This adhesive was just one of several options but others were sold by the dozen and this one was sold by the tube. The quantity required was 2 tubes, but one of the tubes was too old to use. Quite fortunately I had bought 4 tubes. Distributor: DK Hardware.
I took heed of warnings out the viscosity of adhesive and bought a pneumatic gun. In retrospect, a wise choice. A Kong grip will get the job done, but 65psi (from a compressor) will get the job done, oh, five times faster with no struggle. Fyi, the bad tube defeated 65psi.
Get all your templates and supports in place, then lay the windshield in place using two (2!) people.
Add goo around edges in prep for weatherstrip.
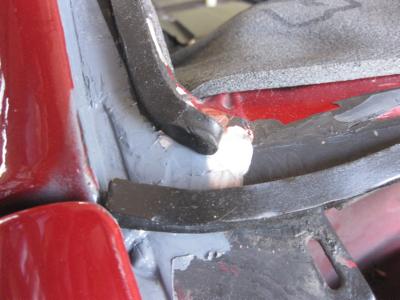
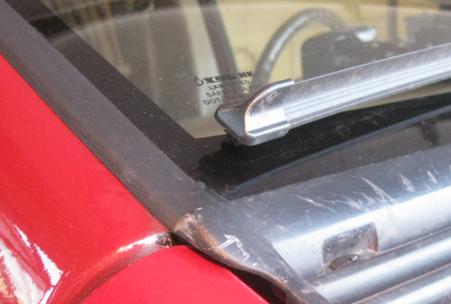
The new weatherstrip was immediately embedded into the adhesive. Triangles were cut out of the inside corner. Awkward, but much better than making no cuts. On the original install the inside corner flared up into a scoop, forcing water down into the channel. Pay attention to sealing that junction with the roof channel. Uncured adhesive cleans up with mineral spirits without damaging the paint. Weatherstrip: CRL CP876261

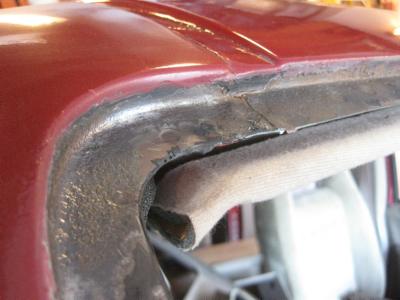
Here is a cross section of the old adhesive plus the weatherstrip. The weatherstrip was hard, possibly shrunk. It was also not well embedded into the old adhesive. The new weatherstrip covers much more paint at the perimeter.
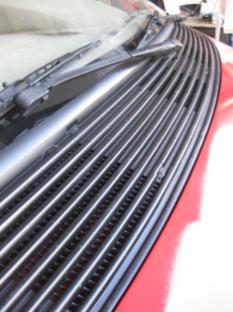
Seal the lower end well even though it is covered by the cowl. Otherwise wind pressure, from forward travel, could force water up the channel.
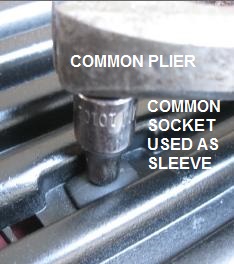
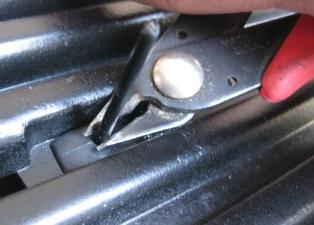
**** Cowl install ***
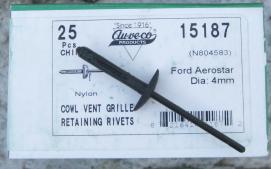
Pull pin till snug.
I was all set to cut out the windshield with an angle blade on a pull knife, but in many places the screen had already detached from the adhesive. A straight blade would have probably sufficed. Note that glass will have a black border that you don't want to scrap off, else you will see the adesive thru the glass.
Here is the other set of trouble. The old adhesive was not bonded well to the sheet metal, instead creating a perfect habitat for rust.
The rust was brushed down to metal and the van prepped for catalysed primer, the gray stuff in pics below.
A square bead of double-sided butyl rubber creates a dam for the adhesive and positions the windshield at the correct level. The original install used 1/4 square, but I guessed correctly that 5/16 would be the better choice, placing the windshield either flush or just slightly proud. CRL FD312R.
This adhesive was just one of several options but others were sold by the dozen and this one was sold by the tube. The quantity required was 2 tubes, but one of the tubes was too old to use. Quite fortunately I had bought 4 tubes. Distributor: DK Hardware.
I took heed of warnings out the viscosity of adhesive and bought a pneumatic gun. In retrospect, a wise choice. A Kong grip will get the job done, but 65psi (from a compressor) will get the job done, oh, five times faster with no struggle. Fyi, the bad tube defeated 65psi.
Get all your templates and supports in place, then lay the windshield in place using two (2!) people.
Add goo around edges in prep for weatherstrip.
The new weatherstrip was immediately embedded into the adhesive. Triangles were cut out of the inside corner. Awkward, but much better than making no cuts. On the original install the inside corner flared up into a scoop, forcing water down into the channel. Pay attention to sealing that junction with the roof channel. Uncured adhesive cleans up with mineral spirits without damaging the paint. Weatherstrip: CRL CP876261
Here is a cross section of the old adhesive plus the weatherstrip. The weatherstrip was hard, possibly shrunk. It was also not well embedded into the old adhesive. The new weatherstrip covers much more paint at the perimeter.
Seal the lower end well even though it is covered by the cowl. Otherwise wind pressure, from forward travel, could force water up the channel.
**** Cowl install ***
Pull pin till snug.
Last edited by RojoStar; 08-07-2020 at 09:55 AM. Reason: Cowl pics added
#2
02-28-2013, 04:12 PM

Nice looking job for DIY. While I dearly love DIY projects, this is one I prefer to leave to the pros. By the time you invest in the glass, suction cup holders for placement, pneumatic gun, 4 tubes of adhesive, etc, etc, I'm not certain there is much savings over the $175 installed price out here. Plus, if if leaks they will fix it free.


Thread
Thread Starter
Forum
Replies
Last Post
sixtyfive_ford
1947 and Older Ford Trucks
3
05-07-2021 02:39 PM
keith56_cruz_cab
1948 - 1956 F1, F100 & Larger F-Series Trucks
130
09-02-2009 12:21 PM