lift kit write up
#1
 02-03-2013, 11:01 PM


Join Date: Apr 2009
Location: Man Cave
Posts: 2,135
Likes: 0
Received 0 Likes
on
0 Posts
lift kit write up
Well I have had my 35" tyres in the garage for about 3 months now and had to get around to my lift kit. The kit arrived the 1st week on 2013 so it was bad time. Had to wait for the kids to go back to school.
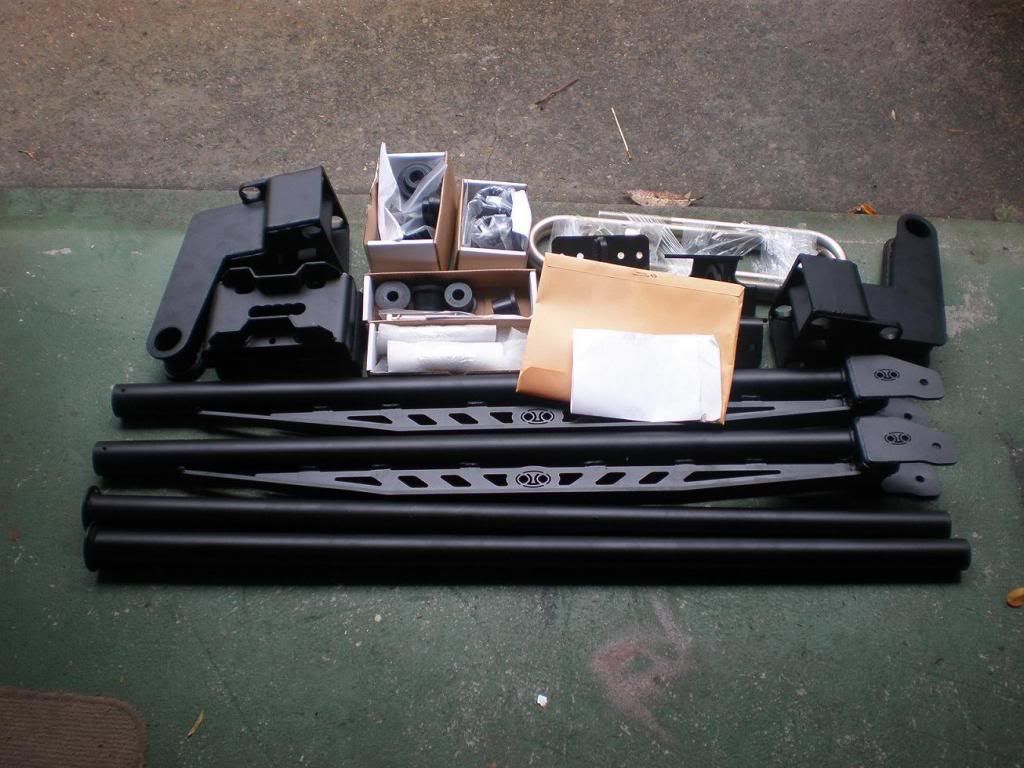
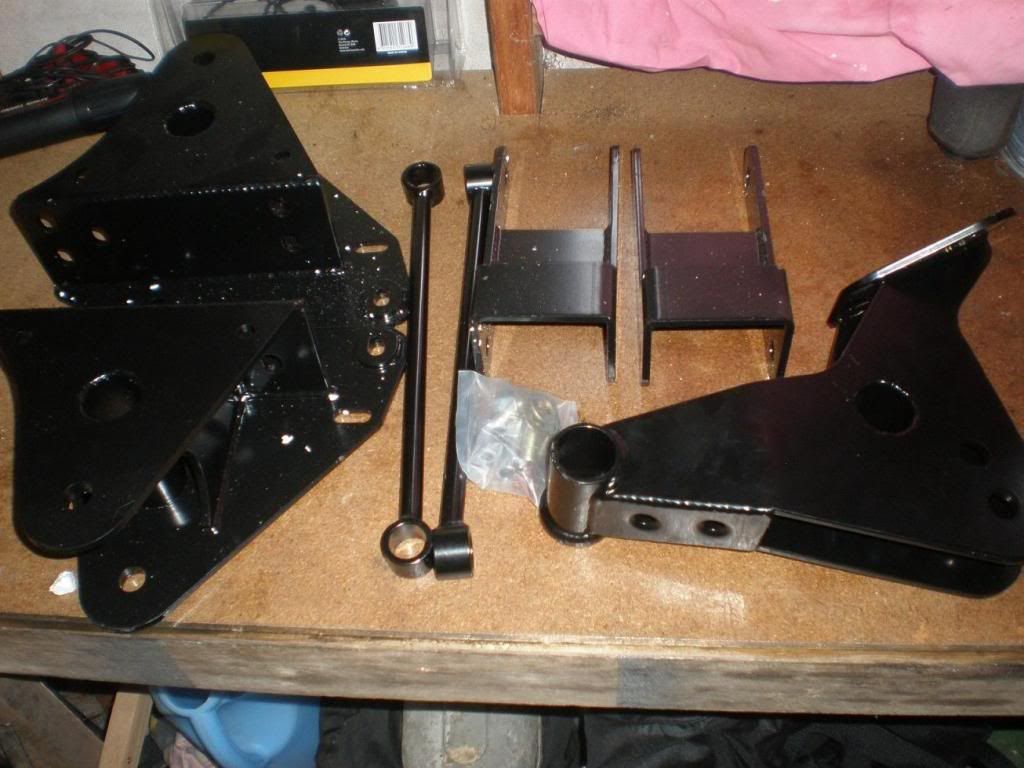
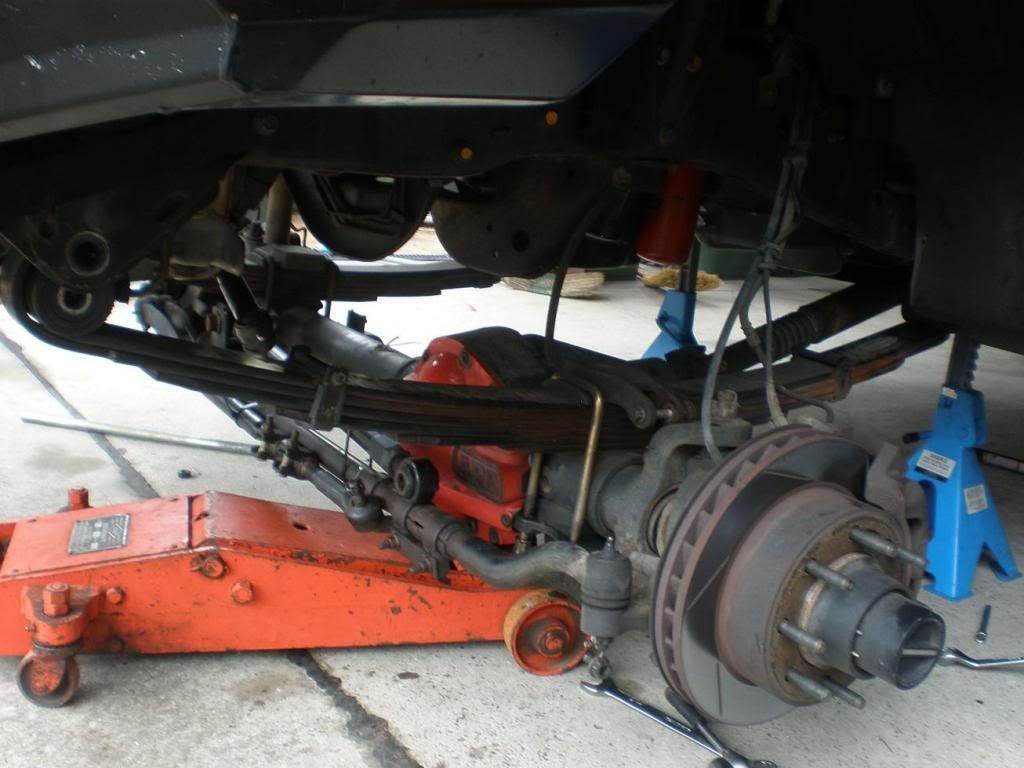
I already have 2" of lift in my spring packs, so I decided to go another 3" by way of OUO 5" block/traction bar at the rear and Icon 3" shackle extension at the front.
Here is the rear kit
And the front
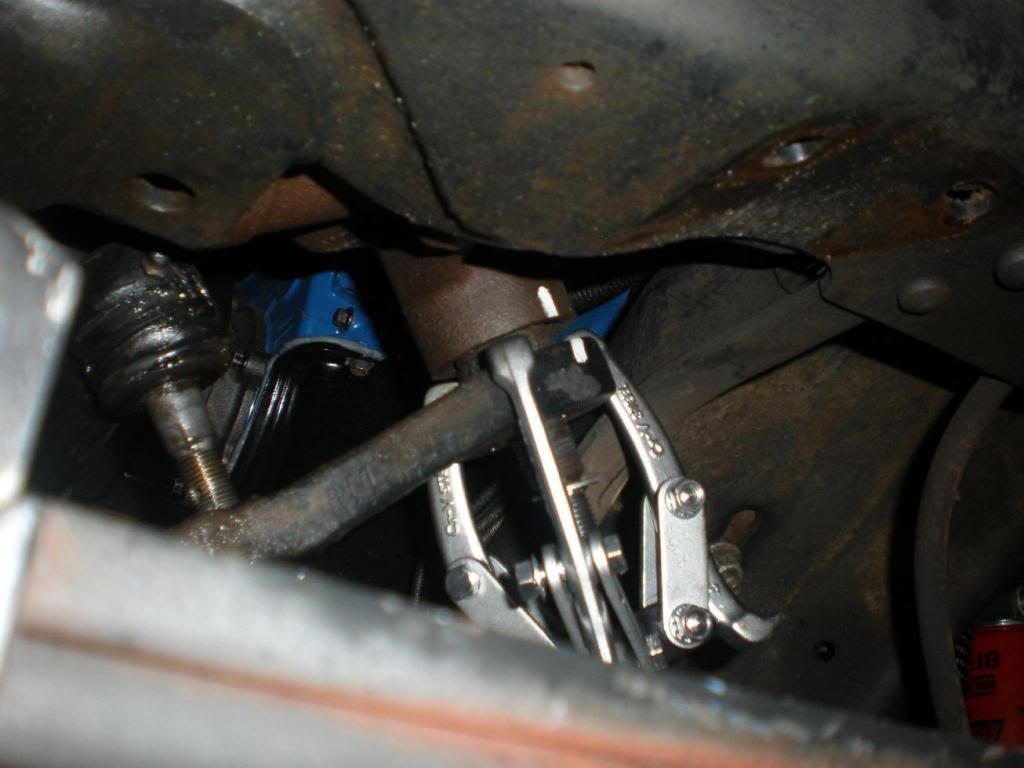
First up was to remove all the steering Knuckles on the drag link and the bar that runs from the steering box to the dummy box. Alot of heat and a bit of PB blaster then a tap with the hammer and they should pop out.
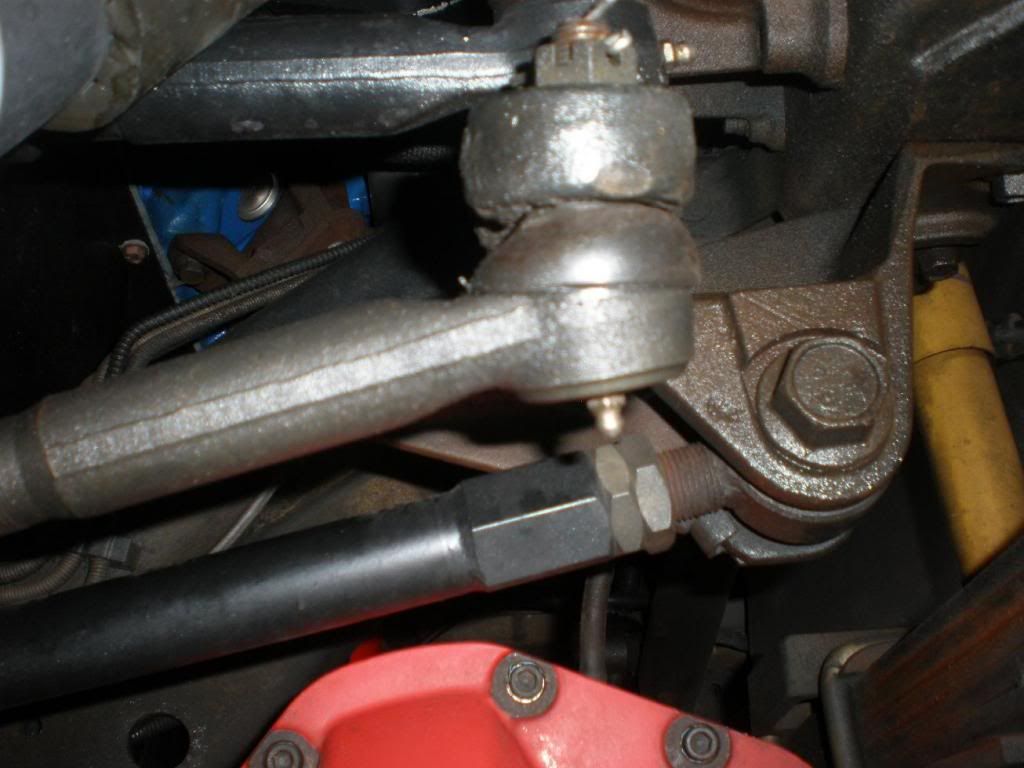
Then remove the pitman arm. Which aint easy. Heaps of heat and a turn on the puller and repeat the process until it pops off. Once of clean her up, add a bit of anti sieze. Flip her over and put it back on.
Then support the front of the truck via stands and support the front axle via jack
Take out the front pin and then the rear and remove the rear shackle. I had to drill out the Icon rear shackle holes a little bit more to fit my pins. Once that was done they are pretty easy to install

Now the instructions say to fit the front extension and then front pin. I used a bottle jack to push the springs down to fit the extension in.
But I gotta tell ya, getting that pin to line up was a complete PITA. So on the other side I pushed the springs down and put the pin in first and let the whole lot come up as one and it was alot easier
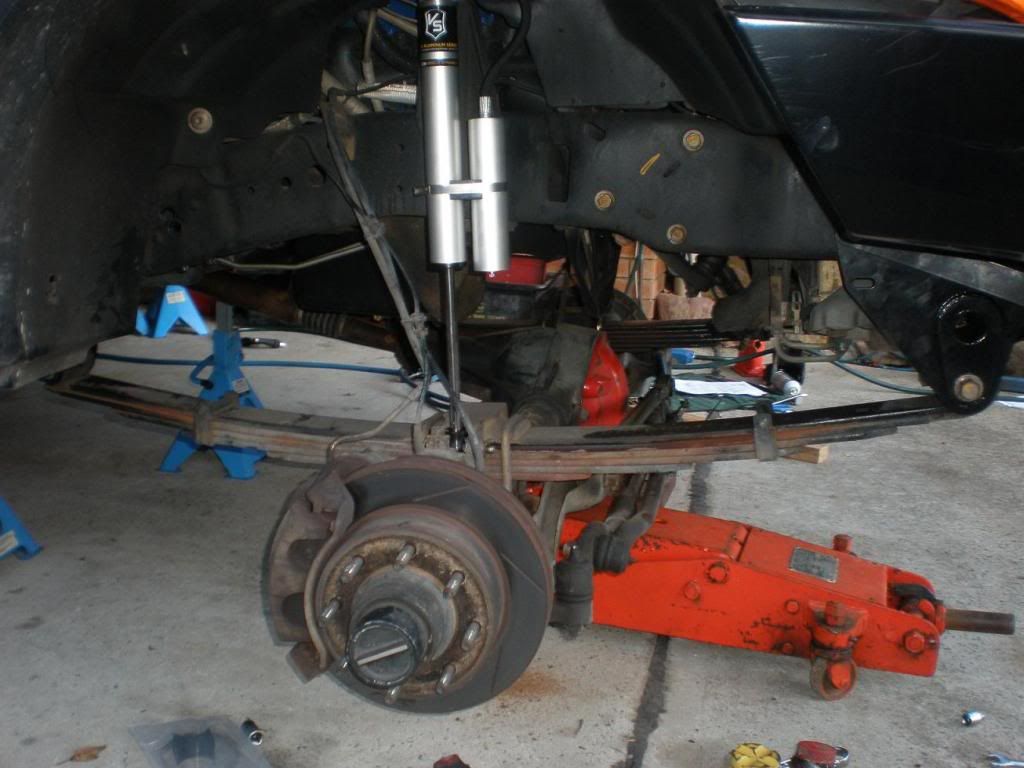
Front kit installed
other side done and shockie in place
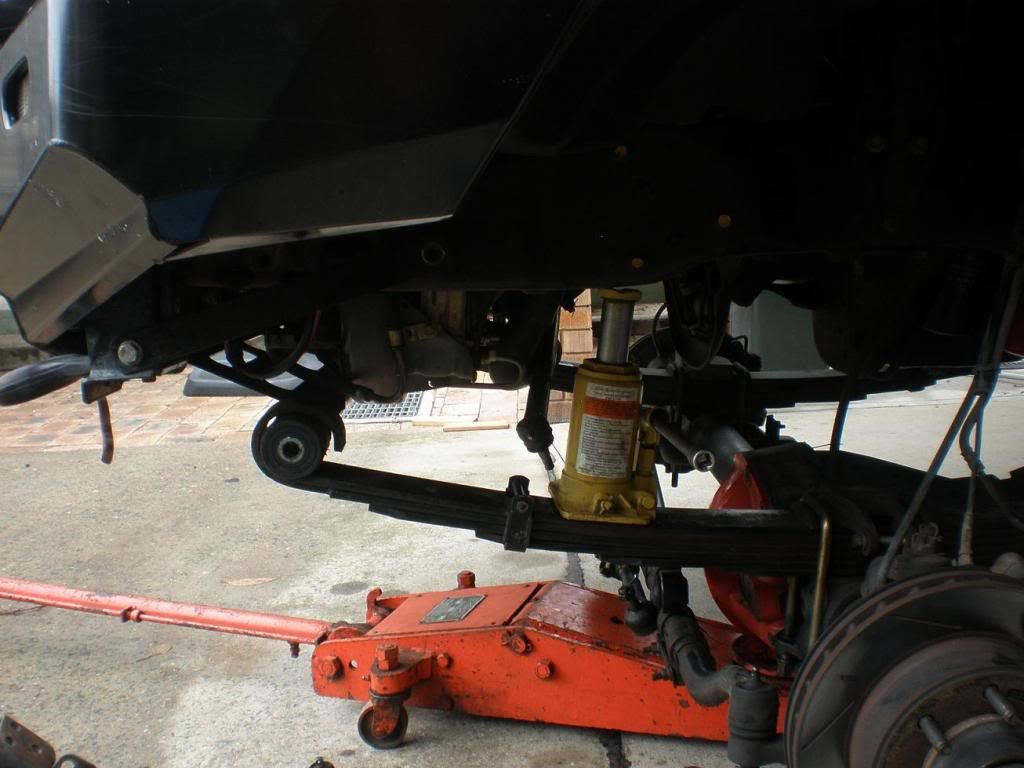
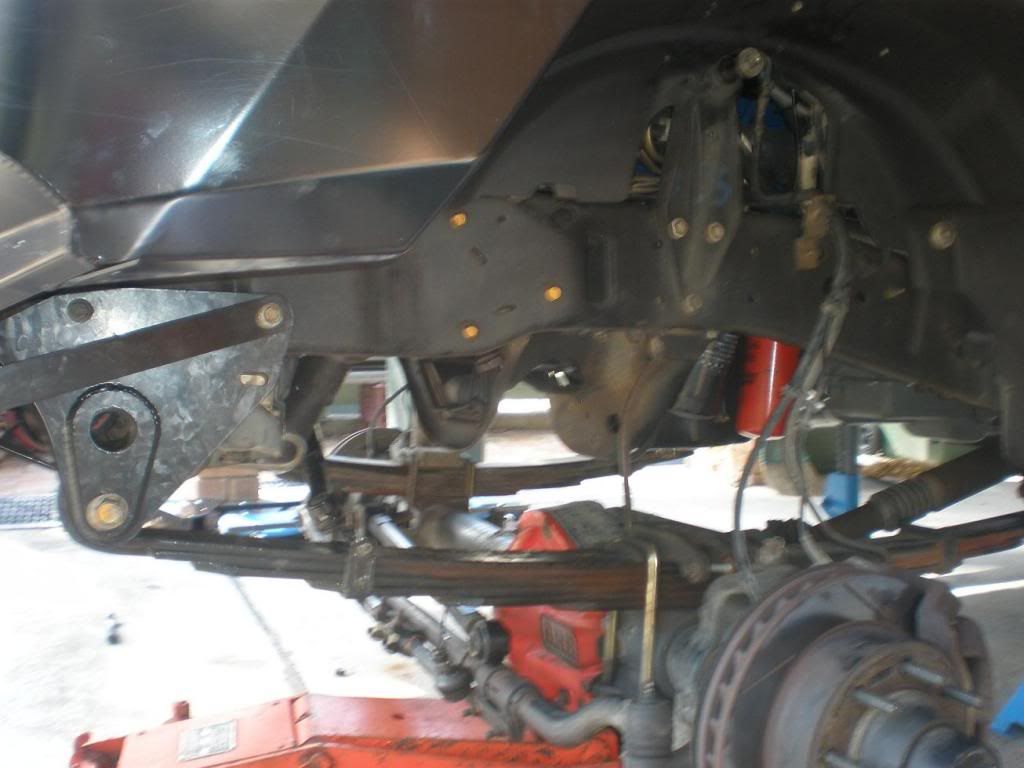
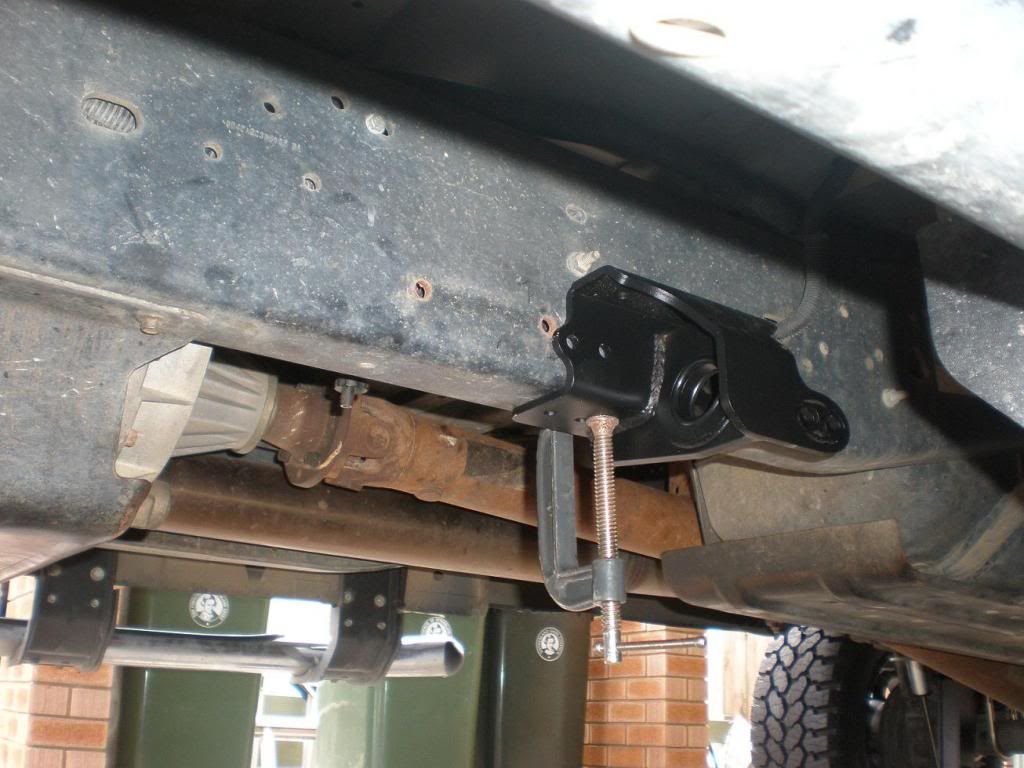
Now the rear block are pretty straight forward. Support the rear of the truck with the tyres off the ground. Support the rear axle with jack. Undo ubolts and remove the 2" OEM block. The OUO blocks have adjustable locating pins for the spring packs. I used the Zero setting. Drop the axle down to fit the block and fit on pin. Now I had to cut a fair bit of the Ubolt to fit my socket due to the fact I didnt have a spanner big enough. They are high tensile so I went through a few cutting disks.
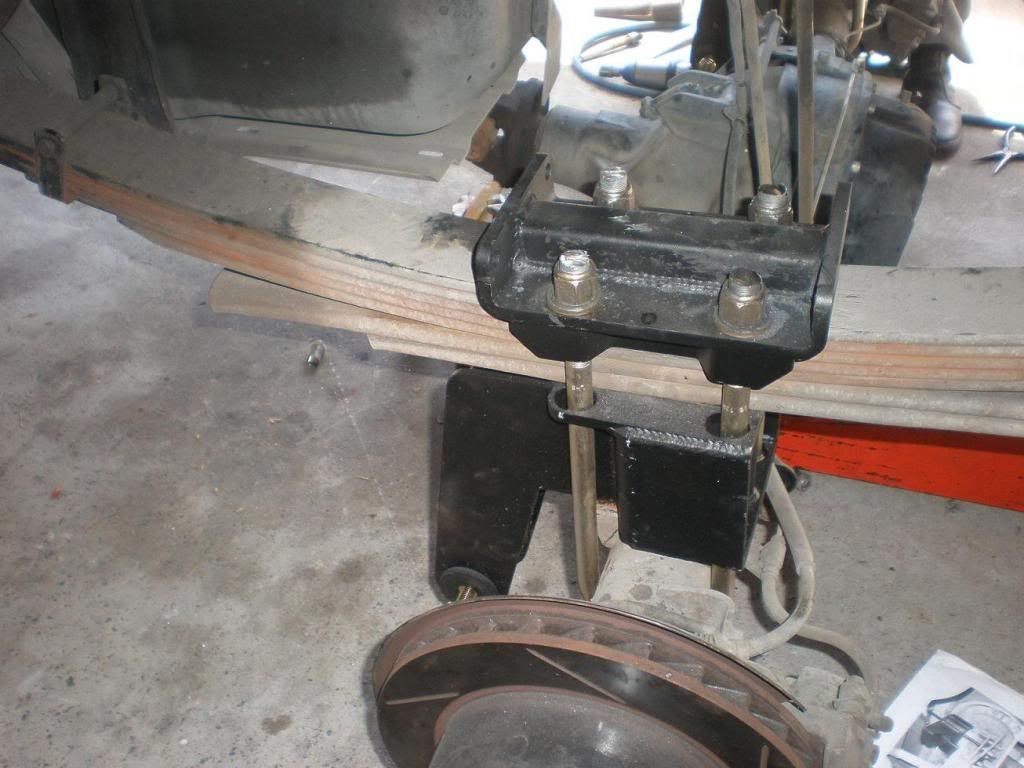
Repeat for the other side and do the suckers up. Then onto the bars. Once again the instructions are straight forward and there is not much technical about it. Find a location up the chassis that the front brackets will fit and you can gain access.
Find a point from the front and get the measurement so you can repeat for the other side
Now some say you should follow the angle of the drive shaft and others say just find a clear spot. Obviously I went for the latter.
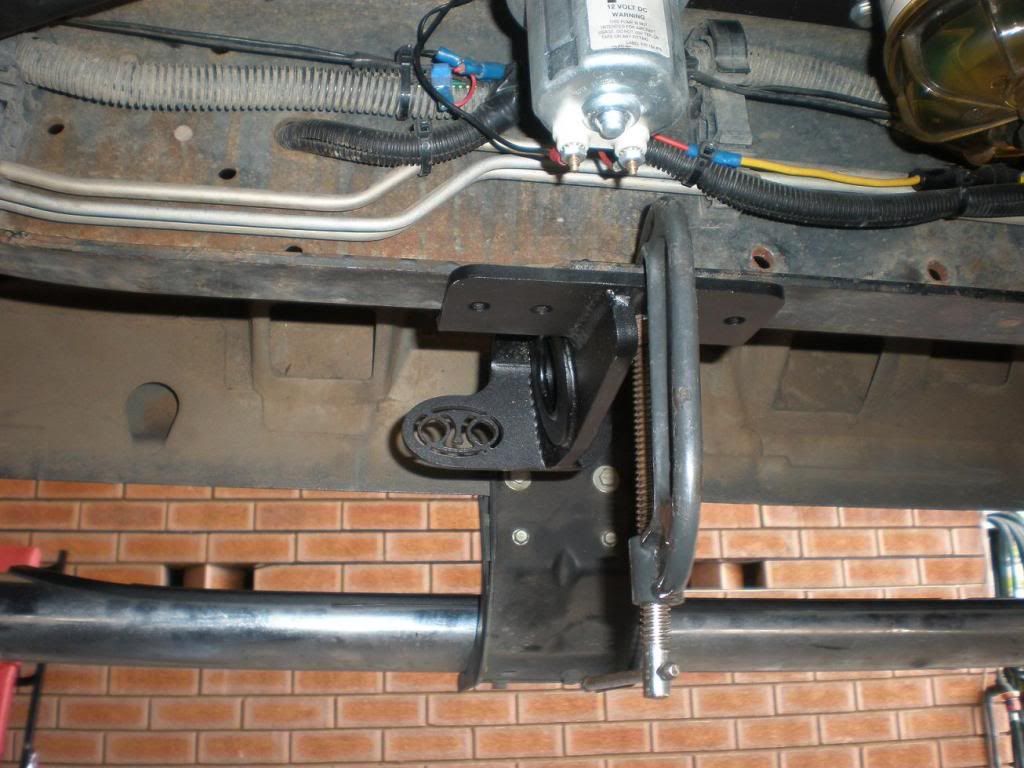
Now there are 8 bolts on each bracket which need pilot holes and intermediate holes until you are up to 10mm. Thats alot of drilling and there aint much room and the chassis is strong. On the outer side of the drivers side I had to use a battery drill cause there isnt enough room for the electrical drill to go in straight. Take ya time, have a break in between and get it right. That was the hardest part of the whole deal
The front bolt needs a 34mm socket and the only one I had was 3/4 drive so my 1/2 drive torque wrench wouldnt fit. You need 125ft/lb of torque so i just did the mungrel up dam tight. You will also need to stop the bar from spinning so I use some stilsens. It left a little mark but I can only work with what I have.
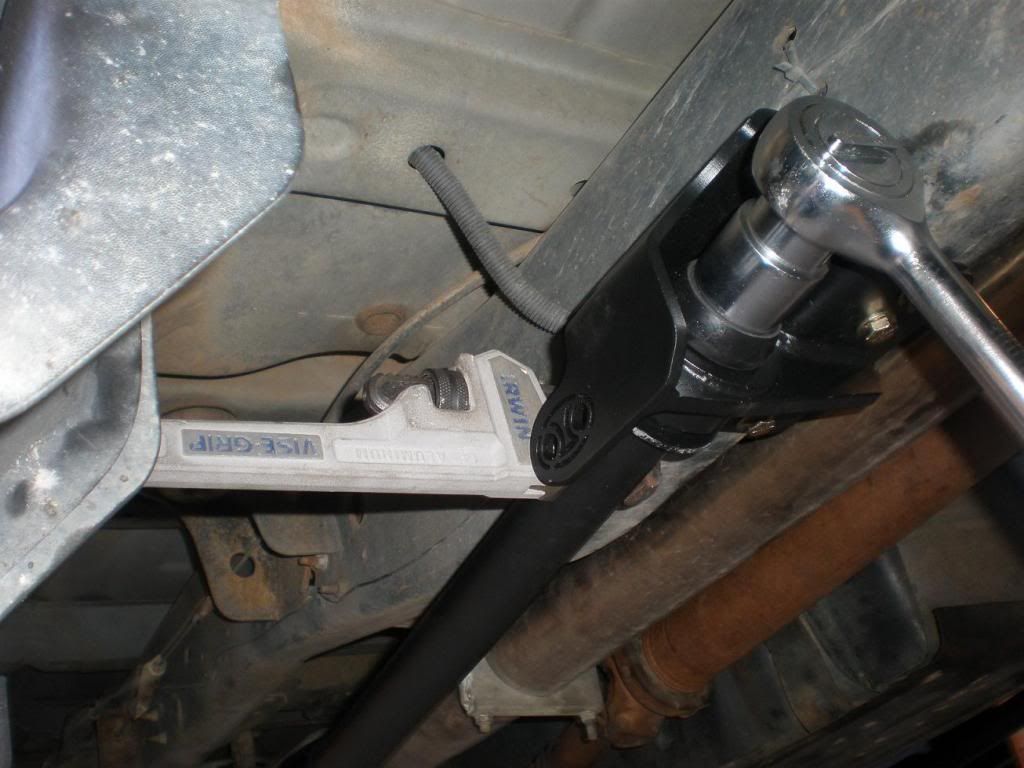
One last bit of drilling on the coupler and you are done. Oh, you are going to need a 1/2 and 5/8 drill for that which I didnt have. So up to bunnings I went.
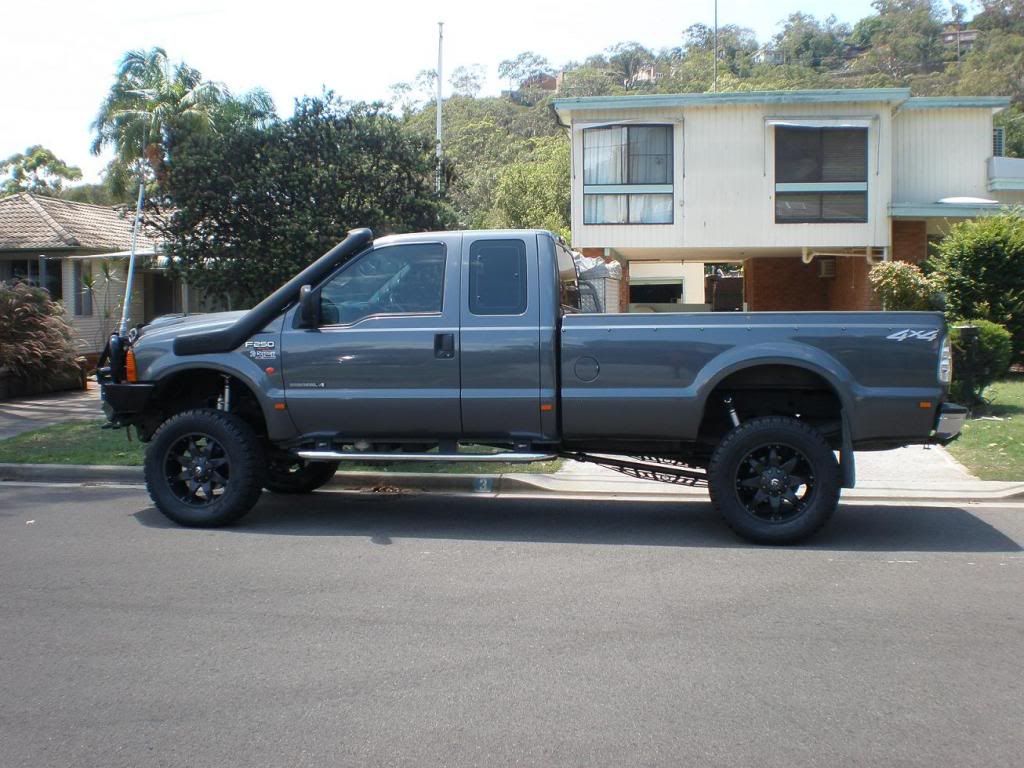
All done

The finished product
I already have 2" of lift in my spring packs, so I decided to go another 3" by way of OUO 5" block/traction bar at the rear and Icon 3" shackle extension at the front.
Here is the rear kit
And the front
First up was to remove all the steering Knuckles on the drag link and the bar that runs from the steering box to the dummy box. Alot of heat and a bit of PB blaster then a tap with the hammer and they should pop out.
Then remove the pitman arm. Which aint easy. Heaps of heat and a turn on the puller and repeat the process until it pops off. Once of clean her up, add a bit of anti sieze. Flip her over and put it back on.
Then support the front of the truck via stands and support the front axle via jack
Take out the front pin and then the rear and remove the rear shackle. I had to drill out the Icon rear shackle holes a little bit more to fit my pins. Once that was done they are pretty easy to install
Now the instructions say to fit the front extension and then front pin. I used a bottle jack to push the springs down to fit the extension in.
But I gotta tell ya, getting that pin to line up was a complete PITA. So on the other side I pushed the springs down and put the pin in first and let the whole lot come up as one and it was alot easier
Front kit installed
other side done and shockie in place
Now the rear block are pretty straight forward. Support the rear of the truck with the tyres off the ground. Support the rear axle with jack. Undo ubolts and remove the 2" OEM block. The OUO blocks have adjustable locating pins for the spring packs. I used the Zero setting. Drop the axle down to fit the block and fit on pin. Now I had to cut a fair bit of the Ubolt to fit my socket due to the fact I didnt have a spanner big enough. They are high tensile so I went through a few cutting disks.
Repeat for the other side and do the suckers up. Then onto the bars. Once again the instructions are straight forward and there is not much technical about it. Find a location up the chassis that the front brackets will fit and you can gain access.
Find a point from the front and get the measurement so you can repeat for the other side
Now some say you should follow the angle of the drive shaft and others say just find a clear spot. Obviously I went for the latter.
Now there are 8 bolts on each bracket which need pilot holes and intermediate holes until you are up to 10mm. Thats alot of drilling and there aint much room and the chassis is strong. On the outer side of the drivers side I had to use a battery drill cause there isnt enough room for the electrical drill to go in straight. Take ya time, have a break in between and get it right. That was the hardest part of the whole deal
The front bolt needs a 34mm socket and the only one I had was 3/4 drive so my 1/2 drive torque wrench wouldnt fit. You need 125ft/lb of torque so i just did the mungrel up dam tight. You will also need to stop the bar from spinning so I use some stilsens. It left a little mark but I can only work with what I have.
One last bit of drilling on the coupler and you are done. Oh, you are going to need a 1/2 and 5/8 drill for that which I didnt have. So up to bunnings I went.
All done
The finished product
#2
02-03-2013, 11:45 PM
Join Date: Jun 2010
Location: tasmania Australia
Posts: 308
Likes: 0
Received 0 Likes
on
0 Posts
#3
02-04-2013, 01:19 AM
Join Date: Apr 2009
Location: Man Cave
Posts: 2,135
Likes: 0
Received 0 Likes
on
0 Posts

#5
02-04-2013, 02:32 AM
Join Date: Jun 2010
Location: tasmania Australia
Posts: 308
Likes: 0
Received 0 Likes
on
0 Posts
#7
02-04-2013, 05:57 PM


Trending Topics
#8
02-05-2013, 01:29 AM
Join Date: Apr 2009
Location: Man Cave
Posts: 2,135
Likes: 0
Received 0 Likes
on
0 Posts
Had a wheel alignment today. Just the tow angles were out. And they adjusted the draglink a bit more to centre the steering wheel
#9
02-05-2013, 04:08 AM
Join Date: Jun 2010
Location: tasmania Australia
Posts: 308
Likes: 0
Received 0 Likes
on
0 Posts
#10
02-06-2013, 01:31 AM
Join Date: Apr 2009
Location: Man Cave
Posts: 2,135
Likes: 0
Received 0 Likes
on
0 Posts
#11
02-06-2013, 03:56 AM

Posting Guru
Join Date: Apr 2010
Location: Canberra Australia
Posts: 1,164
Likes: 0
Received 0 Likes
on
0 Posts
#12
02-06-2013, 02:37 PM
Join Date: Jun 2010
Location: tasmania Australia
Posts: 308
Likes: 0
Received 0 Likes
on
0 Posts
#14
02-08-2013, 05:31 PM
Join Date: Mar 2010
Location: Slade Point, Australia
Posts: 800
Likes: 0
Received 0 Likes
on
0 Posts
 ...
...Truck looks totally different,looks good,can i take it for another spin ?
NO,ok i understand
