Fun with electricity on a '52
#1
 01-23-2013, 08:25 PM

Fun with electricity on a '52
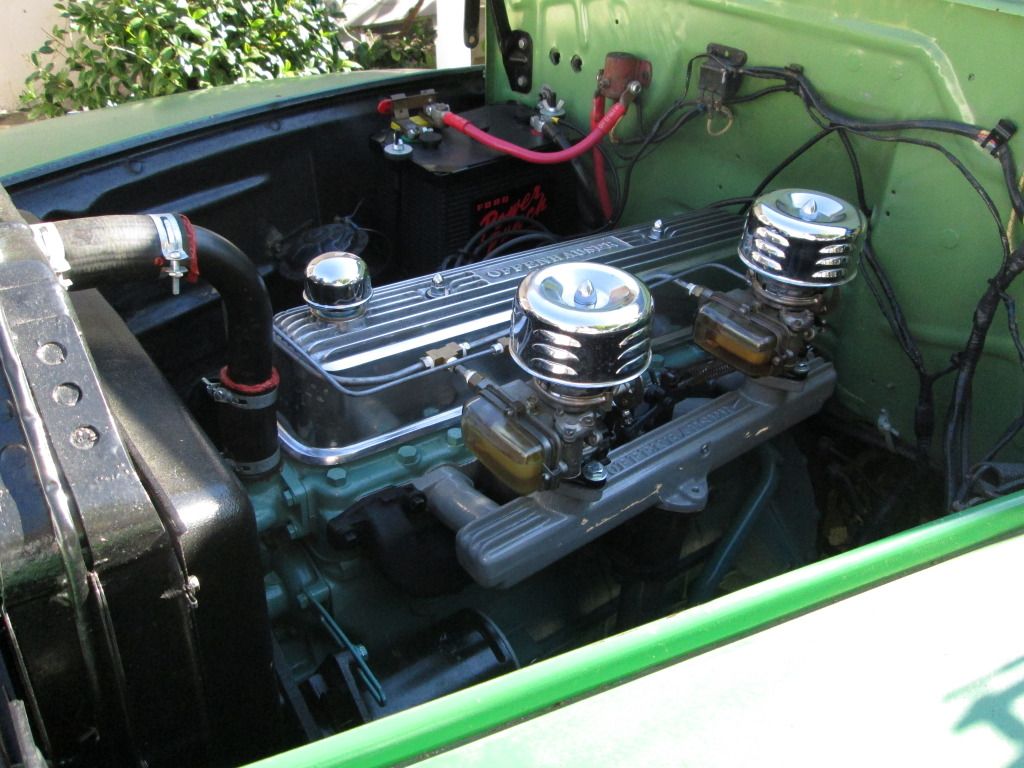
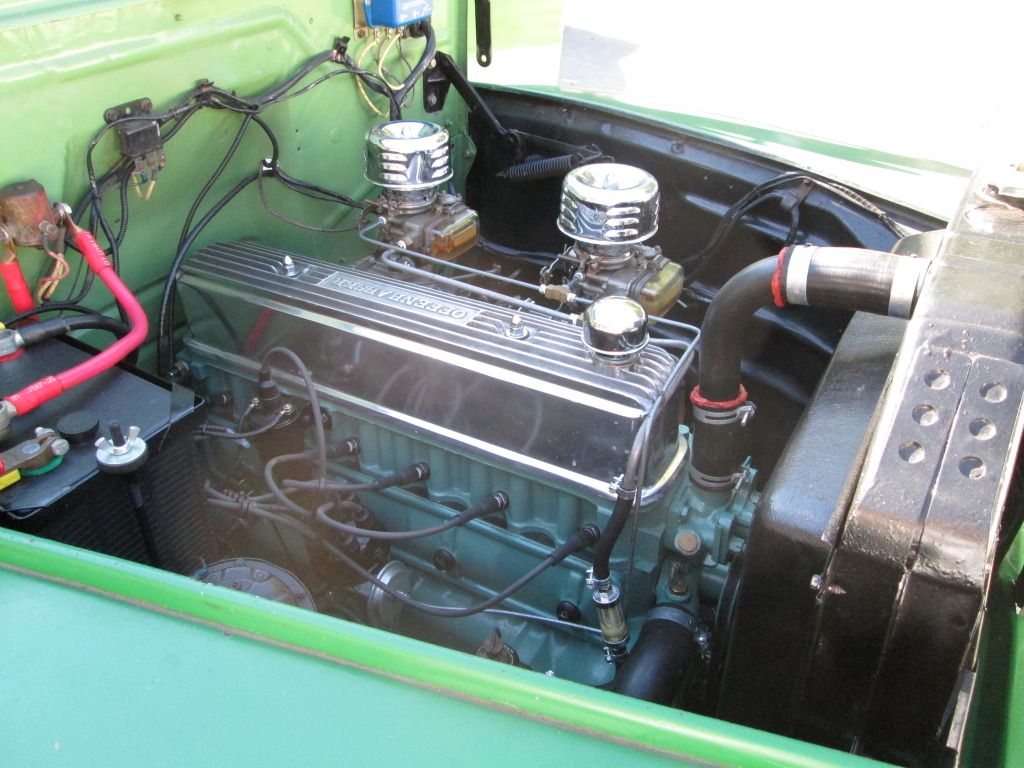
A guy brought me an original, one owner '52 Ford F3. His great grandfather bought it new and passed it down to his son, then his, then his. This guy wants to drive it, so I'm updating it for him to make it more reliable. I put a GM, one wire alternator on it and fabricated the brackets.
The blue brackets are the ones I made and the others are the originals.

It turned out pretty good.

Here's what the truck looks like.

Obviously, I'm not stopping with the alternator. A complete 12 volt conversion will happen along with some other updates. The new wire harness with modern fuses should be here in the next few days.
The blue brackets are the ones I made and the others are the originals.
It turned out pretty good.
Here's what the truck looks like.
Obviously, I'm not stopping with the alternator. A complete 12 volt conversion will happen along with some other updates. The new wire harness with modern fuses should be here in the next few days.


#5
01-24-2013, 07:15 AM
 That looks fantastic!

#7
01-24-2013, 03:29 PM
Trending Topics
#8
01-24-2013, 06:19 PM
Welcome ,you will have fun here.As i look at the bracket on the top,for adjustment.I wonder if ts the picture or is it on the thin side.I could be wrong {most of the time}but I think those brackets are usually about 1/4 inch thick.I would hate to have you break it from vibration and throw a belt.
#9
01-29-2013, 06:22 PM
Welcome ,you will have fun here.As i look at the bracket on the top,for adjustment.I wonder if ts the picture or is it on the thin side.I could be wrong {most of the time}but I think those brackets are usually about 1/4 inch thick.I would hate to have you break it from vibration and throw a belt.
*update* I made the new turn signals for the front today. I spliced in dual filament sockets into the factory park light fixtures. I had to recess the sockets 1/2" to get the clearance I needed around the bulbs so the heat doesn't melt the lenses. Now the park lights under the headlights are amber park lights/turn signals.
Most of the modifications for the 12 volt stuff is done. It started to monsoon outside, so I packed it up for the day.
#10
02-04-2013, 09:06 AM
So, I wrapping up this 12 volt conversion and I thought I'd share some problems I ran into.
The main problem is I'm trying to keep it as stock as possible, yet have all the modern lights a newer vehicle would have.
A couple problems that came up were the turn signals. A '52 F3 did NOT come with turn signals and only one tail light. (at least this one did) Not only aren't the fixtures there, but neither are the controls.
At some point, someone added turn signals by putting a signal-stat turn signal switch in it and mounting very bulky looking tractor lights on the fenders and rear of the truck as the lights. It retained the stock, one tail light with brake light fixture on the driver's side. So how do you get integrated tail lights, brake lights and turn signals?
That's the tricky part. I mounted two sealed, oval trailer lights in brackets that I made in the back. In the front, I took the single filament sockets out of the park lights and mounted dual filament sockets in them. The signal-stat switch is a single circuit switch. That means you have to wire front and rear turn signals together to get them all to work. To make the brake lights work, you have to wire in to the rear turn signals. The problem is, if you do that, every time you step on the brake, the front park lights would come on as well. So I wired two diodes into the circuit between the front and rear turn signals so only the rear brake lights come on when you step on the brake.
As far as the gauges go, the ammeter is no problem. The stock gauge will work with the 12 wire. Why? Because the gauge works off of magnetism of the wire and doesn't actually connect to the gauge. The rest of the gauges, wiper motor, and blower motor run off of a voltage reducer mounted under the dash, so they're still 6 volt.
Another thing I had to remember. I swapped the coil out to a 12 volt coil, but a 12 volt coil actually runs on 9 volts, so I had to add a ballast resistor in line.
Things to replace on a 12 volt conversion:
Generator/alternator
horn relay
head lights
dash light bulbs
park lights
tail lights
starter solenoid
ignition coil
battery
The blower and wiper motor can run on voltage reducers or be replaced with 12 volt stuff. Same with the gauges. The original 6 volt starter will hold up just fine with 12 volts if the vehicle is running properly and the starter solenoid is replaced with a 12 volt unit. I wouldn't sit there and crank it for 30 seconds, though. The stock horn works just fine with 12 volts as well. Same theory. Don't sit there and lay on the horn and you'll be just fine.
I just thought I would give anyone a heads up on some tips if they wanted to do this on their truck.
#11
02-04-2013, 10:43 AM

Thread
Thread Starter
Forum
Replies
Last Post
RL250
1980 - 1986 Bullnose F100, F150 & Larger F-Series Trucks
138
11-17-2014 04:07 PM
ampslw
1999 - 2003 7.3L Power Stroke Diesel
22
10-02-2010 10:15 AM
PinkStroker
1999 - 2003 7.3L Power Stroke Diesel
91
11-13-2008 10:51 AM