
Ugly Betty: Frame-Up Rebuild w/ a Donor
#16
 12-23-2012, 04:12 PM

Join Date: Dec 2010
Location: Carlisle
Posts: 221
Likes: 0
Received 0 Likes
on
0 Posts
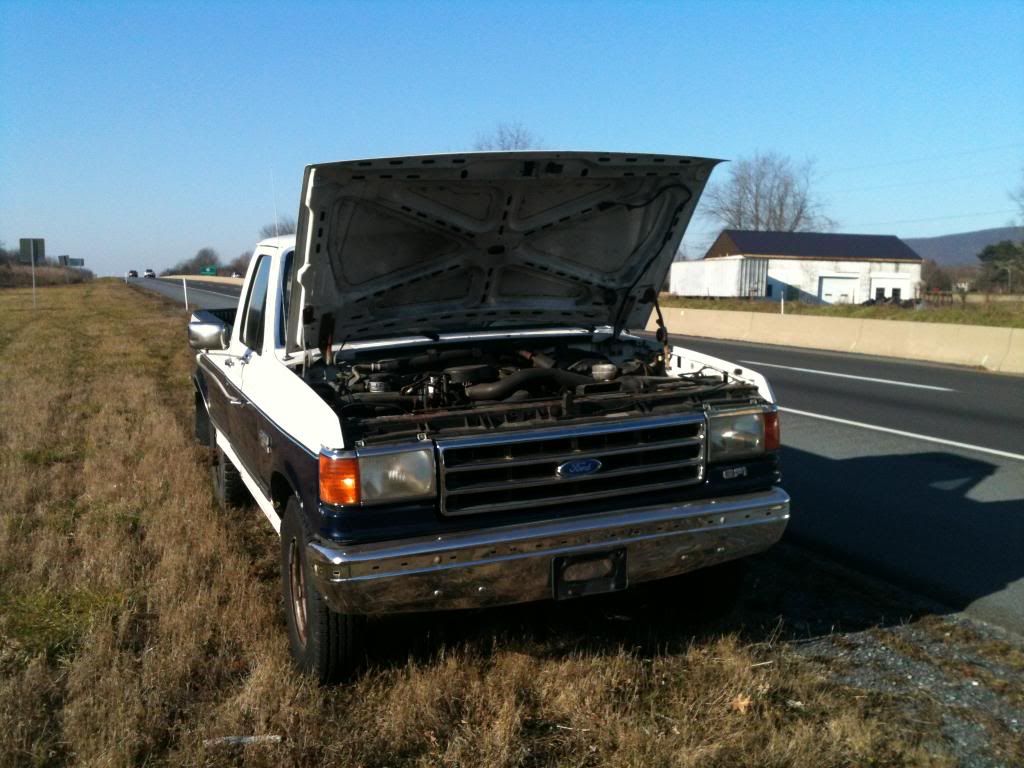
So, why no progress today you might ask… I had a lead on some smokin rims from none other than Diesel_Brad. I figured it would only be right to take Ugly Betty on one last Highway trip before she’s changed forever. Besides, she’d been sitting in the back yard for a few months without a good long run, so it made sense. I had to drop some carpet off at the rental on the way and it was a cold morning- hard frost and all. I got started and had the heat cranked up to thaw the windshield and get some warmth to the old bones. All was running well 1.5 hours into the trip when I noticed the charge indicator was really close to the 8 (volts?) end of the spectrum.
Just for giggles I figured I’d turn the lights on to see where I stood- I stood about 75 seconds from a breakdown, that's where I stood. I thought the check battery light came on initially because the battery was a little low (it did go out in my defense)- turns out it was on because my alternator wasn’t working… (BTW- for some reason the light was PERFECT on the chrome in the picture- it doesn't really look that bright!!)
I called to the wife and the Honda Pilot was mobilized- within 50 minutes I had my spare battery from Betsy (thank goodness I pulled that out a few weeks back) somewhat charged and installed. I had to watch the charge indicator pretty closely and we took the lunch break to charge the battery before the 1.5 hour drive back home. While it took a lot of prime hours from the day it was well worth it- I have RIMS!!!!
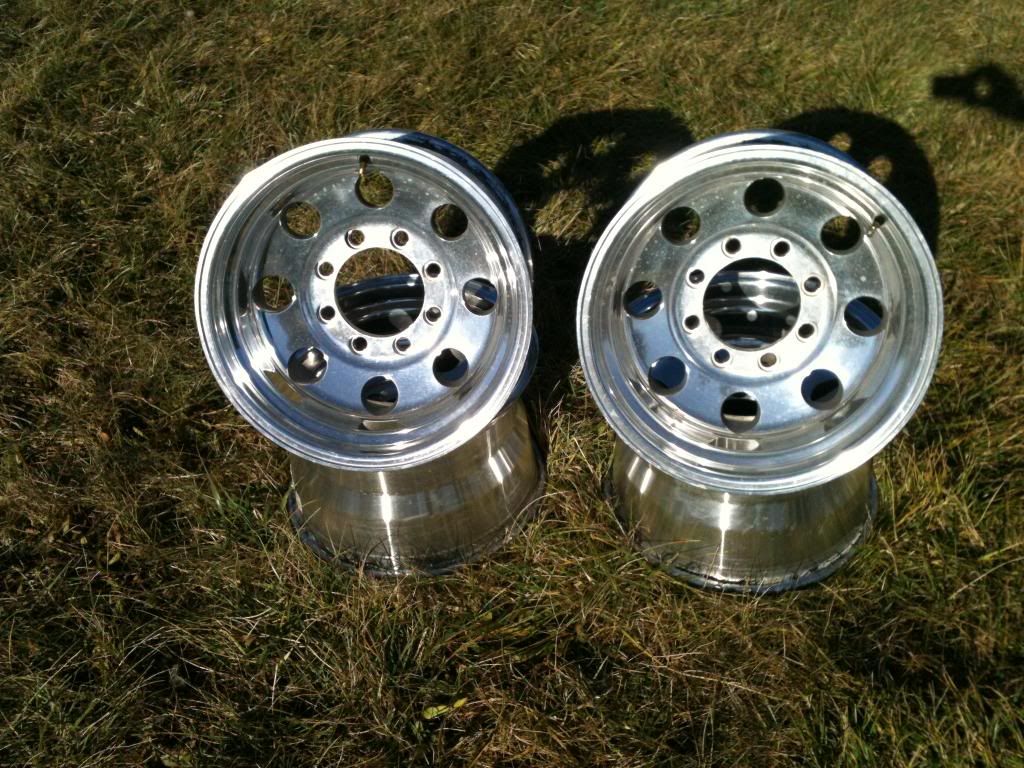
I can only hope they look � as good on UB v2 as they did on Diesel_Brads CCSB…
For those of you who don’t know Brad or the CCSB build, check this out!
https://www.ford-trucks.com/forums/1...csb-build.html
The man is a master and seeing the CCSB in person was a treat worth the trip and breakdown, never mind the rims. I do have one bone to pick with you though Brad- for some reason after leaving today I kept getting the urge to start a powerstroke rebuild even though I have barely started the UB rebuild. Hm, does a man really need two trucks?
Just for giggles I figured I’d turn the lights on to see where I stood- I stood about 75 seconds from a breakdown, that's where I stood. I thought the check battery light came on initially because the battery was a little low (it did go out in my defense)- turns out it was on because my alternator wasn’t working… (BTW- for some reason the light was PERFECT on the chrome in the picture- it doesn't really look that bright!!)
I called to the wife and the Honda Pilot was mobilized- within 50 minutes I had my spare battery from Betsy (thank goodness I pulled that out a few weeks back) somewhat charged and installed. I had to watch the charge indicator pretty closely and we took the lunch break to charge the battery before the 1.5 hour drive back home. While it took a lot of prime hours from the day it was well worth it- I have RIMS!!!!
I can only hope they look � as good on UB v2 as they did on Diesel_Brads CCSB…
For those of you who don’t know Brad or the CCSB build, check this out!
https://www.ford-trucks.com/forums/1...csb-build.html
The man is a master and seeing the CCSB in person was a treat worth the trip and breakdown, never mind the rims. I do have one bone to pick with you though Brad- for some reason after leaving today I kept getting the urge to start a powerstroke rebuild even though I have barely started the UB rebuild. Hm, does a man really need two trucks?
#17
12-23-2012, 05:09 PM
Cargo Master
Join Date: Jan 2012
Location: Northeast Indiana
Posts: 2,654
Likes: 0
Received 0 Likes
on
0 Posts

#18
12-23-2012, 07:21 PM
Join Date: Dec 2010
Location: Carlisle
Posts: 221
Likes: 0
Received 0 Likes
on
0 Posts
Thanks KingBigJoe! I've been on FTE for a few years now and have enjoyed seeing everyone else's builds... Seems only fair that others might be able to enjoy mine back- have a beer and enjoy! 
Tomorrow I'm going to push to get the cab off. To do that I'll need to do 8 main things:
1) Disconnect the emergency break
2) Disconnect the clutch master cylinder
3) Disconnect the break master cylinder and drain the brakes
4) Disconnect the throttle (okay I cheated- this is already done)
5) Disconnect the cab bolts on the frame
6) Disconnect the steering wheel (not really sure how to do that...)
7) Detach the manual shifting levers (both the ZF5 and 4WD shifter)
8) Miscellaneous electrical connectors that I can't readily see at the moment but KNOW are there.
Once that's done I'll get my buddies tractor with a bucket to lift the cab off- let's see what happens...
#19
12-24-2012, 07:16 AM

#20
12-24-2012, 11:34 AM
Join Date: Dec 2010
Location: Carlisle
Posts: 221
Likes: 0
Received 0 Likes
on
0 Posts
Thanks Sidewinder. Most of y'all are so good at working on your trucks that you can say "took the Vapor Canister off today and man where those bolts rusty", which usually prompts a fever of google searches as I try to figure out what you are even talking about... At least now I only need to research what it does! 
#21
12-24-2012, 12:43 PM
Join Date: Dec 2010
Location: Carlisle
Posts: 221
Likes: 0
Received 0 Likes
on
0 Posts
Work continues on the tear down and I'm seriously considering changing my user name to "GrinderKing". I don't know if this is normal or an accepted practice, but I've got almost NO tolerance for screwing with stuck bolts before the grinder comes out. Maybe I just like all the pretty sparks or maybe the fumes get me high, but I can't seem to put the thing away...
I started on bleeding out the breaks because I could intimidate some last minute good behavior before Santa comes tonight...
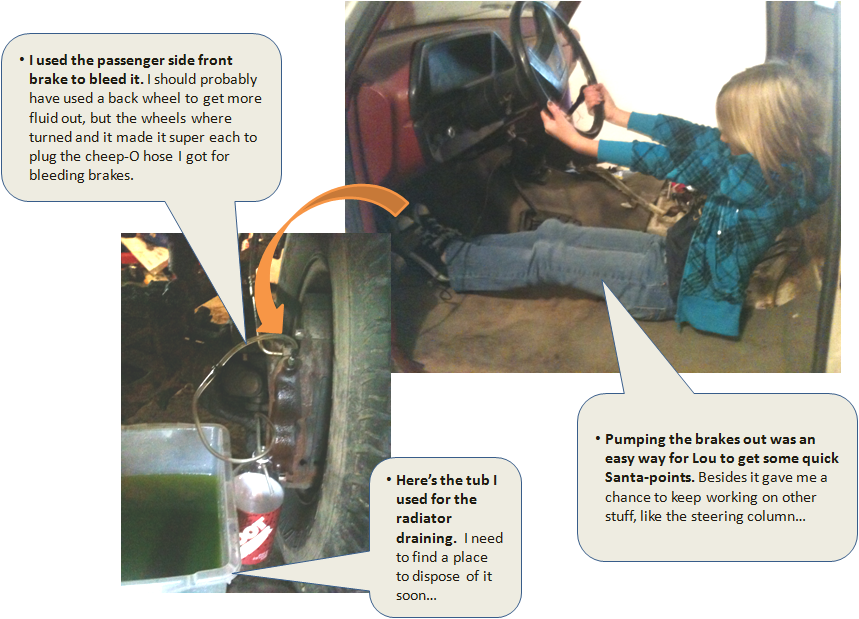
As for the steering column, my grinder finger is gettin itchy! I took two bolts out, one on top close to the brake vacuum booster and one down at the bottom by the steering box. I thought this was a pretty straight forward operation where the column collapses/slides down a bit so you can get it off, but apparently mine is seized up BADLY.
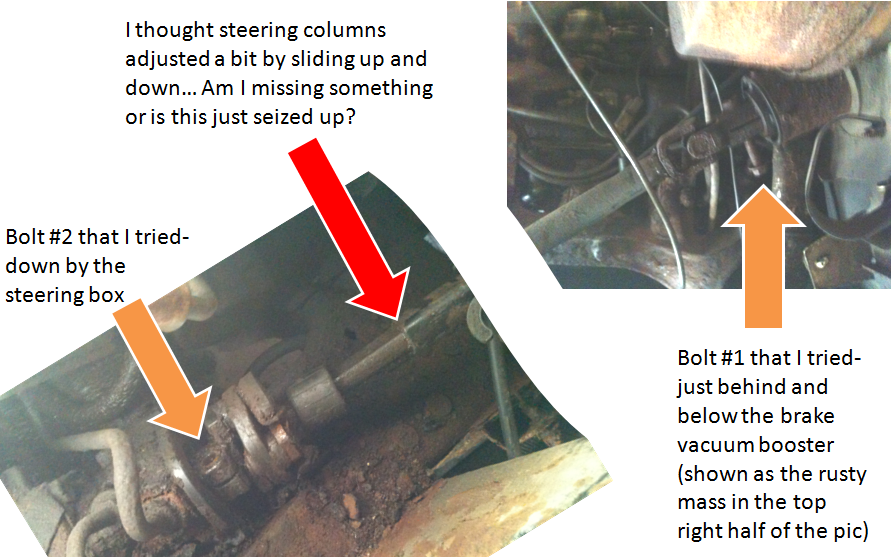
HELP! How can I get the steering column off without grinding/cutting it out? I have a plumbers torch- would that maybe help?
Just to cover the bases I got the ZF5 shifting lever out as well- 2 simple bolts there were kept cozy in the cab, so no grinding required!
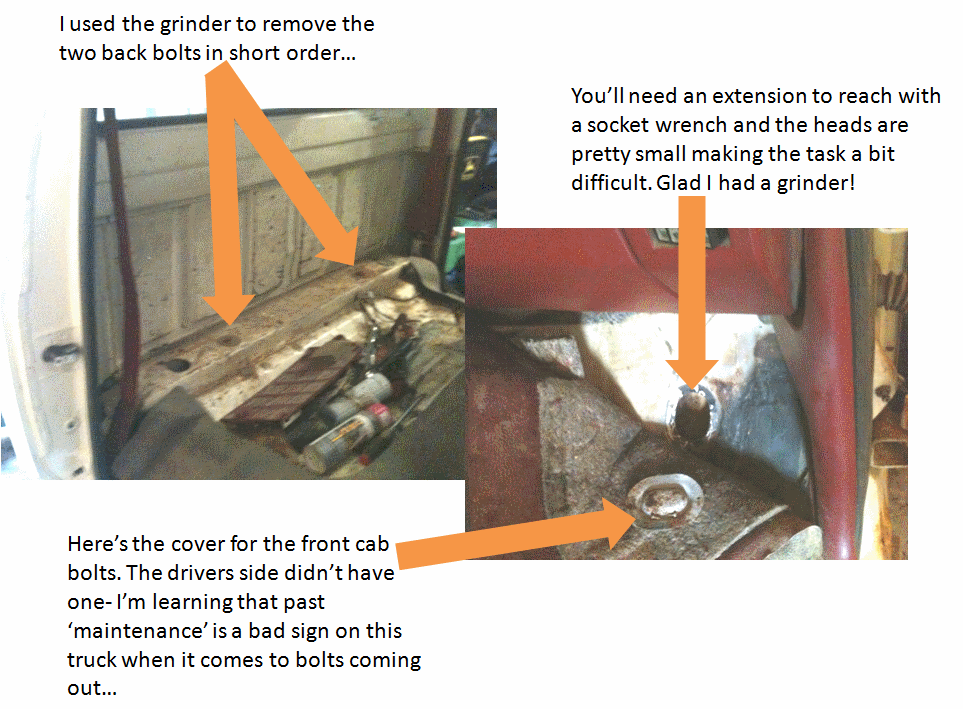
Since I was in the cab I figured I'd hit the four cab bolts- one in each corner. I started on the drivers side. I picked up a 24", 1/2" drive breaker bar this morning and gave it some use trying to break the bolts loose. Unfortunately the bolts won the first round. Grinder in hand, we started the second round! For the front two cab bolts I ground them out from the bottom, under the cab, since the bolt heads are in a small cut-outs in the floor board. The back two bolts were easily ground out since the heads are relatively small and they are reachable...
By this point the brakes were fully bled (Lou needed a few breaks to check the bottle, adjust the radio, beat on her little brother, etc.). So all I needed to do was unscrew the two brake lines from the master cylinder...
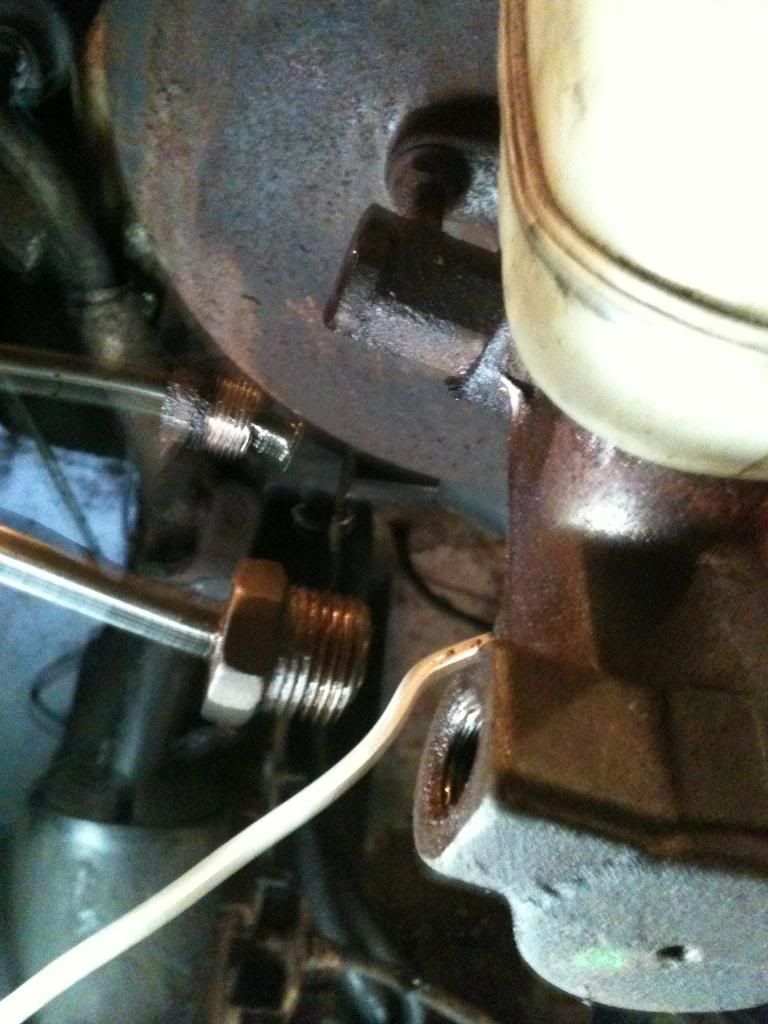
The picture will help me remember that the big fitting goes in front (though it would be tough even for me to screw up the fittings- it's the lines I'll need to pay attention to!).
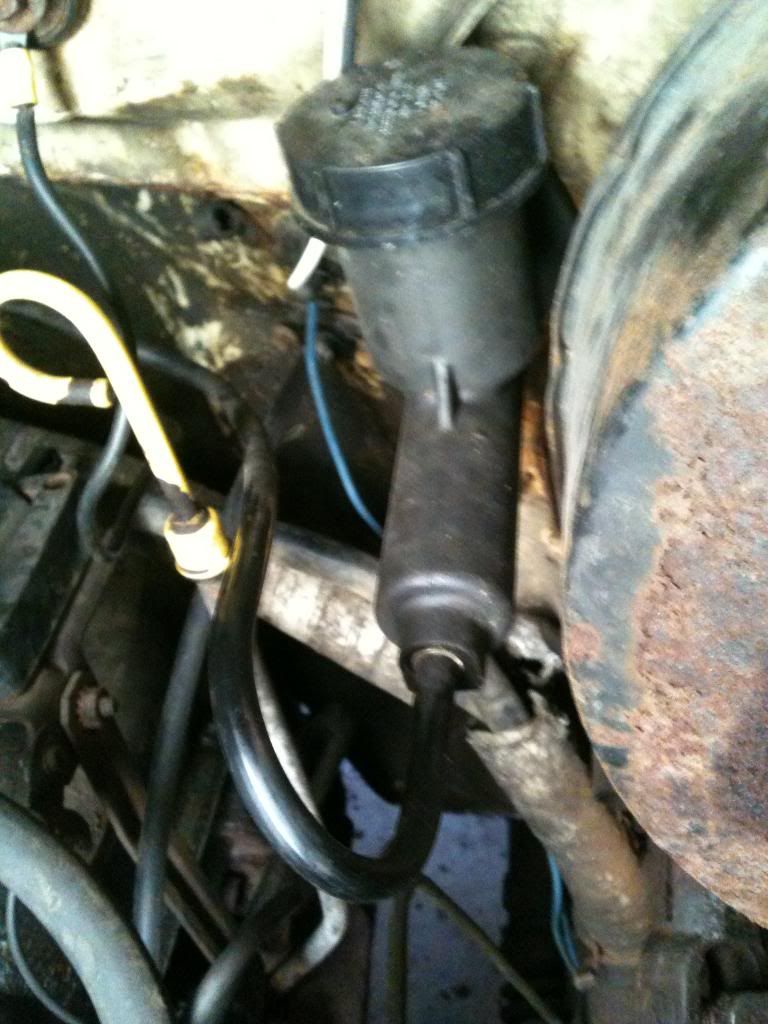
Okay, so last problem of the AM- how the heck to I get the clutch line disconnected? There doesn't feel like there is any kind of screw or "attachment" on the transmission or at the clutch cylinder by the firewall. Betsy's line looks pretty friggin new too, so I'd rather not cut it or something similarly brute-forced in nature. Can someone with a clue please help!? Do I have to take it off the firewall or the tranny?
I started on bleeding out the breaks because I could intimidate some last minute good behavior before Santa comes tonight...
As for the steering column, my grinder finger is gettin itchy! I took two bolts out, one on top close to the brake vacuum booster and one down at the bottom by the steering box. I thought this was a pretty straight forward operation where the column collapses/slides down a bit so you can get it off, but apparently mine is seized up BADLY.
HELP! How can I get the steering column off without grinding/cutting it out? I have a plumbers torch- would that maybe help?
Just to cover the bases I got the ZF5 shifting lever out as well- 2 simple bolts there were kept cozy in the cab, so no grinding required!
Since I was in the cab I figured I'd hit the four cab bolts- one in each corner. I started on the drivers side. I picked up a 24", 1/2" drive breaker bar this morning and gave it some use trying to break the bolts loose. Unfortunately the bolts won the first round. Grinder in hand, we started the second round! For the front two cab bolts I ground them out from the bottom, under the cab, since the bolt heads are in a small cut-outs in the floor board. The back two bolts were easily ground out since the heads are relatively small and they are reachable...
By this point the brakes were fully bled (Lou needed a few breaks to check the bottle, adjust the radio, beat on her little brother, etc.). So all I needed to do was unscrew the two brake lines from the master cylinder...
The picture will help me remember that the big fitting goes in front (though it would be tough even for me to screw up the fittings- it's the lines I'll need to pay attention to!).
Okay, so last problem of the AM- how the heck to I get the clutch line disconnected? There doesn't feel like there is any kind of screw or "attachment" on the transmission or at the clutch cylinder by the firewall. Betsy's line looks pretty friggin new too, so I'd rather not cut it or something similarly brute-forced in nature. Can someone with a clue please help!? Do I have to take it off the firewall or the tranny?
#23
12-24-2012, 01:11 PM

If you can manage, keep the clutch master and slave all connected as an assembly. They are near impossible to bleed once the system is opened and most of the connections are flimsy plastic and will break. Just unscrew the tabs that keep the line attached to the body, remove the two studs holding the master to the firewall, unclip the rod from the pedal, and pry the slave off the transmission.
#24
12-24-2012, 04:21 PM
Join Date: Dec 2010
Location: Carlisle
Posts: 221
Likes: 0
Received 0 Likes
on
0 Posts
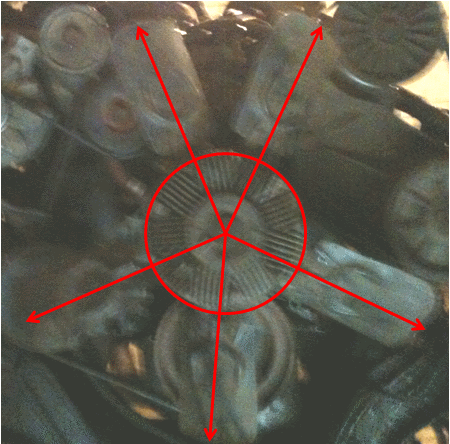
Been meaning to post this picture for a while. My kids were out playing around in front of the engine and spinning the fan around a bit asking "why do cars have fans?" when I noticed that the fan seemed more than slightly bent. Maybe a cat got caught in there at some point- what ever the case that couldn't be good for anything.
#27
12-24-2012, 05:23 PM
Join Date: Dec 2010
Location: Carlisle
Posts: 221
Likes: 0
Received 0 Likes
on
0 Posts
After lunch I got back at it. Turns out the steering column was pretty easy to get off since I had ground the cab bolts off- I just wiggled the cab back about an inch and the bottom bracket slipped right off of the steering box. I was pretty pumped until I had to back the truck out and couldn't steer the 300+ lb Dana60 front axle. I connected the steering wheel to get it out more easily.
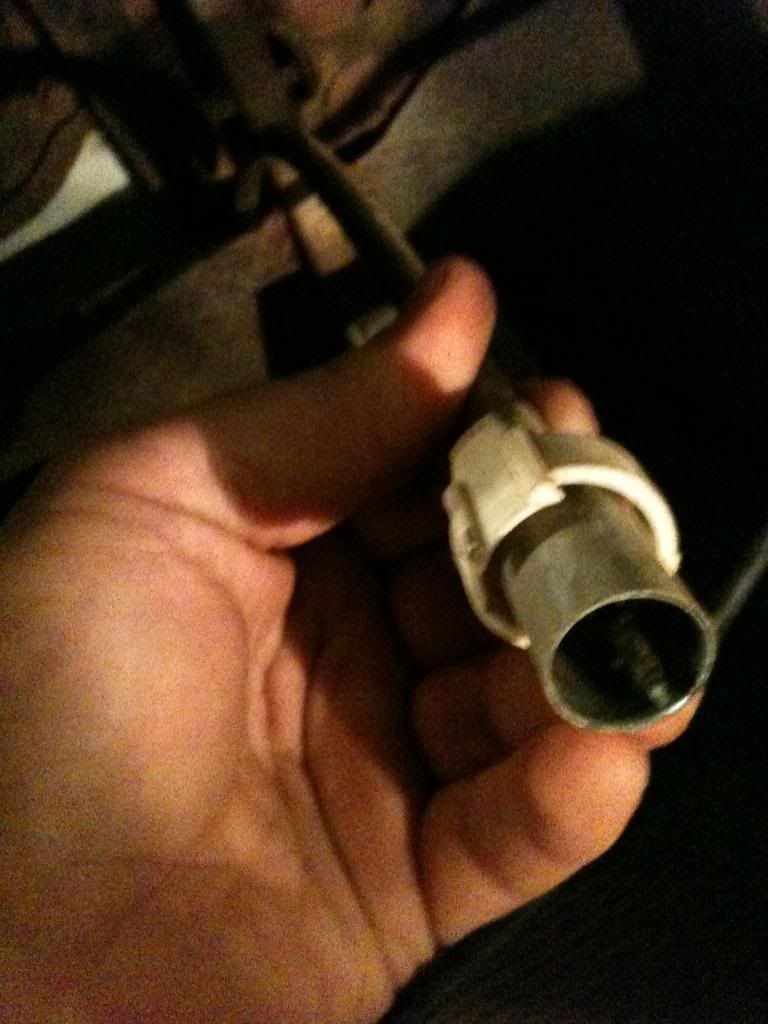
Anyhow, along the way I found the speedo cable, which I had forgotten about. It was detached from the dash, which explains why Betsy never had a working speedometer. Anyhow, there was a small rubber grommet holding it to the cab, which I popped off with a screwdriver. The housing was pretty big, so there's a decent sized hole for it. Here's a shot of the speedo cable...
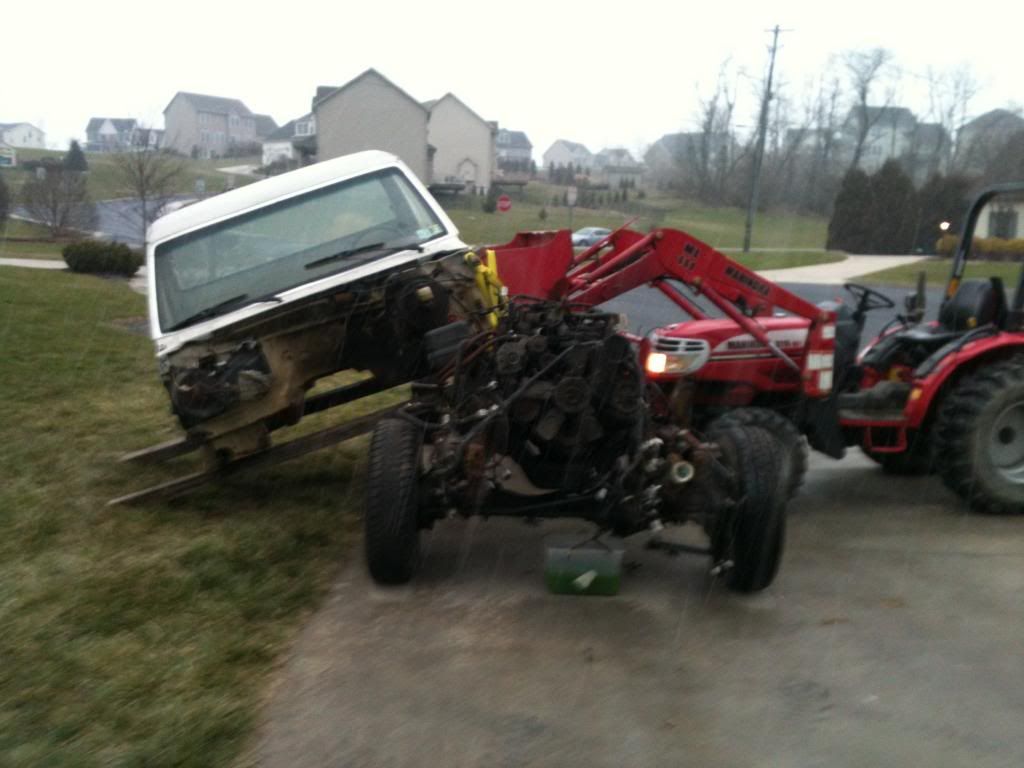
Next it was time to back her out of the garage where my buddies little red tractor was waiting to help with the heavy lifting. I used the tractor to get the front of the cab up in the air and wiggle it back some more until I could more easily see the clutch tube.
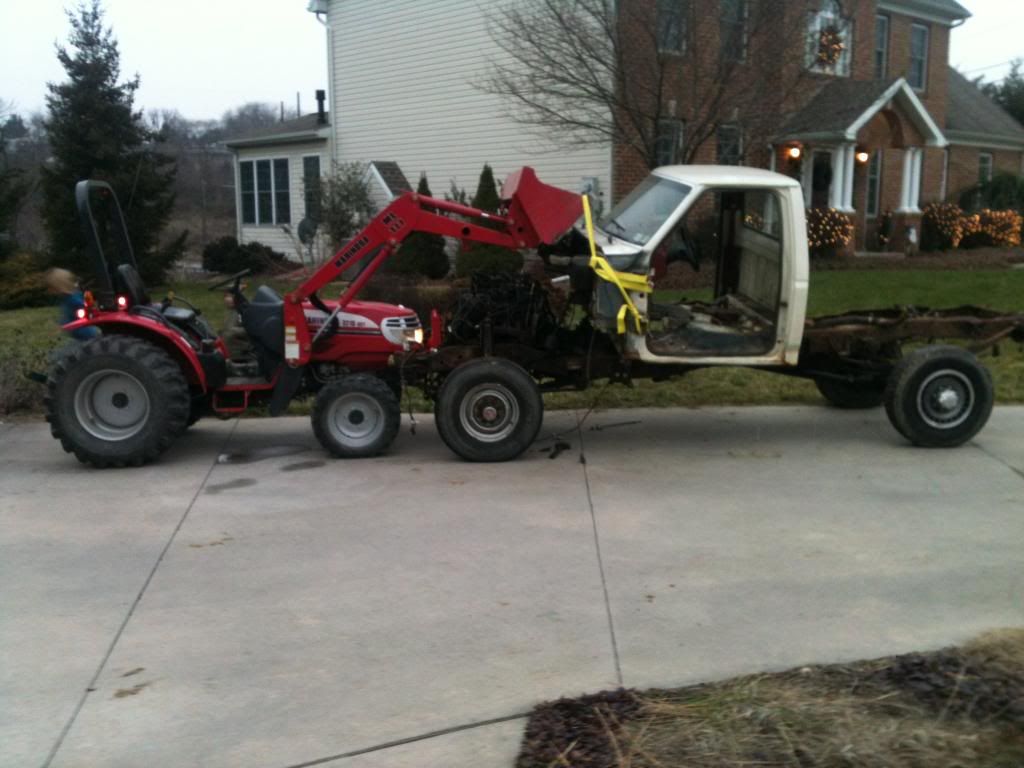
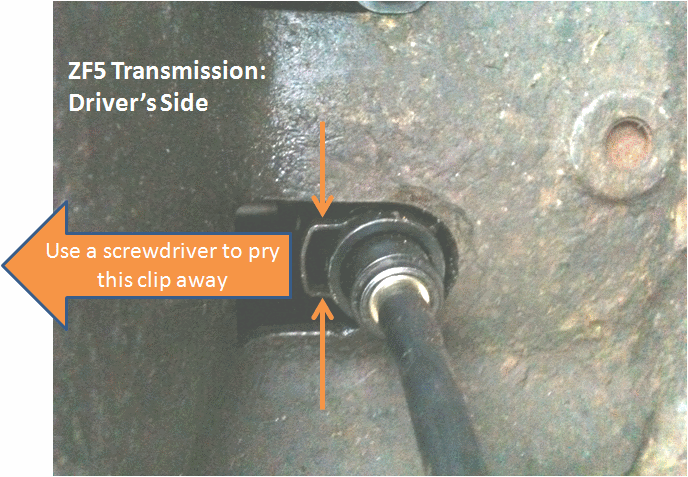
Turns out there's a small clip that holds the clutch tube onto the transmission- a short visit from a screwdriver and the clip was off. Careful if you're doing this though, the clip can easily fall into the tranny.
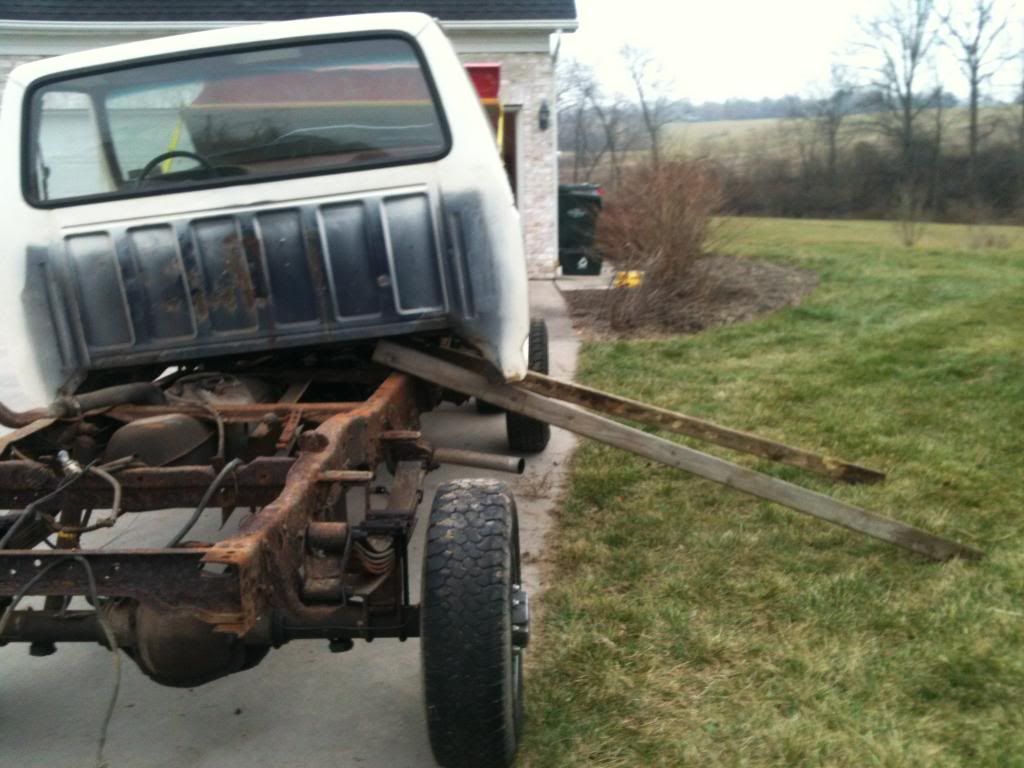
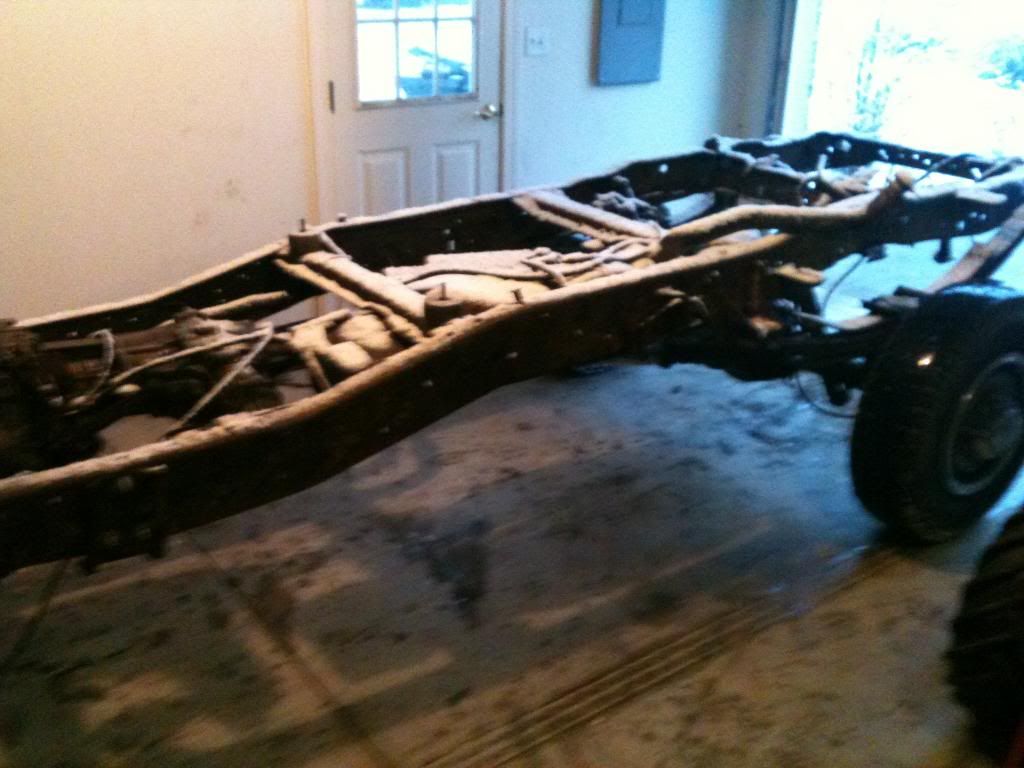
Next I pushed the cab as far back as I could to be past the ZF5 shifter mount in the cab. Once it was back far enough I threw some 4x4s under the passenger side and scooted the cab off the frame. Then is was just a matter of hauling it back to the 'bone pile'. By the way, it started snowing right when I pushed the frame out of the garage...
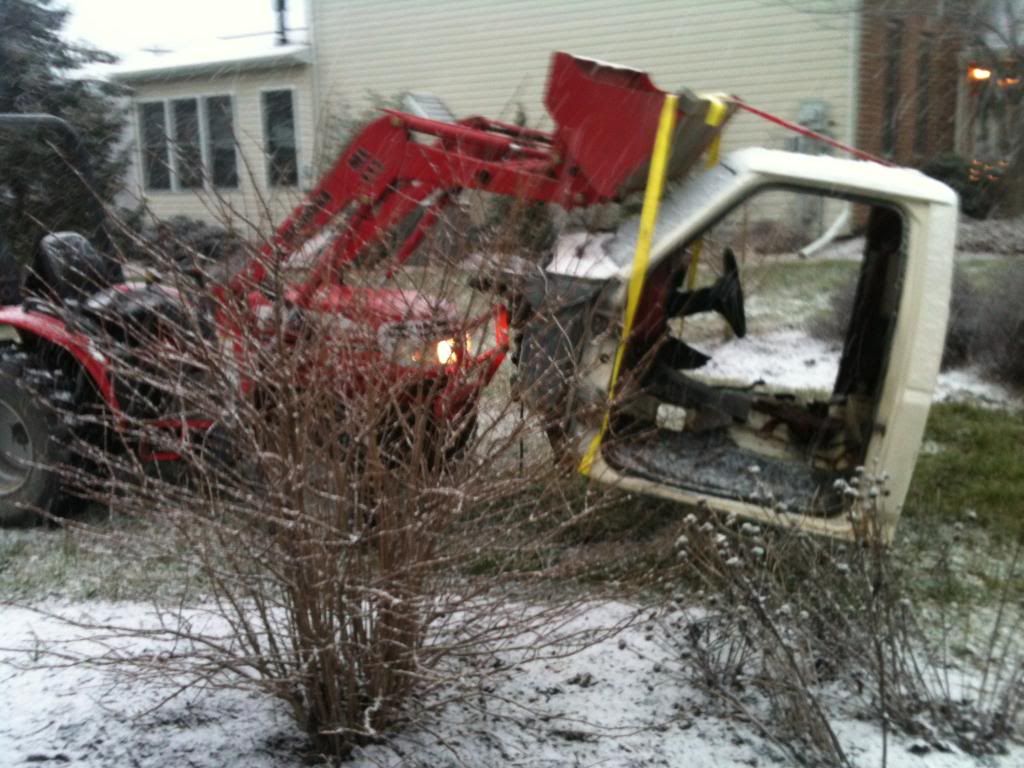
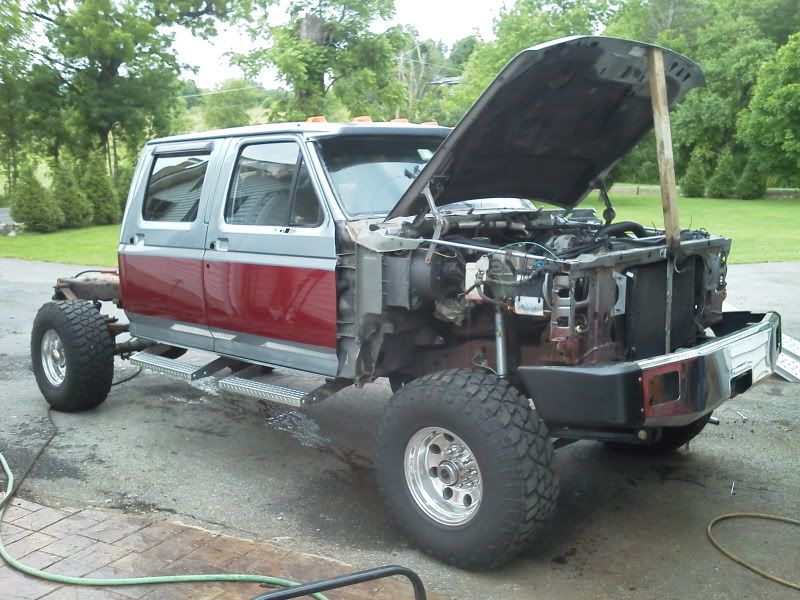
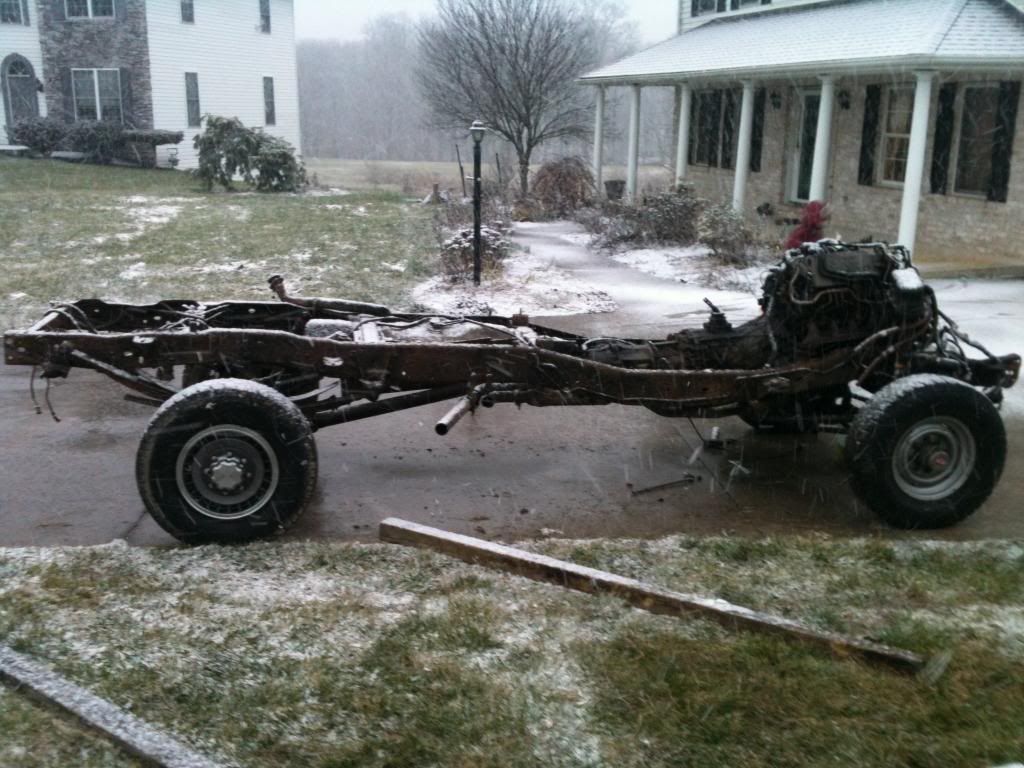
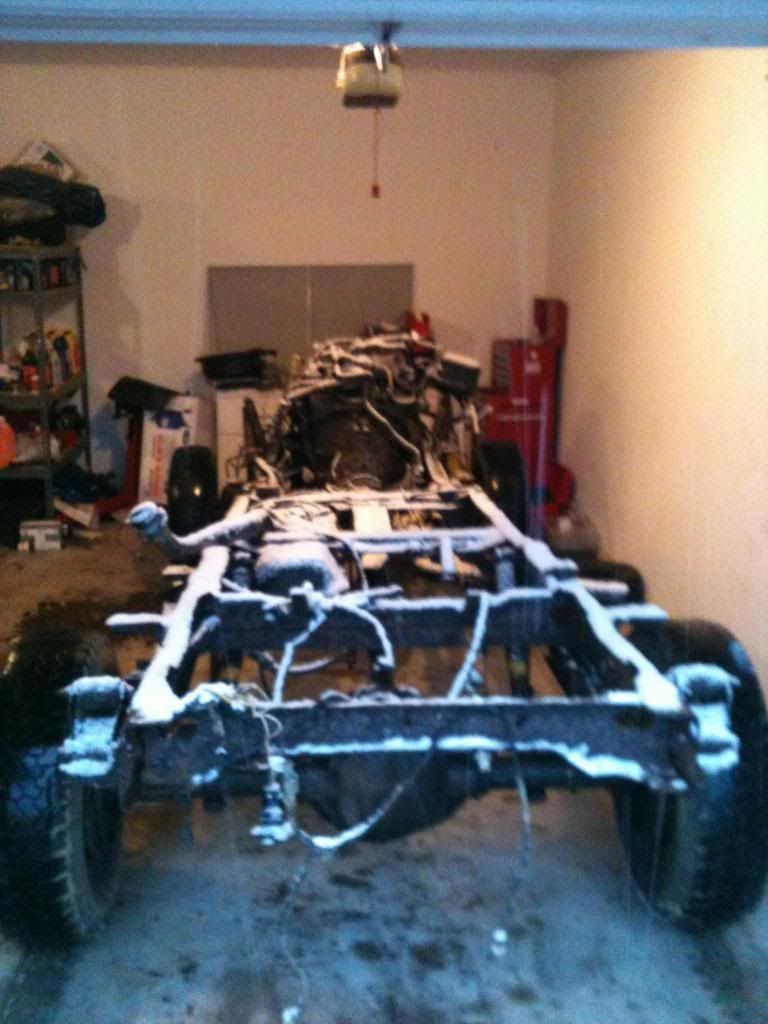
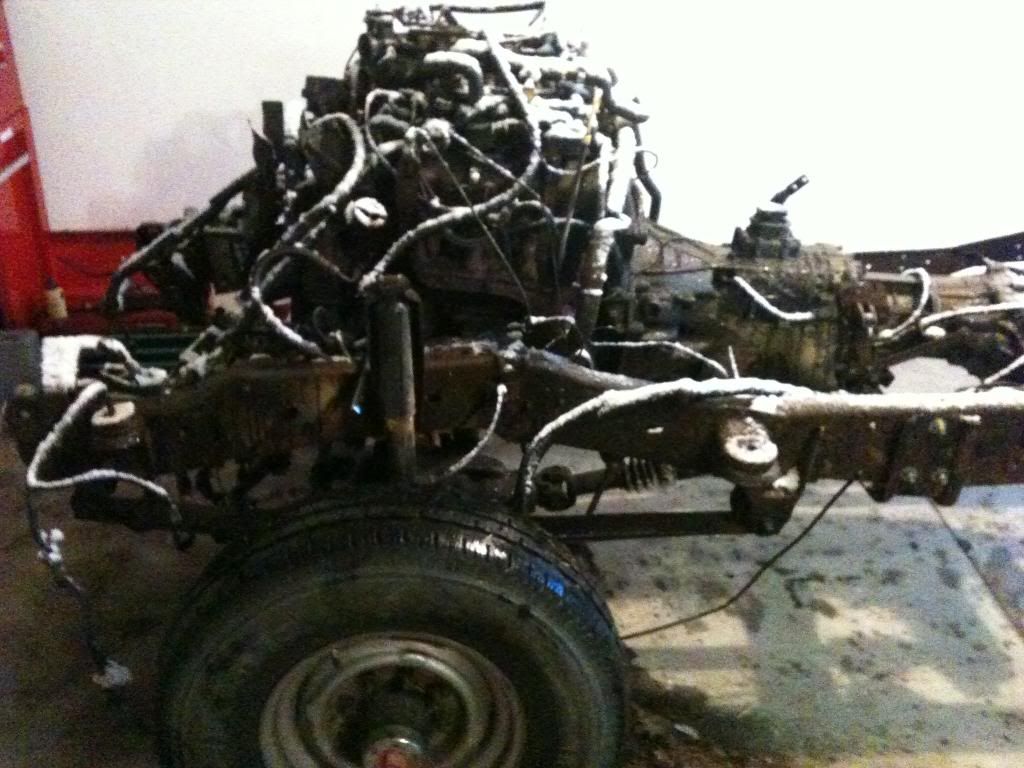
The result, Merry Christmas to me!!! I've got a rolling frame. I'll play more tomorrow to get ready to rip out the 351W engine, ZF5 4WD tranny and BW1356 transfer case on Wednesday. Here's where I stand as of right now:
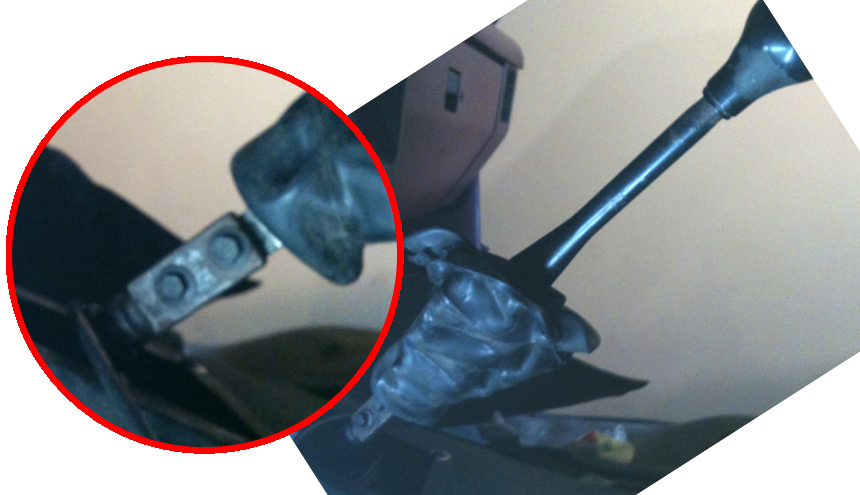
BTW- I was back to figuring out how to steer the rig without a steering wheel. Just to giggles I figured I'd try a 12 point socket of the right size in the hopes that it would grab just enough to be able to crank the wheels over. I got lucky- an 11/16" 12 point fit snug enough that I felt comfortable cranking a bit. You'll have to kick the wheel a bit at the end of each crank though to take some of the pressure off the wrench to crank it over again...
Anyhow, along the way I found the speedo cable, which I had forgotten about. It was detached from the dash, which explains why Betsy never had a working speedometer. Anyhow, there was a small rubber grommet holding it to the cab, which I popped off with a screwdriver. The housing was pretty big, so there's a decent sized hole for it. Here's a shot of the speedo cable...
Next it was time to back her out of the garage where my buddies little red tractor was waiting to help with the heavy lifting. I used the tractor to get the front of the cab up in the air and wiggle it back some more until I could more easily see the clutch tube.
Turns out there's a small clip that holds the clutch tube onto the transmission- a short visit from a screwdriver and the clip was off. Careful if you're doing this though, the clip can easily fall into the tranny.
Next I pushed the cab as far back as I could to be past the ZF5 shifter mount in the cab. Once it was back far enough I threw some 4x4s under the passenger side and scooted the cab off the frame. Then is was just a matter of hauling it back to the 'bone pile'. By the way, it started snowing right when I pushed the frame out of the garage...
The result, Merry Christmas to me!!! I've got a rolling frame. I'll play more tomorrow to get ready to rip out the 351W engine, ZF5 4WD tranny and BW1356 transfer case on Wednesday. Here's where I stand as of right now:
BTW- I was back to figuring out how to steer the rig without a steering wheel. Just to giggles I figured I'd try a 12 point socket of the right size in the hopes that it would grab just enough to be able to crank the wheels over. I got lucky- an 11/16" 12 point fit snug enough that I felt comfortable cranking a bit. You'll have to kick the wheel a bit at the end of each crank though to take some of the pressure off the wrench to crank it over again...
#28
12-24-2012, 05:27 PM
Join Date: Dec 2010
Location: Carlisle
Posts: 221
Likes: 0
Received 0 Likes
on
0 Posts
Seriously!? Wow. I thought it was odd that I didn't hear the thing rattling around. Guess it's one of those things that you learn when you just start digging.
Guess the torch will remain the grinders back-up for the time being since it ended up coming off when I moved the cab. Trust me though, I'm a firm believer that fire=good!
Guess the torch will remain the grinders back-up for the time being since it ended up coming off when I moved the cab. Trust me though, I'm a firm believer that fire=good!
#29
12-24-2012, 05:30 PM
Join Date: Dec 2010
Location: Carlisle
Posts: 221
Likes: 0
Received 0 Likes
on
0 Posts
If you can manage, keep the clutch master and slave all connected as an assembly. They are near impossible to bleed once the system is opened and most of the connections are flimsy plastic and will break. Just unscrew the tabs that keep the line attached to the body, remove the two studs holding the master to the firewall, unclip the rod from the pedal, and pry the slave off the transmission.

#30
12-24-2012, 05:57 PM
Thanks Sidewinder. Most of y'all are so good at working on your trucks that can can say "took the Vapor Canister off today and man where those bolts rusty", which usually prompts a fever of google searches as I try to figure out what you are even talking about... At least now I only need to research what it does!
Without it, you'll notice more fuel fumes, etc...
Been meaning to post this picture for a while. My kids were out playing around in front of the engine and spinning the fan around a bit asking "why do cars have fans?" when I noticed that the fan seemed more than slightly bent. Maybe a cat got caught in there at some point- what ever the case that couldn't be good for anything.