Effii gets rebuilt
#46
 02-17-2013, 04:35 PM

New User
Join Date: Feb 2010
Location: British Columbia
Posts: 22
Likes: 0
Received 0 Likes
on
0 Posts
#47
04-16-2013, 04:14 PM
Join Date: Mar 2007
Location: Australia
Posts: 238
Likes: 0
Received 0 Likes
on
0 Posts
I'm Back
Well we ended up being away for 10 weeks rather than the 6 originally planned.
It will be another couple of weeks before I start doing more work on this as I've got to do things like mow the grass (note it's not lawn as there is no possible way you could call 6ft high guinea grass lawn), replace the glow plugs in the Mav (getting hard to start when the temp is below 20c) and a few other things around the house.
First jobs will be to get the cab of the old chassis and remove the transfer case, gearbox and engine. Then put the engine into my partners 84 ZJ Fairlane (the 302 in it gave up just before we went travelling), this was always the plan with the 351 but I had hoped to leave it until after Effii was finished.
Then on with the remainder of the build.
#48
04-16-2013, 04:22 PM
Join Date: Mar 2007
Location: Australia
Posts: 238
Likes: 0
Received 0 Likes
on
0 Posts
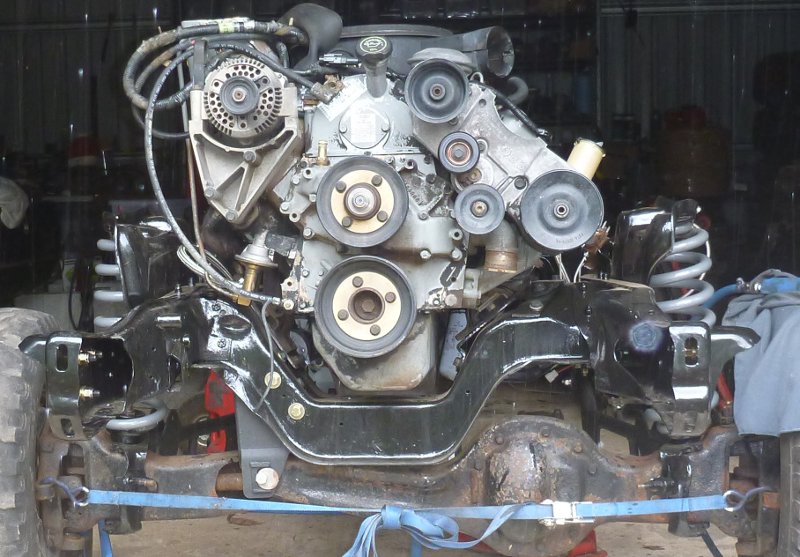
AC compressor is not there at the moment but it goes above the power steering pump on the righthand side as your looking at the picture.
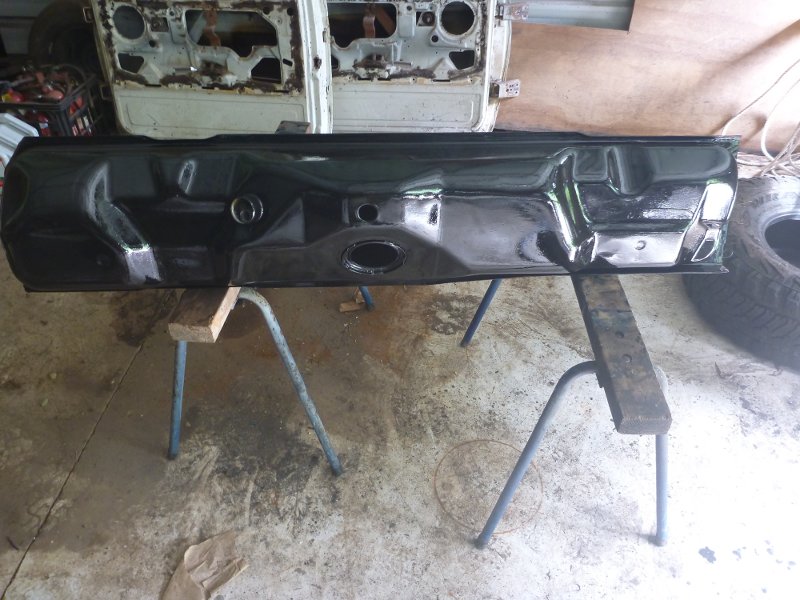
Tank came from an Australian built ambulance. Don't know who made them but probably Jaycab who was (is?) the ambulance supplier at the time. I bought it on evil bay.
#49
05-29-2013, 04:12 PM

Freshman User
Join Date: Dec 2009
Location: Bundaberg Queensland, Aus
Posts: 36
Likes: 0
Received 0 Likes
on
0 Posts
#50
05-29-2013, 07:49 PM
Join Date: Mar 2007
Location: Australia
Posts: 238
Likes: 0
Received 0 Likes
on
0 Posts
Know what you mean about time. Just back into it this week as between being away for ten weeks then returning to clean up around the house and then put the 351C from this into the Fairlane I just have not touched the F100 for the last 4 months.
So updates from this week on sunday, maybe as I've got to go out most of saturday and also sunday afternoon and morning I'm now told. See what I mean about time.

Cheers
Ross
#52
06-05-2013, 08:09 PM
Join Date: Mar 2007
Location: Australia
Posts: 238
Likes: 0
Received 0 Likes
on
0 Posts
Back at it, Week commencing Monday 27 May 2013.
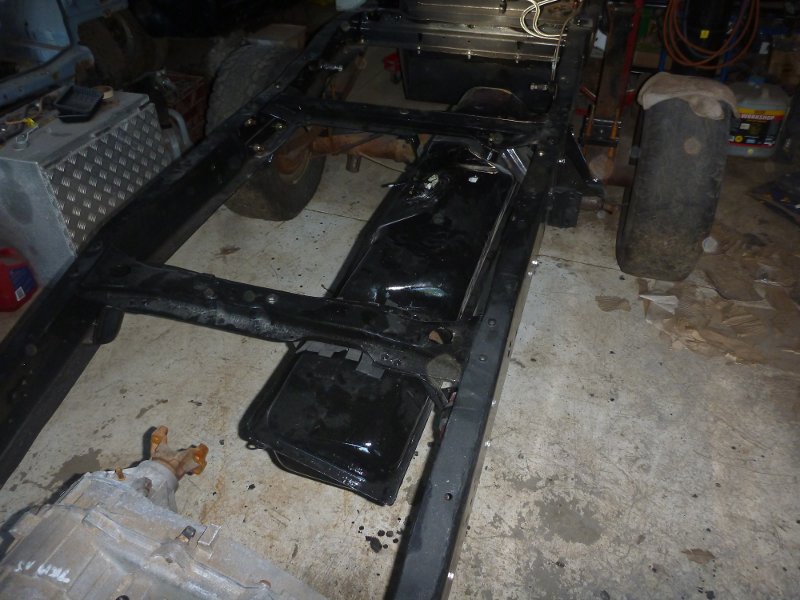
So cleaned up the front crossmembers and painted them.
Set up the power steering, hydraboost cooler and filter.
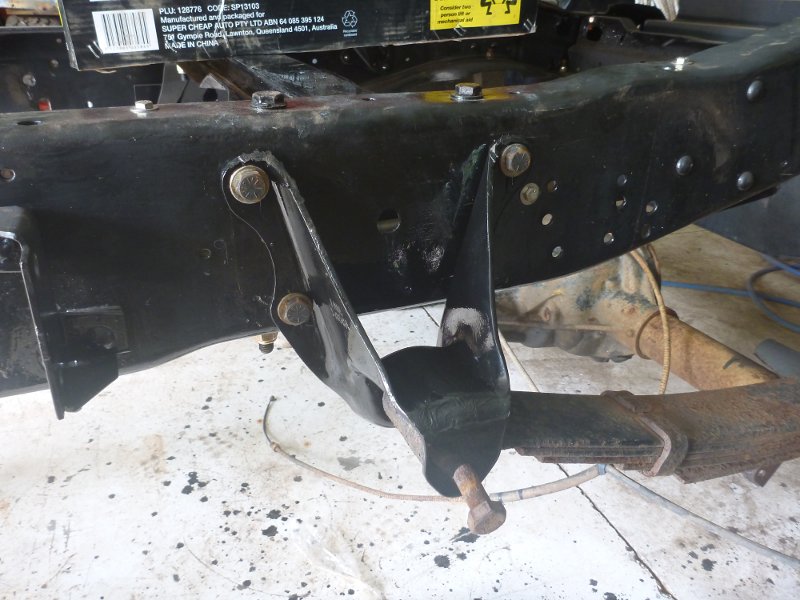
Installed the front recovery hooks.
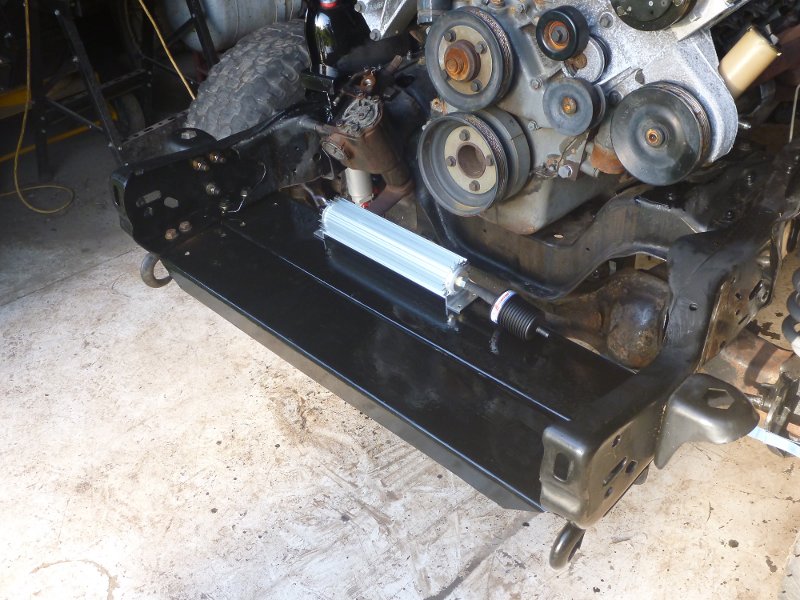
Originally there was only one of these but the new chassis came with one. By reversing one of these and bolting them together and then bolting up to the chassis I've now got somewhere to mount my winch.
Although it's not quite far enough forward and the winch will touch on the front of the radiator support.
I'll probably get one of these
Winch Tray
That way I can move it as far forward as necessary.
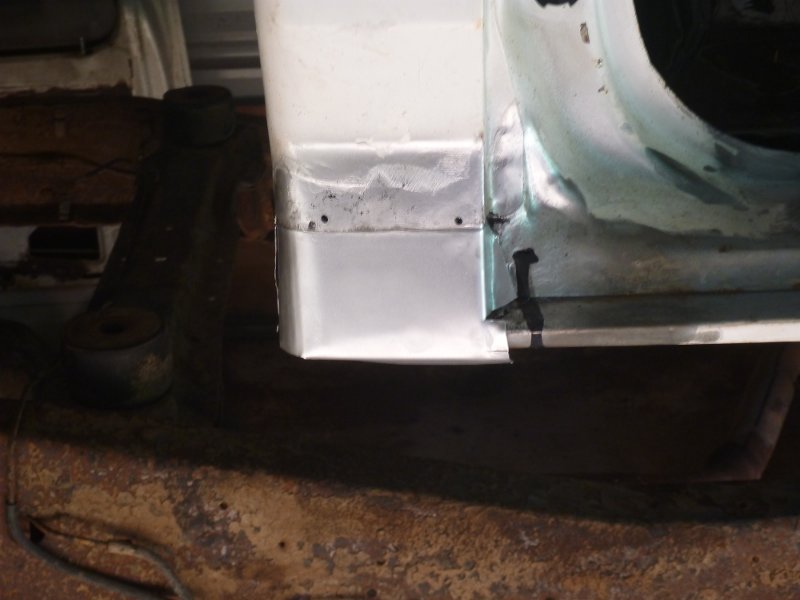
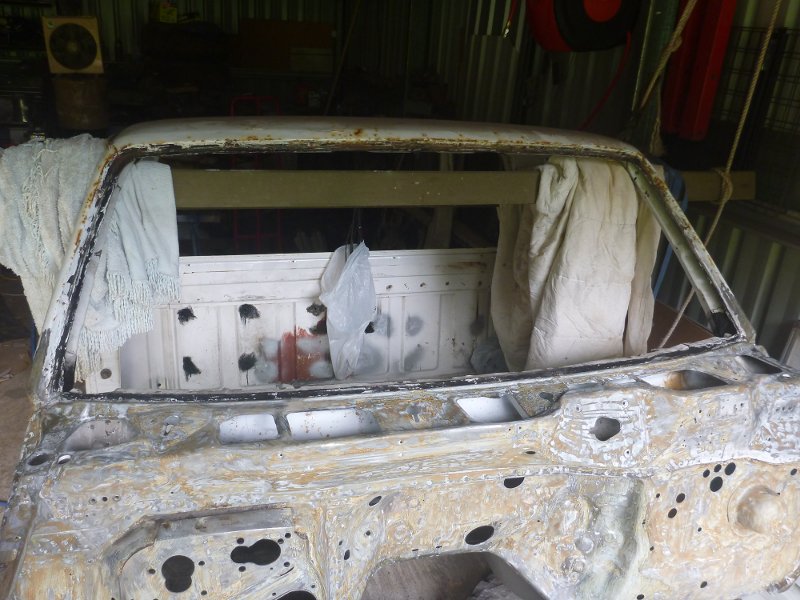
Made a new rear cab corner for the drivers side to fix the bodgy PO rust repair.
Cut the steering box 4th bolt mount point off the old chassis and positioned and welded it to the new chassis.
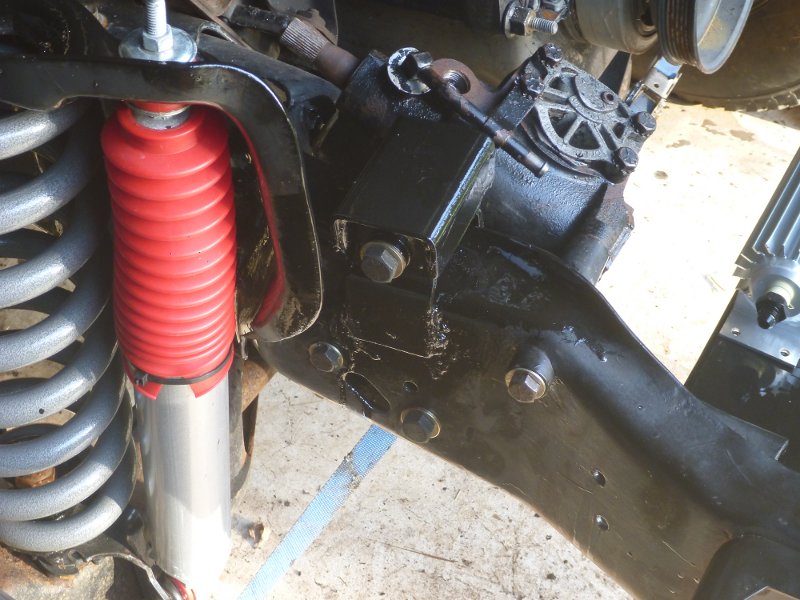
Sourced and ordered the new steering shaft components. Found a supplier in Australia that has Borgeson, Flaming River and SoCal steering components. Cheaper then buying them from the states myself with postage.
Set up the power steering, hydraboost cooler and filter.
Installed the front recovery hooks.
Originally there was only one of these but the new chassis came with one. By reversing one of these and bolting them together and then bolting up to the chassis I've now got somewhere to mount my winch.
Although it's not quite far enough forward and the winch will touch on the front of the radiator support.
I'll probably get one of these
Winch Tray
That way I can move it as far forward as necessary.
Made a new rear cab corner for the drivers side to fix the bodgy PO rust repair.
Cut the steering box 4th bolt mount point off the old chassis and positioned and welded it to the new chassis.
Sourced and ordered the new steering shaft components. Found a supplier in Australia that has Borgeson, Flaming River and SoCal steering components. Cheaper then buying them from the states myself with postage.
#53
06-09-2013, 02:36 AM
Join Date: Mar 2007
Location: Australia
Posts: 238
Likes: 0
Received 0 Likes
on
0 Posts
Week begining Monday 3rd June 2013
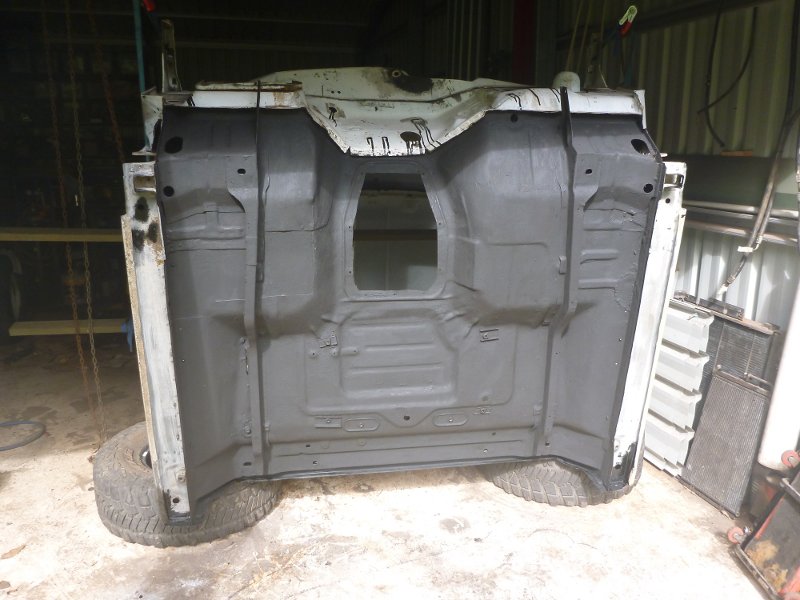
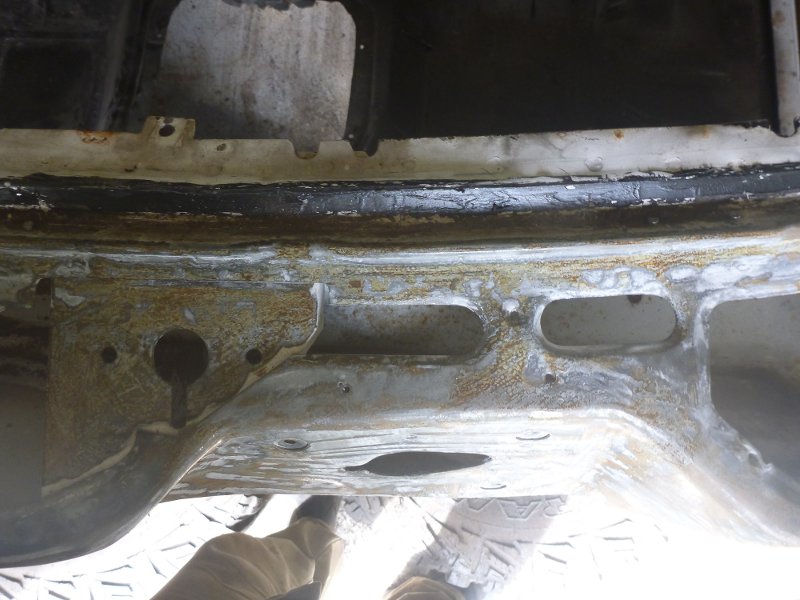
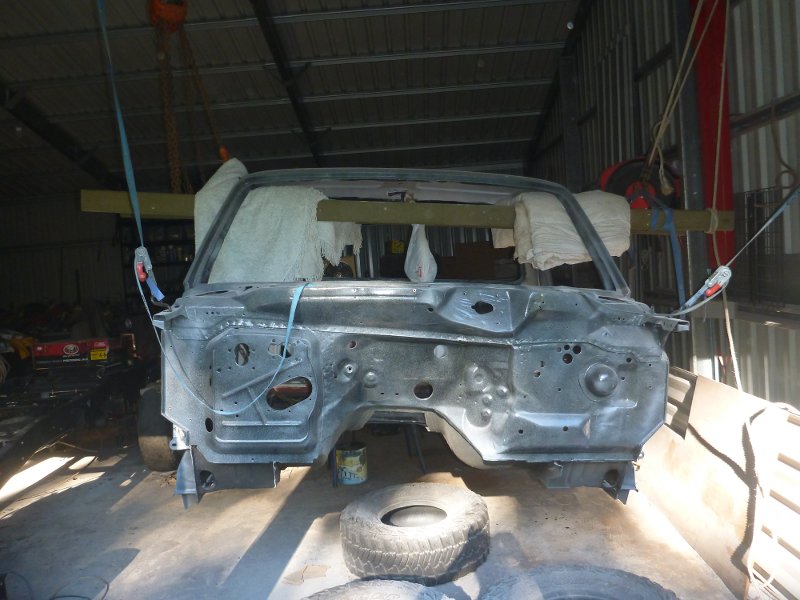
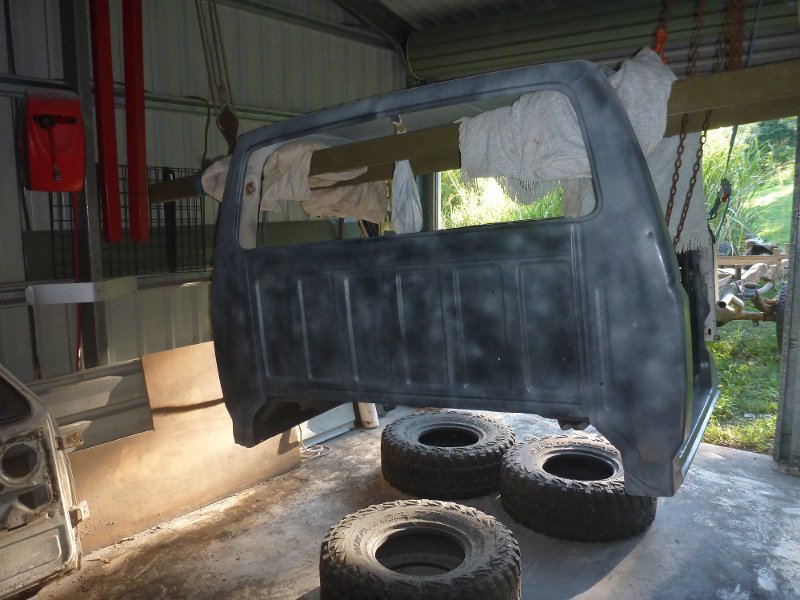
Decided that the easiest way to clean and paint the underside of the cab is to tip it on it's back.
Completed cleaning the underside and painted most of it with Underbody Sound Deadener, this is also a rust preventative. I've probably gone too thick with it in some areas but I was trying to get all the joints covered and sealed. Still have a couple of small rust repairs under the sills to complete before painting the remainder.
Cleaned and painted the mid fuel tank and associated hangers, checked sender for correct operation. Need new rubber strips before installing, they're in the shed somewhere.
Cleaned and painted the replacement spring hanger from the old chassis, now bolted to the new chassis.
Last edited by 4x4falcon; 06-10-2013 at 03:00 AM. Reason: added images
#54
06-16-2013, 03:06 AM
Join Date: Mar 2007
Location: Australia
Posts: 238
Likes: 0
Received 0 Likes
on
0 Posts
Week begining Monday 10th June 2013
Lot's done this week, not so many other things to be done.
Cleaned all the paint off the exterior surfaces of the cab (those areas which need to be painted with acrylic finish) and painted with POR and first coat of acrylic primer.
Cleaning.

Painted.
Mounted the mid tank then found that I don't have enough flex hose to connect it up (used more than I thought I had), so another order to go to Flow Fittings Direct.
Doesn't seem like much when you write it down but try removing all the paint from the exterior of the cab. Paint stripper and pressure wash first, then flap wheel and finally wire brush. It takes one day for each section (firewall, roof and upper door frames, rear wall) then one day to prep and paint it all.
Cleaned all the paint off the exterior surfaces of the cab (those areas which need to be painted with acrylic finish) and painted with POR and first coat of acrylic primer.
Cleaning.
Painted.
Mounted the mid tank then found that I don't have enough flex hose to connect it up (used more than I thought I had), so another order to go to Flow Fittings Direct.
Doesn't seem like much when you write it down but try removing all the paint from the exterior of the cab. Paint stripper and pressure wash first, then flap wheel and finally wire brush. It takes one day for each section (firewall, roof and upper door frames, rear wall) then one day to prep and paint it all.
#55
06-16-2013, 06:58 AM
Senior User
Join Date: Jan 2013
Location: West Aus
Posts: 327
Likes: 0
Received 0 Likes
on
0 Posts
Did you make your own patch for the back corners of the cab or buy patch panels? the reason I ask the ones on ebay seam a little pricey for what you get.
Great work on the truck. Did you get the correct peal for the hydro/brake set up? I have read in the IDI section this makes a world of difference to pedal feel.
Great work on the truck. Did you get the correct peal for the hydro/brake set up? I have read in the IDI section this makes a world of difference to pedal feel.
#56
06-16-2013, 08:43 AM
Join Date: Mar 2007
Location: Australia
Posts: 238
Likes: 0
Received 0 Likes
on
0 Posts
If your using one from another model such as the F450. The one I bought (new from the manufacturer) is supposed to be correct with the brake pedal as is. I had seen the comments in the idi section.
#57
06-16-2013, 05:05 PM

Join Date: Apr 2009
Location: Man Cave
Posts: 2,135
Likes: 0
Received 0 Likes
on
0 Posts
#58
06-16-2013, 06:12 PM
Join Date: Mar 2010
Location: Slade Point, Australia
Posts: 800
Likes: 0
Received 0 Likes
on
0 Posts


