
1990 f250 speakers
#1
 10-23-2012, 10:43 PM


Join Date: Sep 2012
Posts: 10
Likes: 0
Received 0 Likes
on
0 Posts
#2
10-23-2012, 11:24 PM
Senior User
Join Date: Oct 2011
Location: Big Sky Country
Posts: 205
Likes: 0
Received 0 Likes
on
0 Posts
Measure how deep your sub and box will be. Many aftermarket ones will require you to have the seat permanently scooted forward. get a low profile one in a low profile box.
#3
10-24-2012, 01:43 AM
#4
10-24-2012, 11:39 AM
Join Date: Sep 2012
Posts: 10
Likes: 0
Received 0 Likes
on
0 Posts
#5
01-08-2013, 12:26 AM

#6
01-08-2013, 04:03 AM
Just re-did my entire sound system. Yes the door speakers are 6 1/2" or 6 3/4", both work. The thing is though, make sure the speakers CUT-OUT diameter is no bigger than 5 inches, or you will have to enlarge the holes in the doors a little bit. I had to take about 1/4" off the opening all the way around the opening to get the speakers to sit flush. As for rear speakers, if you plan on running new ones, they need to have a mounting depth of 2" or less. Trust me, this is all from experience of buying without knowing, and finding out the hard way the first time around. Second time around I was prepared, ordered the right speakers and all was well. As far as the other things, I recommend a properly sized amp installation kit, speaker wire for the sub, and a wire harness adapter for your truck for the stereo. Here's one: Scosche FD02B Wire Harness to Connect an Aftermarket Stereo
As for the sub box, as well as finding one to fit your truck, make sure its the proper size for the sub. What equipment do you have? I can help more if I know what you are working with.
As for the sub box, as well as finding one to fit your truck, make sure its the proper size for the sub. What equipment do you have? I can help more if I know what you are working with.
#7
01-08-2013, 08:12 AM
Trending Topics
#8
01-08-2013, 08:45 AM
Posting Guru
Join Date: Jan 2001
Location: Poway, CA
Posts: 1,101
Likes: 0
Received 0 Likes
on
0 Posts
Use wiring harness adapters everywhere! Trust me, it makes life SO much easier. You'll need the harness adapter(s) that connect the stereo itself, and the adapter for the speakers. A lot of folks don't use the speaker adapters, but Ford doesn't leave you a lot of slack in the stock wiring, so I've found them to make life MUCH easier! The two main brands out there are Scosche and Metra. I've used both and they're both fine. You'll also need the adapter kit to mount the radio in the dash. Same brands apply. Those are a little more of a PITA for our trucks because we use the 'Super Universal' kit that has brackets and tabs for seemingly EVERY vehicle out there, 90% of which you'll have to hack off. It takes a little time, but it's all very easy.
For the sub, you'll need to find a box to fit the speaker. Where you put is up to you, but obviously a truck cab has limited options. If you have a regular cab, the most common method is to find a thin angled box to fit behind the seat. Only problem is finding the right compromise between a box that fits the speaker, fits behind the seat, and doesn't take away leg room (OK, that last one may just be an issue for me). After that, you'll need to wire in the amp. They make amp install kits that get you most of what you need. The biggest headache is figuring out how/where to route the power cable from the battery into the cab. Just remember to use a grommet or some other means of protection for the cable at the entry point so that the sharp sheet metal doesn't chaff the wiring insulation. You'll also need to run a couple of wires from the head unit to the amp. Usually the amp kit will come with these. The audio is typically carried through RCA cables, but you'll also have to run signal wire off the head unit harness that signals the amp to turn on. It will splice right into the aftermarket wiring harness, so don't worry too much about it.
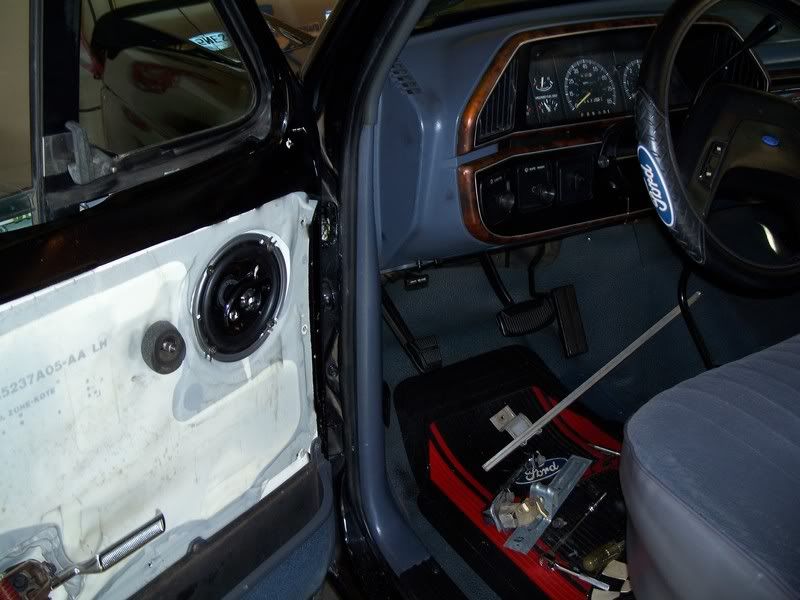
With the door speakers, I find it easiest to rotate the speaker until it lines up with as many OE mounting holes as possible, screw it in, then drill the last couple of holes as necessary. Just remember to do this with the window UP so you don't accidentally send the bit through the glass (very unlikely, but I have heard of weirder things happening).
Tools/stuff you'll need:
Wiring harness adapter (both for the stereo and for the doors)
Stereo install kit
Amp install kit
Butt connectors, or soldering iron if you're up to it
Crimp tool (for the butt connectors)
Wire cutters
Wire stripping tool (or a razor blade, or sharp knife, or whatever)
Philips screwdriver (to remove door panel and speakers)
Door panel removal tool (optional, but makes popping out the mounting tabs SO much easier. Available at any parts stores)
Window crank removal tool (optional, and only needed if you have manual windows, but again, this makes the job much eaiser. Otherwise you'll be fishing off the clip with pliers. No fun)
Torx bit (to remove the stock stereo. Cannot remember which size, but it's small. Actually, I THINK you can use a basic socket as well now that I think of it)
Drill
In all, it's actually a very easy DIY job. Don't shy away from it. Just use the wiring adapter harnesses and take your time routing and hiding the wires for a clean look and you'll be fine.
Mike
PS - A couple of tips on the amp..... Most people prefer to run the power cable for the amp as far away from the RCA cables as possible. Some say routing them next to one another will cause electrical noise through the speaker the amp powers. I've always heeded that advice, but I'd imagine you'd be OK so long as the RCAs you use are a quality cable. Also, for grounding the amp, I always used one of the bolts for the seat belt mount on the cab floor. The downside is that the bolt is a much larger torx bit, but it makes a handy spot to install the ground wire and works very well.
For the sub, you'll need to find a box to fit the speaker. Where you put is up to you, but obviously a truck cab has limited options. If you have a regular cab, the most common method is to find a thin angled box to fit behind the seat. Only problem is finding the right compromise between a box that fits the speaker, fits behind the seat, and doesn't take away leg room (OK, that last one may just be an issue for me). After that, you'll need to wire in the amp. They make amp install kits that get you most of what you need. The biggest headache is figuring out how/where to route the power cable from the battery into the cab. Just remember to use a grommet or some other means of protection for the cable at the entry point so that the sharp sheet metal doesn't chaff the wiring insulation. You'll also need to run a couple of wires from the head unit to the amp. Usually the amp kit will come with these. The audio is typically carried through RCA cables, but you'll also have to run signal wire off the head unit harness that signals the amp to turn on. It will splice right into the aftermarket wiring harness, so don't worry too much about it.
With the door speakers, I find it easiest to rotate the speaker until it lines up with as many OE mounting holes as possible, screw it in, then drill the last couple of holes as necessary. Just remember to do this with the window UP so you don't accidentally send the bit through the glass (very unlikely, but I have heard of weirder things happening).
Tools/stuff you'll need:
Wiring harness adapter (both for the stereo and for the doors)
Stereo install kit
Amp install kit
Butt connectors, or soldering iron if you're up to it
Crimp tool (for the butt connectors)
Wire cutters
Wire stripping tool (or a razor blade, or sharp knife, or whatever)
Philips screwdriver (to remove door panel and speakers)
Door panel removal tool (optional, but makes popping out the mounting tabs SO much easier. Available at any parts stores)
Window crank removal tool (optional, and only needed if you have manual windows, but again, this makes the job much eaiser. Otherwise you'll be fishing off the clip with pliers. No fun)
Torx bit (to remove the stock stereo. Cannot remember which size, but it's small. Actually, I THINK you can use a basic socket as well now that I think of it)
Drill
In all, it's actually a very easy DIY job. Don't shy away from it. Just use the wiring adapter harnesses and take your time routing and hiding the wires for a clean look and you'll be fine.
Mike
PS - A couple of tips on the amp..... Most people prefer to run the power cable for the amp as far away from the RCA cables as possible. Some say routing them next to one another will cause electrical noise through the speaker the amp powers. I've always heeded that advice, but I'd imagine you'd be OK so long as the RCAs you use are a quality cable. Also, for grounding the amp, I always used one of the bolts for the seat belt mount on the cab floor. The downside is that the bolt is a much larger torx bit, but it makes a handy spot to install the ground wire and works very well.
#9
01-08-2013, 03:43 PM
Senior User
Join Date: Feb 2007
Location: Albuquerque 87107
Posts: 122
Likes: 0
Received 0 Likes
on
0 Posts
i removed my center seat and built my own console that house's two 12" subs and also used memory foam for the top part for the arm rest area, added two cup holders with red led lights wired to work with my factory light switch and dimmer. Built an area into the console for later expansion of either gauges, 10" flat screen or what not...

heres a picture of the cupholders at night.


heres a picture of the cupholders at night.


Thread
Thread Starter
Forum
Replies
Last Post
usctrack
Audio & Video Systems, Navigation, Satellite Radio & Mobile Electronics
4
05-24-2006 09:19 AM
luke_trash
Audio & Video Systems, Navigation, Satellite Radio & Mobile Electronics
4
04-16-2003 10:48 PM
ChopsMcgraw
1987 - 1996 F150 & Larger F-Series Trucks
4
05-08-2002 01:50 PM