Stella's '47 updates
#1
 08-30-2012, 11:11 PM

Join Date: Aug 2012
Posts: 131
Likes: 0
Received 0 Likes
on
0 Posts
Stella's '47 updates
Figured I start a new thread for updates of this work in progress.
Some good news today, got 1 piston out completely, 2 others ready to come out. Crank will wiggle a bit now which is good, have a small issue with the rear main bearing cap not wanting to free itself. Can get a sharp putty knife under one side but not the other. Will try persuading it later with brass drift punch and hammer. Once that cap is out I should get enough room to lift-wiggle the crank enough to gain access to the 2 rod caps with unreachable nuts. Picked up a small engine valve spring compressor to start removing the locks off the valves.
Anybody ever notice that you can look through the middle exhaust port on one side of the block and see the other side, factory equalizer tube?
#2
09-02-2012, 03:31 AM
Join Date: Aug 2012
Posts: 131
Likes: 0
Received 0 Likes
on
0 Posts
#3
09-02-2012, 09:09 PM
Elder User
Join Date: Oct 2011
Location: Neosho, MO
Posts: 777
Likes: 0
Received 0 Likes
on
0 Posts
#5
09-07-2012, 02:42 AM
Join Date: Aug 2012
Posts: 131
Likes: 0
Received 0 Likes
on
0 Posts
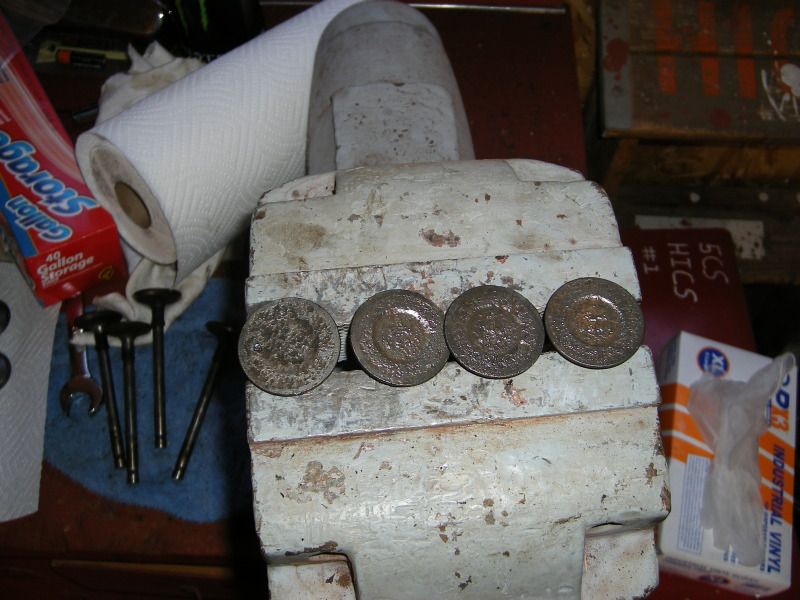
Well, definitely got somewheres today. Got all the remaining pistons out after bringing out the chunks of hardwood and BFH(big f'ing hammer). Also got all the valvetrain removed from the block as well as the cam. Only cracked 1 valve guide due to belt valve. Will have to replace all intake valves as they are pitting rough looking. The exhaust valves may clean up nicely. Going to replace all springs, locks, retainers, and guide retainer clips. May replace the tappets and cam for something a little more busier. One thing I didn't see was any kind of rubber o-ring or seals, unless they just decomposed into nothingness. The old cam looked ok except for the minor surface rust spots, cleanable but may not be worth the extra effort at this time. Will keep it for a later date. Cam bearings looked ok too but will need replacing after cleaning of block and magnafluxing. All pistons have to replaced as some had to be broken apart to get out of block. Gonna have to bore the block anyways as a couple cylinders are rough. Hoping to stay well under the maximum oversize limit if possible so there can be further rebuilds if necessary. All conn. rods seemed in good shape so I'll clean them up and weigh them to get them all equal, replace the castle nuts with new ones. Only thing left to remove from the block now are the head studs. Have to talk to the machine shop to see if these can remain or not. May just replace them just because. Crankshaft looked good, I'll give the journals a little polishing to spruce them up. Still have the flywheel and pressure plate attached so I need to remove them, have the flywheel resurfaced and toss the clutch plate as I'm sure it's no good after all these years. I think that's about it for today.
#6
09-08-2012, 08:07 PM
Join Date: Aug 2012
Posts: 131
Likes: 0
Received 0 Likes
on
0 Posts
Got a few more things done today. Got the starter cleaned up and put back together, fell apart when I took it off the motor. It spins while applying a touch from a 12 volt battery. Hopefully it can turn over a motor.
Have some more pictures of my one crappy cylinder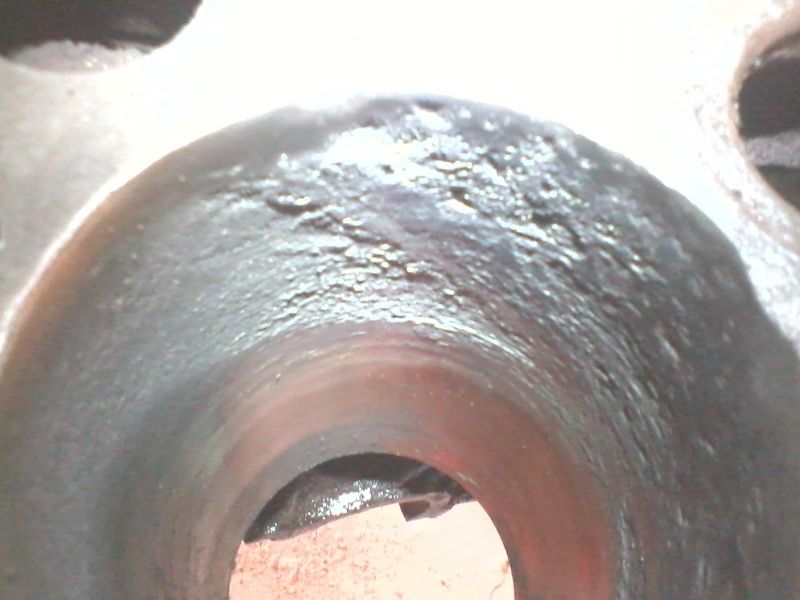
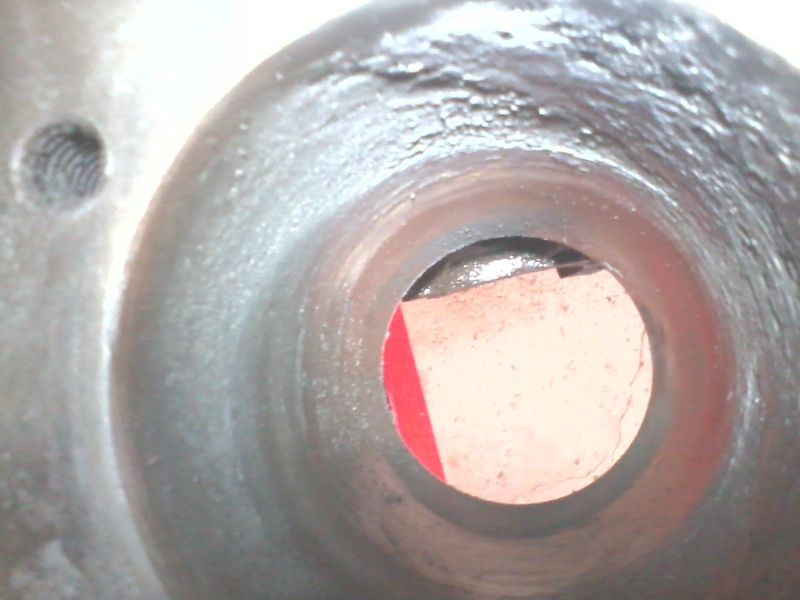
Hoping that a bore to .60 over will clean it right up, if there's a couple of little pits I'm not going to get too excited.
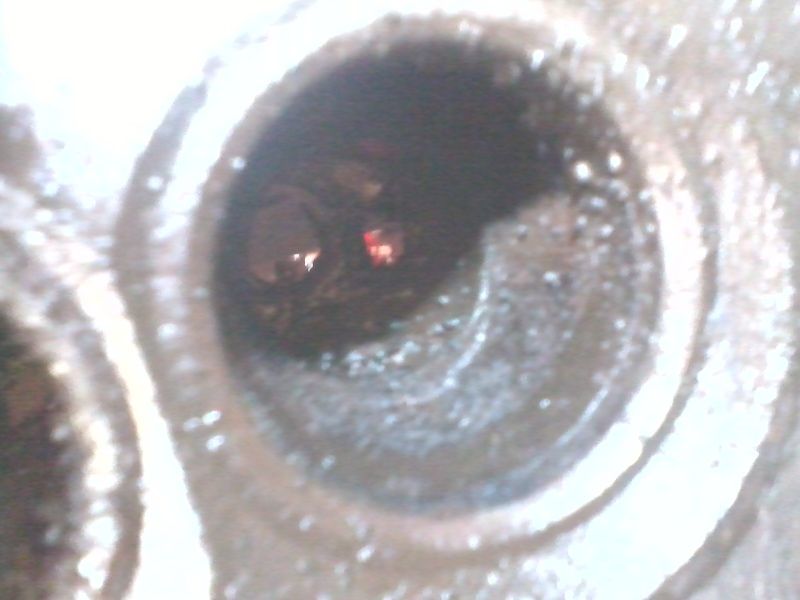
Here's a picture of 4 of the worst intake valves, heavy pitting, totally trashed. The exhaust valves cleaned up to almost new and no pitting.
I'm guessing from this picture I have removable valve seats.
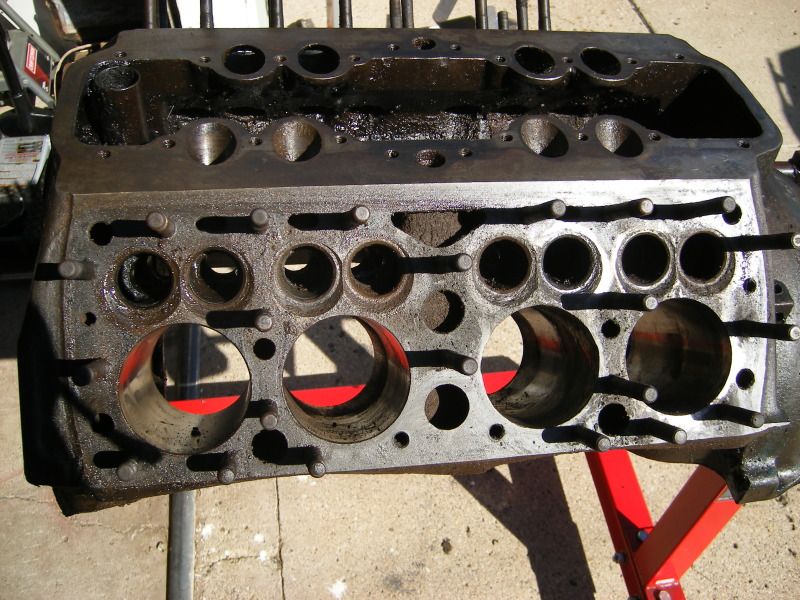
Here's the block as it sits now before going to the machine shop, cleans up kind of nice.
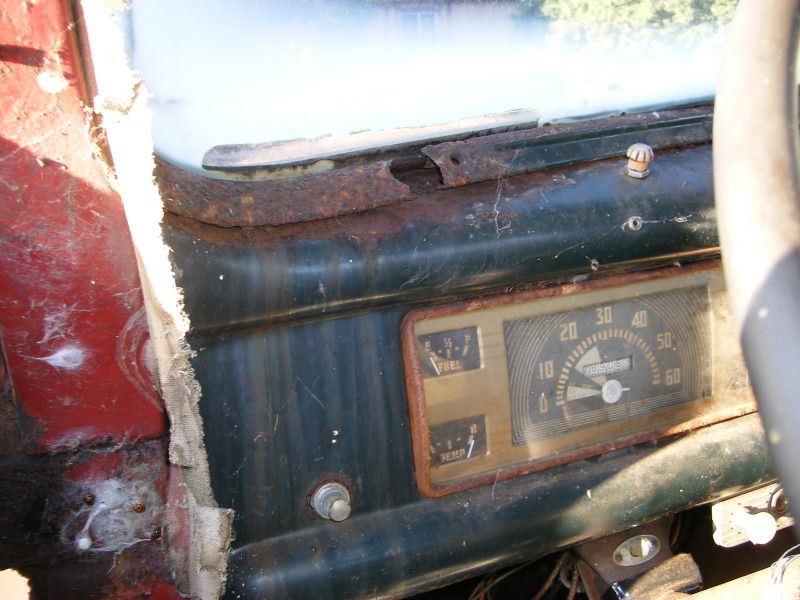
Also looking for the piece of trim that mounts next to the windshield as mine has a big hole in it. I also think I may have the wrong instrument cluster for my truck. Have to get a new backing decal and put a pointer on the speedometer.
Have some more pictures of my one crappy cylinder
Hoping that a bore to .60 over will clean it right up, if there's a couple of little pits I'm not going to get too excited.
Here's a picture of 4 of the worst intake valves, heavy pitting, totally trashed. The exhaust valves cleaned up to almost new and no pitting.
I'm guessing from this picture I have removable valve seats.
Here's the block as it sits now before going to the machine shop, cleans up kind of nice.
Also looking for the piece of trim that mounts next to the windshield as mine has a big hole in it. I also think I may have the wrong instrument cluster for my truck. Have to get a new backing decal and put a pointer on the speedometer.
#7
09-08-2012, 11:06 PM
Senior User
Join Date: Dec 2011
Location: Coaldale, AB, Cdn
Posts: 128
Likes: 0
Received 0 Likes
on
0 Posts
That cylinder does look kind of rough. Sometimes though, the shadows have a nasty habit of exaggerating what's really there. I like to take a good four stone hone (not a deglazer) like a Sunnen and run it down a few times just to true up the cylinder and determine how deep the tin worm burrowed. In many cases I've seen even a flathead with a sleeve in a cylinder so I wouldn't get in too much of a panic. I've stuck engines together with some light blotches in the cylinders. There was no problem other than some minor oil consumption as long as they don't catch a ring and break it.
Your speedo face is correct. The tonner only goes up to 60 and if you have one of those going 60 you've really got it wound up as you've usually got quite a stump puller for a rear end. I think that Mac's still sells a speedo decal (DF1354) for the tonner and up. You'll also have to buy the 1/2 ton kit (DF883) to get the gauges, and the odometer numbers (DF1301). The needle you'll have to scrounge. I might add that I'm looking at clock repair parts in hopes that I can find a needle that can be cut/shaped similar to the original. You'll find that your guage insulators (made of laminated pressed paper) with be all warped and bent out of shape. I make new insulators out of old computer cards or get blank boards from Radio Shack (or equivilant) and cut/drill/file them to shape.
I might have that piece of trim for your windshield but I'll have to check through my stuff to confirm that. Looks like your project is doing good. I guess I'd better get my own butt in gear and get with it myself. Have fun.
GMS
Trending Topics
#8
09-12-2012, 05:06 PM
Join Date: Aug 2012
Posts: 131
Likes: 0
Received 0 Likes
on
0 Posts
Not the greatest news today. Got a call from the machinist, after cleaning and magnafluxing they found 4 cracks around one of the holes for the head studs. Definately have to resleeve the one cylinder as the pitting was to bad. They also said a few of the valve seats need replacing. Won't beable to physically look at it till monday.
They mentioned possibly using a helicoil to fix the cracks around the hole but they won't do anything till I see the block. Hopefully it will be a simple fix as finding a decent block at a cheap enough price in my neck of the woods maybe hard to come by. Would hate to have to go with a modern motor as it blows up my plans to try and keep truck mostly original. Will know more monday.
They mentioned possibly using a helicoil to fix the cracks around the hole but they won't do anything till I see the block. Hopefully it will be a simple fix as finding a decent block at a cheap enough price in my neck of the woods maybe hard to come by. Would hate to have to go with a modern motor as it blows up my plans to try and keep truck mostly original. Will know more monday.
#9
09-12-2012, 07:01 PM
Elder User
Join Date: Oct 2003
Location: Canada
Posts: 785
Likes: 0
Received 0 Likes
on
0 Posts
From the looks of that one cylinder I figured at the very least a .060 bore or more. Your in for a hell of an expense, you would be better off looking for a running engine that maybe some guy is going to rod his truck.
Boring is usually $40-50 $ a hole, plus new pistons, rings, valves, the list goes on. I would think being modest your looking at $4 grand and the block is no good with 4 cracks. Yes it can be stiched but that another expense. As for Head Studs they should be replaced.
Not trying to rain on your parade but been there myself and another engine was the answer to the problem.
#10
09-12-2012, 08:25 PM
Senior User
Join Date: Dec 2011
Location: Coaldale, AB, Cdn
Posts: 128
Likes: 0
Received 0 Likes
on
0 Posts
Cracks between a stud hole and a water jacket passage are quite common in a flattie. Nothing to worry about except that they might seep coolant out around the stud for a short time but eventually quit (Iron Tyte or equivilant can help that a lot). Depending on how severe and long they are may determine if you want to stitch or not. I've stitched a few cracks and really don't have a problem other than they can be immensely time consuming. If the crack runs into the cylinder or valve seat then you have a 200 lb paper weight. What I'm saying here is don't give up on it unless it isn't worth fixing. And I'm of the opinion that most are worth it. I might add that valves and valve seats should be changed anyways, just for the sake of unleaded (and ethanol blended) gas. Like Five Star says, you might be money ahead locating a running engine from someone building a street rod. But if your engine is original it might be worth the extra effort to salvage it.
One final story: I took a restoration course at a museum 4 years ago and you might be interested in how they fixed the rusted cylinders in an ancient tractor engine. It would boggle your mind...
One final story: I took a restoration course at a museum 4 years ago and you might be interested in how they fixed the rusted cylinders in an ancient tractor engine. It would boggle your mind...
#11
09-12-2012, 09:36 PM
Elder User
Join Date: Oct 2003
Location: Canada
Posts: 785
Likes: 0
Received 0 Likes
on
0 Posts
geomechs
That Iron Tight you mentioned is great stuff, I've used it in every Flathead I've rebuilt, for the main reason a safety precaution. I put it right into a warmed up block not into the rad, or it will plug the rad, then you have a real problem.
I've seen blocks such as the one STELLA1 has and beyond that one cylinder wall is a weak casting caused by the water that has layed in it for many years, and just when they put the boring bit in there and start turning it will most likely go through the casting. Further the caustic cleaning agent will only help the process for the worst.
The man wants to drive this truck when its done, and I in my own opinion wouldn't trust that engine on a 50 mile turn around. These Blocks aren't numbers matching blocks to the sspecific vehicle they came out of, thats why I suggested seeking out a good used one.
Onto your rusted Tractor Block in the Musuem that Tractor will never work again as it used to, it might drive through a parade but that would be the extent of it. Also you are right its amazing what you can do with this stuff, but there is a limit as to its former performance.
Once again this is my own opinion, I have been there in that situation such as STELLA1 is now, and it ain't pretty.
#12
09-15-2012, 09:52 PM
Join Date: Aug 2012
Posts: 131
Likes: 0
Received 0 Likes
on
0 Posts
5 Star, thanks for the info. That was one of the places I was going to check out if my block is too questionable. I know of the large junkyard northwest of town, I did see a 40 something pick-up in there awhile back but don't remember if the motor was gone or not.
Today I started getting the heads cleaned up and noticed at one of the spark plug holes had a nice 3/32" wide crack from the top of the threads to the bottom. Also the flat area on the head where the spark plug washer comes to rest was not flat. A bunch of metal was missing down to the threaded area about half way around. This hole corresponds with the cylinder from my earlier pictures. My guess is that this cylinder had been sucking in extra air along with the regular mixture from the carb. and was way too lean causing metal to separate from the piston and end up on the cylinder wall.
So going to take in the heads to be cleaned, checked for cracks, resurfaced to get them flat(very little warpage but might as well get it done), them hole that cracked spark plug hole heli-coiled. If the heads have any cracks I guess I'll splurge for a nice set of aluminum heads.
Cleaned up the cam to check out the lobes. Had some rust pitting on the edges of the lobes so it might still be saveable. Needs a good polishing tho.
Going to have them clean the intake too as I don't really want to waste the time cleaning every little nook and cranny on that thing.
#13
09-15-2012, 09:57 PM
Join Date: Aug 2012
Posts: 131
Likes: 0
Received 0 Likes
on
0 Posts
#14
09-15-2012, 11:03 PM
Elder User
Join Date: Oct 2003
Location: Canada
Posts: 785
Likes: 0
Received 0 Likes
on
0 Posts
59A & 59A-B does not distingguish right from left, that is a 59A Engine the very same as the Car Engine, the Truck Heads were marked 7RA, mine being Canadian are C7RA.
I think you are beating a dead horse by trying to do anything with that Engine, its pure and simple its a boat anchor. By your self a good running Car Engine, have the compression done on it and if its running your money ahead. You should be able to get a good one for around $800.00.
You say the cam has rust on it, then it has to be reground, pistons, rings, valves, guides, bearings, heads, machine work head studs, possible crank turned, block stiched, Gaskets, oil pump, the list goes on and the $$$$$$$$$$$$$$$$$$$$$$$$ signs keep getting bigger.
So for what its worth to you see if you can find a good Engine and your money ahead. Just trying to help you out not discourge you, thats about all the advice I can give you, good luck
#15
09-17-2012, 08:25 PM
Join Date: Aug 2012
Posts: 131
Likes: 0
Received 0 Likes
on
0 Posts
Well, got to see the motor today. 3 hairline cracks coming off 1 stud. Bad thing is 1 crack goes to the cylinder and down it about a 1/4", still fixable but holding for now. 2 sleeves needed so far. Pretty much all valve seat will need replaced. So for about a grand worth of parts and machine work this block could perform again.
The good and not so good news. Went to a local junkyard and happened to find hiding in the back forty I believe to be 1940 grain truck with motor. Tag on license plate said '84, same as mine. Opened hood to find a not bad looking flathead. Noticed right away the goofy distributor with the caps on the side. Head stud count of 24 per head, starting to get a match. Coolant hose attaches to middle of head, looking good so far. Started pulling head stud nuts off. Head off now, no water or rust, cylinders looking good as well as valves and valve seats. Both sides look the same. Heads were marked 81A-RH and 81A-LH. Not sure of that coding. I believe it is a 95hp motor.
Now the kicker, darn near all valves are open. Reattached fan that someone took off. Tried to turn motor by hand. It moves then stops, turn opposite was same thing. However all pistons moving thank god. Crank would appear intact. Sounds like something higher up is stopping it from turn all the way. Possibly cam gear or oil pump gear binding or hitting something or broken. Equal distance turning in either direction. Talked to junkyard owner and they should have truck moved out into the open by next week Monday. I'll take it home after spending $150 and tear it apart to go to the machine shop. Keeping fingers crossed in hopes it will help.