
My 78 Bronco Project (Daddy's Big Truck)
#151
 06-13-2015, 01:04 AM


Posting Guru
I'd be happy with just getting things the way I loaned them instead of loosing.
A very nice 220 MIG can be had for under $1,000 pretty easy if you shop used.
I got lucky and scored my complete setup as a closeout at Costco for $135 as they had discontinued selling that brand and will be selling Lincoln brand welders. It's not the greatest welder but for the price I'm really happy with it and it came with a cart and auto hood, regulator, etc.
#152
06-20-2015, 12:53 AM
Post Fiend
Join Date: Nov 2011
Location: Algona, Washington
Posts: 8,908
Likes: 0
Received 0 Likes
on
0 Posts
#153
08-08-2015, 03:42 PM
So I started cleaning more space around the Bronco to work on it and found some of the small trim pieces and decided to wash them up. I forgot to take before pics but here is the after, I think they turned out pretty well.
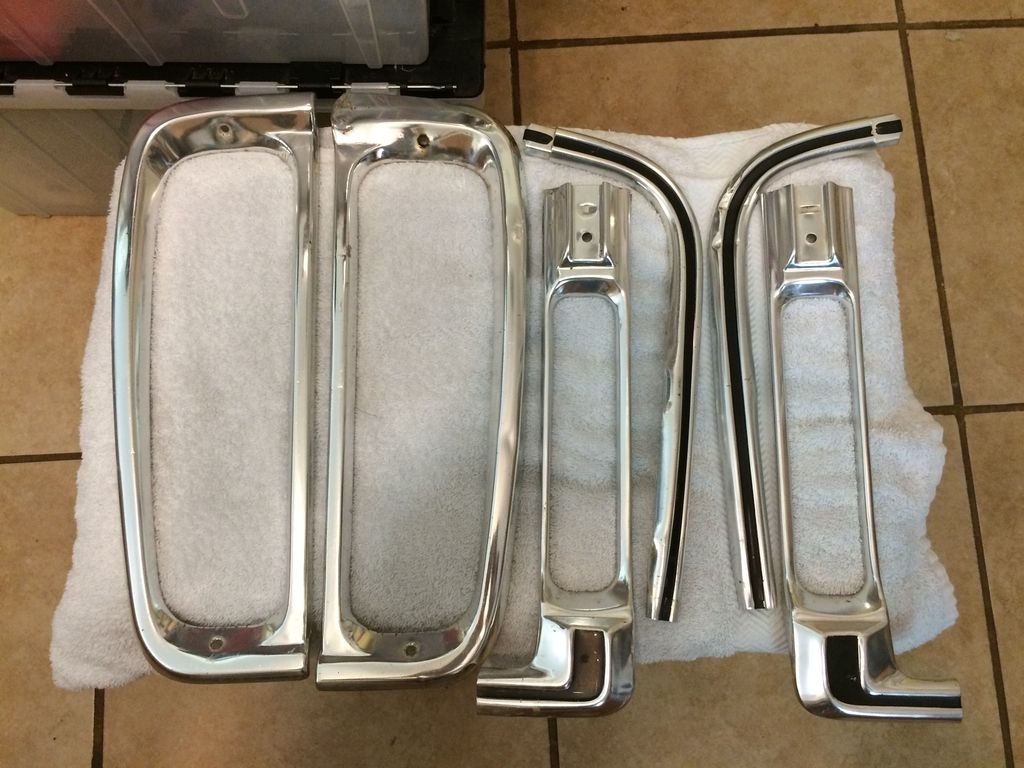
They do need a few dings straightened out but I'm impressed that they were still with the Bronco when I got it. I sorted thru the big trim parts and I think I have everything but I will have to wait to lay it all out and check before I'm sure if I have everything.
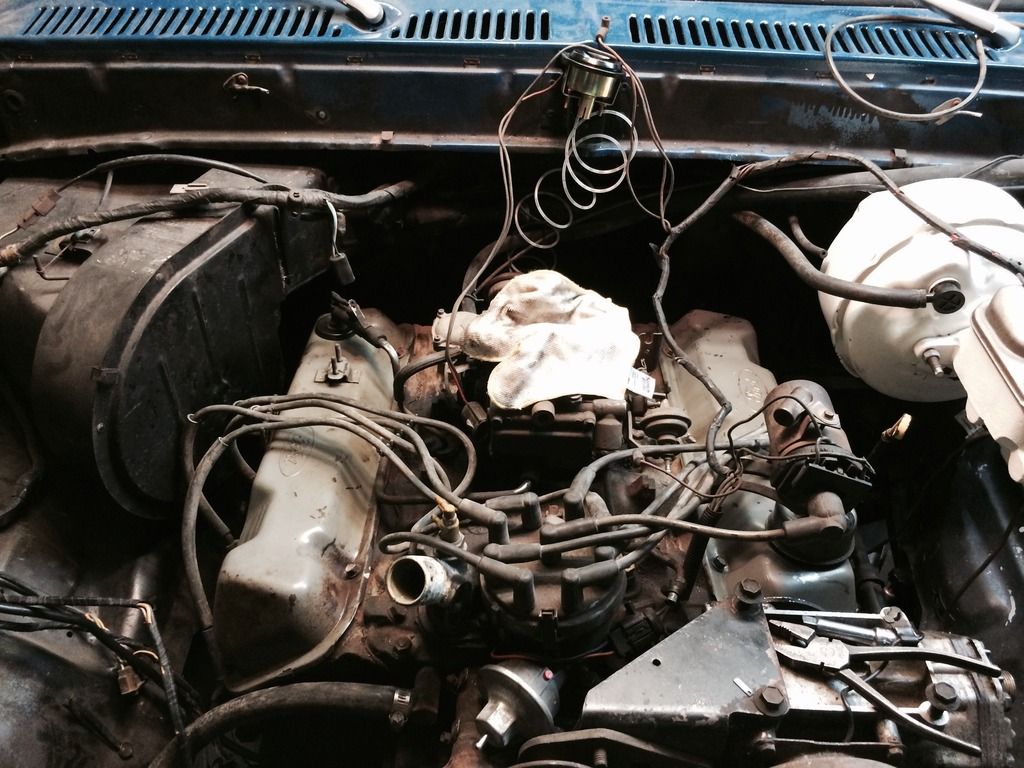
I also put the grill surround back on and cleaned everything off the top of the engine. I even dug out the shop vac and cleaned all the dust, dirt, and crap off the engine. Next up is sorting out how to connect the engine wiring from the 1983 460 to the rest of the 1978 wiring.
I watched Stacey David's Gearz episode where he pulled a 1969 International 1600 Cabover from a junkyard and after some work fired it right up. It has inspired me to try and bring the 460 back to life as the next step in getting the Bronco on the road.

They do need a few dings straightened out but I'm impressed that they were still with the Bronco when I got it. I sorted thru the big trim parts and I think I have everything but I will have to wait to lay it all out and check before I'm sure if I have everything.
I also put the grill surround back on and cleaned everything off the top of the engine. I even dug out the shop vac and cleaned all the dust, dirt, and crap off the engine. Next up is sorting out how to connect the engine wiring from the 1983 460 to the rest of the 1978 wiring.
I watched Stacey David's Gearz episode where he pulled a 1969 International 1600 Cabover from a junkyard and after some work fired it right up. It has inspired me to try and bring the 460 back to life as the next step in getting the Bronco on the road.
#154
08-11-2015, 09:00 AM
So the plan yesterday was to get the spark plugs out of my swapped in 460. Yes, I swapped it in on faith from the seller that it ran good since he was a friend of a friend...
I sprayed some WD40 Rust release on the plugs and let them sit for a few hours while I cleaned out the garage. Cleaning out the garage and moving lots of parts I'm not working with right now to the shed has made room to actually work on the Bronco.
Next up I decided to finally nicely trip the grill shell around the front bumper and brackets. I used some tape to layout where I needed to cut then went to work with my jigsaw. You can see how rough it was when I started trimming before with a tin snips.
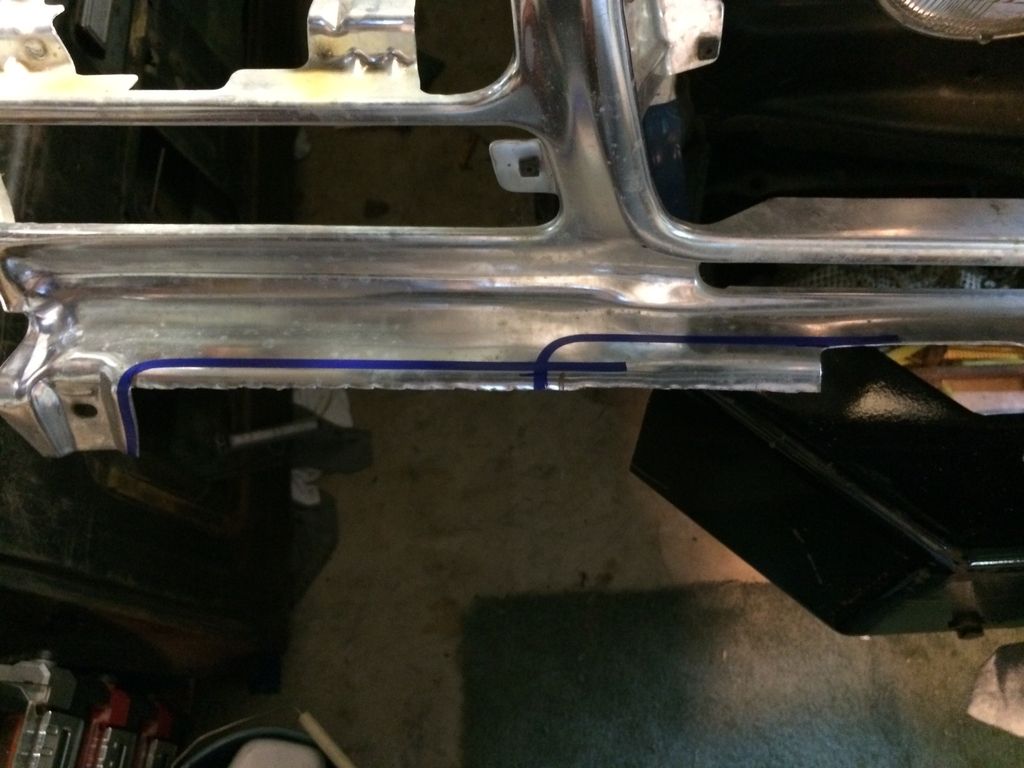
Once the basic layout was cut I finished everything off with some file work to smooth it all out.
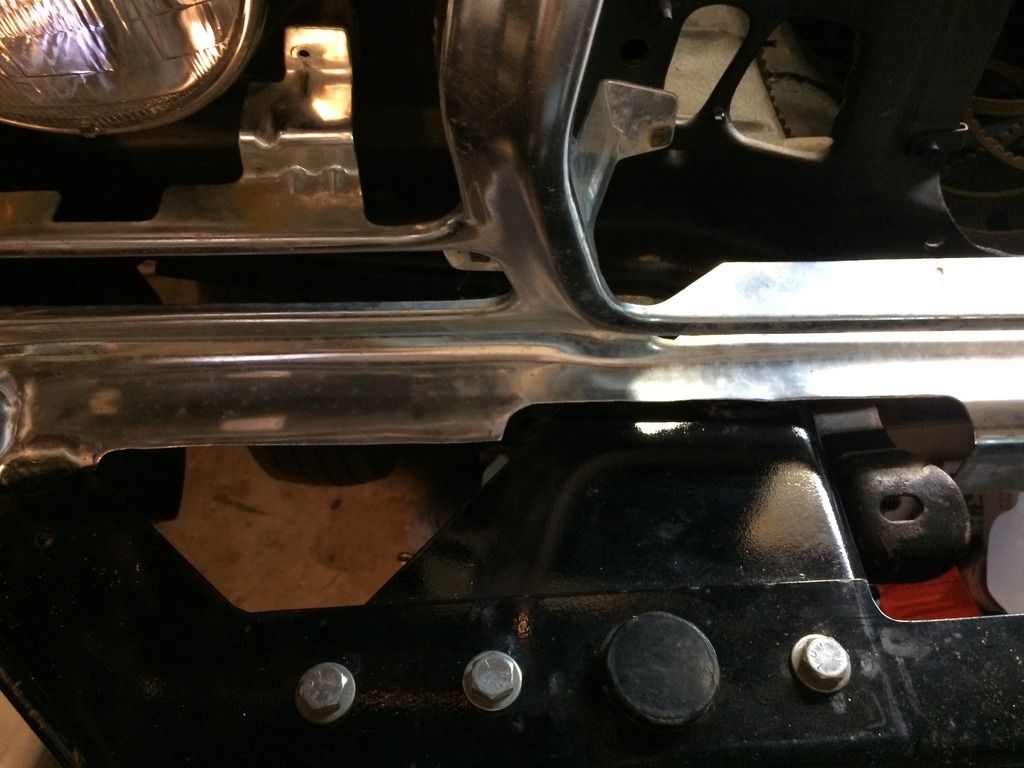
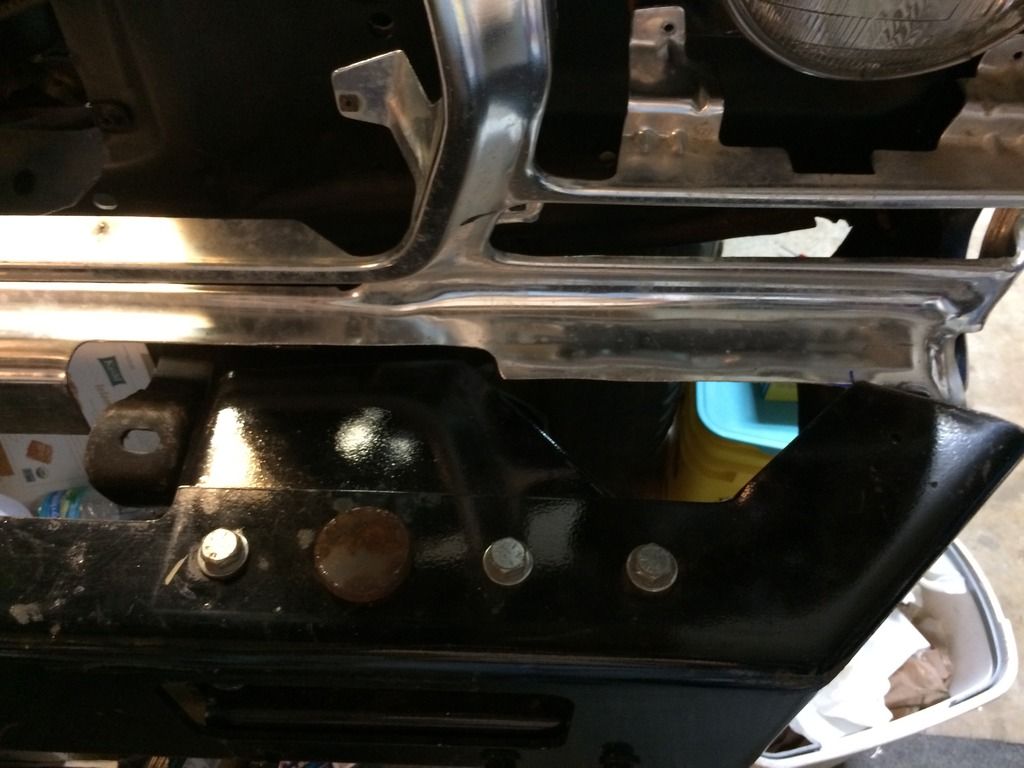
Driver side, sorry I forgot the before pic on this side.
After letting the WD40 sit for 3 hours I started on the driver side plugs.
#5 came out with just a few hand slaps on the 3/8 ratchet.
#6 came out with the same hand slaps on the ratchet.
#7 needed a small hammer on the handle of the ratchet.
#8 needed a 2' pipe slid over the ratchet just because of the strange angle.
On to the passenger side and the fun really started.
#1 needed a hammer hitting the ratchet to break it loose.
#2 also took some hammer hits.
#3 needed a 2' bar on the ratchet and some hammering on the bar.
#4 needed the 2' bar and several hard whacks on the bar with some persuasive language.
I believe the engine was running but I have doubts about "Runs Great" since all 8 of the plugs were very black with carbon buildup.
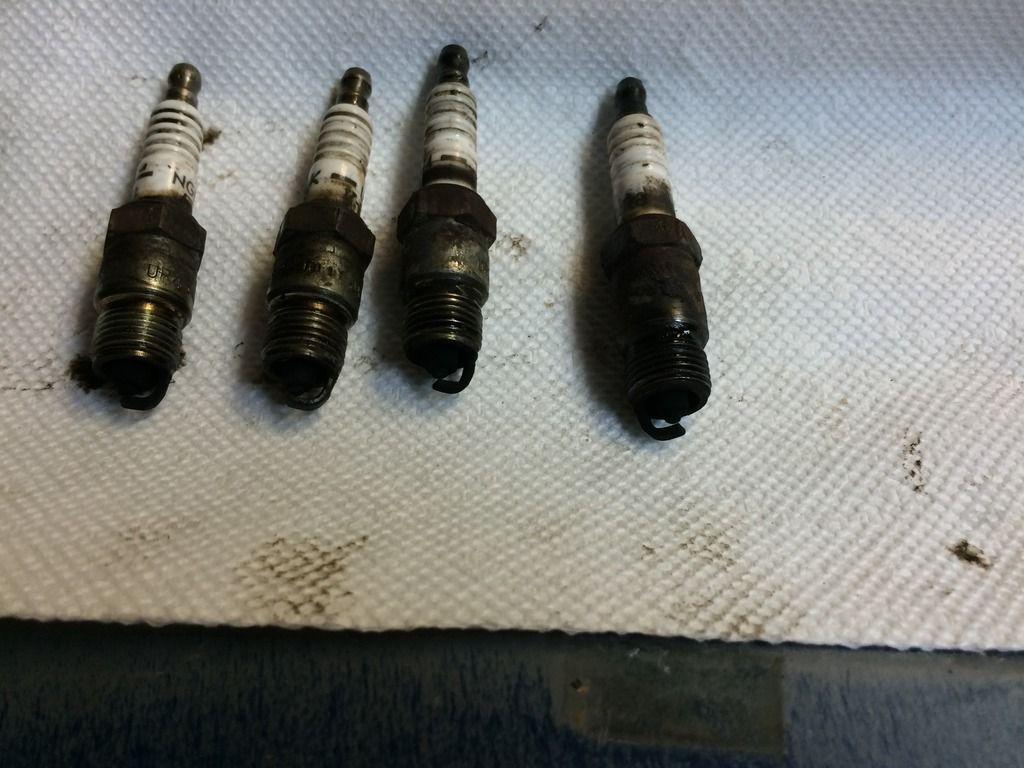
These are 5-8 in order left to right. 5,6,and 7 are all NGK plugs, I can't even read what 8 was but its not an NGK.

These are 1-4 in order right to left and 1 and 2 were NGK's and 3 and 4 are Autolight's. I don't think the P.O. liked contorting into position to change the rear plugs on this engine.
After all the plug adventures I shot 5cc's of Marvel Mystery oil into each cylinder (great reason to keep the kids old medicine syringes) to lube up the cylinders so I don't do any damage on startup. Then I decided to start sorting out the engine wiring and vacuum lines. Most of the vacuum lines are for smog controls that are no longer on this engine. I tried to disconnect them nicely but almost everywhere they hooked to a plastic connector the connectors broke as soon as I tried to unhook the hoses.
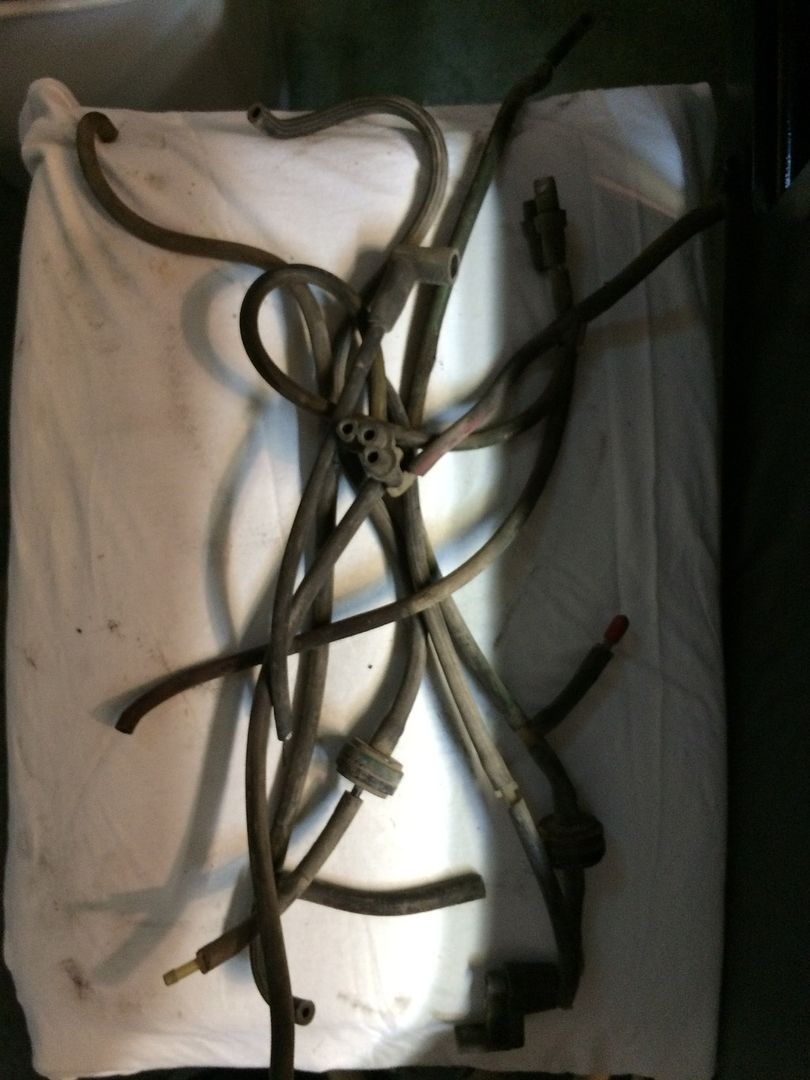
Here is the pile of useless vacuum lines along with the old coil wore that the end came off.
Next up I'm being more careful and trying to unhook the electrical connections. I figured out last night that I have 4 Ford ignition control boxes on the shelf and I have no idea which one I need for this setup or even how to tell the difference between them since only one of them has and marks on it.
I sprayed some WD40 Rust release on the plugs and let them sit for a few hours while I cleaned out the garage. Cleaning out the garage and moving lots of parts I'm not working with right now to the shed has made room to actually work on the Bronco.
Next up I decided to finally nicely trip the grill shell around the front bumper and brackets. I used some tape to layout where I needed to cut then went to work with my jigsaw. You can see how rough it was when I started trimming before with a tin snips.

Once the basic layout was cut I finished everything off with some file work to smooth it all out.

Driver side, sorry I forgot the before pic on this side.

After letting the WD40 sit for 3 hours I started on the driver side plugs.
#5 came out with just a few hand slaps on the 3/8 ratchet.
#6 came out with the same hand slaps on the ratchet.
#7 needed a small hammer on the handle of the ratchet.
#8 needed a 2' pipe slid over the ratchet just because of the strange angle.
On to the passenger side and the fun really started.
#1 needed a hammer hitting the ratchet to break it loose.
#2 also took some hammer hits.
#3 needed a 2' bar on the ratchet and some hammering on the bar.
#4 needed the 2' bar and several hard whacks on the bar with some persuasive language.
I believe the engine was running but I have doubts about "Runs Great" since all 8 of the plugs were very black with carbon buildup.

These are 5-8 in order left to right. 5,6,and 7 are all NGK plugs, I can't even read what 8 was but its not an NGK.

These are 1-4 in order right to left and 1 and 2 were NGK's and 3 and 4 are Autolight's. I don't think the P.O. liked contorting into position to change the rear plugs on this engine.
After all the plug adventures I shot 5cc's of Marvel Mystery oil into each cylinder (great reason to keep the kids old medicine syringes) to lube up the cylinders so I don't do any damage on startup. Then I decided to start sorting out the engine wiring and vacuum lines. Most of the vacuum lines are for smog controls that are no longer on this engine. I tried to disconnect them nicely but almost everywhere they hooked to a plastic connector the connectors broke as soon as I tried to unhook the hoses.

Here is the pile of useless vacuum lines along with the old coil wore that the end came off.
Next up I'm being more careful and trying to unhook the electrical connections. I figured out last night that I have 4 Ford ignition control boxes on the shelf and I have no idea which one I need for this setup or even how to tell the difference between them since only one of them has and marks on it.
#155
08-11-2015, 09:26 PM
Today I scraped all of the loose crap off of the intake area and valve covers so I could get the valve covers off. I had drained the oil this morning and only got a little over a quart of very black crap out of the pan. I wanted to see how much sludge buildup there is in the valve train of my motor. After all the scraping and vacuuming I popped all the greasy bolts loose and took off the oil and goo caked valve covers. Imagine my surprise as to what was under them.
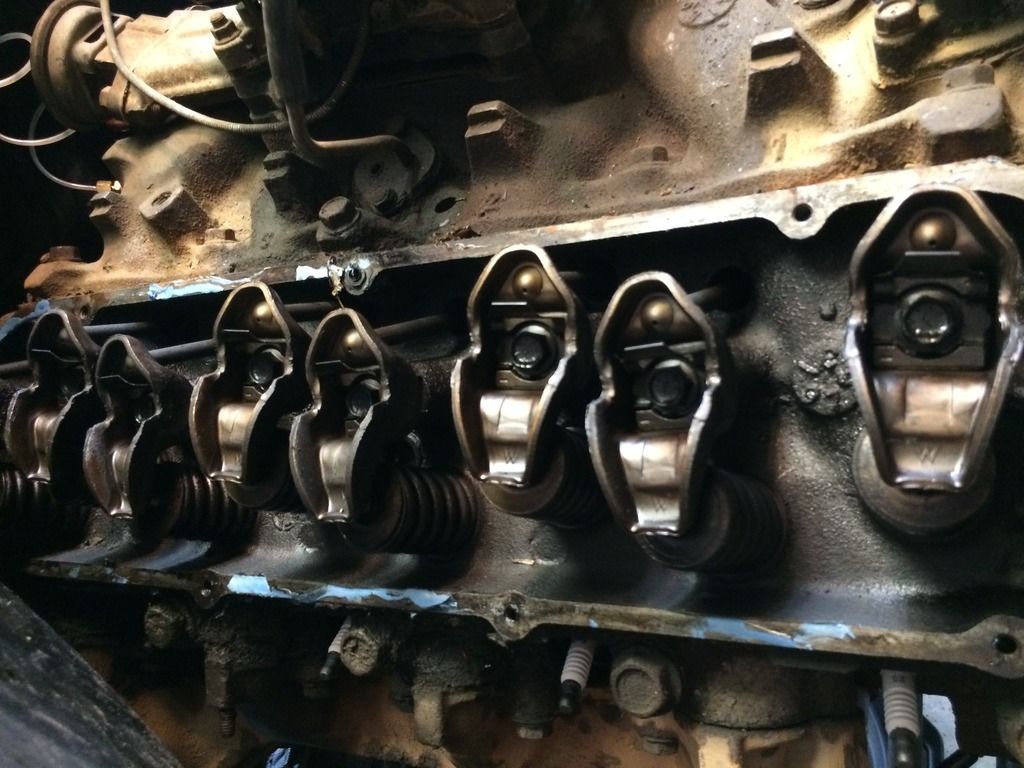
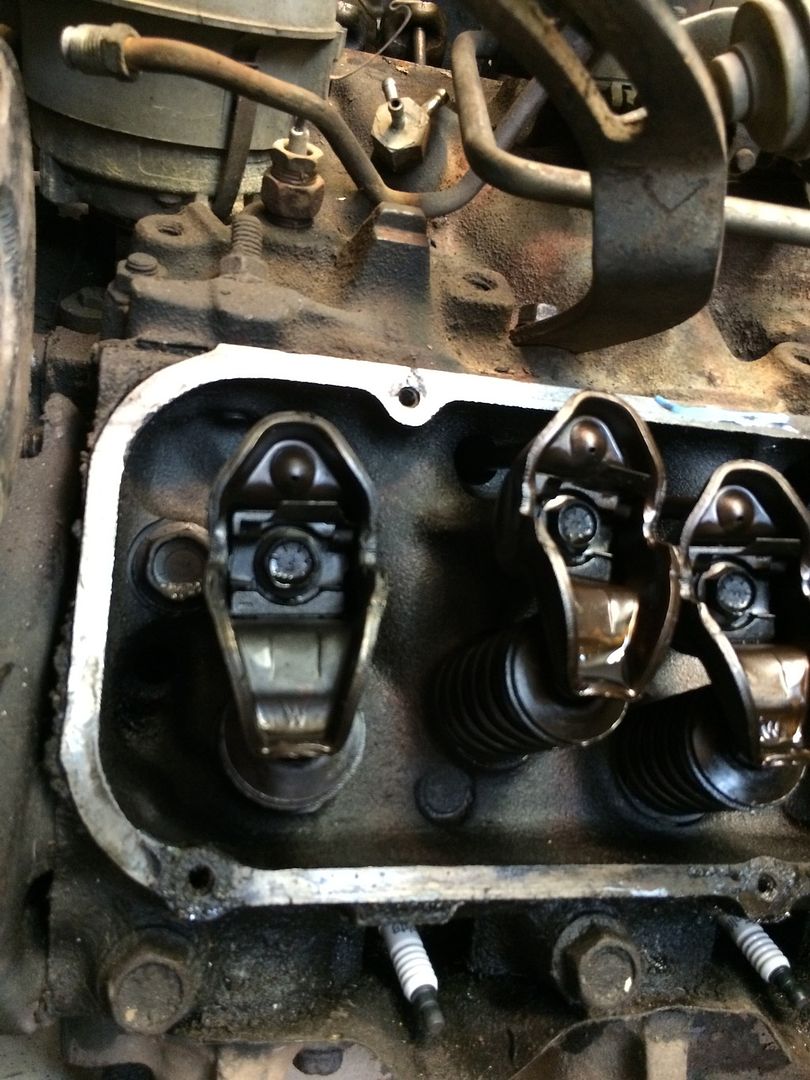
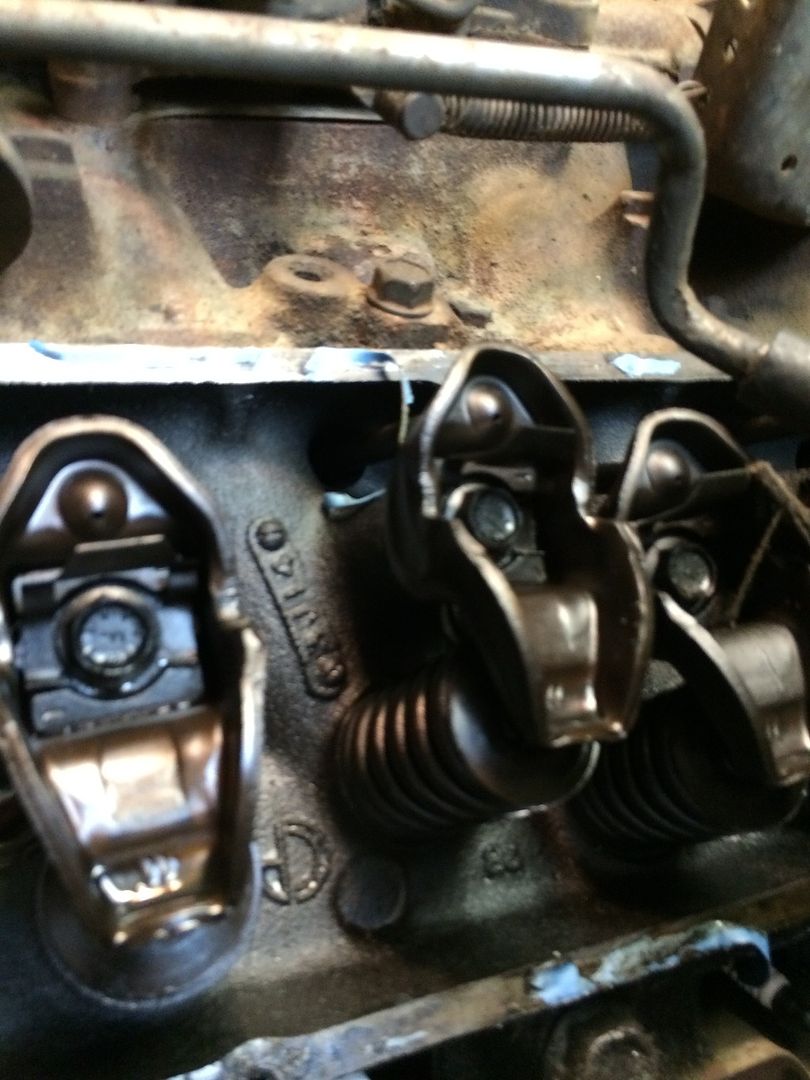
Where is the huge buildup of crap I expected to see? This looks like it was just assembled!
Looking at the valve covers I know they leaked because every bolt hole is bent down from guys cranking on the bolts to seal the leaks. I spent about an hour scrubbing all of the goo off of the covers and was rewarded with these pretty nice looking covers. I guess all of the oil and grease protected the paint on them.
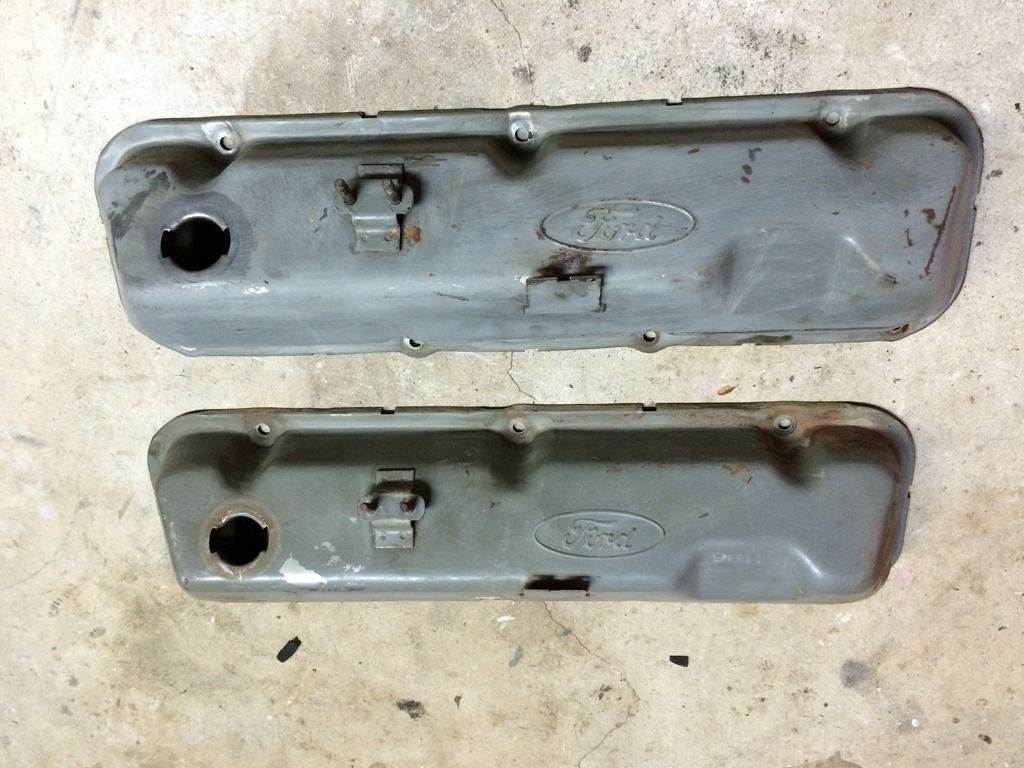
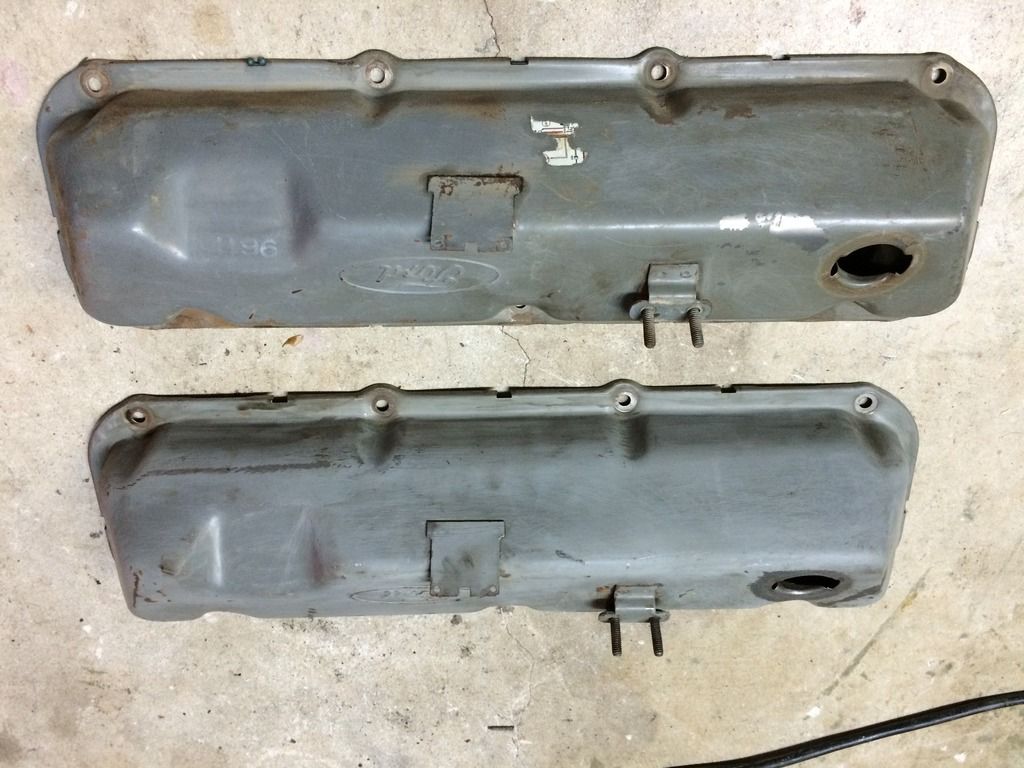
Right after this pic they both got a nice coat of WD40 inside and out to keep them from flash rusting before I get the flanges straightened out and get them reinstalled with nice new Felpro rubber gaskets. Yes I will be taking out the distributor and priming the oil pump with a drill to check that all the passages are clear and to pre-lube everything in the engine before I try to start it in the next 2 to 3 weeks. I believe that this engine hasn't run in over 3 years so I'm trying to be a little cautious. I'm back to work again tomorrow so the work on the Bronco will be slowing down again.
#156
08-12-2015, 06:44 AM
Post Fiend
Join Date: Nov 2011
Location: Algona, Washington
Posts: 8,908
Likes: 0
Received 0 Likes
on
0 Posts
Looks pretty good so far! Boy I know my valve train will be a mess... My covers leak real bad. I am looking into the axles though, I can't really do the work to change gears and the like so I need to see how many appendages I'll be losing to a shop to get it done. I need new gears that actually match (4.10), 31 spline axles to replace my 28 splines... Ball joints if possible.
#157
08-12-2015, 08:12 PM
Looks pretty good so far! Boy I know my valve train will be a mess... My covers leak real bad. I am looking into the axles though, I can't really do the work to change gears and the like so I need to see how many appendages I'll be losing to a shop to get it done. I need new gears that actually match (4.10), 31 spline axles to replace my 28 splines... Ball joints if possible.

#158
08-14-2015, 04:04 AM
Post Fiend
Join Date: Nov 2011
Location: Algona, Washington
Posts: 8,908
Likes: 0
Received 0 Likes
on
0 Posts
#159
08-25-2015, 04:15 PM
So today I scraped the rest of the RTV off the heads. Then I pulled the distributor so I could prime the oil pump since the engine hasn't been started in a few years. That's where I found the first problem of the day.
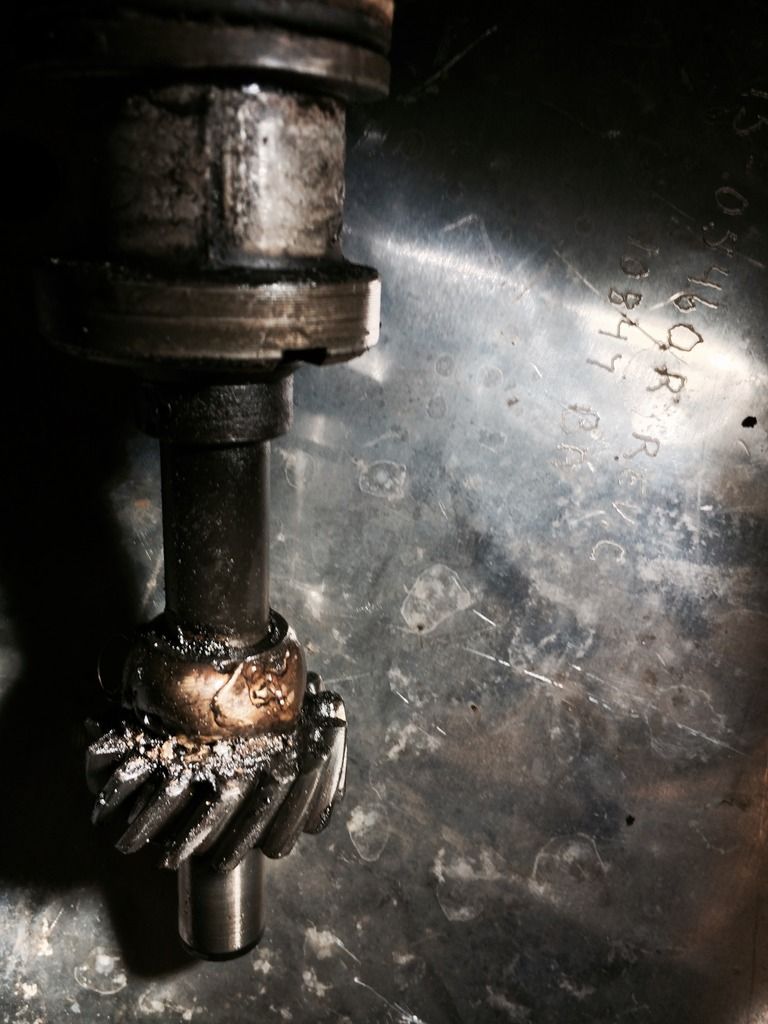
I can't believe someone brazed the drive gear onto the shaft. Lucky thing that I have a spare 460 sitting in the corner of the garage so I stole the distributor out of it to swap into this engine. Yes, I mounted the coil very high on a spare alternator arm bracket I had for now.
Next I got the drill out and primed the oil pump and found I have 70 pounds of oil pressure going on right now. I put the valve covers back on with new gaskets so I could prime it all for an extended time and not spill out all over.
Last up for today has been trying to sort out the underhood wiring and figure out what things I am missing. I have a lot of connections that go no where right now so I guess I need to find the rest of the front wiring harness to my Bronco so I can find out what of it is engine connections and what is everything else. I did at least figure out which ones are for the cruise control module so they are out of the way now.

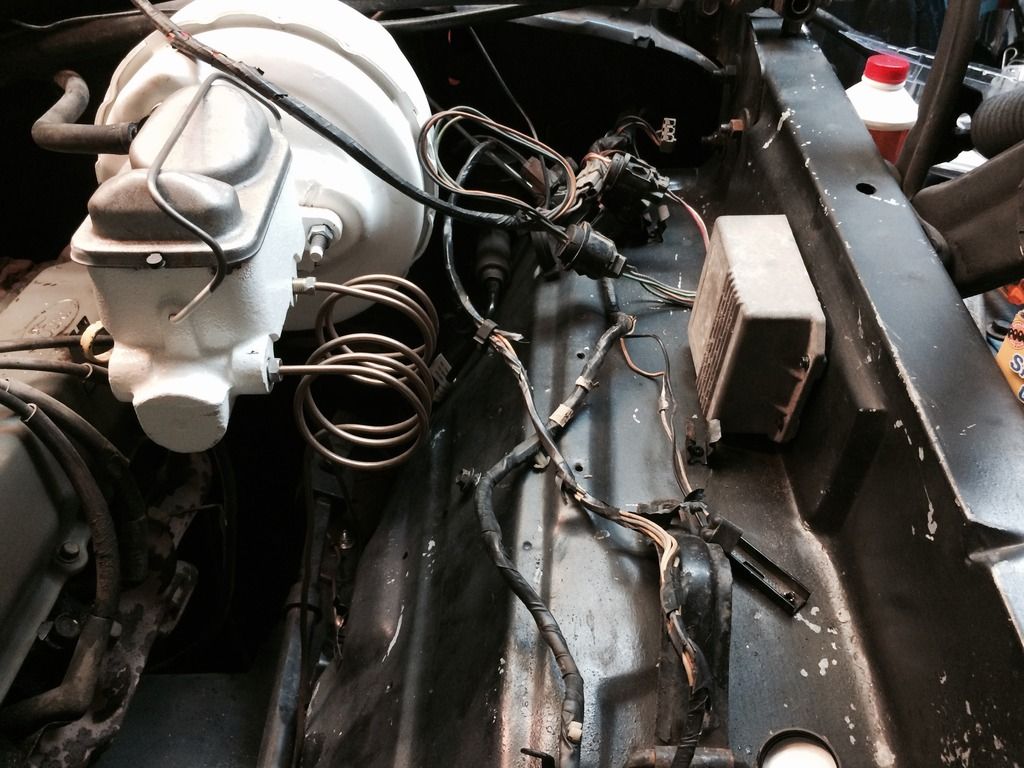
Last up I tried to hit the starter and turn over the engine. I used a jumper to trigger the starter solenoid and got nothing. I tried the starter line directly on the battery and also got nothing. I took the starter off and tried it straight on the battery and no movement at all. My starter is frozen solid so I get to buy a new starter, yippee. Only good thing is I'm pretty sure I have room to use fender well exit headers if I move the routing of my hydraulic clutch line and my brake lines and covert them with some heat shielding so they don't melt.

I can't believe someone brazed the drive gear onto the shaft. Lucky thing that I have a spare 460 sitting in the corner of the garage so I stole the distributor out of it to swap into this engine. Yes, I mounted the coil very high on a spare alternator arm bracket I had for now.
Next I got the drill out and primed the oil pump and found I have 70 pounds of oil pressure going on right now.
I put the valve covers back on with new gaskets so I could prime it all for an extended time and not spill out all over. 
Last up for today has been trying to sort out the underhood wiring and figure out what things I am missing. I have a lot of connections that go no where right now so I guess I need to find the rest of the front wiring harness to my Bronco so I can find out what of it is engine connections and what is everything else. I did at least figure out which ones are for the cruise control module so they are out of the way now.


Last up I tried to hit the starter and turn over the engine. I used a jumper to trigger the starter solenoid and got nothing. I tried the starter line directly on the battery and also got nothing. I took the starter off and tried it straight on the battery and no movement at all. My starter is frozen solid so I get to buy a new starter, yippee. Only good thing is I'm pretty sure I have room to use fender well exit headers if I move the routing of my hydraulic clutch line and my brake lines and covert them with some heat shielding so they don't melt.
#160
08-28-2015, 04:09 AM
Post Fiend
Join Date: Nov 2011
Location: Algona, Washington
Posts: 8,908
Likes: 0
Received 0 Likes
on
0 Posts
#161
08-28-2015, 08:57 PM
#162
08-29-2015, 06:26 AM
Postmaster
#163
08-30-2015, 04:21 AM
Post Fiend
Join Date: Nov 2011
Location: Algona, Washington
Posts: 8,908
Likes: 0
Received 0 Likes
on
0 Posts

#164
09-01-2015, 08:56 PM
#165
09-02-2015, 06:58 PM
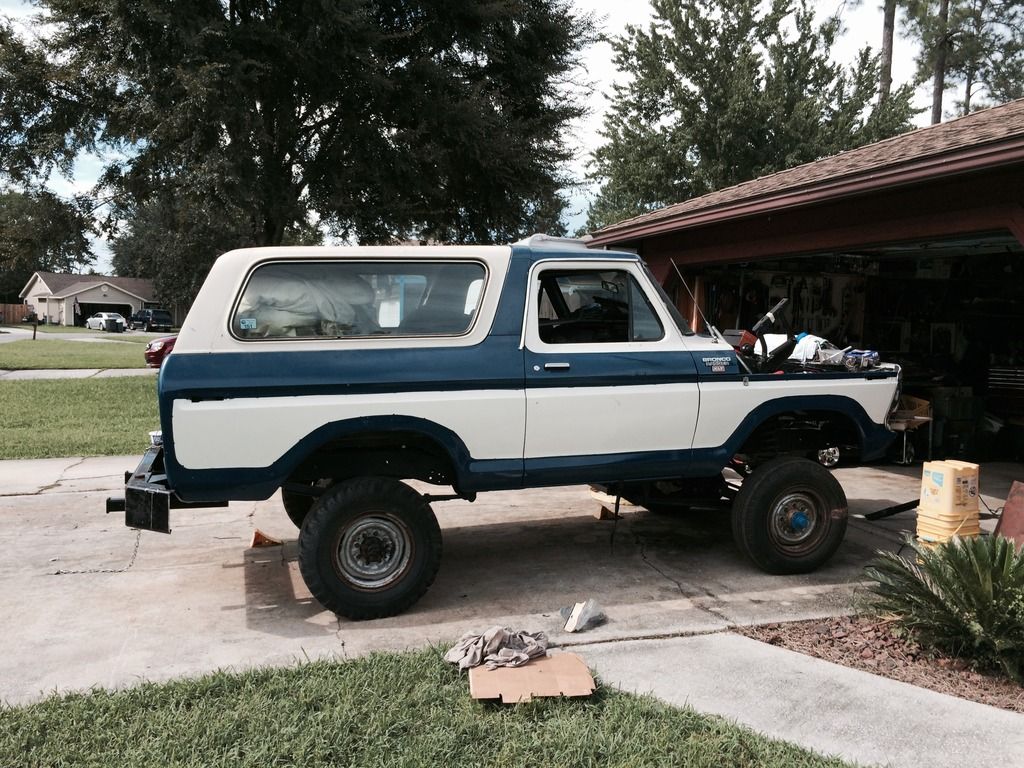
Well as usual life happened and messed up my plans to start the 460 in my Bronco today. It took so long to get all of my other things done that by the time I had the space around the Bronco in the garage cleared out I was out of time to work on it since had to pick my boy up from school. I did manage to roll it out of the garage and back in while I was cleaning. Thanks to my buddy for letting me use his portable winch. It hasn't been out of the garage in a few years so it was nice to see it in the sun, even if it is very dirty.
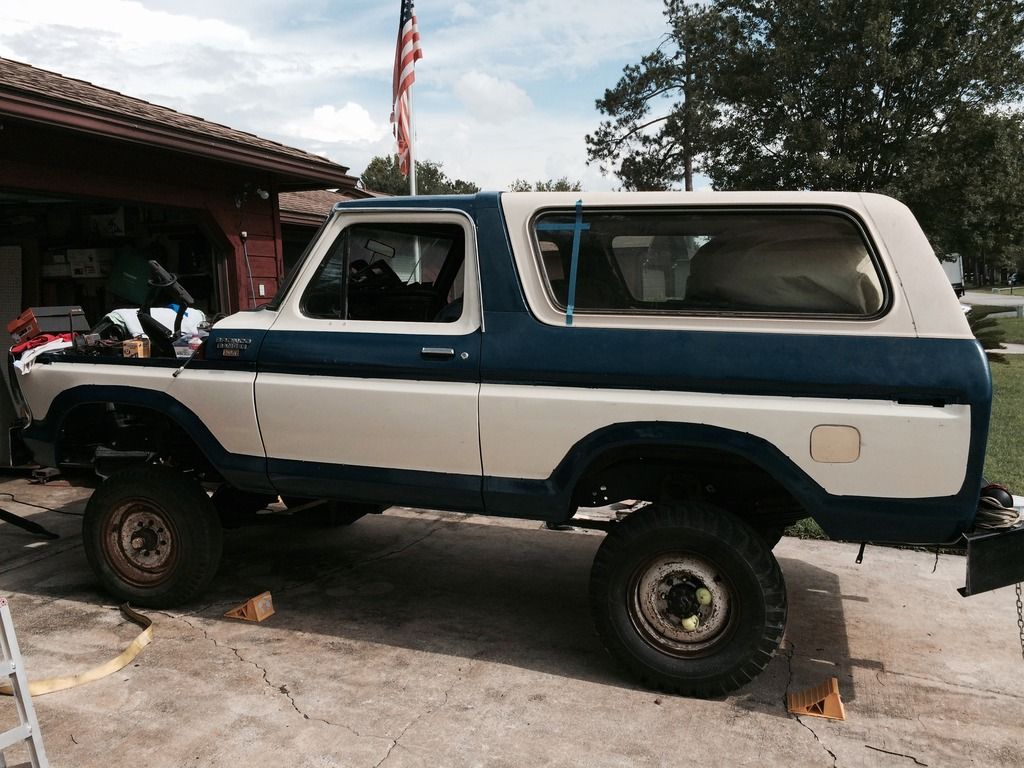
Out of the garage today.
I may have to shorten the stick out of the rear receiver tubes. I knew they were going to stick out but I don't think I took how much the bumper itself sticks out from the rear of the Bronco into account when I started building them into the bumper.

Out of the garage today.

I may have to shorten the stick out of the rear receiver tubes. I knew they were going to stick out but I don't think I took how much the bumper itself sticks out from the rear of the Bronco into account when I started building them into the bumper.