
My 78 Bronco Project (Daddy's Big Truck)
#121
 09-12-2013, 10:35 AM

I've read about that T-Bird swap. Although it looks about as good as the Saginaw, I don't know if it might be too much work for me. When I read about it, there was a lot of custom work done, would I be able to get the parts through a store vs making them? I don't have much fab experience so making parts out of other parts might not go too well.
What $431.29 can do for your brakes.... - FSB Forums
The F350 upgrade doesn't require fab work. It only requires 1 brake line fitting to be changed at the master cylinder. It is popular because of the number of upgraded parts you can put on that are Factory Ford parts. They just really improve the Bronco's stopping abilities. You do not have to upgrade to rear disc brakes, the F350 wheel cylinders in your rear drums will upgrade the rear brakes a bunch to start. Wheel cylinders are cheap and if you feel you need more rear brakes later you can swap to discs.
I couldn't go that route because my Bronco already had a swapped in Dana 60 in the rear and I needed the 8 bolt pattern for my wheels so I upgraded the front to match the rear. I did the disc swap in the rear of my Bronco for several reasons.
1. I needed all new rear brakes anyway, drums were totally shot
2. I wanted better stopping power
3. Discs are easier maintenance
4. I wanted the front and rears to be the same parts, just for ease of parts replacement
5. I like to modify my vehicles to improve them
Manfred, The Bronco alreay has a lift on it, It will clear my 40's but I'm not sure how much lift it is as I didn't put it on. I'm looking at the shackle flip to get rid of the 4 inch rear blocks that currently are part of the rear lift. I do agree that I should probably get it running and driving before I tear into it except the gas tank is currently out of it and this seems like an ideal time to mount the flip hangers on the frame. I guess time and available money will determine what order the swap will go.
#122
02-12-2015, 07:13 PM
So after a long time where I did almost nothing to the Bronco my wife asked me a few weeks ago why I don't just sell it. She said I could take the money I get selling it and modify my Excursion any way I wanted as long as it could still pull our camper. I know that if I sell the Bronco I will not get another one and I know that some "emergency" will hit us that sucks up all the money so I decided to get back working on it and to do some things where she could see the progress.
First thing was to clean the garage around it enough to get to the Bronco and work on it. Contrary to the pictures I didn't shove everything under and beside the Bronco. Most of what I cleaned was under the front of the Bronco and piled along the driver side.
Next up I sat in it and played with the clutch pedal. That was when I realized that even as much as I have added to the firewall it was still flexing from the force exerted on it. I grabbed a scrap C channel and welded it across the firewall right under the hydraulic master cylinder and 95% of the flex is now gone. I hope thats the last thing I need to modify for the clutch. Sorry, no pics of that.
At lunch I was surfing Craigslist for a rear window and using the random search for a "Bronco" i came across a generic listing for a pair of Semi bumpers. A guy had listed them real cheap because he had sold the project truck he bought them for. He finally called me back and I went out to pick them up and bring them home.
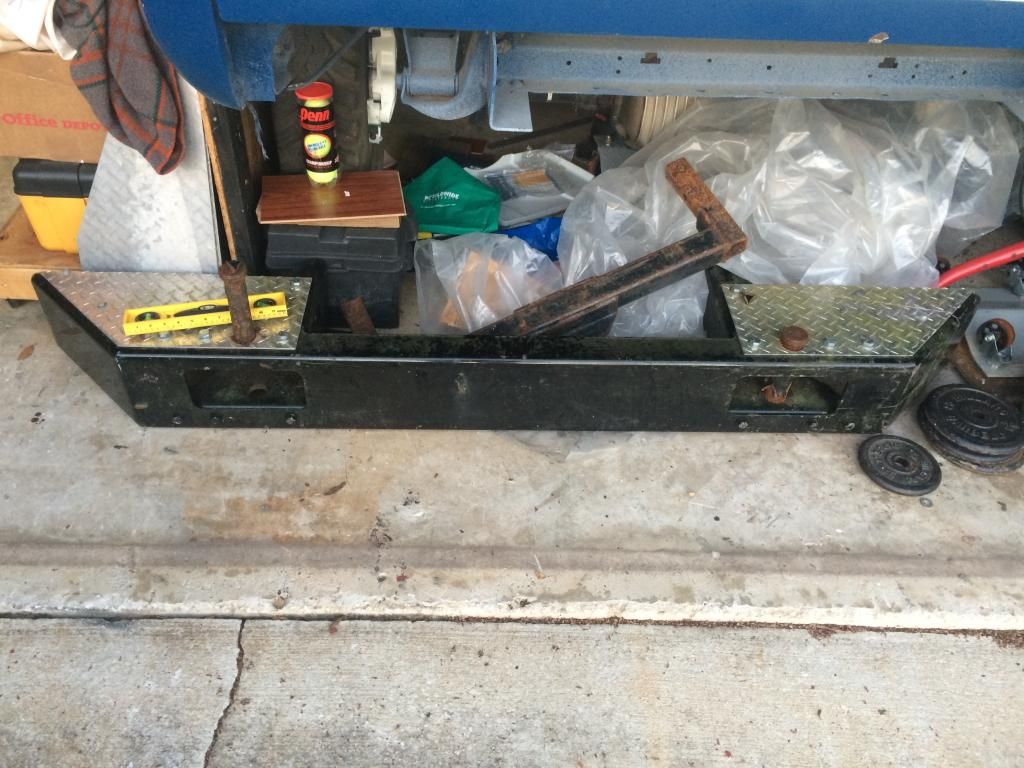
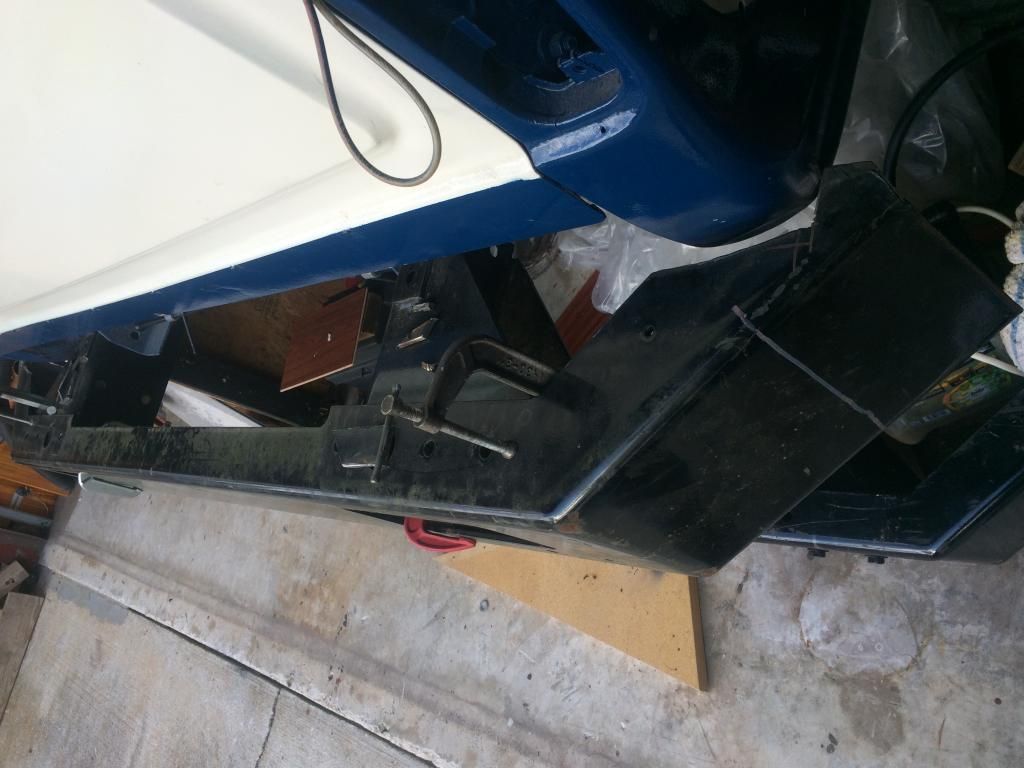
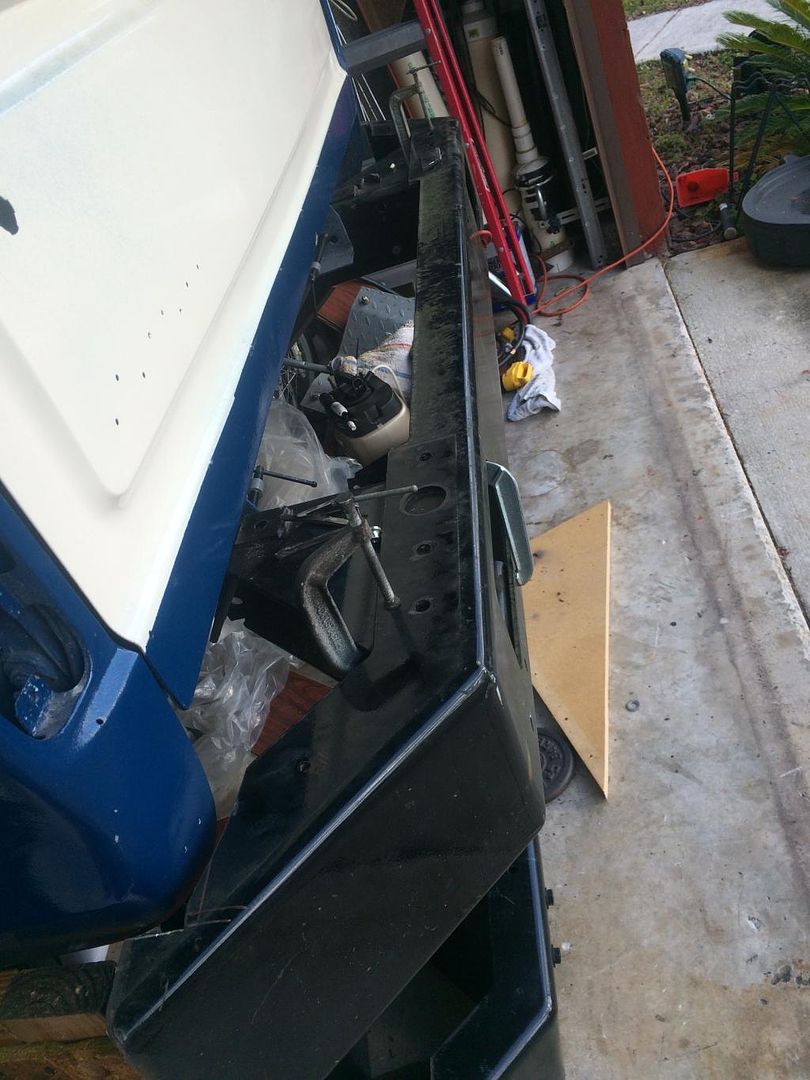
I cleaned one up and realized that when he had cut the width narrower he didn't cut equally from both sides so I need to adjust the cuts. I really wanted to get the front bumper on, but I needed to put the driver side fender all back on first so I moved to the rear bumper. I measured and realized that the brackets on the bumper were set up for a 34" frame width. Perfect for the front but the Bronco rear frame rails are 37 1/2" in width. I took all of the brackets off the rear bumper and started figuring where to bolt them on the frame. Since the bumper is 8" tall and the brackets are 10" deep I have a lot of room to play. I clamped on a bracket and discovered that with a little grinding on the spring shackle mount I could use the existing middle bumper hole in the frame with the upper bolt hole in the bracket. This mounts it down far enough to clear the open tailgate and saves me drilling all of the holes.
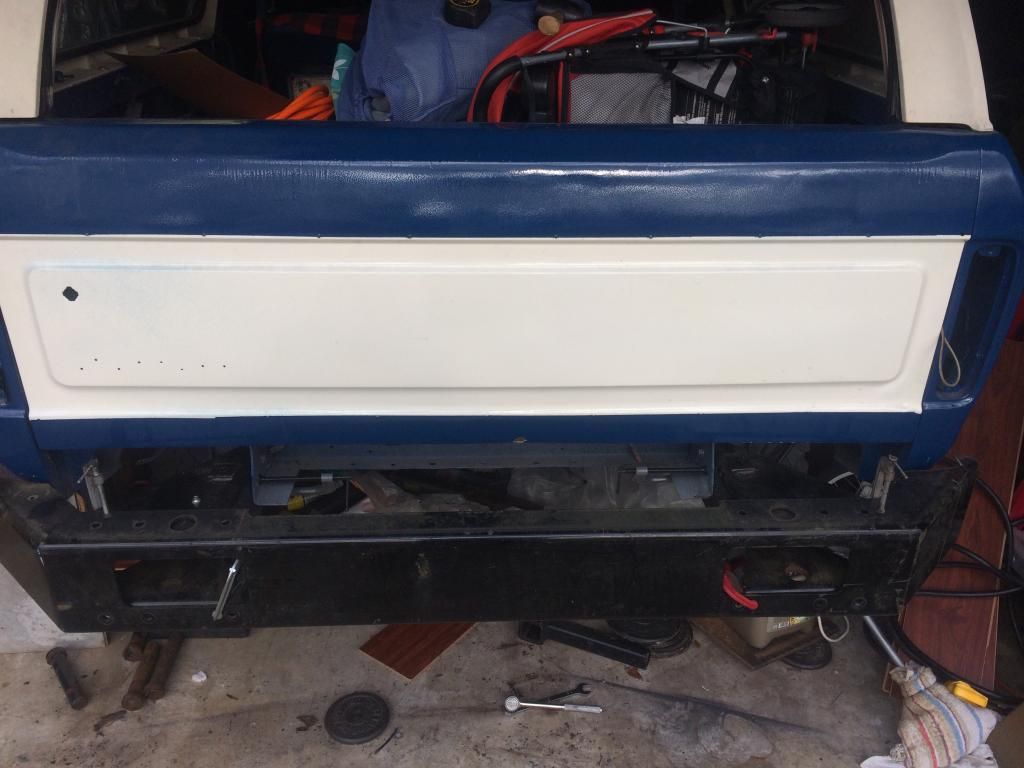
I placed the bumper on the brackets and discovered it needed a little trimming around the body to move far enough forward to fully seat in the brackets. A few times cutting and it fits very nicely.
Now I just need to drill the 6 mounting holes on each side to bolt the bumper to the brackets, drill the big hole for the 1 1/2" pin, and weld up all the extra holes. I'm planning on drilling the holes and doing the fill welding on the bumper instead of the brackets because I think it will be stronger that way. If there is a welder out there that thinks I should do all the drilling and welding on the brackets instead please let me know. The other thing is to well in some receiver tubes on each side. I ordered 24" raw receiver tube to weld in. That will put it 4" past the bumper and all the was back to the rear crossmember so I can bolt them to the frame to add strength to the whole bumper assembly.
Once thats all done I might get to work on the front bumper. I have a feeling that will require more finesse to fit and make it look right. Once the front is done I might start work on a spare tire carrier to build onto the rear bumper.
First thing was to clean the garage around it enough to get to the Bronco and work on it. Contrary to the pictures I didn't shove everything under and beside the Bronco. Most of what I cleaned was under the front of the Bronco and piled along the driver side.
Next up I sat in it and played with the clutch pedal. That was when I realized that even as much as I have added to the firewall it was still flexing from the force exerted on it. I grabbed a scrap C channel and welded it across the firewall right under the hydraulic master cylinder and 95% of the flex is now gone. I hope thats the last thing I need to modify for the clutch. Sorry, no pics of that.
At lunch I was surfing Craigslist for a rear window and using the random search for a "Bronco" i came across a generic listing for a pair of Semi bumpers. A guy had listed them real cheap because he had sold the project truck he bought them for. He finally called me back and I went out to pick them up and bring them home.

I cleaned one up and realized that when he had cut the width narrower he didn't cut equally from both sides so I need to adjust the cuts. I really wanted to get the front bumper on, but I needed to put the driver side fender all back on first so I moved to the rear bumper. I measured and realized that the brackets on the bumper were set up for a 34" frame width. Perfect for the front but the Bronco rear frame rails are 37 1/2" in width. I took all of the brackets off the rear bumper and started figuring where to bolt them on the frame. Since the bumper is 8" tall and the brackets are 10" deep I have a lot of room to play. I clamped on a bracket and discovered that with a little grinding on the spring shackle mount I could use the existing middle bumper hole in the frame with the upper bolt hole in the bracket. This mounts it down far enough to clear the open tailgate and saves me drilling all of the holes.


I placed the bumper on the brackets and discovered it needed a little trimming around the body to move far enough forward to fully seat in the brackets. A few times cutting and it fits very nicely.


Now I just need to drill the 6 mounting holes on each side to bolt the bumper to the brackets, drill the big hole for the 1 1/2" pin, and weld up all the extra holes. I'm planning on drilling the holes and doing the fill welding on the bumper instead of the brackets because I think it will be stronger that way. If there is a welder out there that thinks I should do all the drilling and welding on the brackets instead please let me know. The other thing is to well in some receiver tubes on each side. I ordered 24" raw receiver tube to weld in. That will put it 4" past the bumper and all the was back to the rear crossmember so I can bolt them to the frame to add strength to the whole bumper assembly.
Once thats all done I might get to work on the front bumper. I have a feeling that will require more finesse to fit and make it look right. Once the front is done I might start work on a spare tire carrier to build onto the rear bumper.
#123
02-14-2015, 09:24 AM
So I managed a little more work on the Bronco this week. I got the driver side inner fender on. Then bolted the fender on. I still need to line up all of the panels as the gaps are all over the place, but that will wait for now.
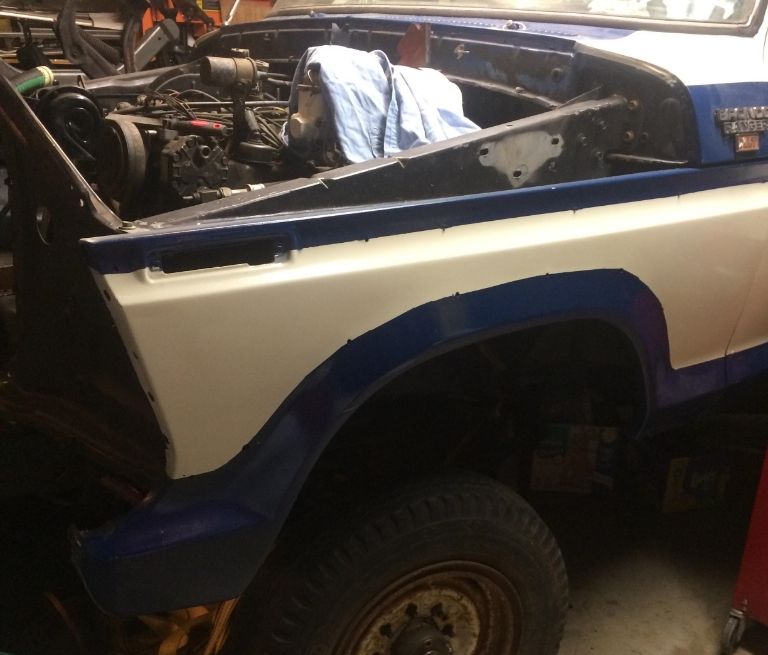
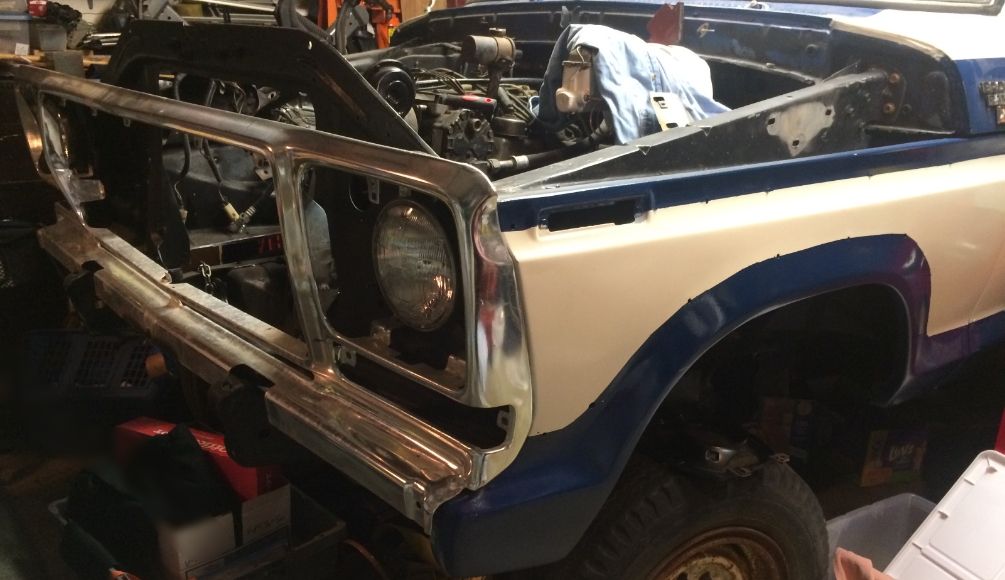
I have decided to go with the round headlights as I like them more than the rectangular headlights. I think it is a little more old school classic look. I picked up the round mounts a while back so I swapped them on.

I finally went outside and got the grill shell off the side of the garage and put it in place. I'm not going to put all the trim and grill center in place right now. I just needed all of this assembled so I can try to start mocking up the new front bumper this weekend.
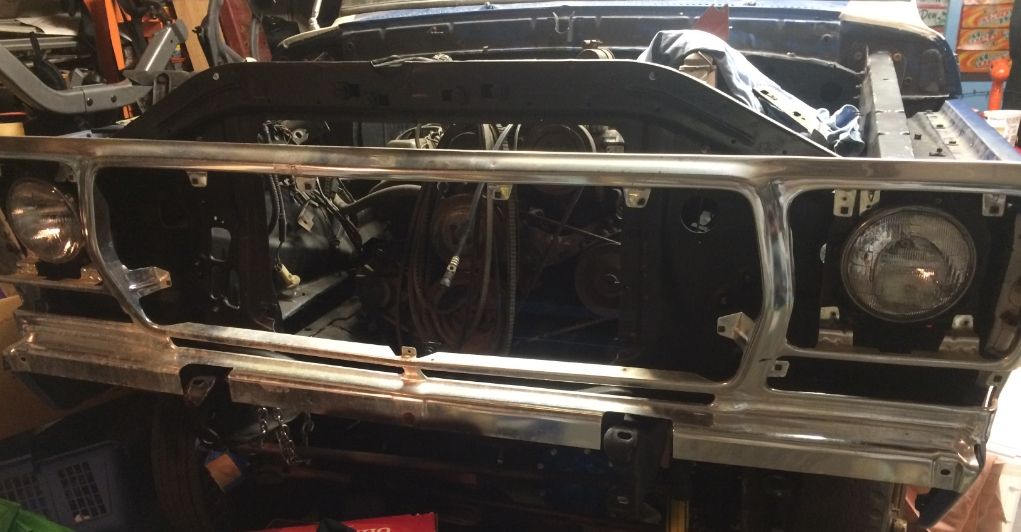
If I'm lucky I may have another update later this weekend. I almost forgot how much fun working on the Bronco can be when I actually make progress!

I have decided to go with the round headlights as I like them more than the rectangular headlights. I think it is a little more old school classic look. I picked up the round mounts a while back so I swapped them on.

I finally went outside and got the grill shell off the side of the garage and put it in place. I'm not going to put all the trim and grill center in place right now. I just needed all of this assembled so I can try to start mocking up the new front bumper this weekend.


If I'm lucky I may have another update later this weekend. I almost forgot how much fun working on the Bronco can be when I actually make progress!
#124
02-14-2015, 12:49 PM
Laughing Gas
 Looking good!
#125
02-17-2015, 09:48 PM
I made some great progress tonight working on my front bumper. I drilled the frame to match the bumper brackets. I had to loosely install the brackets, then line up and loosely install all the bumper bolts. Finally I had to tighten them all down to pull everything together. Next up was trimming the grill shell around the bumper.
Side view.
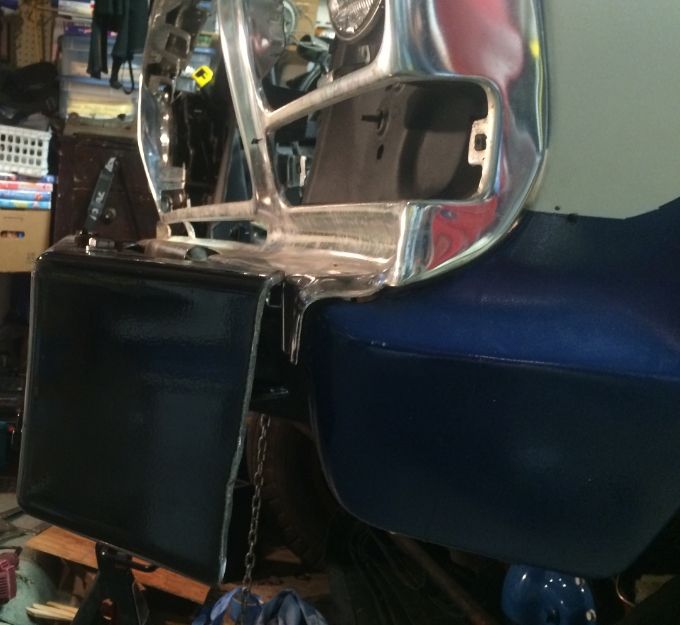
Angle shot.
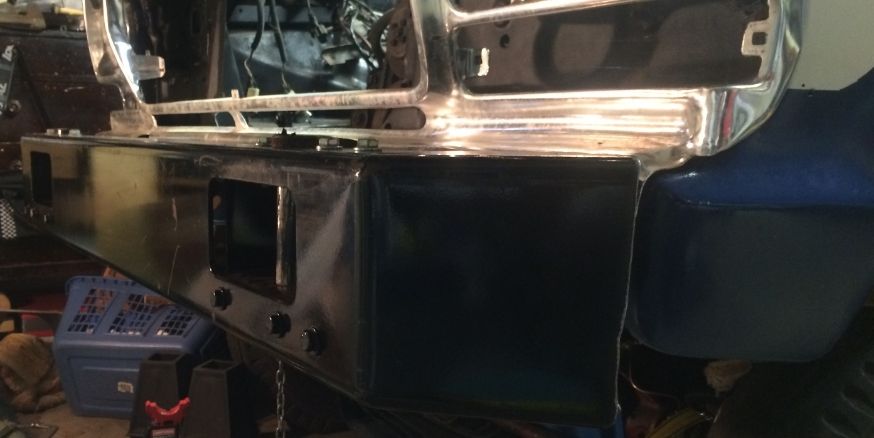
The money shot!
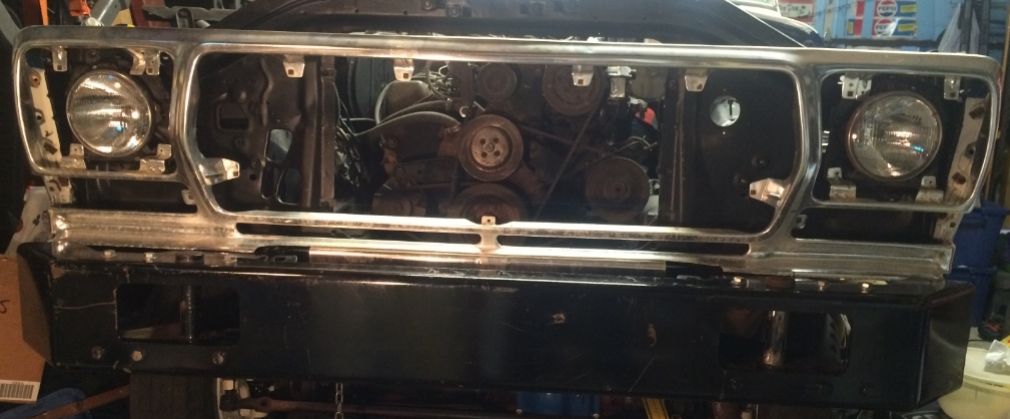
I still need to do some more trimming to the grill shell. the bottom of the shell is rubbing on the top of the bumper and that is before I bolt the diamond plate back on top of the bumper. Next up for the front bumper is figuring out the winch mount. But I think that might wait until the rear bumper is done. It's just nice to make some progress that has a visual hit every time I walk into the garage.


#127
02-19-2015, 07:59 PM

Posting Guru
Looks good, wish I had friends like your brother, my truck could use a lot of body work.
I mounted my hydraulic master cylinder on the other side of the booster but have been debating on moving it over, I also initially had a misalignment and snapped the push lot in half, they're pretty week.
I mounted my hydraulic master cylinder on the other side of the booster but have been debating on moving it over, I also initially had a misalignment and snapped the push lot in half, they're pretty week.
#129
02-20-2015, 04:19 PM
Postmaster
#130
02-20-2015, 06:26 PM
Junior User
Join Date: Dec 2011
Location: woodburn oregon
Posts: 73
Likes: 0
Received 0 Likes
on
0 Posts
So my 1978 F350 Master Cylinder and booster showed up two weeks ago and I got them put on. I had run out of project time so I had not gotten the brake lines done. Today I got a little time so I got the brake lines made the rest of the way and everything mocked into place.
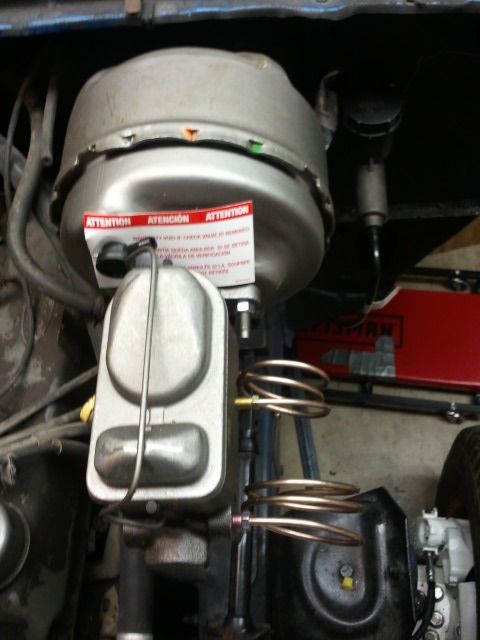
I used a 3 inch pipe to bend around on the front line after free handing the rear line and not liking how it came out. I should have used a 2 inch pipe, oh well.
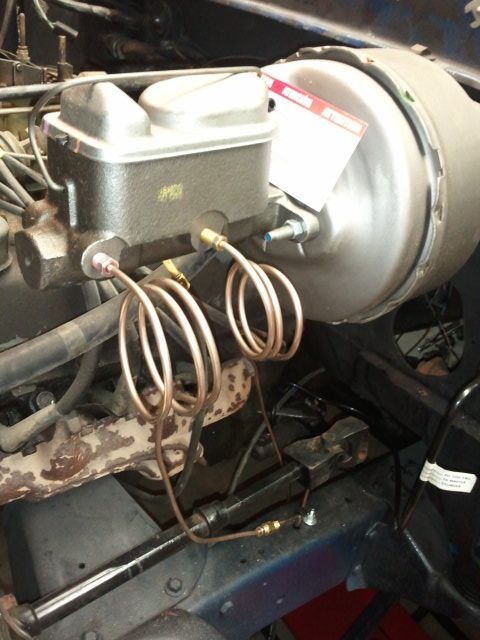
Tomorrow and Wed I am hoping to take everything off and get a coat of paint on the booster and master to prevent rust issues. Then I can attach it for the last time and fill and bleed the whole brake system.
#131
02-20-2015, 07:31 PM
Postmaster
Join Date: Nov 2009
Location: SE Georgia
Posts: 3,189
Likes: 0
Received 0 Likes
on
0 Posts
#132
02-20-2015, 11:21 PM
Junior User
Join Date: Dec 2011
Location: woodburn oregon
Posts: 73
Likes: 0
Received 0 Likes
on
0 Posts
#133
02-20-2015, 11:48 PM
Postmaster
Join Date: Nov 2009
Location: SE Georgia
Posts: 3,189
Likes: 0
Received 0 Likes
on
0 Posts
Yes t bird calipers. You can upgrade rear wheel cylinders to f350 wheel cylinders.
More info here
Complete Brake Upgrade for 1978 - 1979 Ford Broncos - Ford Trucks
More info here
Complete Brake Upgrade for 1978 - 1979 Ford Broncos - Ford Trucks
#135
02-23-2015, 01:56 PM
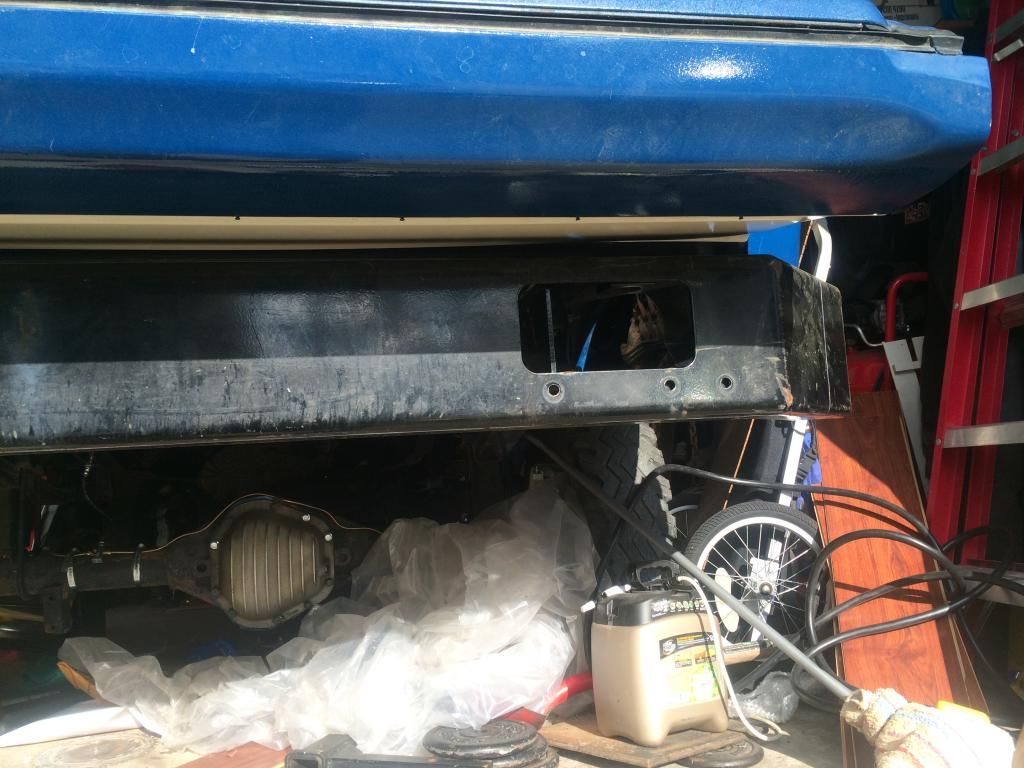
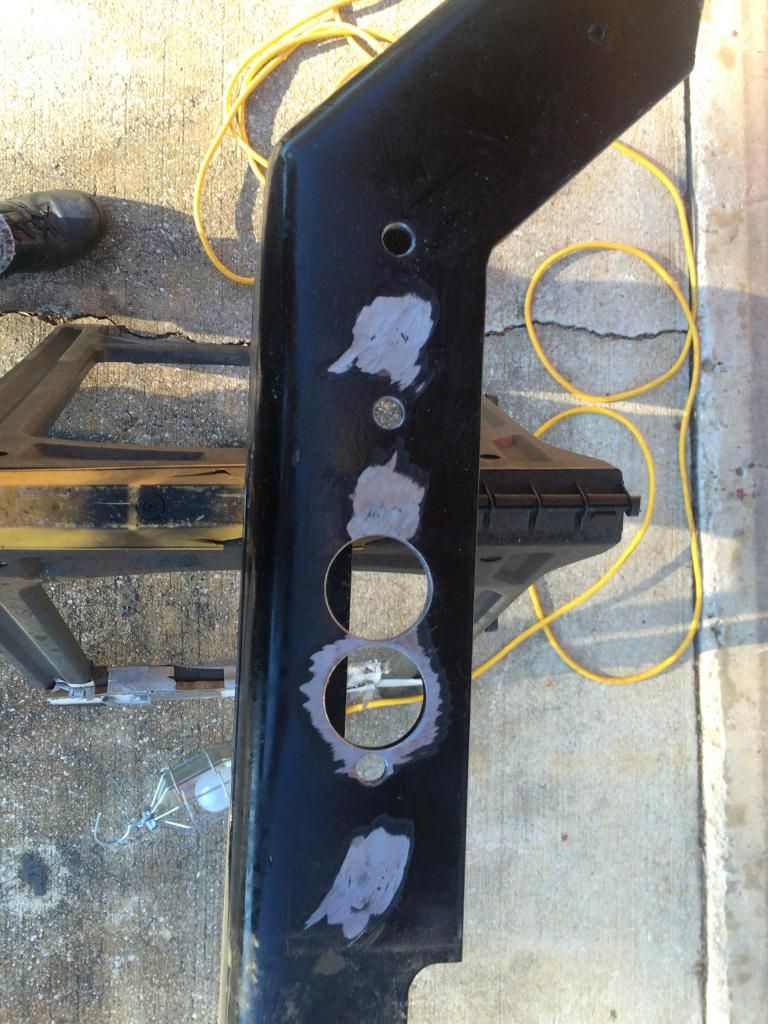
So I got some more work done on the rear bumper last week. The two bumpers that I bought were both originally front bumpers and were set up for a 34" frame width. That is fine on the front of the Bronco where the frame is 34" wide, but the rear of the Bronco has a 37 1/2" frame width. I ended up having to re-drill all 12 of the 5/8" mounting holes and both of the 1 3/4" pin holes 1 3/4" farther out from center on each side. I then welded up and ground down all of the old mounting holes.
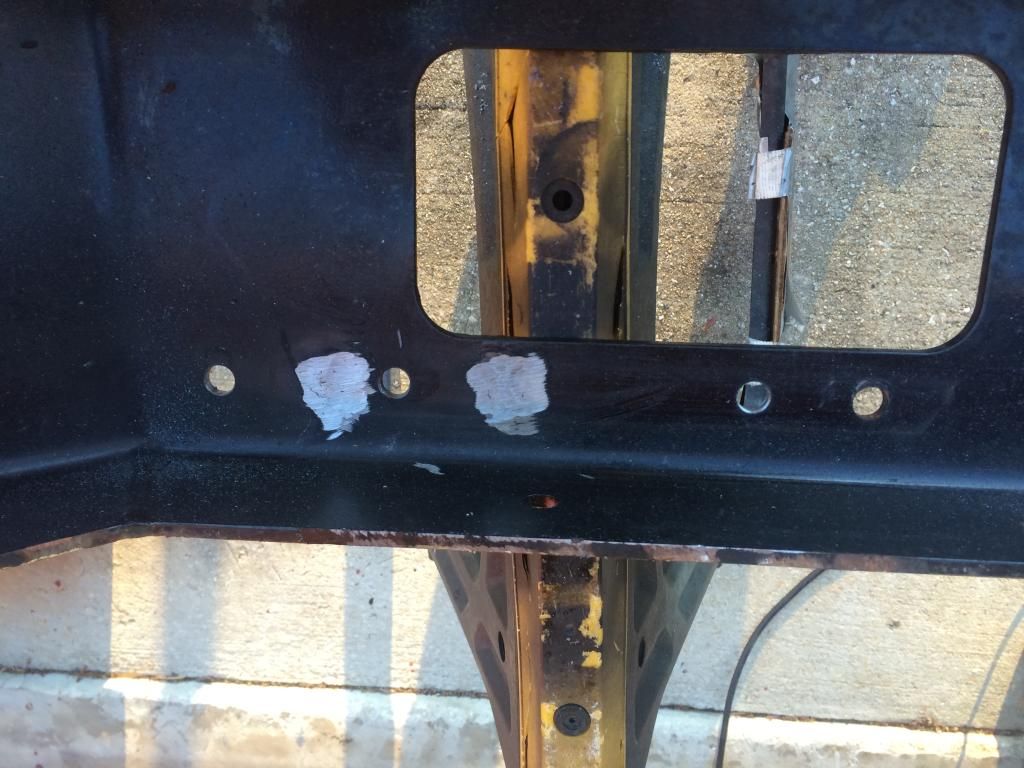
I didn't take any pics before I started drilling and welding but I did grab a few while the work was in progress. This was where I had to stop because I had killed the cheap hole saw that I was using.
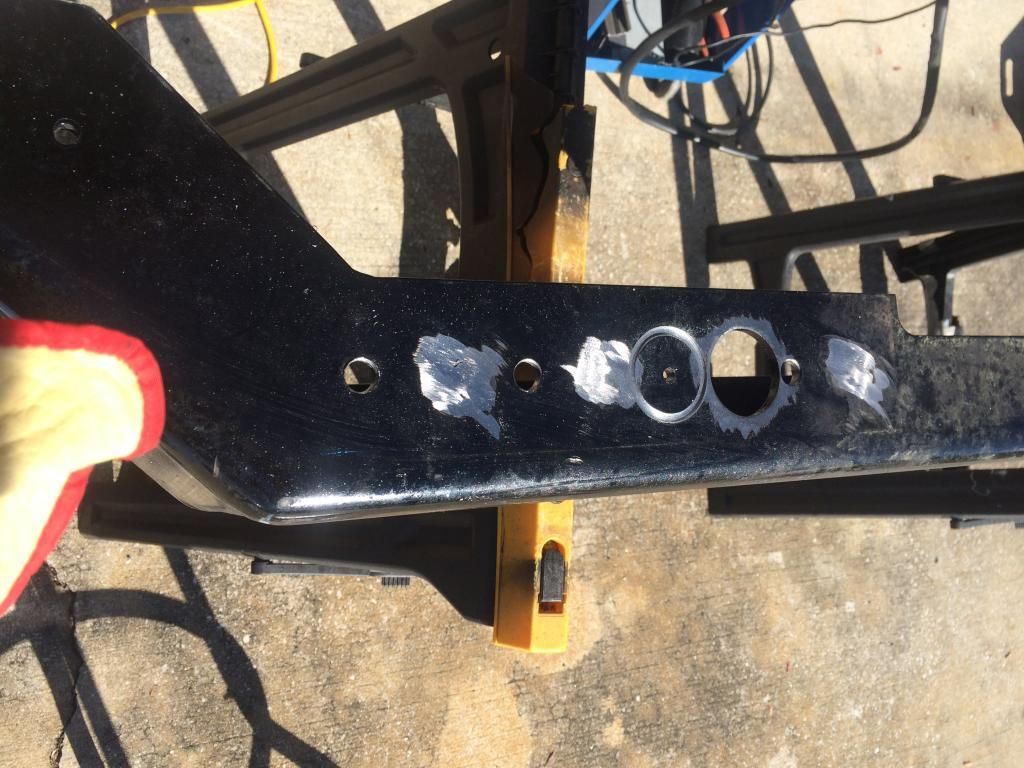
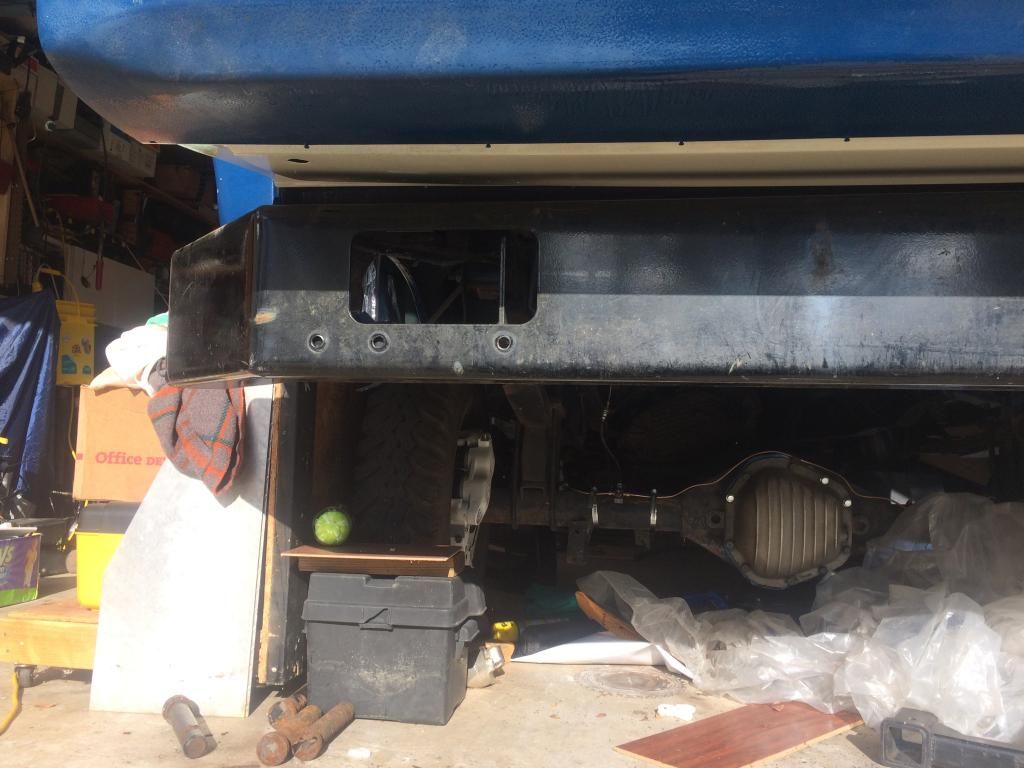
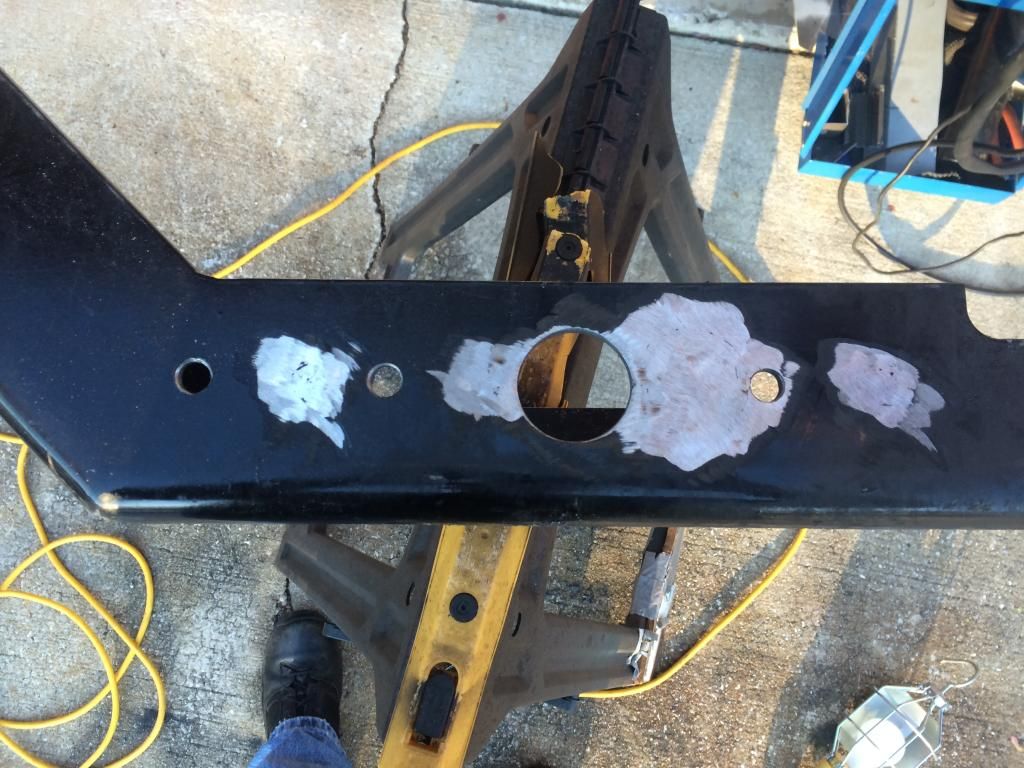
Then I went and picked up a quality hole saw to complete the job. I wasn't sure how I was going to fill the original 1 3/4" hole while I was drilling.
Then I got the holes done and the light bulb went off and I used the slug I had drilled out as the filler to be welded into the old hole.
Tomorrow I am taking a road trip to pick up a complete tailgate I found on Craigslist. I have needed a rear window since I got the Bronco and this one is supposed to have good glass and all of the other internals.

I didn't take any pics before I started drilling and welding but I did grab a few while the work was in progress. This was where I had to stop because I had killed the cheap hole saw that I was using.

Then I went and picked up a quality hole saw to complete the job. I wasn't sure how I was going to fill the original 1 3/4" hole while I was drilling.

Then I got the holes done and the light bulb went off and I used the slug I had drilled out as the filler to be welded into the old hole.

Tomorrow I am taking a road trip to pick up a complete tailgate I found on Craigslist. I have needed a rear window since I got the Bronco and this one is supposed to have good glass and all of the other internals.