
Easy Rust Removal (Electrolytic)
#1
 08-15-2012, 11:15 AM

Easy Rust Removal (Electrolytic)
I am swapping my Dana 44 to 8 bolt outers with all the Dana 44HD stuff from a 1976 F250 front axle. I wanted to clean up the parts going on as I was swapping them but I didn't want to spend hours in the hot garage doing it. I found this process a while ago and figured this was the perfect time to try it. Here is one of the sites I got all the setup info from. The only difference was I have to add a battery in series with the battery charger because my charger is too "smart" to start without reading the load of the battery.
Rust removal by electrolysis
I must say the science experiment went very well.
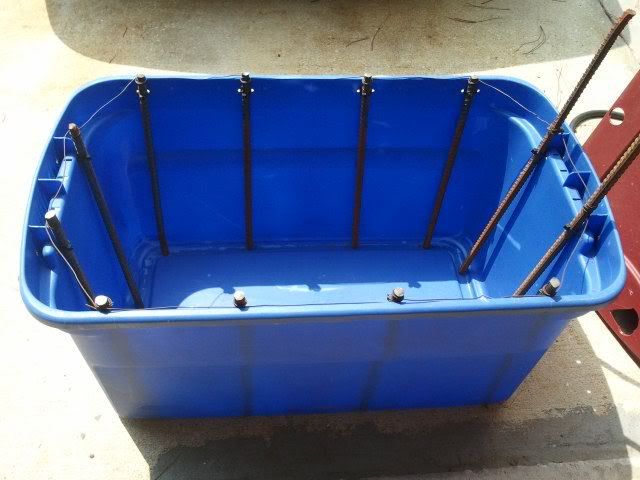
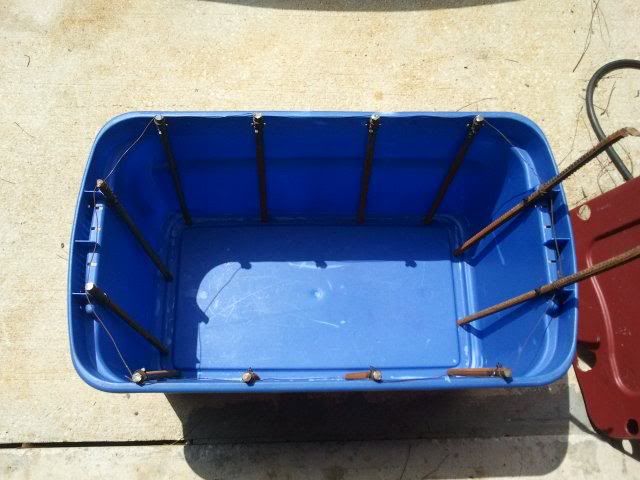
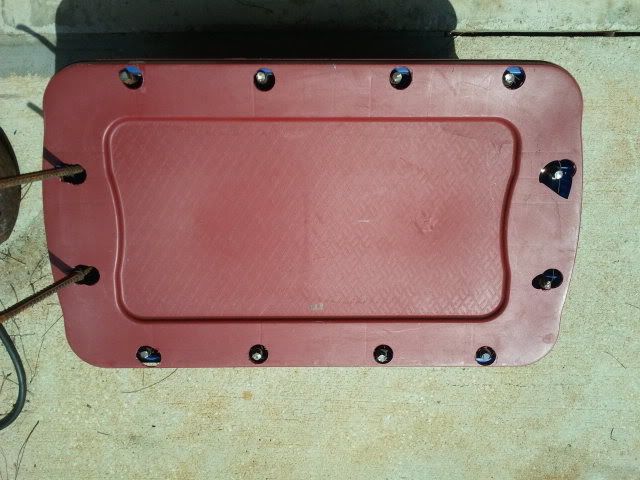
Setup of the "tank."
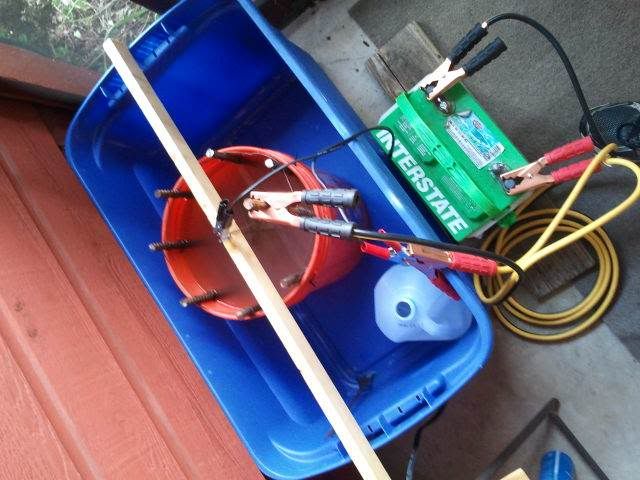
Rust removal in progress. (It is very white because I had an led flashlight shining in the bucket for the picture)

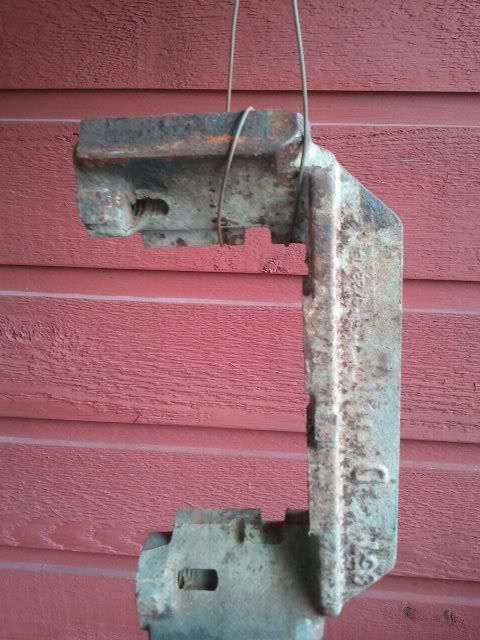
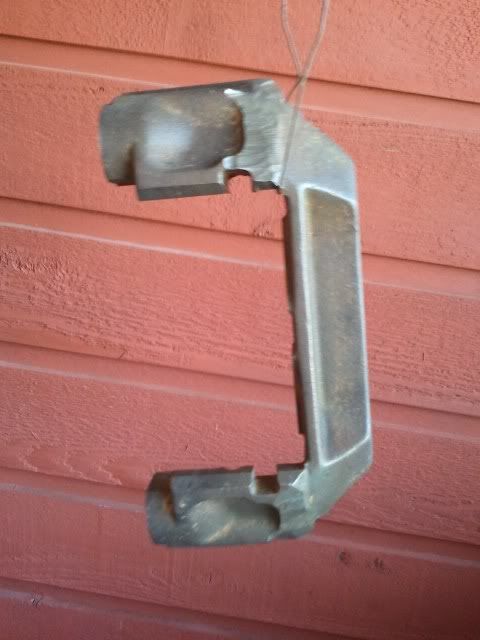
Caliper bracket before.
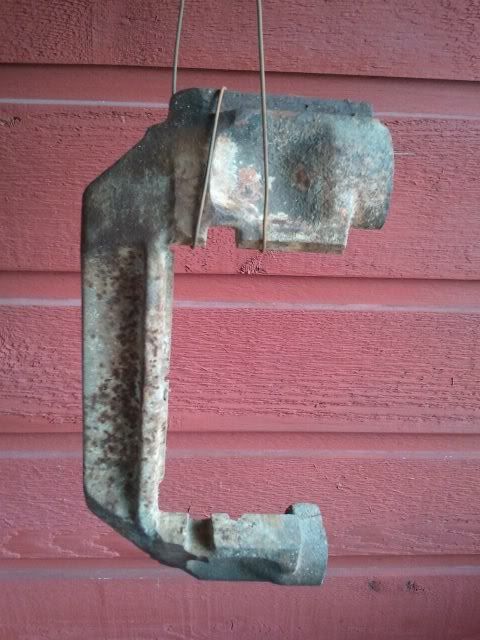
Caliper bracket after.
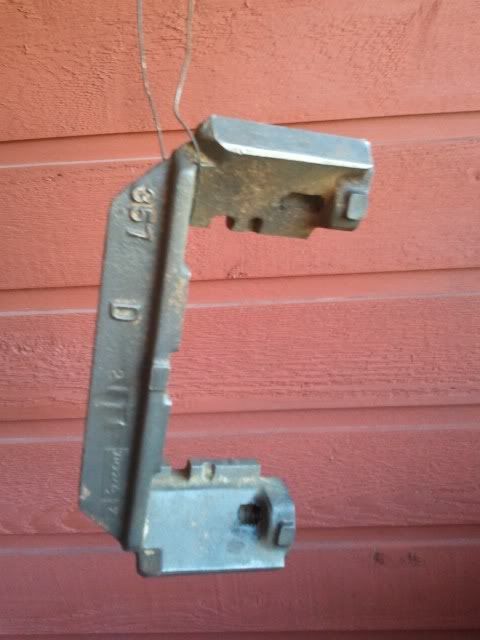
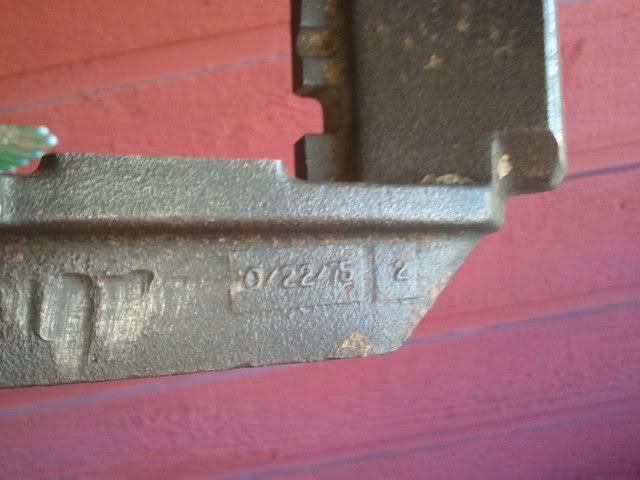
Bonus, I have never seen the date code this clear.
Now so no one yells at me this is not how they looked straight out of the solution. I spent 5 min in a 5 gallon bucket of clean water with a wire brush and a green scotch pad to knock the last little bit of scale rust and the black "stuff" that was left on after the process. Considering that my investment is the 30 min it took to put the bucket together and then let it sit for 3 hours while I did other stuff followed by 5 min of cleaning I am VERY HAPPY!!
I also got to find out that someone has "clearanced" the bracket with a grinder sometime in the past. Not so bad as to be anything to worry about, just nice to know. Now I need to go throw more parts in the bucket to get cleaned.
Rust removal by electrolysis
I must say the science experiment went very well.
Setup of the "tank."
Rust removal in progress. (It is very white because I had an led flashlight shining in the bucket for the picture)
Caliper bracket before.
Caliper bracket after.
Bonus, I have never seen the date code this clear.
Now so no one yells at me this is not how they looked straight out of the solution. I spent 5 min in a 5 gallon bucket of clean water with a wire brush and a green scotch pad to knock the last little bit of scale rust and the black "stuff" that was left on after the process. Considering that my investment is the 30 min it took to put the bucket together and then let it sit for 3 hours while I did other stuff followed by 5 min of cleaning I am VERY HAPPY!!
I also got to find out that someone has "clearanced" the bracket with a grinder sometime in the past. Not so bad as to be anything to worry about, just nice to know. Now I need to go throw more parts in the bucket to get cleaned.
#2
08-15-2012, 11:21 AM

Former Vendor
Join Date: May 2012
Location: Walpole MA
Posts: 17,141
Likes: 0
Received 0 Likes
on
0 Posts

#3
08-15-2012, 03:53 PM
#4
08-15-2012, 03:55 PM
Former Vendor
Join Date: May 2012
Location: Walpole MA
Posts: 17,141
Likes: 0
Received 0 Likes
on
0 Posts

#5
08-16-2012, 09:16 PM
Senior User
Join Date: Mar 2001
Location: Cincinnati, Ohio
Posts: 152
Likes: 0
Received 0 Likes
on
0 Posts
#6
08-22-2012, 09:48 PM
I have now stripped the rust off of the caliper mounting plate and the disc heat/ dust shield. I have also decided to be a little different and paint up my brake parts in white.
I know most everybody uses black, yellow or red but since my Bronco is Blue and white I figure some bright white parts underneath her will look great. Pics will have to wait as the camera is acting up today...
I know most everybody uses black, yellow or red but since my Bronco is Blue and white I figure some bright white parts underneath her will look great. Pics will have to wait as the camera is acting up today...
#7
08-30-2012, 08:16 AM
Former Vendor
Join Date: May 2012
Location: Walpole MA
Posts: 17,141
Likes: 0
Received 0 Likes
on
0 Posts
Trending Topics
#8
08-31-2012, 09:18 PM
Post Fiend
Join Date: Nov 2011
Location: Algona, Washington
Posts: 8,908
Likes: 0
Received 0 Likes
on
0 Posts
That looks pretty neat. I don't know if i would trust myself around all that connected metal and a car battery though. Plus Unless i am using a drycell i don't think i would try it. I don't like the thought of hydrogen gasses near all of that haha. Might just be me though. They also use this process in chrome plating and nickle plating.
#9
09-01-2012, 01:29 PM
Wade that looks great, I am thinking of setting up a bigger one with a large rubbermaid tub. I was told not to use a 55 gallon drum (if its metal) because it will be consumed in the process and start to leak. I'd use a 55 gal plastic drum but I already have the rubbermaid.
Gruesome, that is why you set it up outside where it is well ventilated.
That looks pretty neat. I don't know if i would trust myself around all that connected metal and a car battery though. Plus Unless i am using a drycell i don't think i would try it. I don't like the thought of hydrogen gasses near all of that haha. Might just be me though. They also use this process in chrome plating and nickle plating.
#10
09-01-2012, 05:57 PM
Post Fiend
Join Date: Nov 2011
Location: Algona, Washington
Posts: 8,908
Likes: 0
Received 0 Likes
on
0 Posts
#11
09-01-2012, 08:07 PM
Senior User
Join Date: Mar 2001
Location: Cincinnati, Ohio
Posts: 152
Likes: 0
Received 0 Likes
on
0 Posts
Wade that looks great, I am thinking of setting up a bigger one with a large rubbermaid tub. I was told not to use a 55 gallon drum (if its metal) because it will be consumed in the process and start to leak. I'd use a 55 gal plastic drum but I already have the rubbermaid.
Gruesome, that is why you set it up outside where it is well ventilated.
Gruesome, that is why you set it up outside where it is well ventilated.
#12
09-02-2012, 06:37 AM
Former Vendor
Join Date: May 2012
Location: Walpole MA
Posts: 17,141
Likes: 0
Received 0 Likes
on
0 Posts
I grabbed a 35 gal rubbermaid tub yesturday. I plan in running some more through the process today. I did a few more things in the bucket, but need more room (bigger parts). The other caliper bracket, shield, and battery tray I've already done were left in for 2 1/2 hours while I was doing other things. Simply awe struck at how wel this works. 2.5 hours and I wiped them off with a rag. That was it, and they looked new except for the battle scares (road debris has hit everything under this truck). Guess I'll try it in a 45 gal trash bucket I have. That will fit a few more things in it. Thanks for the input guys. Saved me from making a mess of my yard with a metal barrel. Ha ha. The wife says thanks too. LOL
#13
09-10-2012, 01:52 PM
#14
09-10-2012, 02:10 PM
Former Vendor
Join Date: May 2012
Location: Walpole MA
Posts: 17,141
Likes: 0
Received 0 Likes
on
0 Posts

#15
09-10-2012, 03:40 PM
Post Fiend
Join Date: Nov 2011
Location: Algona, Washington
Posts: 8,908
Likes: 0
Received 0 Likes
on
0 Posts