When you click on links to various merchants on this site and make a purchase, this can result in this site earning a commission. Affiliate programs and affiliations include, but are not limited to, the eBay Partner Network.
the only problem now is that it looks like its going to be tough to get to the headlight switch.
Fill the holes in the floor and use a 1970s GM floor mounted dimmer switch, they can be mounted anywhere on the floor. I mount mine on the upper left floor pan for easy access.
I am not sure that I understand completely what you did but in the end when you compress the clutch or brake you want the longer curved part of the pedals to not shift left or right as a pedal(s) is pushed, i.e. it stays in the hole as it travels through the floorboard.
Now who would have thought that you needed to relocate the dimmer switch because you wanted a big block!
Good lookin' hot rod!
Have you tried copper backers for your welds? I have had success using various copper plate to back up the welds on my sheet metal welds. Helps to absorb heat and make smaller beads too.
Most electricians have old electric panels with copper bussing, I got an asst. for free.
Keep up the fine work!
I made my copper backer "spoons" from lengths of scrap copper plumbing pipe Flatten the end with a hammer or in a vise, use the rest of the pipe as a handle. For a wider spoon split one side of the pipe lengthwise for a few inches then open it up before hammering it flat.
I am not sure that I understand completely what you did but in the end when you compress the clutch or brake you want the longer curved part of the pedals to not shift left or right as a pedal(s) is pushed, i.e. it stays in the hole as it travels through the floorboard.
Now who would have thought that you needed to relocate the dimmer switch because you wanted a big block!
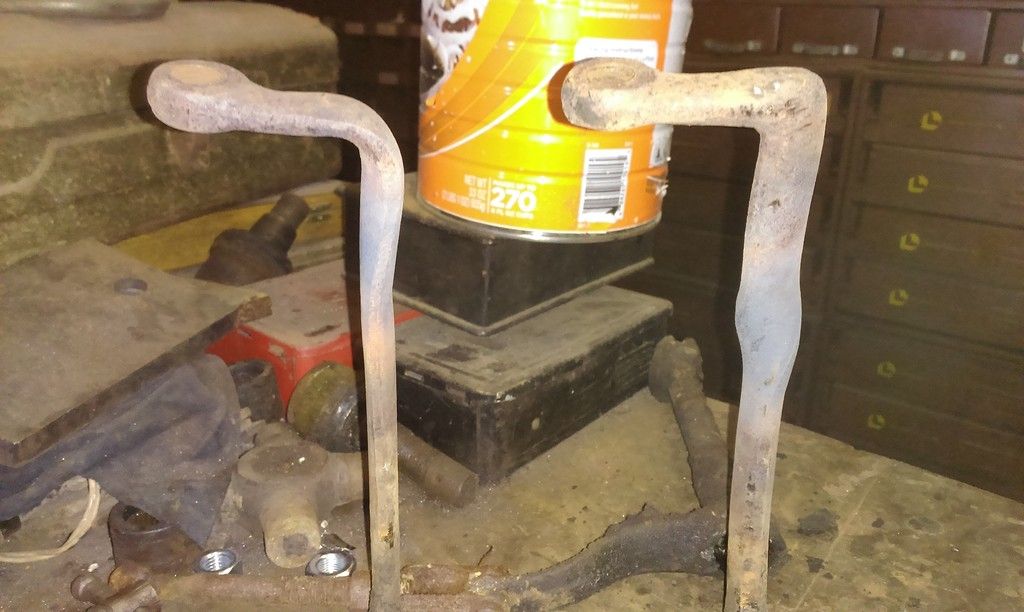
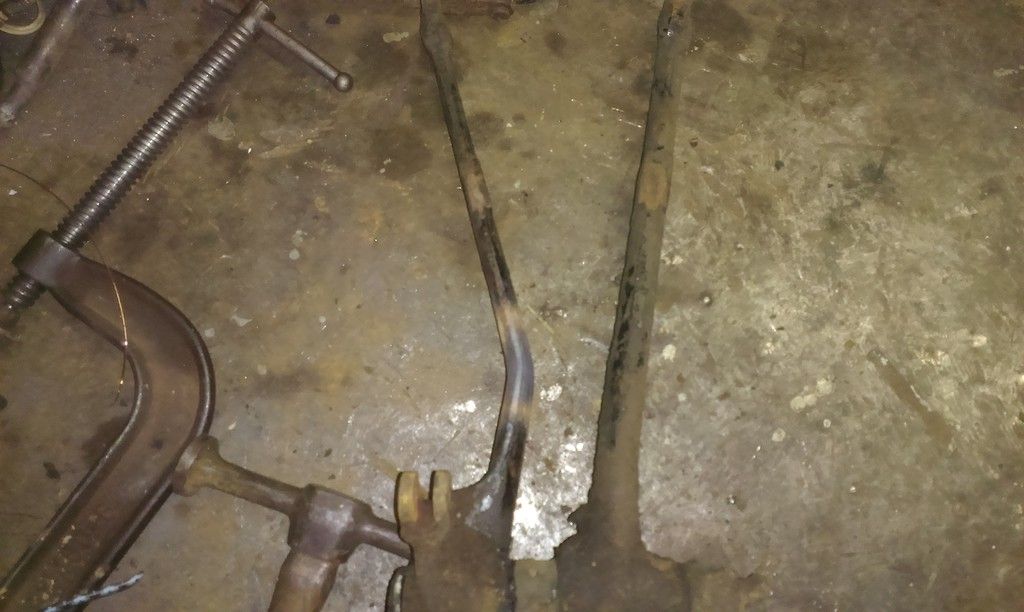
Ill have to take some more detailed pictures, but the pedals don't move left to right at all through their travel.
I think moving the pedals had more to do with the transmission than with the big block. My trans tunnel i made just didnt leave enough for or the gas pedal.
This is how i twisted the pedals. Just below where the pads mount. I twisted them so that the brake arm was point straight to the left rather than at an angle to the right, then twisted the clutch so that it was parallel.
Then I bent the clutch arm over at the existing bend right at the pivot point to gain clearance between the pedals.
I will lend you one of mine. Wait until I put an LT1 into my 56 Dodge pickup, you think Ford guys are bad?
I could imagine haha. Small block chevy would have definitely been easier, but I'm just a Ford in a Ford kind of guy. I bet that dodge will rip though!
So since I will be in Rhode Island all summer for my internship, we moved my truck up to the house to give my dad more room at the shop. That means i won't be getting anything done until August, but i will be making a bunch of money to fund the project. I will probably bring my gauge cluster with me and try and finish that project while I am away. That way the project won't be siting idle.
Hey Nick,
Don't sweat it - you need money for your truck projects. Good luck with your internship! It's nice to start seeing real money after all your studies...
Hey Nick,
Don't sweat it - you need money for your truck projects. Good luck with your internship! It's nice to start seeing real money after all your studies...
What's the car off to the left in that pic?
Ben in Austin
1950 F1
That's my moms old 88 Thunderbird Turbo coupe. I re-did that when I was in high school.
I was just wondering about your progress over the weekend for some reason. Happy for the update.
Have a good summer and let us know when you get something done on that old machine.
And your mom's car looks nice!
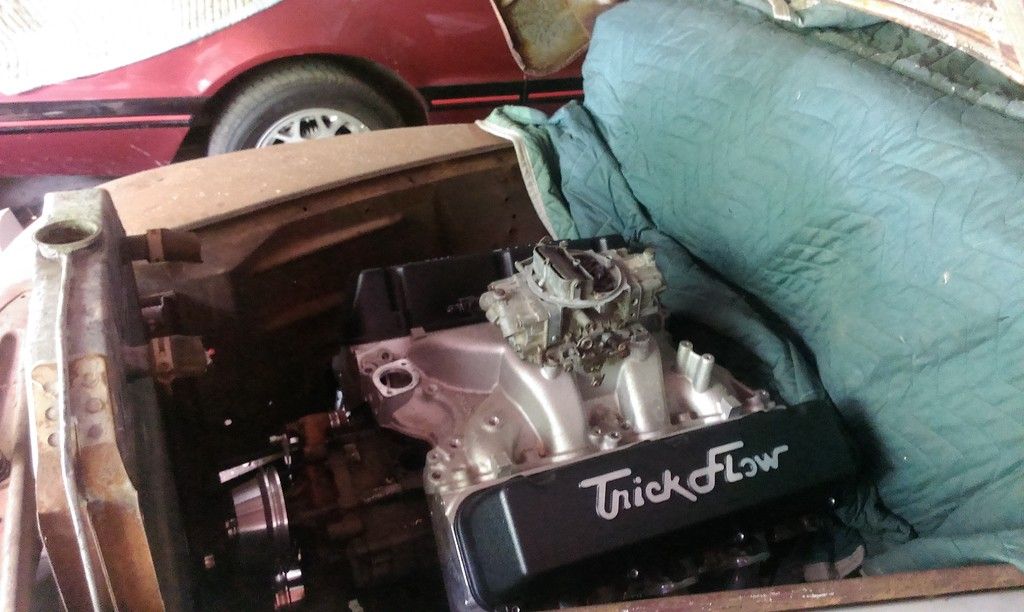
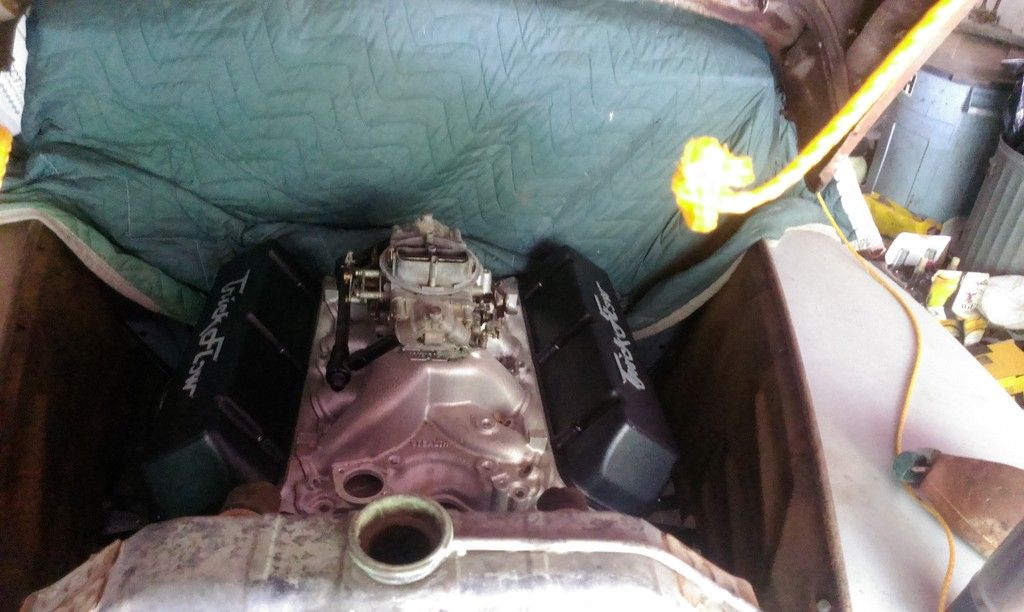
So now that the money has started to roll in, parts are starting to roll in too. Got some valve covers and my clutch and flywheel. I also got a lokar floor mount throttle pedal, but I'm not sure that there will be enough clearance with the transmission for that. I'll have to check that out next I'm home.
Finally back working on the truck. Havent had a chance to move the truck back down to the shop, but I did start on the doors. I started off cutting out the area around the door lock on one of my deluxe cab doors and welded it into one of my good doors. Now I will have a drivers side door lock.
 03-21-2015, 11:25 AM


 . I will probably bring my gauge cluster with me and try and finish that project while I am away. That way the project won't be siting idle.