
The College/University Budget Build Thread


#122
 03-07-2014, 10:11 PM

Ugh.. bickering over winters? Neither of you know what winter is until you get to Saskatchewan in February
 -42 without the windchill.
Thanks Mike! That means a lot coming from you. Must mean I'm doing something right haha.
#123
03-07-2014, 11:04 PM
Well... I battled some more sickness and I finally found the time to post the last little bit of my progress.
First a foremost, I emailed Brian at Oregon Performance Transmission. He has mailed me the proper 4x2 transmission filter (it's still in the mail). Thanks for catching that GIGGER!
Onto the progress!
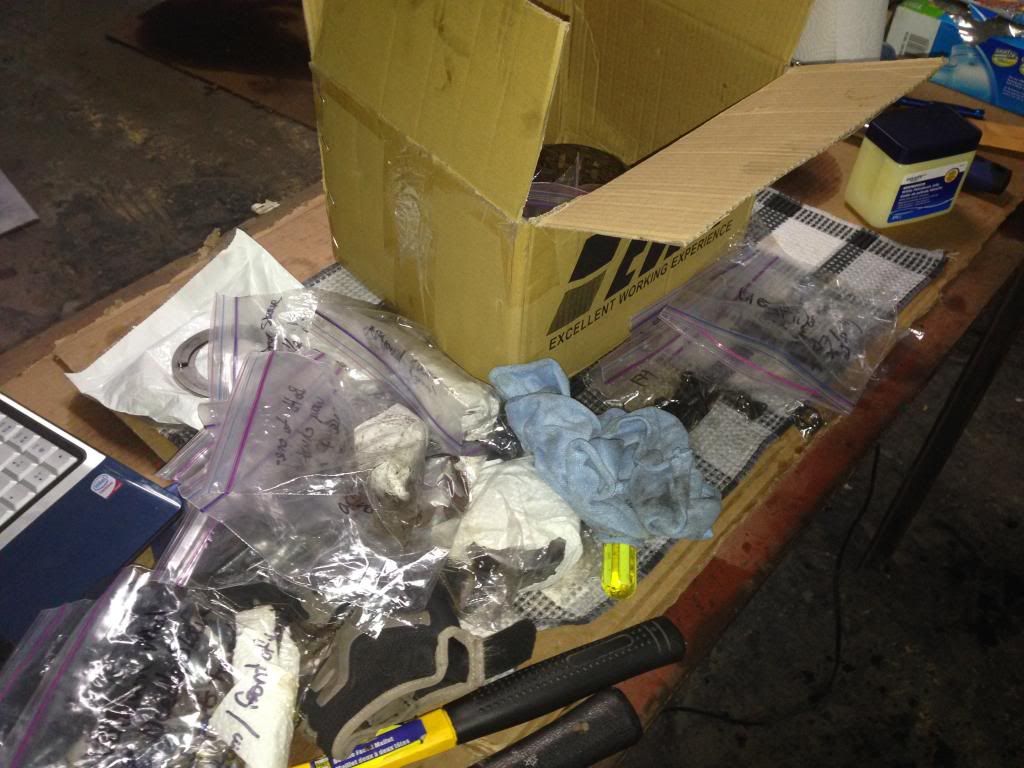
So I started off with clear coating the main part of the case. After a couple of coats, I started working on this massive box of parts.
Cleaned each set of pieces individually, then wrapped in paper towel and stuck them back into their dirty plastic baggies. I didn't want to waste baggies or relabel, so I figured paper towel was the way to go.
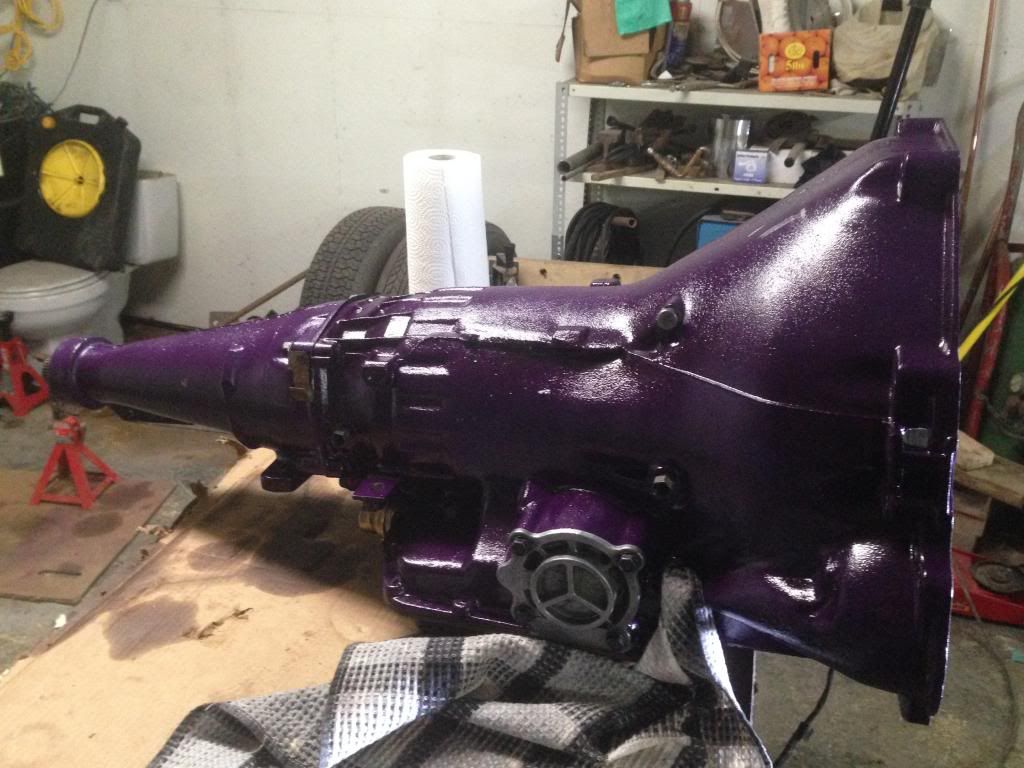
Here's the main case after I let it dry for 2 hours (while cleaning my parts).
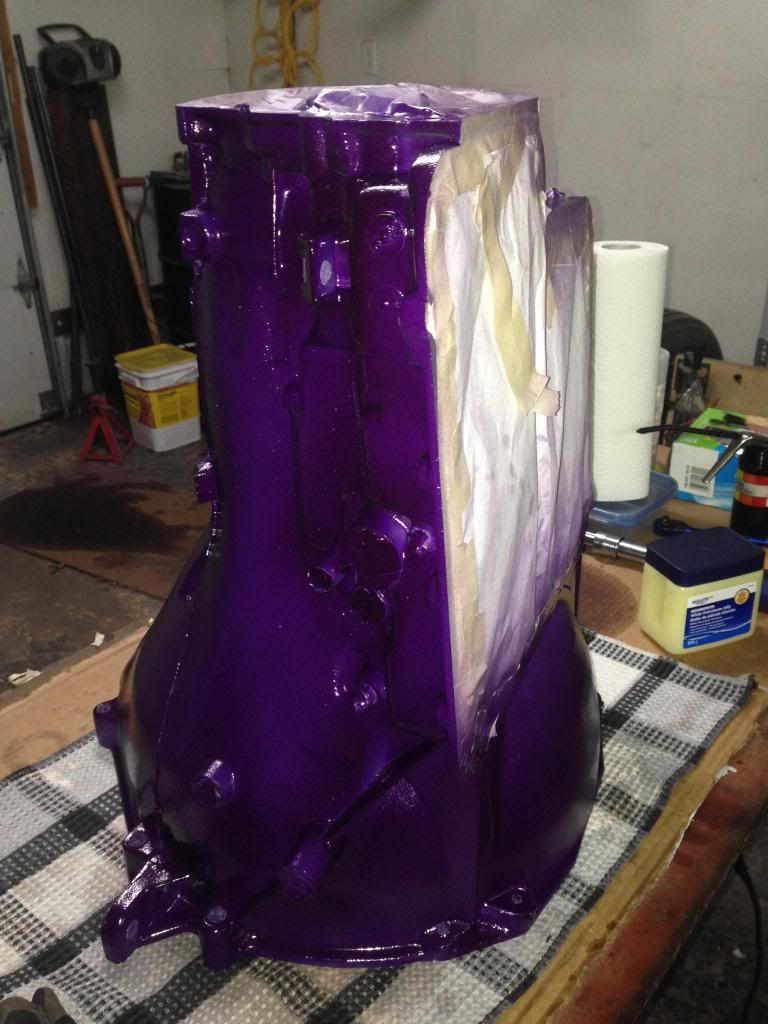
And with a little TV magic, Vwola! I have a very nicely painted case!
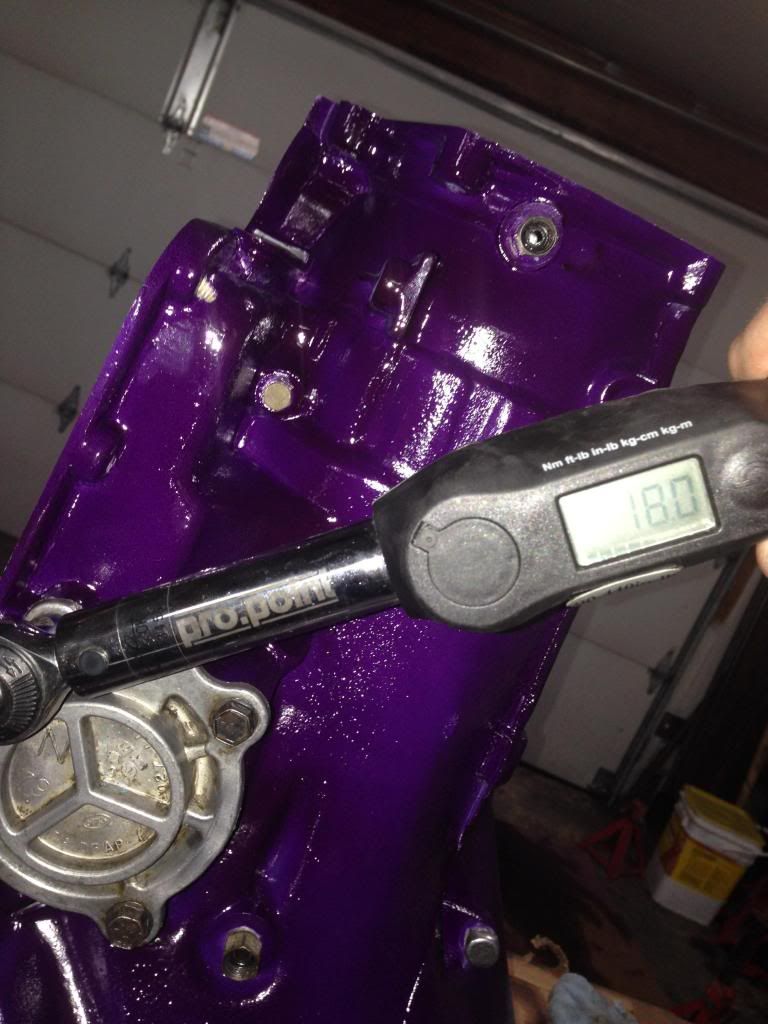
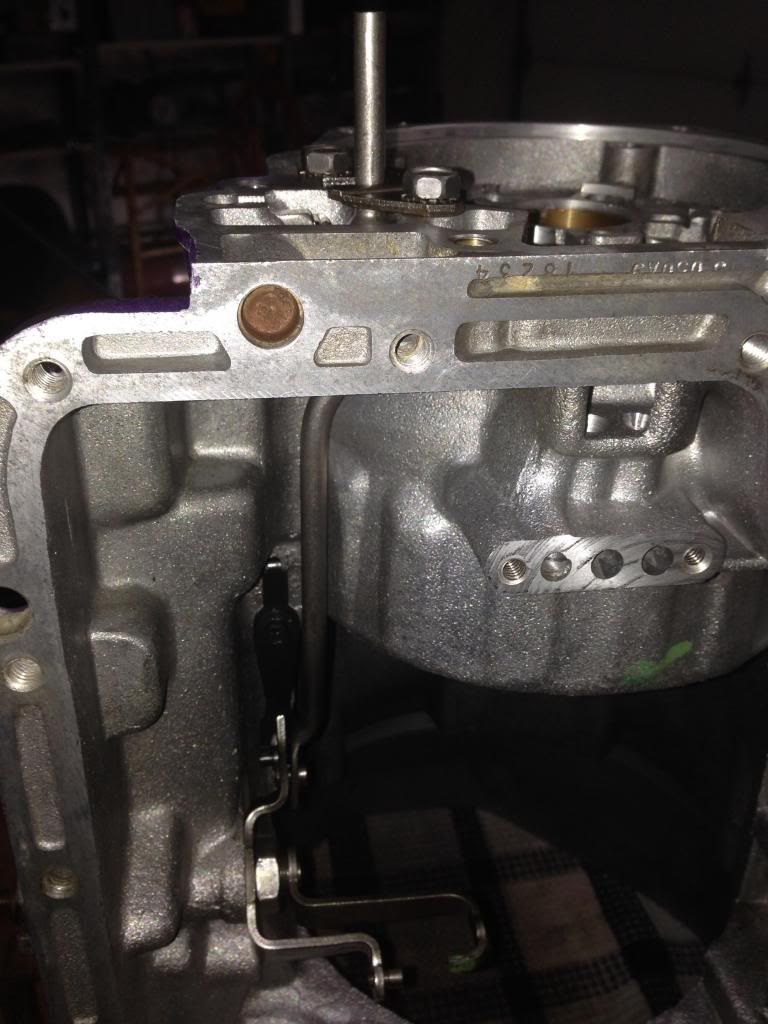
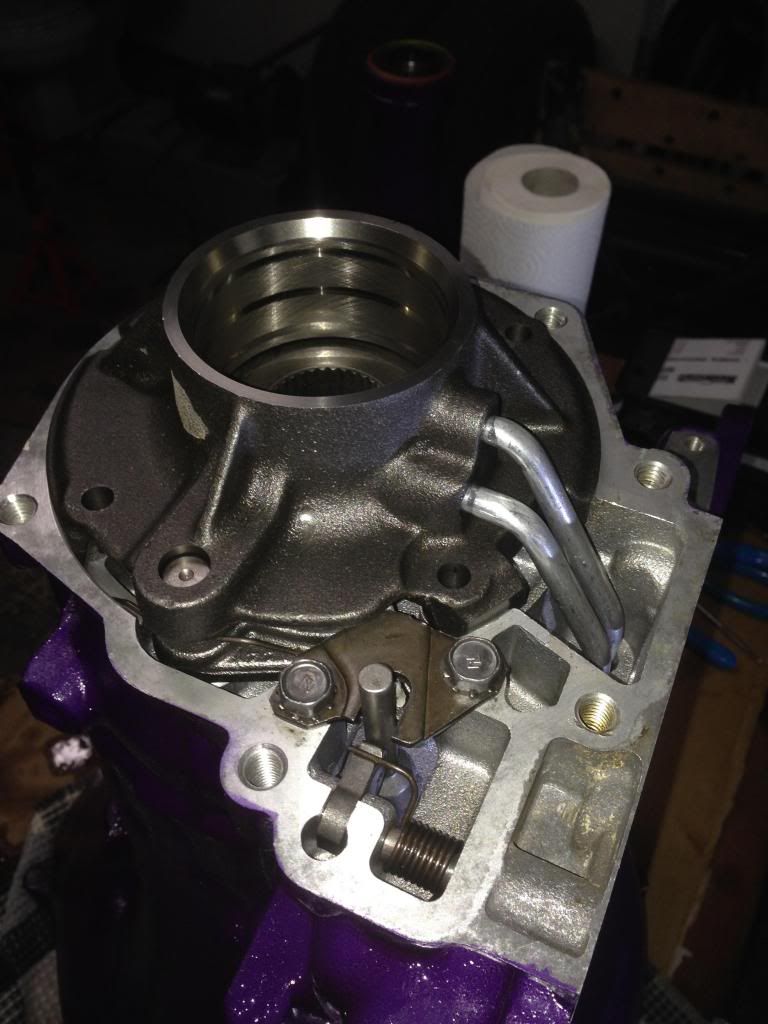
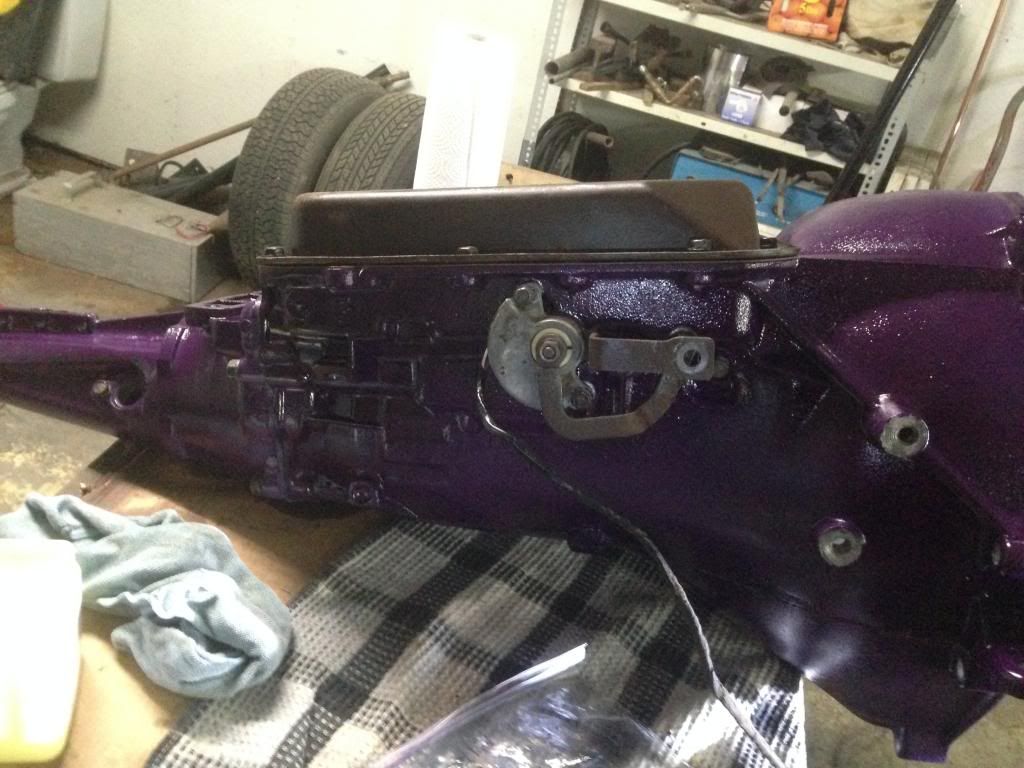
Servo installed and lubed up very well. Bolts tightened to 18 ft-lbs.
Pretty darn clean compared to before!
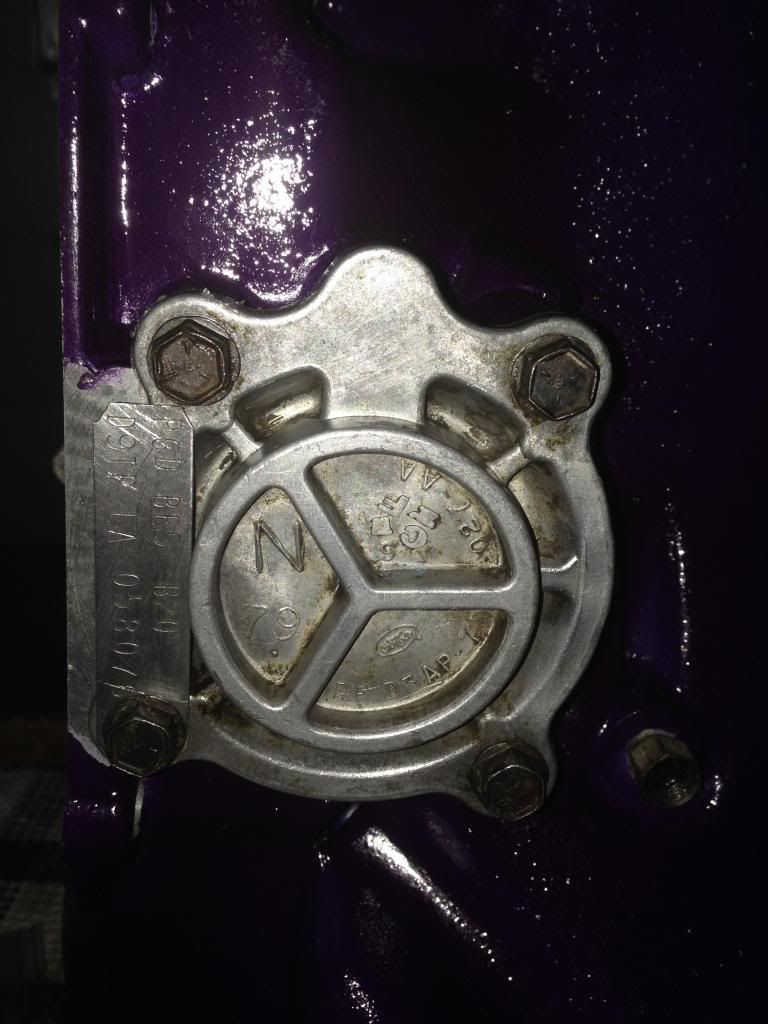
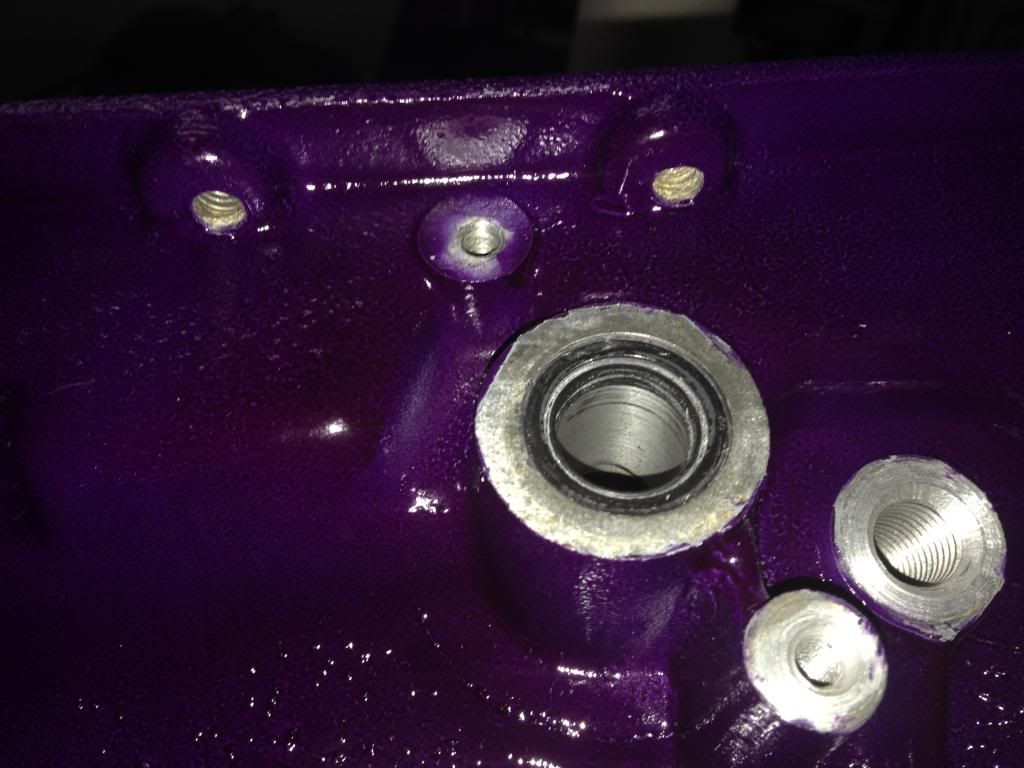
I made sure to keep all of the holes very clean and tidy while painting. Can't clog them up with paint, nor can I clear coat over them!
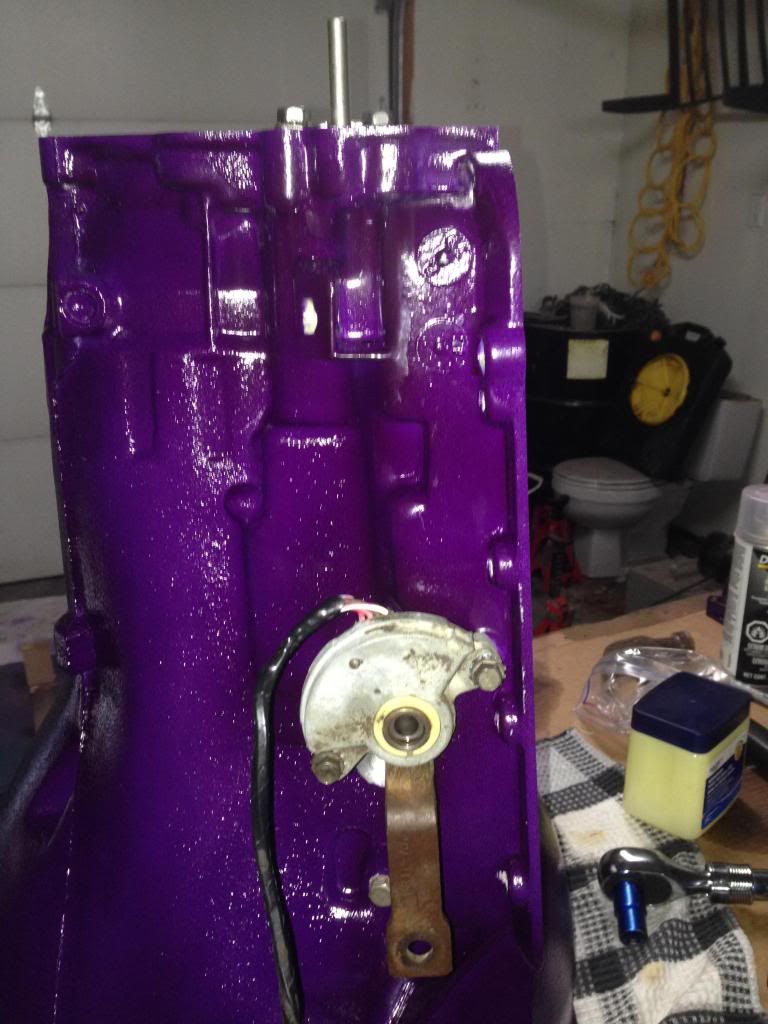
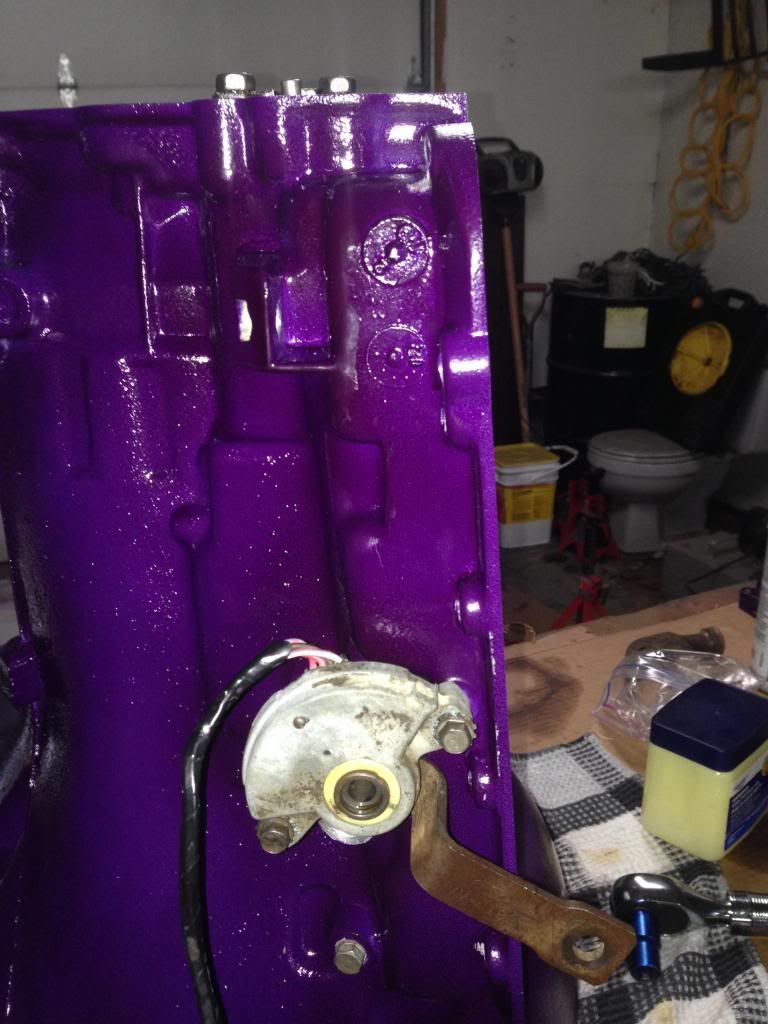
New seal for the shift lever installed. The original was a ***** to get out.
Shift lever installed. Man... that nut on the interior is in the WORST SPOT ever. It's also massive, so it takes a bit of mmmph to get it tight.
I triple checked the shift lever orientation with old photos as reading up online about it did me no good.
Apparently old mustangs are common to have the shift lever oriented 180 degrees due to how long the lever from the column is. This all makes reading up on these sort of things a pain... Good thing I took lots of pictures from the start.
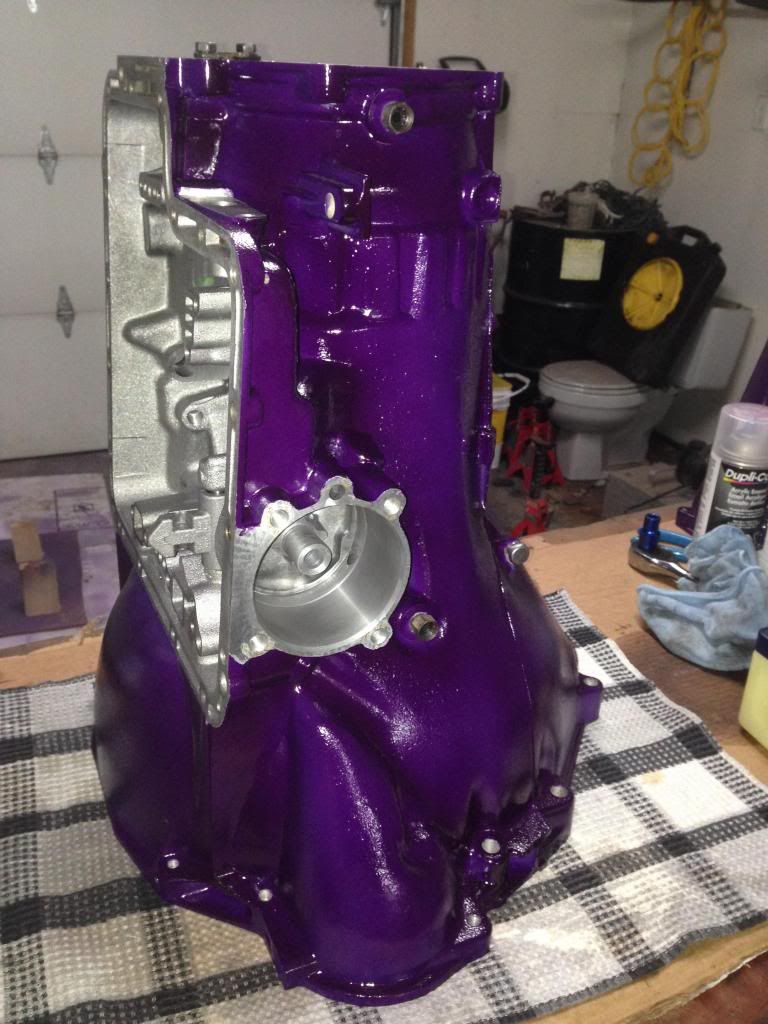
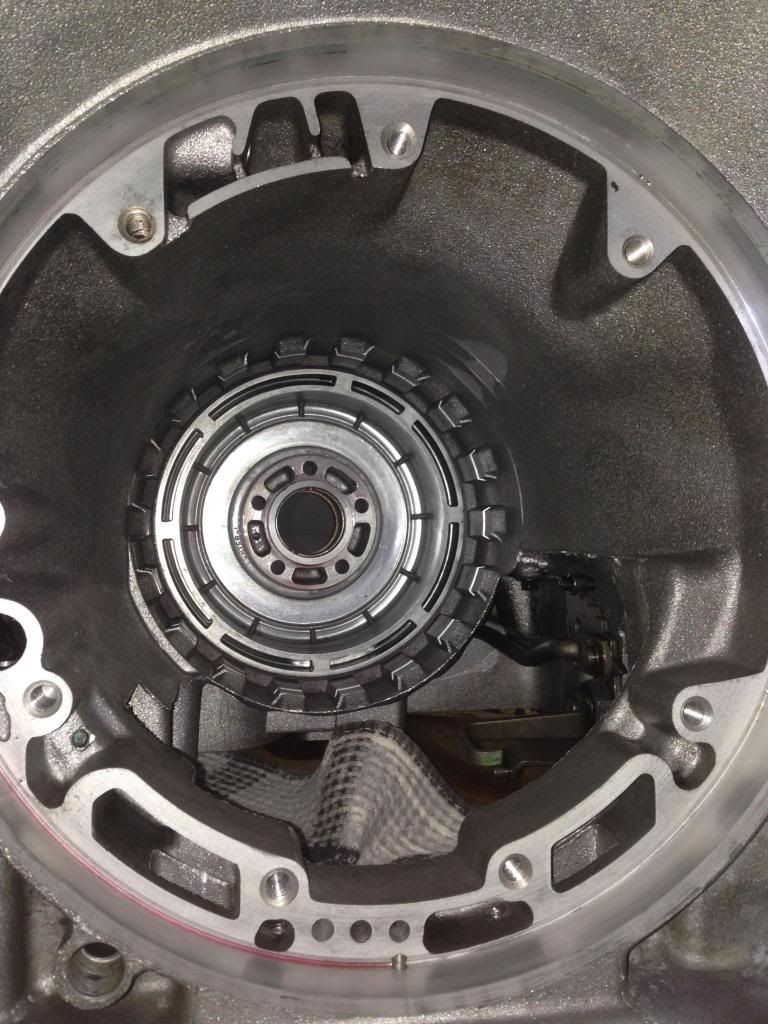
Look at how clean the inside of the case is!

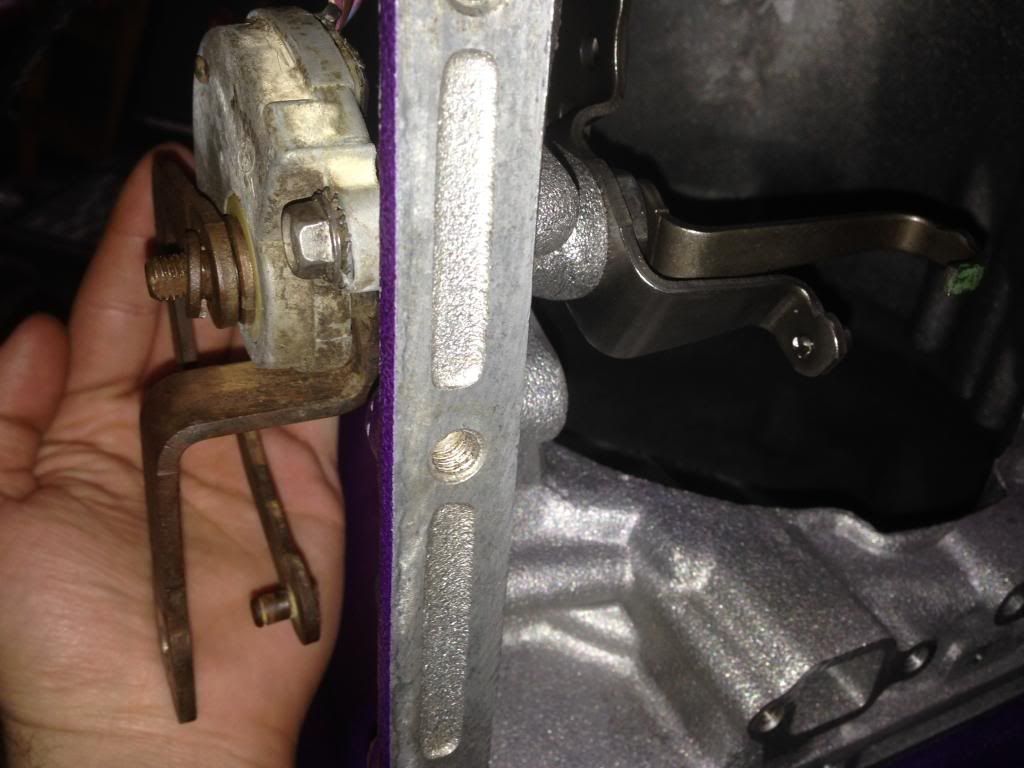
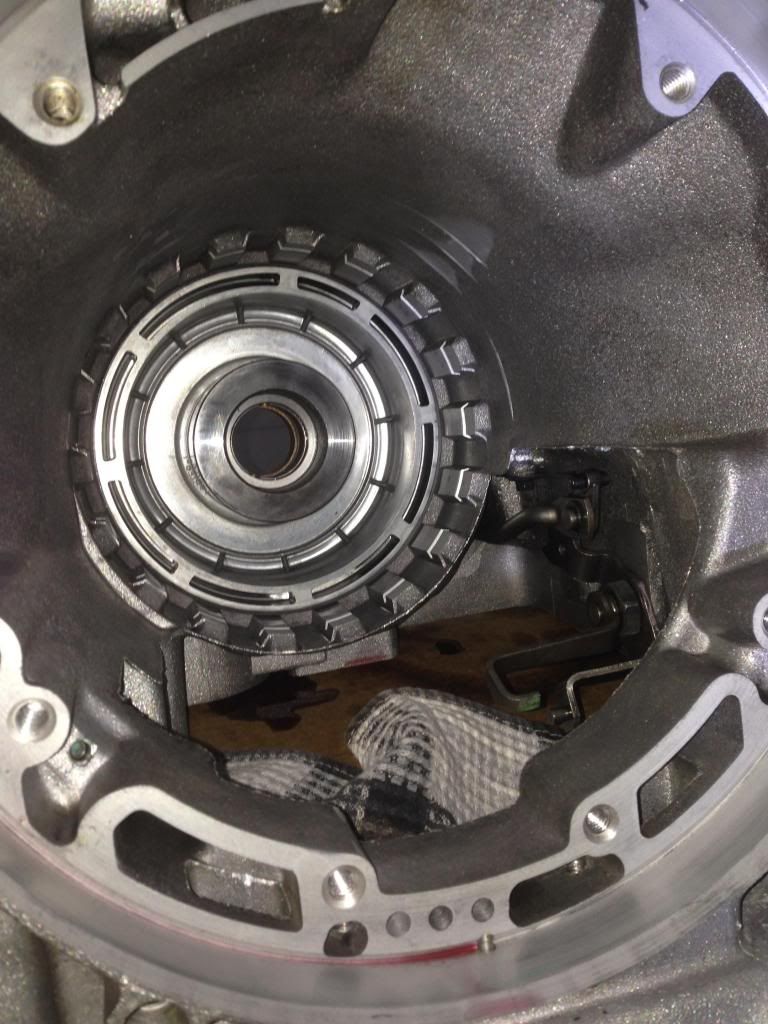
The kick-down lever was a pain, but only near the end of the build.
Can't get enough pictures of all these clean surfaces. They won't stay this way forever!
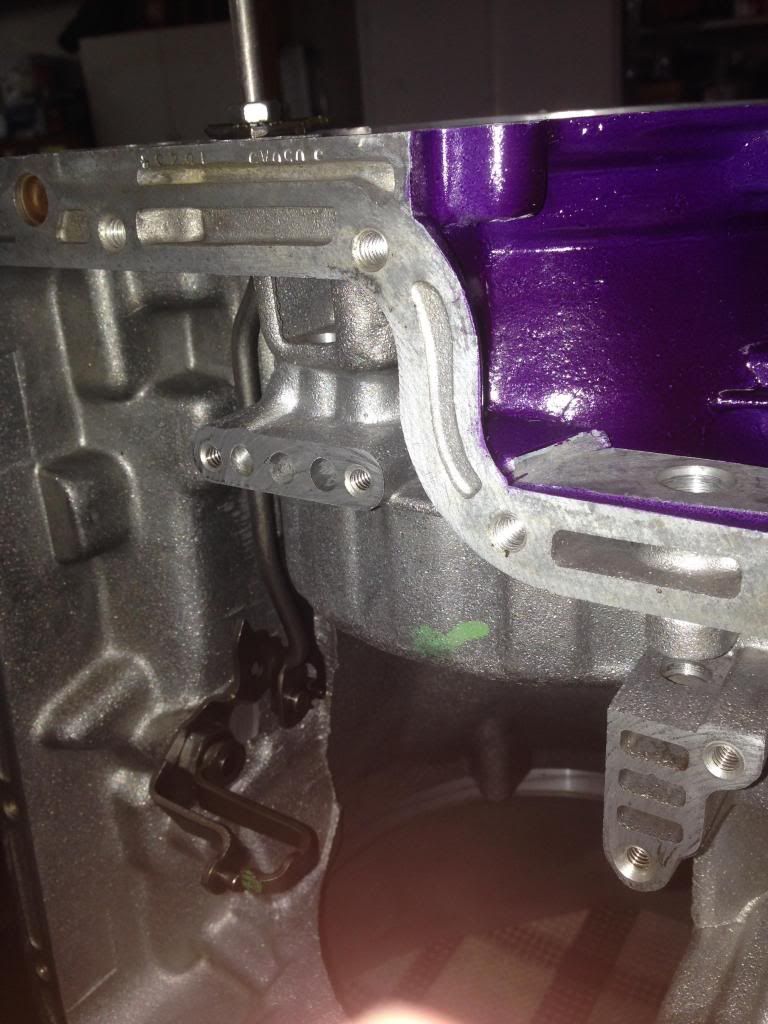
Couldn't figure out the exterior portion of the kick-down lever for the longest time either. Just goes to prove that you can never take enough pictures!
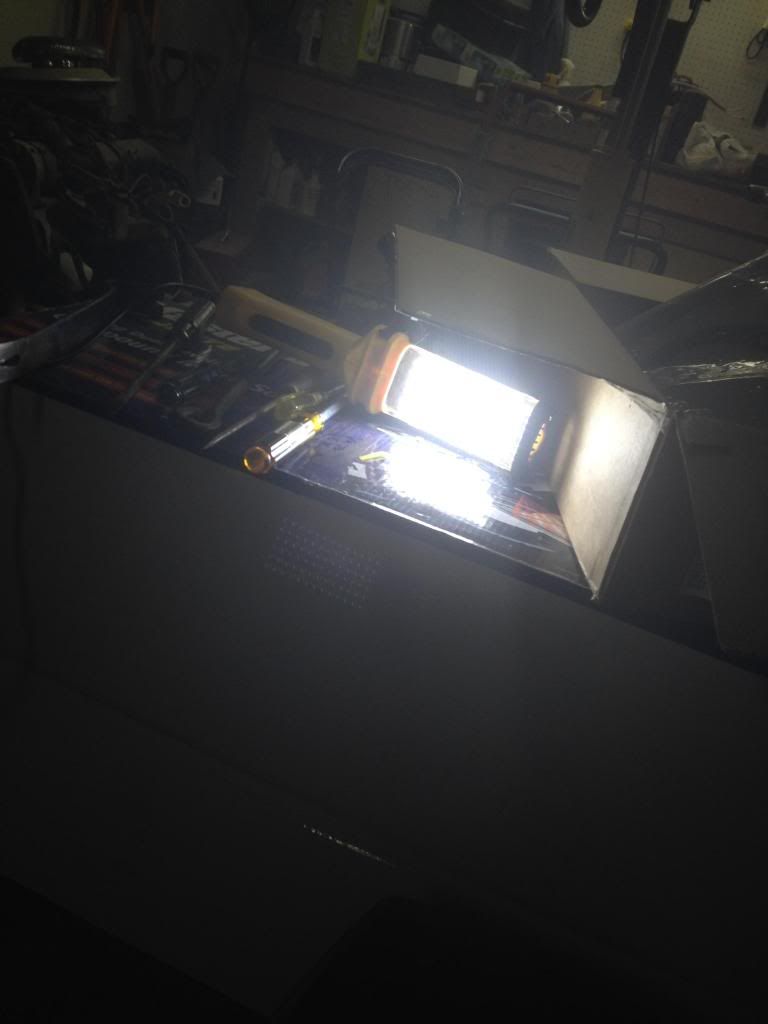
Setting up the case for the main internals. Gotta have some light!!!
Large boxes help to elevate my light
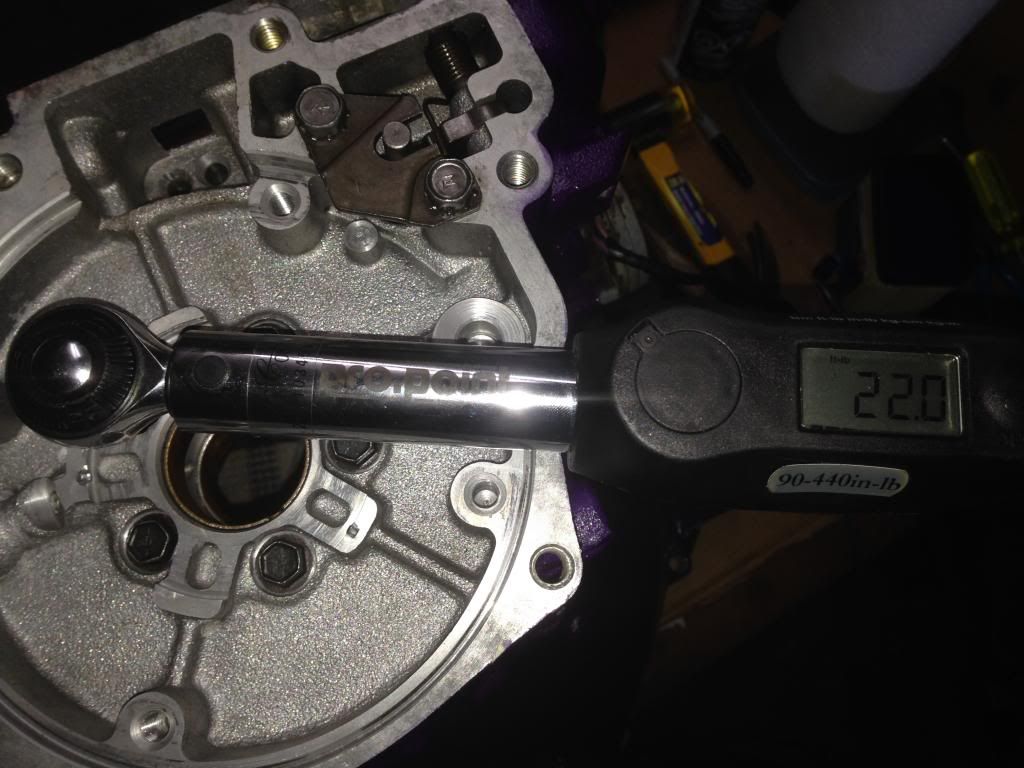
Got the race at the rear of the case installed and torqued down to 22 ft-lbs.
Rear spring retainer installed and tightened down with the clutch clamp I bought. Man this thing is handy!
Might have to rent it out to my friends in the city for a price
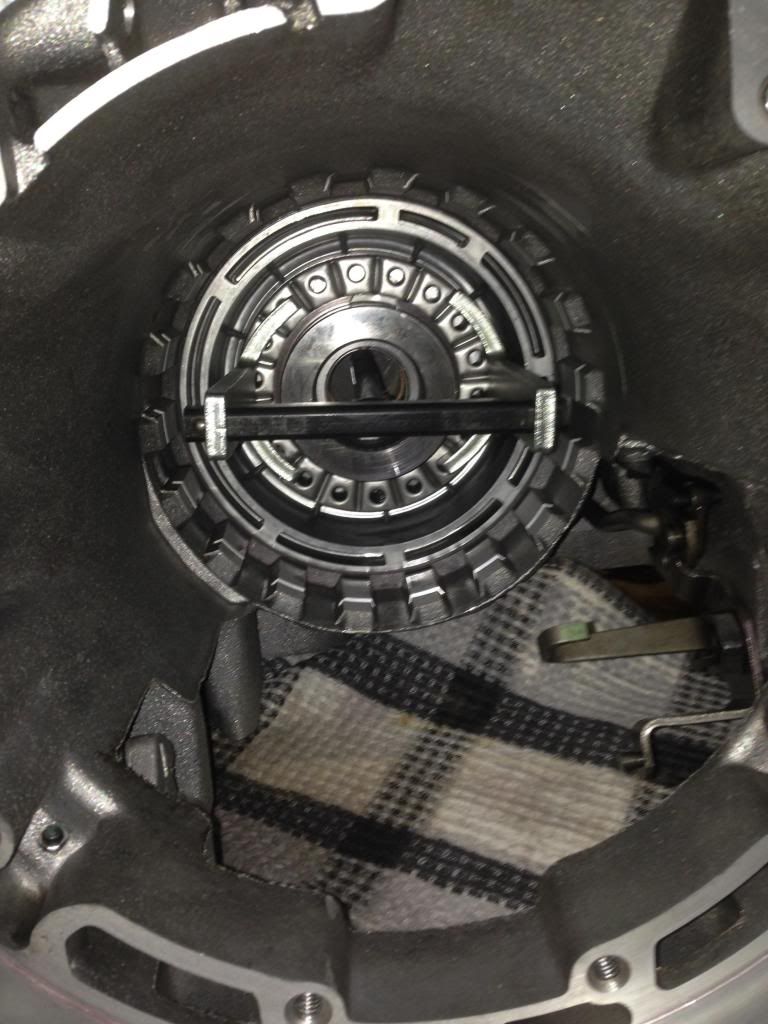
Snap ring installed. Went VERY smoothly.
New Parking Paw thrust washer installed. Thicknesses were exactly the same, but the new one has no wear
Paw, lever, spring and stud all installed. Checked spring tension with my fingers... Yup! She's good!
Still can't remember this things name... But the "thinga-ma-jigger" got installed haha.
Pick-up tubes gently tapped in place.
Tightened down to 14 ft-lbs.
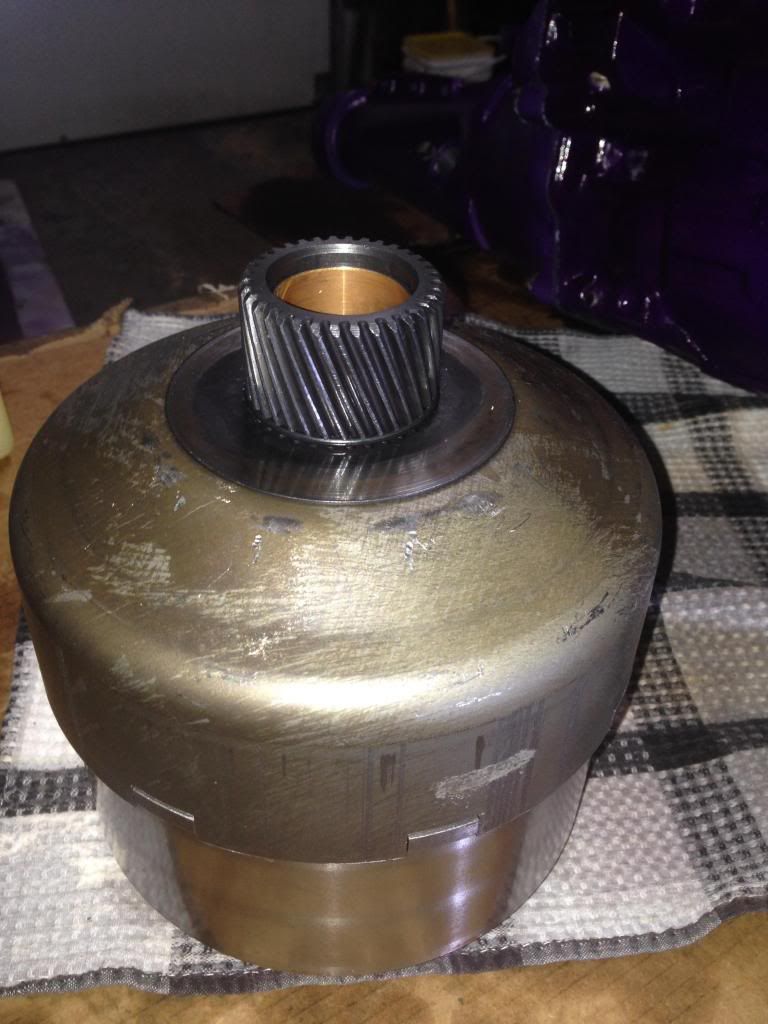
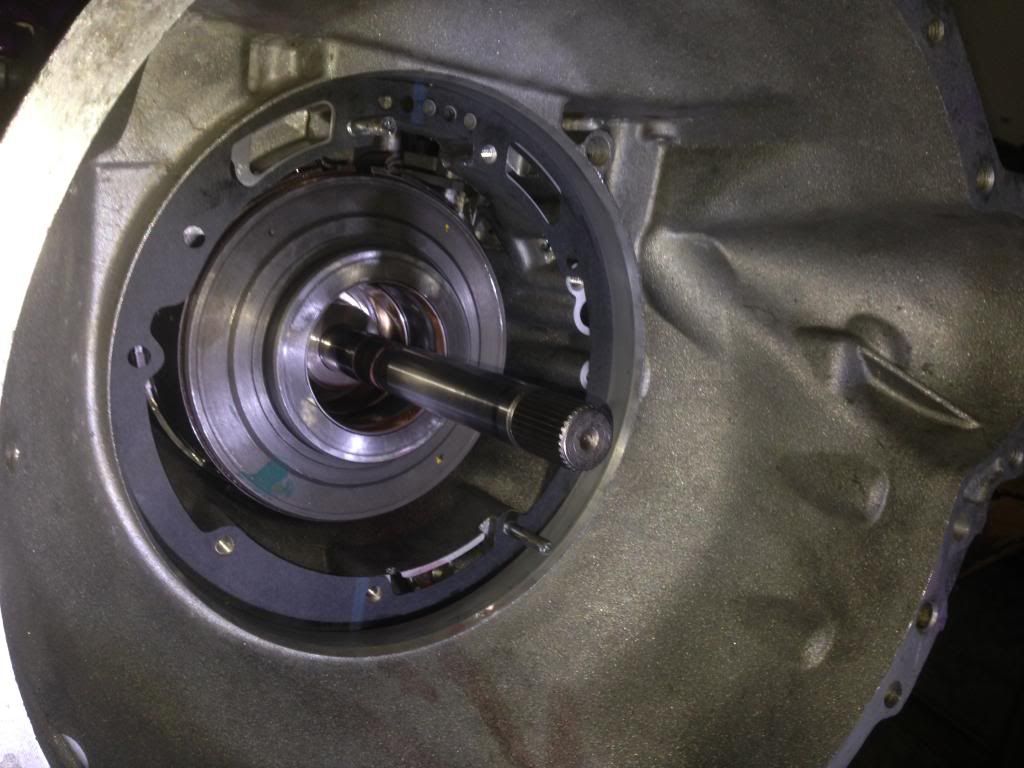
Output shaft installed.
Lots of ATF sprayed in the back!
Completely forgot earlier that the piston in the back was installed! It was, and lots of lube was used.
Used the butt-end of a hammer to install the piston. Took a while, but it went in!
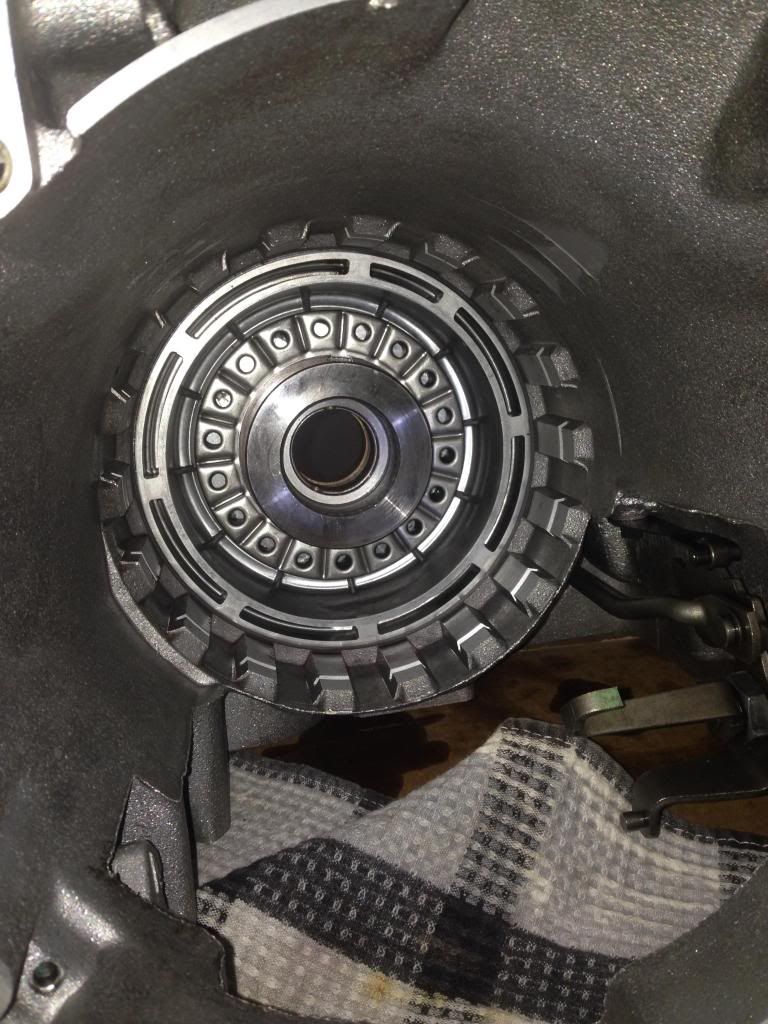
Rear hub installed.
New thrust washer installed. The original had a lot of irregular wear, so I figured a new one was definitely necessary. Both the old and the new had the same thickness, which was strange for how much wear the original had.

Inner rear hub installed. The snap ring that goes on the output shaft was a giant ***** with a capital B. That single snap ring was honestly the hardest part of this entire build. Took a half hour to get it on right.
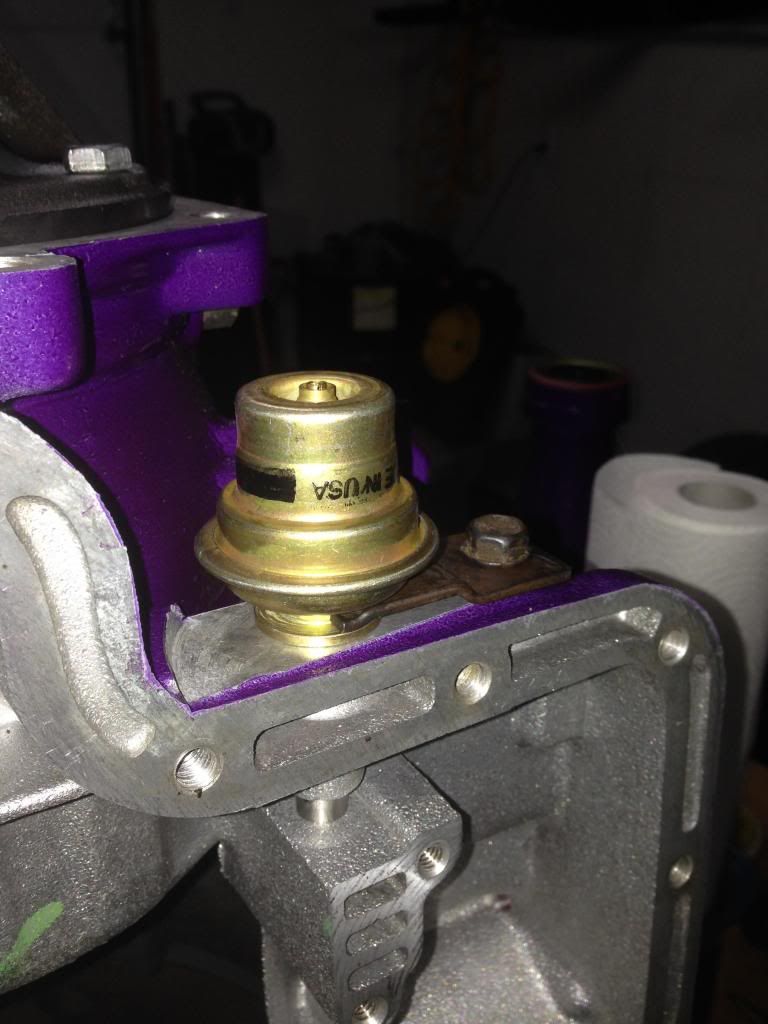
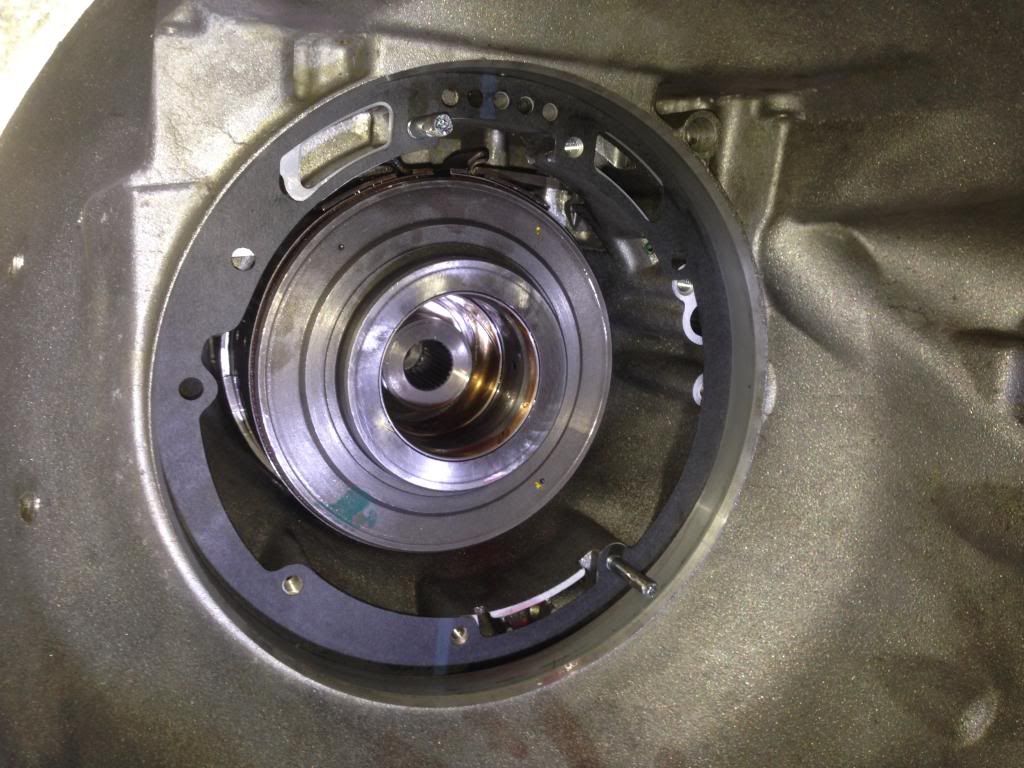
Vacuum modulator installed. Haven't tampered with the adjust-ability functions yet as it won't be test driven for a while.
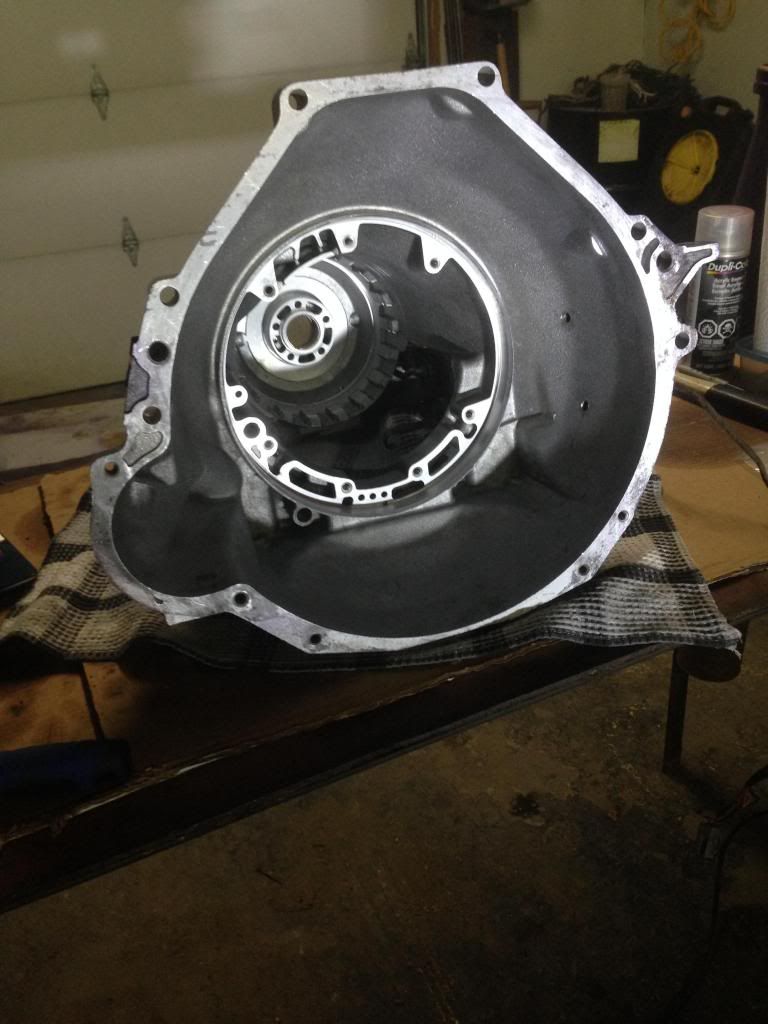
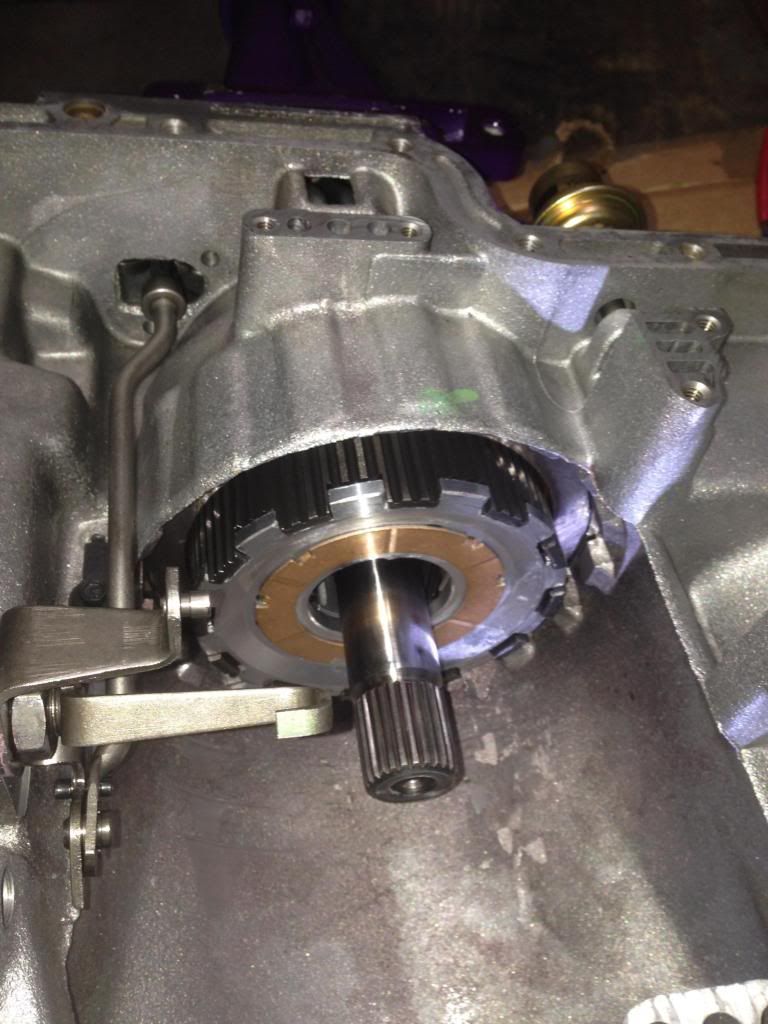
Extension housing installed!
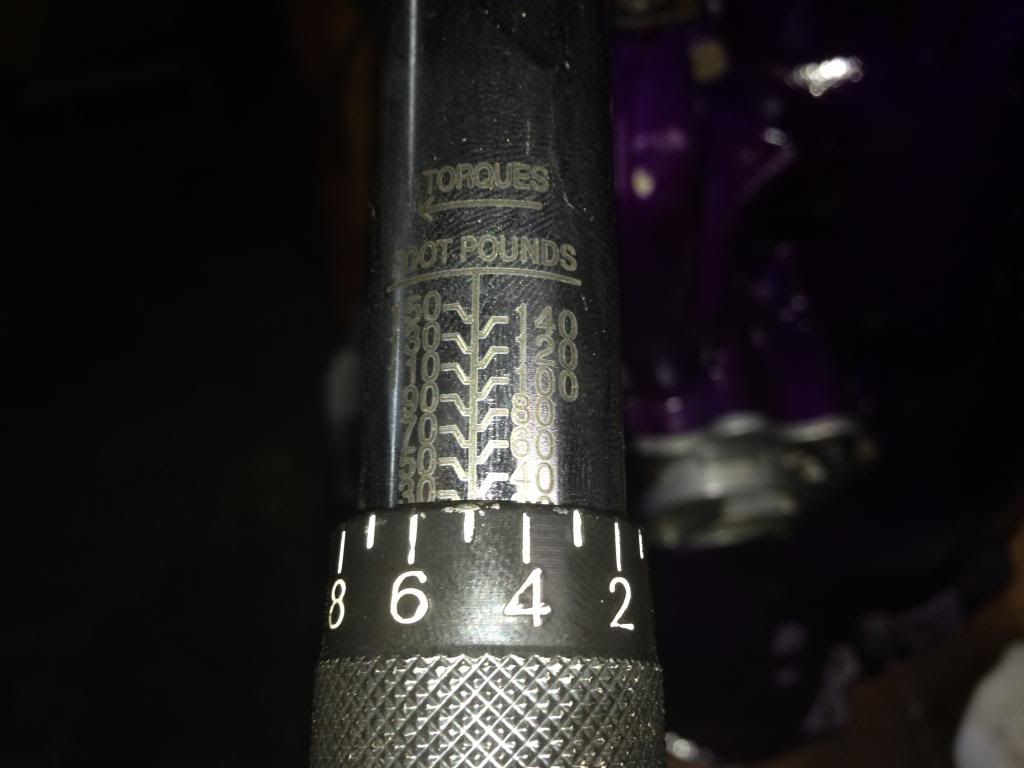
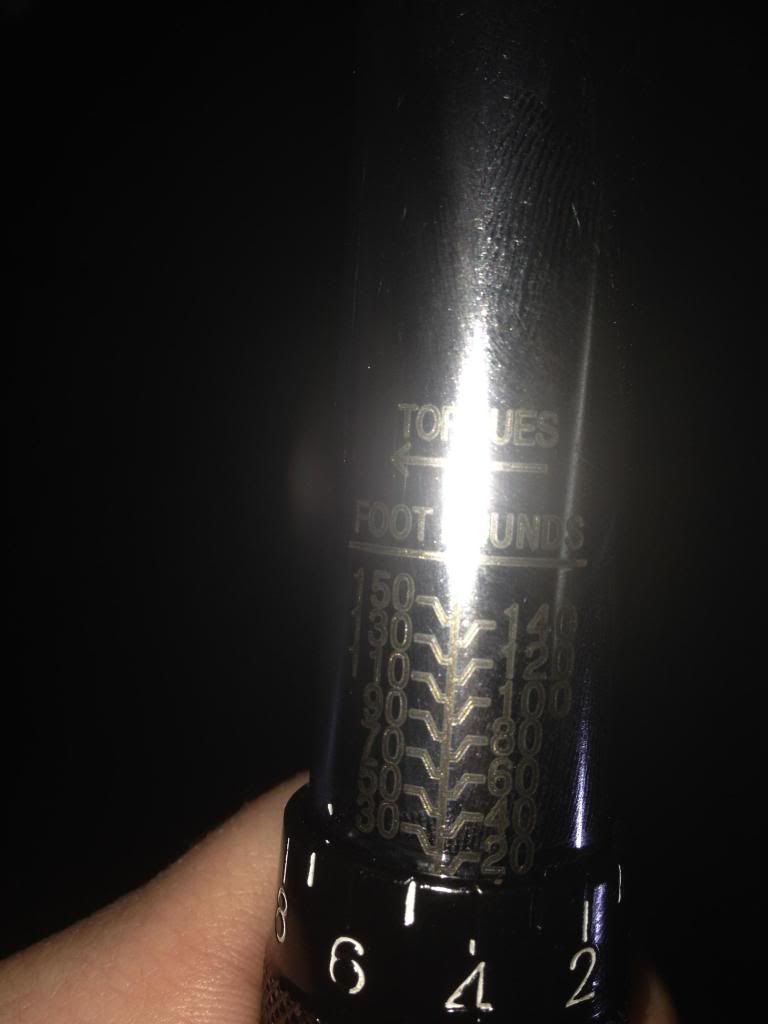
Gotta break out the bigger torque wrench. Love having torque wrenches now that they're at my disposal.
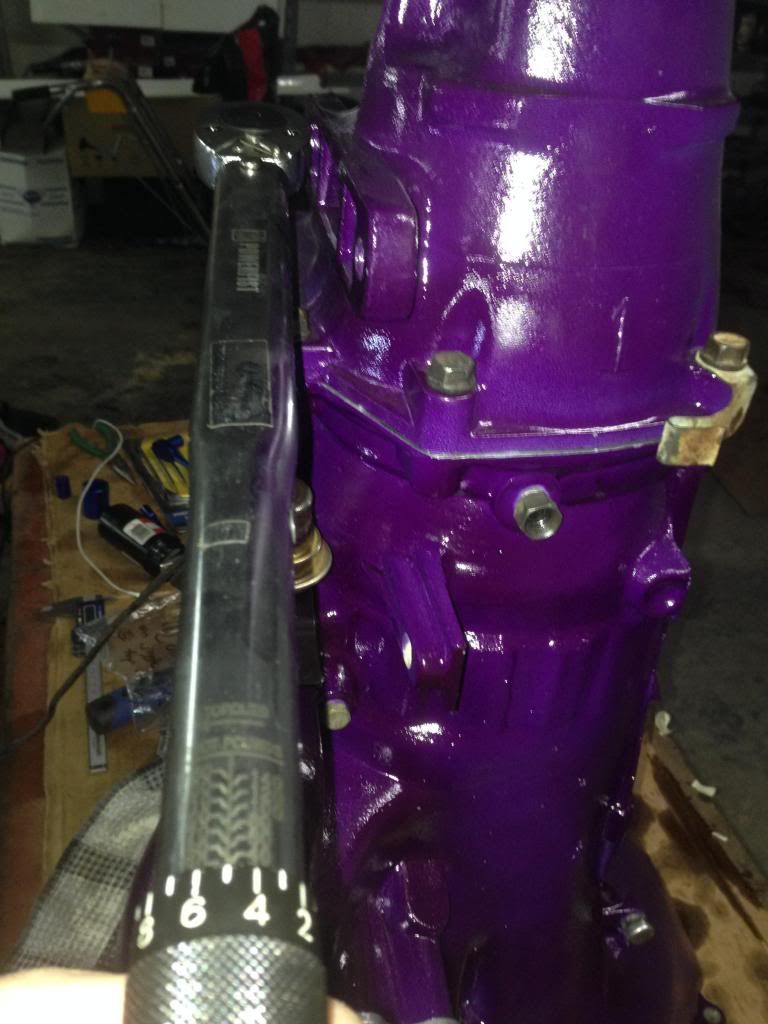
Tightened to 25 ft-lbs.
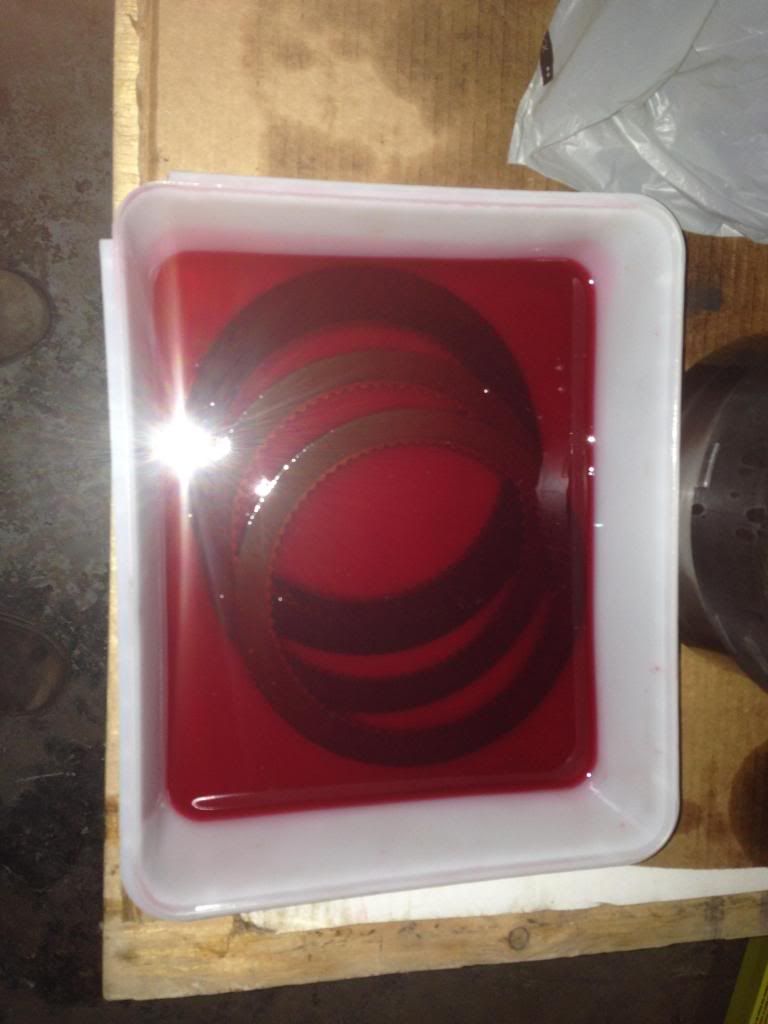
Rear clutch fibers soaked for 20 minutes. Don't worry, there are 4 of them in there. Just looks like 3.
Brand new steels and clutch fibers installed. This snap ring wasn't nearly as bad... thank god...
Another brand new thrust washer for the rear planet. Another irregular wear pattern, and another equal thickness. Wonder what the original's thickness was without the wear pattern
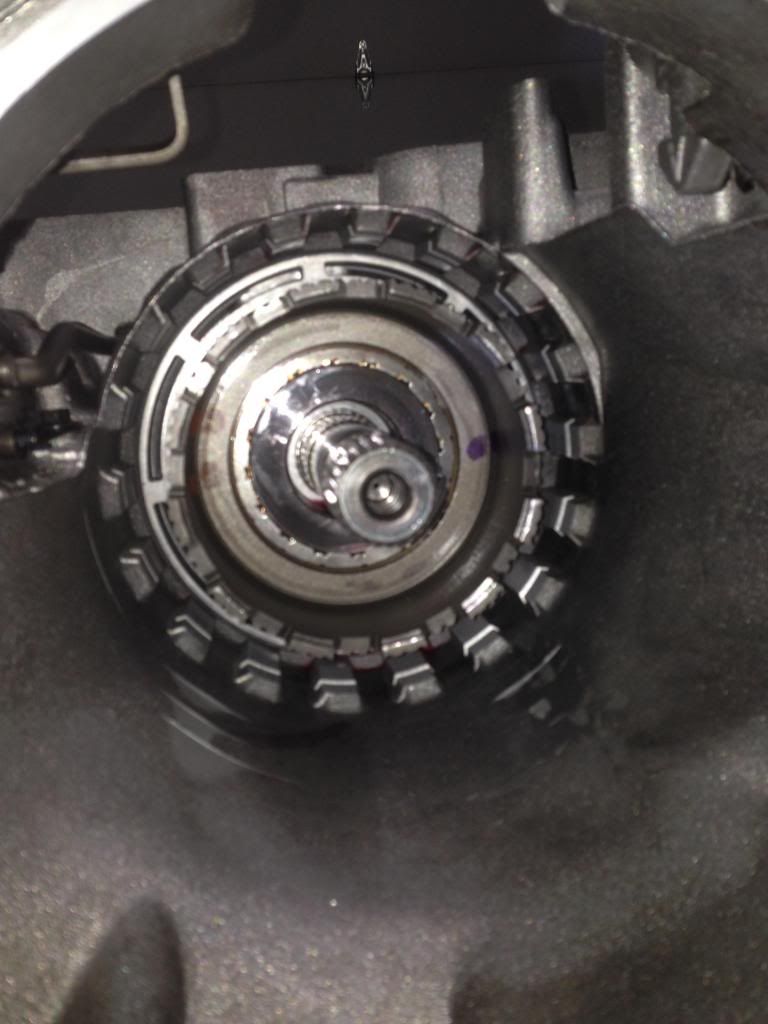
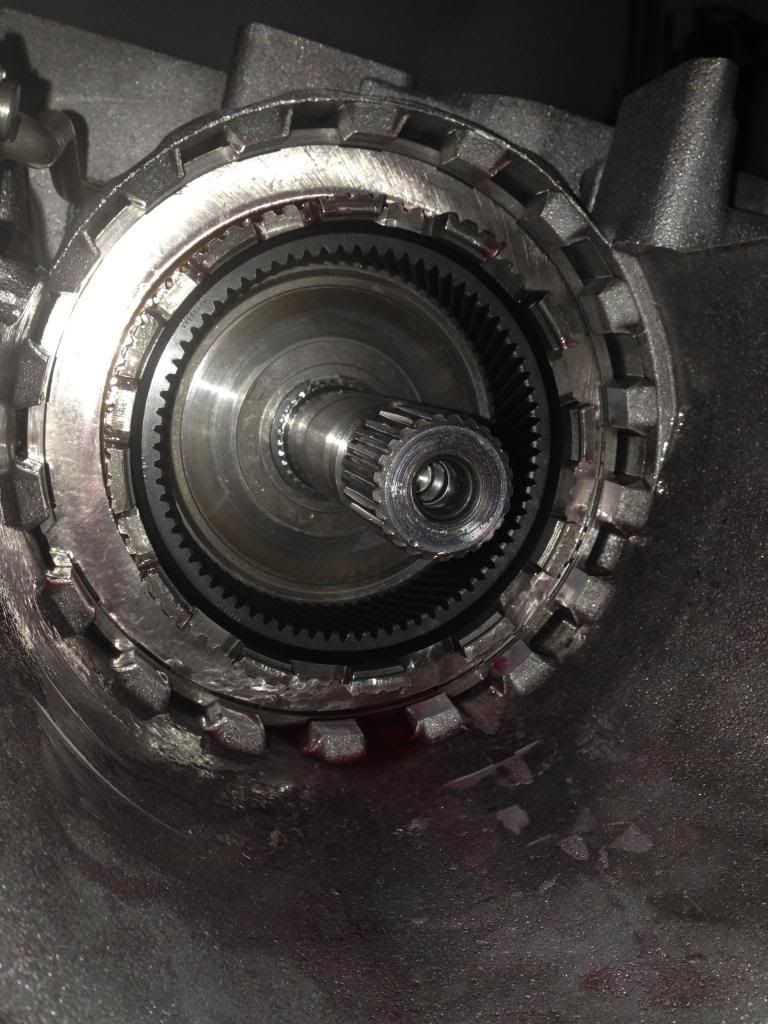
Rear planet installed.
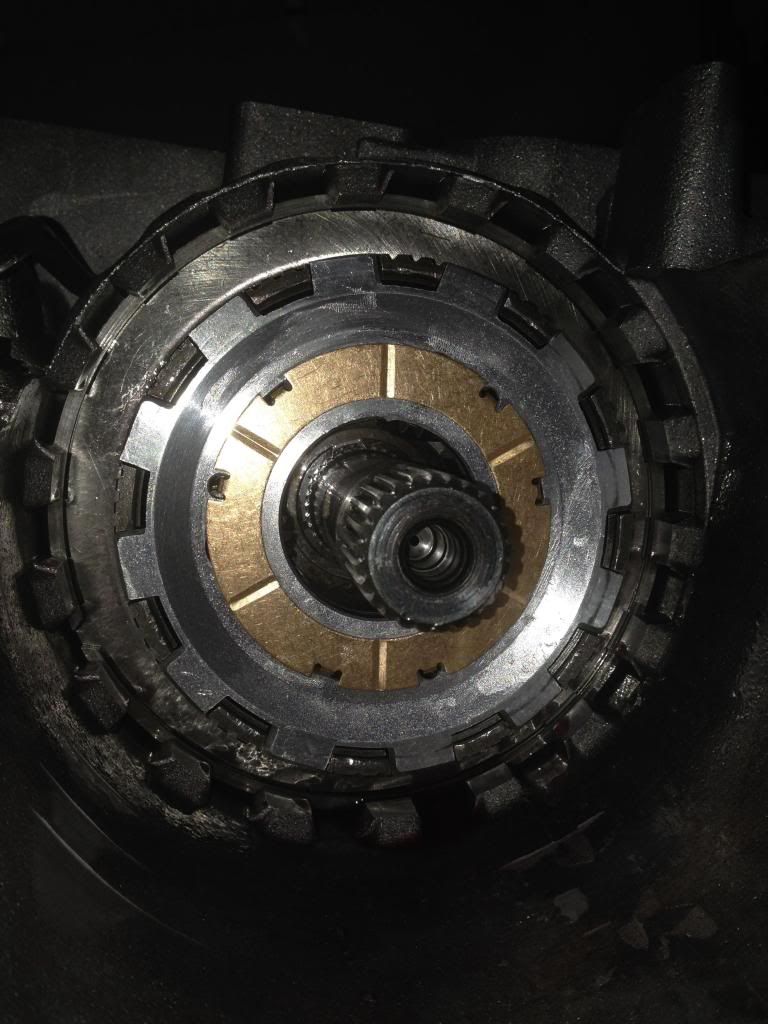
Now this is the fun part. I already rebuilt this from a day or two earlier because I had so much time on my hands. Really saved me a lot of time while I was cleaning/soaking other parts.
Everything is definitely indexed correctly. Notice how deep the teeth from the sun shell sit.
More TV magic. Wasn't actually too hard to install.
Made my 3/8" wrench useful by holding the whole assembly up.
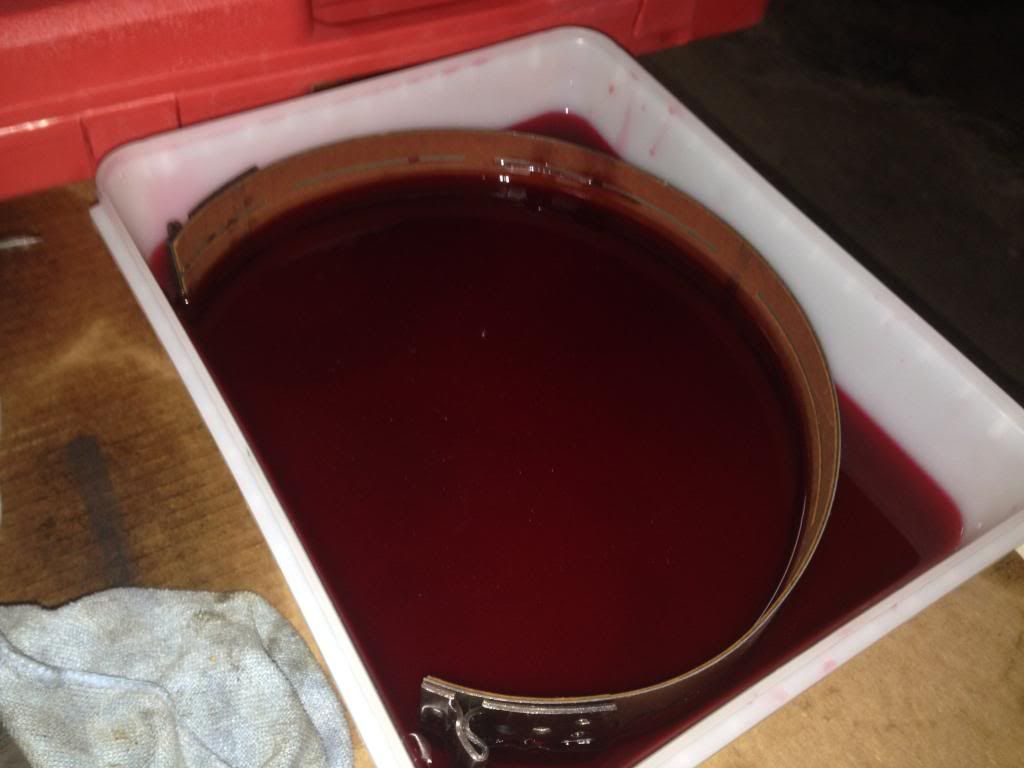
Soaked the new band.
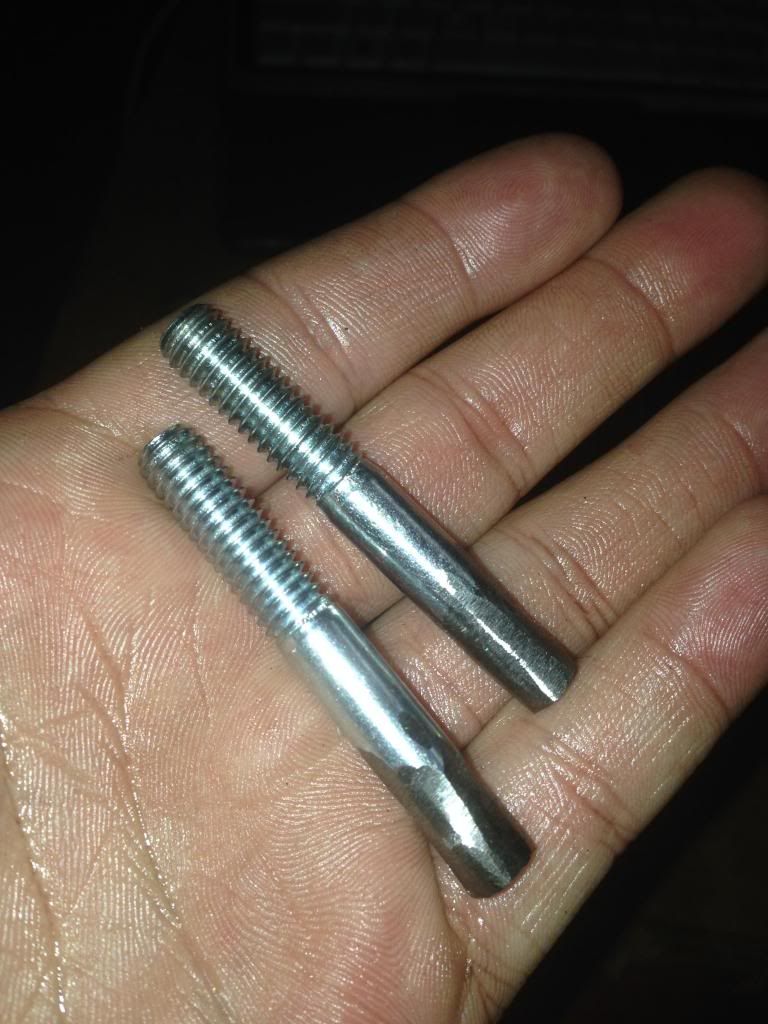
In the meantime, I looked ahead and realized that I was missing something! No studs for when I get to the pump!
Went out to Home Depot after 20 minutes of one side of the band being soaked, flipped it, and left.
Came back and ground down the heads of two bolts to make these.
Brand new band-adjusting nut.
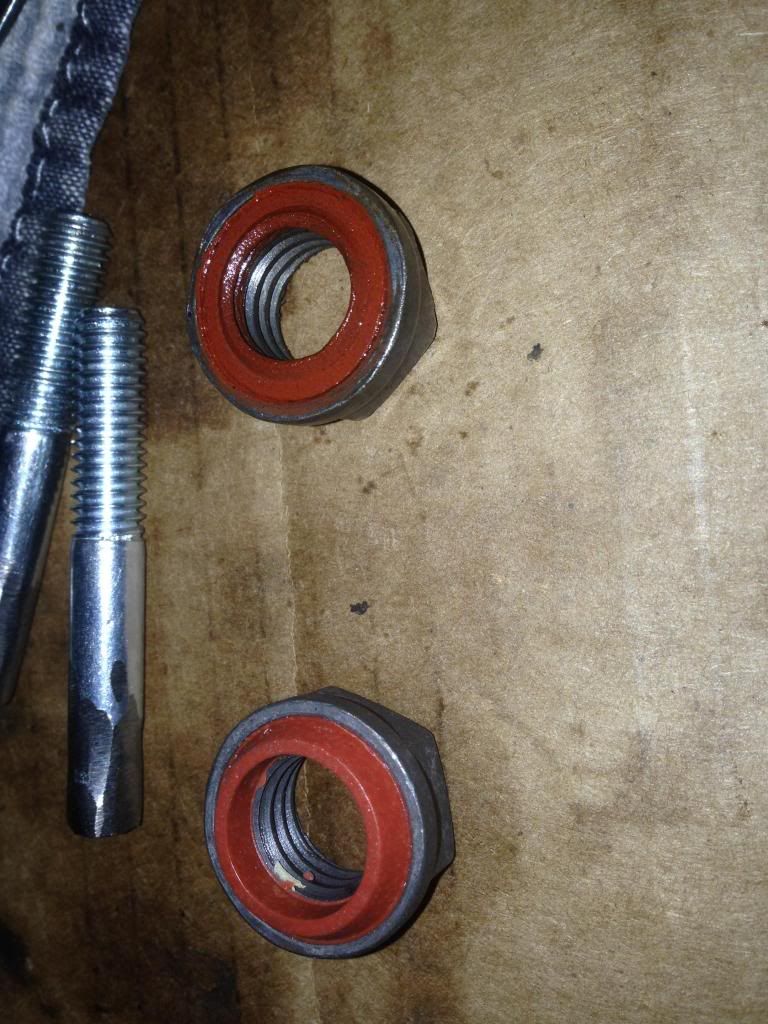
Band installed and tightened down to as far as I could go with my fingers.
Didn't forget to take my wrench out either. Wouldn't that be funny? That'd really throw a "wrench" into my transmission rebuild
Pump was lubed back up again just for good measure and installed.

As you can see, I definitely goofed up the first time with the gasket. Don't worry, I corrected it before the pump went on.
Corrected.
Pump installed and tightened down with a cross-pattern for even tightening. Just like installing a rim on a vehicle.

Tightened to 25 ft-lbs.
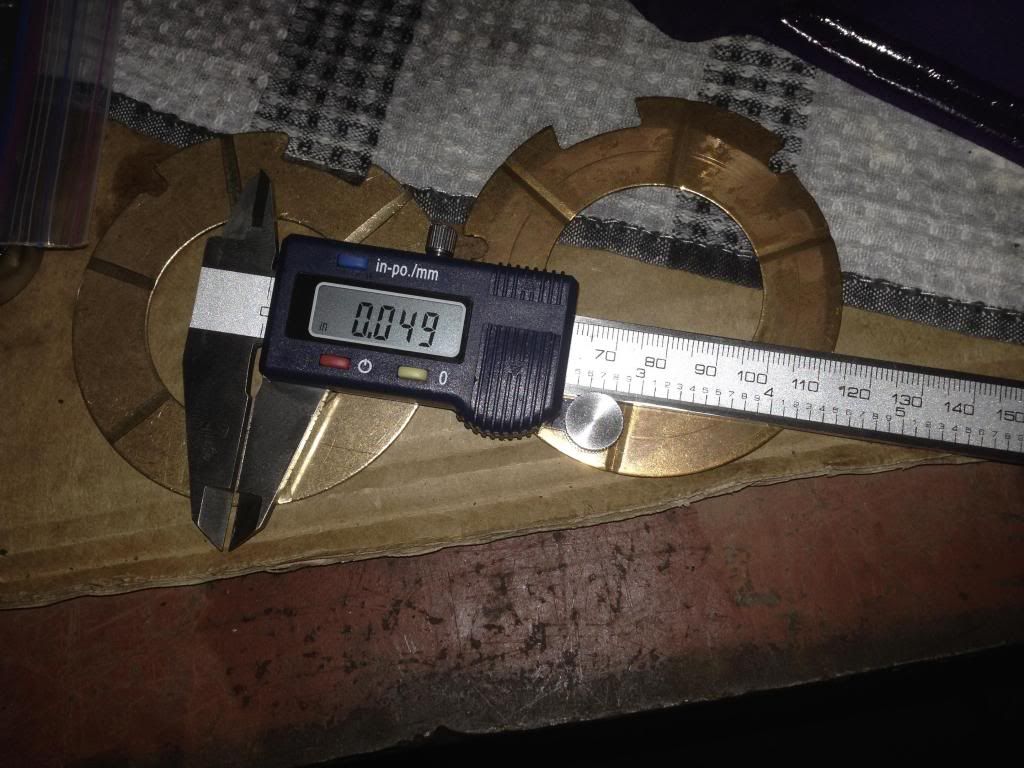
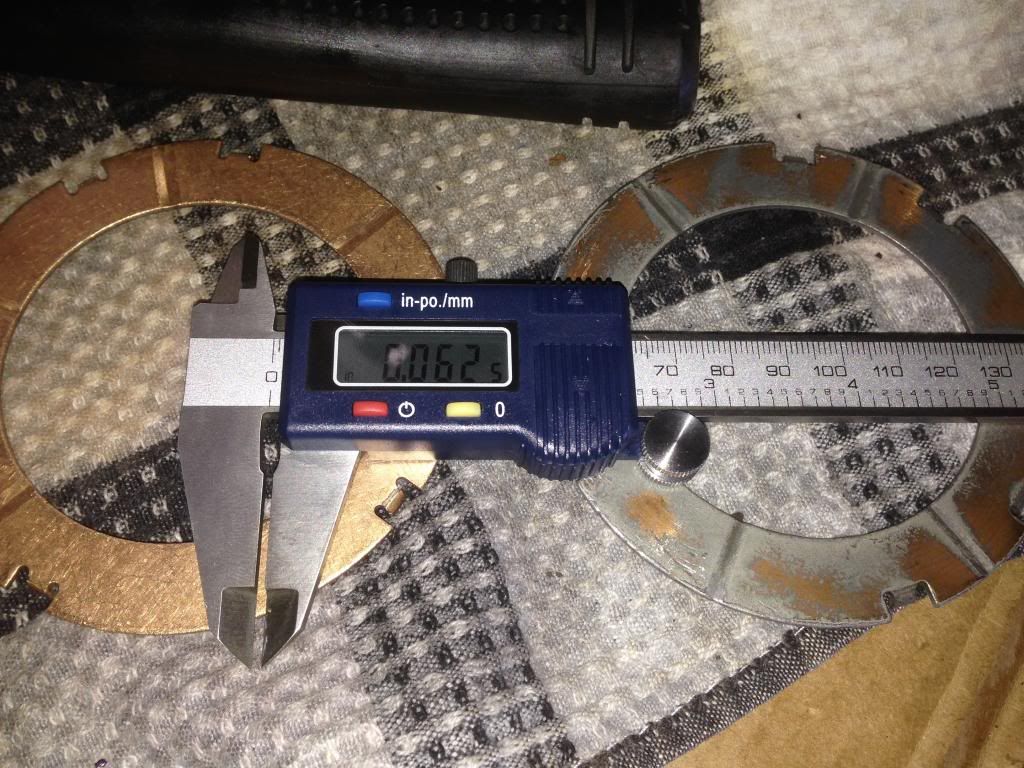
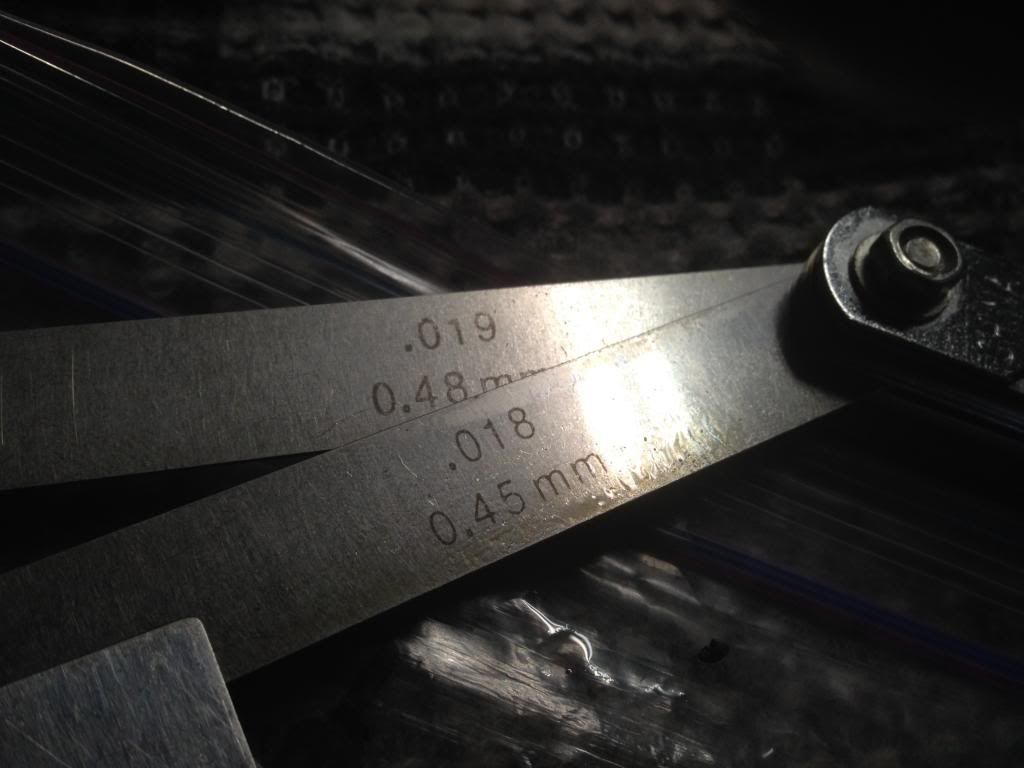
0.037" wouldn't fit between the pump at the sun shell, but 0.027 would. Seems like we've lost a weeeeee tiny bit of endplay, but we're still good!
My guess is the loss of endplay is from those few thrust washers that are new. No big deal.
Checked all the proper air passages (4 in total) with my compressor and proper nozzle.
Everything seemed 100%, but the governor (out) didn't make 100% the sound that it did on the BAD SHOE video.
Don't misinterpret what I just said. The sound was around 80% similar, just not 100%. The governor's parts were definitely heard moving when air was passed through it, so I'm not concerned about this "very slightly different" sound at all.
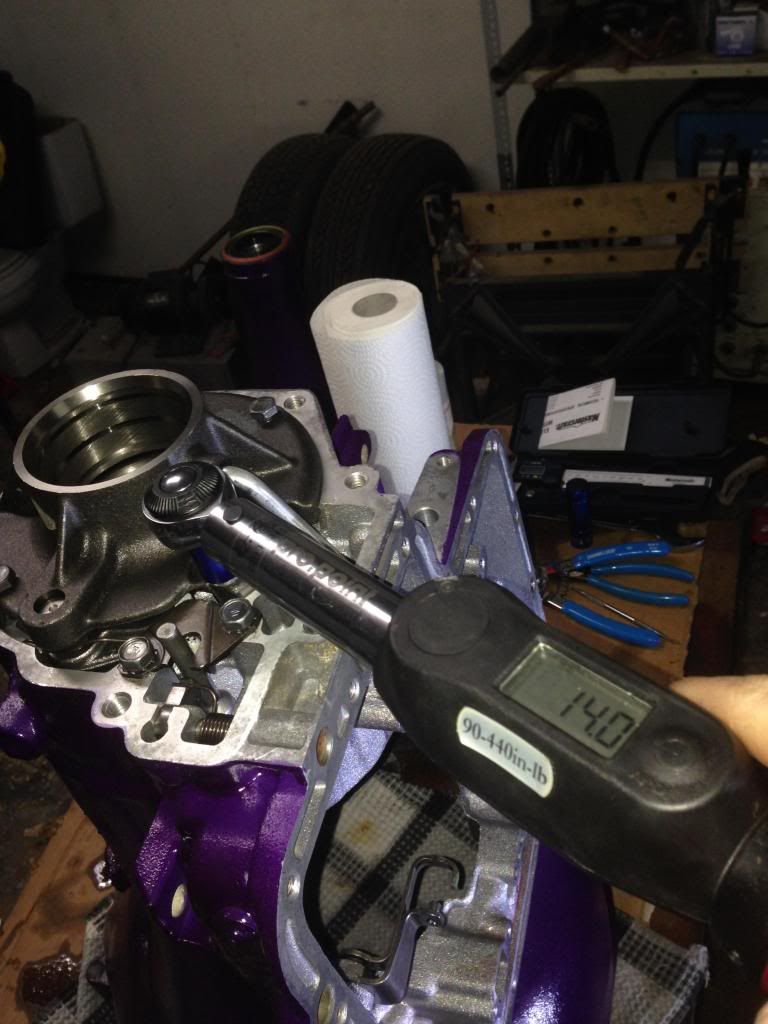
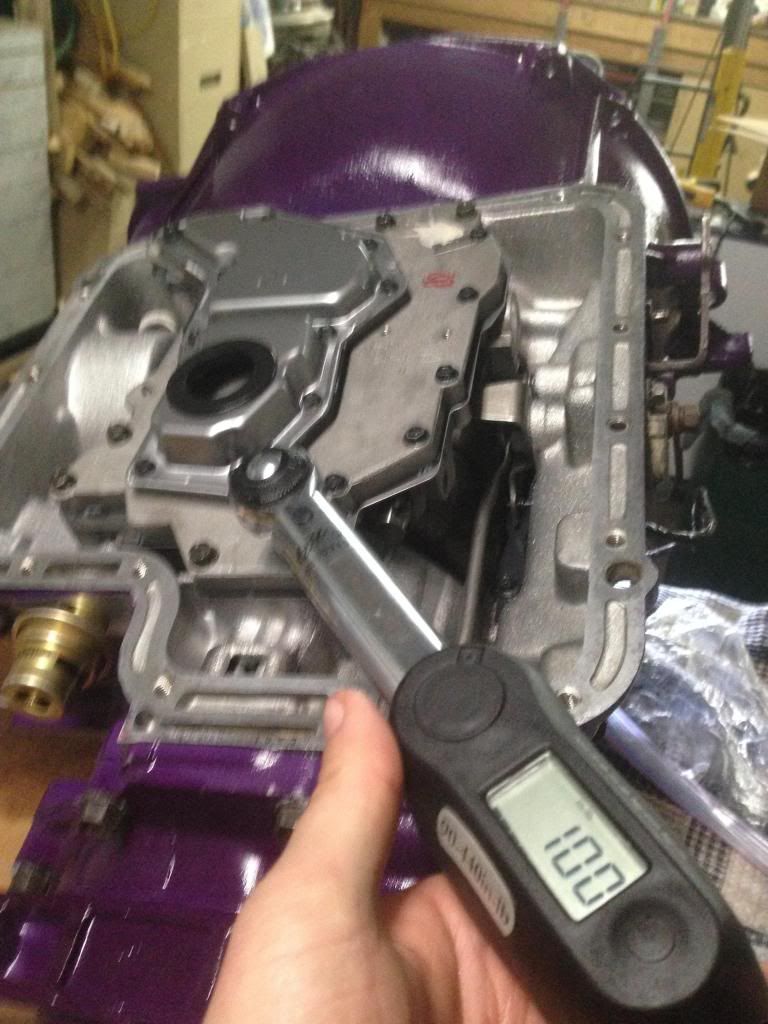
The valve body was installed and the proper bolts were tightened down to 100 inch-lbs.
Smaller input shaft installed.
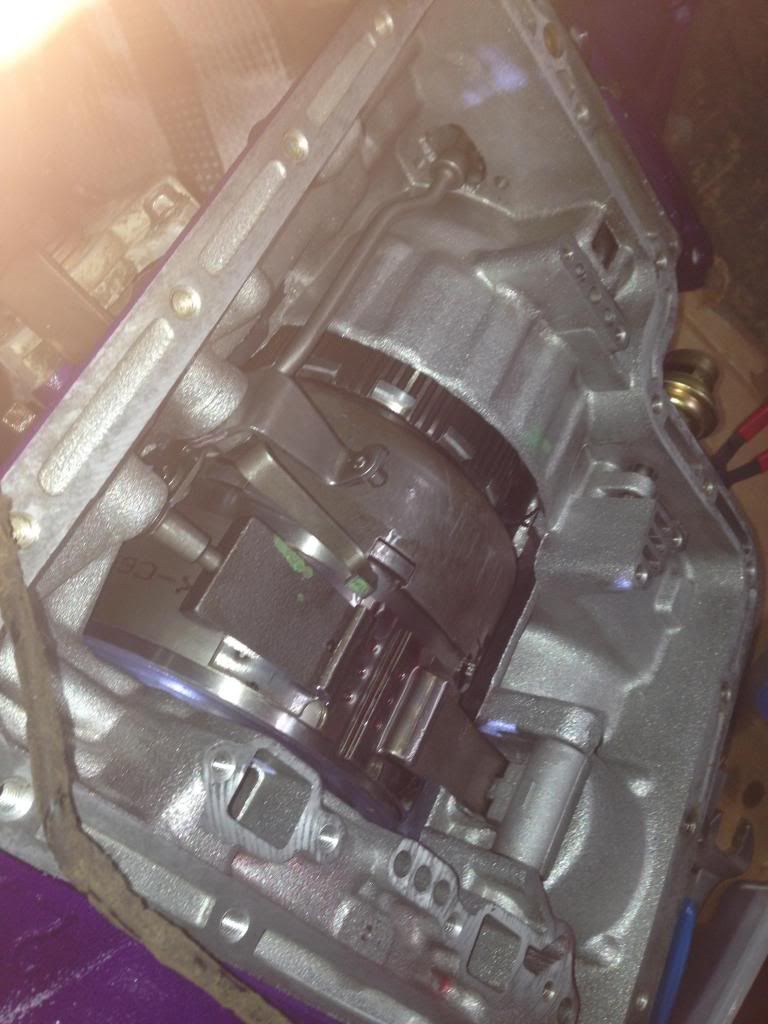
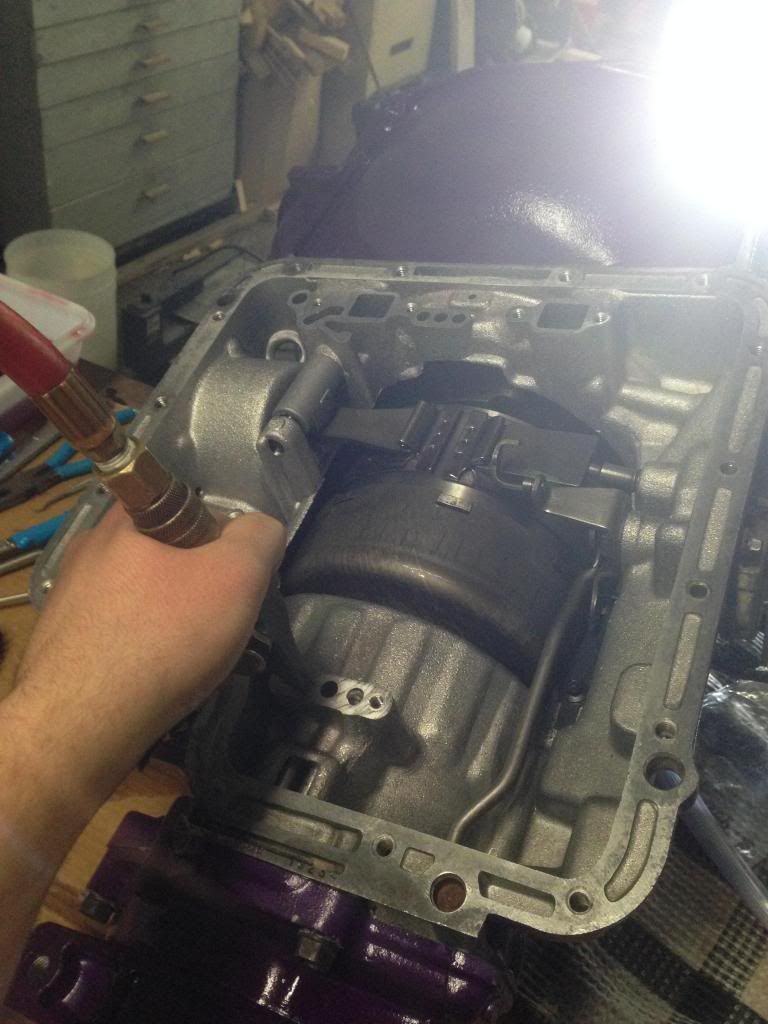
Last thing was the pan. The bottom was washed a few times and it is still quite rusty. PERFECT for POR-15.
When I get around to it, I will gently wire wheel the bottom of the pan to knock down some of the surface rust, then I will Metal-Ready it and then finally it will get hit with 2 coats of POR-15.
Inside of the pan was cleaned out about 3 times to reduce the amount of grit going back into the transmission. Gotta remember to pick up some small magnets to put in the bottom of the pan corners so that it catches any other metal flakes that still come through the trans.
Pan installed with just a few bolts.
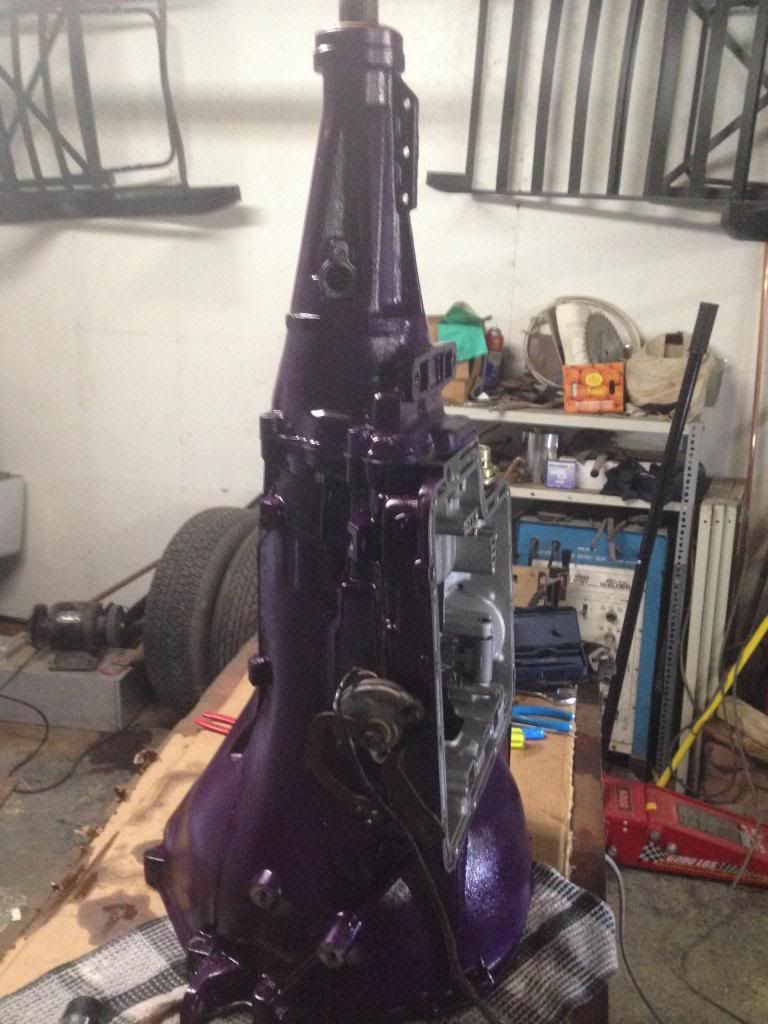
The final product.
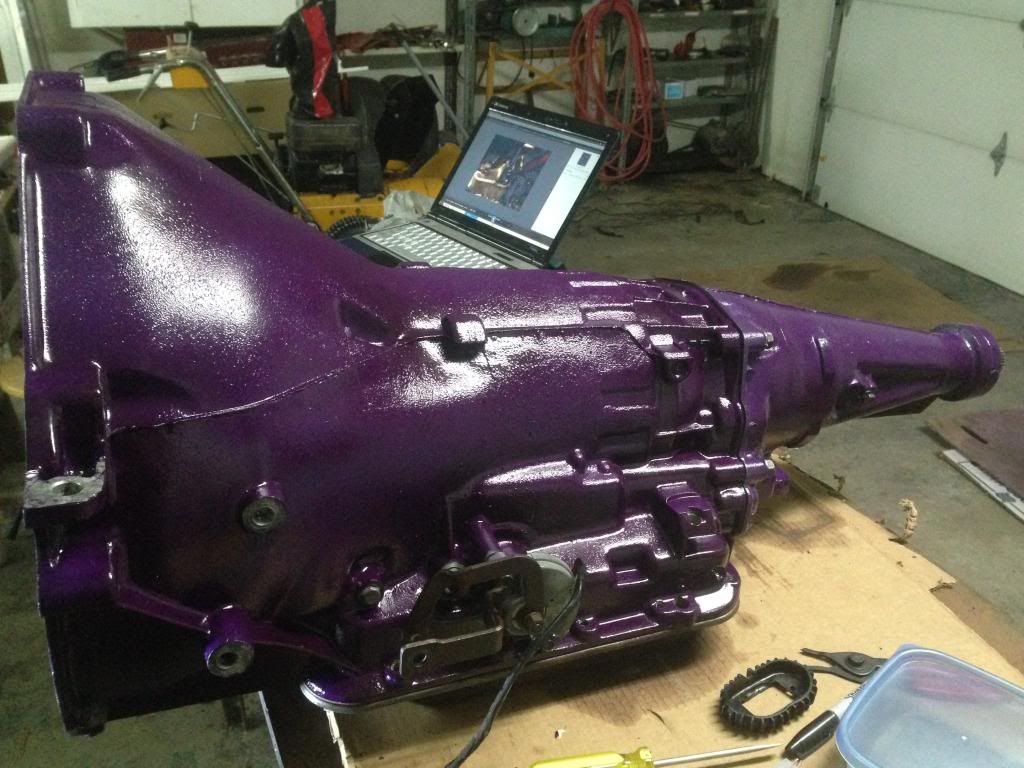
The extension housing needs some paint touch-ups, but those will come later when I come back to POR-15 the pan and fully install it.
That's the end of this build for now folks.
Hope you've enjoyed my recent updates. I know I did.
For what I spent on tools and the kit from Oregon Performance Transmission, I would say that it was worth 100X more than having it rebuilt by a shop.
Hopefully more progress to come within a month or so.
First a foremost, I emailed Brian at Oregon Performance Transmission. He has mailed me the proper 4x2 transmission filter (it's still in the mail). Thanks for catching that GIGGER!
Onto the progress!
So I started off with clear coating the main part of the case. After a couple of coats, I started working on this massive box of parts.
Cleaned each set of pieces individually, then wrapped in paper towel and stuck them back into their dirty plastic baggies. I didn't want to waste baggies or relabel, so I figured paper towel was the way to go.

Here's the main case after I let it dry for 2 hours (while cleaning my parts).

And with a little TV magic, Vwola! I have a very nicely painted case!

Servo installed and lubed up very well. Bolts tightened to 18 ft-lbs.

Pretty darn clean compared to before!

I made sure to keep all of the holes very clean and tidy while painting. Can't clog them up with paint, nor can I clear coat over them!
New seal for the shift lever installed. The original was a ***** to get out.

Shift lever installed. Man... that nut on the interior is in the WORST SPOT ever. It's also massive, so it takes a bit of mmmph to get it tight.
I triple checked the shift lever orientation with old photos as reading up online about it did me no good.
Apparently old mustangs are common to have the shift lever oriented 180 degrees due to how long the lever from the column is. This all makes reading up on these sort of things a pain... Good thing I took lots of pictures from the start.


Look at how clean the inside of the case is!

The kick-down lever was a pain, but only near the end of the build.

Can't get enough pictures of all these clean surfaces. They won't stay this way forever!

Couldn't figure out the exterior portion of the kick-down lever for the longest time either. Just goes to prove that you can never take enough pictures!

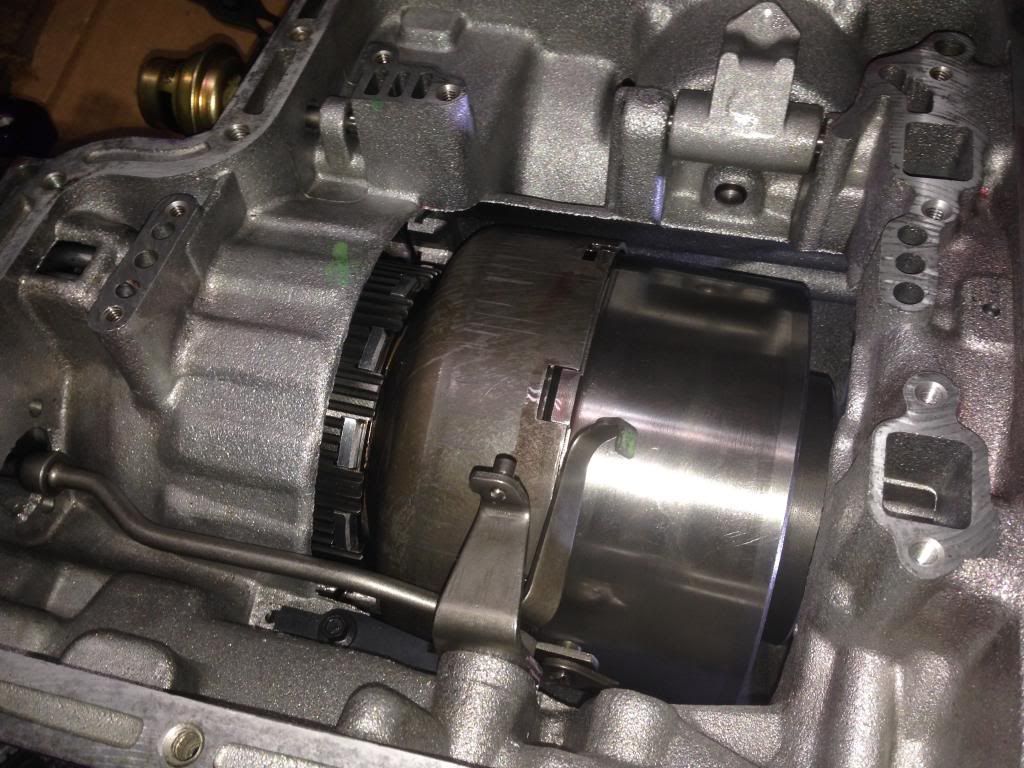
Setting up the case for the main internals. Gotta have some light!!!

Large boxes help to elevate my light


Got the race at the rear of the case installed and torqued down to 22 ft-lbs.


Rear spring retainer installed and tightened down with the clutch clamp I bought. Man this thing is handy!
Might have to rent it out to my friends in the city for a price

Snap ring installed. Went VERY smoothly.

New Parking Paw thrust washer installed. Thicknesses were exactly the same, but the new one has no wear

Paw, lever, spring and stud all installed. Checked spring tension with my fingers... Yup! She's good!

Still can't remember this things name... But the "thinga-ma-jigger" got installed haha.
Pick-up tubes gently tapped in place.

Tightened down to 14 ft-lbs.

Output shaft installed.

Lots of ATF sprayed in the back!
Completely forgot earlier that the piston in the back was installed! It was, and lots of lube was used.
Used the butt-end of a hammer to install the piston. Took a while, but it went in!

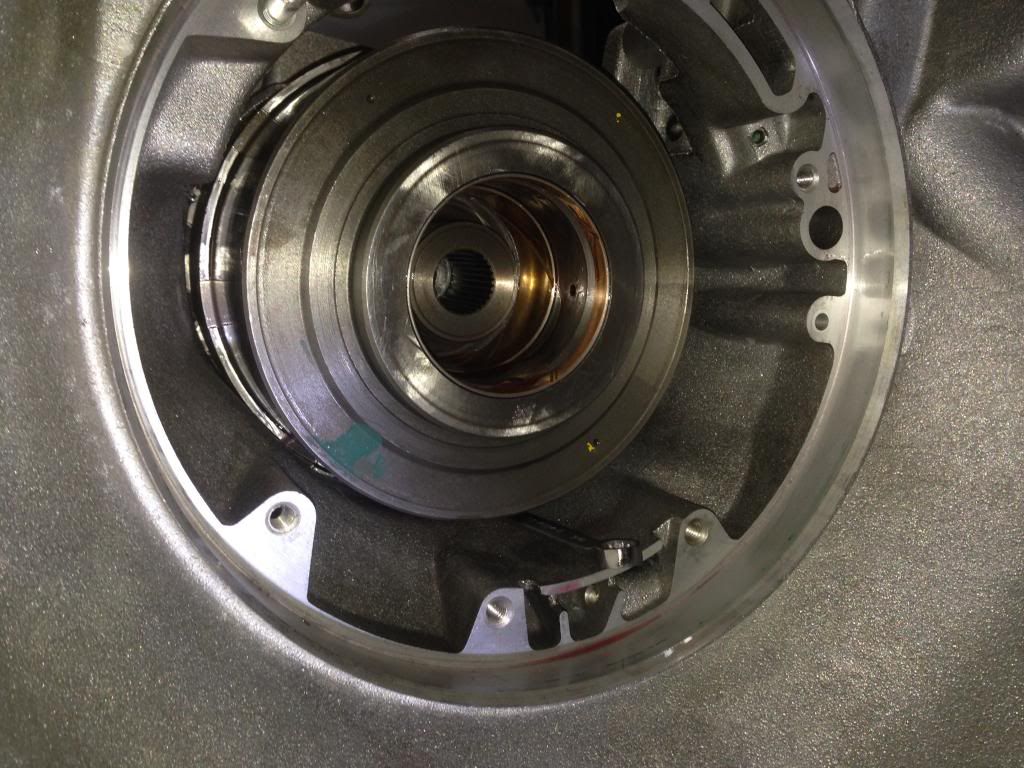
Rear hub installed.

New thrust washer installed. The original had a lot of irregular wear, so I figured a new one was definitely necessary. Both the old and the new had the same thickness, which was strange for how much wear the original had.

Inner rear hub installed. The snap ring that goes on the output shaft was a giant ***** with a capital B. That single snap ring was honestly the hardest part of this entire build. Took a half hour to get it on right.

Vacuum modulator installed. Haven't tampered with the adjust-ability functions yet as it won't be test driven for a while.

Extension housing installed!

Gotta break out the bigger torque wrench. Love having torque wrenches now that they're at my disposal.

Tightened to 25 ft-lbs.

Rear clutch fibers soaked for 20 minutes. Don't worry, there are 4 of them in there. Just looks like 3.

Brand new steels and clutch fibers installed. This snap ring wasn't nearly as bad... thank god...

Another brand new thrust washer for the rear planet. Another irregular wear pattern, and another equal thickness. Wonder what the original's thickness was without the wear pattern

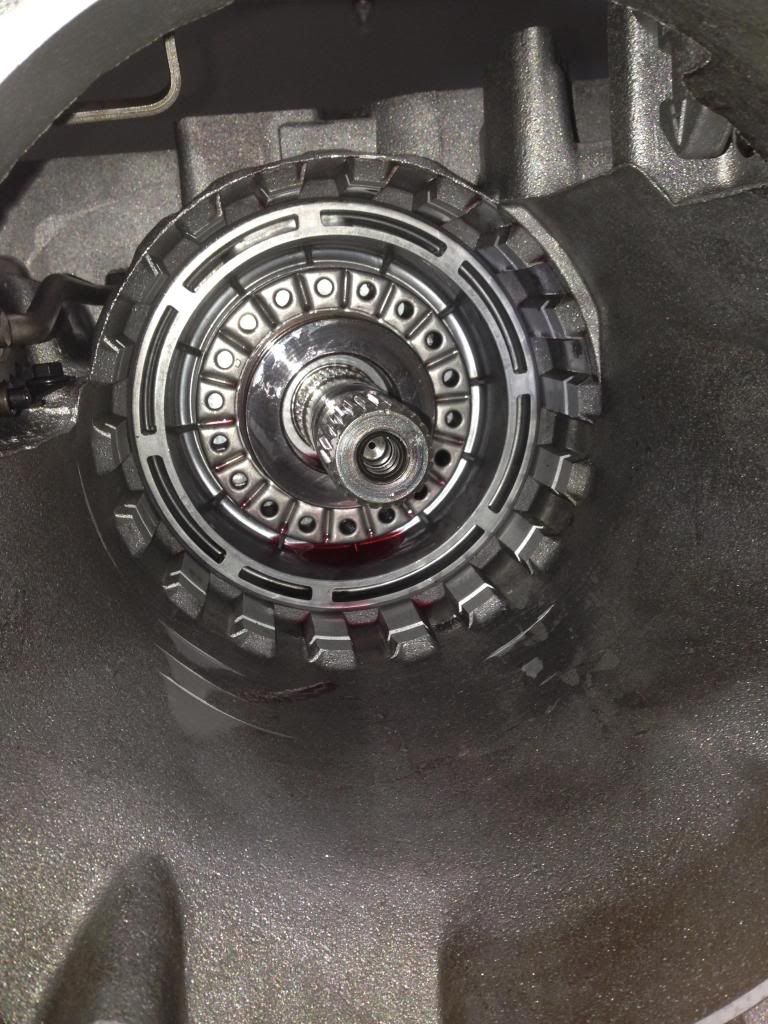
Rear planet installed.


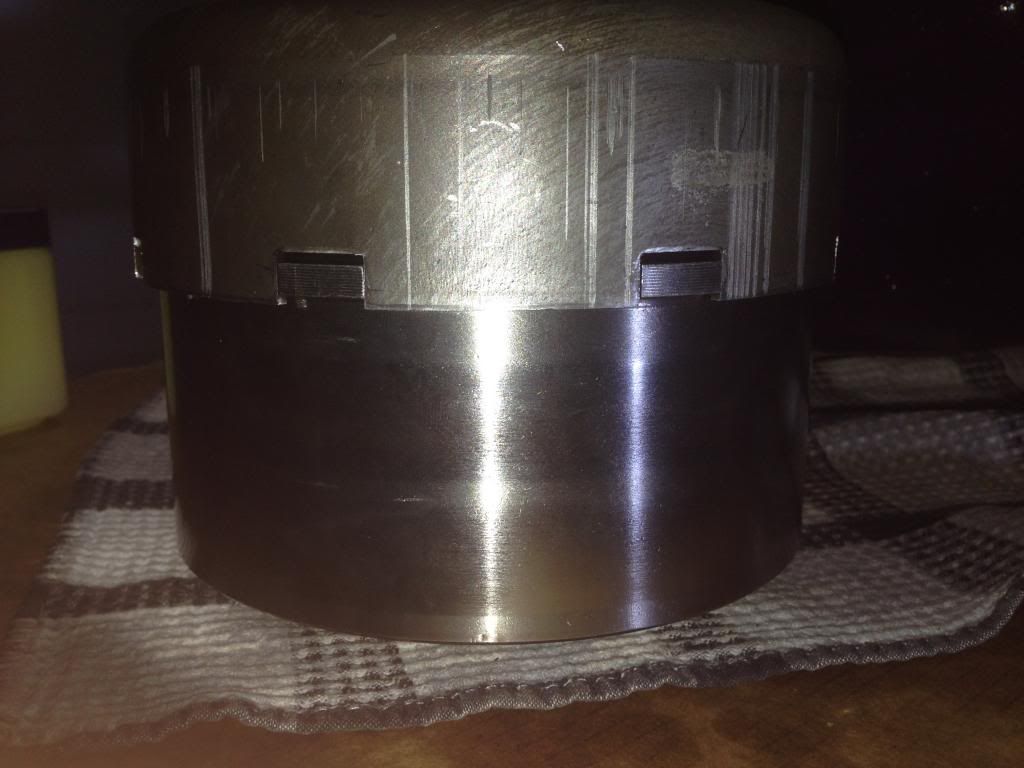
Now this is the fun part. I already rebuilt this from a day or two earlier because I had so much time on my hands. Really saved me a lot of time while I was cleaning/soaking other parts.

Everything is definitely indexed correctly. Notice how deep the teeth from the sun shell sit.

More TV magic. Wasn't actually too hard to install.

Made my 3/8" wrench useful by holding the whole assembly up.

Soaked the new band.

In the meantime, I looked ahead and realized that I was missing something! No studs for when I get to the pump!
Went out to Home Depot after 20 minutes of one side of the band being soaked, flipped it, and left.
Came back and ground down the heads of two bolts to make these.

Brand new band-adjusting nut.

Band installed and tightened down to as far as I could go with my fingers.

Didn't forget to take my wrench out either. Wouldn't that be funny? That'd really throw a "wrench" into my transmission rebuild
Pump was lubed back up again just for good measure and installed.

As you can see, I definitely goofed up the first time with the gasket. Don't worry, I corrected it before the pump went on.

Corrected.

Pump installed and tightened down with a cross-pattern for even tightening. Just like installing a rim on a vehicle.

Tightened to 25 ft-lbs.

0.037" wouldn't fit between the pump at the sun shell, but 0.027 would. Seems like we've lost a weeeeee tiny bit of endplay, but we're still good!
My guess is the loss of endplay is from those few thrust washers that are new. No big deal.

Checked all the proper air passages (4 in total) with my compressor and proper nozzle.
Everything seemed 100%, but the governor (out) didn't make 100% the sound that it did on the BAD SHOE video.
Don't misinterpret what I just said. The sound was around 80% similar, just not 100%. The governor's parts were definitely heard moving when air was passed through it, so I'm not concerned about this "very slightly different" sound at all.

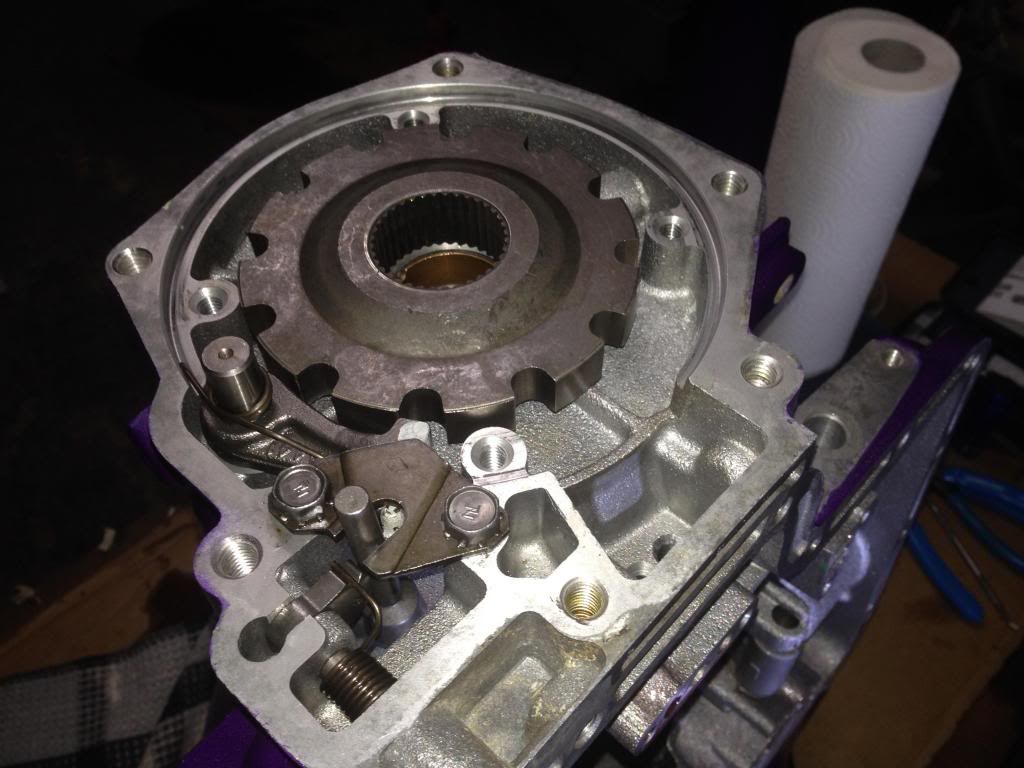
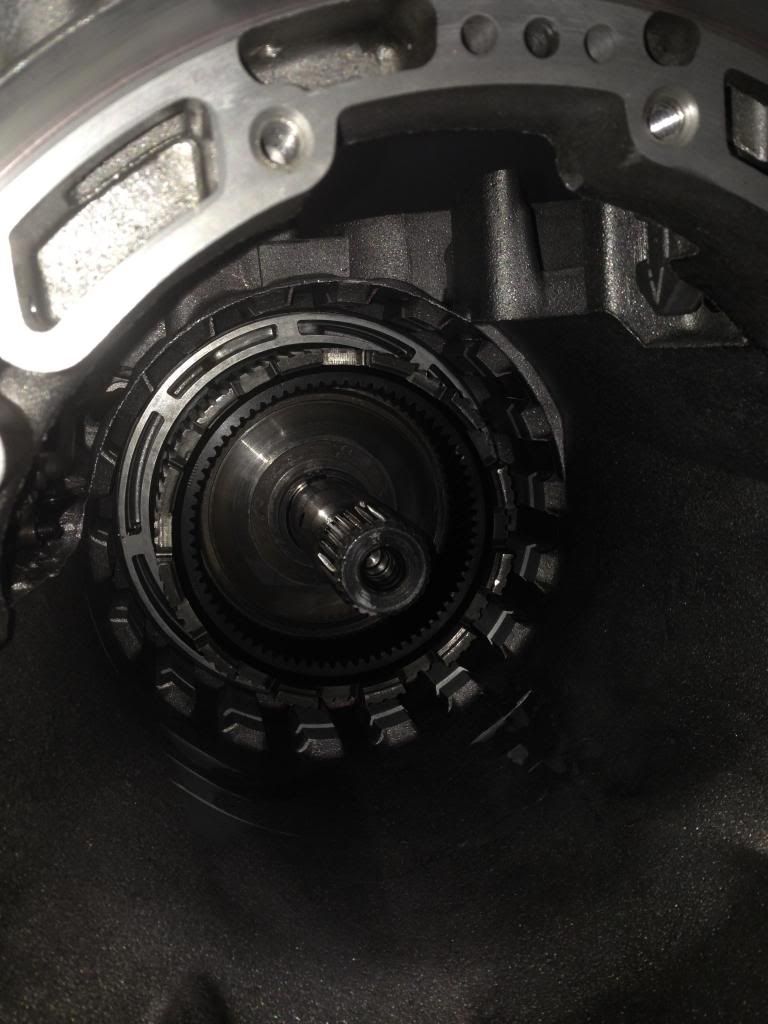
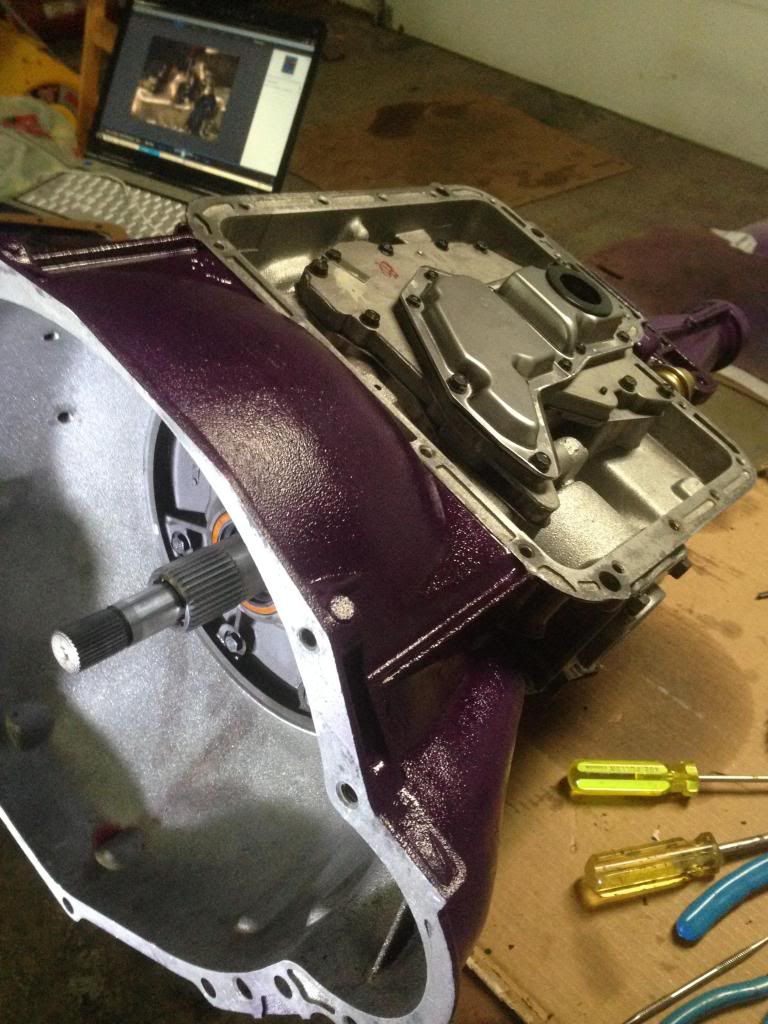
The valve body was installed and the proper bolts were tightened down to 100 inch-lbs.

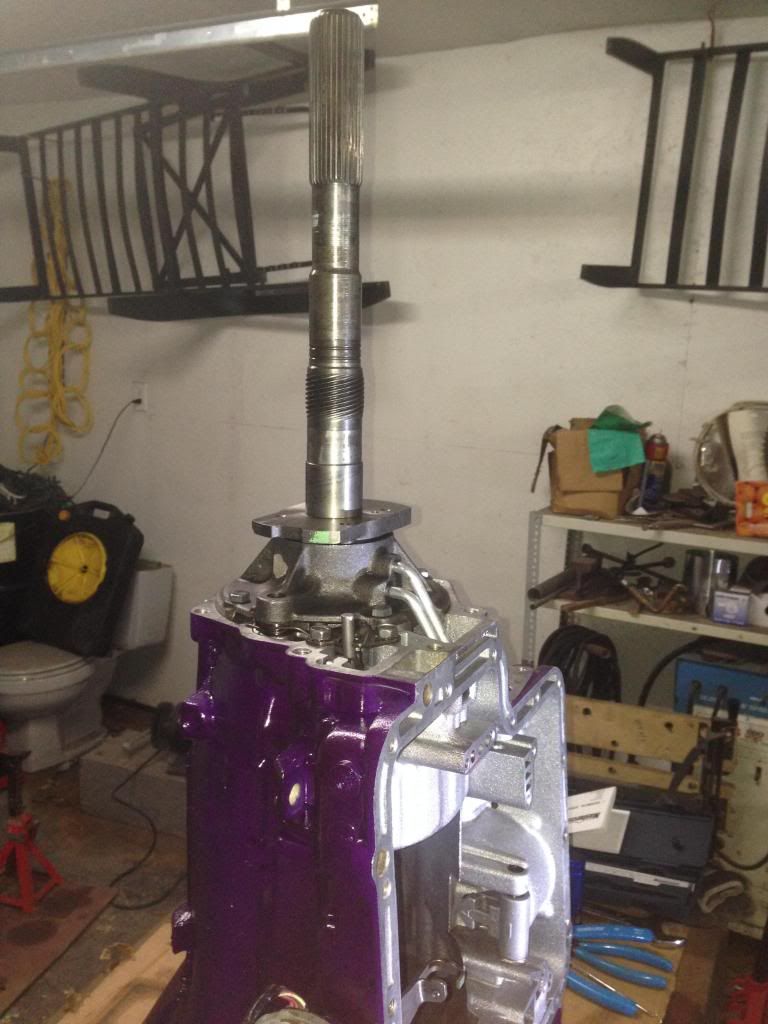
Smaller input shaft installed.

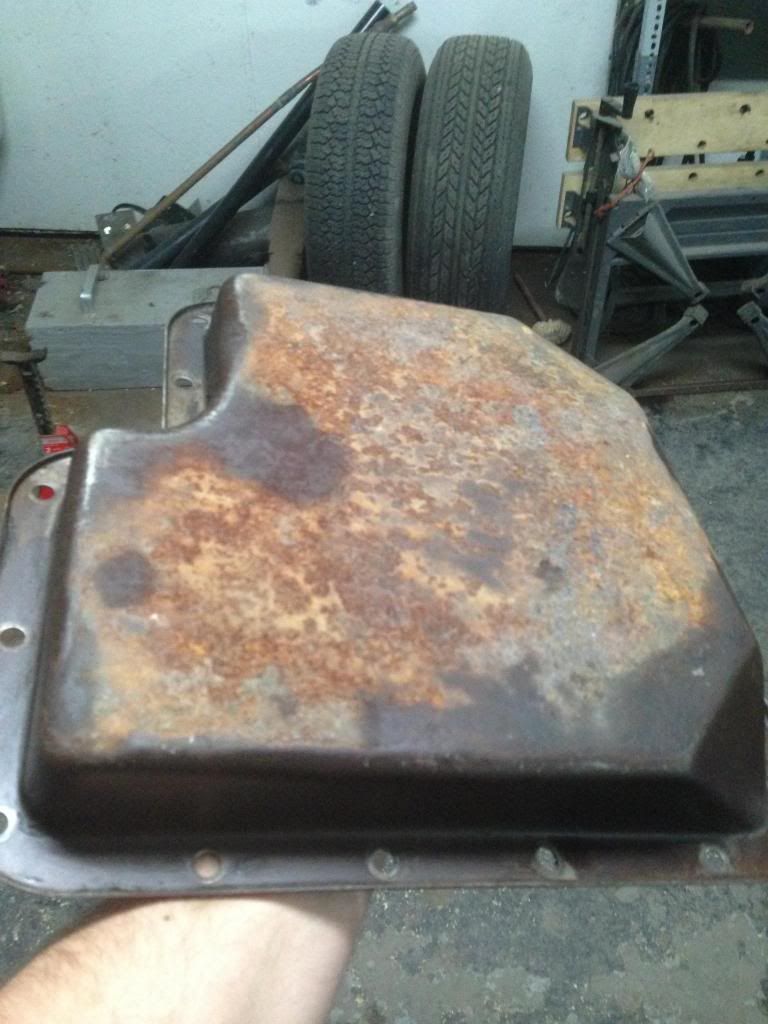
Last thing was the pan. The bottom was washed a few times and it is still quite rusty. PERFECT for POR-15.
When I get around to it, I will gently wire wheel the bottom of the pan to knock down some of the surface rust, then I will Metal-Ready it and then finally it will get hit with 2 coats of POR-15.

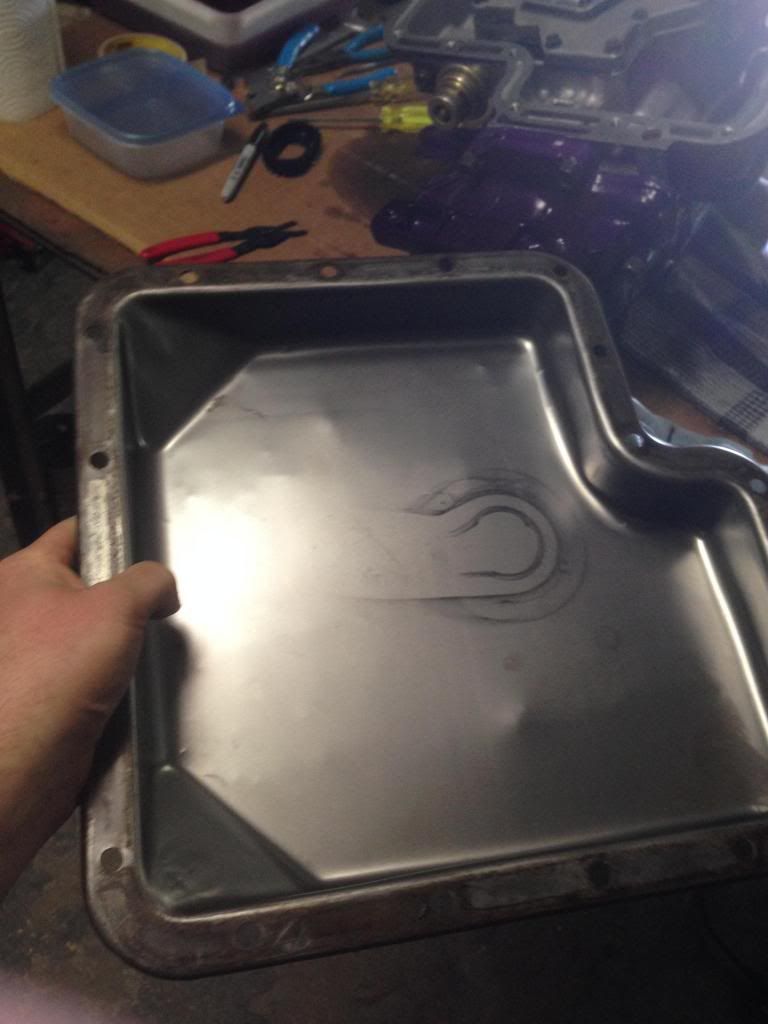
Inside of the pan was cleaned out about 3 times to reduce the amount of grit going back into the transmission. Gotta remember to pick up some small magnets to put in the bottom of the pan corners so that it catches any other metal flakes that still come through the trans.

Pan installed with just a few bolts.

The final product.


The extension housing needs some paint touch-ups, but those will come later when I come back to POR-15 the pan and fully install it.
That's the end of this build for now folks.
Hope you've enjoyed my recent updates. I know I did.
For what I spent on tools and the kit from Oregon Performance Transmission, I would say that it was worth 100X more than having it rebuilt by a shop.
Hopefully more progress to come within a month or so.
#124
03-08-2014, 12:59 AM
My C4 rebuild kit came from Oregon Performance Transmission as well. I got the "Stage 1" rebuild kit with the Kevlar bands and fancy clutches and all that. It really is a quality kit and seems to be able to handle abuse just fine. You should be happy with it!
I unfortunately made the mistake of not knowing that the truck C4 was different. It's bigger in the body and shorter in the tail, so I had to contact a local tranny to get the proper output seal and the proper sized clutches, but I got it all together in the end.
I unfortunately made the mistake of not knowing that the truck C4 was different. It's bigger in the body and shorter in the tail, so I had to contact a local tranny to get the proper output seal and the proper sized clutches, but I got it all together in the end.
#125
03-08-2014, 09:21 AM
My C4 rebuild kit came from Oregon Performance Transmission as well. I got the "Stage 1" rebuild kit with the Kevlar bands and fancy clutches and all that. It really is a quality kit and seems to be able to handle abuse just fine. You should be happy with it! I unfortunately made the mistake of not knowing that the truck C4 was different. It's bigger in the body and shorter in the tail, so I had to contact a local tranny to get the proper output seal and the proper sized clutches, but I got it all together in the end.
Good to know cause if I find this C6 to be too much of a pig on fuel, and the AOD doesn't work out, a C4 is option number 3!

#127
03-09-2014, 04:16 PM
You know... I have no idea what's next on the list. I've been researching and reading on how to do this transmission for so long that I don't really know what the next step is haha.
What I would really love to do is take all the parts off of the truck and completely POR-15 the frame and fixed the cab mounts so they're all good to go...
I'd also like to finish sanding down the underside of the cab and POR-15 it as well so I don't have rust issues in the near future...
But what I really think I'm going to end up doing next, is I'll likely try and get my truck rolling under it's own power without any assistance from me and 2 other friends pushing it
I would love to get that 302 engine that's just sitting into the truck so I can tear-down the 351 and work on fixing it's problems but am still able to maneuver the truck around under it's own power.
Within a year or so I should be in the market to buy a place of my own, so I'll need the truck to be able to move from A to B without a tow.
To be honest, I have a lot of options for where I can go from here, but it's all dependent on how much my work will keep me out of town this summer. If I'm at home on the weekends, I'll be trying to fix up the frame and painting the under-side of the cab so I don't see the horrid rust build up and tear away my nice cab.
Otherwise, I'll just be trying out that 302 under the hood and getting the truck to run right.
#129
12-14-2014, 10:22 PM
#130
06-30-2015, 02:29 PM
Reviving this build thread.
Selling my motorcycle (getting tired of $$$$$ to licence it).... which means more time to get back at this build.
Still have a few things left to do on the trans to get it to where I want it to be, but at least I'm thinking on the build (it's a start).
Remembering back to 2.5 years ago....
I've got a fried wire in my dash... Here's the wire.
It looks like it's a Red wire with a green stripe - MUCH thicker than the rest of the wires around it.

What does this wire go to and why would it be literally burning itself up?
From the wiring diagrams on Fordification.com, it looks to be an ignition wire. This could explain why the truck will only start if I directly hook power from the dizzy to the battery (won't start with keys).
This is where I'm starting (again) with my build boys... I could use a hand with this wiring stuff!
Selling my motorcycle (getting tired of $$$$$ to licence it).... which means more time to get back at this build.
Still have a few things left to do on the trans to get it to where I want it to be, but at least I'm thinking on the build (it's a start).
Remembering back to 2.5 years ago....
I've got a fried wire in my dash... Here's the wire.
It looks like it's a Red wire with a green stripe - MUCH thicker than the rest of the wires around it.
What does this wire go to and why would it be literally burning itself up?
From the wiring diagrams on Fordification.com, it looks to be an ignition wire. This could explain why the truck will only start if I directly hook power from the dizzy to the battery (won't start with keys).
This is where I'm starting (again) with my build boys... I could use a hand with this wiring stuff!
#131
06-30-2015, 07:58 PM
Red+green is the wire from the ignition switch to the coil. It's a resistor wire that will get slightly warm (but not like that) in normal operation and reduces the operating voltage at the coil to ~9V instead of 12. Sometimes a problem like that comes up when a previous owner hooks up to that wire as a +12V source under the hood (e.g. for an electric choke) and pulls too much current through it - then it'll overheat and burn up.
#133
07-01-2015, 07:57 AM
Yes, the resistor wire to the coil is sized to provide around 9V to the coil during normal engine operation. If you overload it by trying to pull more current through it for something other than the coil as well, you'll end up with a situation like that pictured above.
What are you looking to power with 12V switched? Generally speaking, the best practice is to run a new fuse from the switched bus on the fuse panel, but there are other options (piggy-backing on existing circuits) depending on the required current draw...
What are you looking to power with 12V switched? Generally speaking, the best practice is to run a new fuse from the switched bus on the fuse panel, but there are other options (piggy-backing on existing circuits) depending on the required current draw...
#134
07-01-2015, 06:56 PM
#135
07-01-2015, 09:59 PM