
New EX and New forum user!
#1
 06-29-2012, 10:39 AM


Join Date: Jun 2012
Location: Katy, TX
Posts: 15
Likes: 0
Received 0 Likes
on
0 Posts
New EX and New forum user!
Well guys just wanted to drop a hello! I just purchased a 2000 EX 6.8L 4WD, has 180k on it. I was looking for a diesel 4WD but got killer cash deal on the gasser. <O </O
</O
<O</O
Anyway during the test drive I could tell the truck needed some serious attention to the front end. Steering play, tire wobble, bad ball joints, tie rods, and the brakes and rotors are trash. The front right side hub is squeaking at low speeds also.<O</O
<O</O
I found this forum before I purchased the truck and started reading up on common problems and fixes.<O</O
<O</O
So the day after I get her home I ordered the following:<O</O
<O</O
1. Brake rotors all the way around � Got off EBay for $175 shipped all four. <O</O
(at that price even if they take a crap in 5k ill buy some new ones)<O</O
2. Hawk LTS brake pads for front and rear - $150<O</O
3. Billstien Heavy Duty Shocks -4 $310 shipped<O</O
4. Rancho 9000 steering stabilizer - $70 shipped from Summit<O</O
5. OEM Knockoff Ball joints upper and lower - $150 (Guess we will find out)<O</O
6. Front 4wd hubs w/ABS - $135 shipped from eBay (same here, life span ?)<O</O
<O</O
So for $990 I got all the parts I need to fix up my suspension. The tires on the truck are also shot, uneven wear from not rotating, all four are trash. Good tread left but we all know that�s not what makes a tire. New tires will be bought after the suspension repairs are finished. Hate to screw up $1000 worth of tires with a wacked front end. Plan to make the repairs on July 4<SUP>th</SUP> seeing as I have the day off anyway.<O</O
<O</O
I have some rust around the upper windshield corners I need to address ASAP, also in the rain gutters running the length of the roof! There was also some rust on the roof in the rear by the lift gate and near the front by the passenger front door. I sanded the rear section down removing all the rust, best I could. Then I painted it with some white primer to help stop the decay until I can get the roof refinished properly. I want to address the rust near the windshield corners ASAP so I can stop the decay from going any further. I think I will sand the best I can to remove loose rust and debris then treat with a rust reformer, prime, & paint. I plan to have the truck repainted in the future, going to stick with the stock white, tan two tone and the tan pin striping, when I get this done I will have the body shop fix the rust issues professionally.<O</O
<O</O
Besides that there are some small issues here and there, like the rear lift gate wont lock, opens fine with the new struts, but controller mechanism behind lift gate is stuck so no lock/unlock. I lubed it up really good last night after rebuilding the actuator, will reinstall actuator and try to free it up tonight. All other actuators are working fine.<O</O
<O</O
4WD is not working, the front locking hubs do not have the Lock/Auto designator text on them, but the owner�s manual shows turning CW puts them in Auto mode. I turn the ESOF switch on the dash while cruising around 15-20mph and no light on dash. I locked them in manually and then tried it same thing. I got in a big open parking lot rolled the windows down and made sharp turns, no luck, no wheel skip, so no 4WD. Going to diagnose the system this weekend. I plan to first, CHECK FUSE DUH! Then secondly check transfer case switching motor. Will be assessing front hubs and o-rings on the hubs when I replace them next week.<O</O
<O</O
Great forum guys lots of great info and thanks for sharing. I plan to contribute as I go.<O</O
<O</O
-TexasEX2K<O</O
</O<O
</OAnyway during the test drive I could tell the truck needed some serious attention to the front end. Steering play, tire wobble, bad ball joints, tie rods, and the brakes and rotors are trash. The front right side hub is squeaking at low speeds also.<O
</O<O
</OI found this forum before I purchased the truck and started reading up on common problems and fixes.<O
</O<O
</OSo the day after I get her home I ordered the following:<O
</O<O
</O1. Brake rotors all the way around � Got off EBay for $175 shipped all four. <O
</O(at that price even if they take a crap in 5k ill buy some new ones)<O
</O2. Hawk LTS brake pads for front and rear - $150<O
</O3. Billstien Heavy Duty Shocks -4 $310 shipped<O
</O4. Rancho 9000 steering stabilizer - $70 shipped from Summit<O
</O5. OEM Knockoff Ball joints upper and lower - $150 (Guess we will find out)<O
</O6. Front 4wd hubs w/ABS - $135 shipped from eBay (same here, life span ?)<O
</O<O
</OSo for $990 I got all the parts I need to fix up my suspension. The tires on the truck are also shot, uneven wear from not rotating, all four are trash. Good tread left but we all know that�s not what makes a tire. New tires will be bought after the suspension repairs are finished. Hate to screw up $1000 worth of tires with a wacked front end. Plan to make the repairs on July 4<SUP>th</SUP> seeing as I have the day off anyway.<O
</O<O
</OI have some rust around the upper windshield corners I need to address ASAP, also in the rain gutters running the length of the roof! There was also some rust on the roof in the rear by the lift gate and near the front by the passenger front door. I sanded the rear section down removing all the rust, best I could. Then I painted it with some white primer to help stop the decay until I can get the roof refinished properly. I want to address the rust near the windshield corners ASAP so I can stop the decay from going any further. I think I will sand the best I can to remove loose rust and debris then treat with a rust reformer, prime, & paint. I plan to have the truck repainted in the future, going to stick with the stock white, tan two tone and the tan pin striping, when I get this done I will have the body shop fix the rust issues professionally.<O
</O<O
</OBesides that there are some small issues here and there, like the rear lift gate wont lock, opens fine with the new struts, but controller mechanism behind lift gate is stuck so no lock/unlock. I lubed it up really good last night after rebuilding the actuator, will reinstall actuator and try to free it up tonight. All other actuators are working fine.<O
</O<O
</O4WD is not working, the front locking hubs do not have the Lock/Auto designator text on them, but the owner�s manual shows turning CW puts them in Auto mode. I turn the ESOF switch on the dash while cruising around 15-20mph and no light on dash. I locked them in manually and then tried it same thing. I got in a big open parking lot rolled the windows down and made sharp turns, no luck, no wheel skip, so no 4WD. Going to diagnose the system this weekend. I plan to first, CHECK FUSE DUH! Then secondly check transfer case switching motor. Will be assessing front hubs and o-rings on the hubs when I replace them next week.<O
</O<O
</OGreat forum guys lots of great info and thanks for sharing. I plan to contribute as I go.<O
</O<O
</O-TexasEX2K<O
</O
#2
06-29-2012, 11:38 AM

Pics or it didn't happen
Try something quick 'n easy for that ESOF. Take a BFH (big hammer) and crawl up under the X
The shift motor is a black solenoid about size of 12oz coke can
Give it some love taps
That solenoid gets moisture in it and corrodes into place. Love taps knock the stuff loose usually and let it do it's thing. Been a ESOF issue for Fords since 1992.
#4
06-29-2012, 01:18 PM
Join Date: Jun 2012
Location: Katy, TX
Posts: 15
Likes: 0
Received 0 Likes
on
0 Posts


#7
06-29-2012, 07:28 PM

Trending Topics
#8
07-02-2012, 09:10 AM
Join Date: Jun 2012
Location: Katy, TX
Posts: 15
Likes: 0
Received 0 Likes
on
0 Posts
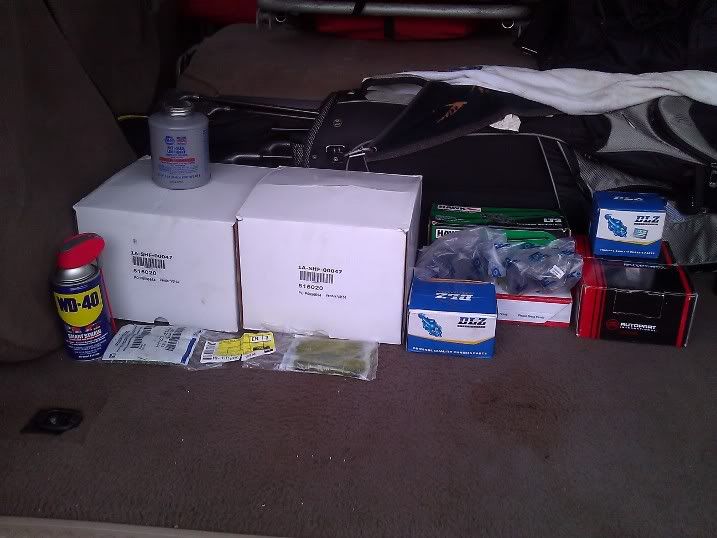
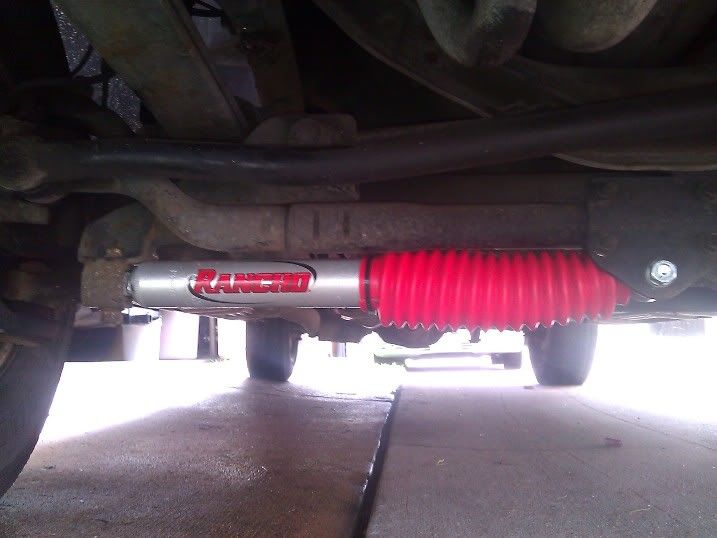
Still waiting on the shocks and rotors to show up, but all my other parts came in. I already installed the new Rancho steering stabilizer, took about 15 minutes. Tip: When doing the steering stabilizer if you turn the wheels all the way to the left it allows you easy access to the bolt holding the stock one to the spindle. Before you attach the new bolt for the other end, turn the wheels all the way to the right, allowing you an easy line up without having to fight the dampener out to the bolt hole location.
Ready for the rest of the parts to get here, still waiting on shocks and rotors. I hope they make it by Wednesday since I plan to install everything on that day. I went ahead and went to the dealership to get new studs for the back side of the hub since I read that people were having a problem removing these for re-use. If I can remove my existing ones with ease well then great I will re-use them, but if not I have new ones ready to go. The damn bolts were like $8 a piece, so $70 and some change for 8 new ones.
Pics of the parts stacking up in the rear of the X & a shot of the new steering stabilizer:
#10
07-02-2012, 09:56 AM
Join Date: Jun 2012
Location: Katy, TX
Posts: 15
Likes: 0
Received 0 Likes
on
0 Posts
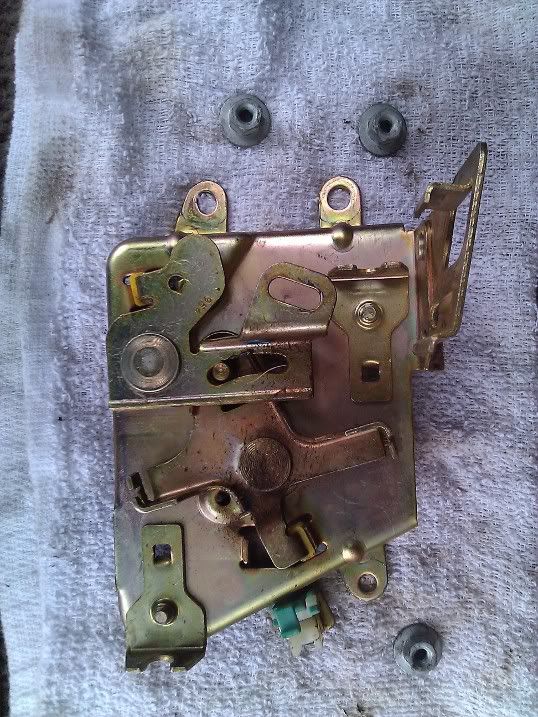
Ok I also got to take care of my liftgate not locking.
I pulled the controller out to give it a good clean/lube and rebuilt the actuator even though I think it was still working.
I took a few pics a video of the actuator doing it's thing.
Here you can see how filthy it was, reason it was stuck in place.
This shot shows it after a good soaking in WD40 and a good wipe down with a rag and some compressed air.
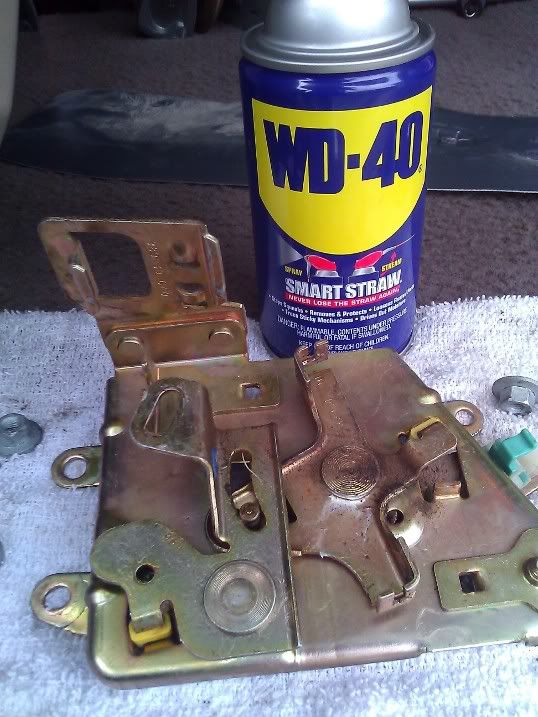
Here it is with the rebuilt actuator ready to go back in truck.

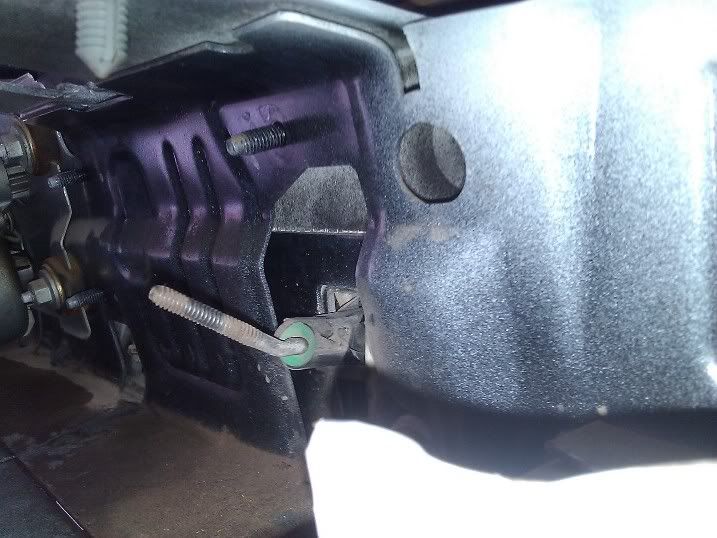
Here you can see the latch rod and the three studs used to hold the controller in place. TIP: when you go to put the controller back in make sure this little rod is pushed back out of the way.
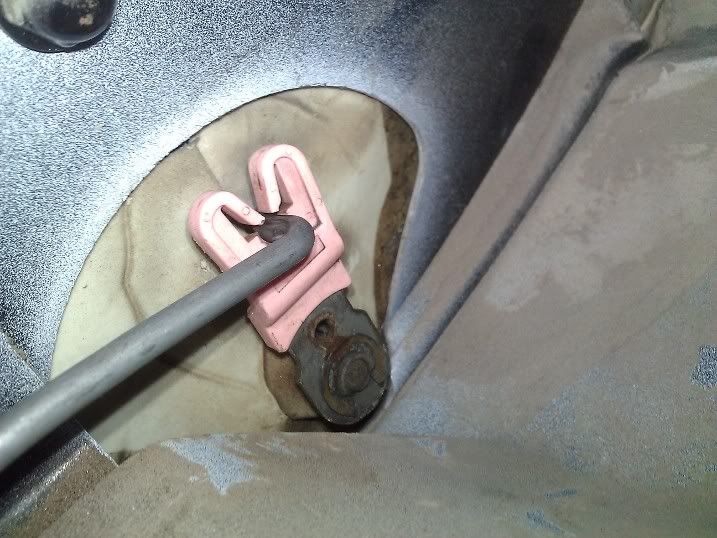
In this shot you can see the locking rod connected to the key tumbler, i found it easier to remove the small c-clip instead of chancing breaking one of the plastic tabs on that pink plastic thing.
So heres a short video of the actuator and controller test, working like new!

Till next time!
I pulled the controller out to give it a good clean/lube and rebuilt the actuator even though I think it was still working.
I took a few pics a video of the actuator doing it's thing.
Here you can see how filthy it was, reason it was stuck in place.
This shot shows it after a good soaking in WD40 and a good wipe down with a rag and some compressed air.
Here it is with the rebuilt actuator ready to go back in truck.
Here you can see the latch rod and the three studs used to hold the controller in place. TIP: when you go to put the controller back in make sure this little rod is pushed back out of the way.
In this shot you can see the locking rod connected to the key tumbler, i found it easier to remove the small c-clip instead of chancing breaking one of the plastic tabs on that pink plastic thing.
So heres a short video of the actuator and controller test, working like new!
Till next time!

#12
07-02-2012, 10:08 AM

#13
07-02-2012, 10:18 AM
Join Date: Jun 2012
Location: Katy, TX
Posts: 15
Likes: 0
Received 0 Likes
on
0 Posts
I will update later this week to the feel of the truck after the front end rebuild, and alignment. Not to mention the tires are still *****, new ones coming as soon as I complete the front suspension.
Thinking of doing the front spring upgrade also.
#14
07-02-2012, 12:26 PM
Senior User
Join Date: Dec 2004
Location: sw mich
Posts: 451
Likes: 0
Received 0 Likes
on
0 Posts
Don't forget Knuckle Seals and axles seals. You may also want to replace the axle u-joints while you have that front end apart.
https://www.ford-trucks.com/forums/3...ll-joints.html
https://www.ford-trucks.com/forums/3...ll-joints.html
#15
07-05-2012, 07:41 AM
Join Date: Jun 2012
Location: Katy, TX
Posts: 15
Likes: 0
Received 0 Likes
on
0 Posts
New Ball Joints, Hubs, Shocks, Rotors, & Pads!
Started the install/teardown yesterday morning at 9:00am. Took 1.5hrs to teardown both front sides to the axle. I guess I got lucky, after reading some of the 10-12 hr jobs on here for ball joint replacement I was expecting the worst.
After further inspection, the last shop or person who worked on the front end put the plastic thrust washers (ones with the grooves) behind the axle spindle seal! WTF? Also the hexagonal thrust washer was missing from drivers side. I checked around for it at local auto parts houses and no luck, guess I have to get from stealership!
Vacum lines to hubs were trash. Passenger side had moog ball joints, both totally gone! The driver side wasn't as bad but ball joints were definelty on there way out!
Got it all put back together minus the Hex thrust washer on driver side. (Will get today replace this weekend). WOW what a difference. Truck drives and handles like new now. Still have steering wander but not as bad as it was. The billstien shocks are amazing, feels tight and a real joy to ride in now.
I didn't take any pics of the install I figured that horse had been beat here enough.
I do have a tip to those doing this though!
***TIP***: When reasmbling, make sure dust shields are oriented correctly!
I had to tear down the drivers side again becuase I got the damn shield 180 out! Oh welllive and learn, it's amazing how fast you can re-do it when you have all the tools right there and know exactly what your doing. Had it tore down and put back in like 10 mins!
All in all I would have to say what a day, wrapped it all up and got everythinbg cleaned up in garage just in time to shower and go BBQ with friends for the 4th! Took me a total of 6 hrs to complete, air tools are your friend, just use your torque wrench when you put it all back together.
Have a great weekend!

