Dad's ZF5 Swap


#572
 10-13-2012, 08:07 PM
Success!?
Got it all back together today and took it for a spin. The clutch pedal pressure is dramatically better, much easier to handle and no need for even more leverage. Makes it much easier to drive and a lot easier to find the friction point so you can ease into the gear now where before it was all-in.
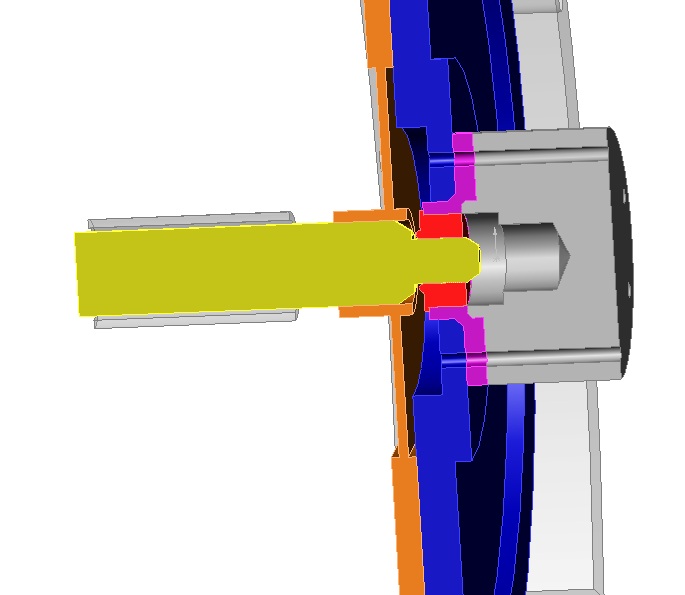
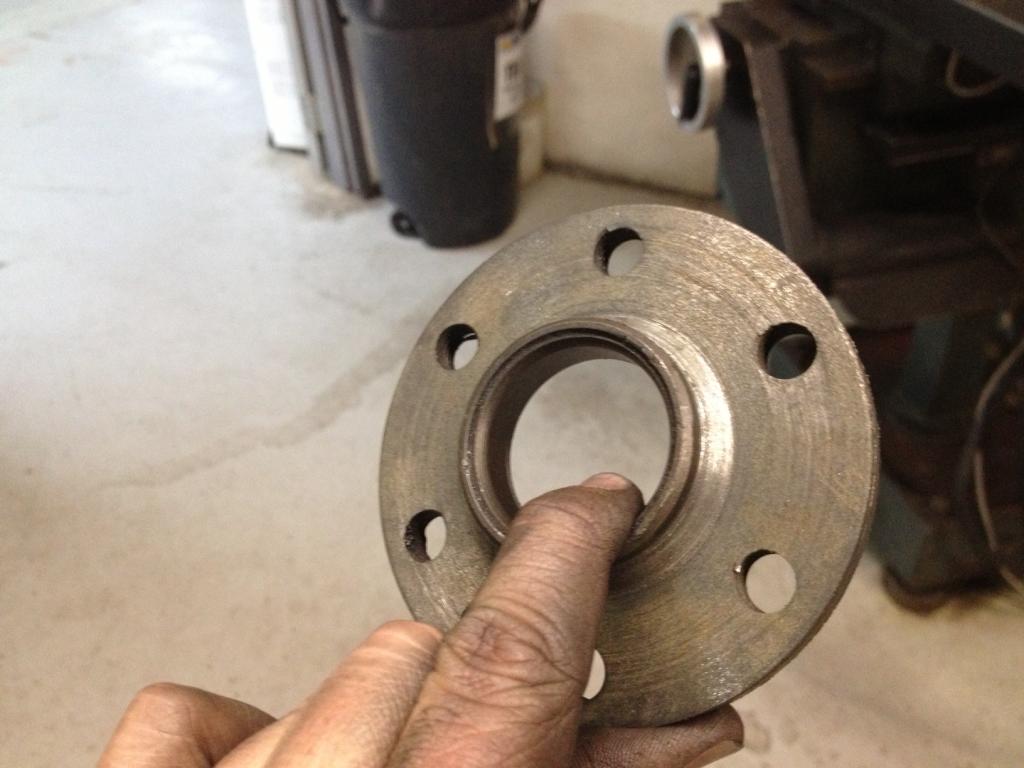
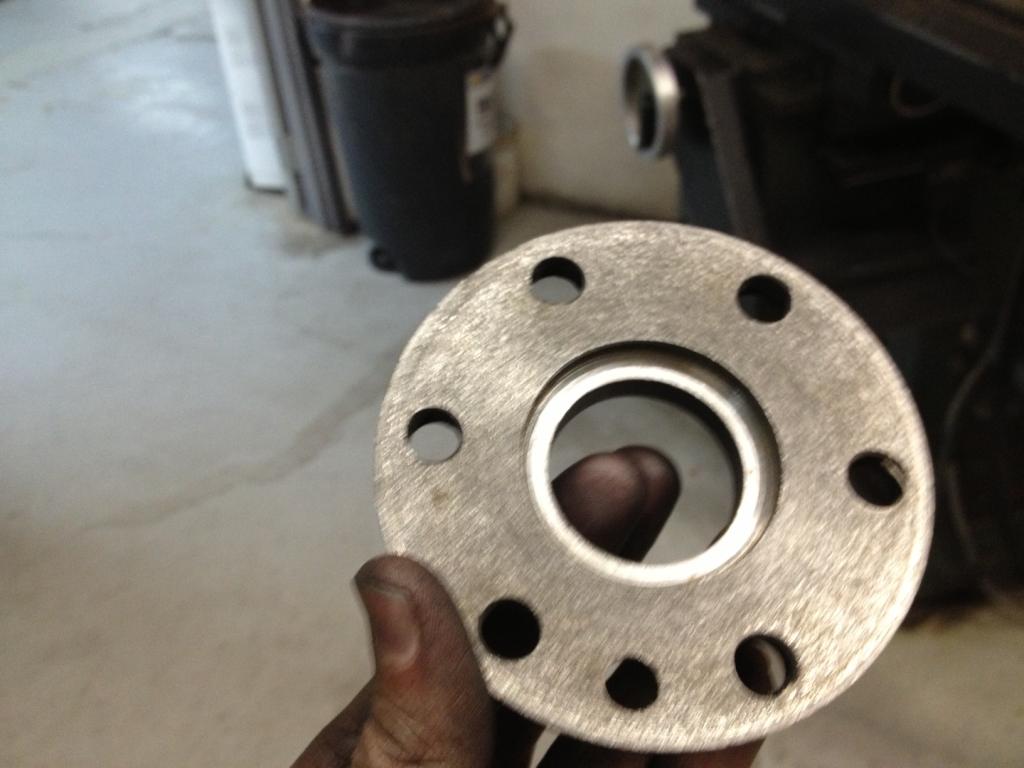
However, when I first pulled out on the drive there was a squeal, kind of like a belt, when the pedal was part way in/out. I'm guessing that the noise was the fingers of the pressure plate wearing into the edge of the throwout bearing. I copied the picture from yesterday to show what I'm talking about, and you can see how the fingers come right to the edge when the clutch is fully engaged, so would actually extend into the center when you push the clutch pedal down. But, as there were no marks on the input shaft they don't come in that far. And, my theory is that when the bearing was new and stiff it was easier for the fingers to slip than for the bearing to turn. But, the noise has gone away and the clutch action is smooth. Anyone have other theories?
I'll drive it for a few days and then take a peek inside the bell housing to see what I can see. But, comments/thoughts would be appreciated.
#573
10-13-2012, 08:24 PM

Elder User
Join Date: Jan 2012
Location: Norman, Ar
Posts: 698
Likes: 0
Received 0 Likes
on
0 Posts
[quote=Gary Lewis;12369635]Got it all back together today and took it for a spin. The clutch pedal pressure is dramatically better, much easier to handle and no need for even more leverage. Makes it much easier to drive and a lot easier to find the friction point so you can ease into the gear now where before it was all-in.
However, when I first pulled out on the drive there was a squeal, kind of like a belt, when the pedal was part way in/out. I'm guessing that the noise was the fingers of the pressure plate wearing into the edge of the throwout bearing. I copied the picture from yesterday to show what I'm talking about, and you can see how the fingers come right to the edge when the clutch is fully engaged, so would actually extend into the center when you push the clutch pedal down. But, as there were no marks on the input shaft they don't come in that far. And, my theory is that when the bearing was new and stiff it was easier for the fingers to slip than for the bearing to turn. But, the noise has gone away and the clutch action is smooth. Anyone have other theories?
I'll drive it for a few days and then take a peek inside the bell housing to see what I can see. But, comments/thoughts would be appreciated.
Your theory sounds good...Maybe that or the pressure plate had a little surface rust from the humidity and the clutch disc sanded it for you...
I say that as it only squealed when you were easing out on the clutch.
No rattling,grinding, etc. AND the noise disapeared....
BTW,,,Exhaust leaks??? Trav...
#575
11-23-2012, 12:12 AM

Senior User
Join Date: Jan 2004
Location: denver
Posts: 367
Likes: 0
Received 0 Likes
on
0 Posts
I have been tracking this post for a while. I am in the process of doing the exact same swap. I almost feel like a thief, since Gary has done so much work, and I have copied a lot of it. I even ordered the exact same flywheel bolts. (there are still some left!!) however, I did do a solidworks model of the whole clutch/flywheel/adapter/etc., and basically determined that gary's plan for the spacer is about right. A few things I am doing different... I plan on using the hydraulic clutch. I am thinking I will get a clutch kit for an 89 F250 with a ZF, and drill my 400 flywheel to bolt up the pressure plate.
For the adapter, I had a 5.0 and 351M crank that I sabatoged to make the dummy crank for the lathe, and the adapter itself.
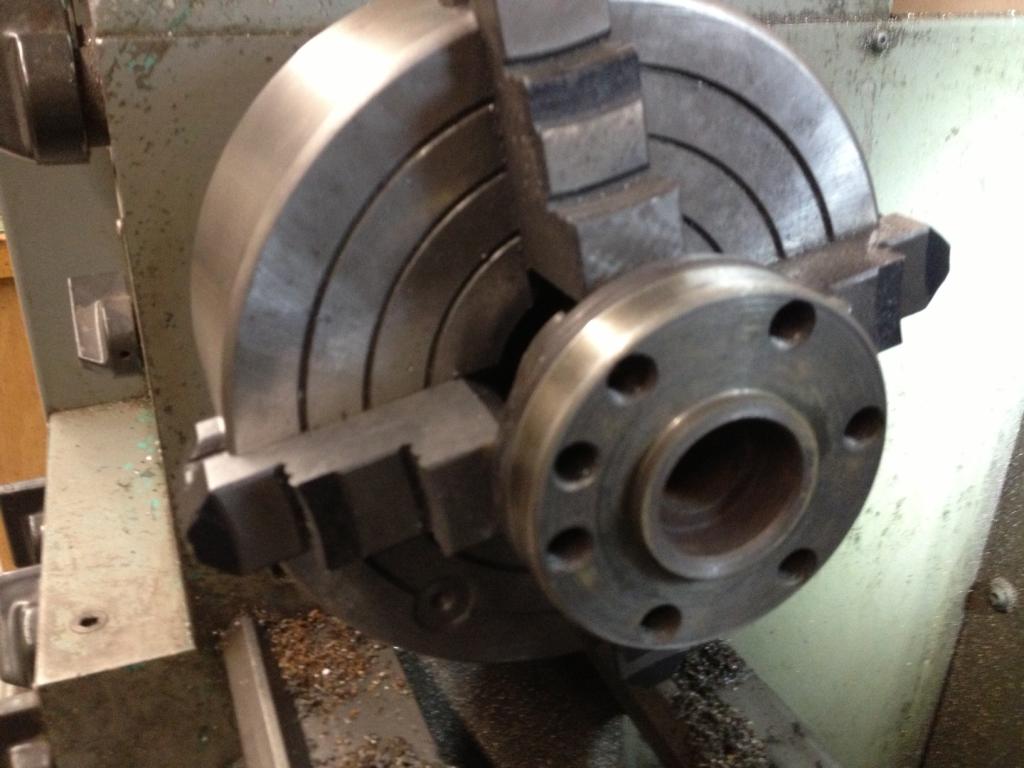
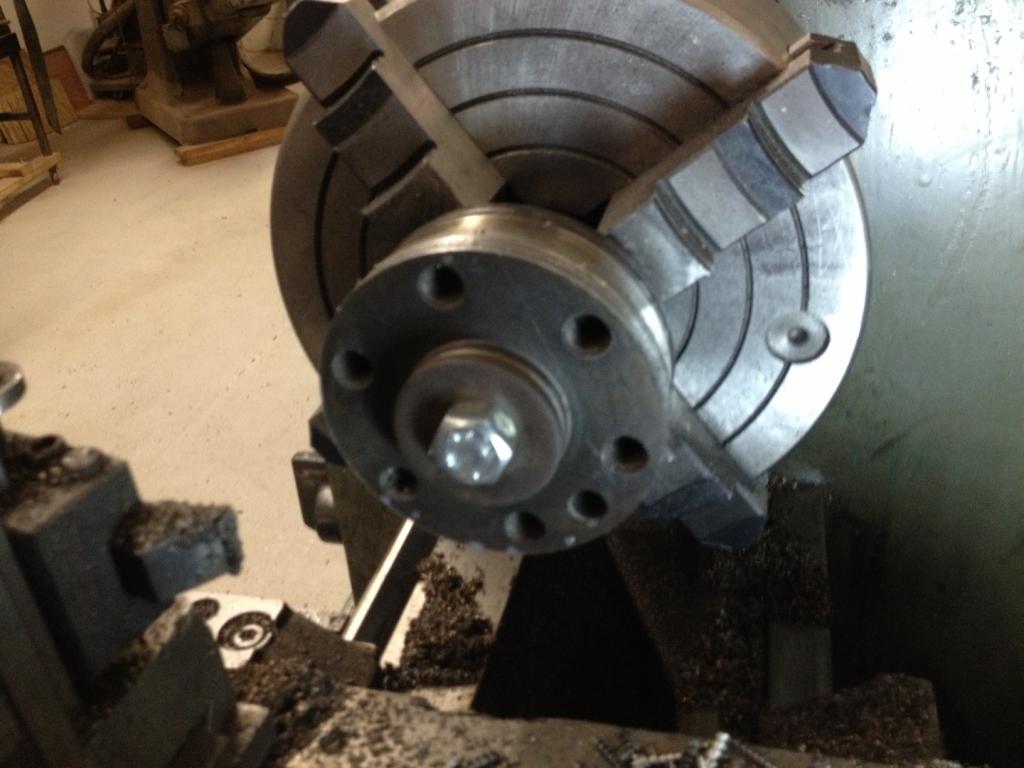
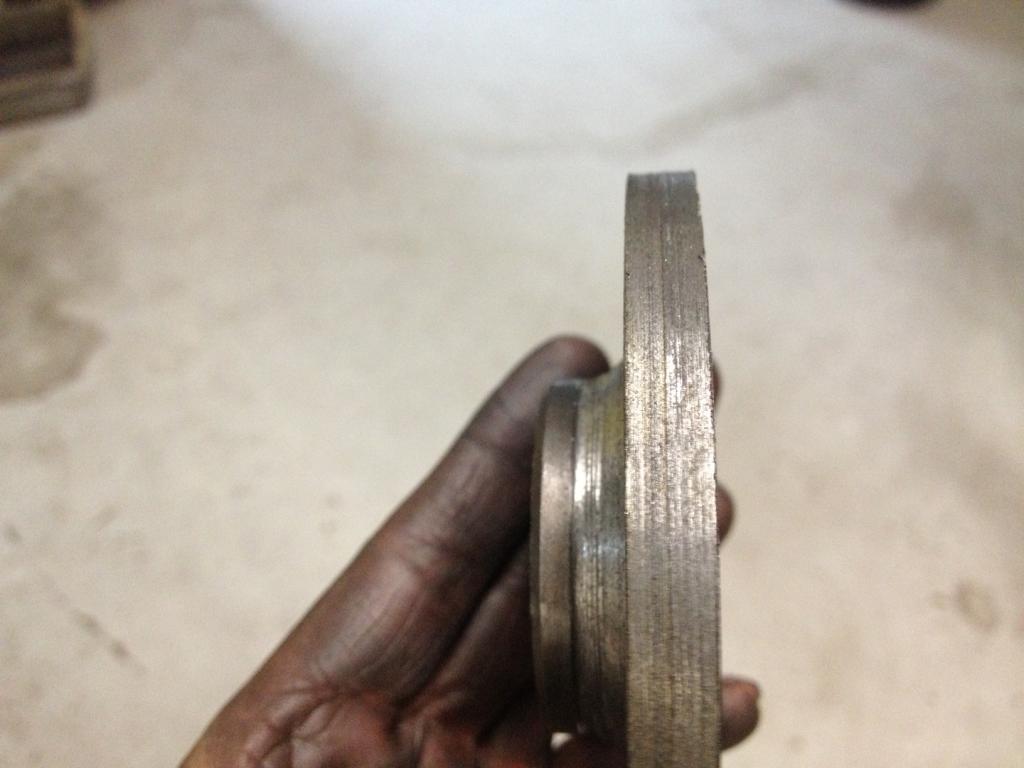
For the adapter, I had a 5.0 and 351M crank that I sabatoged to make the dummy crank for the lathe, and the adapter itself.
Last edited by bigperm2; 11-23-2012 at 12:14 AM. Reason: image coding
#576
11-23-2012, 07:45 AM
Your aren't stealing, but shopping smartly. That's a big reason why I did the thread in the first place. That and the excellent help I got from the others.
And, that leads me to a question re the faux hub and your use of a hub from another crank. The main reason for doing that step was to ensure the part is exactly square with the lathe's chuck. For that reason the faux hub wasn't removed from the chuck after making it. So, are you taking a trueing cut on the hub after chucking it up? Otherwise there is no assurance it will be true with the chuck - unless you use a dial test indicator on it and play with it until it is dead-on. Or, did I misunderstand?
Anyway, I like the Solidworks drawing. Cool!
#577
11-23-2012, 05:49 PM
Senior User
Join Date: Jan 2004
Location: denver
Posts: 367
Likes: 0
Received 0 Likes
on
0 Posts
Gary, the truing cut is exactly what I did. And if I ever have to build another one, I will use the same process. I did find that it probably would have been perfect. As soon as the tool hit the faux hub, it contacted all the way around,but I took a couple thousandths off anyway. Did you use a 3 jaw or 4 jaw chuck? I found that I could get the faux hub and spacer almost perfectly concentric with the 4 jaw chuck. I love the lathe, I need to buy one someday
#578
11-23-2012, 06:03 PM
Good, I'm glad that you used a truing cut since any runout there is much larger at the outside of the flywheel. My runout at the edge of the flywheel was .005", which is well within the .010" max spec.
I used a 3-jaw chuck, but it has very little runout itself. And, by truing the hub you negate the fore/aft runout, which is the critical one.
I used a 3-jaw chuck, but it has very little runout itself. And, by truing the hub you negate the fore/aft runout, which is the critical one.
#580
12-08-2012, 06:59 PM
Finishing Up
Ok, it is about time to finish this thread up. Some time ago I think I said I needed to do three things to finish up. Here they are and here's the status:
I'll let you know how all this goes, but the end is in sight!
- RP Synchromax: I ran O'Reilly's ATF in the tranny for ~1500 miles and now I'm going to put Royal Purple's Synchromax in with the hope that it'll quiet the tranny, protect the synchros, improve shifting, and maybe even help on the MPG. I ordered it in from Amazon and also picked up gaskets for the PTO covers as one of those was leaking. Unfortunately the guy at O'Reilly's said I needed Felpro #55377 so that's what they ordered in. As it turns out they are the 8-bolt version and I need the 6-bolt variety, which is #55380. So, those are on order and won't be in until Tuesday, meaning the truck is down until then.
- Throwout bearing: You'll probably remember that the throwout bearing that I used initially was eaten up by the fingers on the pressure plate. I replaced it with one from a from a Dodge, as shown in a previous post. I checked today and it looks fine. Problem solved.
- Backup lights: Last, I need to hook up the backup lights. In fact, what I'd like to do is to put a light in the unused slot left of the left turn signal indicator so I can see when it is truly in reverse. So, today I did a temp connection and the lights didn't work. Hmmm, maybe it doesn't trigger the switch if the lever doesn't go a long way into reverse, and my Reverse synchros are bad so it doesn't go in very well. But, I pulled the switch to check and - it is bad. No problem, I have another. Now all I have to do is to make up a short harness to connect to the truck's harness. It won't be pretty, but I have the connectors so it shouldn't be a problem.
I'll let you know how all this goes, but the end is in sight!
#581
12-09-2012, 03:37 PM
I used part of an existing harness and made a harness that connects the main wiring to the switch in the tranny. And, the backup lights work, albeit dimly. I'm sure that"s as bright as they can be, but it looks just adequate to tell an observant driver you are backing up.
Do the later model lenses, which RW says will fit pretty well, provide better backup lights? Would LED bulbs do a better job? It is kinda scary thinking I'll have a load on the truck that will block my vision through the main mirror and I'll have to back up relying on the side mirrors and the feeble light coming from those lenses. I guess the Murano with the superb backup camera has spoiled me. (No, I don't want to add one of those to the truck.)
Do the later model lenses, which RW says will fit pretty well, provide better backup lights? Would LED bulbs do a better job? It is kinda scary thinking I'll have a load on the truck that will block my vision through the main mirror and I'll have to back up relying on the side mirrors and the feeble light coming from those lenses. I guess the Murano with the superb backup camera has spoiled me. (No, I don't want to add one of those to the truck.)
#582
12-09-2012, 04:33 PM

#583
12-09-2012, 08:33 PM
#584
12-09-2012, 08:47 PM
Posting Guru
#585
12-09-2012, 09:27 PM
Sam - I don't think there's much voltage drop to back there, although I could check. However, going with LED's will cure any voltage problem since there will be a significant reduction in current. And, LED's should also be brighter - if I get the right ones. Looking at Amazon there is a wide range of them.
Jim - Do your LED's all point to the rear or do you have ones on the sides as well? I'm thinking the best way is something like this one:

Instead of ones like this:

Jim - Do your LED's all point to the rear or do you have ones on the sides as well? I'm thinking the best way is something like this one:
Instead of ones like this:

