1970 F250 4x4 Cummins Conversion Build Thread - Lots of Pics!
#121
 12-11-2012, 11:43 PM

Join Date: Oct 2011
Location: Willard
Posts: 207
Likes: 0
Received 0 Likes
on
0 Posts

#122
01-05-2013, 10:53 PM
Logistics Pro
#123
01-06-2013, 09:37 PM
Join Date: Oct 2011
Location: Willard
Posts: 207
Likes: 0
Received 0 Likes
on
0 Posts
I am making progress. The truck is a roller, but not all of my work is permanent. I have to get the weight of the motor and the cab on the front to properly set the caster. I need get the drivetrain in before I can set my driveline angle.
Next step is to set up the steering and and build the motor mounts. I am in the midst of an emergency move to a new place right now (pipes were bursting everywhere at my current rental and no water will be flowing until Spring). Good news is that the new house has a sweet garage with a 8' tall garage door. It will make a great paint booth

Next step is to set up the steering and and build the motor mounts. I am in the midst of an emergency move to a new place right now (pipes were bursting everywhere at my current rental and no water will be flowing until Spring). Good news is that the new house has a sweet garage with a 8' tall garage door. It will make a great paint booth
#124
01-16-2013, 10:59 PM
Join Date: Oct 2011
Location: Willard
Posts: 207
Likes: 0
Received 0 Likes
on
0 Posts
I am needing some advice from all you experienced Ford gurus. I have the correct polyurethane body/radiator support bushings for my truck, but need new body mount sleeves since my old ones were rusted together and had to be cut off.
I have come up with one option so far - I don't like it.
1. Mill a unfinished piece of steel tubing to fit the bushing sleeve area where the bolt goes through and buy large enough washers to cover the bushing. I already stopped by Alcan Spring and inquired about finding a busing insert that is close enough to fit my body mount bushings, but no such luck.
There has to be a better (easier) way. I know that I am not the first guy to run into this. Those body mount sleeves are always rusted shut and are nearly impossible to remove intact. Bronco Graveyard has sleeves for the 1973-1979 trucks, but they are WAY OVERPRICED - plus they probably wouldn't even fit.
Suggestions?
#125
01-17-2013, 11:45 AM
#126
01-17-2013, 05:42 PM
Cargo Master
#127
01-17-2013, 07:45 PM
Senior User
Join Date: Jan 2013
Location: Broken Arrow, OK = Tulsa
Posts: 491
Likes: 0
Received 0 Likes
on
0 Posts
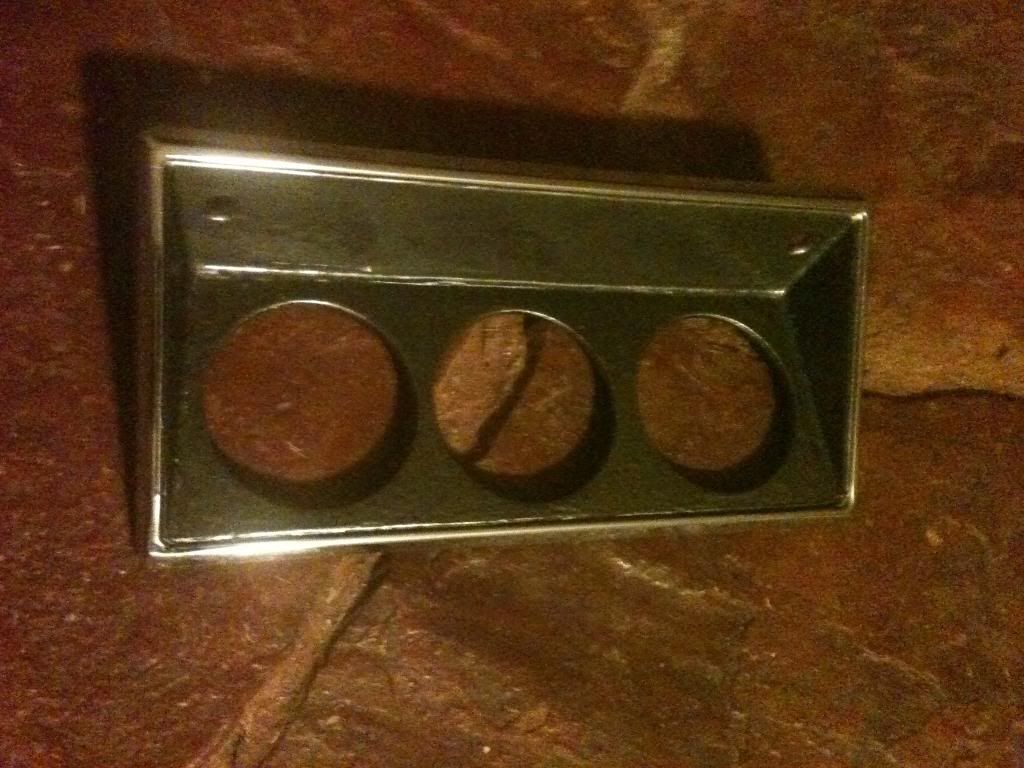
I also have been working on additional gauge mounting locations in the cab. I ditched the stock stereo and shaved the stereo mounting bezel to accept a plate with 2" holes in it. I had to glue the plate to the bezel since the bezel is cast, but it looks like it is going to hold fine. Cleaned up the additional glue with a razor blade and some sand paper and painted everything up 
#128
01-20-2013, 08:29 PM
Join Date: Oct 2011
Location: Willard
Posts: 207
Likes: 0
Received 0 Likes
on
0 Posts
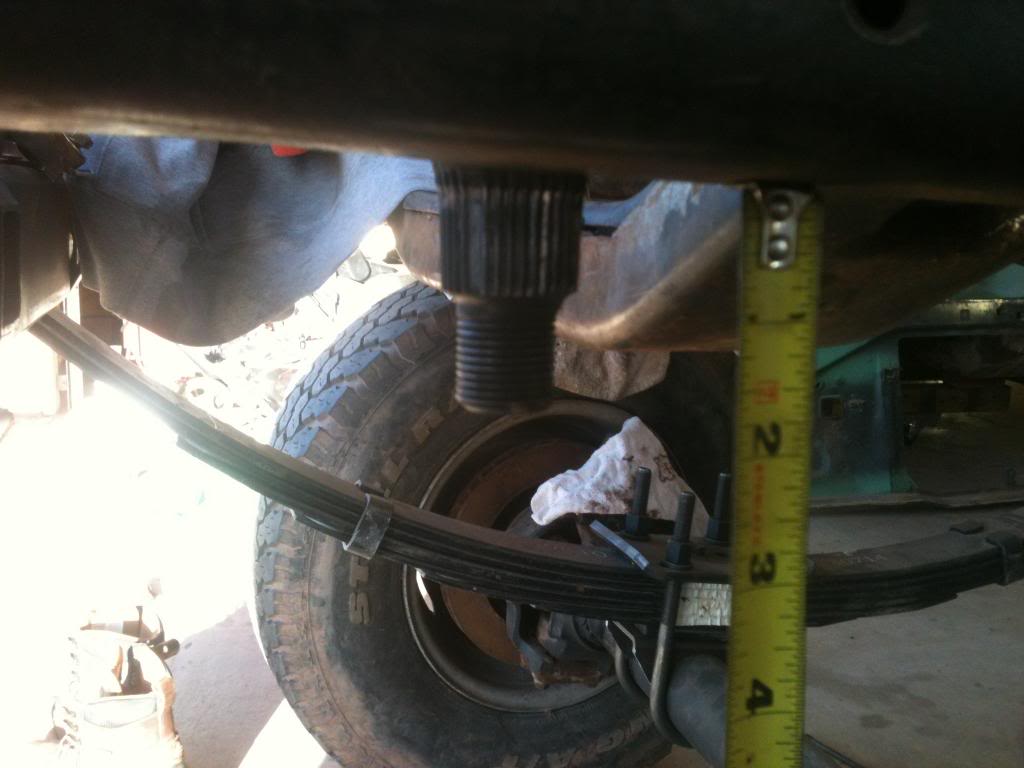
This truck is going to be tall. Add 4 1/2 inches for 40" tires (currently has 31" stock tires on it) and a inch or two less for sag once the motor is in. The rear of the frame is not set at the correct ride hight yet. It will be getting custom springs once the drive train and cab are on.
Can anyone post the measurement from the ground to the bottom of their frame on a stock Highboy with 31" tall tires? I am wanting to see what the actual lift is by using the 6" Superduty lift springs in the front.
#129
01-21-2013, 03:11 PM

Glad no one was hurt.
#130
01-22-2013, 09:49 PM
Join Date: Oct 2011
Location: Willard
Posts: 207
Likes: 0
Received 0 Likes
on
0 Posts
#131
01-27-2013, 05:00 PM
Logistics Pro
#132
02-17-2013, 11:21 PM
Join Date: Oct 2011
Location: Willard
Posts: 207
Likes: 0
Received 0 Likes
on
0 Posts
Finally some progress. Finances have been tight, but I sold the '79 F350 to help fund this project along for a while.
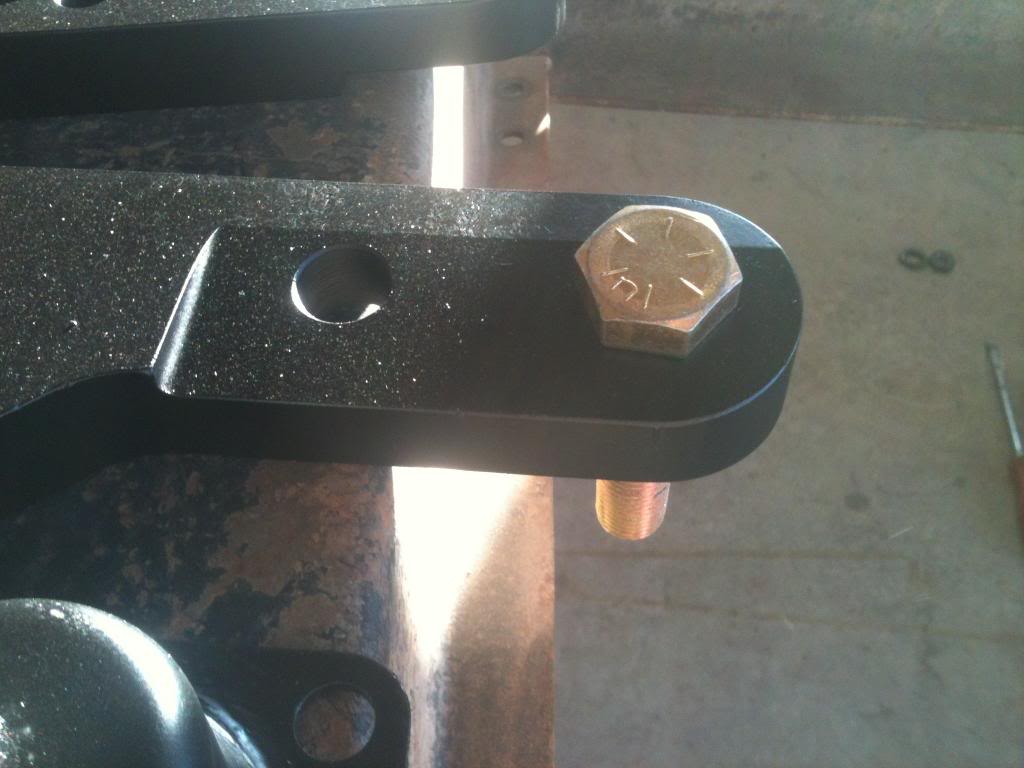
I had the high steer arms milled out at the machine shop (don't use a drill press on these - mill them) to 3/4" to match the heim joints from Ruff Stuff I ordered.
Steering Box Part #1
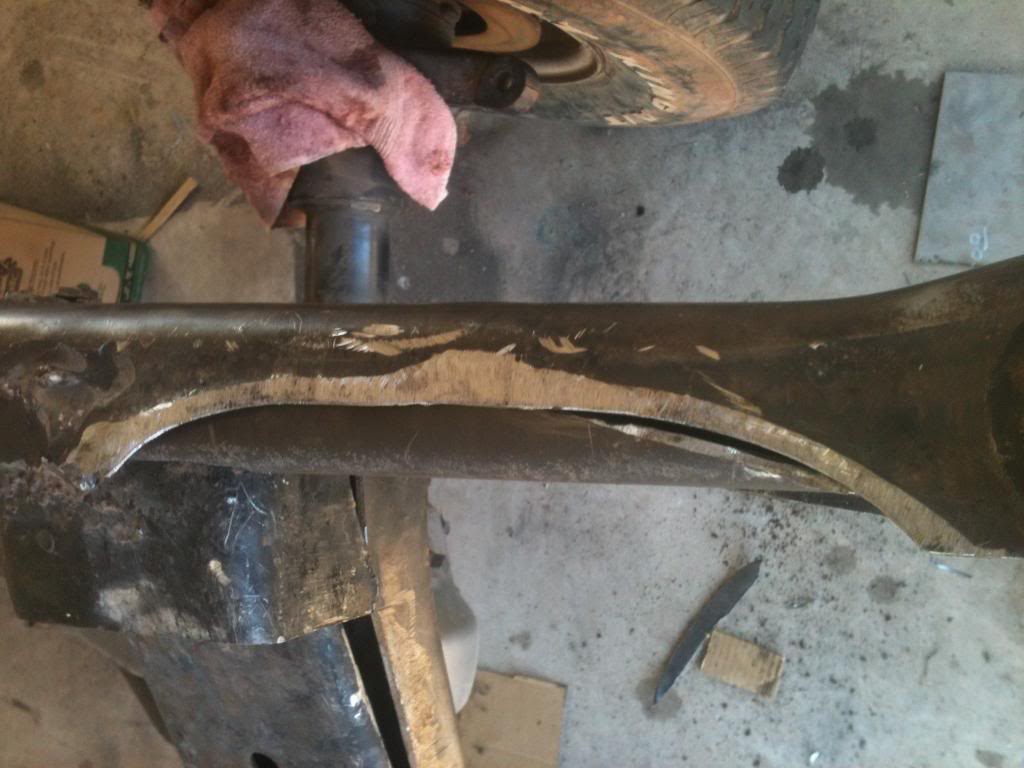
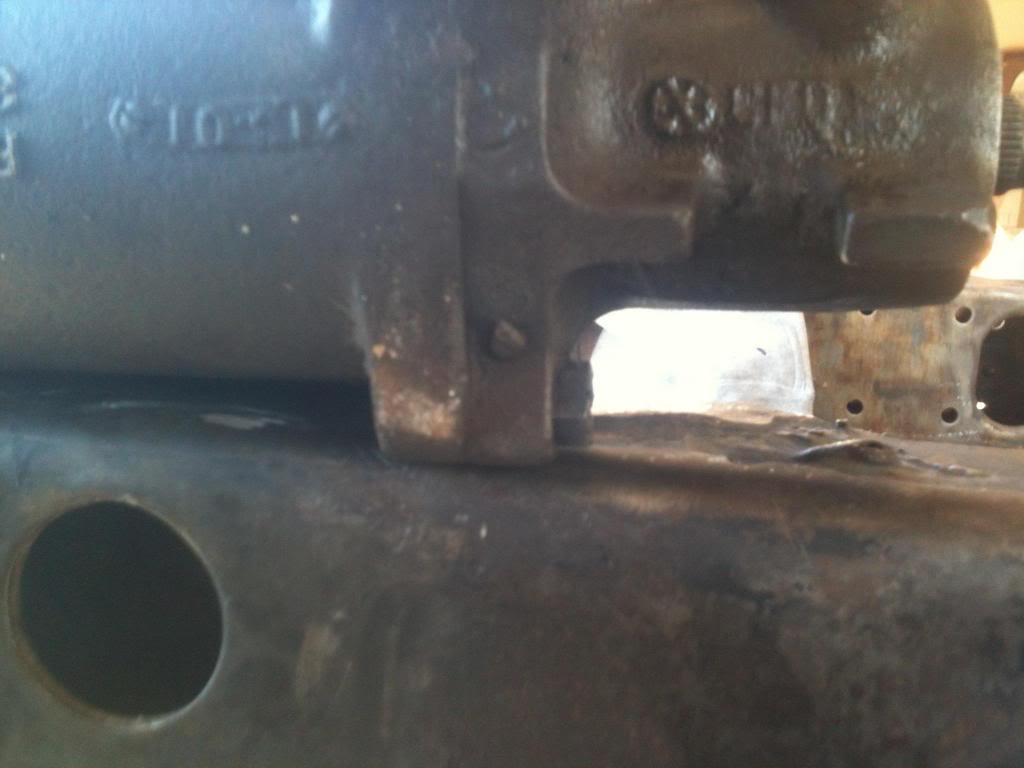
Next I got working on mounting the '79 F250 4x4 steering box. This was not as strait forward as I had hoped. My 1970 frame is about a inch taller than a '79 frame, so the pitman arm shaft doesn't hang down very far. Luckily I was able to get everything lined up so that the shaft dropped down low enough to clear the frame.
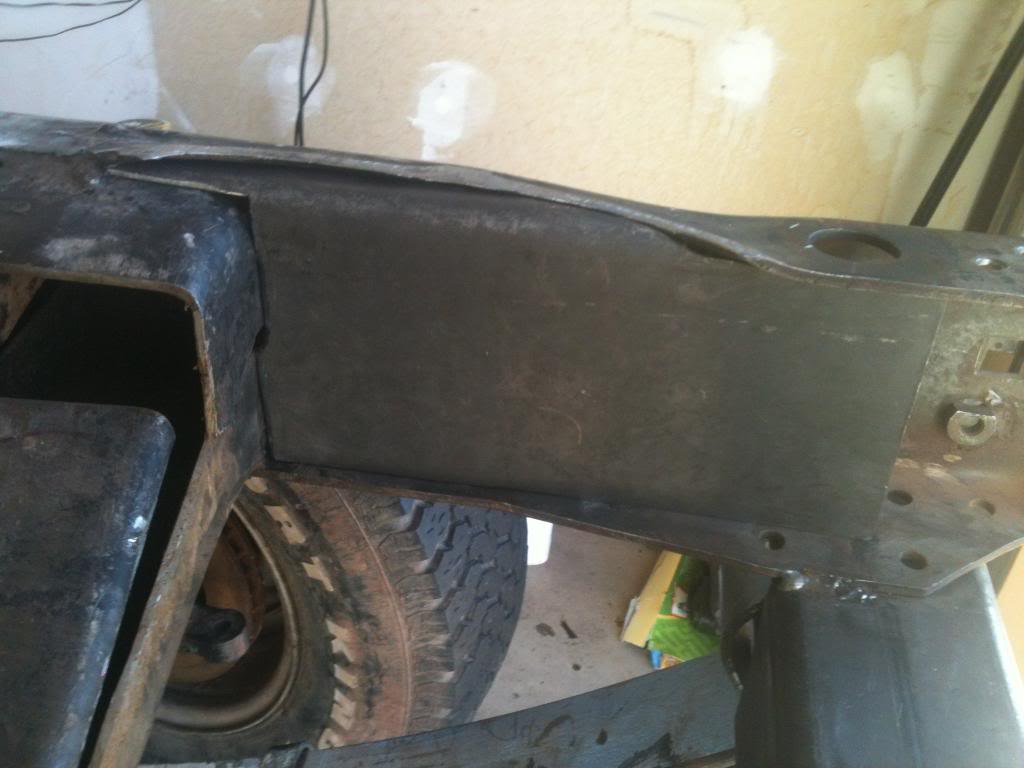
Shaved off the raised portion on the 1970 frame so that the '79 steering box would fit.
Had the local steel place put a break in 3/16" steel so that I could just do some trim work to get things to fit nicely.
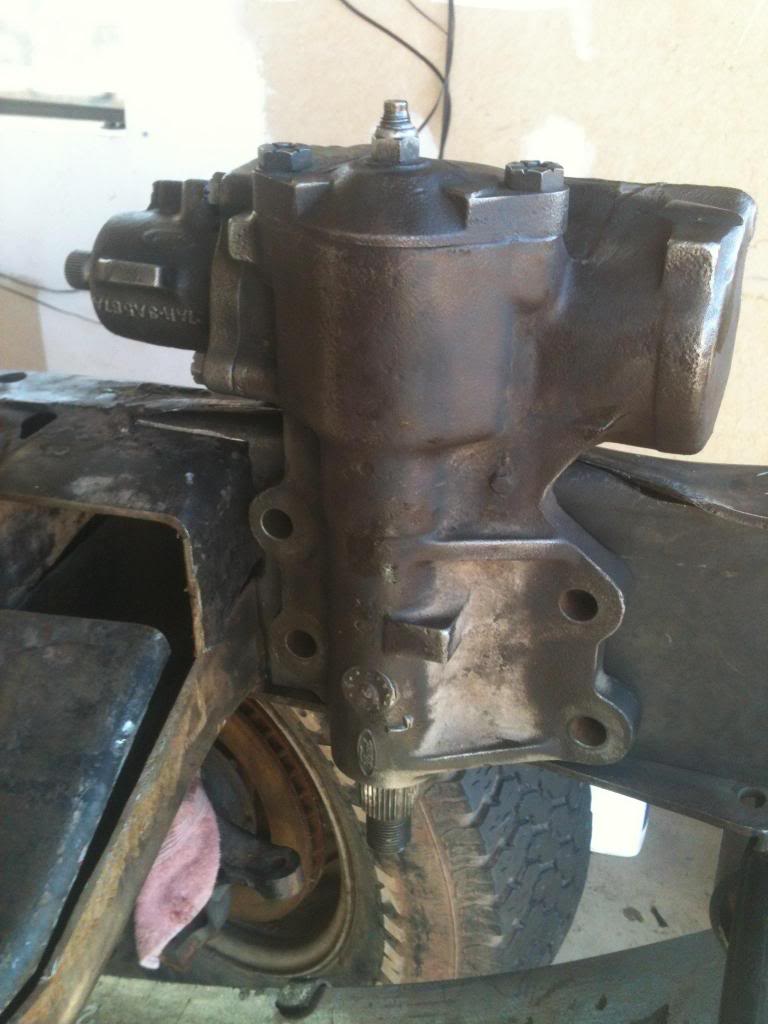
There was a small area that I ground down on the steering box to allow the box to sit as far down as possible on the frame.
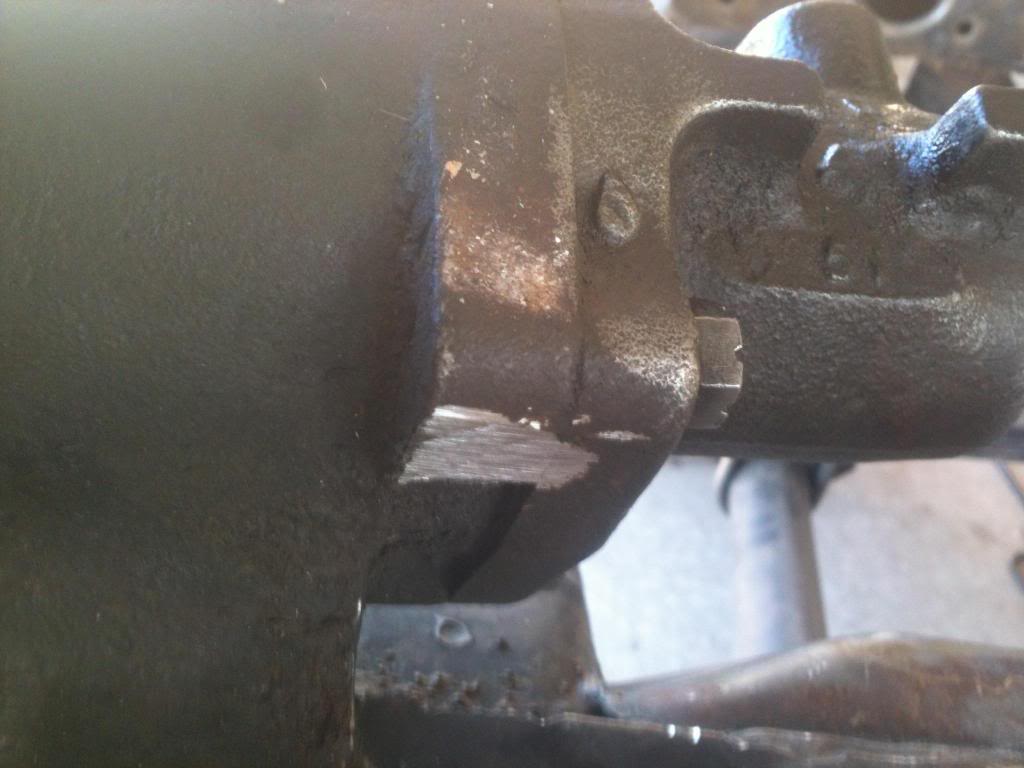
Here is the clearance I got on the pitman arm shaft.

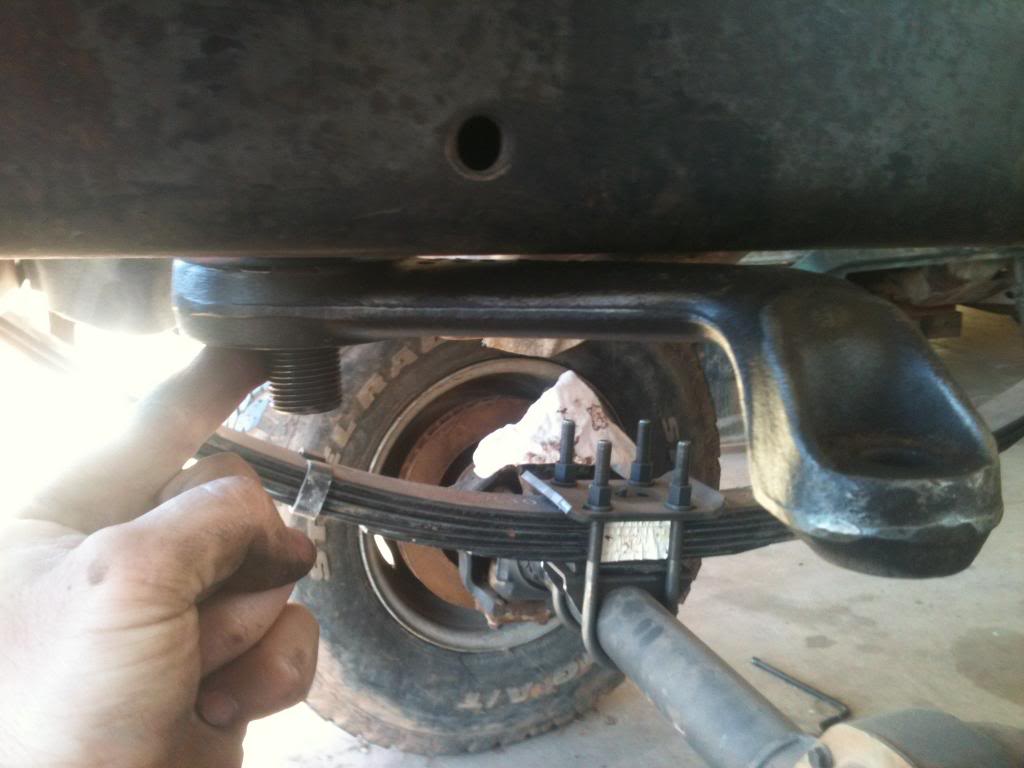
The stock '79 pitman arm is obviously not going to work because I won't clear the crossmember. I ordered a 3" drop pitman arm from Bronco Graveyard to resolve this.
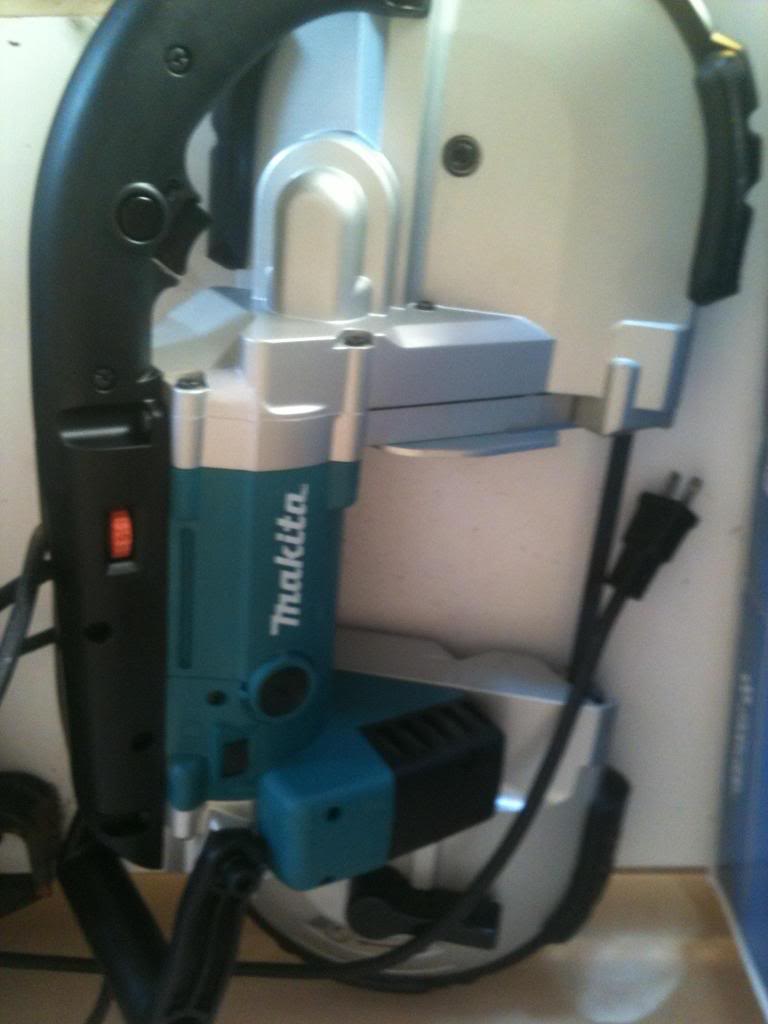
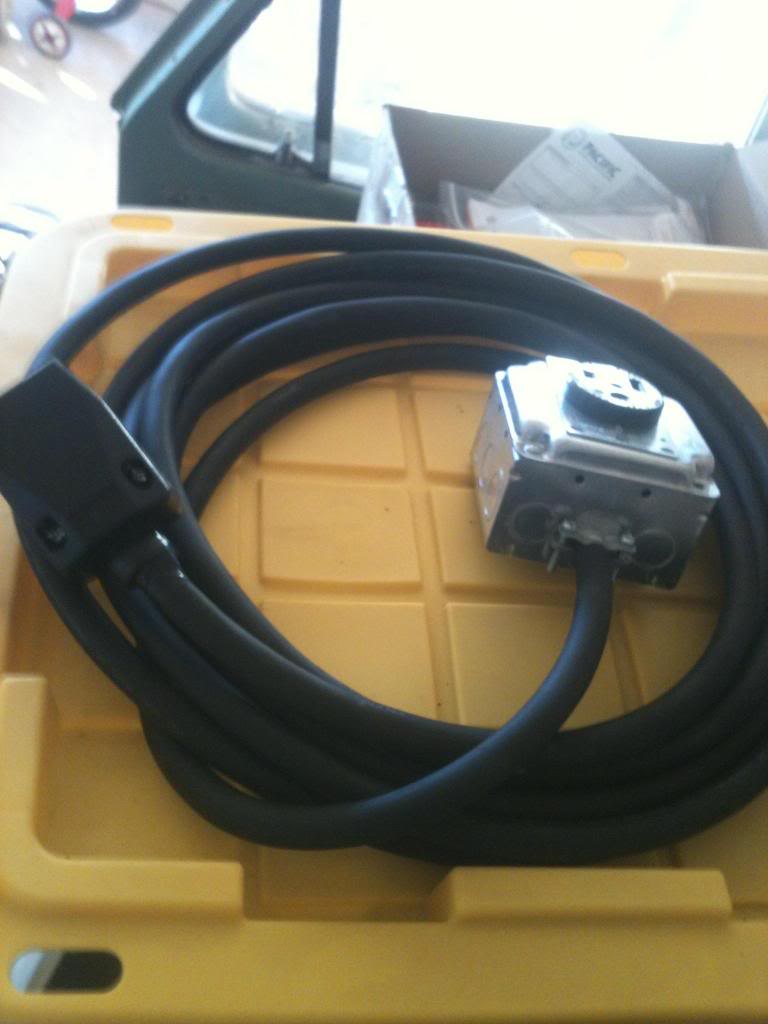
I purchased some new shop toys
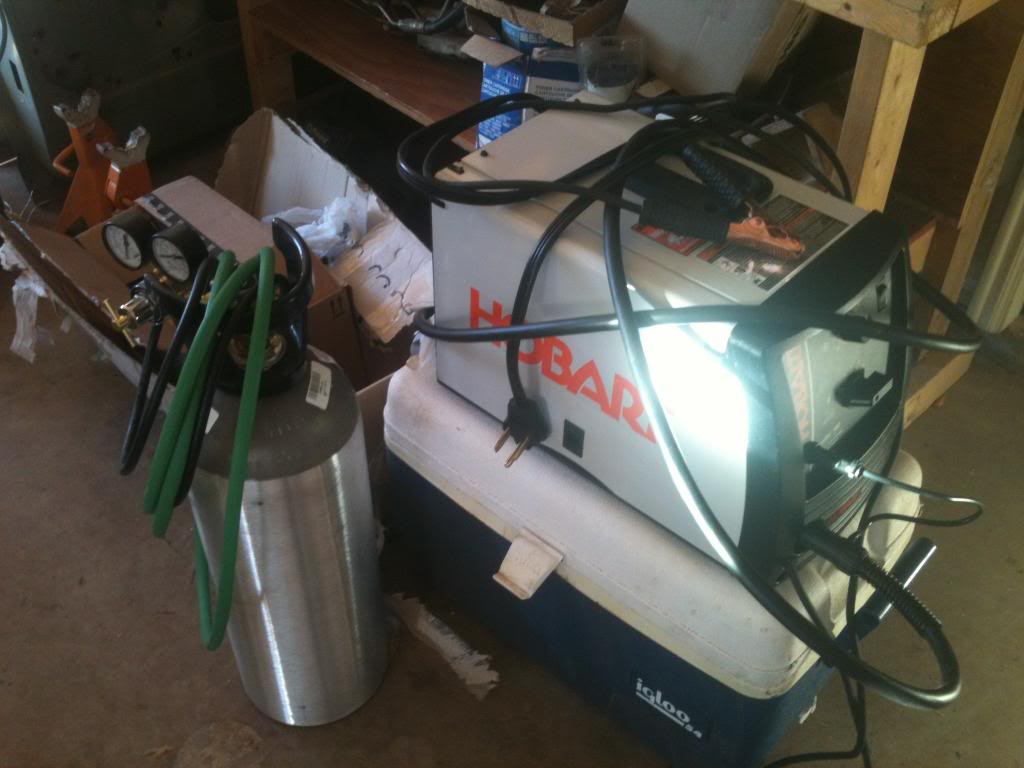
I made this adapter to run from my 3 prong dryer plug to my welder from stuff purchased at Home Depot.
I had the high steer arms milled out at the machine shop (don't use a drill press on these - mill them) to 3/4" to match the heim joints from Ruff Stuff I ordered.
Steering Box Part #1
Next I got working on mounting the '79 F250 4x4 steering box. This was not as strait forward as I had hoped. My 1970 frame is about a inch taller than a '79 frame, so the pitman arm shaft doesn't hang down very far. Luckily I was able to get everything lined up so that the shaft dropped down low enough to clear the frame.
Shaved off the raised portion on the 1970 frame so that the '79 steering box would fit.
Had the local steel place put a break in 3/16" steel so that I could just do some trim work to get things to fit nicely.
There was a small area that I ground down on the steering box to allow the box to sit as far down as possible on the frame.
Here is the clearance I got on the pitman arm shaft.
The stock '79 pitman arm is obviously not going to work because I won't clear the crossmember. I ordered a 3" drop pitman arm from Bronco Graveyard to resolve this.
I purchased some new shop toys
I made this adapter to run from my 3 prong dryer plug to my welder from stuff purchased at Home Depot.
#133
02-18-2013, 09:06 AM
I had Pittman arm problems too. I'm working on a 2wd camper special and my arm didn't have the drop necessary either. However 3" was too much. I posted my solution here:
A Diesel Conversion of a 1969 Ford F250 Camper Special: Pittman Arm Solutions
A Diesel Conversion of a 1969 Ford F250 Camper Special: Pittman Arm Solutions
#134
02-18-2013, 09:58 PM
Join Date: Oct 2011
Location: Willard
Posts: 207
Likes: 0
Received 0 Likes
on
0 Posts
I had Pittman arm problems too. I'm working on a 2wd camper special and my arm didn't have the drop necessary either. However 3" was too much. I posted my solution here:
A Diesel Conversion of a 1969 Ford F250 Camper Special: Pittman Arm Solutions
A Diesel Conversion of a 1969 Ford F250 Camper Special: Pittman Arm Solutions
 I will have to see how the Bronco Graveyard drop pitman arm works out.
I made the first test fit of the motor today

Everything looks great so far. I am thinking about modifying and using the stock Dodge motor mounts that I torched off the frame of my doner truck. They look like they will fit really well with a bit of modification. They each will have to be narrowed a 1/4" or so from what I can tell to fit the frame rails. I will keep you posted on how it all turns out.
#135
02-19-2013, 02:01 AM
Logistics Pro
Got a nice update for us I see today. That welder and porta band will come in handy often. Let me know how you like the Porta band I've been thinking about buying one for awhile now just haven't because of the price. Beats using a 4 1/2" grinder with a cutoff wheel for everything like I been using. Where did you get your axle rebuild kits at? I'm looking around now for them so I can finally build mine and move on to the next step. I was thinking about using the stock motor mounts on mine but one side was cracked so I built my own. I may end up going back and redoing them Alittle different using the stock mounts from the cummins like they say one step forward and two steps back.