1970 F250 4x4 Cummins Conversion Build Thread - Lots of Pics!
#106
 11-09-2012, 12:25 AM

Logistics Pro
Got some good progress going on. How hard was it to press out those old front shackle bushings? Mine were held in there pretty good with rust. I pressed mine out just like you did the one was so tight even after heating it up some I broke one of the bolt hole ears off and had to weld it back on. Are you using a u bolt flip kit? I think you mentioned it before but what are those rear spring hangers out of? Are they for 3" springs? I need to get longer spring hangers to correct my pinion angle the SD hangers I have are to short making the axle locating pin tilt forward to much instead of pointing to the ground. Would you mind taking some measurements of them if I took pics of what parts of them I need measured? Every time I look at these cummins build threads makes me want to work on my crew but I keep having other things pop up to drag me away from it. And keep having to spending my axle funds on my new truck to fix all the little problems to keep it reliable
#107
11-09-2012, 01:49 PM
Join Date: Oct 2011
Location: Willard
Posts: 207
Likes: 0
Received 0 Likes
on
0 Posts
Got some good progress going on. How hard was it to press out those old front shackle bushings? Mine were held in there pretty good with rust. I pressed mine out just like you did the one was so tight even after heating it up some I broke one of the bolt hole ears off and had to weld it back on. Are you using a u bolt flip kit? I think you mentioned it before but what are those rear spring hangers out of? Are they for 3" springs? I need to get longer spring hangers to correct my pinion angle the SD hangers I have are to short making the axle locating pin tilt forward to much instead of pointing to the ground. Would you mind taking some measurements of them if I took pics of what parts of them I need measured? Every time I look at these cummins build threads makes me want to work on my crew but I keep having other things pop up to drag me away from it. And keep having to spending my axle funds on my new truck to fix all the little problems to keep it reliable
Can't you just relocate your spring perch on the axle to change your pinion angle? I have to get my transferase in before I can weld my spring perches in so that I know what the proper angle will be.
The hangers are from the front of the rear spring on an '85 Chevy 4x4. They are for a 3" wide spring. By using a set of these (both the front and rear) on my rear spring (shackle flip assumed), I can get about 5" of lift in the rear without any spring adjustment. Since I am ditching my lift blocks, I will still have to use around a 5" lift spring to make up the difference. I am thinking about just ordering custom rear springs from Alcan since they are local here where I live.
Let me know what specific measurements you want and I will post pics

#108
11-14-2012, 11:20 AM
Join Date: Oct 2011
Location: Willard
Posts: 207
Likes: 0
Received 0 Likes
on
0 Posts
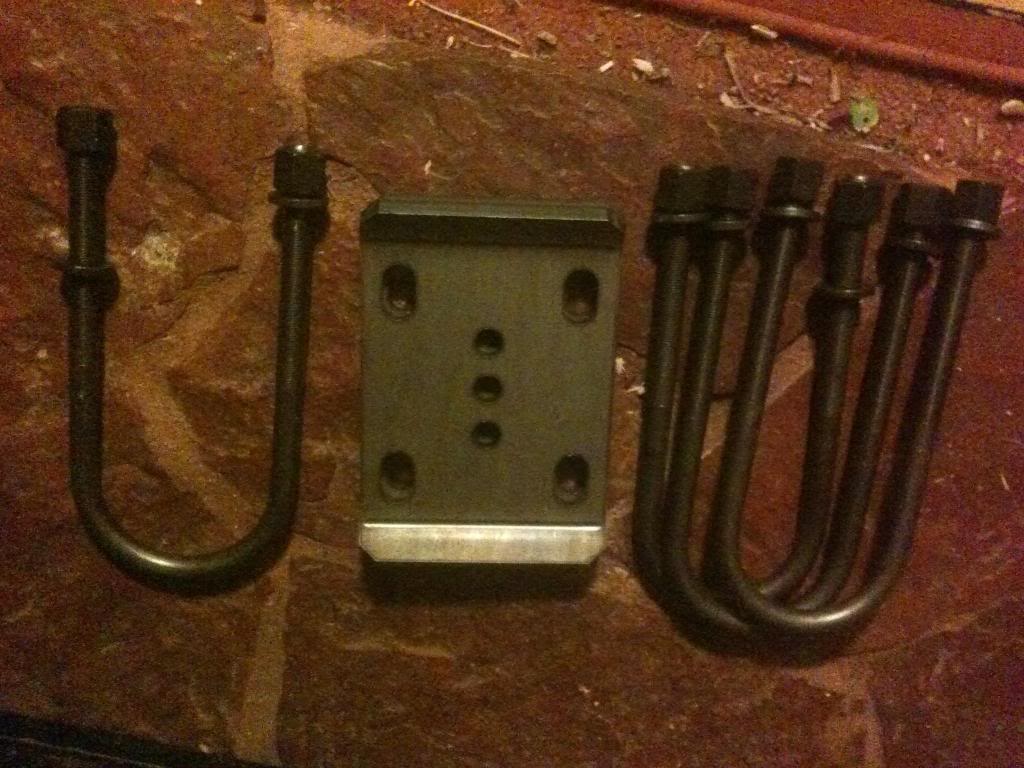
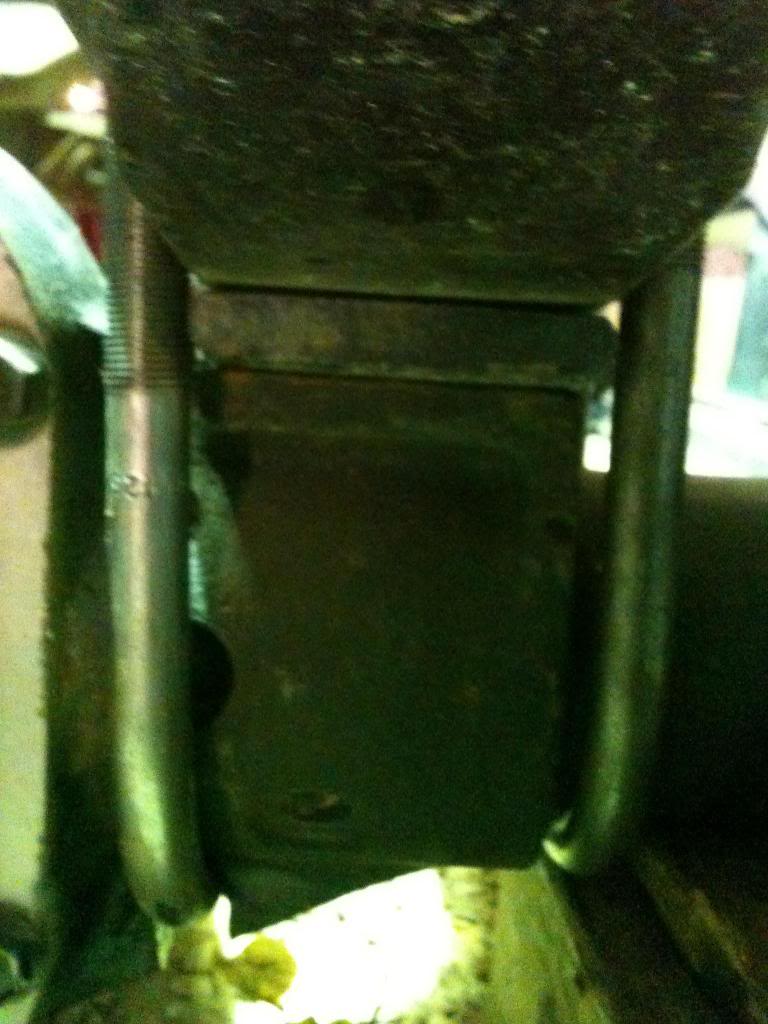
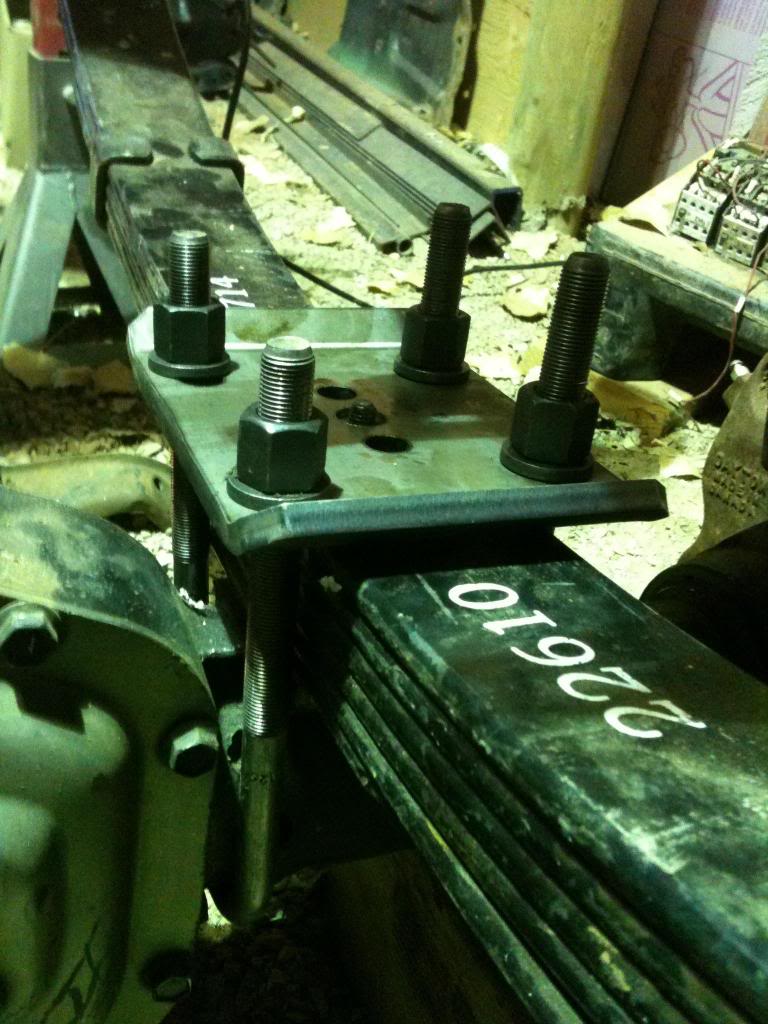
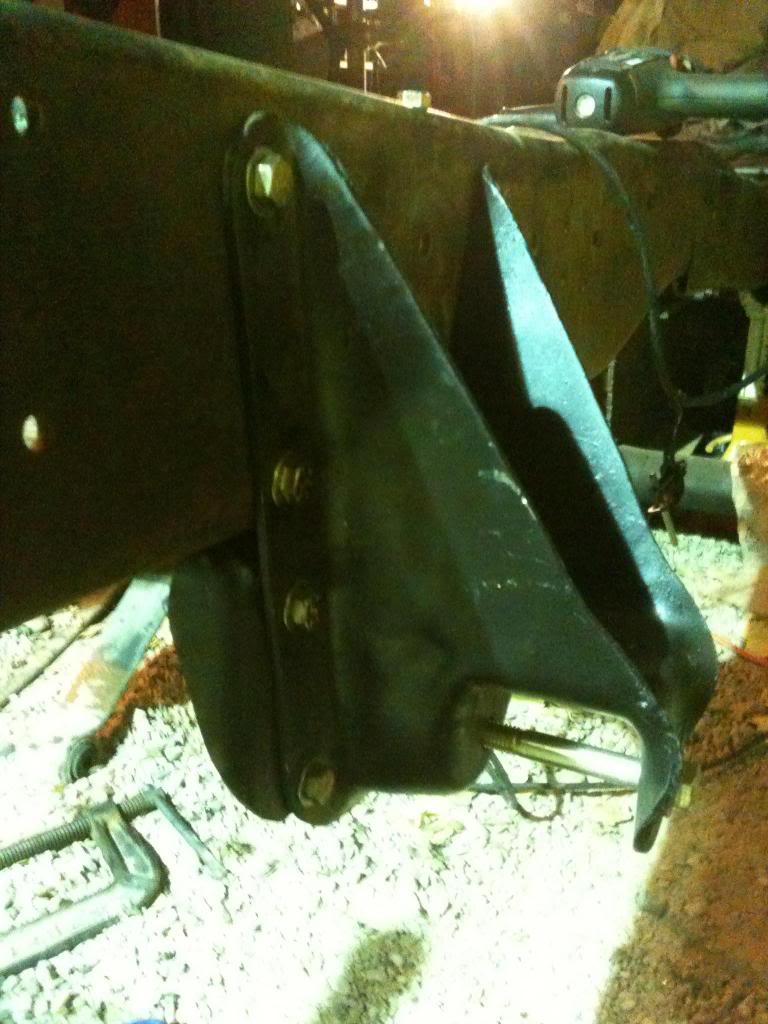
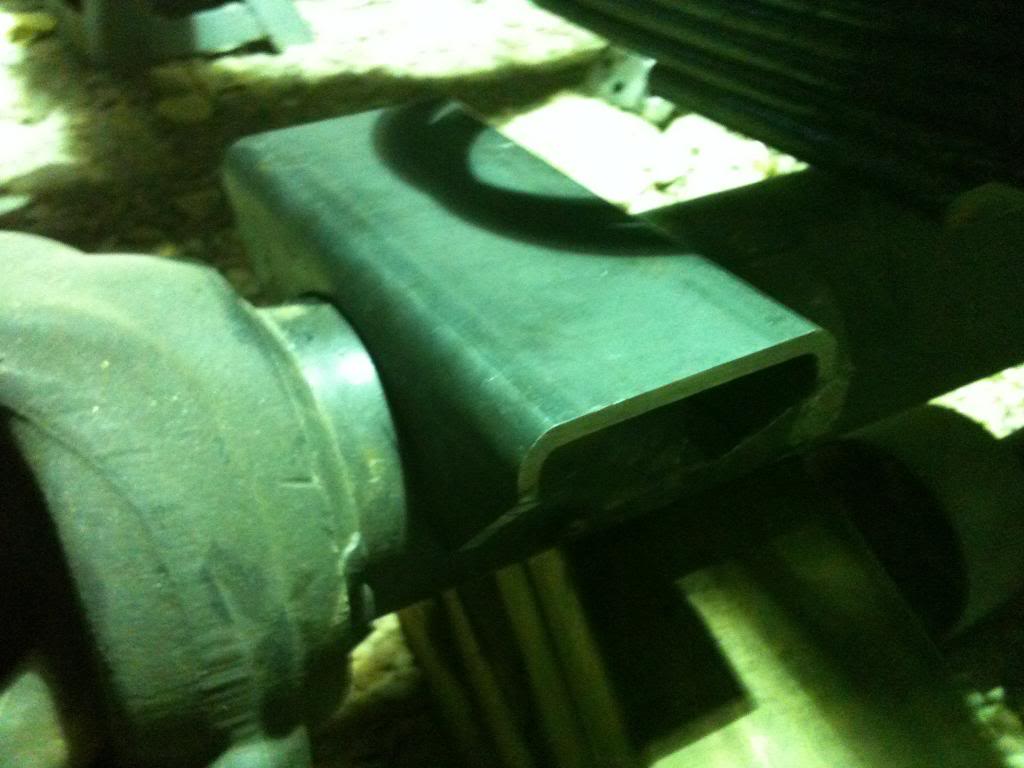
Received the U-bolts and plates from Ruff Stuff the other day. Notice that one U-bolt is larger than the others. This is to make up for the U-bolt that has to go over the differential case a little bit. From what I understand, I am going to have to notch the differential housing gusset to flip the U-bolts and make these work.
I also have been working on additional gauge mounting locations in the cab. I ditched the stock stereo and shaved the stereo mounting bezel to accept a plate with 2" holes in it. I had to glue the plate to the bezel since the bezel is cast, but it looks like it is going to hold fine. Cleaned up the additional glue with a razor blade and some sand paper and painted everything up
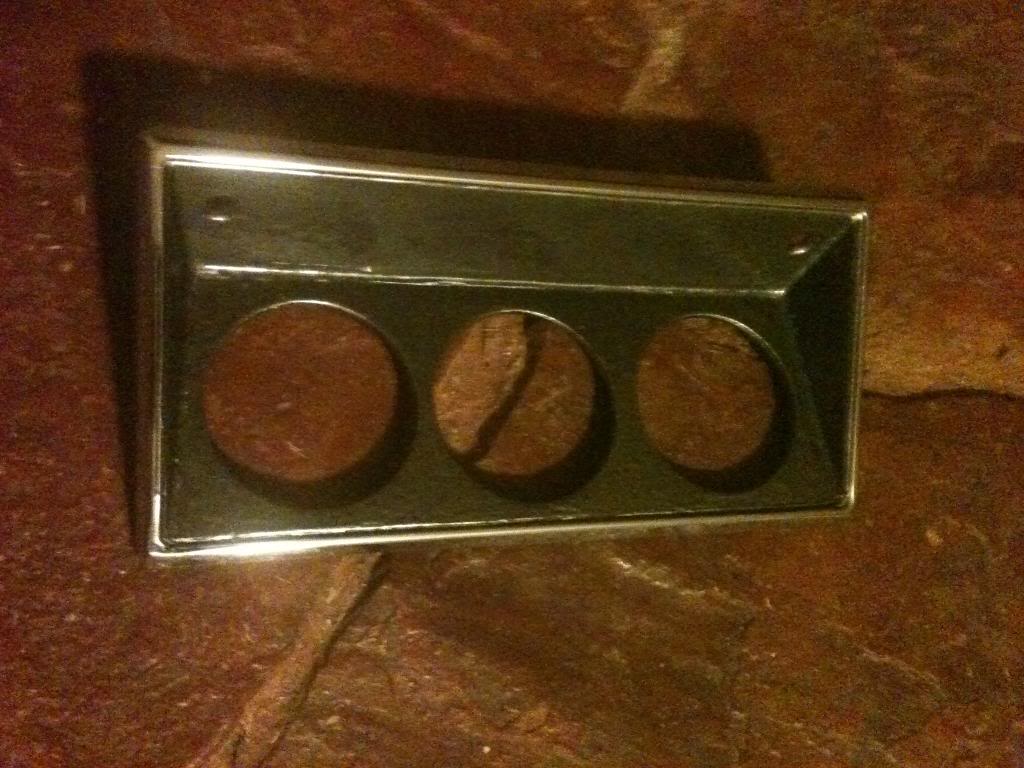
I also have been working on additional gauge mounting locations in the cab. I ditched the stock stereo and shaved the stereo mounting bezel to accept a plate with 2" holes in it. I had to glue the plate to the bezel since the bezel is cast, but it looks like it is going to hold fine. Cleaned up the additional glue with a razor blade and some sand paper and painted everything up
#109
11-14-2012, 03:39 PM
Join Date: Oct 2011
Location: Willard
Posts: 207
Likes: 0
Received 0 Likes
on
0 Posts
Flipping the U-bolts on the Dana 60 is not so simple. My initial plan of attack was to drill a 5/8" hole in the gusset and try and slide the U-bolt in. This would have left some of the gusset intact and much stronger.
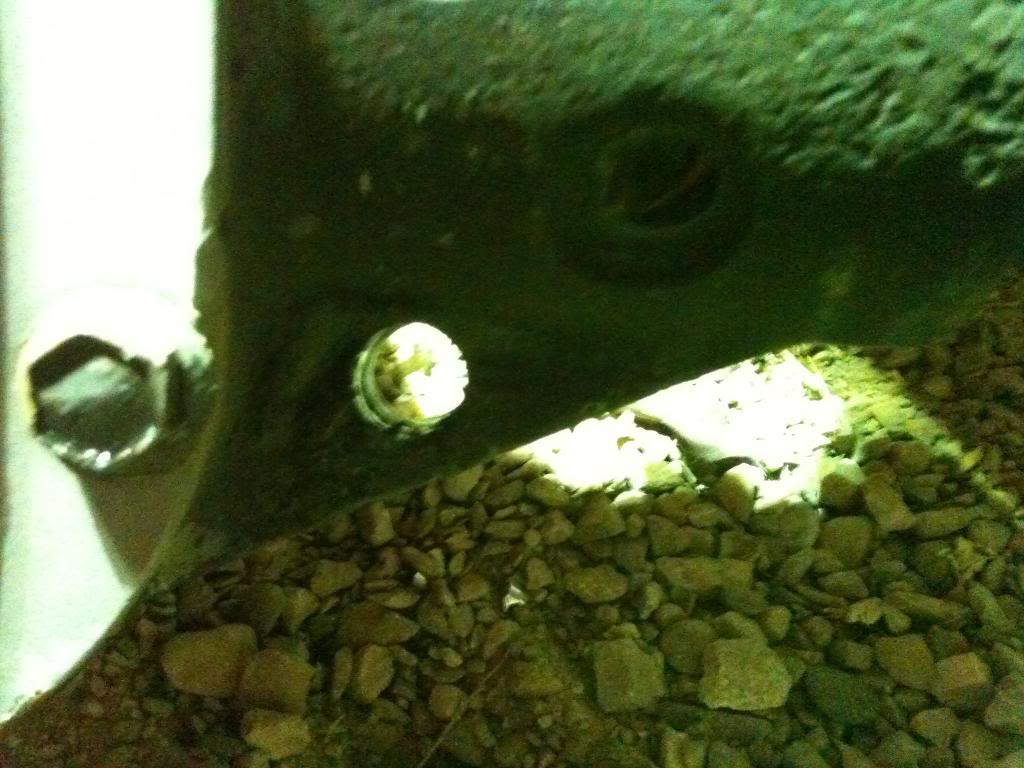
Since getting the U-bolt in like this was impossible, I decided to cut out the rest of the material with a port-o-band.

Smoothed the edges a little for curvature and there you have it. I am planning on adding a 1/4" bridge on the gusset I had to cut to give it back some strength.
I had to drill out the location hole the U-bolt plates to fit the bolt on the 1999-2004 Superduty springs.
And there you have it
Since getting the U-bolt in like this was impossible, I decided to cut out the rest of the material with a port-o-band.
Smoothed the edges a little for curvature and there you have it. I am planning on adding a 1/4" bridge on the gusset I had to cut to give it back some strength.
I had to drill out the location hole the U-bolt plates to fit the bolt on the 1999-2004 Superduty springs.
And there you have it

#111
11-14-2012, 10:43 PM
Join Date: Oct 2011
Location: Willard
Posts: 207
Likes: 0
Received 0 Likes
on
0 Posts
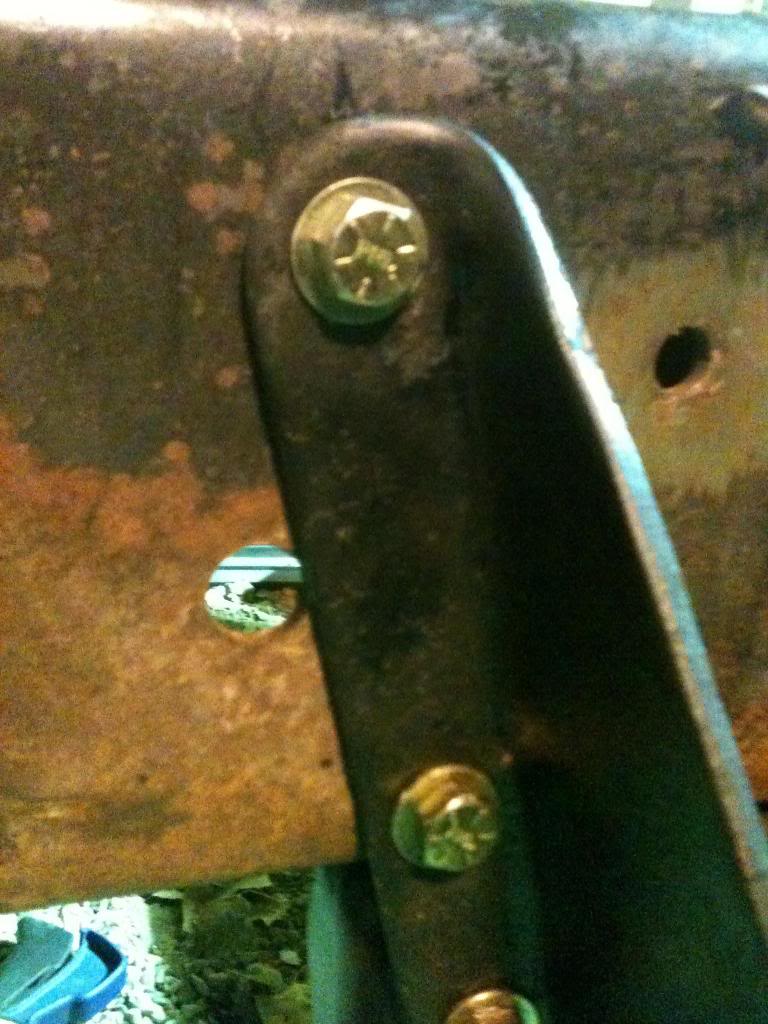
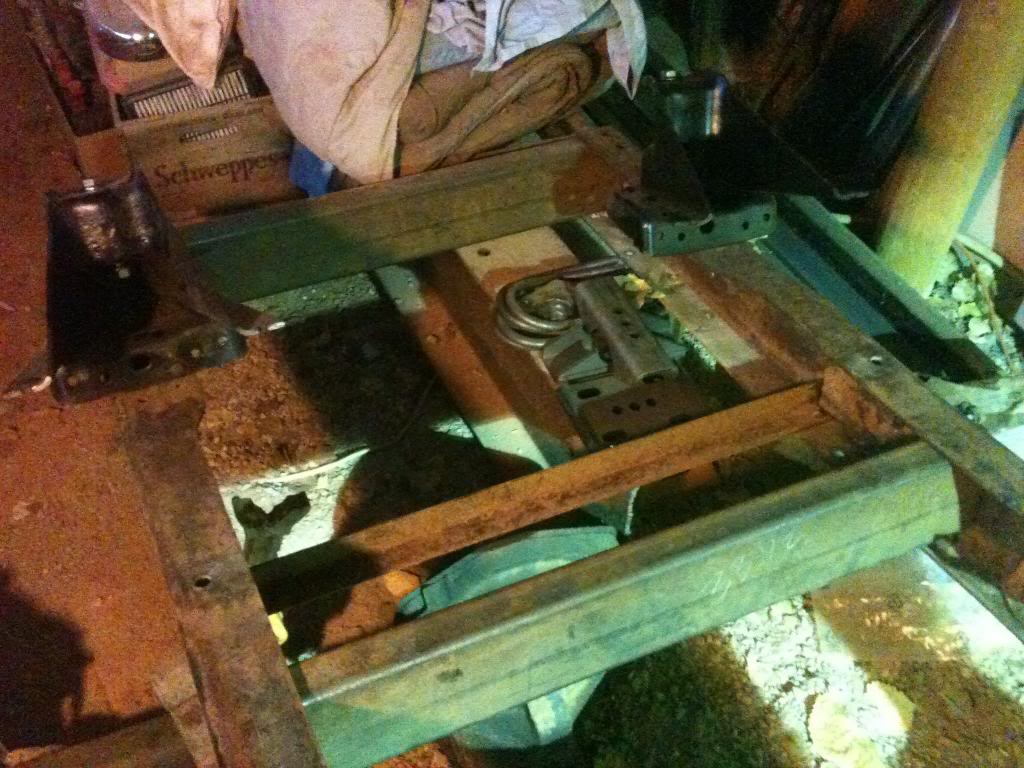
Time to mount the the rear front hanger. Since I am using 64" Chevy springs, I have to move the rear crossmember to match the new location of the hanger. If you don't do this, you will get unwanted flex in the frame and it could be an issue over time. Notice that the crossmember was located exactly in the location of the stock hanger. There is a reason.
Had to drill out the rivets to free up the crossmember - my favorite
My measurement from center of the bump stop to center of the spring hanger bolt was 31 1/2" since the spring I have as a reference is 63" eye to eye.
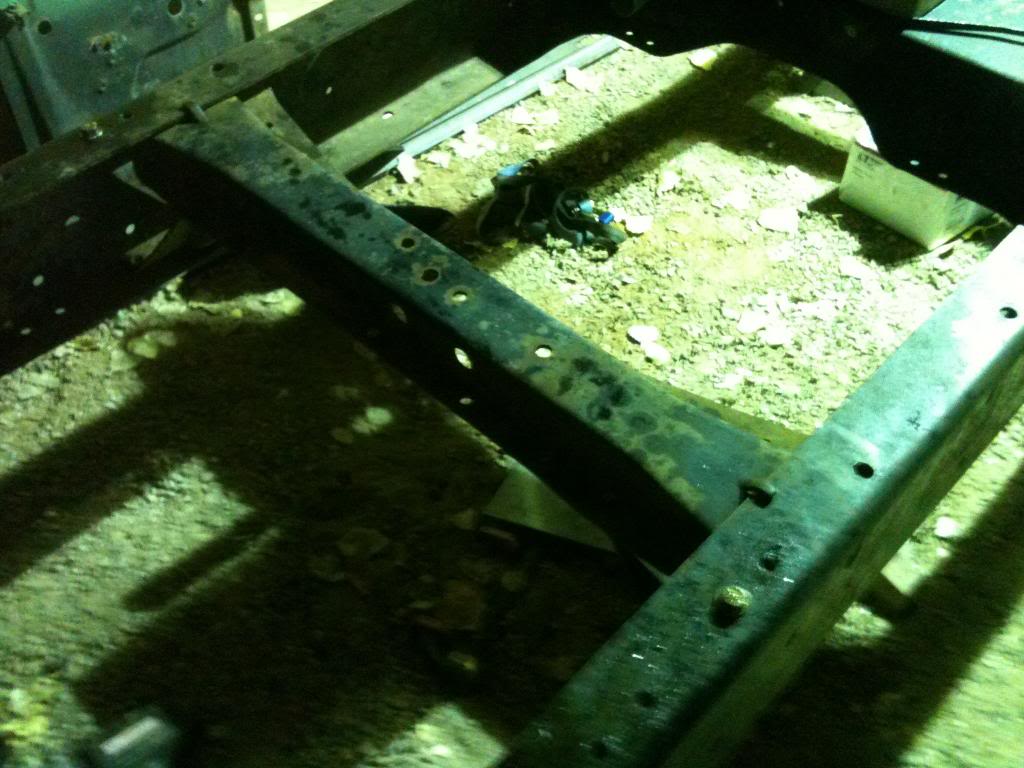
The nice thing is that once the crossmember was free, the front hole lined up perfectly with on of the old rivet holes and I could put a bolt through to secure it. This kept everything square.
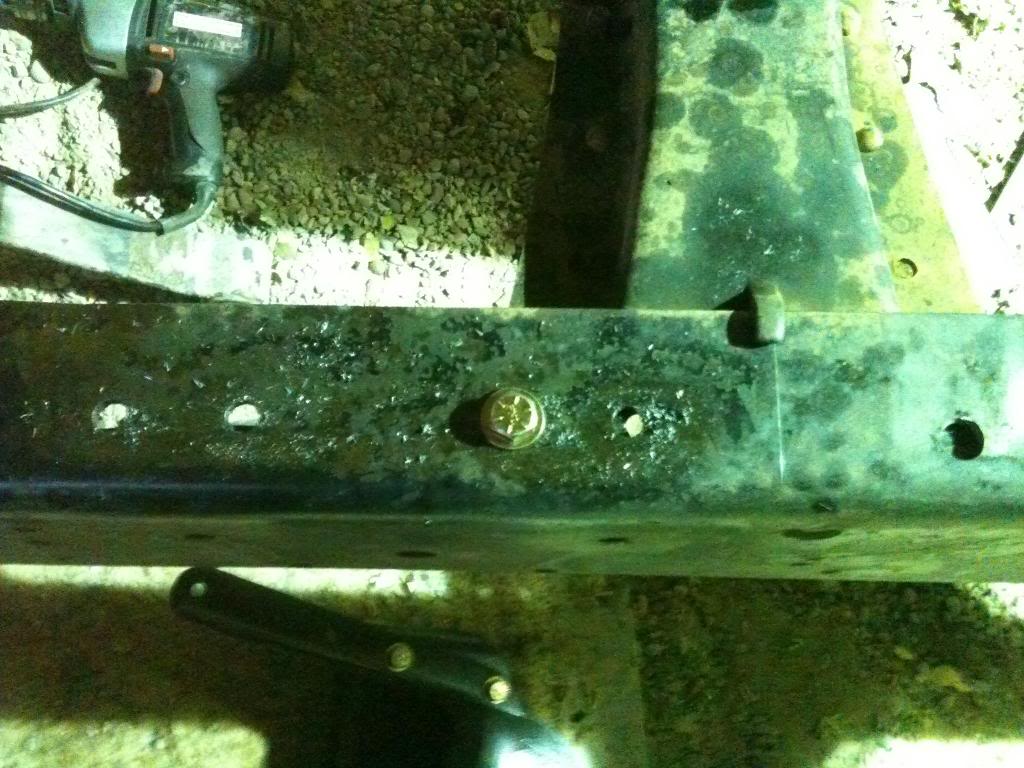
Next I lined up the Chevy hanger, clamped it in place, and drilled out some bolt holes. I still need to plug weld all the other holes in the crossmember and weld the part of the hanger that goes on the bottom of the frame in place.
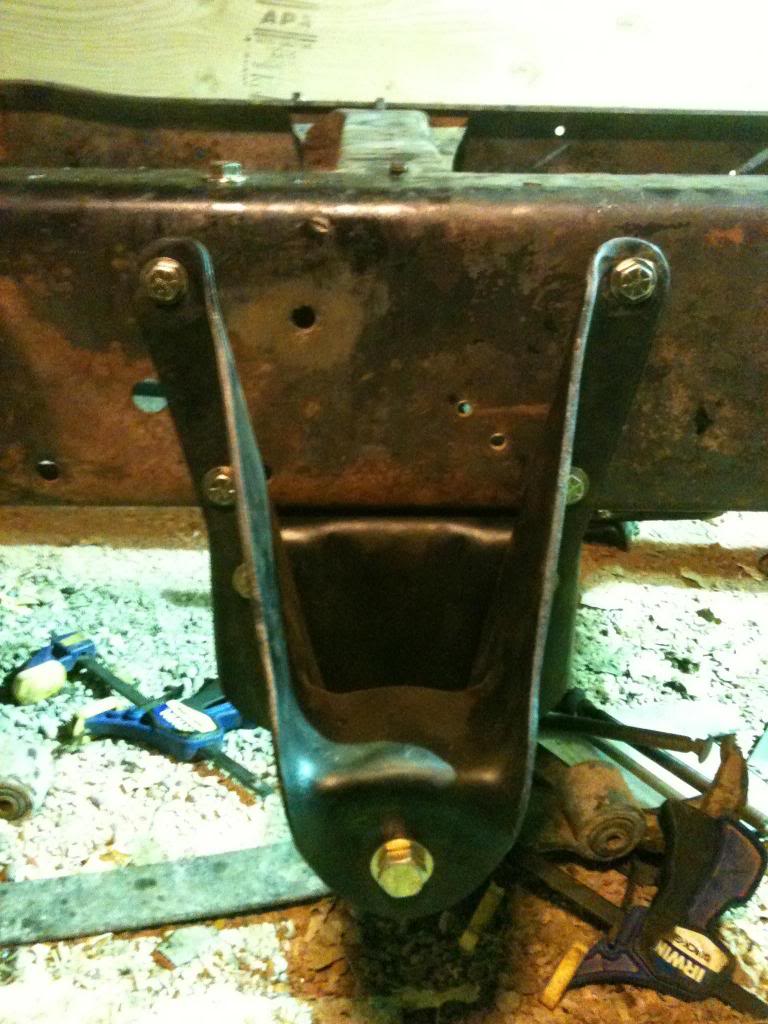
The nice thing is that my hanger lined up perfectly so that I could use the large existing hole in the frame as a reference so that each side would be exactly the same.
And there you have it. After a little welding, the front hangers for the rear are done.

Had to drill out the rivets to free up the crossmember - my favorite
My measurement from center of the bump stop to center of the spring hanger bolt was 31 1/2" since the spring I have as a reference is 63" eye to eye.
The nice thing is that once the crossmember was free, the front hole lined up perfectly with on of the old rivet holes and I could put a bolt through to secure it. This kept everything square.
Next I lined up the Chevy hanger, clamped it in place, and drilled out some bolt holes. I still need to plug weld all the other holes in the crossmember and weld the part of the hanger that goes on the bottom of the frame in place.
The nice thing is that my hanger lined up perfectly so that I could use the large existing hole in the frame as a reference so that each side would be exactly the same.
And there you have it. After a little welding, the front hangers for the rear are done.
#112
11-15-2012, 12:30 AM
Logistics Pro
Your really moving along now almost got it as a roller. I went through the same exact thing with my front 44 when I put it in with the u bolt flip and and the center hole in the plate I also had to slot the one u bolt holes for the larger bolt around the pumpkin webbing I just notched the webbing so it sits up in there nice I wasn't sure if I'd have to do the same when I get my front 60 built good to know what I'll have to do now. I have the money to build my front axle but I'm debating buying a even bigger turbo for my other truck (one major reason I haven't been doing much with the crew lately) all my time money in that lately. But as for my rear hanger situation I could cut reweld the leaf perches to correct angle as ill be doing it anyway to get them perfect in line with the springs but the spring locating pin that gos in the perch is angled towards the front of the truck instead of straight at the ground so to correct it a longer front hanger will push the pin downwards more. What is the length from the bottom of the frame to center of the Chevy leaf mount bolt hole that gos through the leaf eye?
#113
11-23-2012, 04:17 PM
Join Date: Oct 2011
Location: Willard
Posts: 207
Likes: 0
Received 0 Likes
on
0 Posts
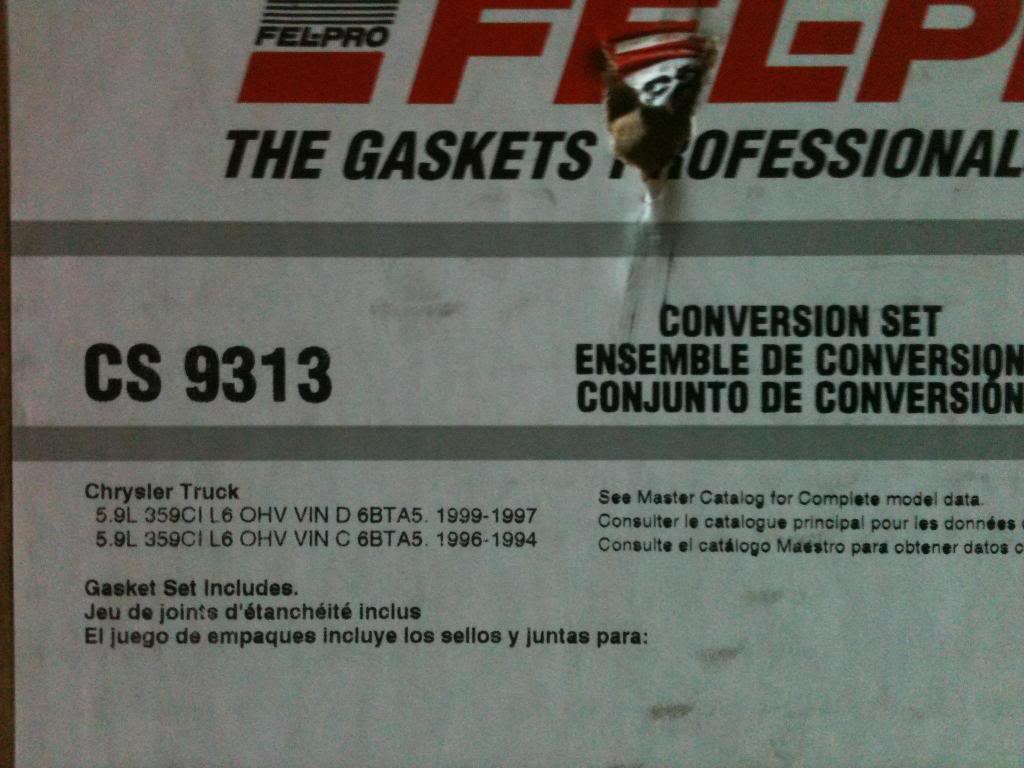
Got the Felpro gasket conversion set in the mail today 
Goals for the week are to get the oil pan repaired, fab a new front axle mount for the passenger side, fab a new cross member to finish off the rear crossmembers, and ??? Mount the engine? I probably am getting too far ahead of myself. I think I will wait to do most of the gaskets in this kit including the killer dowel pin when the engine is mounted. We will have to see how things come together
Goals for the week are to get the oil pan repaired, fab a new front axle mount for the passenger side, fab a new cross member to finish off the rear crossmembers, and ??? Mount the engine? I probably am getting too far ahead of myself. I think I will wait to do most of the gaskets in this kit including the killer dowel pin when the engine is mounted. We will have to see how things come together
#114
11-25-2012, 08:43 PM
Join Date: Oct 2011
Location: Willard
Posts: 207
Likes: 0
Received 0 Likes
on
0 Posts
Here is your measurement Mr. Crazedbronco = 4"

I got a little more work done today. Got the rear crossmembers cut to the right length (33 7/16"). I used 3/16" steel 5" X 2". I will cut out the small factory angle iron piece once I get everything squared up and welded into place.
Also got the passenger side axle perch fabricated. Just need to line everything up and tack it into place.
#115
11-26-2012, 08:31 PM
Join Date: Oct 2011
Location: Willard
Posts: 207
Likes: 0
Received 0 Likes
on
0 Posts
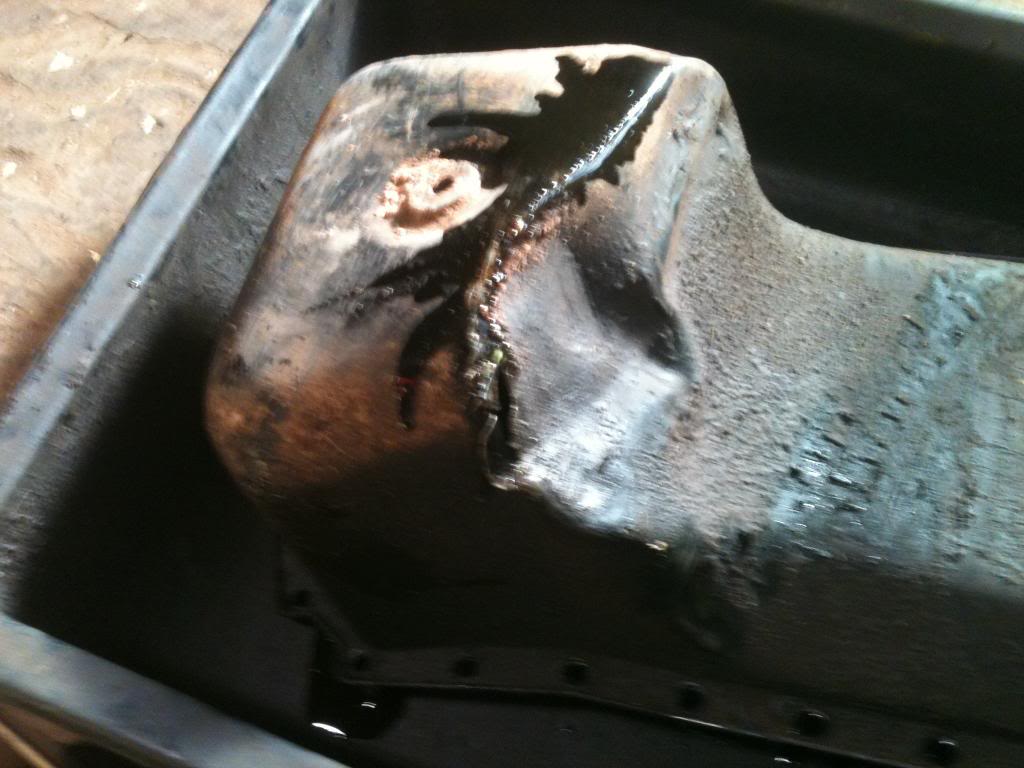
Pulled the oil pan off of the cummins today to assess the damage. The good news is that the cummins oil pickup is built like a tank and undamaged. the bad news is that my oil pan isn't worth repairing 
On a happy note. Chasetruck shared a awesome link for info on the 1994-1998 Cummins fuel system:
Joe G's fuel system writeup - Dodge Cummins Diesel Forum
That is what I call comprehensive!
On a happy note. Chasetruck shared a awesome link for info on the 1994-1998 Cummins fuel system:
Joe G's fuel system writeup - Dodge Cummins Diesel Forum
That is what I call comprehensive!
#116
11-26-2012, 11:19 PM

#117
11-29-2012, 12:27 AM
Posting Guru
Join Date: Jun 2009
Location: Bastrop, Texas (Austin,TX
Posts: 1,443
Likes: 0
Received 0 Likes
on
0 Posts

#118
11-29-2012, 09:06 AM
Join Date: Oct 2011
Location: Willard
Posts: 207
Likes: 0
Received 0 Likes
on
0 Posts
I head out to Grand Junction pretty regularly for parts and steel. Pacific Steel is the best. Next time you are in Moab on a Saturday you could drop by my church for some good old fashioned preaching
Ordered the a new oil pan from Geno's Garage the other day. $140 delivered
 Now I just have to wait to get that installed before I can build motor mounts.
I have a broken passenger side motor mount. I am thinking about just building my own custom motor mounts and ditching the factory ones attached to the engine since a new motor mount is $100+. I need to get the engine hanging between the frame before I can know for sure.
#119
12-11-2012, 12:58 PM
Join Date: Oct 2011
Location: Willard
Posts: 207
Likes: 0
Received 0 Likes
on
0 Posts
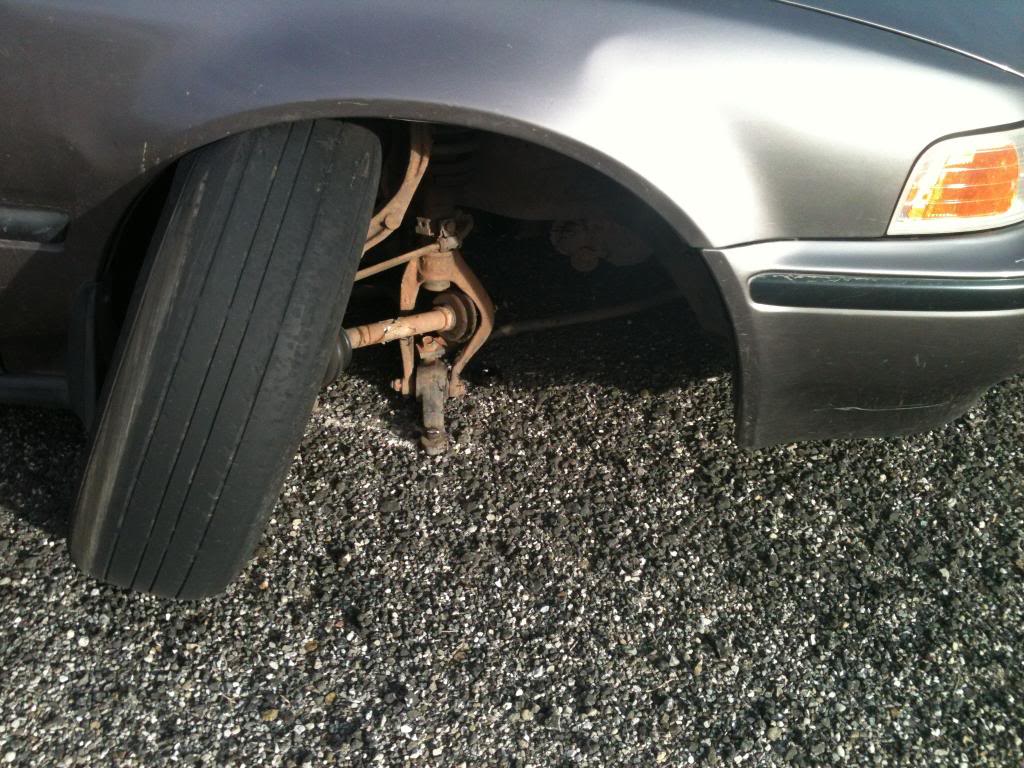
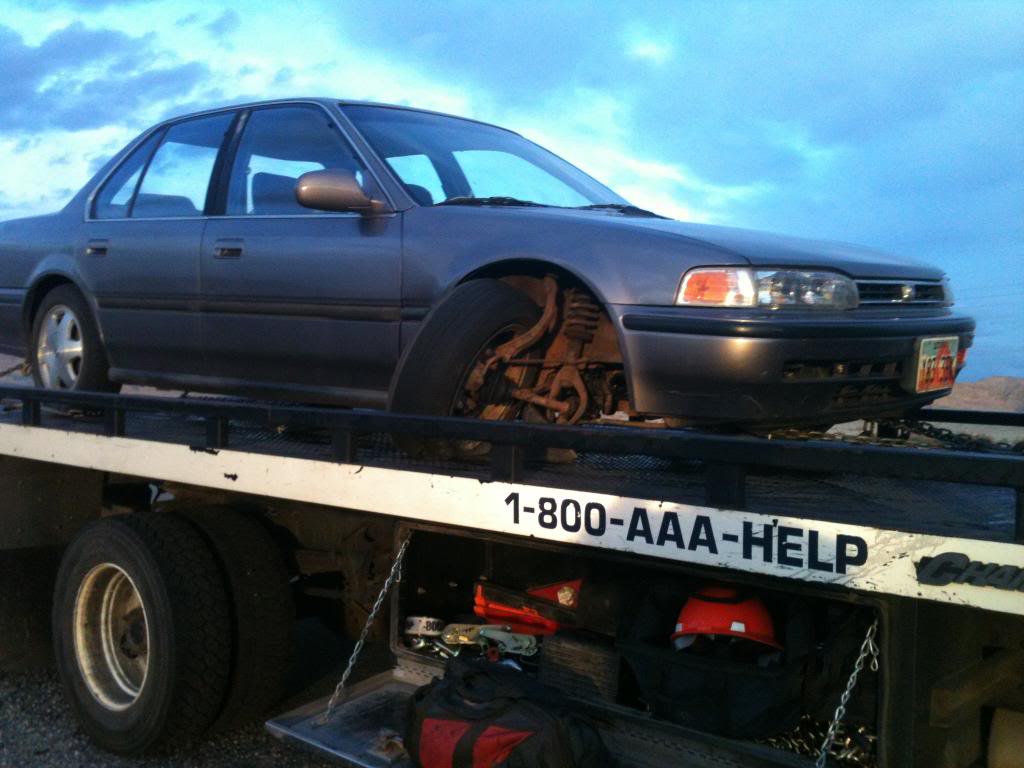
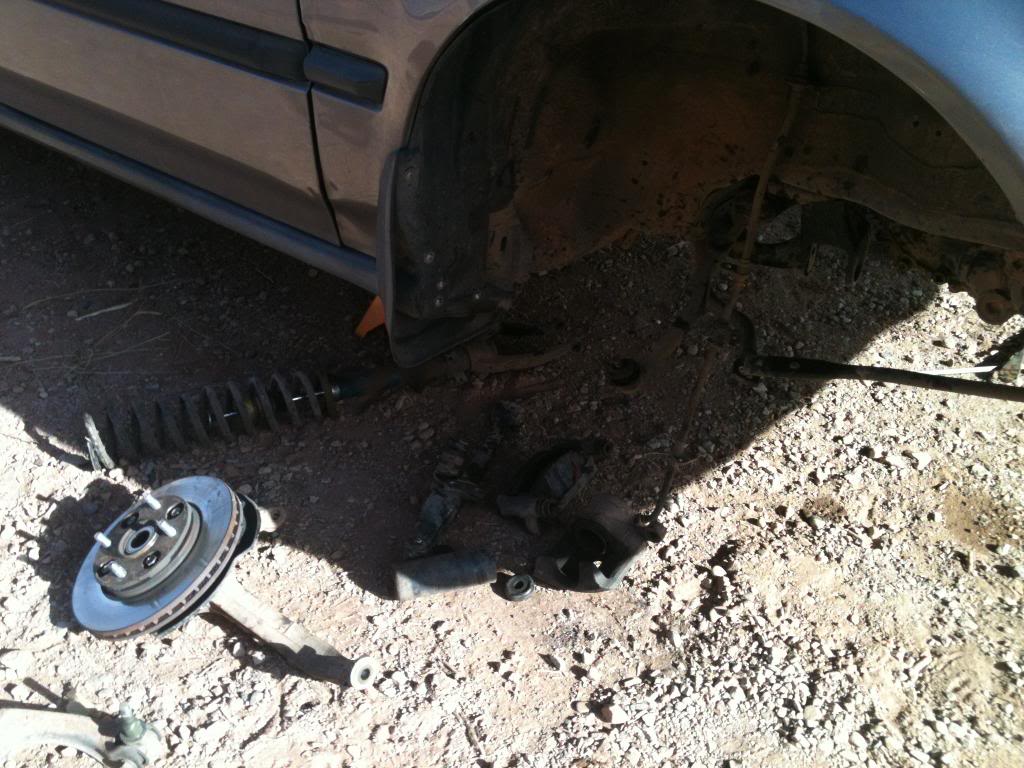
Sorry for the lack of progress guys The grocery getter had a front passenger tire that tried to choose a different direction unexpectedly. Now I am stuck rebuilding the front suspension on the A to B car 
Remember that 1993 Turbo Diesel I got for $860? It got traded the other day for this ~
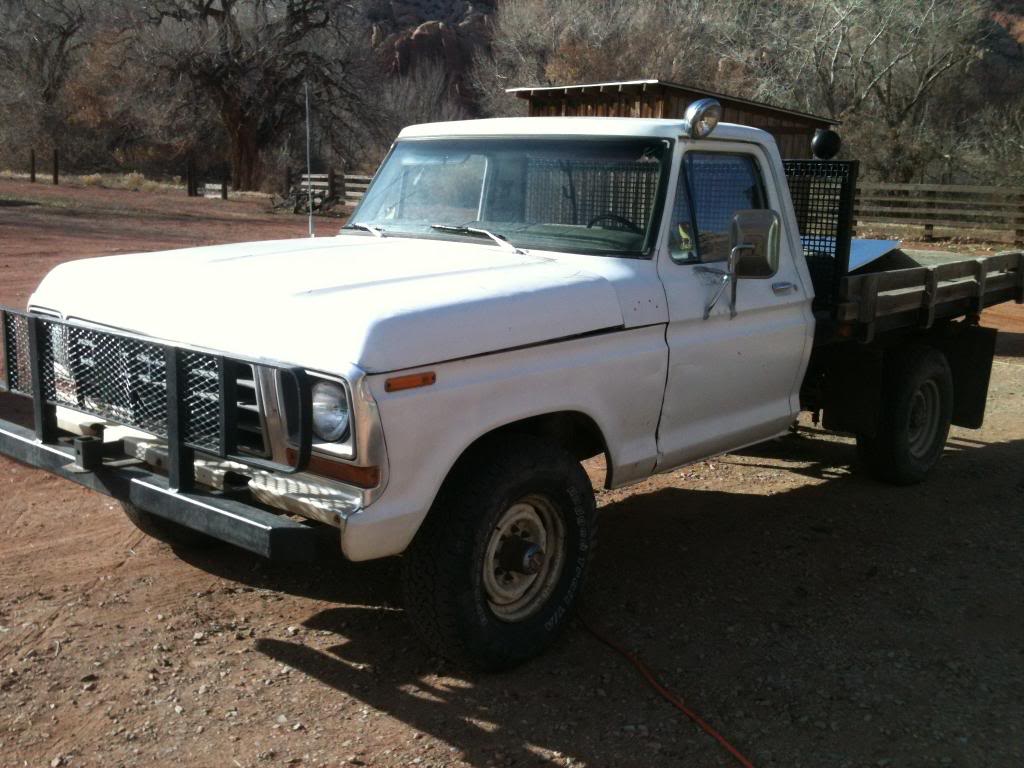
Pretty UGLY Right? Here is why I traded it ~
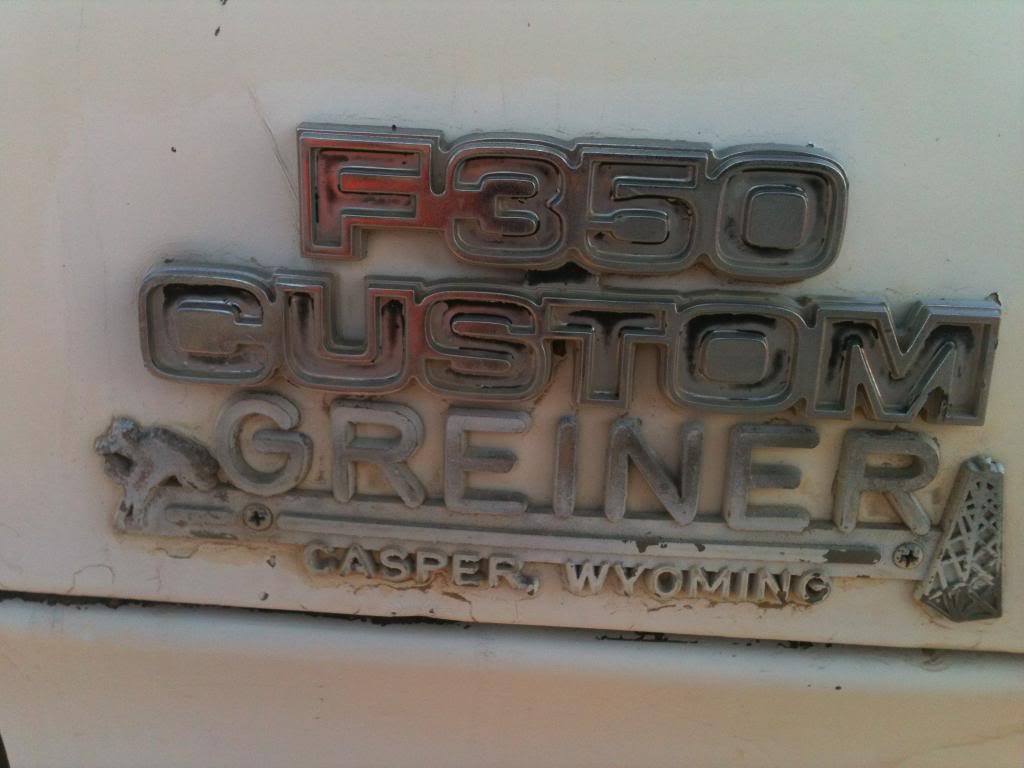
It's a 1979 F350 4X4 with Dana 60's front and rear. For now I will drive it around and smash it up a little bit. After I am done with the current project - it will be getting a nice doner body from a 2wd Truck and a 4" Lift.
The grocery getter had a front passenger tire that tried to choose a different direction unexpectedly. Now I am stuck rebuilding the front suspension on the A to B car Remember that 1993 Turbo Diesel I got for $860? It got traded the other day for this ~
Pretty UGLY Right? Here is why I traded it ~
It's a 1979 F350 4X4 with Dana 60's front and rear. For now I will drive it around and smash it up a little bit. After I am done with the current project - it will be getting a nice doner body from a 2wd Truck and a 4" Lift.
#120
12-11-2012, 10:19 PM
Posting Guru
Join Date: Jun 2009
Location: Bastrop, Texas (Austin,TX
Posts: 1,443
Likes: 0
Received 0 Likes
on
0 Posts