1970 F250 4x4 Cummins Conversion Build Thread - Lots of Pics!
#91
 08-03-2012, 11:40 AM

Join Date: Oct 2011
Location: Willard
Posts: 207
Likes: 0
Received 0 Likes
on
0 Posts
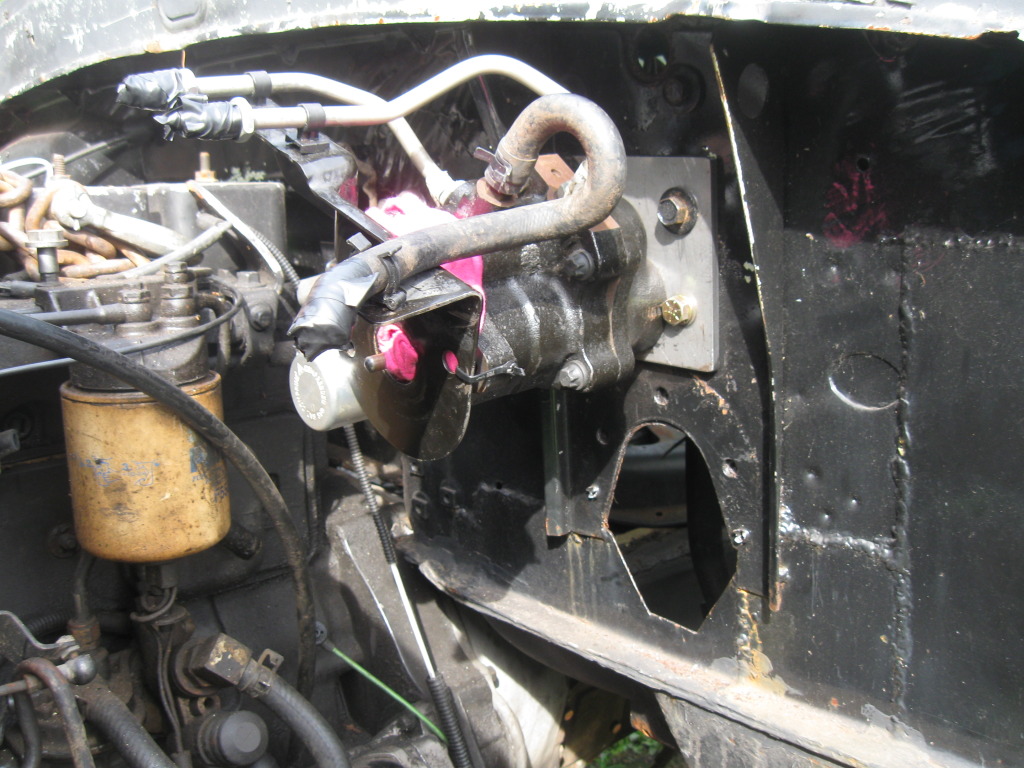
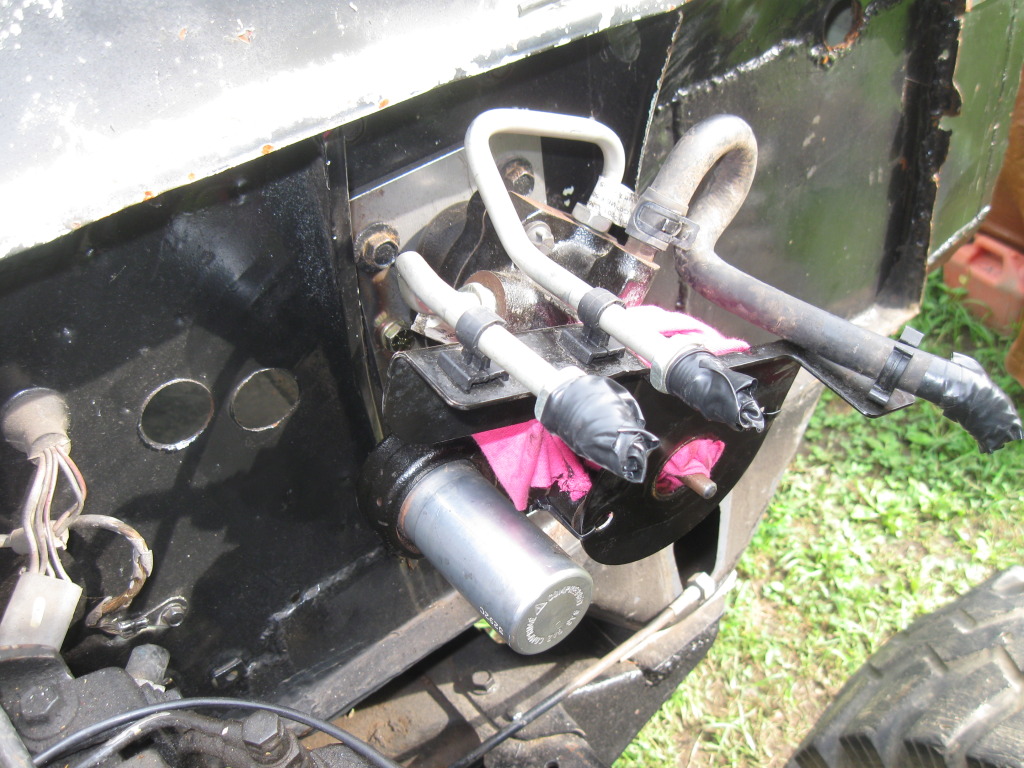
Let me know how the install on the 2006 Dodge hydroboost setup goes. I am planning on using the hydroboost setup off of the 1997 donor Dodge I picked up. The only trick will be getting the dodge power steering pump, hydroboost set up, and my 1979 Ford steering box to all work together properly. Then again, maybe I will just try and used the steering box off of the donor Dodge and keep everything in the loop. I guess it depends on whether or not I can change the pressure coming out of the Dodge power steering pump to match the needed pressure on the 79 Ford steering gear 
#92
09-03-2012, 09:26 PM
Logistics Pro
#93
09-03-2012, 11:13 PM
Join Date: Oct 2011
Location: Willard
Posts: 207
Likes: 0
Received 0 Likes
on
0 Posts
Terrible right? I have been making some progress, but nothing critical. Everything usable has been pulled from the donor Dodge and the remaining pieces have been sold to some Dodge Ram lover. I decided to not only use the engine and tranny, but the hydroboost, steering column, and steering gear off of the Dodge also. I also snagged the petal assembly out of the dodge to keep things simple.
For now, I am trying to figure out how to come up with $2500 to rebuild my front axle and buy a few other items to make my frame a roller again. Soon very soon.
On a happy note, I bought this little baby from a neighbor for $860
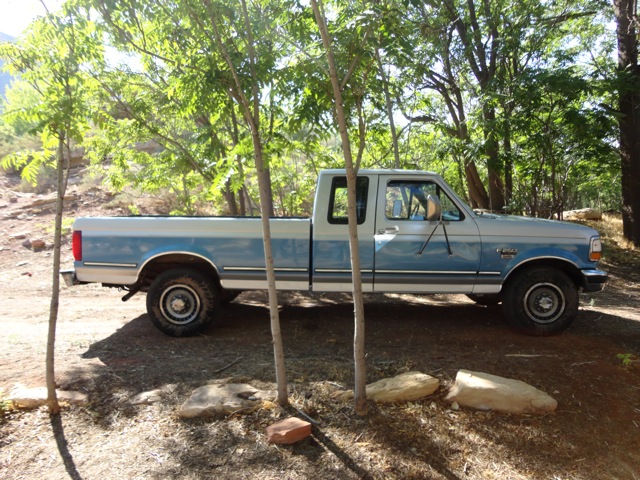
1993 Ford F250 7.3L Turbo Diesel 220K miles. Now I can haul all my junk around
For now, I am trying to figure out how to come up with $2500 to rebuild my front axle and buy a few other items to make my frame a roller again. Soon very soon.
On a happy note, I bought this little baby from a neighbor for $860
1993 Ford F250 7.3L Turbo Diesel 220K miles. Now I can haul all my junk around
#94
09-04-2012, 06:51 AM
That my friend is what you call a steal!!!
QUOTE=ryanhablitzel;12233692]Terrible right? I have been making some progress, but nothing critical. Everything usable has been pulled from the donor Dodge and the remaining pieces have been sold to some Dodge Ram lover. I decided to not only use the engine and tranny, but the hydroboost, steering column, and steering gear off of the Dodge also. I also snagged the petal assembly out of the dodge to keep things simple.
For now, I am trying to figure out how to come up with $2500 to rebuild my front axle and buy a few other items to make my frame a roller again. Soon very soon.
On a happy note, I bought this little baby from a neighbor for $860

1993 Ford F250 7.3L Turbo Diesel 220K miles. Now I can haul all my junk around[/QUOTE]
QUOTE=ryanhablitzel;12233692]Terrible right? I have been making some progress, but nothing critical. Everything usable has been pulled from the donor Dodge and the remaining pieces have been sold to some Dodge Ram lover. I decided to not only use the engine and tranny, but the hydroboost, steering column, and steering gear off of the Dodge also. I also snagged the petal assembly out of the dodge to keep things simple.
For now, I am trying to figure out how to come up with $2500 to rebuild my front axle and buy a few other items to make my frame a roller again. Soon very soon.
On a happy note, I bought this little baby from a neighbor for $860
1993 Ford F250 7.3L Turbo Diesel 220K miles. Now I can haul all my junk around
[/QUOTE]
#95
09-05-2012, 01:54 PM
Logistics Pro
havent heard any updates lately hows the front axle going? i need to get a clutch next and engine gasket kit when its out for the last time hopefully and do the KDP. heres how i did my hydroboost setup off a 2006 dodge it worked out pretty good just need to either cut and thread a heim joint on the rod to the pedal or fab a bracket off of your pedal but your using alot more dodge parts interested in how you make it all work.
#96
09-17-2012, 07:05 PM
Logistics Pro
#97
09-28-2012, 09:12 PM
Join Date: Oct 2011
Location: Willard
Posts: 207
Likes: 0
Received 0 Likes
on
0 Posts
Sorry for the lack of progress. Just got a great deal on a 2005 Denali that needed a front axle rebild. I am buttoning that up this week.
Unfortunately the financial well has run dry for the time being. I will have to wait on the front axle rebild for a while. My plan is to try and make the thing a roller and get the engine and tranny all mounted up before next spring. I have decided to shoot for 7" over all lift instead of 10". This means I will have to ditch the bull bar, but that is ok.
I think using the steering column, gear, and petal assembly off the dodge will make things simpler. We will see.
#98
10-26-2012, 10:45 AM
Join Date: Oct 2011
Location: Willard
Posts: 207
Likes: 0
Received 0 Likes
on
0 Posts
Alright. Back in the saddle again. The goal is to get the axles mounted, engine transplanted, and steering completed before Jan 1. Lets Roll.
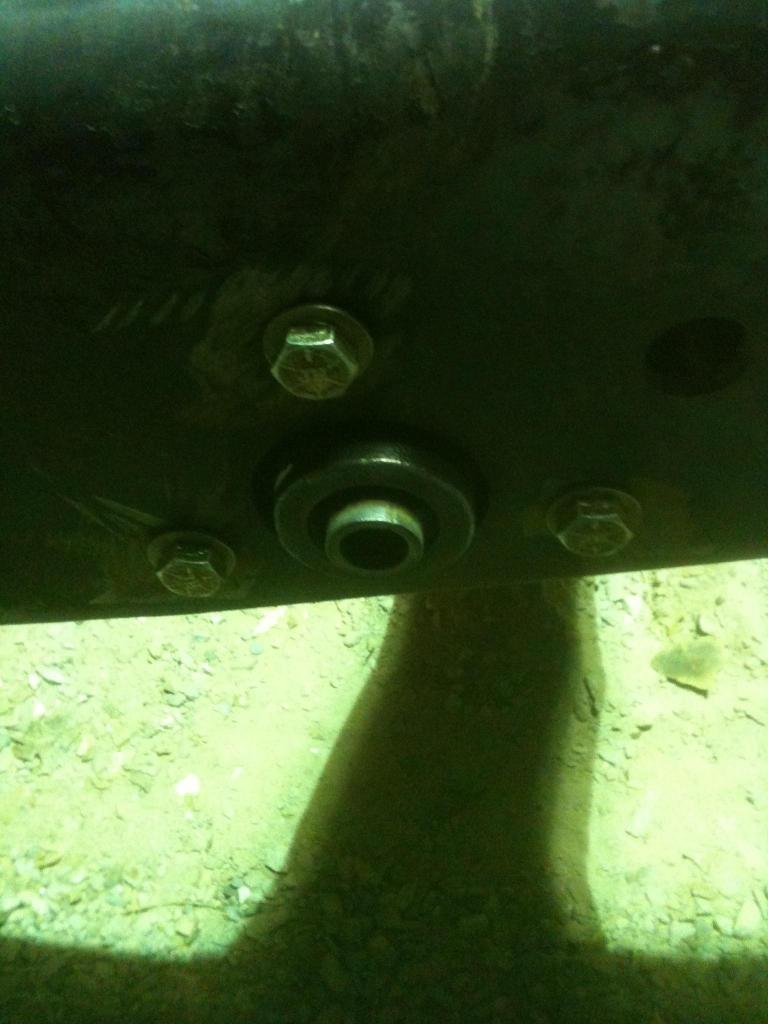
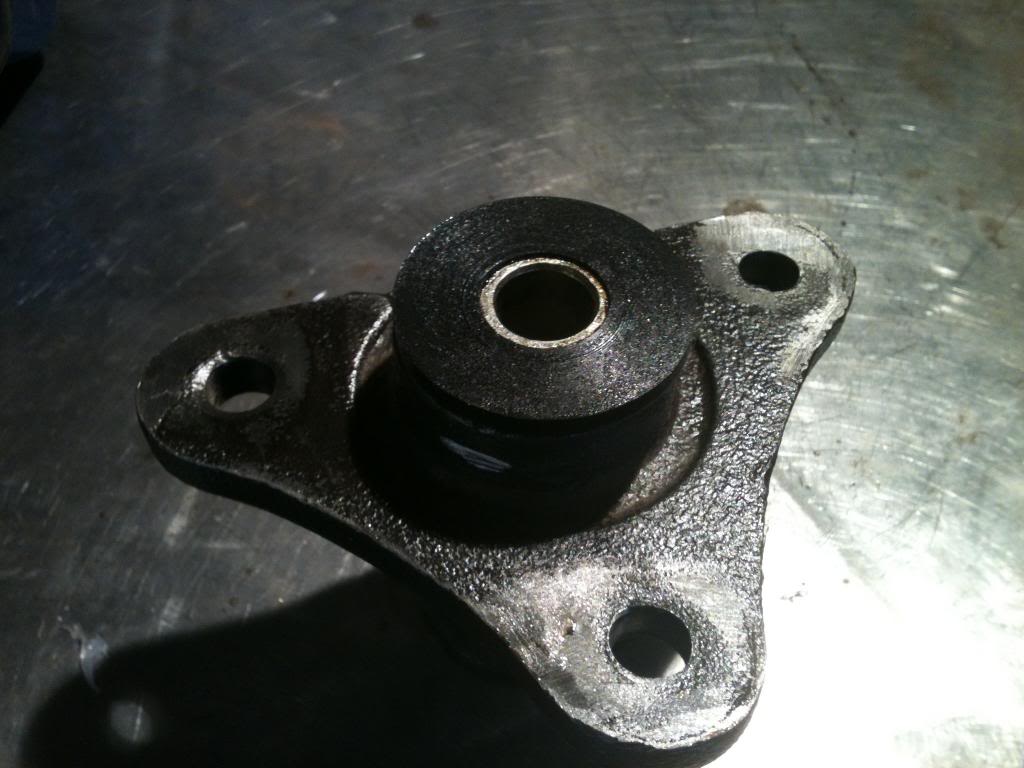
Got the rear (of front) shackle mounts cleaned up and mounted. Does anyone know of a good polyurethane replacement bushing for these?
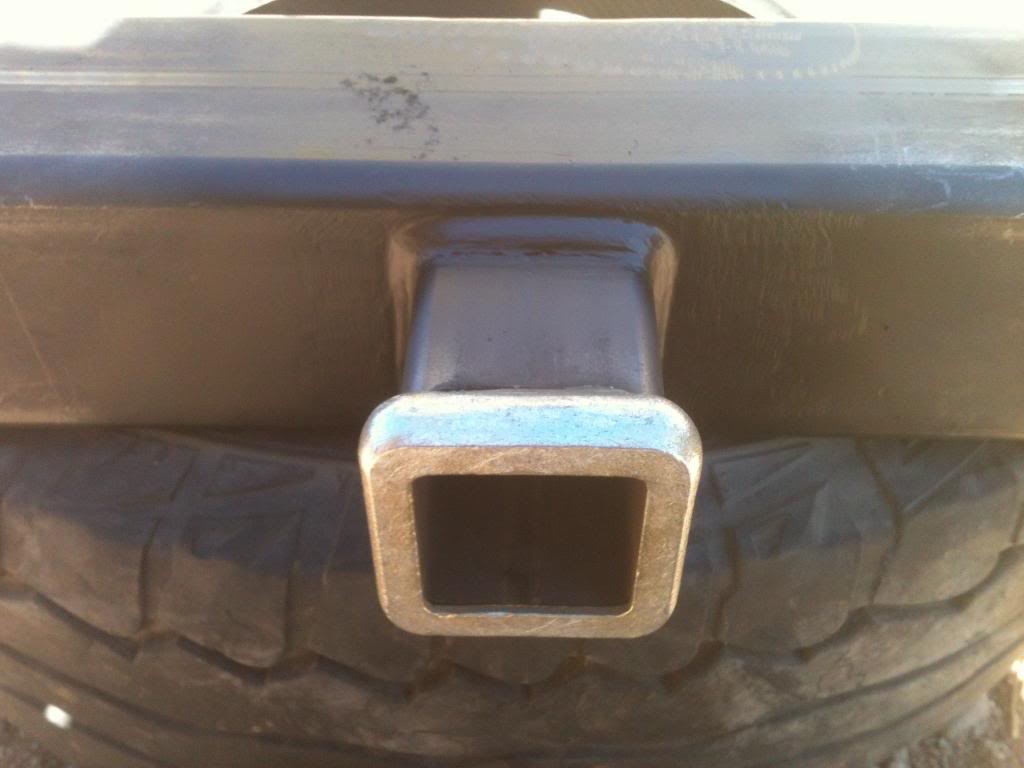
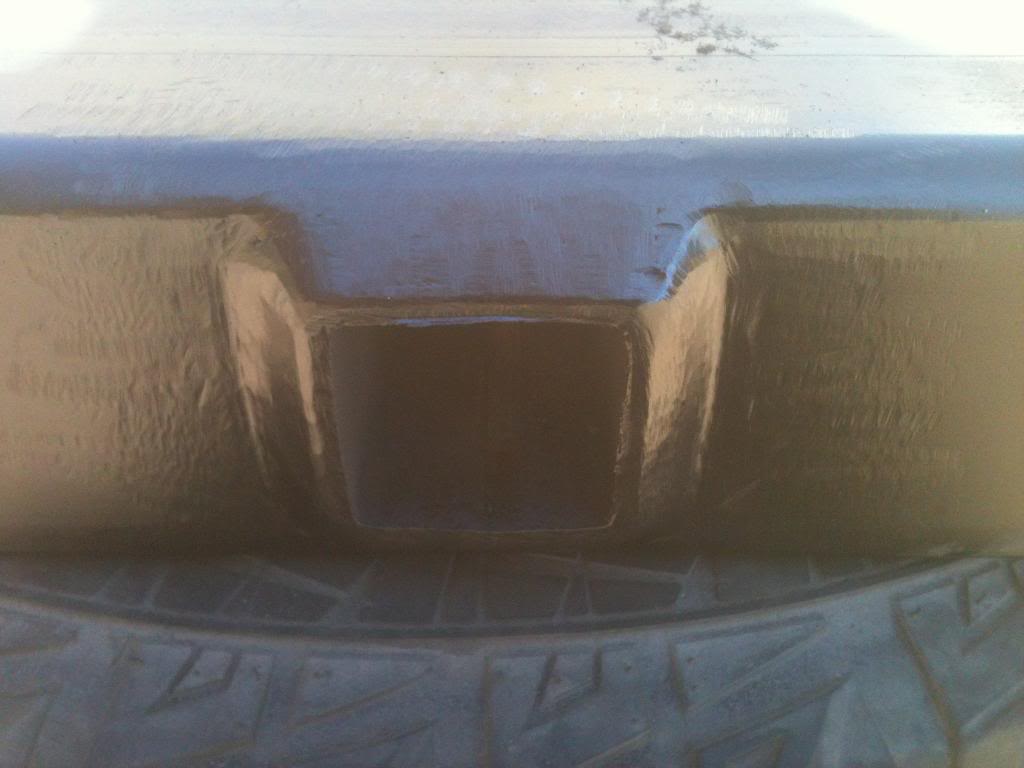
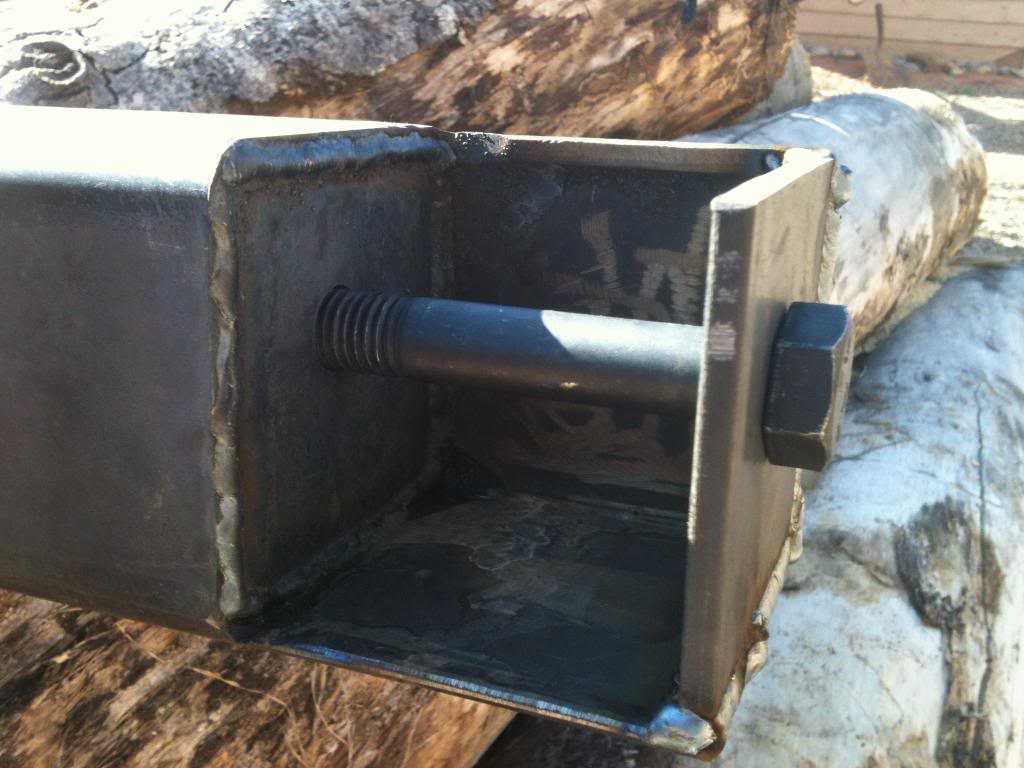
I am building a custom front crossmember out of 4"X4" 1/4" steel tubing. The reason for a custom cross member is: one - so I can mount the 1999-2004 Superduty springs without grinding down the bushings or cutting the military wrap for a stock easy replacement in the future. Two - so I have a solid place to mount a front receiver and clevis mounts. The down side is that this will take a little more work.
In order to do this I first had to find the center to center measurement of my 1979 F350 Dana 60 front axle in order to make sure that everything will line up even once the axle is mounted. The measurement was 31 3/4".
Next order of business was to measure the center to center measurement of the rear (of front) busing mounts. This measurement was 31 7/8".
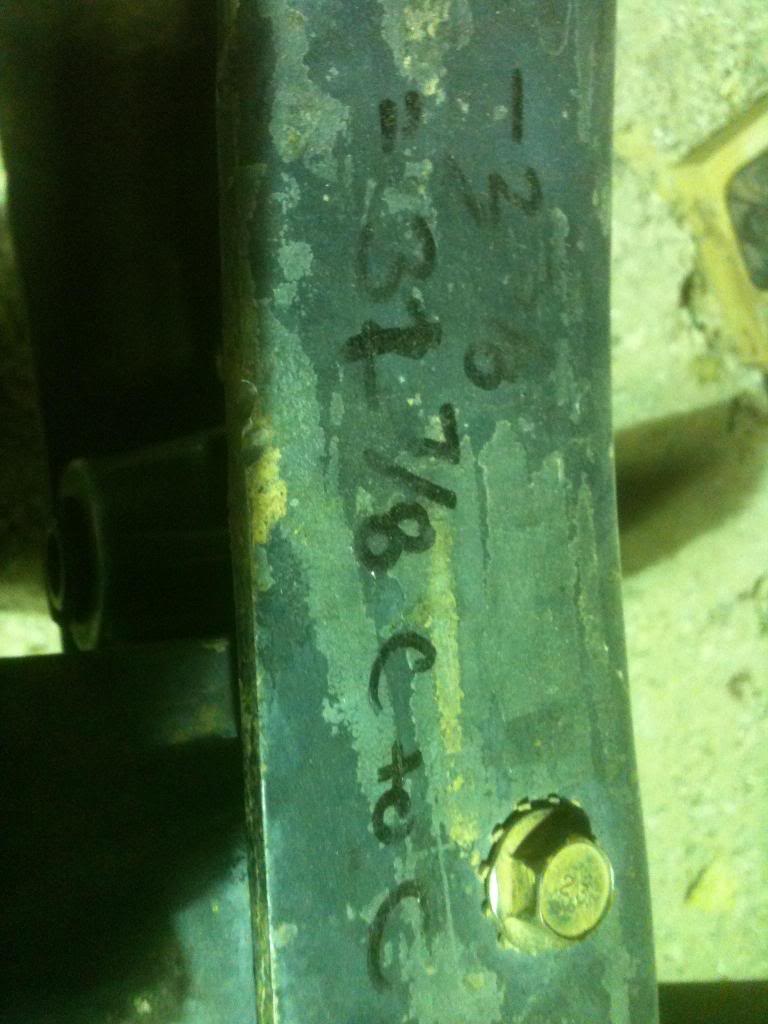
A 1/16" difference on each side of the axle is acceptable so I am going with the 31 7/8" measurement since the rear mounts are stationary and can not change (easily that is).
Everything I do on the front axle mount will be with 31 7/8" center to center as my standard.
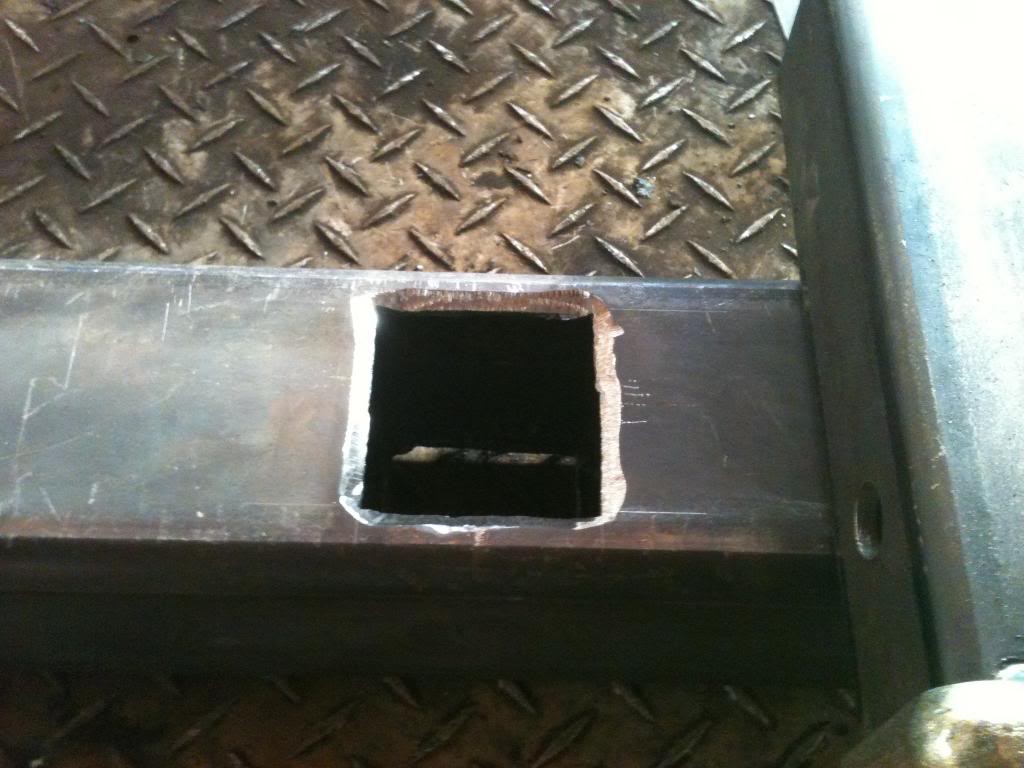
I cut away my spring access on the cross member using a plasma and a grinder. I had to go in 3 3/4".
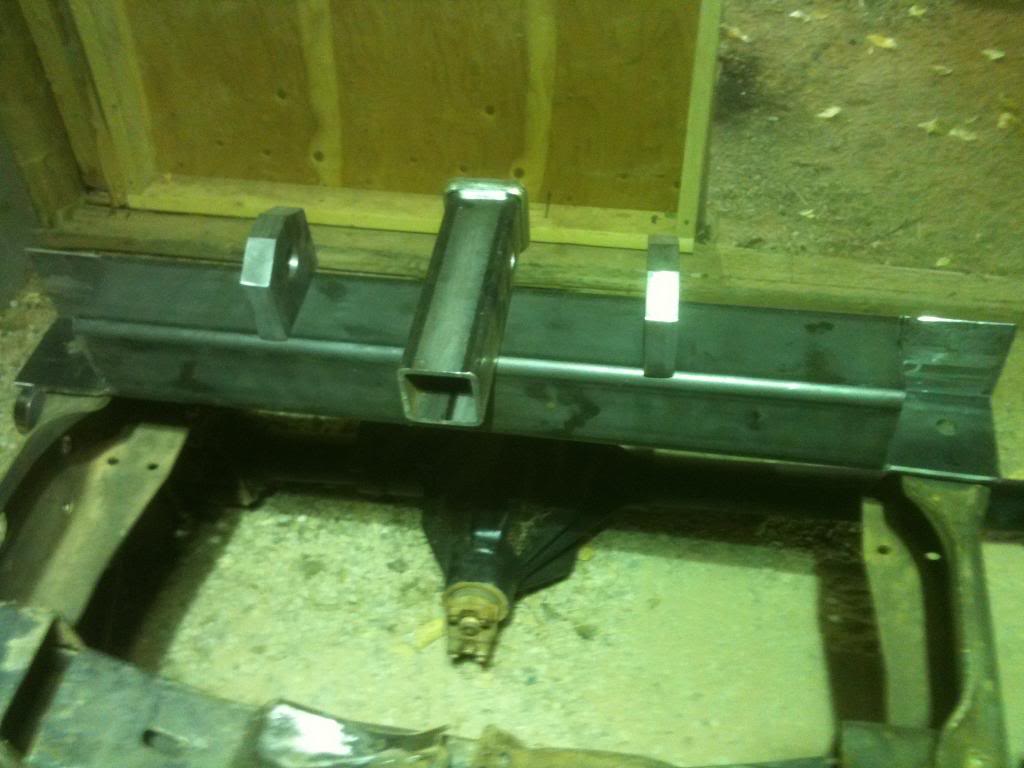
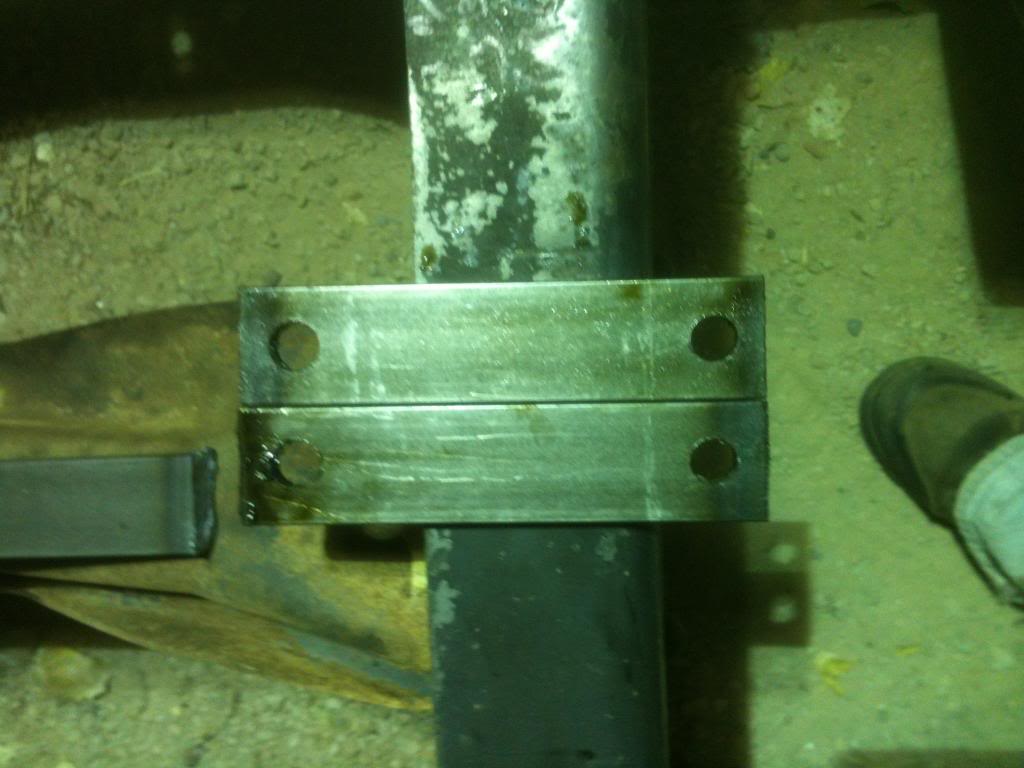
Now I had to make plates to add to each side to hang the front half of spring on. Notice that I drilled the mount holes slightly lower and back from center so I could clear the Superduty springs military wrap.

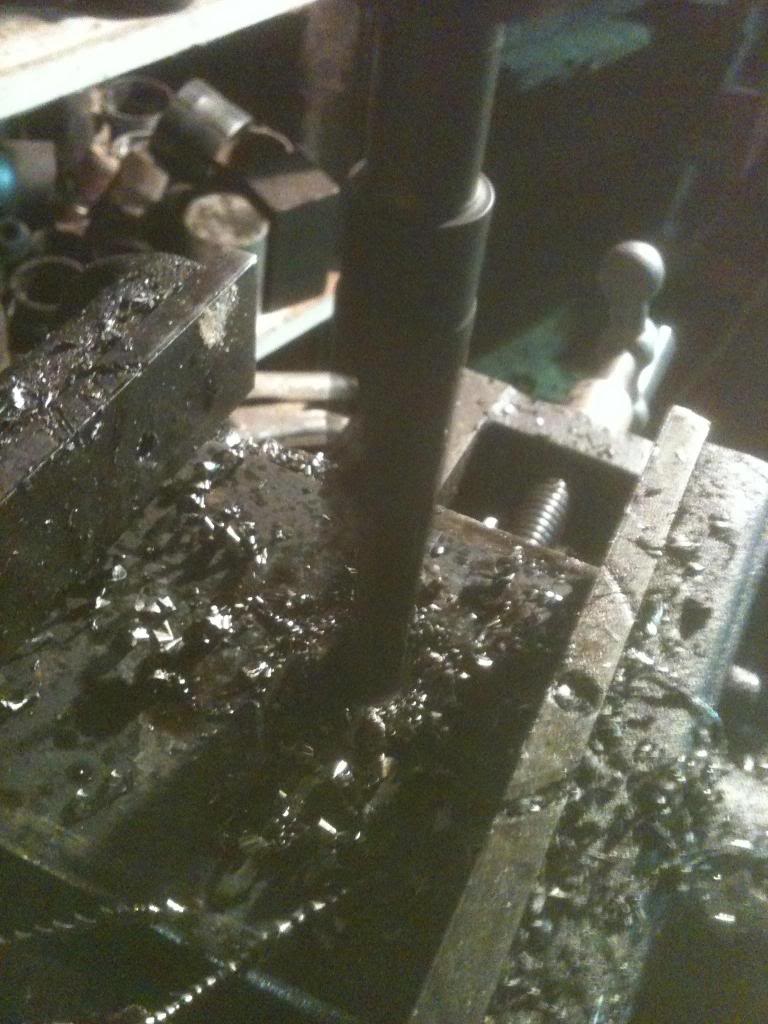
Now with the front cross member ready to weld, I will move to the back. I need to buy bolts and nuts before I weld everything in place so I can weld a nut to the backside of the inner cross member plate. This will allow me to install the spring without having to get a wrench on the inside of the crossmember. You have to use a zinc nut because grade 8 nuts are not good for welding on.
I cut out temporary shackles for the rear so that I could mount everything up and and put weight on the springs before I cut a final set. The main thing to remember is that this is where caster will be affected. Too long of shackles and you will have a steering issue. Think about the turning radius of a motorcycle with long forks. If you tilt the axle too far forward like a motorcycle with long forks - you will start to have turning radius issues. Since I am building a custom front cross member, I am going to clamp everything in place and put weight on the springs so that I can move the cross member forward or back to achieve the ideal caster. I am starting with 5" eye to eye and then going from there.
Incase anyone is wondering here are the bolt sizes for the Superduty spring and stock shackle:
Front - 11/16"
Rear - 5/8"
Rear Shackle Mount - 9/16"
Off to the bolt store before I move forward anymore.
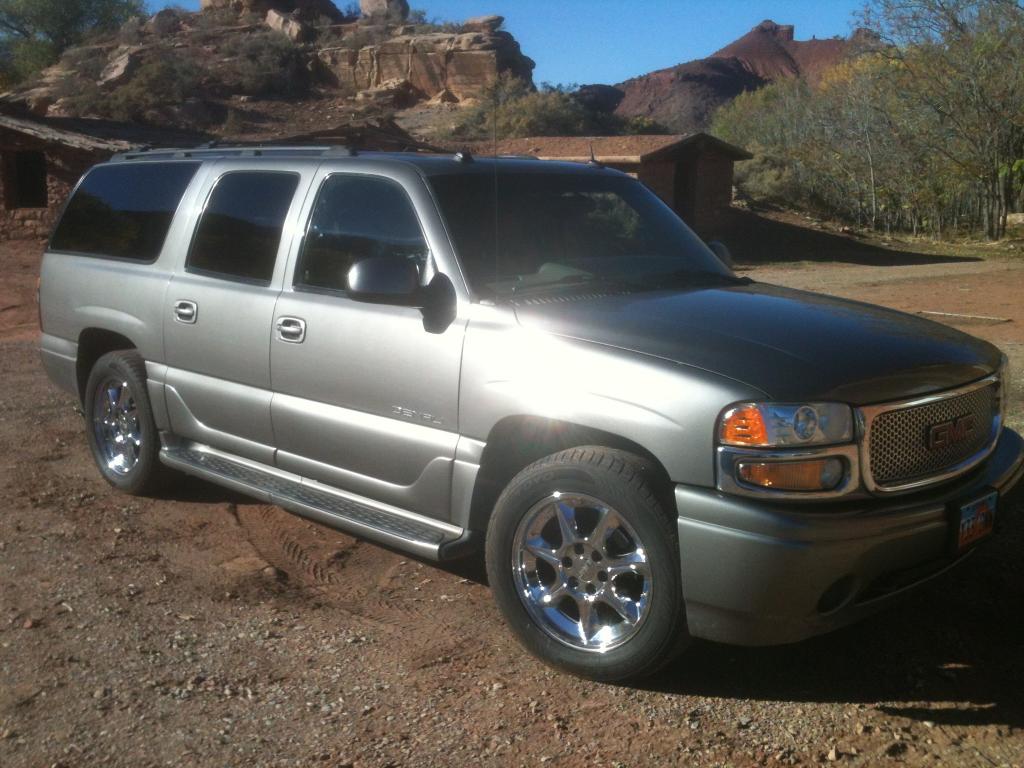
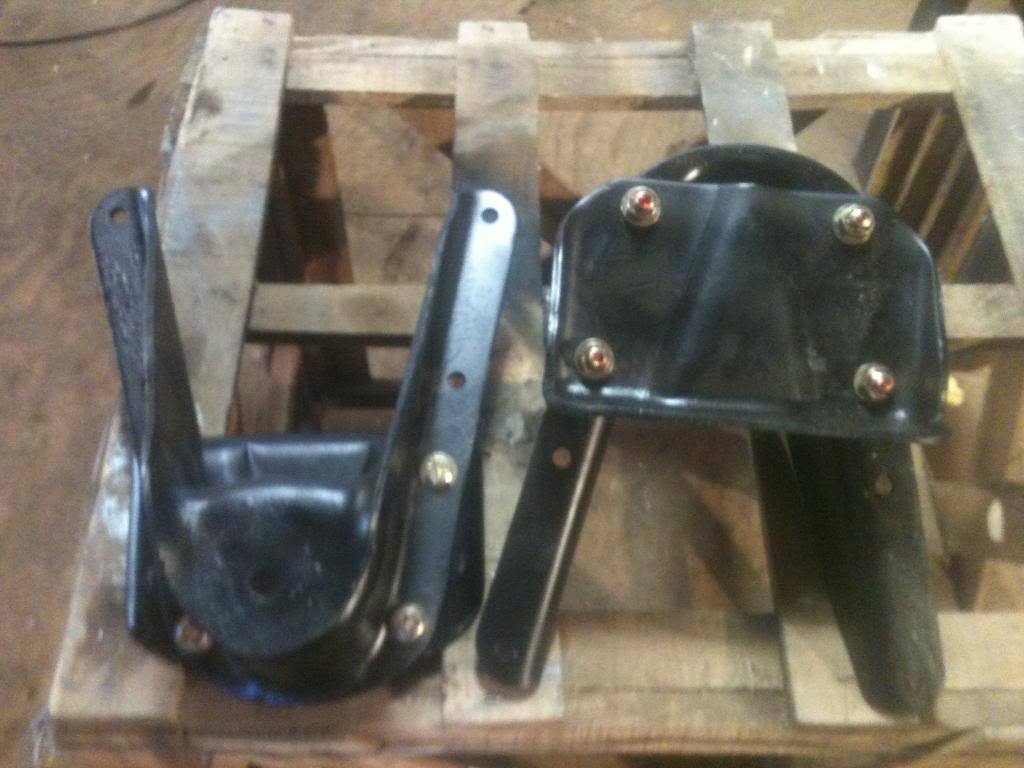
Here is a pic of the Denali that has consumed my attentions over the last month or so. Had to rebuild the front axle, have the front lower seat re upholstered, total detail on the interior (dog hair and coffee stains everywhere), and replace the instrument cluster. But I got a sweet deal so I am not complaining.
Got the rear (of front) shackle mounts cleaned up and mounted. Does anyone know of a good polyurethane replacement bushing for these?
I am building a custom front crossmember out of 4"X4" 1/4" steel tubing. The reason for a custom cross member is: one - so I can mount the 1999-2004 Superduty springs without grinding down the bushings or cutting the military wrap for a stock easy replacement in the future. Two - so I have a solid place to mount a front receiver and clevis mounts. The down side is that this will take a little more work.
In order to do this I first had to find the center to center measurement of my 1979 F350 Dana 60 front axle in order to make sure that everything will line up even once the axle is mounted. The measurement was 31 3/4".
Next order of business was to measure the center to center measurement of the rear (of front) busing mounts. This measurement was 31 7/8".
A 1/16" difference on each side of the axle is acceptable so I am going with the 31 7/8" measurement since the rear mounts are stationary and can not change (easily that is).
Everything I do on the front axle mount will be with 31 7/8" center to center as my standard.
I cut away my spring access on the cross member using a plasma and a grinder. I had to go in 3 3/4".
Now I had to make plates to add to each side to hang the front half of spring on. Notice that I drilled the mount holes slightly lower and back from center so I could clear the Superduty springs military wrap.
Now with the front cross member ready to weld, I will move to the back. I need to buy bolts and nuts before I weld everything in place so I can weld a nut to the backside of the inner cross member plate. This will allow me to install the spring without having to get a wrench on the inside of the crossmember. You have to use a zinc nut because grade 8 nuts are not good for welding on.
I cut out temporary shackles for the rear so that I could mount everything up and and put weight on the springs before I cut a final set. The main thing to remember is that this is where caster will be affected. Too long of shackles and you will have a steering issue. Think about the turning radius of a motorcycle with long forks. If you tilt the axle too far forward like a motorcycle with long forks - you will start to have turning radius issues. Since I am building a custom front cross member, I am going to clamp everything in place and put weight on the springs so that I can move the cross member forward or back to achieve the ideal caster. I am starting with 5" eye to eye and then going from there.
Incase anyone is wondering here are the bolt sizes for the Superduty spring and stock shackle:
Front - 11/16"
Rear - 5/8"
Rear Shackle Mount - 9/16"
Off to the bolt store before I move forward anymore.
Here is a pic of the Denali that has consumed my attentions over the last month or so. Had to rebuild the front axle, have the front lower seat re upholstered, total detail on the interior (dog hair and coffee stains everywhere), and replace the instrument cluster. But I got a sweet deal so I am not complaining.
#99
10-26-2012, 12:04 PM
Logistics Pro
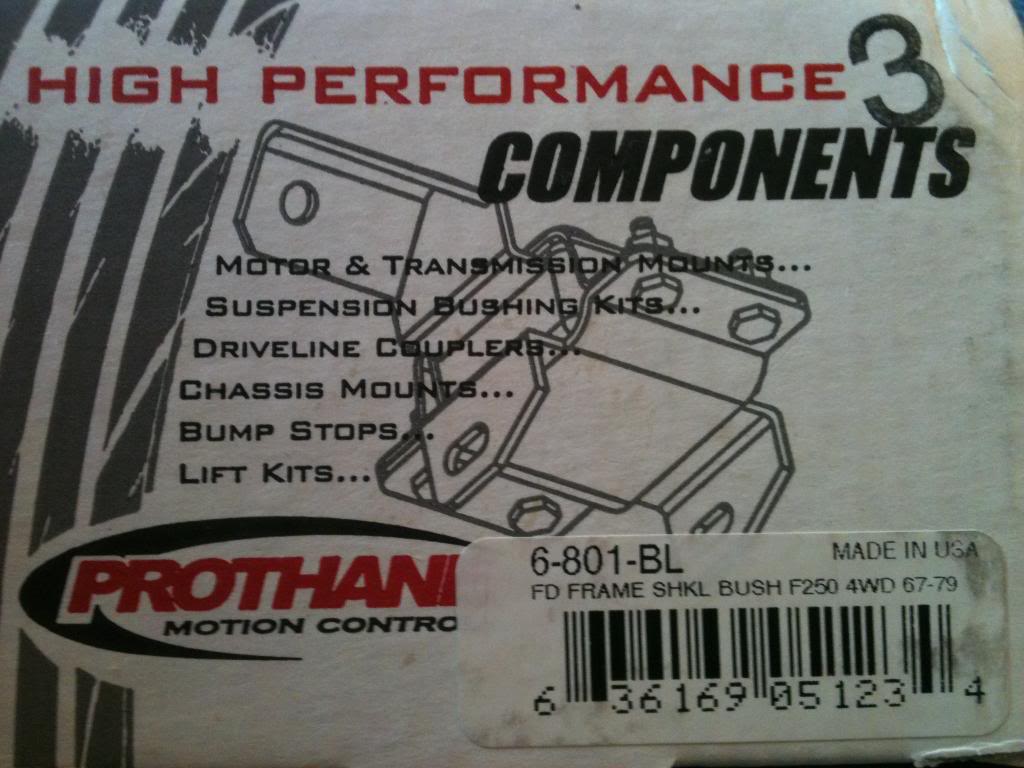
Looking good I believe the front leaf holes are 18mm ford went to metric instead of standard for the SD I took out a stock SD leaf bolt and it was a 18mm thread I got longer 18mm bolts in order to go through my custom leaf crossmember. Ill be redoing it after winter I have some time to think about it if I want to convert to coil overs or stay with leafs. I believe these are the ones I used for the rear shackle hanger bushings might I say good luck getting the old ones out it took me awhile before I got mine out yours might be easier as you have less rust issues then I have Shackle Bushings Only, Black
#100
10-26-2012, 10:55 PM
Join Date: Oct 2011
Location: Willard
Posts: 207
Likes: 0
Received 0 Likes
on
0 Posts
Thanks for the heads up on the shackle mount bushings. I was planning on using a press to get the old ones out and applying some heat if necessary. I will order up a pair of the ones you mentioned and see how things go.
You are correct on Ford using metric for the SD. I didn't even think about it since I was measuring with a dial caliper. I will likely try to find standard size bolts since I drilled everything out with standard sized drill bits. The tolerances should be close enough. I may just have to use the 18mm though because 11/16" is a bit of an oddball size. The 9/16 and 5/8 will be no problem.
You are correct on Ford using metric for the SD. I didn't even think about it since I was measuring with a dial caliper. I will likely try to find standard size bolts since I drilled everything out with standard sized drill bits. The tolerances should be close enough. I may just have to use the 18mm though because 11/16" is a bit of an oddball size. The 9/16 and 5/8 will be no problem.
#101
11-06-2012, 02:11 PM
Join Date: Oct 2011
Location: Willard
Posts: 207
Likes: 0
Received 0 Likes
on
0 Posts
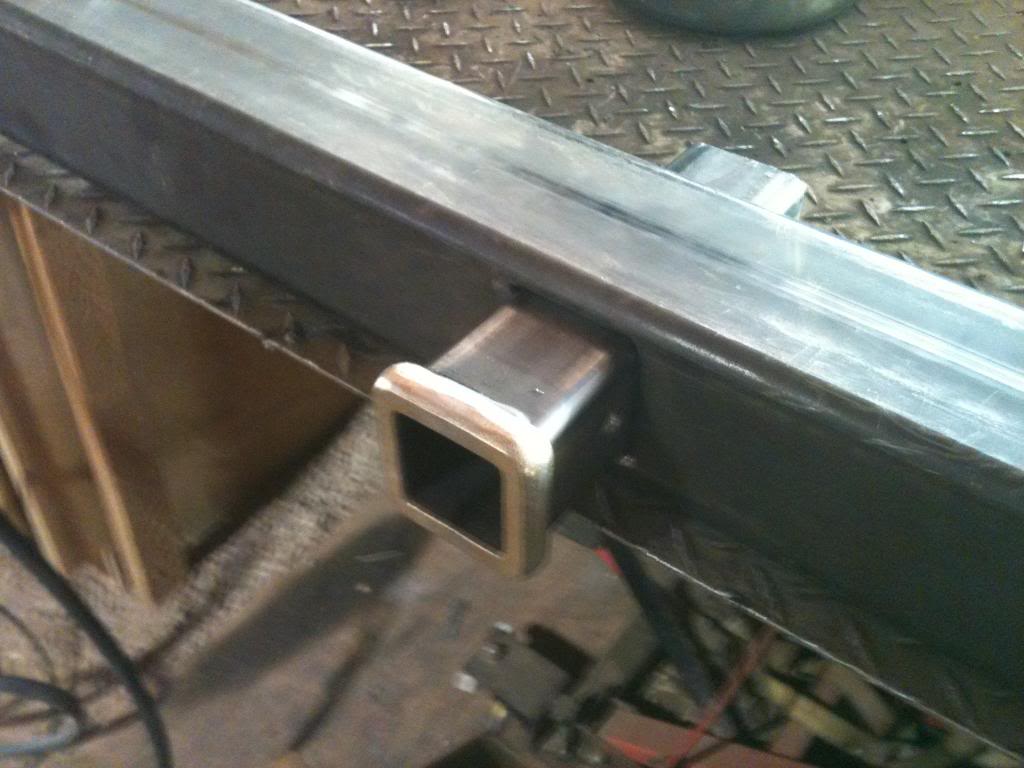
Got the receiver welded into the front crossmember yesterday
OFFICIAL BOLT SIZES for the Superduty springs are:
Front - 18mm (had to order these from the bolt house)
Rear - 16mm (ended up splurging and buying these at the Ford dealer just because)
Rear Frame Shackle Pivot - 9/16"
Thanks crazedbronco for keeping me strait. The 16mm fit the 5/8" hole I drilled perfectly so you could use either size on the rear. The 18mm fits the 11/16" hole perfectly, but you won't find a 11/16" bolt anywhere.
#102
11-08-2012, 03:35 AM
Logistics Pro
Nice fab work like the front spring crossmember with hitch mount. Ill be redoing mine next year I got a truck for winter now so I don't have to rush on things and go back and redo things the way I want them can't wait to get started on that. How long we're your 18mm bolts? I had a hell of a time finding ones long enough 18mm is sort of a odd size bolt for some reason.
#103
11-08-2012, 07:55 AM
Join Date: Oct 2011
Location: Willard
Posts: 207
Likes: 0
Received 0 Likes
on
0 Posts
Nice fab work like the front spring crossmember with hitch mount. Ill be redoing mine next year I got a truck for winter now so I don't have to rush on things and go back and redo things the way I want them can't wait to get started on that. How long we're your 18mm bolts? I had a hell of a time finding ones long enough 18mm is sort of a odd size bolt for some reason.
You could also just get a pair at your local Ford dealer for a 1999-2004 Superduty. This actually may have been a cheaper option in hindsight.
I have learned my lesson about going to the local "hardware" store for bolts. A bolt specialty store is always 20 times cheaper and you can get whatever you want.
#105
11-08-2012, 11:48 PM
Join Date: Oct 2011
Location: Willard
Posts: 207
Likes: 0
Received 0 Likes
on
0 Posts
PROGRESS
Installed new rear of front shackle mount bushings
Finished up the front cross member

Got the rear spring mounts cleaned up also
I will be setting the springs on the front axle tomorrow. Ordered some Ruff Stuff spring plates and u-bolts for the Dana 60. $106 shipped to the door for everything.
Soon it will be time to set the Cummins between the frame for a test fit.
Installed new rear of front shackle mount bushings
Finished up the front cross member
Got the rear spring mounts cleaned up also
I will be setting the springs on the front axle tomorrow. Ordered some Ruff Stuff spring plates and u-bolts for the Dana 60. $106 shipped to the door for everything.
Soon it will be time to set the Cummins between the frame for a test fit.