Coolant Bypass Filter Writeup
#1
 01-28-2012, 04:57 PM

Join Date: Dec 2008
Location: Maysville, Kentucky
Posts: 2,347
Likes: 0
Received 0 Likes
on
0 Posts
Coolant Bypass Filter Writeup
Well guys as promised here's the write up for the coolant bypass filter install. I'd like to thank guzzle's site for looking at where to put a couple things.
Ok to start I decided I was going to put mine into the heater hoses as I felt it was simpler and easier to get clamps and such tight.
Ill start with a parts list.
1 4019 Napa Coolant Filter Base
1 4070 or 4071 Coolant filter( 71 is load with SCA additives other is not)
2 9934 5/8" T Connector
2ft H-152 5/8'' Heater Hose
8 505-1210 Hose Clamps
3ft piece of 1.5'' by 1/8'' thick
Supplies are:
A small welder or you can hold it all together with bolts.
5/16'' drill bit
1/4'' Drill bit
Drill
Wire brush
Paint of your choice
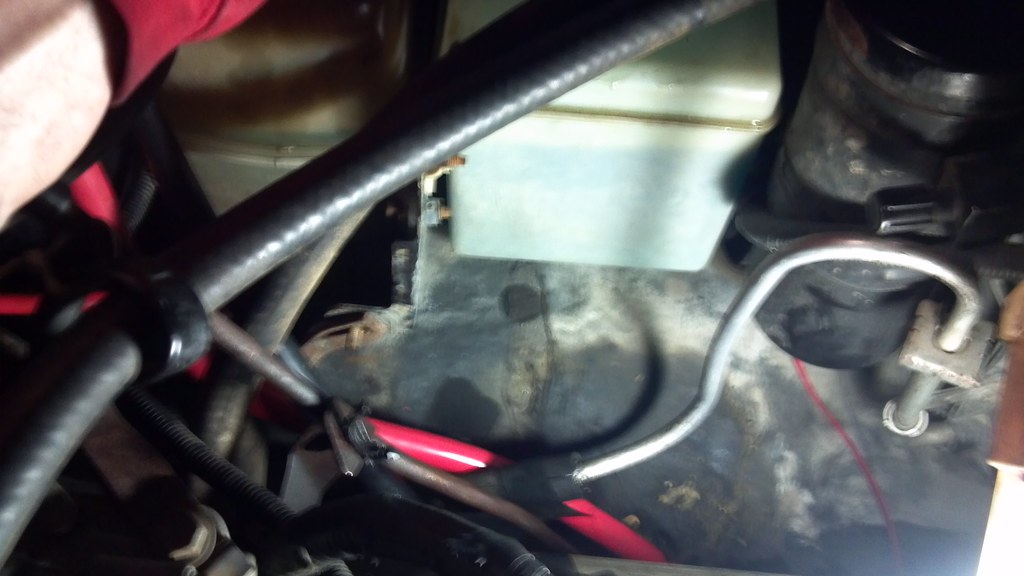
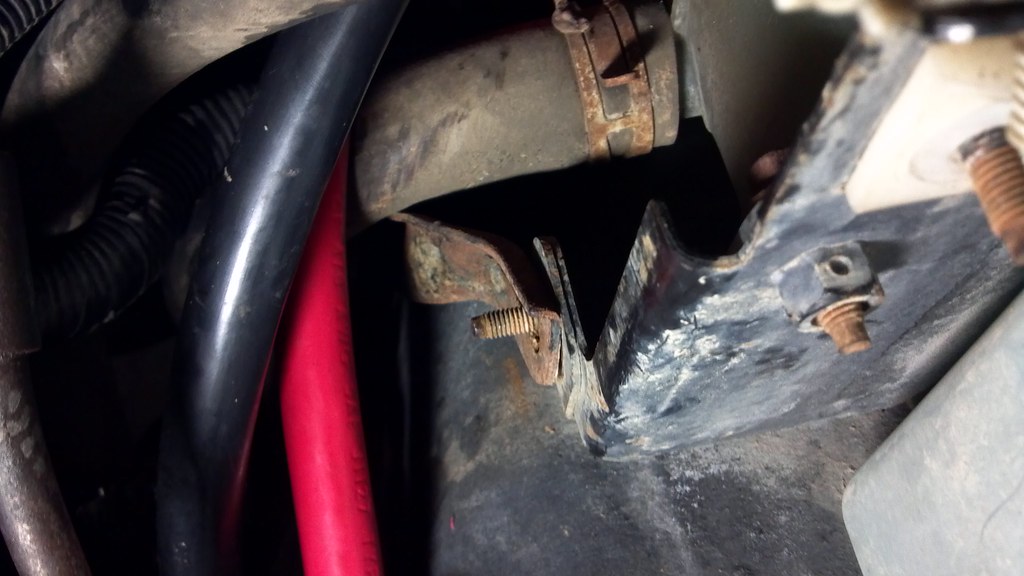
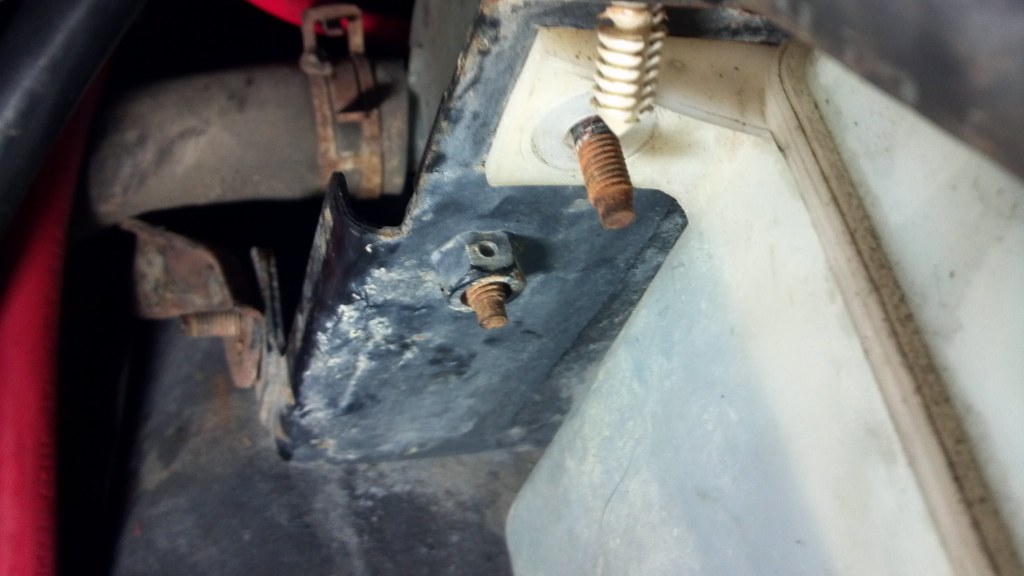
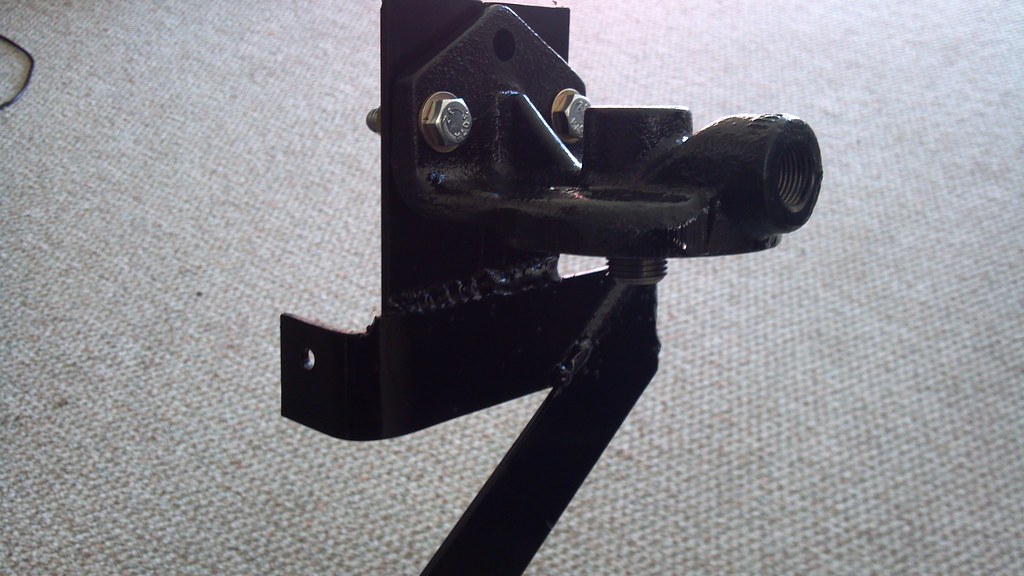
Ok to start make the bracket to hold the filter head. I mounted mine beside the windshield washer fluid tank. I have a long dipstick tube off of a SD so you may need to tweak yours slightly to clear. I'm using the bolt on the windshield washer tank bracket and one below it on the battery tray.
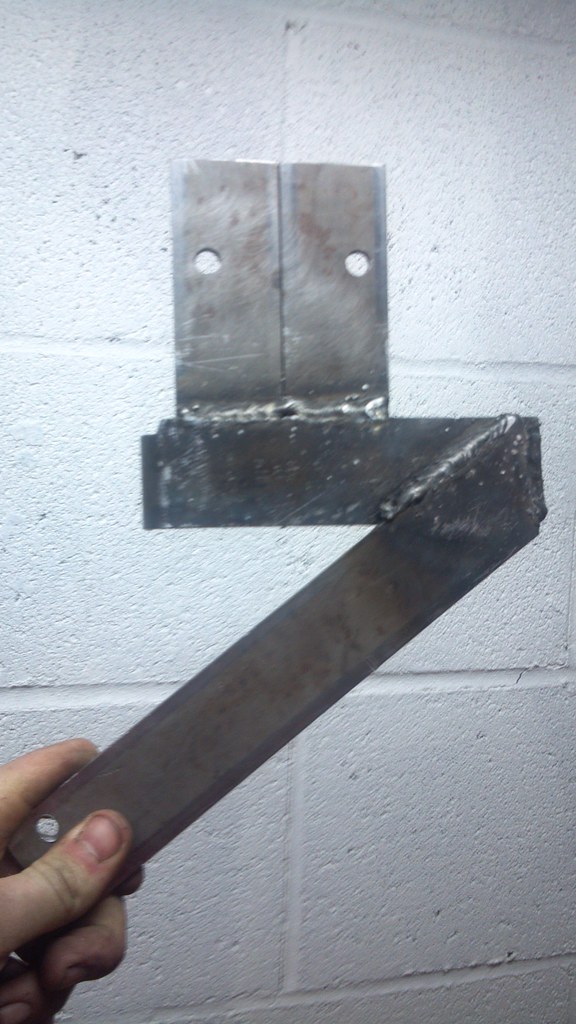
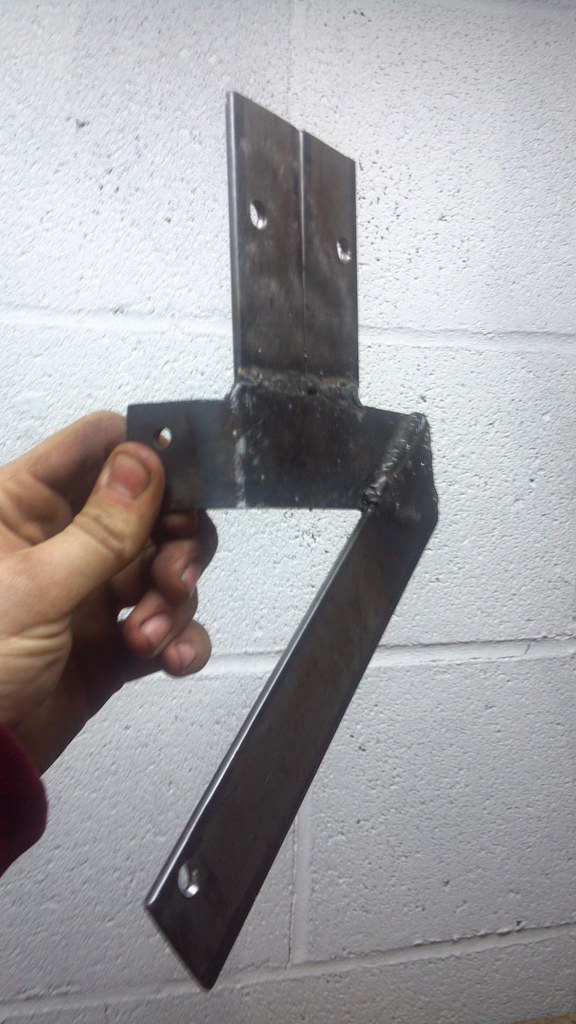
First I took and cut a 6 3/4'' then bent it about 1 1/4'' up. Then I drilled a 1/4'' hole about a 1/4'' from the top. I slightly miss drilled the hole so I had to notch the end to clear the tank.
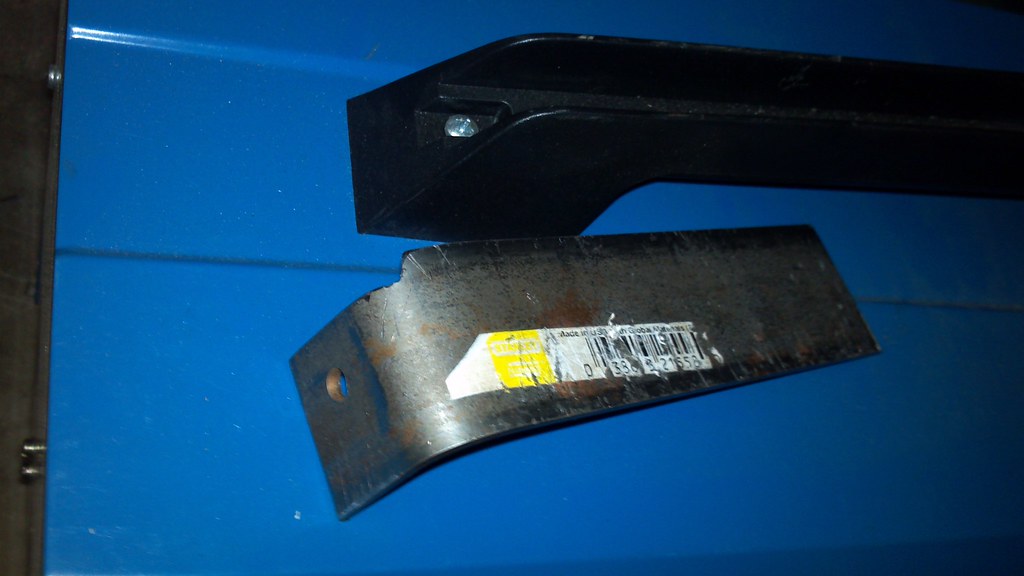
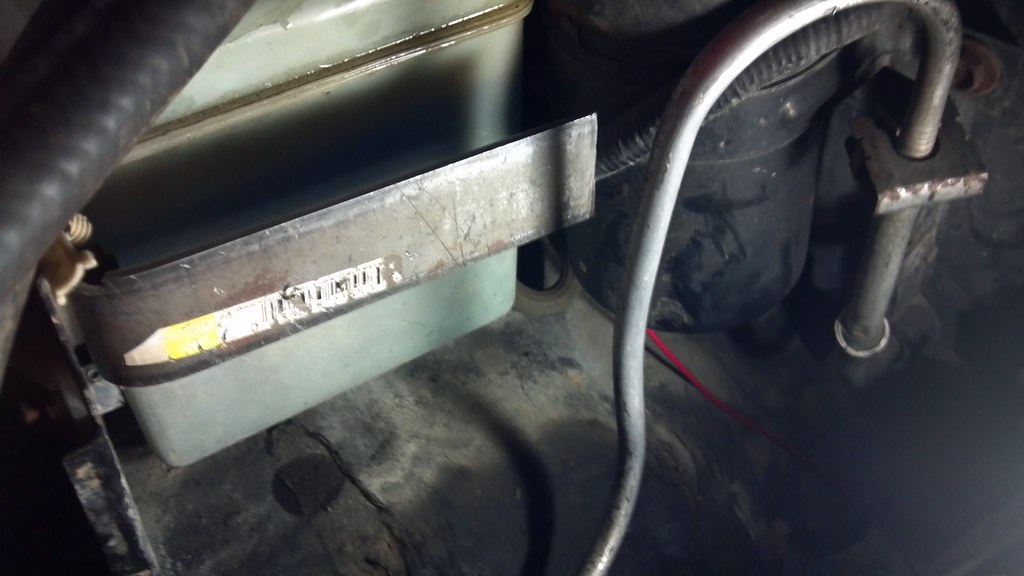
Next I took and cut a 9'' piece of flat to mate up to the upper piece. Also drilled a 1/4'' hole in the similar location. I then cut it off so it was flush on the top. I then welded it to the upper bracket.
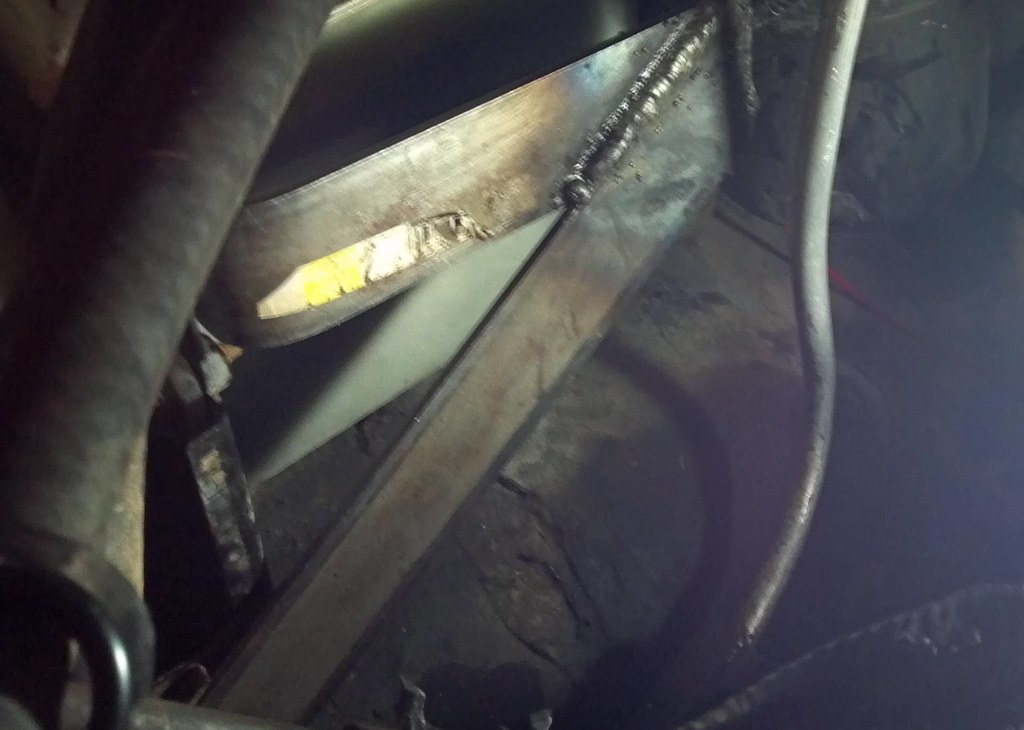
Next I took and cut 2 4 3/4'' pieces of flat to weld to the bracket to support the filter head. I then marked the bracket off the filter head and drilled 2 5/16'' holes.
Now that the brackets done its time to paint it. I painted it gloss black and painted the filter head to after I taped it off add plugged the holes. Looks much better then green.
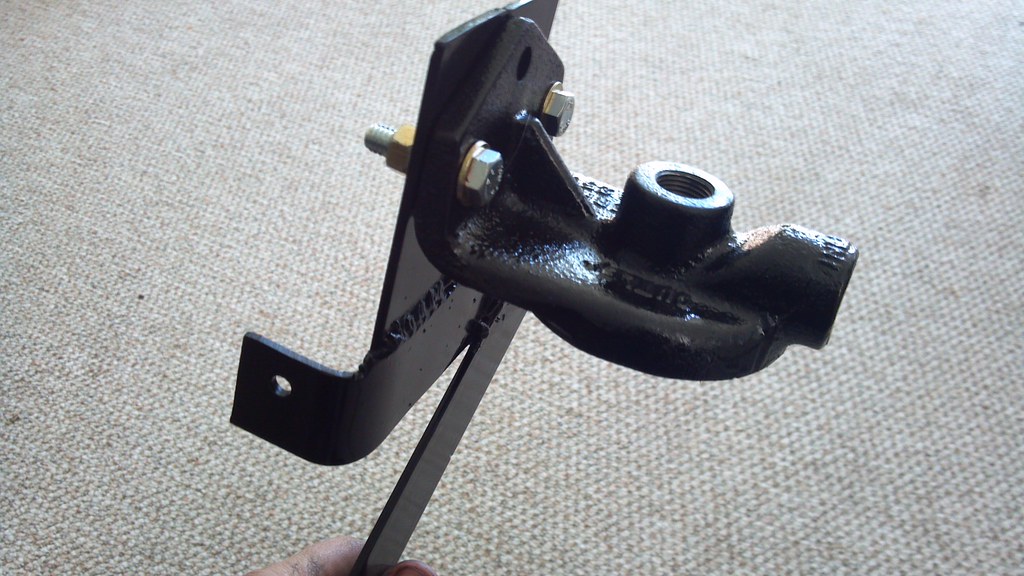
After the paint dries bolt the bracket into the truck. There is an 11mm nut by the washer tank and a 10mm on the bottom.

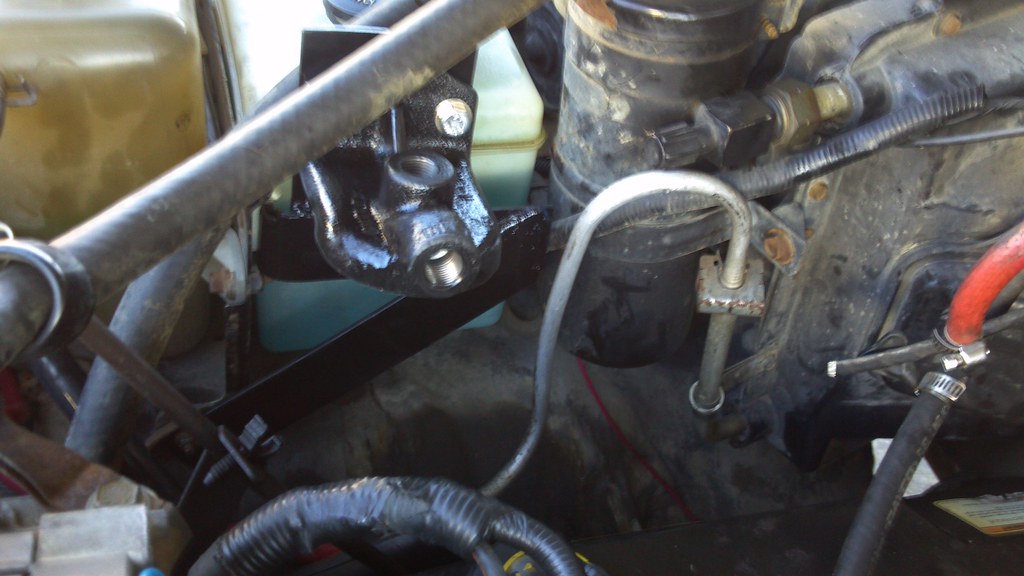
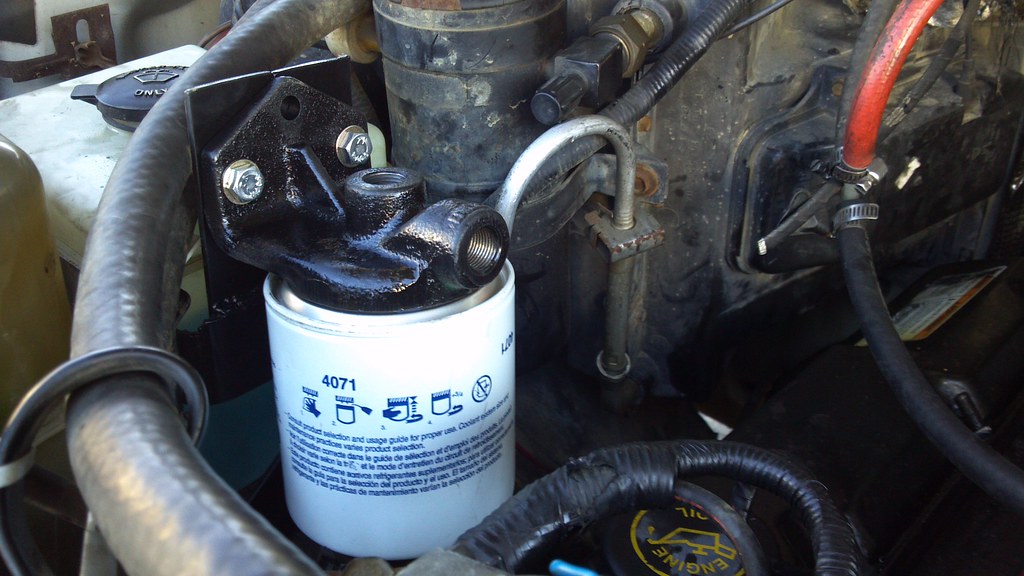
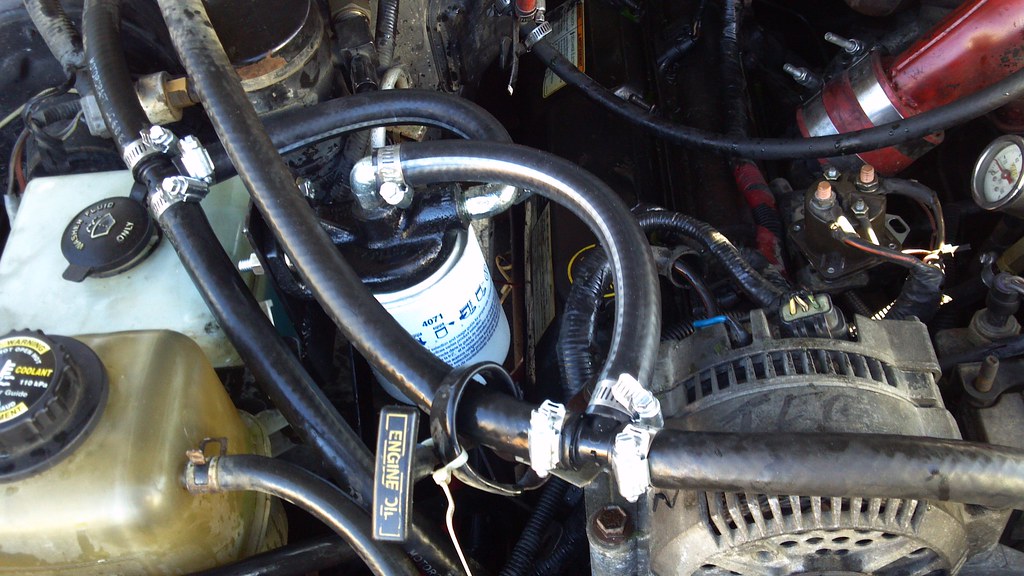
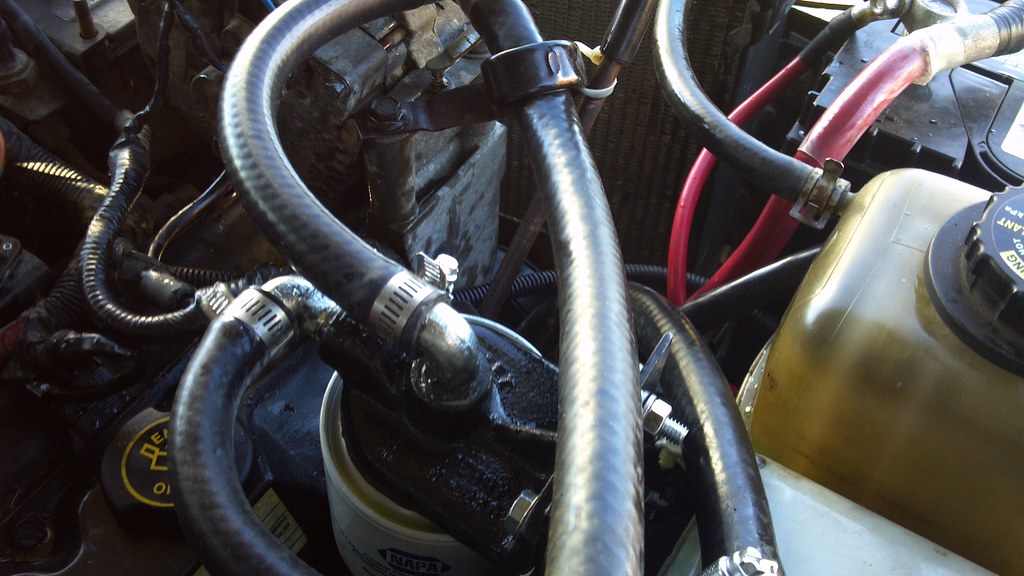
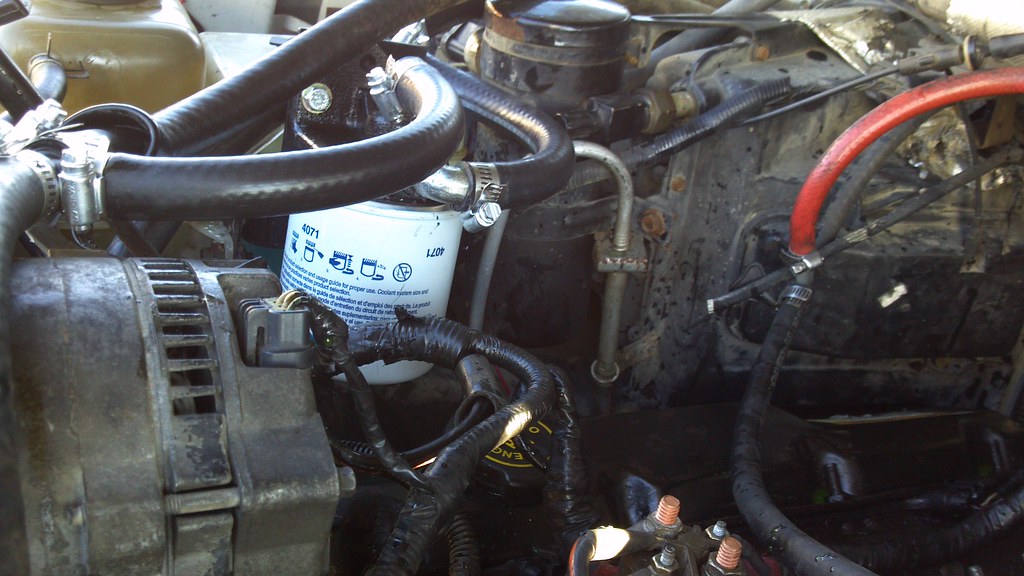
Finally hook up all the hoses. The outlet goes in the line going to the top of the water pump. The inlet goes into the line going to the block. Next cut the line you need. Eyeball the lengths to put into where the line will T for you and not kink.
Now it's time to cut the existing line. MAKE SURE to open the lid on the expansion tank other wise it WILL make a mess. Don't ask how I know. Then put your Tee's in and tighten up the clamps. Double check all the connections are tight and the filter is tight and check for leaks. Then your good to start it. I ran mine for a minute or two to make sure all the air was out with the cap off.
Here are the finished pics

Any questions just let me know. I have some more pics as well.
Ok to start I decided I was going to put mine into the heater hoses as I felt it was simpler and easier to get clamps and such tight.
Ill start with a parts list.
1 4019 Napa Coolant Filter Base
1 4070 or 4071 Coolant filter( 71 is load with SCA additives other is not)
2 9934 5/8" T Connector
2ft H-152 5/8'' Heater Hose
8 505-1210 Hose Clamps
3ft piece of 1.5'' by 1/8'' thick
Supplies are:
A small welder or you can hold it all together with bolts.
5/16'' drill bit
1/4'' Drill bit
Drill
Wire brush
Paint of your choice
Ok to start make the bracket to hold the filter head. I mounted mine beside the windshield washer fluid tank. I have a long dipstick tube off of a SD so you may need to tweak yours slightly to clear. I'm using the bolt on the windshield washer tank bracket and one below it on the battery tray.
First I took and cut a 6 3/4'' then bent it about 1 1/4'' up. Then I drilled a 1/4'' hole about a 1/4'' from the top. I slightly miss drilled the hole so I had to notch the end to clear the tank.
Next I took and cut a 9'' piece of flat to mate up to the upper piece. Also drilled a 1/4'' hole in the similar location. I then cut it off so it was flush on the top. I then welded it to the upper bracket.
Next I took and cut 2 4 3/4'' pieces of flat to weld to the bracket to support the filter head. I then marked the bracket off the filter head and drilled 2 5/16'' holes.
Now that the brackets done its time to paint it. I painted it gloss black and painted the filter head to after I taped it off add plugged the holes. Looks much better then green.
After the paint dries bolt the bracket into the truck. There is an 11mm nut by the washer tank and a 10mm on the bottom.
Finally hook up all the hoses. The outlet goes in the line going to the top of the water pump. The inlet goes into the line going to the block. Next cut the line you need. Eyeball the lengths to put into where the line will T for you and not kink.
Now it's time to cut the existing line. MAKE SURE to open the lid on the expansion tank other wise it WILL make a mess. Don't ask how I know. Then put your Tee's in and tighten up the clamps. Double check all the connections are tight and the filter is tight and check for leaks. Then your good to start it. I ran mine for a minute or two to make sure all the air was out with the cap off.
Here are the finished pics
Any questions just let me know. I have some more pics as well.
#2
01-28-2012, 05:06 PM
#3
01-28-2012, 05:19 PM


#7
01-28-2012, 06:44 PM
Hotshot
Couple questions Jeffrey, is there only one coolant filter with a charge in it or are there different filters with a different amount of charge? Do you know if the system can be "overcharged"? I'm gonna get this stuff this week. I haven't checked my coolant for 7-8k miles since I fully charged it after a coolant change. I don't have any test strips right now either.
Got some other things to get at Napa so the list is being made out right now..
Got some other things to get at Napa so the list is being made out right now..
Trending Topics
#8
01-28-2012, 06:47 PM
Join Date: Dec 2008
Location: Maysville, Kentucky
Posts: 2,347
Likes: 0
Received 0 Likes
on
0 Posts
#11
01-28-2012, 07:30 PM
#12
01-28-2012, 08:10 PM
Hotshot

#14
01-28-2012, 11:06 PM