
Project TGM
#301
 05-11-2012, 12:10 AM

Post Fiend
Join Date: Sep 2006
Location: Island Southeast Alaska
Posts: 14,325
Likes: 0
Received 5 Likes
on
5 Posts
Well I would prolly have plenty to make several mistakes and change the design lots of times.
I may put some on the back and front from bumper bracket to bumper bracket. Than I could reach a cargo rack on top from the back. And have a step to help get up under the hood. And if strong enough the could work to hook a snap chain or strap to.
I may put some on the back and front from bumper bracket to bumper bracket. Than I could reach a cargo rack on top from the back. And have a step to help get up under the hood. And if strong enough the could work to hook a snap chain or strap to.
#302
05-11-2012, 12:18 AM
Join Date: Nov 2011
Location: Algona, Washington
Posts: 8,908
Likes: 0
Received 0 Likes
on
0 Posts
#303
05-11-2012, 07:12 AM
I had to cut some chain for my work truck...talk about a pain. Thankfully I now have a bench mounted cut off wheel. Check this chain out, I had to use a hack saw on it.
http://www.flickr.com/photos/62639173@N03/7176032592/http://www.flickr.com/photos/62639173@N03/7176032592/ by http://www.flickr.com/people/62639173@N03/, on Flickr
That intake looks awesome bud! I went with plain aluminum colored paint on mine.
http://www.flickr.com/photos/62639173@N03/7176032592/http://www.flickr.com/photos/62639173@N03/7176032592/ by http://www.flickr.com/people/62639173@N03/, on Flickr
That intake looks awesome bud! I went with plain aluminum colored paint on mine.

#305
05-11-2012, 08:03 PM
Join Date: Nov 2011
Location: Algona, Washington
Posts: 8,908
Likes: 0
Received 0 Likes
on
0 Posts
Also if they did manage to get caught on something the bolts would fail before the metal. I had to buy a bolt already cause i twisted the head off one. I am not super strong or anything these bolts are just old and weathered.
#306
05-15-2012, 10:07 PM
Join Date: Nov 2011
Location: Algona, Washington
Posts: 8,908
Likes: 0
Received 0 Likes
on
0 Posts
So as a pre-update, my agenda for tomorrow so far is to goto Fastenal and buy another Radius arm bolt (lost one), then off to Napa to get about 3 feet of 1/8 inch "vacuum" hose so i can replace the section of gas line going from the carb to the filter, then back home to do said work (using thread lock on the stupid radius arm bolts this time ;]) and i have to investigate a possible tranny fluid leak. I have noticed my pan is wet and i haven't checked to see if it is ATF or not. I can also check pan bolts, and what not. MAYBE if i can get to them easily, i might also check the oil pan bolts. I haven't tried yet i don't think so why not.
Today, i check ATF level for the heck of it, no difference from before, i also took what was left of the low pressure return line i bought for the sag and it was the correct size for the gas line, i just didn't have enough. Then i made up the vacuum plan for the new intake, of swapping over the vacuum tree and using a mini tree thing for the carbs vacuum. I have to look at my 4bbl to see where the primary vacuum is. My 2bbl intake has the same little spring bracket that the 4bbl has for keeping tension on the throttle. However i did notice that there was a spacer of sorts under the 2bbl i have, but it has an opening in the back that has been covered. Anyone know about this? I doubt it is vital to the motor being that it has been capped off and doesn't seem to do anything but vacuum for stuff i guess.
Also i was thinking i might as well change the valve cover gaskets while i am doing the intake, i'm sure it has an old set on there. I don't know if i should keep them for blue though, i am thinking gloss black would suit her right.
Another question, when i take the intake off, there is going to be a lot of RTV cause i think the PO was too cheap to buy a real gasket OR he just used a lot of RTV with a gasket, either way, how would i go abut cleaning it off without getting a bunch of crap down in the heads?
Then another question (i know i know) so i have a picture, in the red box looks like a plug for a water jacket, would i need to use this? When i look at my current intake i don't really see one.

Could this be for the heater lines?
Today, i check ATF level for the heck of it, no difference from before, i also took what was left of the low pressure return line i bought for the sag and it was the correct size for the gas line, i just didn't have enough. Then i made up the vacuum plan for the new intake, of swapping over the vacuum tree and using a mini tree thing for the carbs vacuum. I have to look at my 4bbl to see where the primary vacuum is. My 2bbl intake has the same little spring bracket that the 4bbl has for keeping tension on the throttle. However i did notice that there was a spacer of sorts under the 2bbl i have, but it has an opening in the back that has been covered. Anyone know about this? I doubt it is vital to the motor being that it has been capped off and doesn't seem to do anything but vacuum for stuff i guess.
Also i was thinking i might as well change the valve cover gaskets while i am doing the intake, i'm sure it has an old set on there. I don't know if i should keep them for blue though, i am thinking gloss black would suit her right.
Another question, when i take the intake off, there is going to be a lot of RTV cause i think the PO was too cheap to buy a real gasket OR he just used a lot of RTV with a gasket, either way, how would i go abut cleaning it off without getting a bunch of crap down in the heads?
Then another question (i know i know) so i have a picture, in the red box looks like a plug for a water jacket, would i need to use this? When i look at my current intake i don't really see one.
Could this be for the heater lines?
#307
05-16-2012, 05:16 PM
Join Date: Nov 2011
Location: Algona, Washington
Posts: 8,908
Likes: 0
Received 0 Likes
on
0 Posts
Alrighty, so all that work is pretty much done, i wasn't able to check the pan for loose bolts but there was a lot of fluid everywhere so that tells me there is a leak somewhere. I did however replace the missing radius arm bracket bolt with a new Grade 8 one. I also locktighted them. Then i went and replaced the section of fuel line that went from my carb to my filter, i have some pictures to show.
Old line
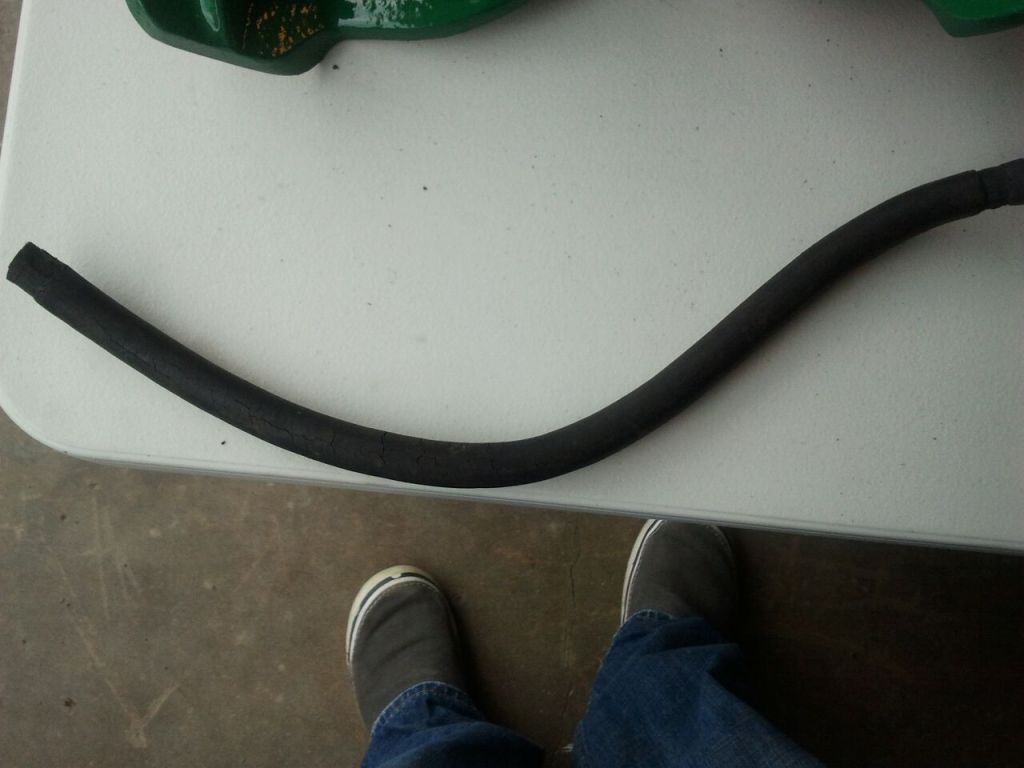
I am surprised this old one didn't leak anywhere. When i bent it a bit this happened
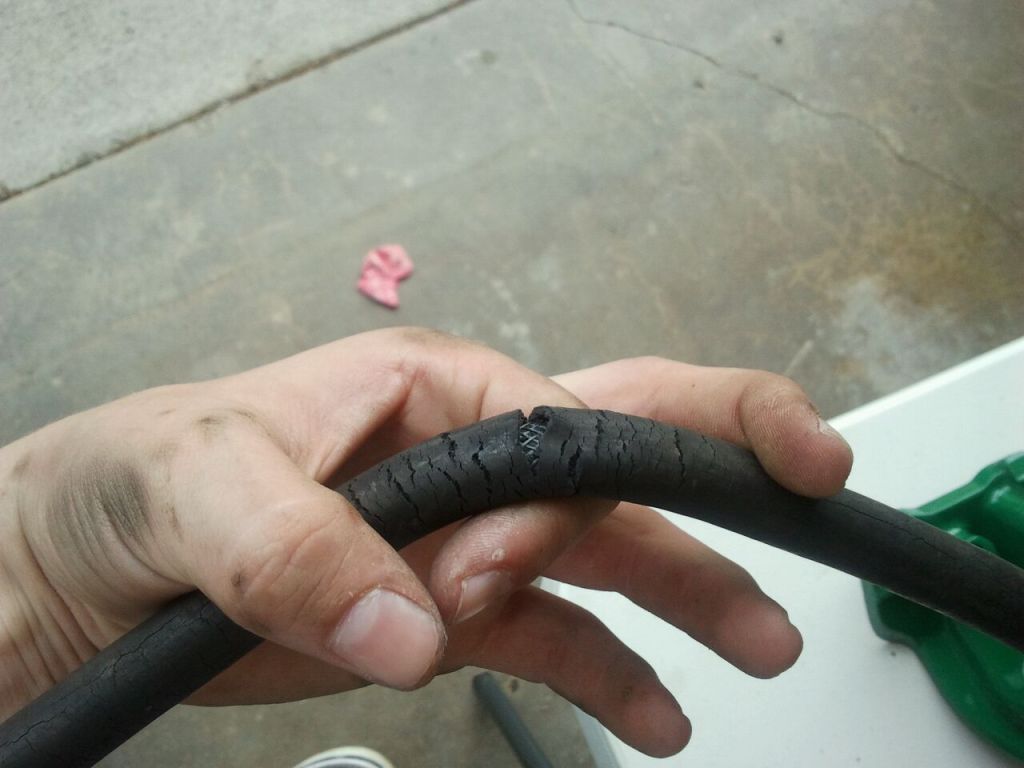
Pretty easy, and simple job, though i wasn't expecting any pressure in the line, when i pulled it off the carb there was a lot of gas... It got pretty smelly in my garage.
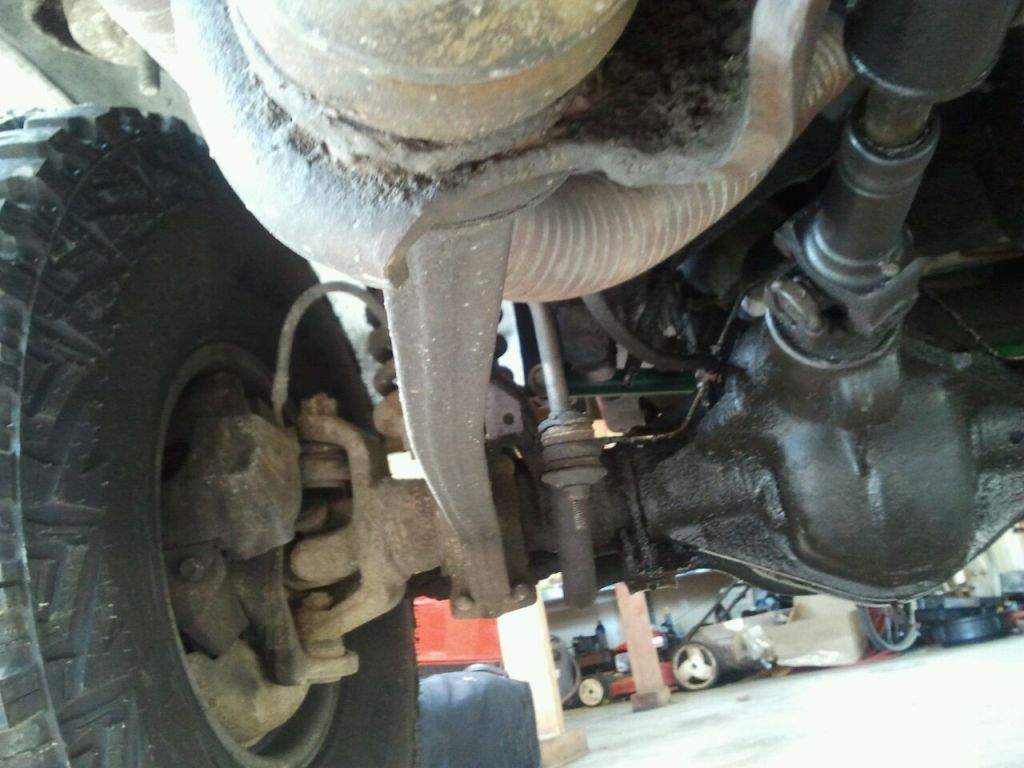
I also brought some pictures of my bent radius arm too. It isn't really bad but i don't know if this affects anything in the system, it seems like it could.
Passenger side, just fine and straight.
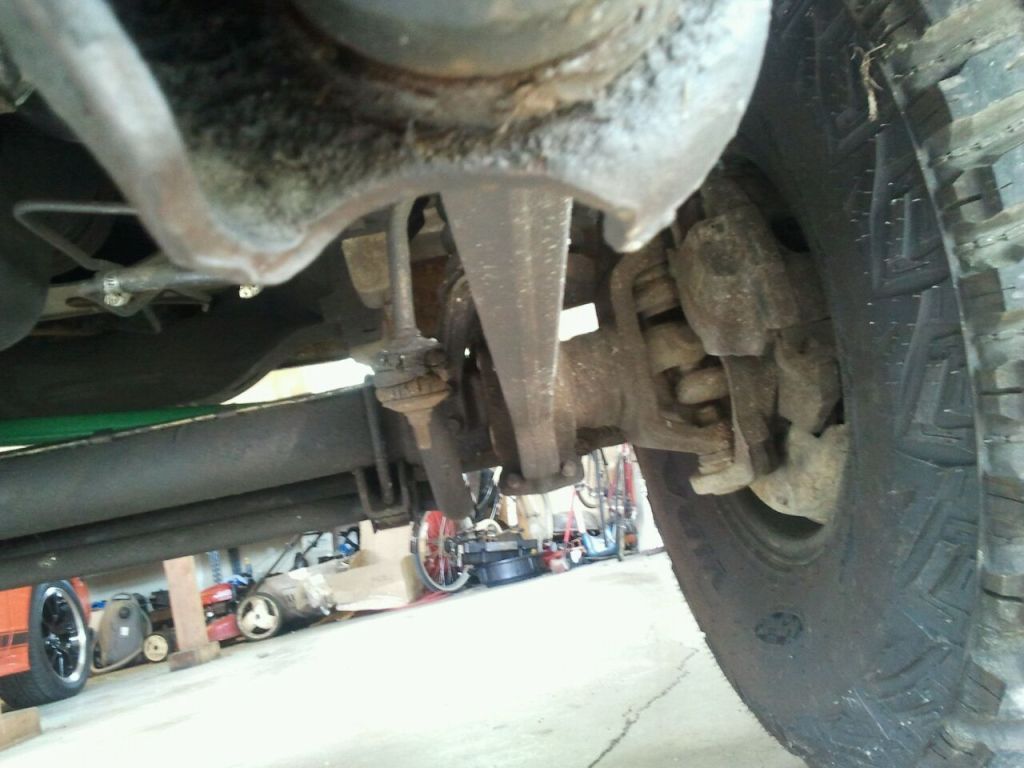
Driver side. Bent.
Anyone know if this will cause issues? So far every thing seems ok in drive ability but it looks like it could cause some problems.
Old line
I am surprised this old one didn't leak anywhere. When i bent it a bit this happened
Pretty easy, and simple job, though i wasn't expecting any pressure in the line, when i pulled it off the carb there was a lot of gas... It got pretty smelly in my garage.
I also brought some pictures of my bent radius arm too. It isn't really bad but i don't know if this affects anything in the system, it seems like it could.
Passenger side, just fine and straight.
Driver side. Bent.
Anyone know if this will cause issues? So far every thing seems ok in drive ability but it looks like it could cause some problems.
#308
05-16-2012, 08:04 PM

#309
05-16-2012, 08:15 PM
#310
05-16-2012, 09:26 PM
Post Fiend
Join Date: Sep 2006
Location: Island Southeast Alaska
Posts: 14,325
Likes: 0
Received 5 Likes
on
5 Posts
Do an X measurement from one front tire to one back tire. than the other side. This will tell ya how much she has been knocked out of line. Tire wear would be the biggest concern. Having the front end realigned by a reputible shop will tell ya all you would want to know and more. IF it will align all should be good. How is the bushing? Did it get crushed or damaged any? To adjust the camber on a two wheel drive of that era a shop bent the I beam. Only way to do it. True story.
#311
05-16-2012, 09:38 PM
Join Date: Nov 2011
Location: Algona, Washington
Posts: 8,908
Likes: 0
Received 0 Likes
on
0 Posts
Thanks guys, yeah the alignment was the only thing i could thin of that it would mess up. It was like this when i got it, and after i cured the death wobble/wander, everything seems fine. I can let go of the wheel and it drive straight and true, but i spose a bend that amount wouldn't affect it that much to cause it to drag to left would it? So far i haven't noticed any unusual wear on the tires but they are still pretty new so i doubt it would wear too quickly. There is a few shops around i could get quotes from for alignments, maybe even the local Ford dealer. Shouldn't be much more than about $90 right? Might be more due to labor prices.
Thanks Brett, i can't wait to get it done. But i do have to wait. I will have to see how much rubber line is under the body, IIRC there is more metal line than anything. The new stuff is the stuff up front, the hose to carb and to the metal line are newer.
I can do that X measurement tomorrow while i am poking around under there, what would be the best way to measure them? Maybe hooking the end of a tape measure on the brake disc or trying to wedge it under the tire? I'll figured something out.
As for the intake, i think that plugged hole is kind of an auxiliary port of sorts, my stock intake has the same thing in the same spot but with a hex style Allen head. My temp sensor is down on the block...
I got another question, i was getting a price for the intake gasket kit from Napa today, and along with the 2 small rubber seals and the 2 metal port gasket there was a big metal pan that goes under the intake. i was wondering if this was some sort of heat shield or something like that? Is is vital to the intake?
#313
05-16-2012, 09:47 PM
Join Date: Nov 2011
Location: Algona, Washington
Posts: 8,908
Likes: 0
Received 0 Likes
on
0 Posts
 I'll make sure i get the full kit then. I just have to order the stuff.
#314
05-16-2012, 09:51 PM

Laughing Gas
The only gasket you need for the intake is the valley pan gasket, the big metal one, I usually just put a little rtv around the ports and use rtv on the ends of the intake. The rubber end gaskets don't work with the aluminum intakes, you just have to lay down a thick bead of rtv on the ends.
#315
05-16-2012, 09:57 PM
Join Date: Nov 2011
Location: Algona, Washington
Posts: 8,908
Likes: 0
Received 0 Likes
on
0 Posts
The only gasket you need for the intake is the valley pan gasket, the big metal one, I usually just put a little rtv around the ports and use rtv on the ends of the intake. The rubber end gaskets don't work with the aluminum intakes, you just have to lay down a thick bead of rtv on the ends.

