HIDs the Correct Way - How To
#1
 10-27-2011, 10:14 PM


Join Date: Nov 2008
Location: Lakewood, Colorado
Posts: 1,138
Likes: 0
Received 0 Likes
on
0 Posts
HIDs the Correct Way - How To
Well after driving my truck close to a 1000 miles a couple weekends ago all at the dark of the day, I came to the conclusion my head lights really didn't cut it. They have had different bulbs in them and are starting to yellow. So I decided it was time to do what I have always wanted. A HID kit.
Now yes there is a proper way to do an HID kit and an improper way. The improper way takes a normal headlight and puts a cheap HID kit in it. The problem with any HID kit, is that when you put them in a non projector style housing, it creates a great amount of scattered light, and in the end basically wastes the output of an HID and blinds oncoming drivers.
The proper way to do it is to use a projector style head light. Right now there is nothing produced for our old trucks without getting a ricer style off ebay. So I decided to do some research and figure out how to do my own.
This is what I used
Headlight Housings
Projector/Ballasts/Bulbs/Harness
So I got the housings here at the house, and actually was very surprised by the quality.

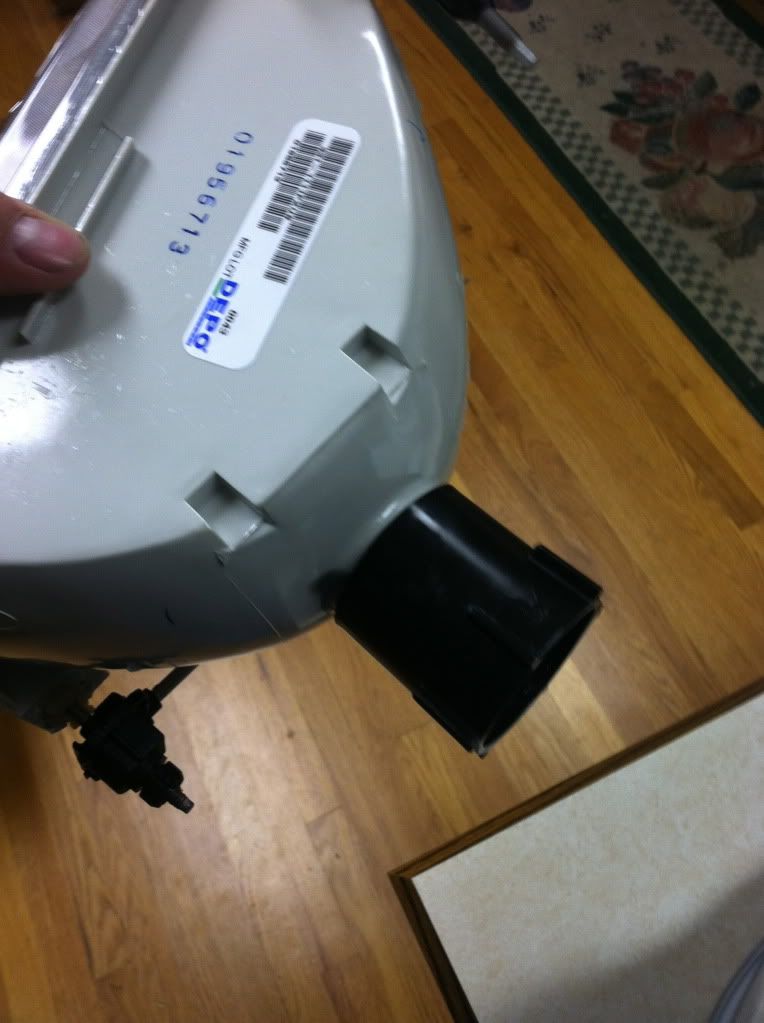
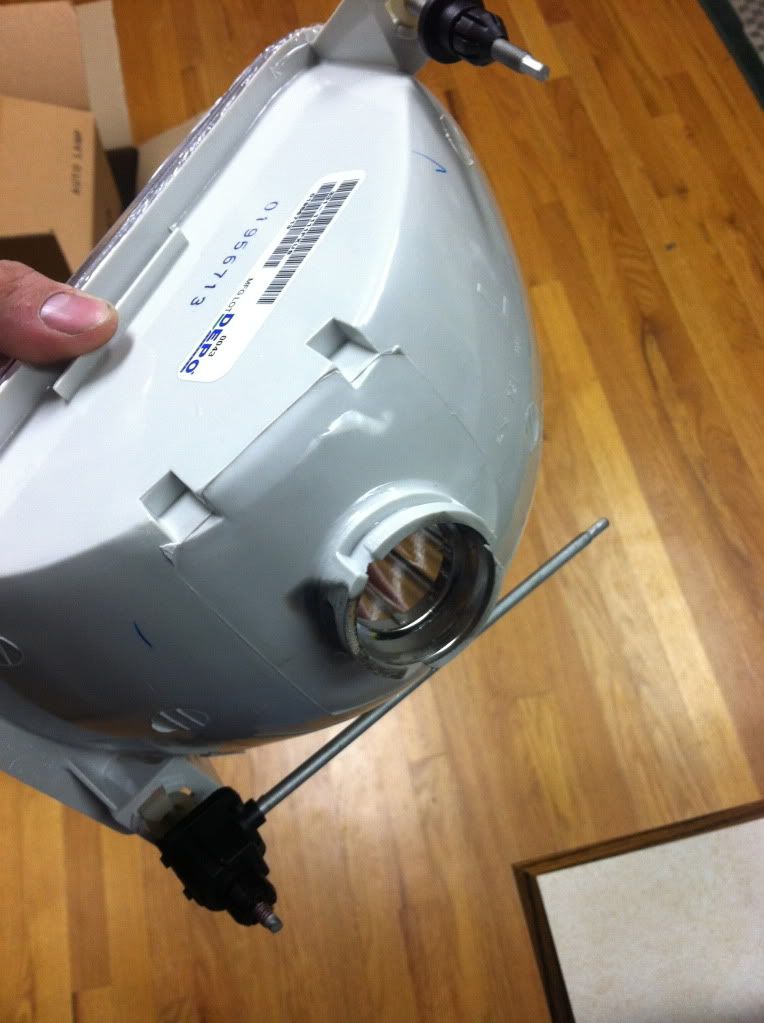
Now was the time to take the lenses off the housings so I could put the projectors inside the housings. This took a lot more work than I expected, but after about an hour and putting them in and out of the oven I finally got them off. The main trick I learned towards the end was to leave them in longer. I was afraid I would melt the housings, but even at 275 degrees and 10 minutes there was no issues.

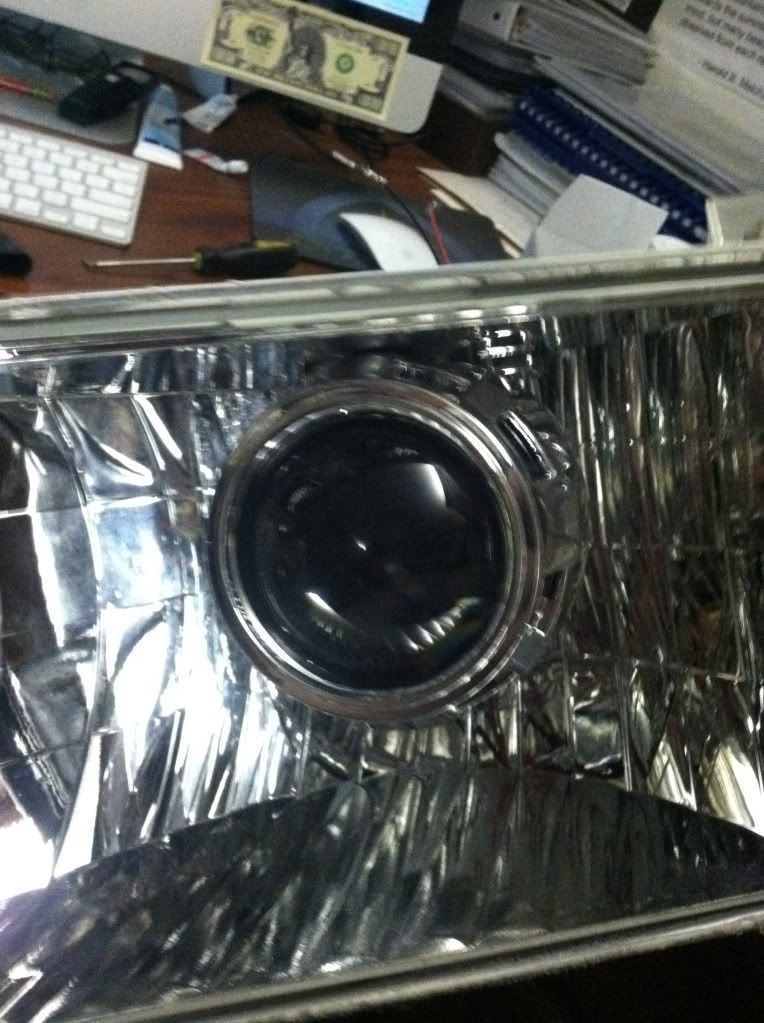
Now that the lenses are off, its time to put the retro fit projectors in.
First lets put the shrouds on the projectors, there are 4 screws to tighten them on. Not tough to do, but if forgotten to do, you gotta take the next steps apart to put back on.
Because these trucks come with a 9007 bulb stock, I got some of the 9007 adapters when I ordered the HID setup.
Without the Adapter
With the Adapter
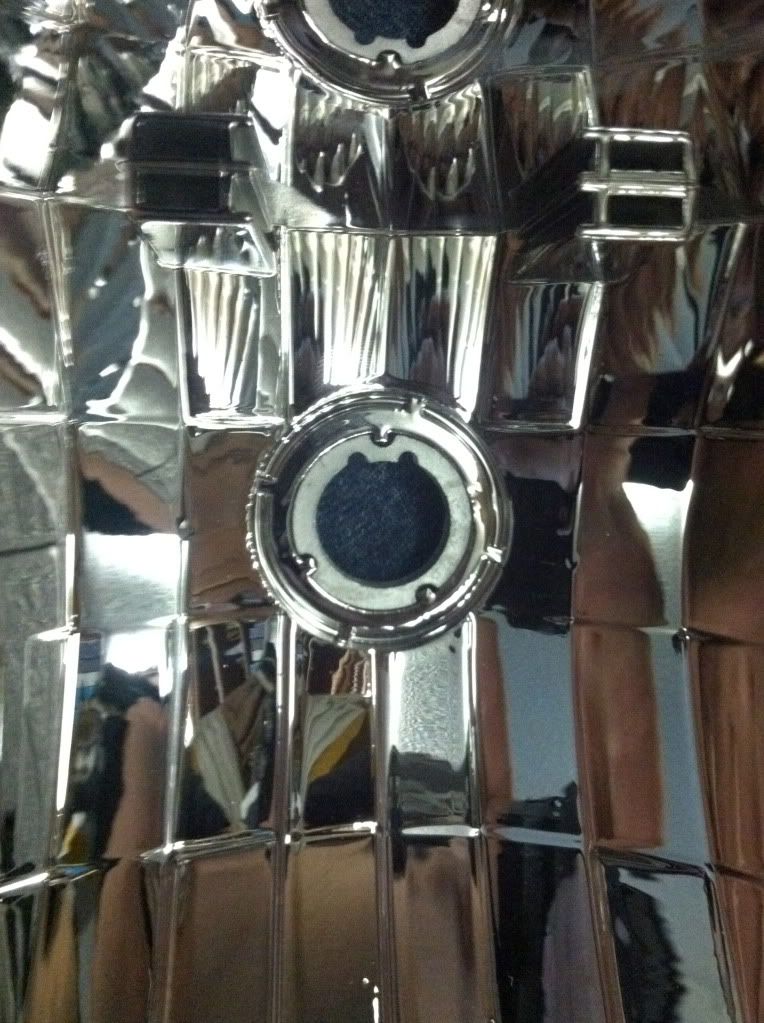
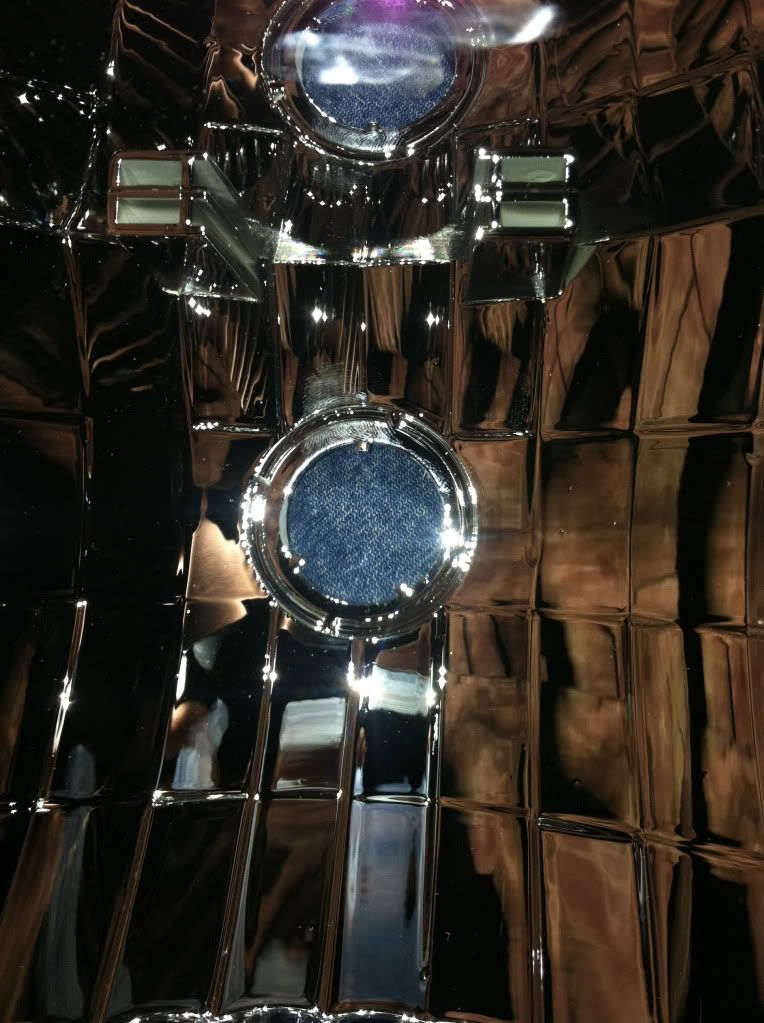
The flat spot with the two ears on the top is the guide for the Projector to slide though and be properly aimed. The two ears on either side are for the wires to go through that are used for the shield solenoid or the High Beams.
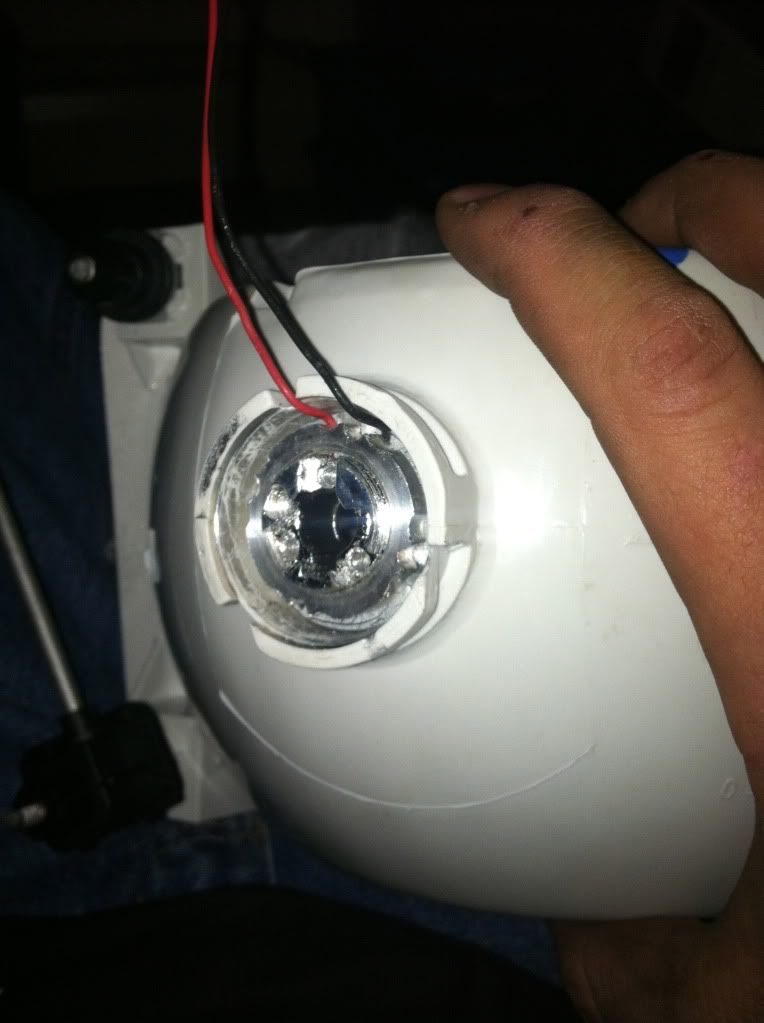
The kit comes with a few pieces. I used the big silicone white washer right on the projector, then the projector was fed through the housing while aligning the wires, and then I put the lock nut on them. The wires seem to get in the way a bit, but if you kinda push them down and out of the way of the lock nut its not terrible to tighten up. I just used a pair of needle nose.
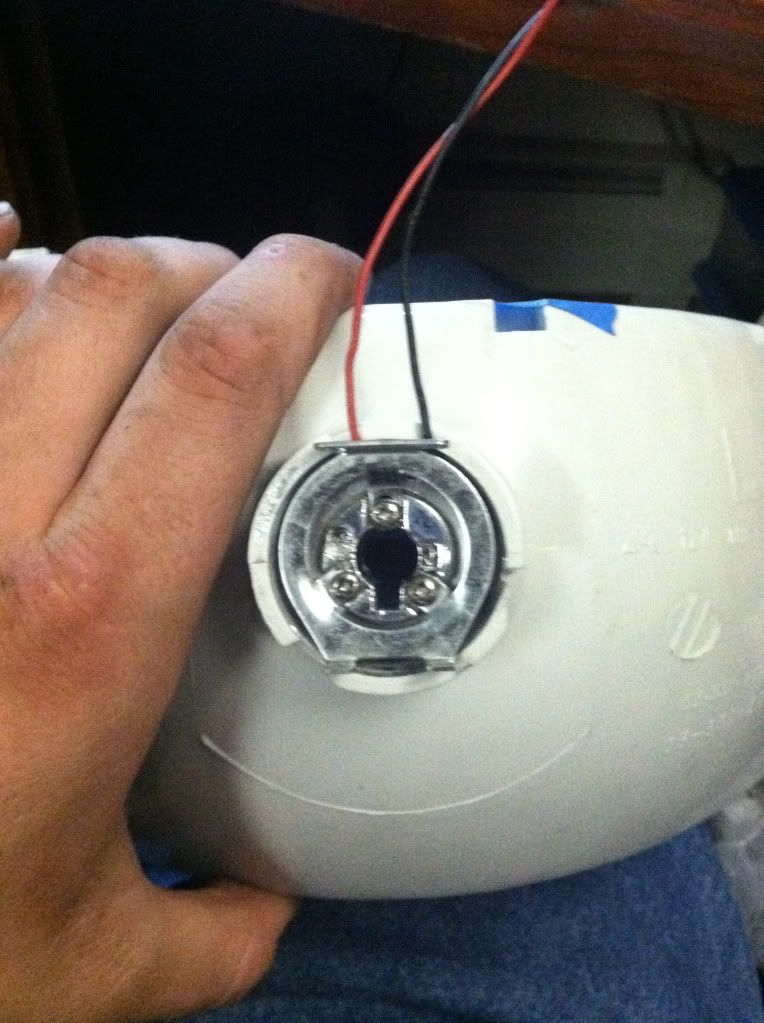
Here is what it looks like with the lock nut on.
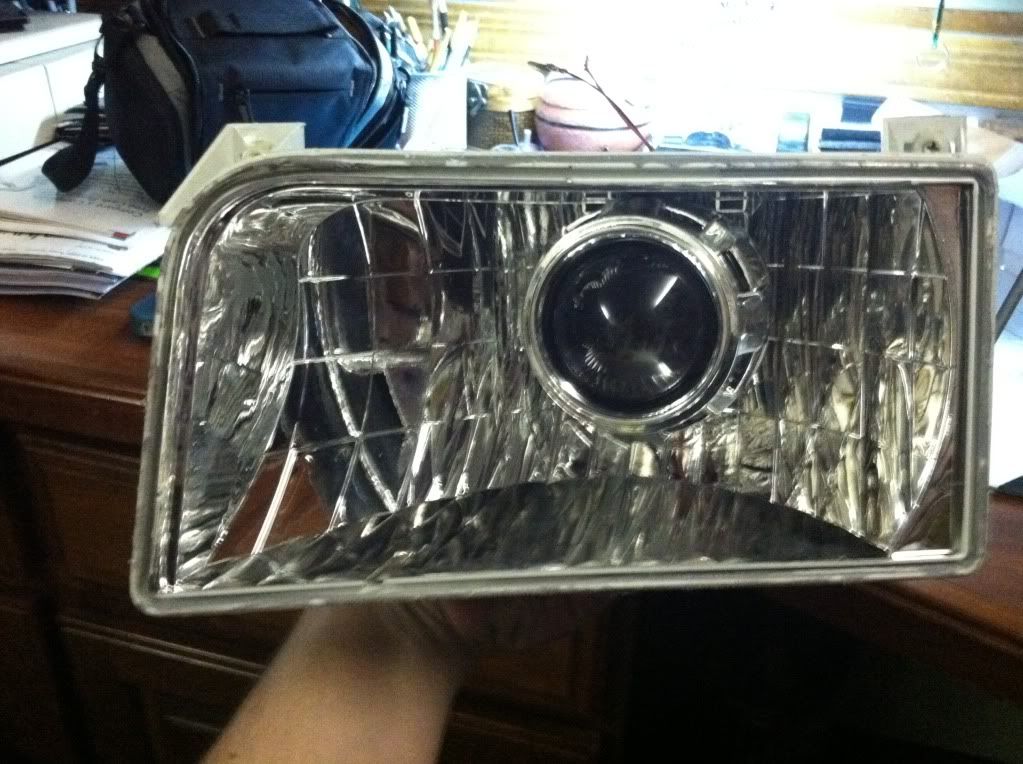
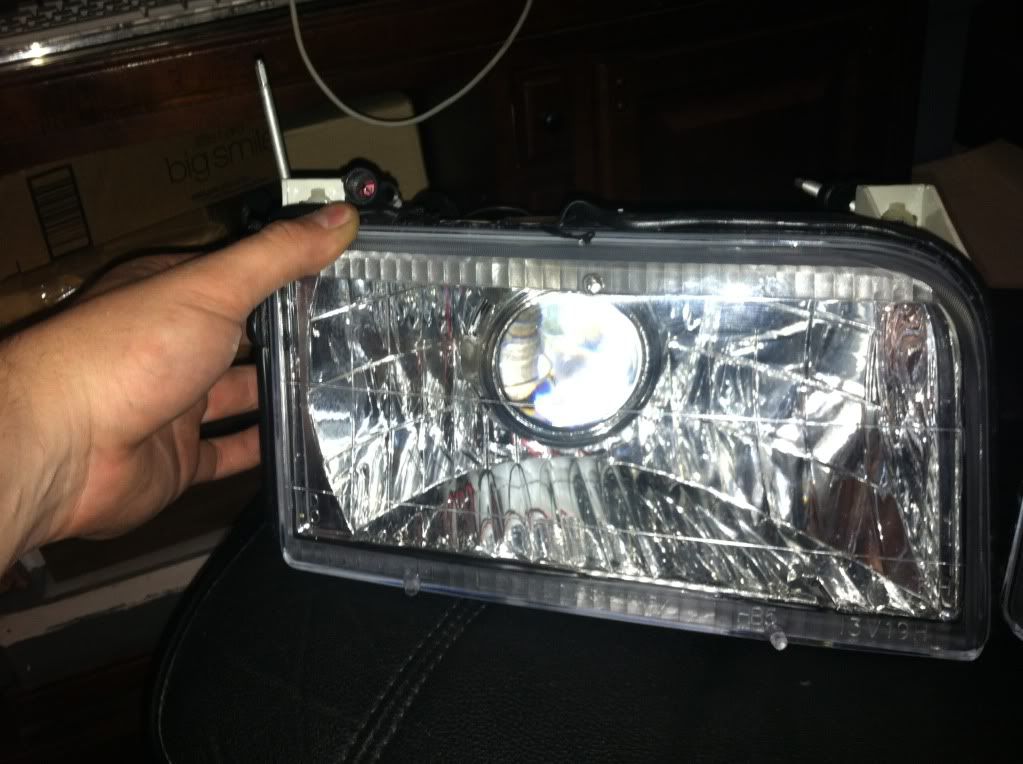
After those are tight, you can screw the bulb holder back onto the projector.
Then the bulb can slide in.

Here is what the other side looks like.
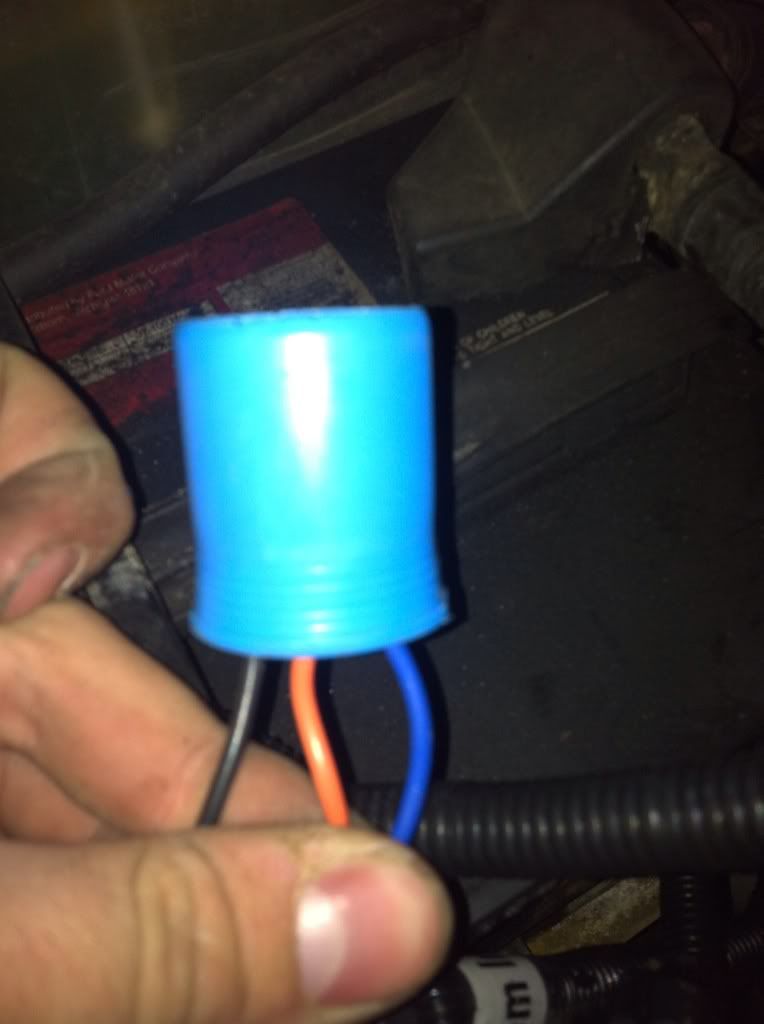
So now that everything here is done. Time to put the harness for the high lows on, which is not hard at all, the wires just slide in, but you have to make sure the black goes to the black. The harness other wires are Blue and Red. The Projector wires are Red. So the Red goes to the red or Blue, and the Blacks go to the Blacks.
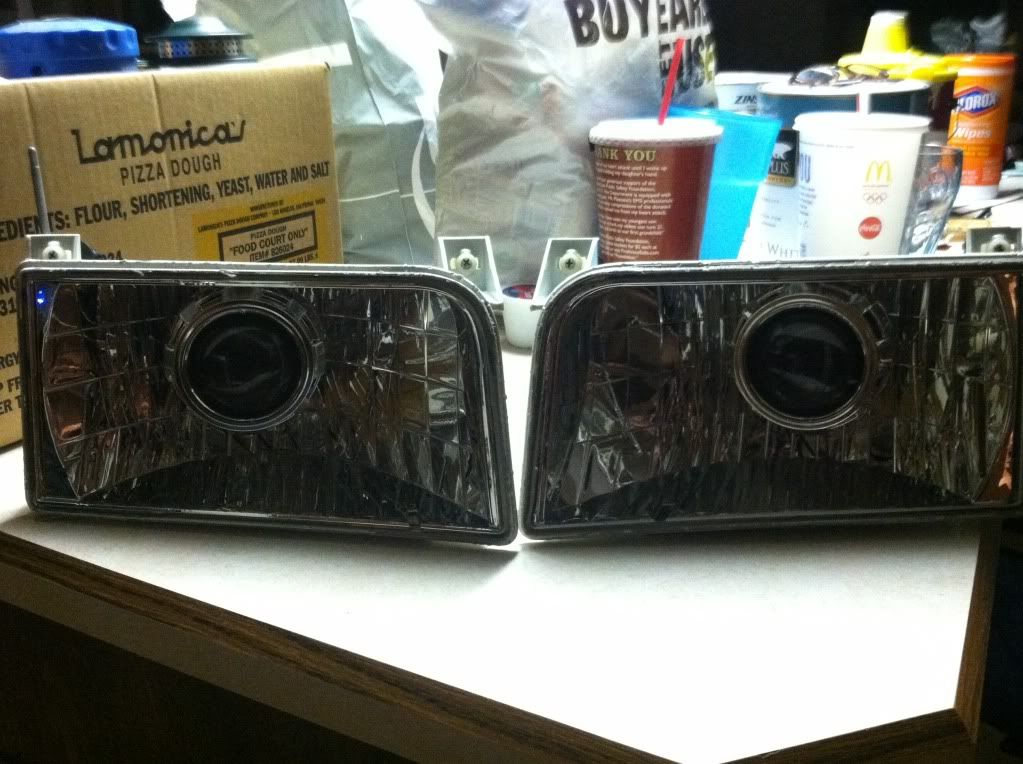
Final step is resealing the Housings. I bought the extra sealing glue to seal these back up. Take a strip of it and put it on the down the housing edges. Error on the out side of the housing (I did this on one, and the other I didn�t), otherwise you can see the glue on the inside.
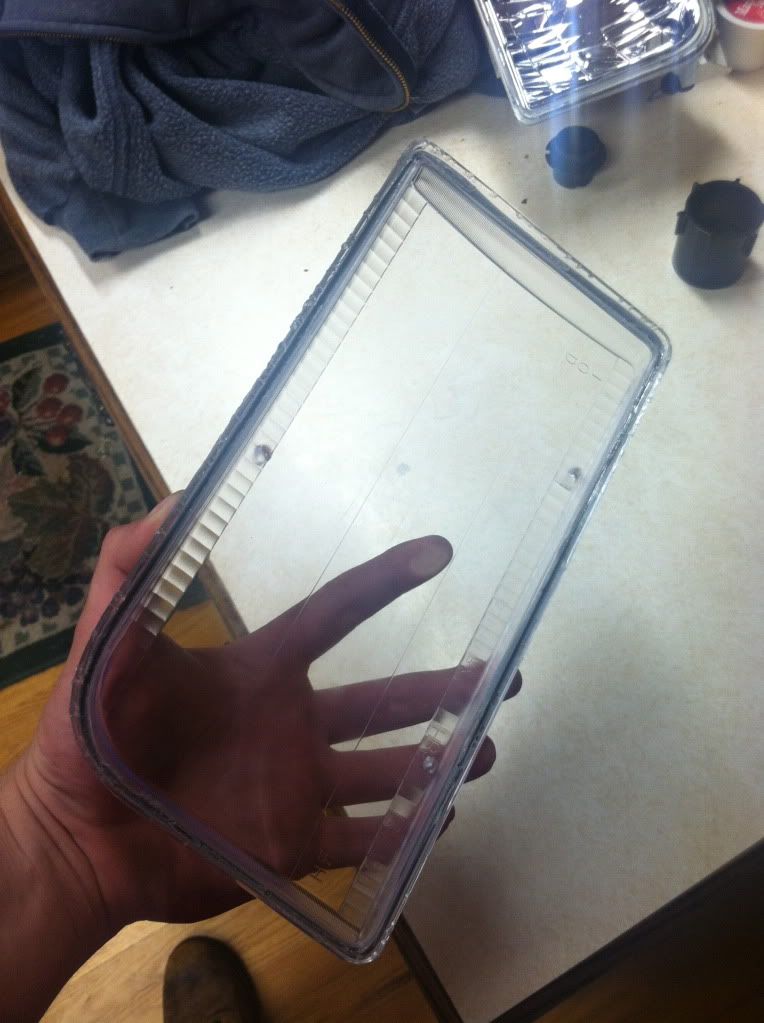
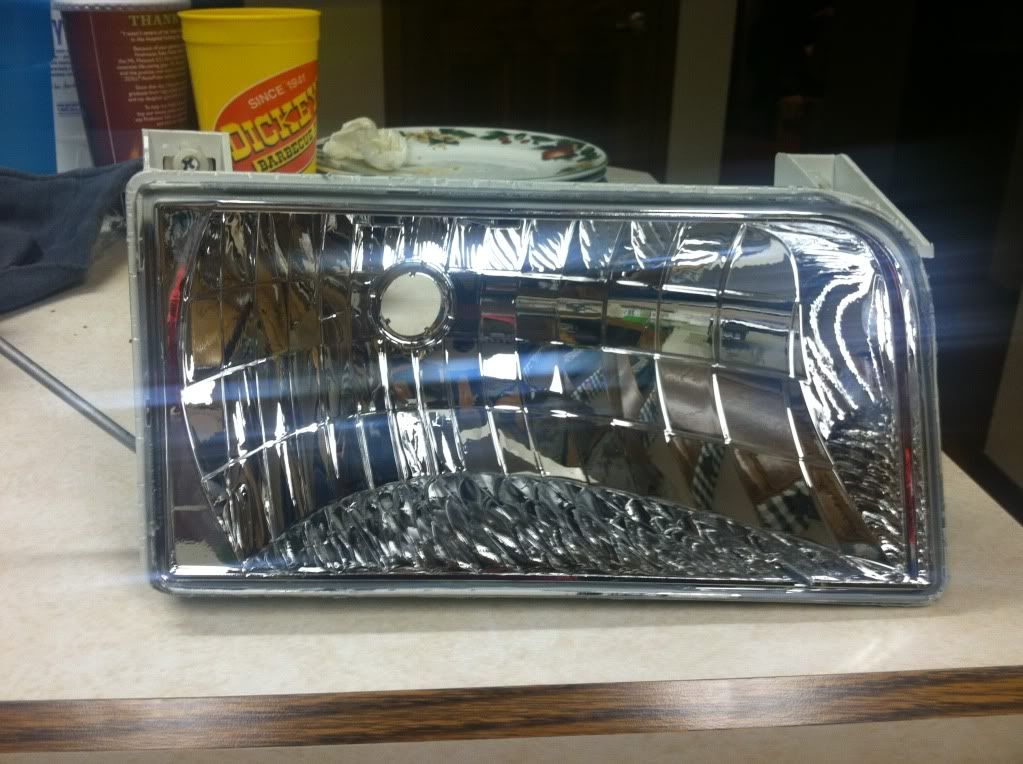
Once the stripe of glue is on both housings, put them in oven at 265 degrees for 8 minutes. Once you take them off, make sure that the lenses are clean and not printed up, as well as the reflective part in the housing. Then take the lenses and press them on. Make sure they are nice and tight. Wait for the glue to cool down and trim down the excess glue.
This is what they look like now. Ready to go in the truck.
To take the header panel out of the truck. Take the grill out, there are 5 screws on top and one under the Ford Emblem. Next take the two screws out of the chrome trim piece around the head lights.
The trim piece is attached to the side marker and the lower housing. The lower housing then has 2 11 mm bolts hold it on that you have to take off from the back side of the radiator support.
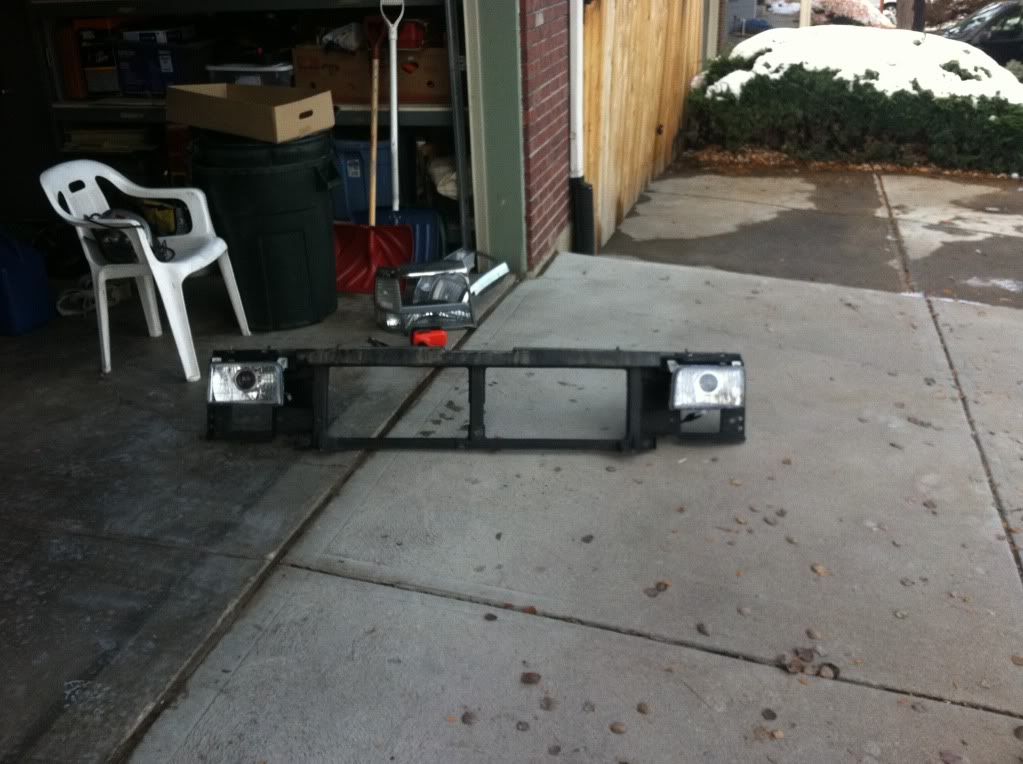
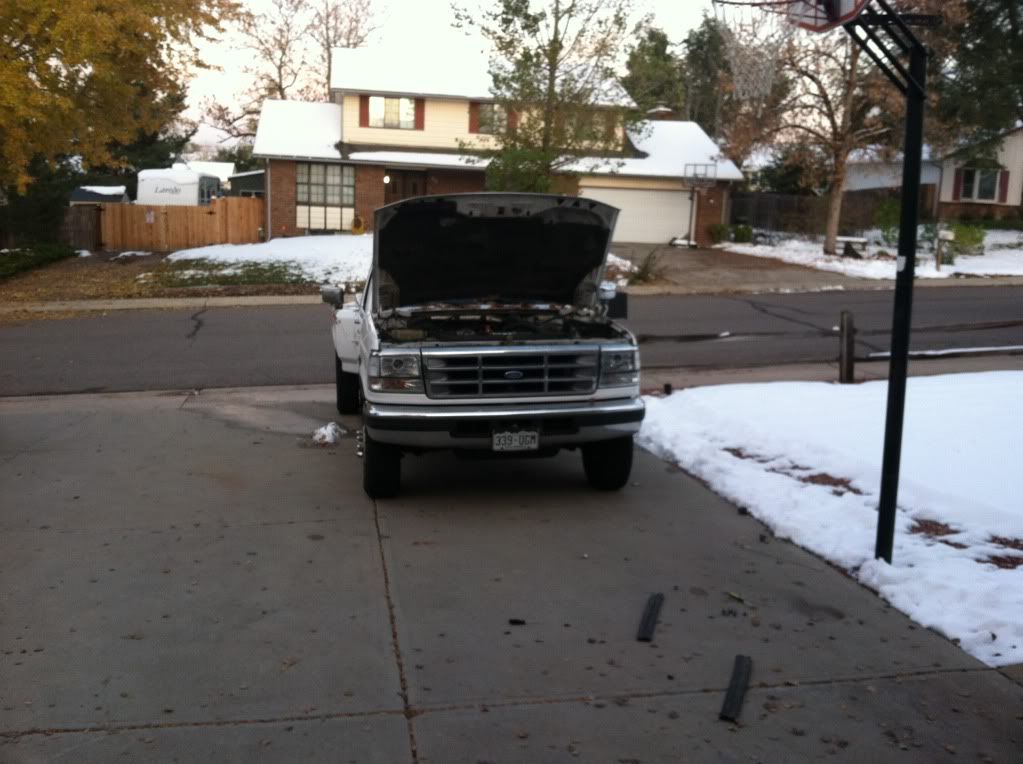
Once those are out, you can take the bulbs out and you are left with the two head lights on the truck and the header panel The header panel has 11 8 mm bolts holding it on. Take them out and then take the header panel off the truck with the headlights.
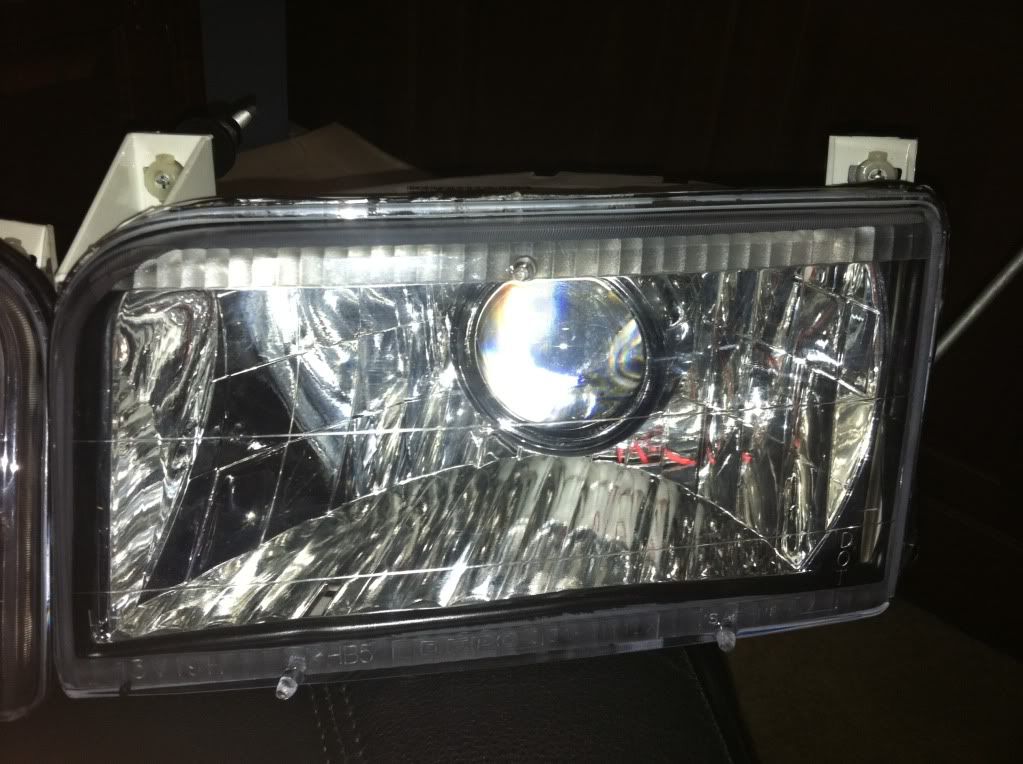
I then took the stock headlights and matched the new headlights screws and everything, so that they would be close in alignment. Then I installed them into the header panel.
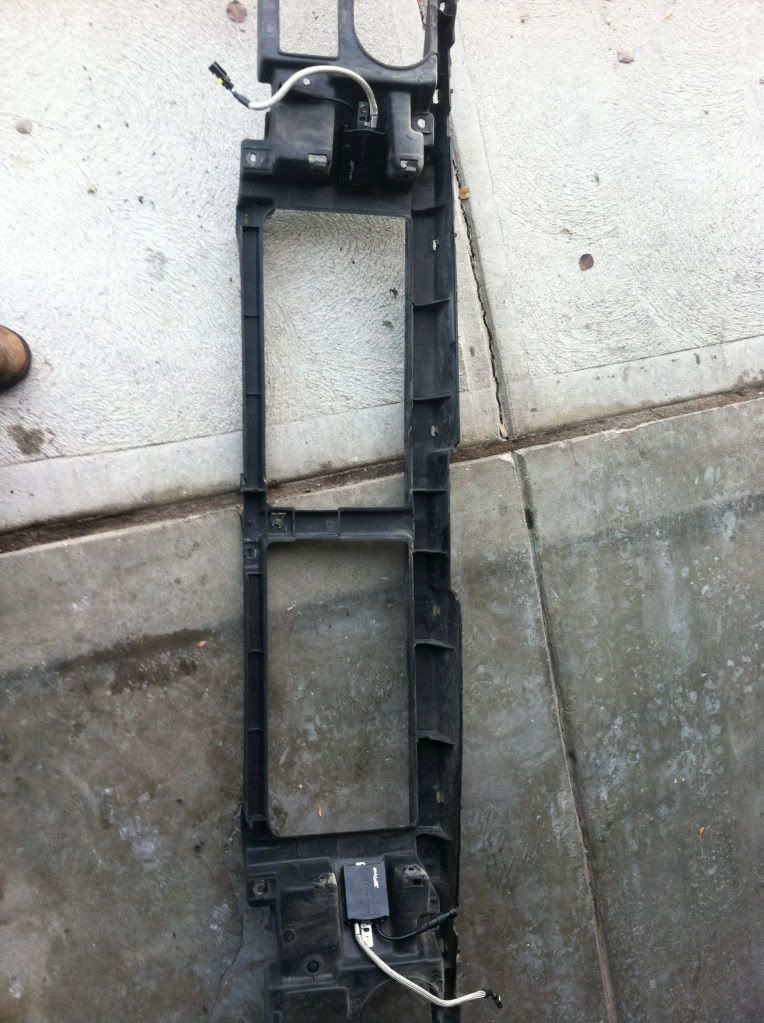
I had to find a place to mount the ballasts for the HIDs. I used the back of the header panel.

Now lets put the wiring harness in the truck.
12V source I put to the always hot side of the starter solenoid. The ground I found a place to put right near the passenger side battery. I ran the long wire segment to the drivers side in front of the radiator and A/C condenser. Then I brought the Header panel close and plugged everything in.
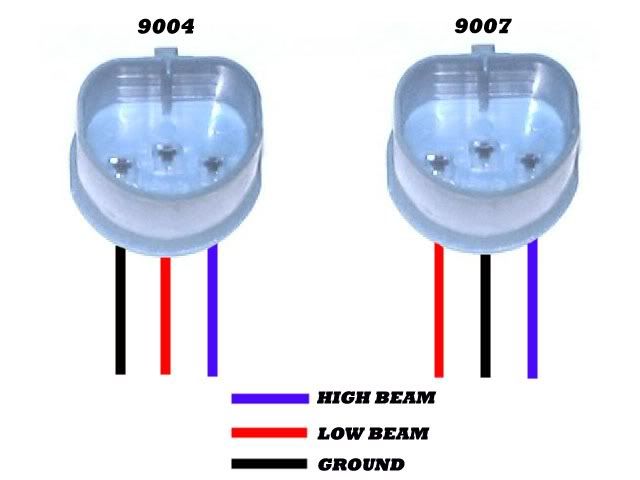
Thick black and red wires went to the ballasts. The Ballasts then were plugged into the bulbs. The high beam setup was blue and black. The projectors had the red and black. The red goes to the 12Vs (blue wire) and the ground goes to the blue.
Now the part that hooks to the input, is originally wired for a 9004 bulb. So the wiring there needs to change.
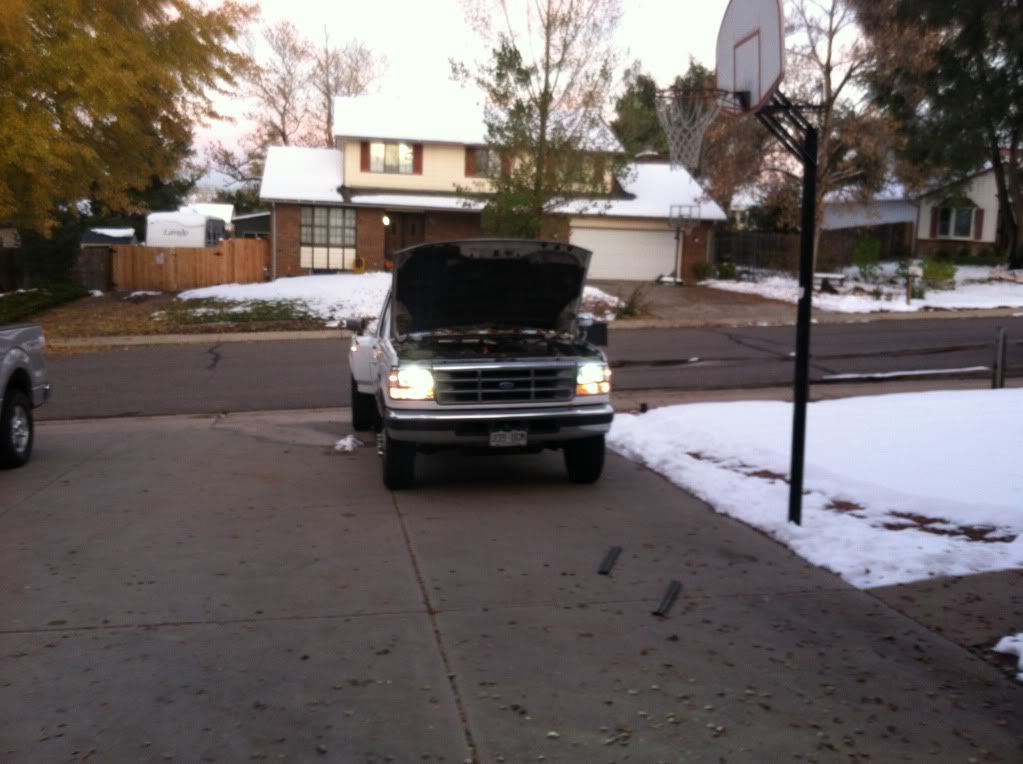
Simple swap. Now time to test and see if everything is working.

Now its time to reassemble. And do a final aiming of them. 25 feet out, the cutoff line from the projector should be 1-2 inches lower than the point they are on the truck.
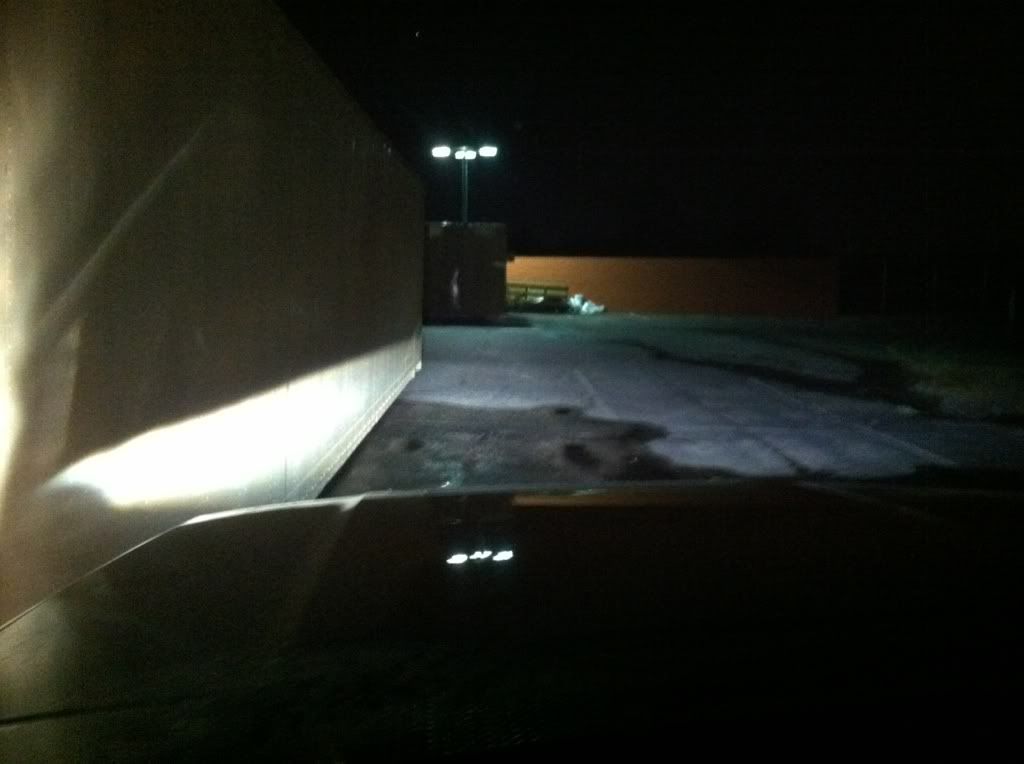
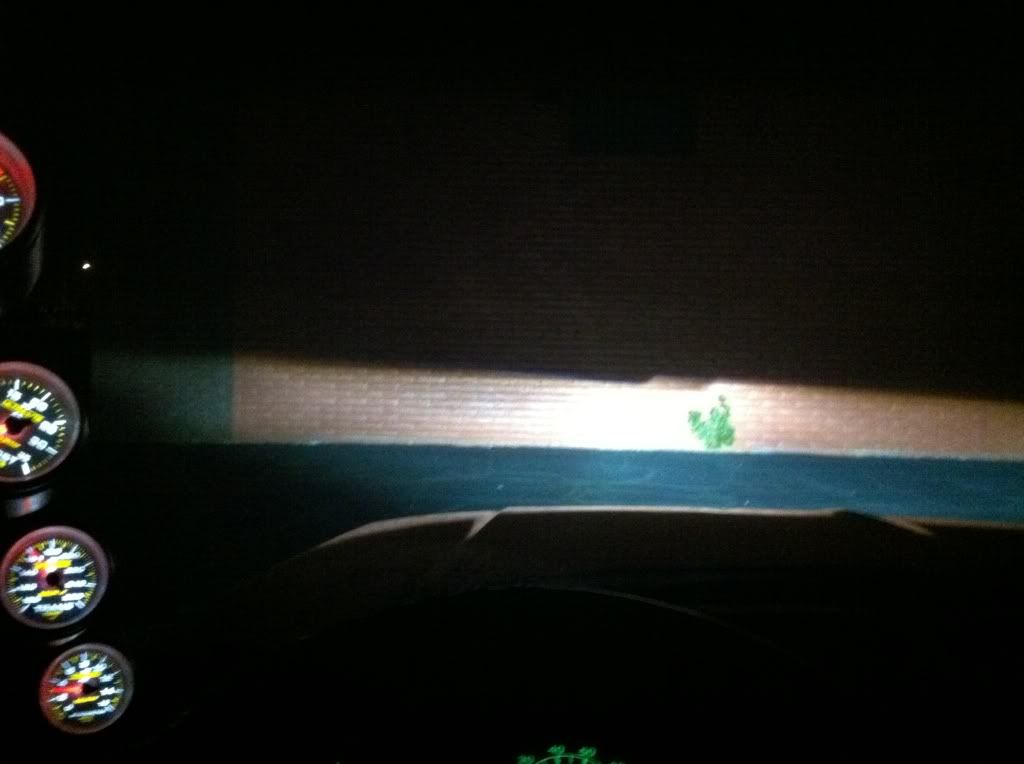
Finished product!
Very nice to drive with! I will try and get some pictures of the new light output
Now yes there is a proper way to do an HID kit and an improper way. The improper way takes a normal headlight and puts a cheap HID kit in it. The problem with any HID kit, is that when you put them in a non projector style housing, it creates a great amount of scattered light, and in the end basically wastes the output of an HID and blinds oncoming drivers.
The proper way to do it is to use a projector style head light. Right now there is nothing produced for our old trucks without getting a ricer style off ebay. So I decided to do some research and figure out how to do my own.
This is what I used
Headlight Housings
Projector/Ballasts/Bulbs/Harness
So I got the housings here at the house, and actually was very surprised by the quality.
Now was the time to take the lenses off the housings so I could put the projectors inside the housings. This took a lot more work than I expected, but after about an hour and putting them in and out of the oven I finally got them off. The main trick I learned towards the end was to leave them in longer. I was afraid I would melt the housings, but even at 275 degrees and 10 minutes there was no issues.
Now that the lenses are off, its time to put the retro fit projectors in.
First lets put the shrouds on the projectors, there are 4 screws to tighten them on. Not tough to do, but if forgotten to do, you gotta take the next steps apart to put back on.
Because these trucks come with a 9007 bulb stock, I got some of the 9007 adapters when I ordered the HID setup.
Without the Adapter
With the Adapter
The flat spot with the two ears on the top is the guide for the Projector to slide though and be properly aimed. The two ears on either side are for the wires to go through that are used for the shield solenoid or the High Beams.
The kit comes with a few pieces. I used the big silicone white washer right on the projector, then the projector was fed through the housing while aligning the wires, and then I put the lock nut on them. The wires seem to get in the way a bit, but if you kinda push them down and out of the way of the lock nut its not terrible to tighten up. I just used a pair of needle nose.
Here is what it looks like with the lock nut on.
After those are tight, you can screw the bulb holder back onto the projector.
Then the bulb can slide in.
Here is what the other side looks like.
So now that everything here is done. Time to put the harness for the high lows on, which is not hard at all, the wires just slide in, but you have to make sure the black goes to the black. The harness other wires are Blue and Red. The Projector wires are Red. So the Red goes to the red or Blue, and the Blacks go to the Blacks.
Final step is resealing the Housings. I bought the extra sealing glue to seal these back up. Take a strip of it and put it on the down the housing edges. Error on the out side of the housing (I did this on one, and the other I didn�t), otherwise you can see the glue on the inside.
Once the stripe of glue is on both housings, put them in oven at 265 degrees for 8 minutes. Once you take them off, make sure that the lenses are clean and not printed up, as well as the reflective part in the housing. Then take the lenses and press them on. Make sure they are nice and tight. Wait for the glue to cool down and trim down the excess glue.
This is what they look like now. Ready to go in the truck.
To take the header panel out of the truck. Take the grill out, there are 5 screws on top and one under the Ford Emblem. Next take the two screws out of the chrome trim piece around the head lights.
The trim piece is attached to the side marker and the lower housing. The lower housing then has 2 11 mm bolts hold it on that you have to take off from the back side of the radiator support.
Once those are out, you can take the bulbs out and you are left with the two head lights on the truck and the header panel The header panel has 11 8 mm bolts holding it on. Take them out and then take the header panel off the truck with the headlights.
I then took the stock headlights and matched the new headlights screws and everything, so that they would be close in alignment. Then I installed them into the header panel.
I had to find a place to mount the ballasts for the HIDs. I used the back of the header panel.
Now lets put the wiring harness in the truck.
12V source I put to the always hot side of the starter solenoid. The ground I found a place to put right near the passenger side battery. I ran the long wire segment to the drivers side in front of the radiator and A/C condenser. Then I brought the Header panel close and plugged everything in.
Thick black and red wires went to the ballasts. The Ballasts then were plugged into the bulbs. The high beam setup was blue and black. The projectors had the red and black. The red goes to the 12Vs (blue wire) and the ground goes to the blue.
Now the part that hooks to the input, is originally wired for a 9004 bulb. So the wiring there needs to change.
Simple swap. Now time to test and see if everything is working.
Now its time to reassemble. And do a final aiming of them. 25 feet out, the cutoff line from the projector should be 1-2 inches lower than the point they are on the truck.
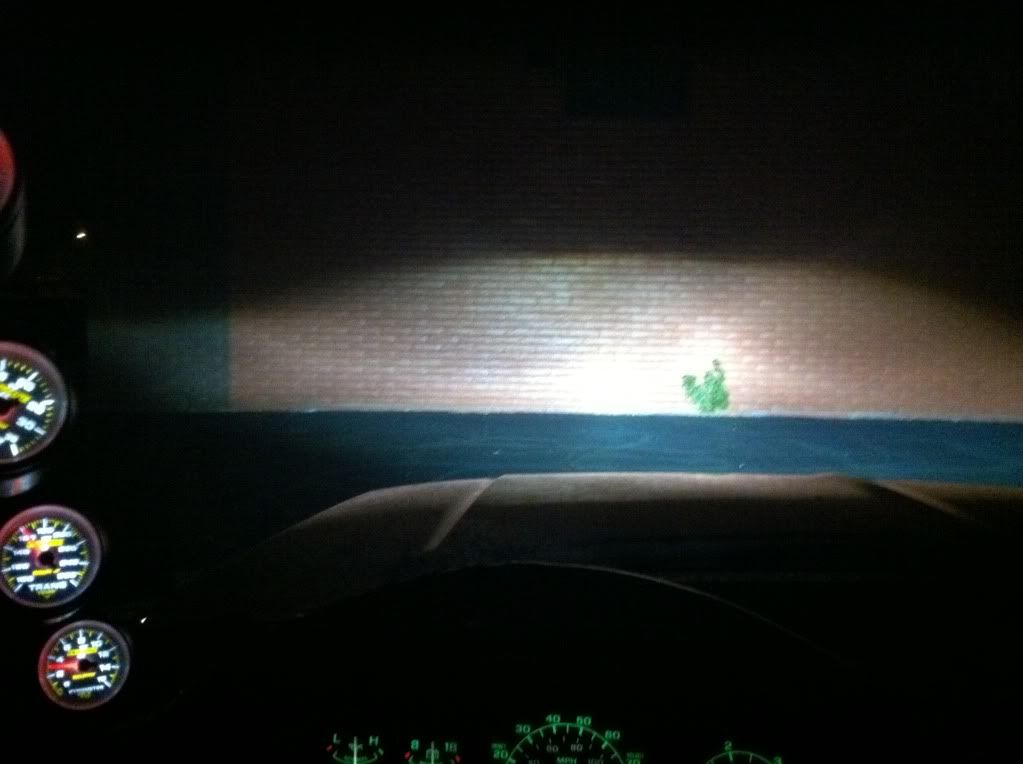
Finished product!
Very nice to drive with! I will try and get some pictures of the new light output

#3
10-27-2011, 10:26 PM
Join Date: Nov 2008
Location: Lakewood, Colorado
Posts: 1,138
Likes: 0
Received 0 Likes
on
0 Posts
And then school takes up most my time, Junior at Colorado School of Mines, and junior year is the hardest. And I guess I could say that Sense I have put the electric fuel system in my truck last winter break, the truck has not gotten anything special but an oil change and about 7000 miles haha. Its going to get new front brake discs, new wheel bearings, and a big tranny cooler probably before winter.
How have you guys been?
#6
10-28-2011, 07:37 AM
Post Fiend
#7
10-28-2011, 08:06 AM
Trending Topics
#8
10-28-2011, 09:15 AM
Posting Guru
Join Date: Dec 2008
Location: Maysville, Kentucky
Posts: 2,347
Likes: 0
Received 0 Likes
on
0 Posts


#10
10-28-2011, 11:13 AM
Join Date: Nov 2008
Location: Lakewood, Colorado
Posts: 1,138
Likes: 0
Received 0 Likes
on
0 Posts
So I have 408 dollars total into the setup, but Because I don't plan on getting rid of the truck for quite a while, I figured it was very worth the expense. My sister graduated from college and she went and bought a Range Rover sinse she is single and this is prolly the one time she can afford it. The HIDs in that is what convinced me I needed some. Very Very different driving experience at night.
I will get some output light pictures tonight for these.
Thanks guys!

#12
10-29-2011, 01:24 PM
Join Date: Nov 2008
Location: Lakewood, Colorado
Posts: 1,138
Likes: 0
Received 0 Likes
on
0 Posts
#13
10-29-2011, 09:34 PM
Posting Guru
Join Date: Dec 2008
Location: Mt.Angel
Posts: 1,161
Likes: 0
Received 0 Likes
on
0 Posts
Matt are you saying you dont like my projector headlights? haha
And you are right the 4300 are the brightest and closest to stock color. And for those looking to get projector headlights with HID's, do what Matt did and get 35W. If you get 55W bulbs and put them in a projector headlight it creates a LOT of heat to where it may damage something. The 35w is more than enough paired with the projector to out shine any headlight. But 55W are great for a regular headlight setup like the clear after market ones.
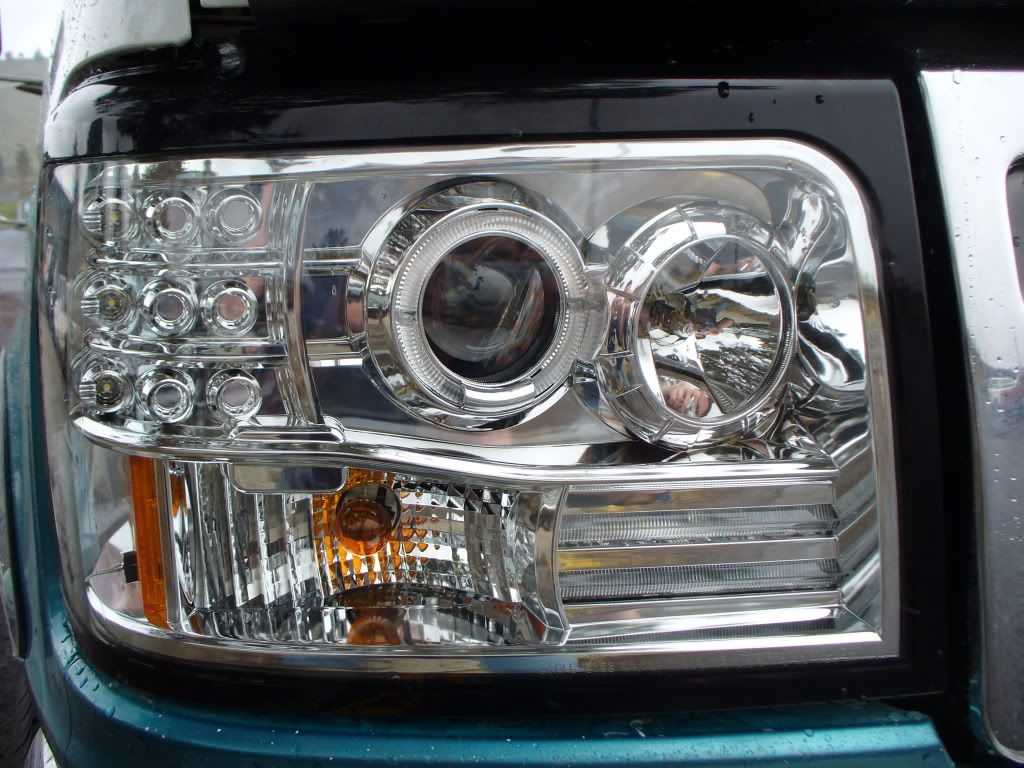
And you are right the 4300 are the brightest and closest to stock color. And for those looking to get projector headlights with HID's, do what Matt did and get 35W. If you get 55W bulbs and put them in a projector headlight it creates a LOT of heat to where it may damage something. The 35w is more than enough paired with the projector to out shine any headlight. But 55W are great for a regular headlight setup like the clear after market ones.
#14
10-31-2011, 10:39 AM
Join Date: Nov 2008
Location: Lakewood, Colorado
Posts: 1,138
Likes: 0
Received 0 Likes
on
0 Posts
Matt are you saying you dont like my projector headlights? haha
And you are right the 4300 are the brightest and closest to stock color. And for those looking to get projector headlights with HID's, do what Matt did and get 35W. If you get 55W bulbs and put them in a projector headlight it creates a LOT of heat to where it may damage something. The 35w is more than enough paired with the projector to out shine any headlight. But 55W are great for a regular headlight setup like the clear after market ones.
And you are right the 4300 are the brightest and closest to stock color. And for those looking to get projector headlights with HID's, do what Matt did and get 35W. If you get 55W bulbs and put them in a projector headlight it creates a LOT of heat to where it may damage something. The 35w is more than enough paired with the projector to out shine any headlight. But 55W are great for a regular headlight setup like the clear after market ones.
Nope not a fan of your headlights. I'm not even sure I like the clear side markers and underneath on mine... Might switch back.
But I am glad your using a projector with your HIDs. Nothing is worse than without.
#15
12-13-2011, 10:34 PM
Senior User
Join Date: Mar 2007
Location: Lebanon MO
Posts: 186
Likes: 0
Received 0 Likes
on
0 Posts
Matt are you saying you dont like my projector headlights? haha
And you are right the 4300 are the brightest and closest to stock color. And for those looking to get projector headlights with HID's, do what Matt did and get 35W. If you get 55W bulbs and put them in a projector headlight it creates a LOT of heat to where it may damage something. The 35w is more than enough paired with the projector to out shine any headlight. But 55W are great for a regular headlight setup like the clear after market ones.
And you are right the 4300 are the brightest and closest to stock color. And for those looking to get projector headlights with HID's, do what Matt did and get 35W. If you get 55W bulbs and put them in a projector headlight it creates a LOT of heat to where it may damage something. The 35w is more than enough paired with the projector to out shine any headlight. But 55W are great for a regular headlight setup like the clear after market ones.
I think these headlights are badd a$$!! Where did you get them from?