How to make your Ranger look like new! Tons of pics!
#1
 09-03-2011, 08:41 PM

How to make your Ranger look like new! Tons of pics!
Hey guys/gals i am making this thread to show how you make your Ranger look like new again! I own a private detail company and have done everything from old school muscle cars to $100k Mercedes benz's. This ranger i bought was sitting for a year and a half plus and was only moved a few times so it had alot of stuff growing on it and in it. There was algae all over the car, dirt baked on it from the sun, along with spider webs, hornet nests, mud diver nests everywhere and a dead animal skull in the bed. It looked like the last time she took it through a car wash was about 2-3 years ago... so you can imagine how much dirt was on it. Now i am going to show you and tell you the steps to make your Ranger look like new again. I apologize for the pictures i took them using my Samsung smart phone so its not exactly high quality but you can get the idea.
All this will take you roughly 4-6 hours, it took me about 4 hours but my good buffer burnt out so i had to use a cheap $20 6" orbital buffer but will do the job just fine. Now heres what you will need...
- Dawn dish soap
- Wash Mitt (Any microfiber mitt will be good)
- Paint cleaner (I used Meguiar's products and highly recommend them but i used Meguiar's paint cleaner which is part of the "Deep Crystal system)
- Polish (I used Meguiars Mirror Glaze #7)
- Carnauba Wax ( I used Meguiar's Deep Crystal Carnauba Wax but any Carnauba Wax will be just fine)
- Any Orbital buffer will be fine i used a cheap $20 one from Walmart.
- 3 microfiber bonnets for buffer (one for applying paint cleaner, one for applying polish and one to apply wax. I take it all off by hand using a microfiber towel its a bit more work but inless you have a high end buffer it wont get all of it off)
- Microfiber towels for drying vehicle, and one for removing each product i mark on the corner with a sharpie with what i am removing with what towel so i am not removing wax with a towel i used to remove polish. A simple P for polish, W for wax and C for paint cleaner. I also do this on the back side of the bonnets.
- You can also get a California Blade which looks like a squeegee which makes drying you vehicle alot faster.
- You will also need a good spot with shade, doing all this in the sun light isnt a good idea. I do mine under a large tree...
- Also clay barring isnt a bad idea but if you wash it good with dawn that will get most of the containment's out of the paint and paint cleaner with get the rest.
- Tire shine for tires and plastic parts if you dont want to buy specific stuff for the plastic. I apply this with a terry towel or applicator pad.
- Last thing is patience! This do's take time so throw some music on, get your favorite beverage and relax and take your time!
Now i will be listing the steps followed by plenty of before and after photos...
1. Wash the car with dawn, i always wash it twice incase i didnt get something the first time.
2. Dry the car, make sure everything is completely dry before you apply anything.
3. Grab your buffer, and put your paint cleaner bonnet on. Shake the bottle for a good 30-45 seconds to make sure the product is thoroughly mixed. Now i drip the the actual product onto half the vehicle so i dont have to keep picking up the bottle and putting it on. You dont need alot of product and after you apply alittle onto the paint and start buffing you will see exactly how much you need to apply. Put a bit of the product on the buffer to get started but after that you will not need to do this. I go from left to right, but alot of folks go in circles its just whatever you like will work. Apply alittle pressure pushing the buffer down and that will be all that is needed. Now after done with one side you can do the other. If you see a shiny spot in the paint that means you missed applying product in the area.
4. Now grab your microfiber towel you marked to remove your paint cleaner, and start wiping the product off the vehicle.
5. Its time for polish, grab your bonnet marked for polishing, grab your polish, shake it up good for 30-45 seconds. Now DO NOT let polish sit on the paint, wipe it off as soon as you get done doing one area. I drip this onto the vehicle as well but i do one section at a time. I will split the vehicle up into sections i will do just the hood, pick up the mircofiber for removing polish, remove the polish then do a fender and cab, then wipe off and continue to do this in sections.
6. After polishing you should see your paint has a "Wet" look to it. But now its time to protect that paint. Grab your Wax, shake it up good for 30-45 seconds. Put your wax bonnet on your buffer. I also drip this onto the paint, and then buff it in. Once again if you see a spot thats shiny you missed applying the product to that area. I apply wax to all the windows, it acts like rain-x and water will bead right off your windows. I apply a good coat to the windshield. It makes visibility a ton better when its raining which also makes driving alot safer.
7. Finally grab your microfiber to remove your wax. Make sure you remove all the wax from inside the cracks and weatherstripping.
8. Now your done with the paint! almost finished with with a full detail!
9. Clean your chrome parts, apply wax to it to protect the finish if you would like and then wipe it off.
10. Apply tire shine to your plastic parts or if you have specific product for plastic parts apply that. I apply them with applicator pad but a terry towel will work just fine. If you get some on your paint just wipe it off when your done.
11. Now if you can use rubbing compound or if you have a specific polish for your rims to polish them. I use a terry towel for this or a applicator pad will work. After you wipe the polish off apply wax to the rims to protect it from containments like brake dust. It will eat away at the wax instead of your rims so well worth spending the time.
12. Apply your tire shine, now over the years i have tried every tire shine out there. Alot of it will splatter off or wont even produce much of a shine at all. The best stuff i have used is Black Magic's Tire Wet Gel, it lasts the longest, produces the best shine and splatters the least amount.
Now your finally done! Sit back and enjoy the work you just did! It is alot of work but keeping your paint clean and protected is alot cheaper then having to get it repainted! If your selling the vehicle, a clean vehicle is a attractive one and will make a difference if someone is deciding between vehicles and will also help a buyer decide whether the price is right.
Over the next hour or so i will be uploading pictures of this process of my Ranger when my computer stops being a PITA. Please be free if you have any questions on processes or how to do something to post it up and i will reply ASAP.
#3
09-03-2011, 08:57 PM
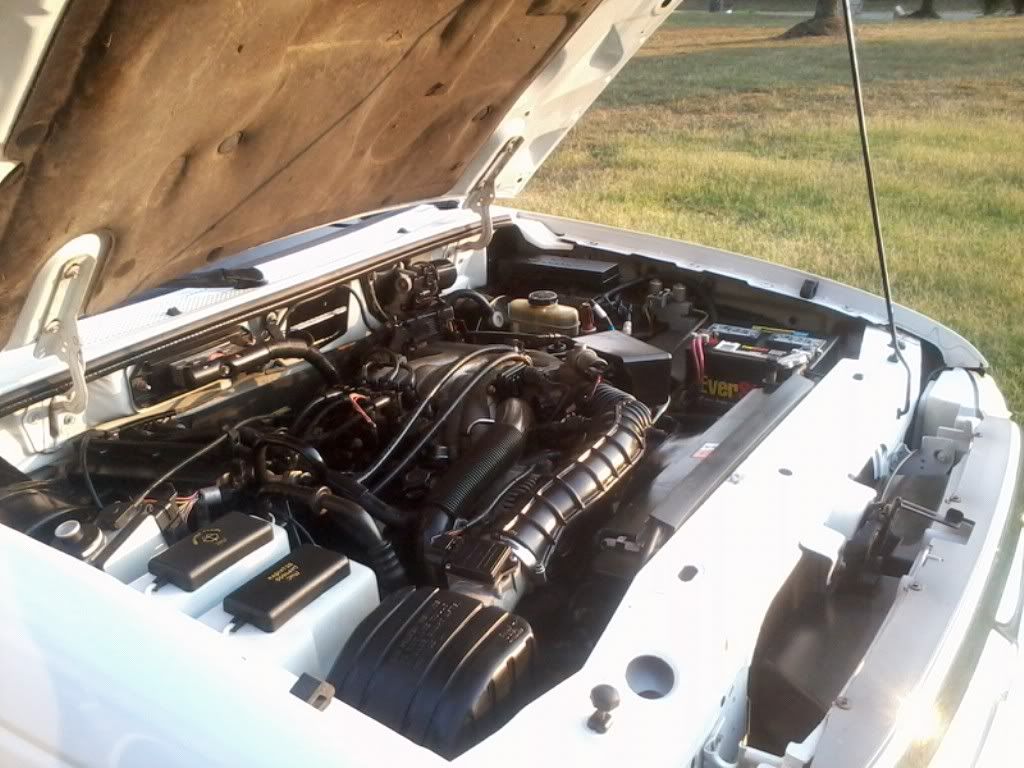
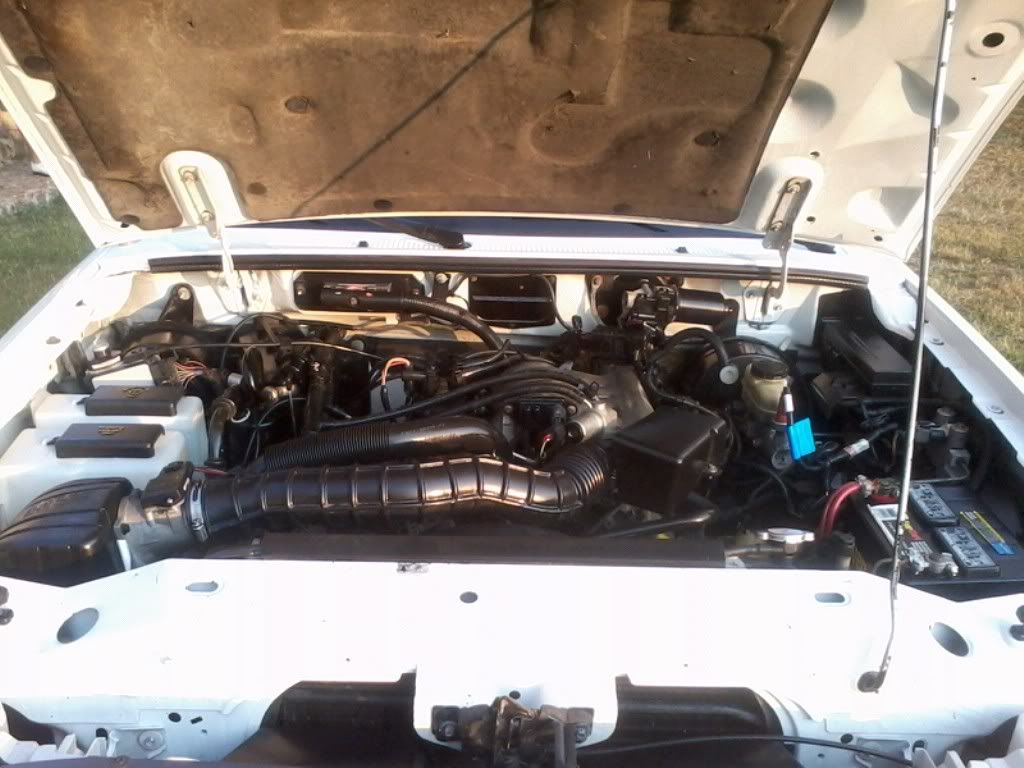
I forgot to add how to clean your engine bay...
Heres the products you will need...
- A wire brush of some sort to scrub and get inbetween the cracks.
- Heavy duty degreaser (You can buy a actual degreaser from Engine Brite which is about $4 a can which will work well)
- Tire shine or a product to condtion all the rubber/plastic parts.
- Some plastic bags
Your engine is made to with stand water but powerwashing it is NEVER a good idea. Powerwashing forces water into places it should not be. Clean your engine at your own risk. If a gasket or you have a leak some where i recommend you dont clean it because you do not want water getting into places it should not. Its best to warm your engine up, you want it warm to touch. DO NOT spray water on a hot engine it is not a good idea.
1. Take some of the plastic bags and cover your alternator and distributor.
2. If you have a attachment on your hose that you can set to mist set it on that if you do not turn your hose on so it comes out slowly you DO NOT want to completely soak your engine with water. Rinse the engine down.
3. Take your degreaser and spray it everywhere, then take your wire brush and scrub anything that needs to be scrubbed. I also use a terry cloth that is damp and spray some degreaser on it to do most of the scrubbing.
4. After you have scrubbed it, spray more degreaser on it and let it sit for 5-10 mins to let it do its work.
5. Rinse the engine off. Also remove the bags.
6. Start the vehicle and let it idle for a few minutes to help get water off the engine and help dry things.
7. I usually just wait till it air drys, but if you dont want to wait just get a dry terry towel and dry it.
8. Take a terry cloth or applicator pad and spray the engine with tire shine or what ever product you may want to use to condition the plastic and rubber parts.
Now your finished by conditioning the plastic and rubber parts it helps stop them from dry rotting and its also easier to work on and spot leaks on a clean engine.
Heres the products you will need...
- A wire brush of some sort to scrub and get inbetween the cracks.
- Heavy duty degreaser (You can buy a actual degreaser from Engine Brite which is about $4 a can which will work well)
- Tire shine or a product to condtion all the rubber/plastic parts.
- Some plastic bags
Your engine is made to with stand water but powerwashing it is NEVER a good idea. Powerwashing forces water into places it should not be. Clean your engine at your own risk. If a gasket or you have a leak some where i recommend you dont clean it because you do not want water getting into places it should not. Its best to warm your engine up, you want it warm to touch. DO NOT spray water on a hot engine it is not a good idea.
1. Take some of the plastic bags and cover your alternator and distributor.
2. If you have a attachment on your hose that you can set to mist set it on that if you do not turn your hose on so it comes out slowly you DO NOT want to completely soak your engine with water. Rinse the engine down.
3. Take your degreaser and spray it everywhere, then take your wire brush and scrub anything that needs to be scrubbed. I also use a terry cloth that is damp and spray some degreaser on it to do most of the scrubbing.
4. After you have scrubbed it, spray more degreaser on it and let it sit for 5-10 mins to let it do its work.
5. Rinse the engine off. Also remove the bags.
6. Start the vehicle and let it idle for a few minutes to help get water off the engine and help dry things.
7. I usually just wait till it air drys, but if you dont want to wait just get a dry terry towel and dry it.
8. Take a terry cloth or applicator pad and spray the engine with tire shine or what ever product you may want to use to condition the plastic and rubber parts.
Now your finished
by conditioning the plastic and rubber parts it helps stop them from dry rotting and its also easier to work on and spot leaks on a clean engine.
#5
09-03-2011, 09:07 PM
This is pictures after i power washed it a few times, and washed it with dawn. The dirt and algae was literally caked on the darn thing. I also found a large rat/mouse nest in the air box that took up the whole inside of the air box 
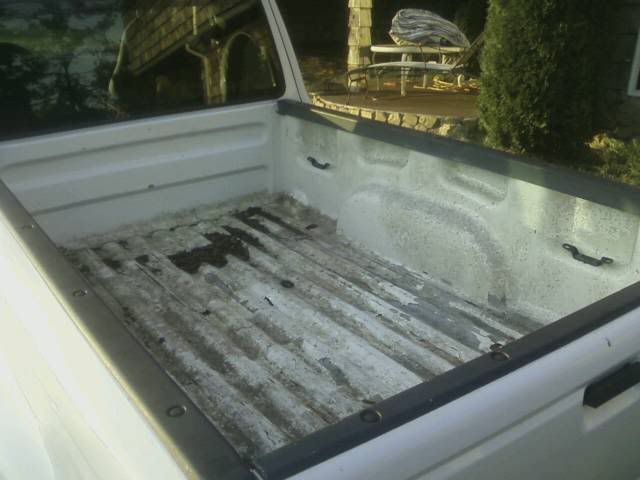
Bed of the truck you can say all the nasty junk/algae all over it -
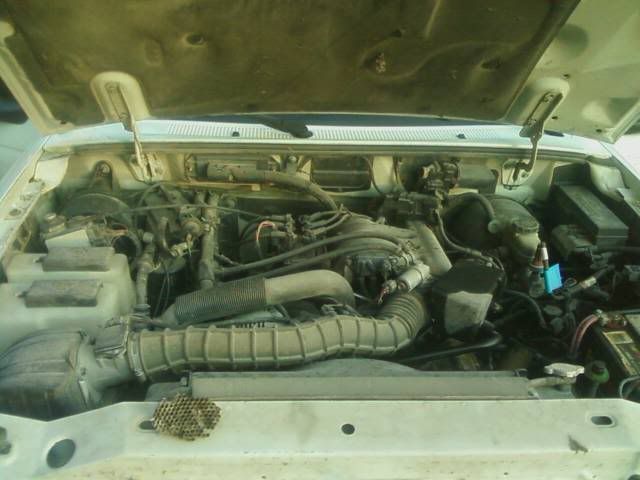
Engine, you can see one of the many hornet nests in the bottom left corner of the picture -
Green Algae that was caked all over the truck before i powerwashed it...
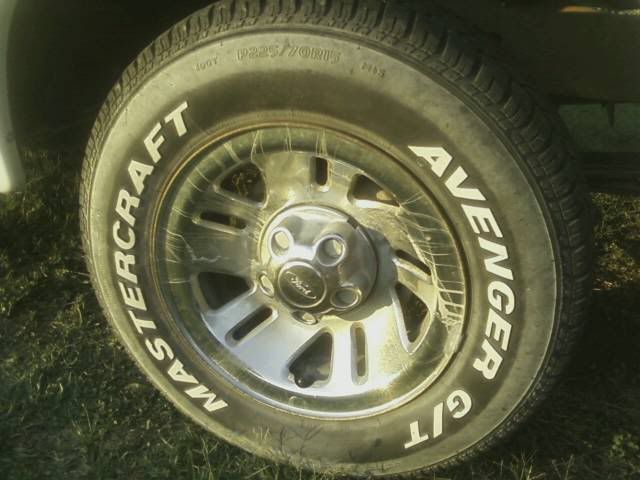
Rims, they were caked in junk and lots of surface rust before i power washed them.
One of the many dirty spider webs that i found that were all over the outside intell i powerwashed it...
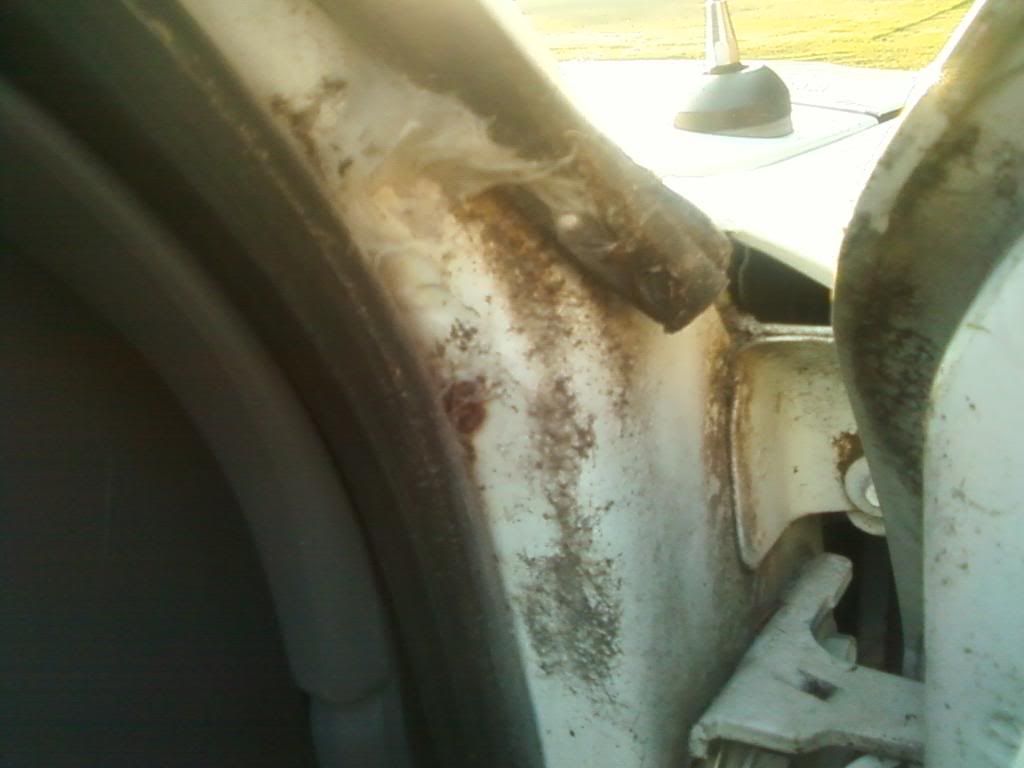
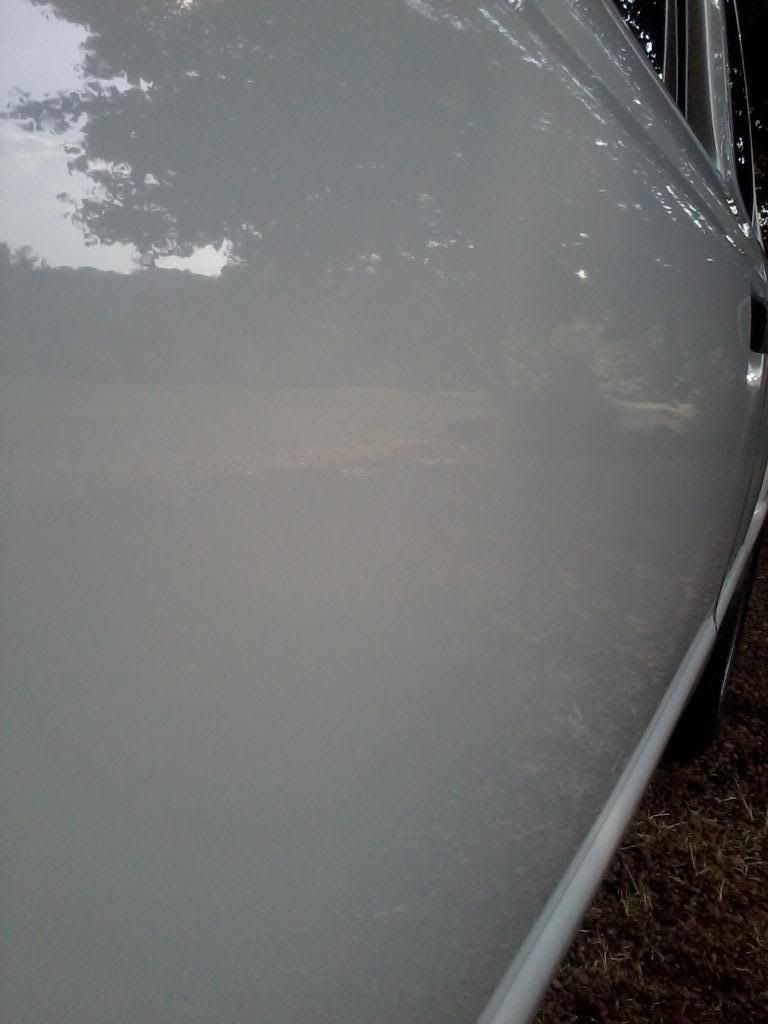
In this picture it was right after i used paint cleaner and you can see the water/dirt marks that were in the paint. I left this spot like this so you can see the difference...
Bed of the truck you can say all the nasty junk/algae all over it -
Engine, you can see one of the many hornet nests in the bottom left corner of the picture -
Green Algae that was caked all over the truck before i powerwashed it...
Rims, they were caked in junk and lots of surface rust before i power washed them.
One of the many dirty spider webs that i found that were all over the outside intell i powerwashed it...
In this picture it was right after i used paint cleaner and you can see the water/dirt marks that were in the paint. I left this spot like this so you can see the difference...
#6
09-03-2011, 09:21 PM
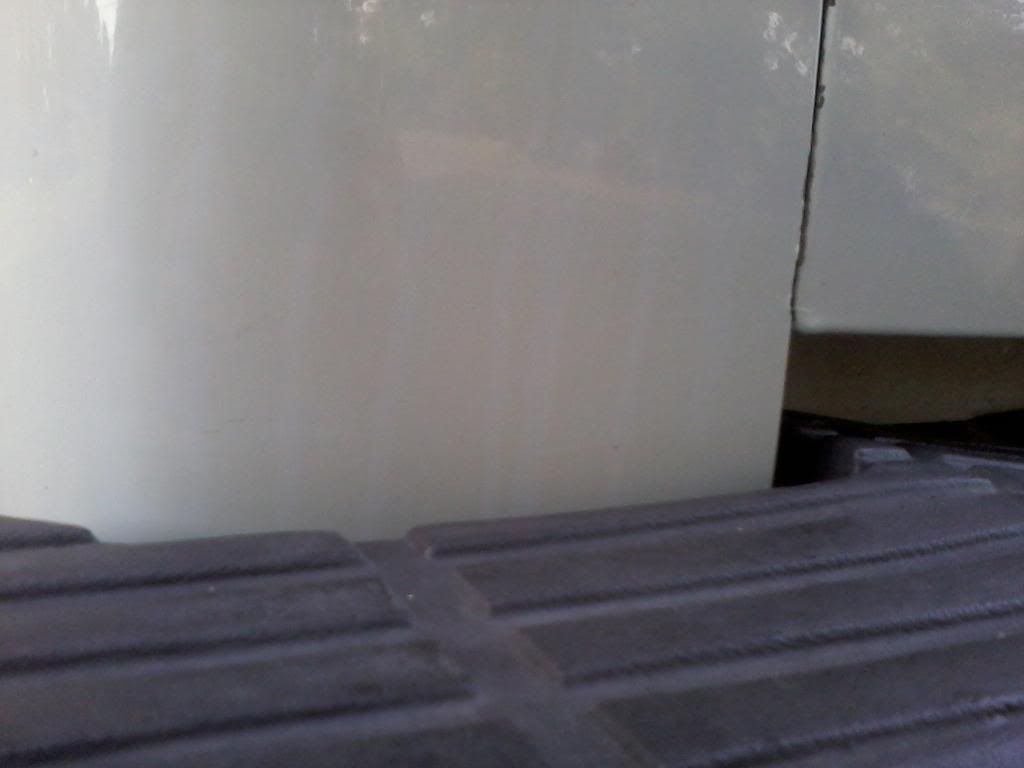
This is a side shot of the paint cleaner on the truck... you want it to look as dull as possible which means you covered the whole area.
Here is a few shots after removing the paint cleaner off the truck, those water/dirt marks were all over the truck and as you can see the paint cleaner got rid of all of those...
Here is a few pictures of the polish on the truck as you can see the shiny spots, i left a few spots without it so you can see what it will look like if you miss a area. Once again you want the paint to look dull with this product on which means you got everywhere covered...
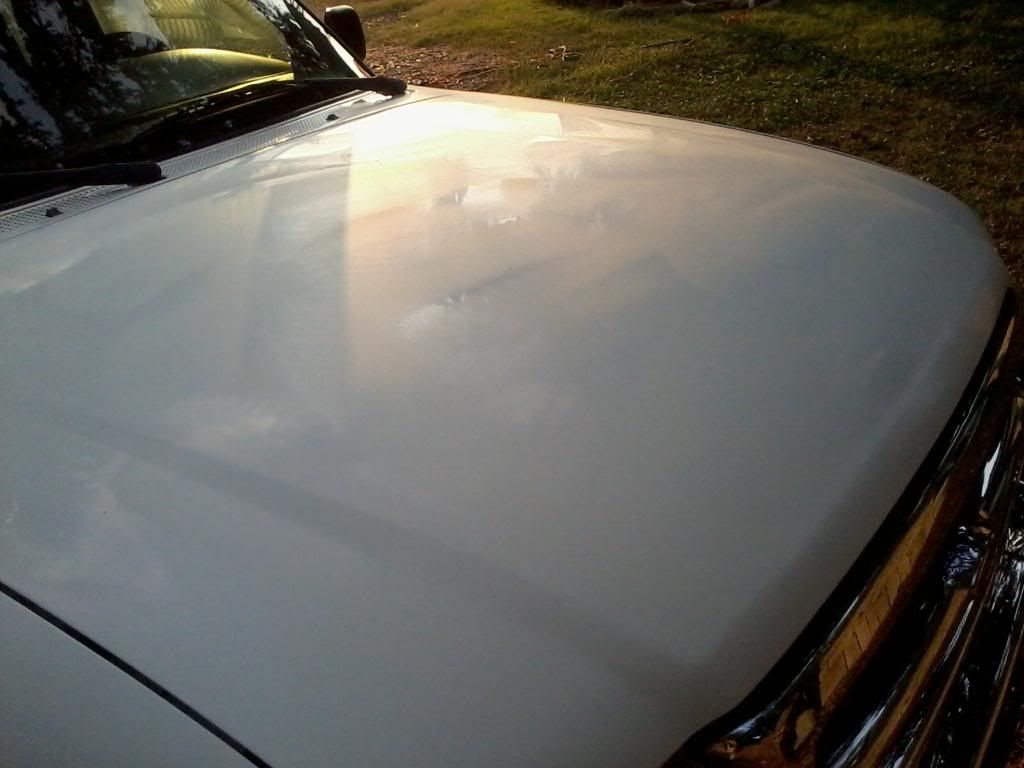
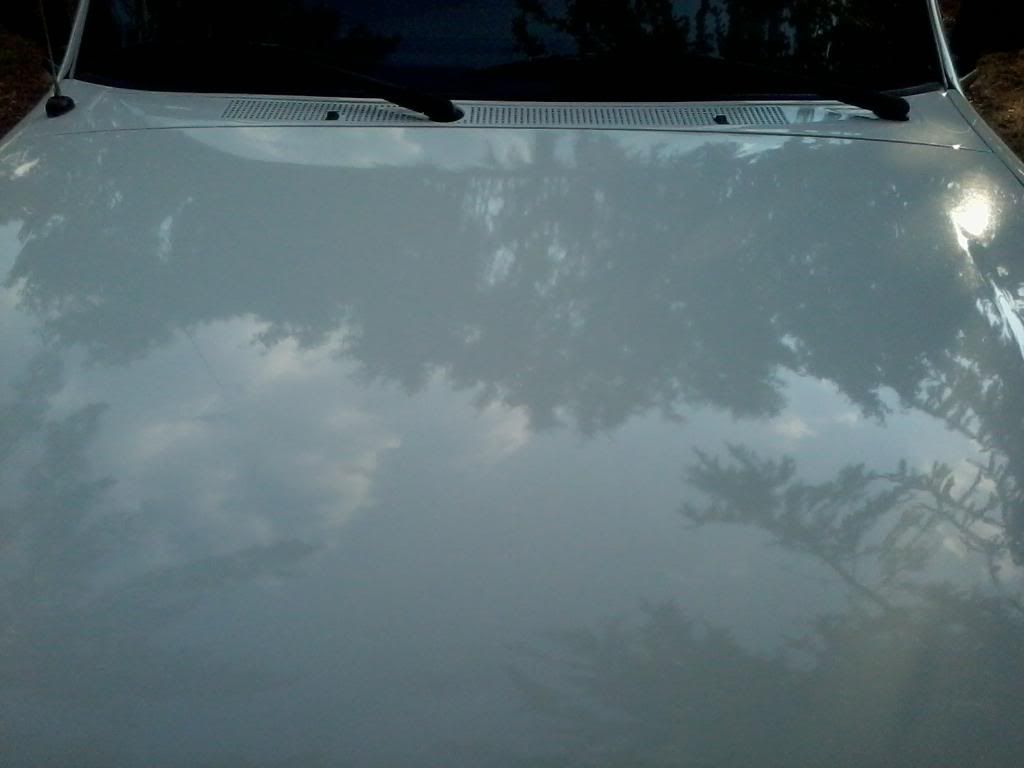
Now pictures of the polish off the truck, you would be able to see better if i used a good quality camera but the paint has that "Wet" look.
Here is a few shots after removing the paint cleaner off the truck, those water/dirt marks were all over the truck and as you can see the paint cleaner got rid of all of those...
Here is a few pictures of the polish on the truck as you can see the shiny spots, i left a few spots without it so you can see what it will look like if you miss a area. Once again you want the paint to look dull with this product on which means you got everywhere covered...
Now pictures of the polish off the truck, you would be able to see better if i used a good quality camera but the paint has that "Wet" look.
#7
09-03-2011, 09:24 PM
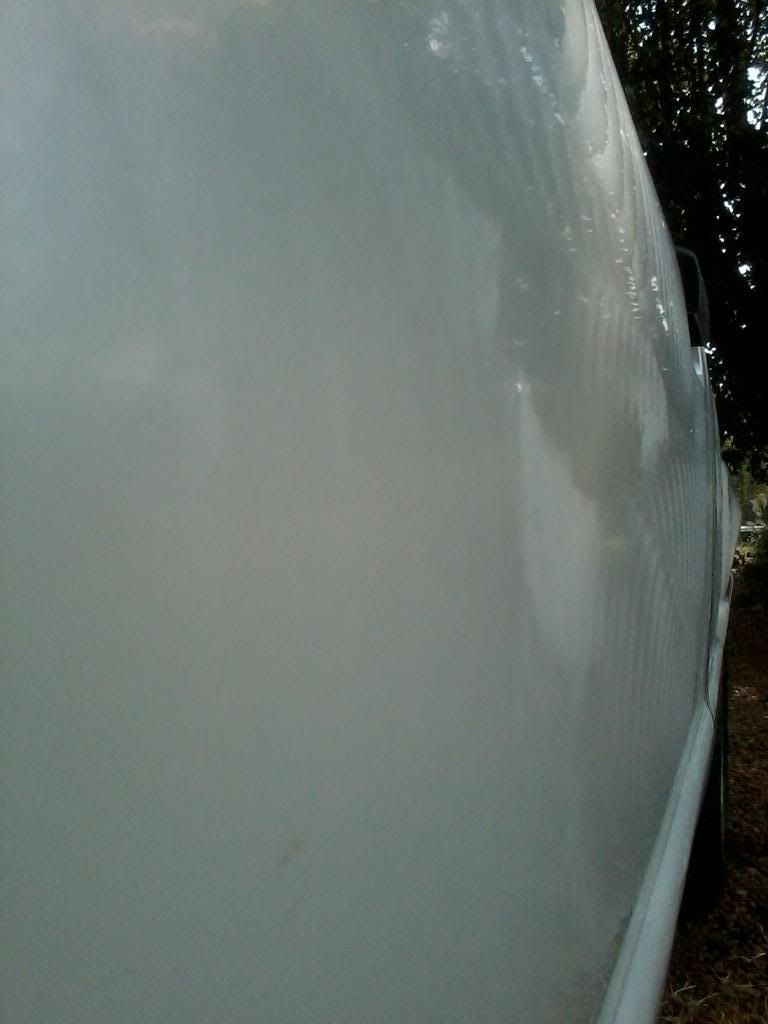
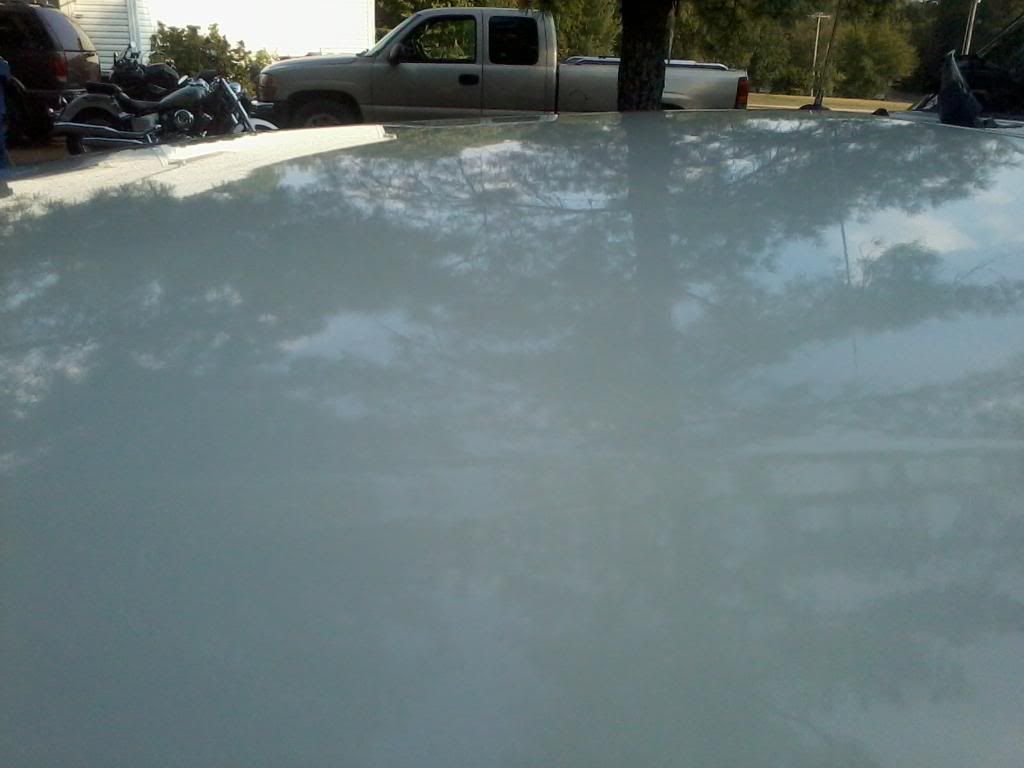
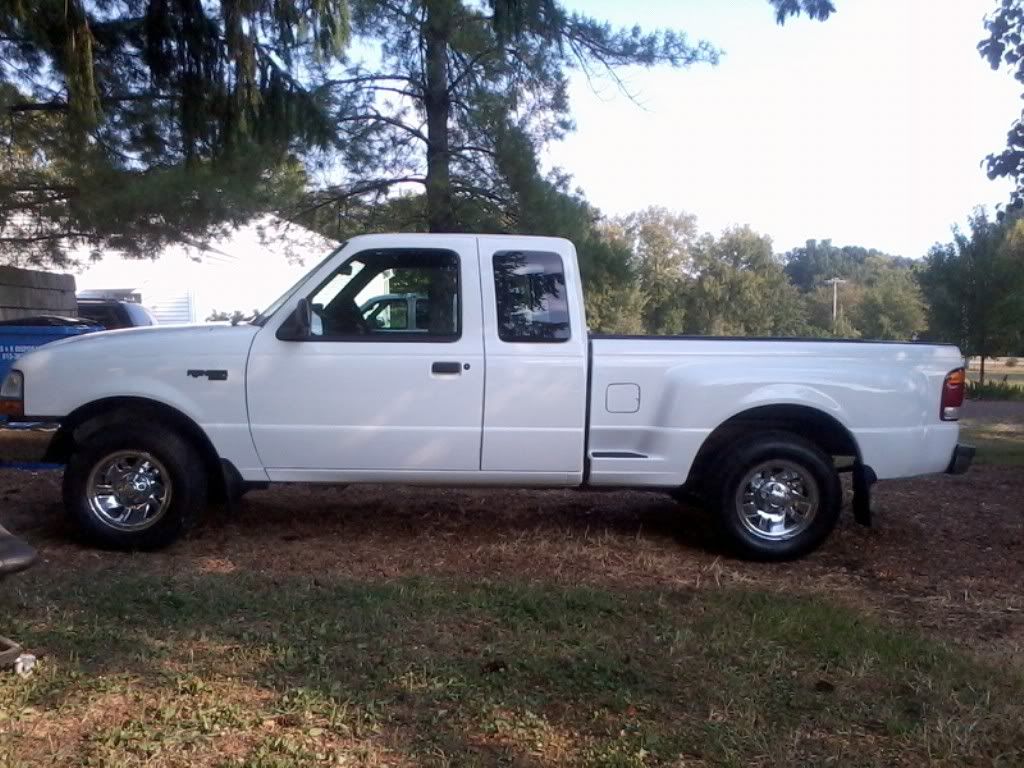
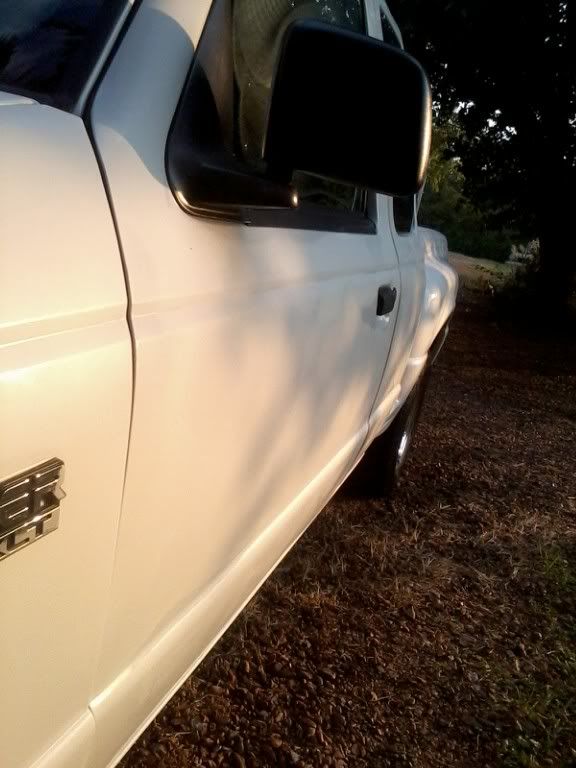
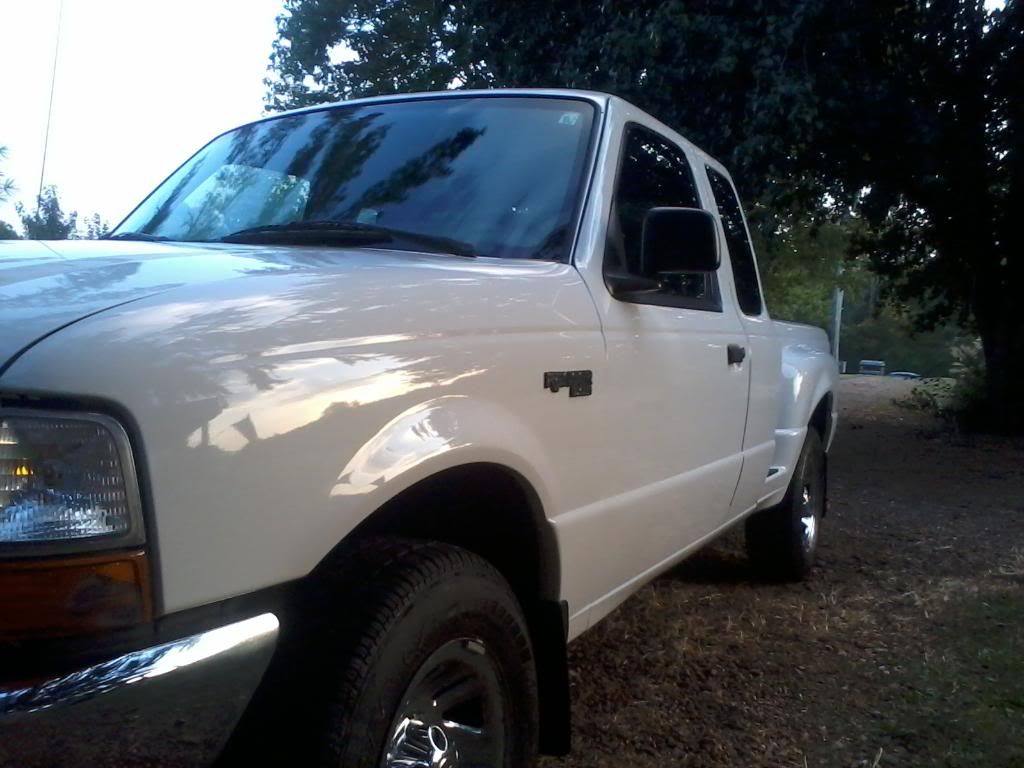
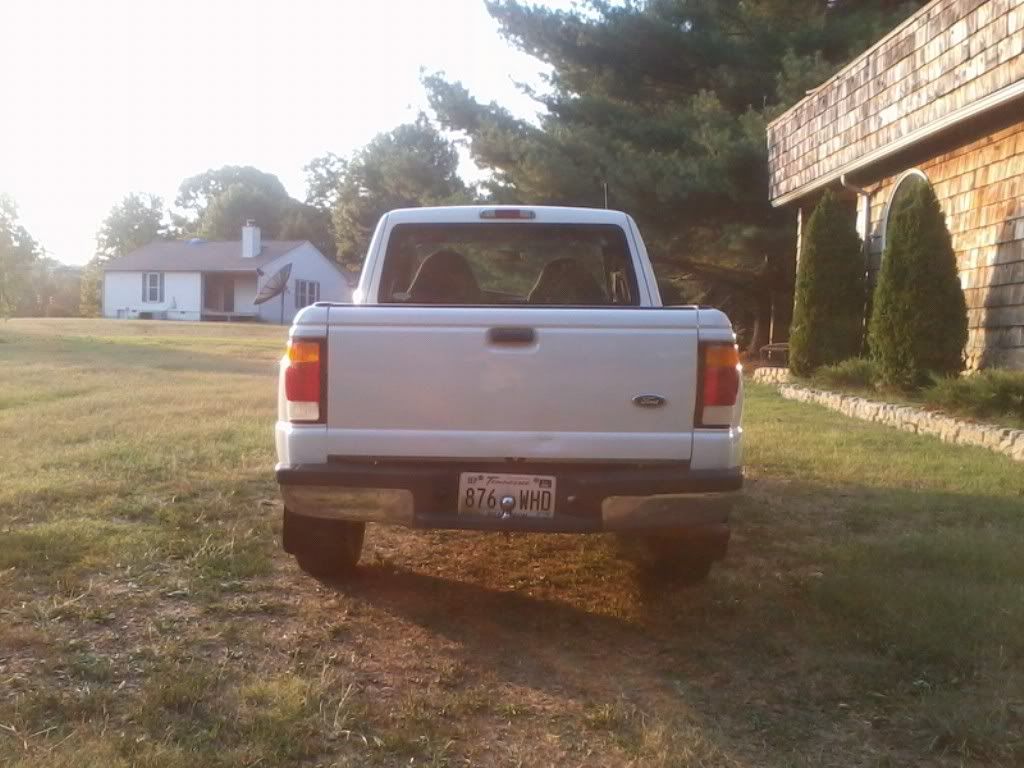
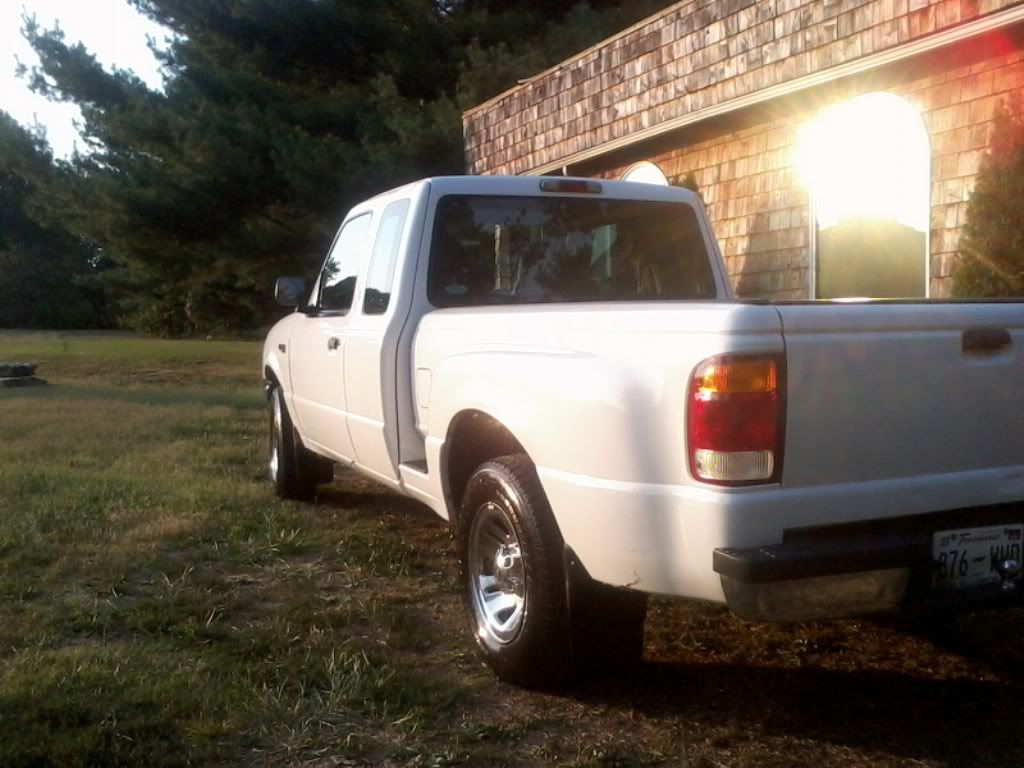
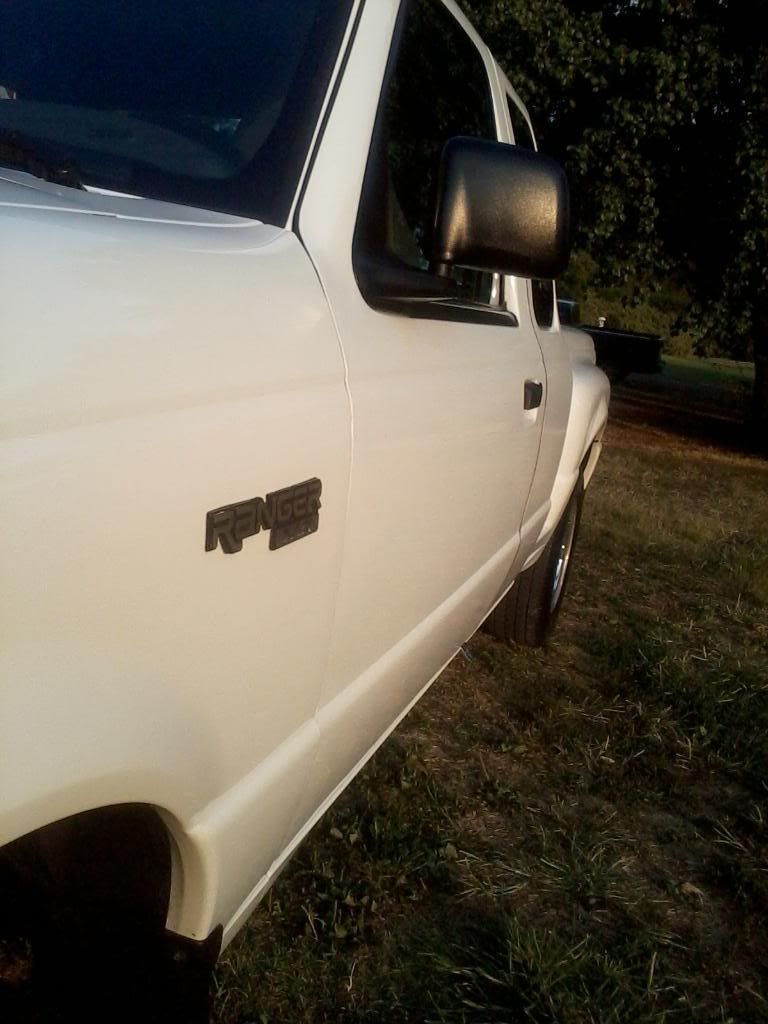
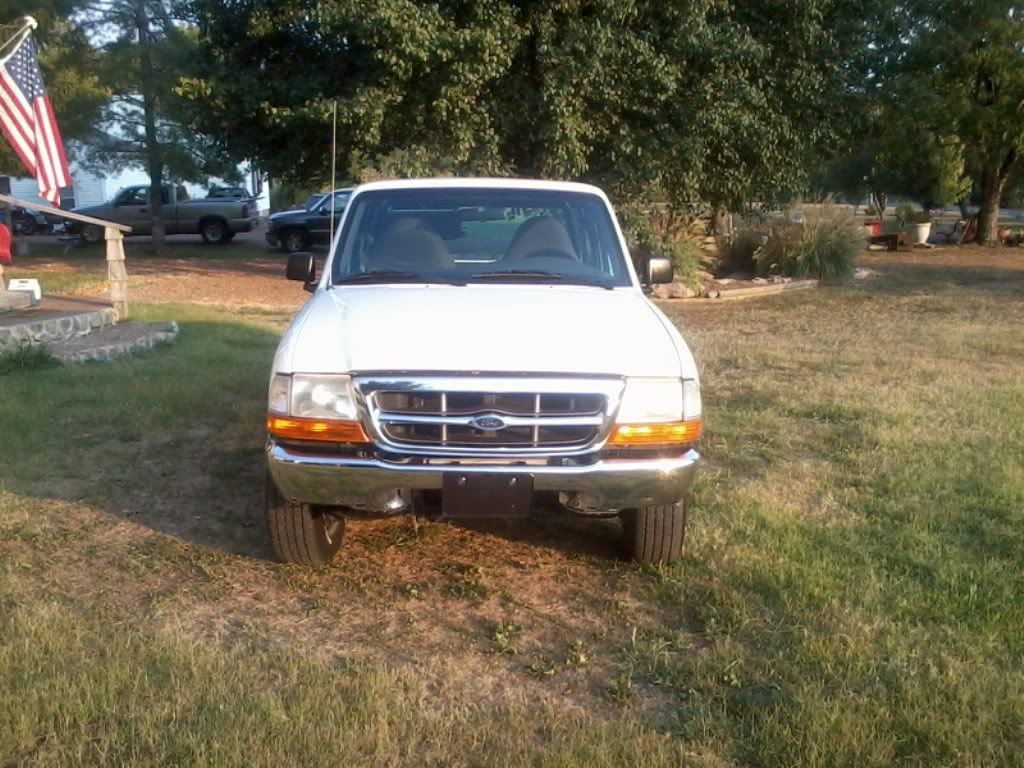
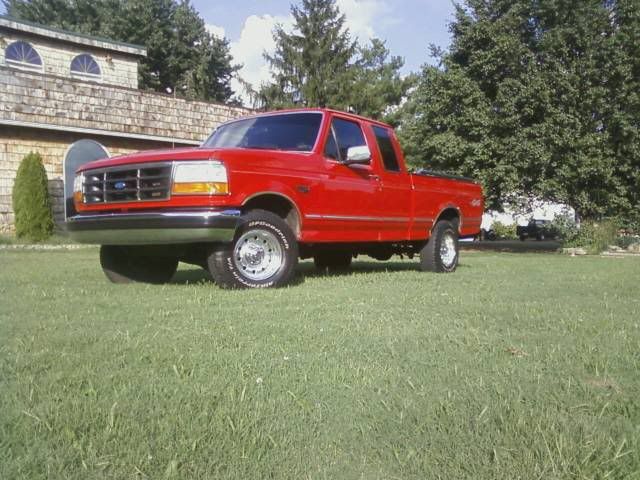
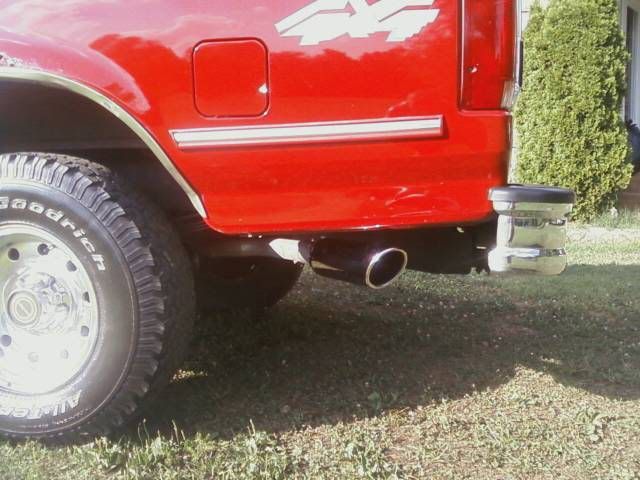
Now some pictures of the finished product  The only thing i did not do is polish the rims in these pictures. The pictures of the sun hitting it make it look kinda dull so to speak but thats because my camera is not very good. But you can see the shine in the pictures taken of the side in the shade.
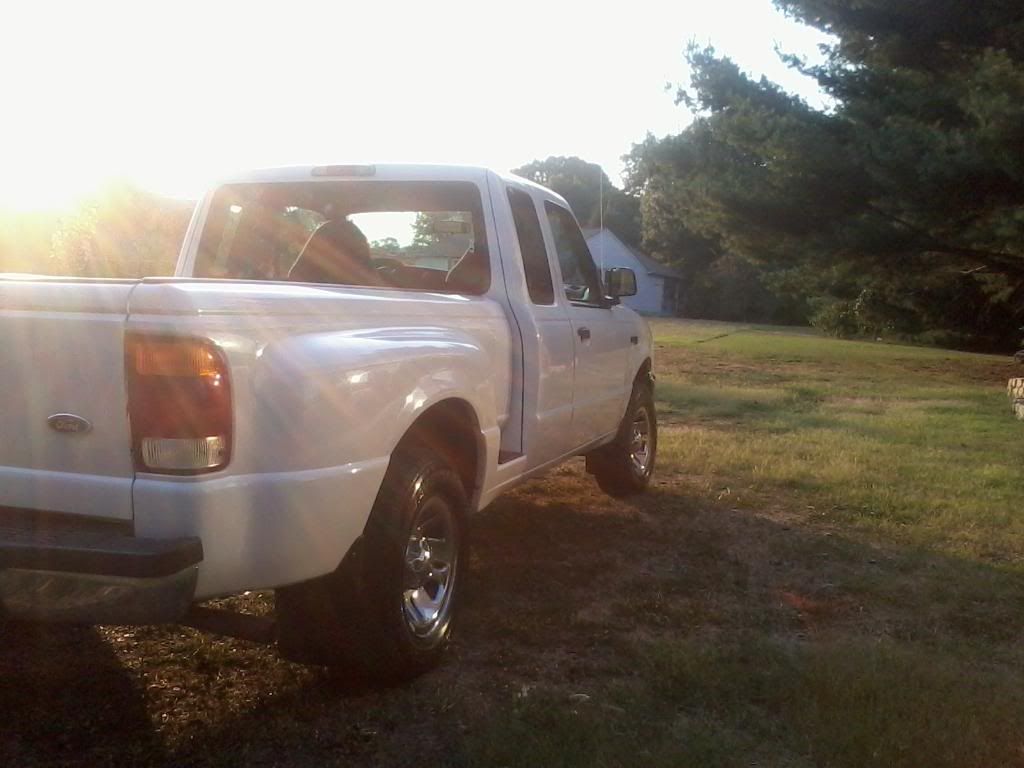


The only thing i did not do is polish the rims in these pictures. The pictures of the sun hitting it make it look kinda dull so to speak but thats because my camera is not very good. But you can see the shine in the pictures taken of the side in the shade.
Trending Topics
#9
09-03-2011, 09:33 PM

#12
09-04-2011, 01:33 PM

Senior User
Join Date: Aug 2011
Location: Elwood, Tx
Posts: 192
Likes: 0
Received 0 Likes
on
0 Posts
#13
09-04-2011, 03:53 PM
Senior User
Join Date: Dec 2010
Location: Pittsburgh PA (Northside)
Posts: 188
Likes: 0
Received 0 Likes
on
0 Posts
I have a few questions.
Somewhere I heard that after applying the paint cleaner you should rinse the vehicle off with water and dry. Then apply the glaze (rinse and dry) then apply the wax (doing a nice job for me will take all weekend).
Is this a unnessary step?
2nd question. What do you do with the windows (exterior glass and mirrors)? Anything special?
#14
09-05-2011, 12:43 AM
I live just outside nashville, TN i actually am from Lansing, Michigan I moved down here 5 years ago. I really appreciate all the comments and feed back!  Its alot of work but you saw for the most part how bad mine was, and mine was just about as bad as they get, imagine if you have kept your vehicle paint somewhat clean how it will look!
I moved down here 5 years ago. I really appreciate all the comments and feed back! Its alot of work but you saw for the most part how bad mine was, and mine was just about as bad as they get, imagine if you have kept your vehicle paint somewhat clean how it will look!
#15
09-05-2011, 12:49 AM
Yeah dirt roads are no fun when you want to keep your ride clean but if you keep a good coat of wax on it and give it a quick wash once a week it will stay alot cleaner and will be alot easier to maintain then letting that dirt work its way into your paint. It may not be shiny all the time but it will keep your paint/chrome protected.