The closest I may ever get to owning a T-bucket Roadster...
#76
 10-01-2011, 07:29 PM

FTE Legend
Join Date: May 2008
Location: In my own world
Posts: 56,542
Likes: 0
Received 0 Likes
on
0 Posts
#78
10-06-2011, 02:49 PM
Okay - ONE OF THE THINGS slowing stuff down is a grandiose Easter Egg Hunt for all of the bolts I need for this thing - complicated by changing almost everything about it.
I still lack water pump pulley bolts - and I refuse to use less than grade five.
The bolts will be shorties, because I'm bringing it into the electronic age as far as the fan itself. So obviously - I don't have any like that anywhere around the place...
But here it is with the mounts, valve covers (Edelbrock SIG series) and the 4160 bolted down

You can really see the difference between the left and right headers. One has to go down and in to miss the steering and brake master - the other runs straight back, but the starter may still need a heat shield
*I hope I'm right, and I also found the trans mount bolts at the same time
*The Holley 4160 on here used a heat riser tube for the choke. I'm not well pleased with electric chokes either - so this is going to get a manual choke conversion. I know how to use that well.
Soon I'll be dropping this puppy in to it's final resting place. The tranny is next. When both are together and right it will be time for the PLANT
Update: I'm having to re-order the tranny parts. Some kind of a backorder problem. In the meantime I've at least got the transbox itself slicked up -
Believe it or not the amber highlight is NOT expected. That paint came out of a plain old rattle can

"Man ~That thing so black it shine..."
I still lack water pump pulley bolts - and I refuse to use less than grade five.
The bolts will be shorties, because I'm bringing it into the electronic age as far as the fan itself. So obviously - I don't have any like that anywhere around the place...
But here it is with the mounts, valve covers (Edelbrock SIG series) and the 4160 bolted down
You can really see the difference between the left and right headers. One has to go down and in to miss the steering and brake master - the other runs straight back, but the starter may still need a heat shield
*I hope I'm right, and I also found the trans mount bolts at the same time
*The Holley 4160 on here used a heat riser tube for the choke. I'm not well pleased with electric chokes either - so this is going to get a manual choke conversion. I know how to use that well.
Soon I'll be dropping this puppy in to it's final resting place. The tranny is next. When both are together and right it will be time for the PLANT
Update: I'm having to re-order the tranny parts. Some kind of a backorder problem. In the meantime I've at least got the transbox itself slicked up -
Believe it or not the amber highlight is NOT expected. That paint came out of a plain old rattle can
#79
10-11-2011, 01:34 PM
WARNING about oil pressure senders: Part# PS-60 (manufactured by 'STANDARD') WILL NOT FIT a Windsor or 302 without a stand-off from the block.
- it also won't fit a 351M or "C"
There is ANOTHER SENDER UNIT THAT YOU NEED TO TAKE NOTE OF THE PART NUMBER OF
(compact, and fits flush to the block)
*More info to follow here. You need the small one to tuck into that spot without problems
- it also won't fit a 351M or "C"
There is ANOTHER SENDER UNIT THAT YOU NEED TO TAKE NOTE OF THE PART NUMBER OF
(compact, and fits flush to the block)
*More info to follow here. You need the small one to tuck into that spot without problems
#80
10-11-2011, 02:10 PM
HOLD THE PHONE ON THAT, Man...
The Oven Spray was $2.65 a pop - what wuzz the name of that stuff again?
I may have to "GIT ME SUM!!!"
KUDOS!
I'm proud of you....
~Although - foaming oven cleaner is notorious for tearing up stubborn spots of hard baked on crap (I apologise for the language, but you know well the nasty stuff I mean)
I will go on point by stating this: IF Oven Cleaner won't tear up whatever it is, the last resort is gasket destroyer spray. At that point, you're almost better off with leather working tools (such as rounded punches and chisels)
"CHEAP" and "INEXPENSIVE" are 2 completely different things...
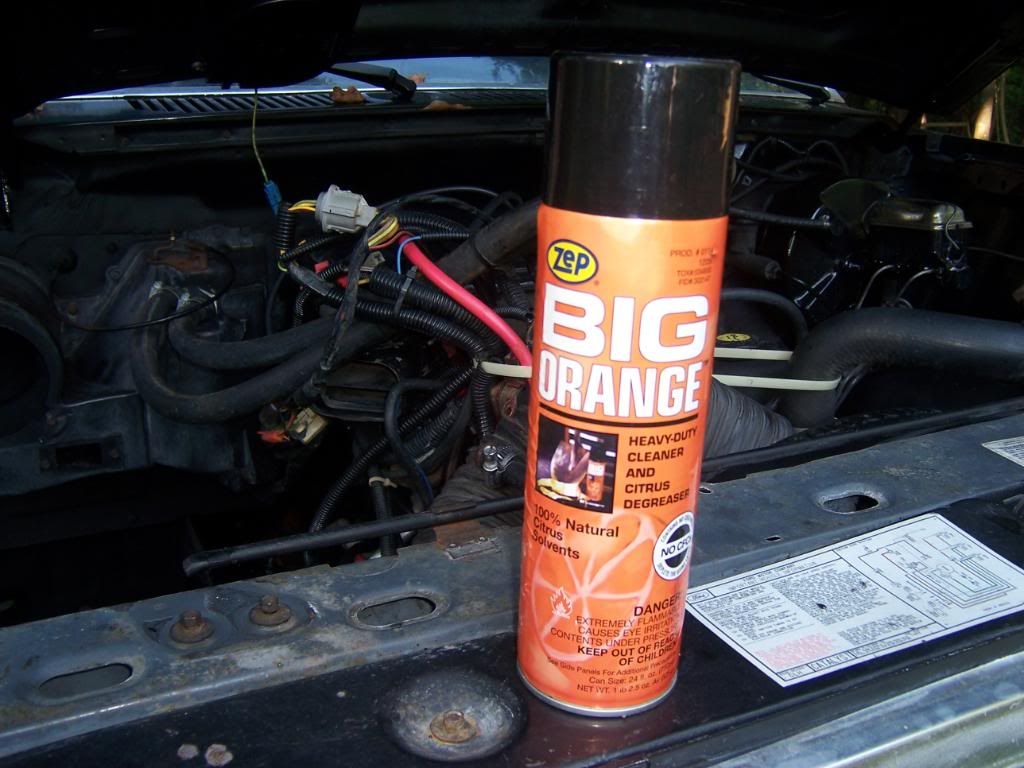
I have used this stuff to really clean epoxy primer, undercoating, Chassis saver paint, regular paint, and stuff like that.
#82
10-15-2011, 07:15 PM
Here's that cleaner that I was telling you about. I have to tell you that it has also removed some Chassis Saver paint and Rustoleum paint from my skin with a little scrubbing (several hours old only), as well as grease and everything else.
I have used this stuff to really clean epoxy primer, undercoating, Chassis saver paint, regular paint, and stuff like that.
I have used this stuff to really clean epoxy primer, undercoating, Chassis saver paint, regular paint, and stuff like that.
I rounded up a set of flexplate nuts, and if I had been a day earlier I could have had a treasure trove of FORD nuts and bolts - my bud across the street did a massive garage-ex and ditched a whole truckload of ford mostly fasteners... He said it was 20 years worth of head bolts, and who knows what all.

*I may go back for a second look.
#83
10-19-2011, 06:30 PM
A nice toy to have - mine was so cool I only just got it back after three years from a guy that borrowed it...
Almost nothing ever goes directly to an engine stand. Especially since I prefer to pull engines and trannies as a single unit when I can. So what do you set stuff down on?
I decided that the important factor was an exact fit under my cherry picker - so I made this "SKATEBOARD" with doubled 3/4" ply and 2X4 bracing using a set of solid steel casters

This package sits nice and square on its oil and trans filter pan
*which might not be great for the gaskets - I'll have to check them
** Small update:
As the day of the actual "Engine Stuffing" draws closer, I'm studyin' the actual space it needs to slide into. Ain't no way it will go in one piece - the AOD is going to have to be insinuated first and the mill dropped almost vertically to mate to it.
The engine and accessories are 28 - 29 inches front to back by themselves, and the space isn't much longer
Almost nothing ever goes directly to an engine stand. Especially since I prefer to pull engines and trannies as a single unit when I can. So what do you set stuff down on?
I decided that the important factor was an exact fit under my cherry picker - so I made this "SKATEBOARD" with doubled 3/4" ply and 2X4 bracing using a set of solid steel casters
This package sits nice and square on its oil and trans filter pan
*which might not be great for the gaskets - I'll have to check them
** Small update:
As the day of the actual "Engine Stuffing" draws closer, I'm studyin' the actual space it needs to slide into. Ain't no way it will go in one piece - the AOD is going to have to be insinuated first and the mill dropped almost vertically to mate to it.
The engine and accessories are 28 - 29 inches front to back by themselves, and the space isn't much longer
#84
10-26-2011, 05:48 PM
#85
11-01-2011, 05:09 PM
November already.....
(01NOV2011)
This perspective view outlines where the exhaust has to run - note the location of the tranny mount. The crossmember runs under it but dips up on each side - making interesting pipe routing possible. The left has to come under to the right side and join up with the right side, there's no other way to do it without going over the frame and outside the rails.

I forsee a "Y" connection, or a pair of pipes one on top of the other
This next is kinda forlorn looking, isn't it? But it's always like that.
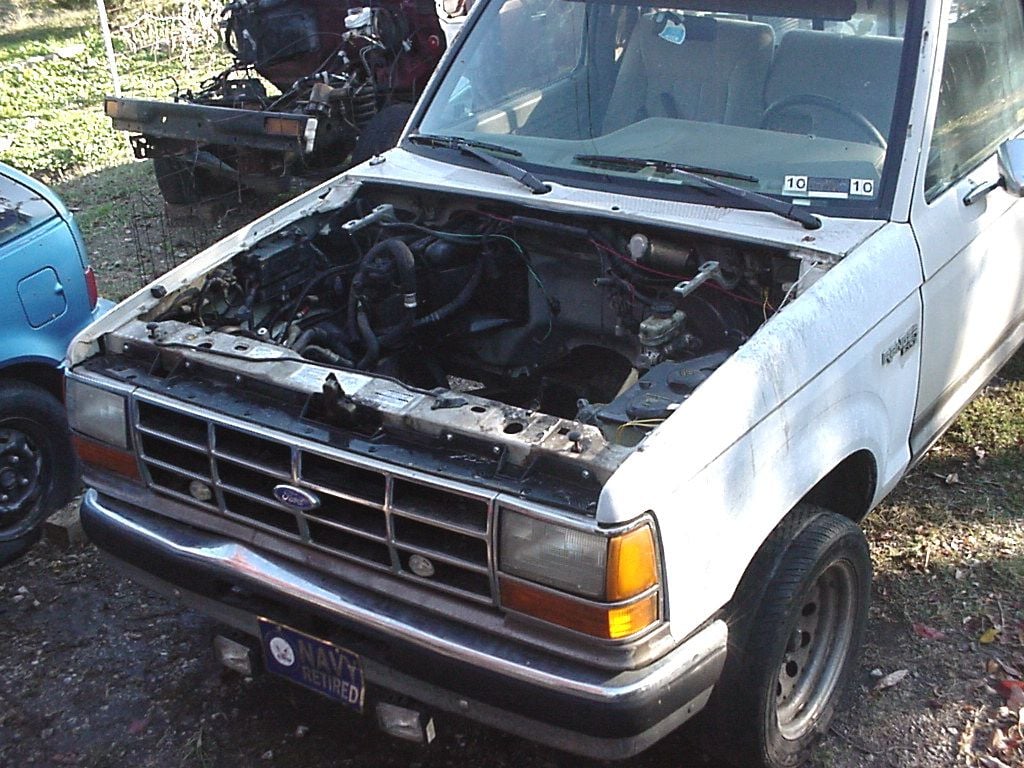
Wow - you can really see the bend in the bumper from a PO
Mass quantities of nasty filth and grossness were uncovered when the old engine was lifted out. Since my philosophy is that I never leave anything filthy that I HAVE TO work on later - a cleanup was definitely called for. This is stage 2:

Amazingly, oven cleaner is the cheapest and best way to go...
~ You may still have to scrub the dickens out of parts of it though
Papa's old "OOGAH" horn was suprisingly clean after several years in there...
The "O-C" (oven cleaner) also did a great job of cleaning all the grease off the left fender, which I had previously primer painted about a year lost ago...
(01NOV2011)
This perspective view outlines where the exhaust has to run - note the location of the tranny mount. The crossmember runs under it but dips up on each side - making interesting pipe routing possible. The left has to come under to the right side and join up with the right side, there's no other way to do it without going over the frame and outside the rails.
I forsee a "Y" connection, or a pair of pipes one on top of the other
This next is kinda forlorn looking, isn't it? But it's always like that.
Wow - you can really see the bend in the bumper from a PO
Mass quantities of nasty filth and grossness were uncovered when the old engine was lifted out. Since my philosophy is that I never leave anything filthy that I HAVE TO work on later - a cleanup was definitely called for. This is stage 2:
Amazingly, oven cleaner is the cheapest and best way to go...
~ You may still have to scrub the dickens out of parts of it though
Papa's old "OOGAH" horn was suprisingly clean after several years in there...
The "O-C" (oven cleaner) also did a great job of cleaning all the grease off the left fender, which I had previously primer painted about a year lost ago...
#86
11-05-2011, 08:09 PM
*This space reserved for a dead wide open engine bay shot*

~There, just like I promised
NOW the adapter plates need to be set in. A hole needs to be drilled for the left one.
Some artful bashing is required.
Some plastic forming too.
The dimension from the centerline between the engine mounts to the bolts on the trans mount of a 351W with an AOD are 36 inches.
The original engine was 39 1/2 inches.
The mount adapters make up that difference - but a driveshaft fitting is going to be part of it.
Measuring from the tranny mount bolts to the rear seal (where the yoke will ride) it's far different. (roughly 8 1/2 inches versus 5 1/2)
*This supposes the crossmember stays put - but the dimension from the trans mount to the block mounts means that this is just where the rear of the tranny will be. The old shaft was ugly anyhow...
At center top of the pic above is a nuisance crossmember that also mounts the ends of the radius rods from the front suspension. The only good way to get rid of it is to transplant an entire mustang "K" frame and suspension. Instead of all that - an Explorer chassis to begin with is lots simpler to deal with.
But this isn't that Ranger.
For the time being I'm stuck with and have to work around it. It makes a total of 3 X-members under the cab. One for the engine, one for the rear trans mount, and THAT THING... (for whatever freakin' good it does)
~There, just like I promised
NOW the adapter plates need to be set in. A hole needs to be drilled for the left one.
Some artful bashing is required.
Some plastic forming too.
The dimension from the centerline between the engine mounts to the bolts on the trans mount of a 351W with an AOD are 36 inches.
The original engine was 39 1/2 inches.
The mount adapters make up that difference - but a driveshaft fitting is going to be part of it.
Measuring from the tranny mount bolts to the rear seal (where the yoke will ride) it's far different. (roughly 8 1/2 inches versus 5 1/2)
*This supposes the crossmember stays put - but the dimension from the trans mount to the block mounts means that this is just where the rear of the tranny will be.
The old shaft was ugly anyhow...At center top of the pic above is a nuisance crossmember that also mounts the ends of the radius rods from the front suspension. The only good way to get rid of it is to transplant an entire mustang "K" frame and suspension. Instead of all that - an Explorer chassis to begin with is lots simpler to deal with.
But this isn't that Ranger.
For the time being I'm stuck with and have to work around it. It makes a total of 3 X-members under the cab. One for the engine, one for the rear trans mount, and THAT THING... (for whatever freakin' good it does)
#87
11-11-2011, 08:02 PM
And so we come to these mysterious "Adapter Plates" that so many people have wondered about since this madmans travelog first caught their eye...
As you see them here - we're peeking in from above the battery spot on the right looking directly at the drivers side (in the US) engine mount location.
The lower bolt slot on the adapter needs to be drilled, and with my usual luck:
I have the drill bit (specially hardened tool steel, suitable for drilling RV frames)
I have the drill and plenty of batteries...
The charger is no-where to be seen

But now at least I can point out what Bruce was originally asking many posts ago -
You can see here EXACTLY what the adapter plates are going to do, and where the mounts on the sides of the smallblock will be situated. A fraction up, and a touch to the rear of the engine crossmember.
~Oddly enough, that comes out very close to the original I-4 mount bolt position
The rear I-beam also has to be accounted for, and space reserved for IT to move up and down. I wonder how much clearance there will really be there afterwards? Be a drag to kick a hole in the pan, I bet. There's a lot of room to slide the mounts though - especially since the tranny rear mount has fore-and-aft slots about an inch or so long. To some amount the overall location can be massaged if needed. I bet it needs it, too.
Supposedly - a carburetted V8 is only about a hundred pounds heavier than a V6. I already know it weighs a lot more than the I-4. I think I'll put a shot here of the 351 (5.8 Liter!!!) and the 2.3 face to face...

"ON THE LEFT *obviously MISTER WINDSOR! Weighing in at 6.0+ liters..."
YEP - I think it's going to make the front end dip a little more than the absence of a passenger could account for
As you see them here - we're peeking in from above the battery spot on the right looking directly at the drivers side (in the US) engine mount location.
The lower bolt slot on the adapter needs to be drilled, and with my usual luck:
I have the drill bit (specially hardened tool steel, suitable for drilling RV frames)
I have the drill and plenty of batteries...
The charger is no-where to be seen
But now at least I can point out what Bruce was originally asking many posts ago -
You can see here EXACTLY what the adapter plates are going to do, and where the mounts on the sides of the smallblock will be situated. A fraction up, and a touch to the rear of the engine crossmember.
~Oddly enough, that comes out very close to the original I-4 mount bolt position
The rear I-beam also has to be accounted for, and space reserved for IT to move up and down.
I wonder how much clearance there will really be there afterwards? Be a drag to kick a hole in the pan, I bet. There's a lot of room to slide the mounts though - especially since the tranny rear mount has fore-and-aft slots about an inch or so long. To some amount the overall location can be massaged if needed. I bet it needs it, too.Supposedly - a carburetted V8 is only about a hundred pounds heavier than a V6. I already know it weighs a lot more than the I-4. I think I'll put a shot here of the 351 (5.8 Liter!!!) and the 2.3 face to face...
"ON THE LEFT *obviously MISTER WINDSOR! Weighing in at 6.0+ liters..."
YEP - I think it's going to make the front end dip a little more than the absence of a passenger could account for
#89
11-12-2011, 03:54 PM
FTE Legend
Join Date: May 2008
Location: In my own world
Posts: 56,542
Likes: 0
Received 0 Likes
on
0 Posts
#90
11-12-2011, 10:57 PM
It's a geometric progression. One banger, two banger, four banger...
To be complete it needs one of the lawn tractors in the pic
The scary part is what am I going to put a V16 into, and where will I find one?
* it isn't like there's a WWII airplane salvage yard handy
I keep wondering if there's enough adjustment to align the front axles. Depends how low it squats I suppose.