how to make a grill shine
#31
 08-10-2011, 08:39 PM

Join Date: Jan 2011
Location: oklahoma
Posts: 199
Likes: 0
Received 0 Likes
on
0 Posts
#32
08-10-2011, 09:14 PM

#33
08-10-2011, 09:23 PM
Join Date: Jan 2011
Location: oklahoma
Posts: 199
Likes: 0
Received 0 Likes
on
0 Posts

#34
08-11-2011, 11:41 AM

Just to add to my comment, my grille was steel not aluminum, not sure if you can chrome alum. but these grilles are nearly impossible to find by themselves.
#35
08-11-2011, 06:47 PM
Join Date: Jan 2011
Location: oklahoma
Posts: 199
Likes: 0
Received 0 Likes
on
0 Posts
I looked at you and Gangstkr's trucks today via your profiles you both have really nice trucks hope to one day get one of mine up to par like that.
#36
08-11-2011, 07:21 PM

just finished my grille
I just finished mine and for a first timer I am happy with it. What I learned-easy off did not work well, red devil lye is supposed to work as a stripper I could not find it. i bought a product from Jestco -online-that worked great. Someone here described how to build the device to soak the grill-do this first. i tried several methods build one from pvc and plastic sheet.
You can get polishing compounds, wheels, and directions from eastwood, jestco and others. All of Ganstakrs advice is right on. The more you sand the more you work. Start around 1000 grit if you can. Before you tap out the dents push on them from the back with a piece of wood-hard, with the grill laying face down on a thick towel. I carved out several shapes of scrap wood that fit into the rear grill recess for dent removal.
I used a buffer from northern tool it worked great
I did all of the grille, headlight buckets and some other items over the course of 4 weekends. That included alot of do overs- cost effective no way. But I enjoyed learning how and I will probably do it again
I get the truck back from paint this weekend I will post a picture.
Chuck
Last edited by cwii; 08-11-2011 at 07:35 PM. Reason: Jestco is the company not jessco
#37
08-13-2011, 03:47 PM
I agree I got lucky on this one found a post on craigslist just said f100 parts and just happened to be close to me so I called. Got the grill im working on plus front bumper and valence and tailgate. Paid $40 for the grill $40 for the bumper and valence and $20 for the tailgate and hardware. The kid knew what he had enough to take the parts off the truck but he had no idea what they were worth. I didn't low ball him either I let him set the prices, he was happy and so was I.
I looked at you and Gangstkr's trucks today via your profiles you both have really nice trucks hope to one day get one of mine up to par like that.
I looked at you and Gangstkr's trucks today via your profiles you both have really nice trucks hope to one day get one of mine up to par like that.
P.M. Sent
#38
08-14-2011, 12:01 PM
Join Date: Jan 2011
Location: oklahoma
Posts: 199
Likes: 0
Received 0 Likes
on
0 Posts
got sandpaper starting at 800 to 2500. The 800 grit is not getting even the pitted areas. I must need some stouter sand paper. I ended up buying 3m rubbing compund it is working better than the dremel stuff I had. No luck on a new polishing machine stuck with the dremel for now plugin away just an update
#39
08-14-2011, 02:33 PM
Join Date: Jan 2011
Location: oklahoma
Posts: 199
Likes: 0
Received 0 Likes
on
0 Posts
#40
08-20-2011, 06:35 PM
Join Date: Jan 2011
Location: oklahoma
Posts: 199
Likes: 0
Received 0 Likes
on
0 Posts
#41
09-10-2011, 11:06 PM
Join Date: Jan 2011
Location: oklahoma
Posts: 199
Likes: 0
Received 0 Likes
on
0 Posts
Just another update. Now I do not work on this grill everyday, and may only do so for thirty minutes at a time. But, for anyone wanting to try this... it is not easy. Striping the anodized coating off has proven to be difficult. Lots and lots of sanding on all the tight areas.
I'm still plugging away but have to admit still on the bezel. Just one small area left to get it completely stripped thinking about leaving some of the blimishes in the metal for kinda like a patina look. Or so it has a little character to it. They way I see it is if it comes out perfect people will think I just bought it instead of seeing the original that I worked so hard to get polished. What do you all think?
I'm still plugging away but have to admit still on the bezel. Just one small area left to get it completely stripped thinking about leaving some of the blimishes in the metal for kinda like a patina look. Or so it has a little character to it. They way I see it is if it comes out perfect people will think I just bought it instead of seeing the original that I worked so hard to get polished. What do you all think?
#42
09-10-2011, 11:41 PM

#43
09-11-2011, 09:12 AM
Just another update. Now I do not work on this grill everyday, and may only do so for thirty minutes at a time. But, for anyone wanting to try this... it is not easy. Striping the anodized coating off has proven to be difficult. Lots and lots of sanding on all the tight areas.
I'm still plugging away but have to admit still on the bezel. Just one small area left to get it completely stripped thinking about leaving some of the blimishes in the metal for kinda like a patina look. Or so it has a little character to it. They way I see it is if it comes out perfect people will think I just bought it instead of seeing the original that I worked so hard to get polished. What do you all think?
I'm still plugging away but have to admit still on the bezel. Just one small area left to get it completely stripped thinking about leaving some of the blimishes in the metal for kinda like a patina look. Or so it has a little character to it. They way I see it is if it comes out perfect people will think I just bought it instead of seeing the original that I worked so hard to get polished. What do you all think?
#44
09-11-2011, 11:19 AM
Not trying to jack this thread and I agree with everything on here (oh and yes your grills look awesome ! I saw them on ebay before I saw this post great job! ) I have a "How to" on another site I will see if I can copy and paste it here. It's has one other way of going about this that I haven't seen on here yet.
) I have a "How to" on another site I will see if I can copy and paste it here. It's has one other way of going about this that I haven't seen on here yet.
#45
09-11-2011, 11:21 AM
Ok here it is......
Restoring your trim. Many of us would like to have as many new parts as we can but if you can't find them or can't afford them here is another option for at least the trim.
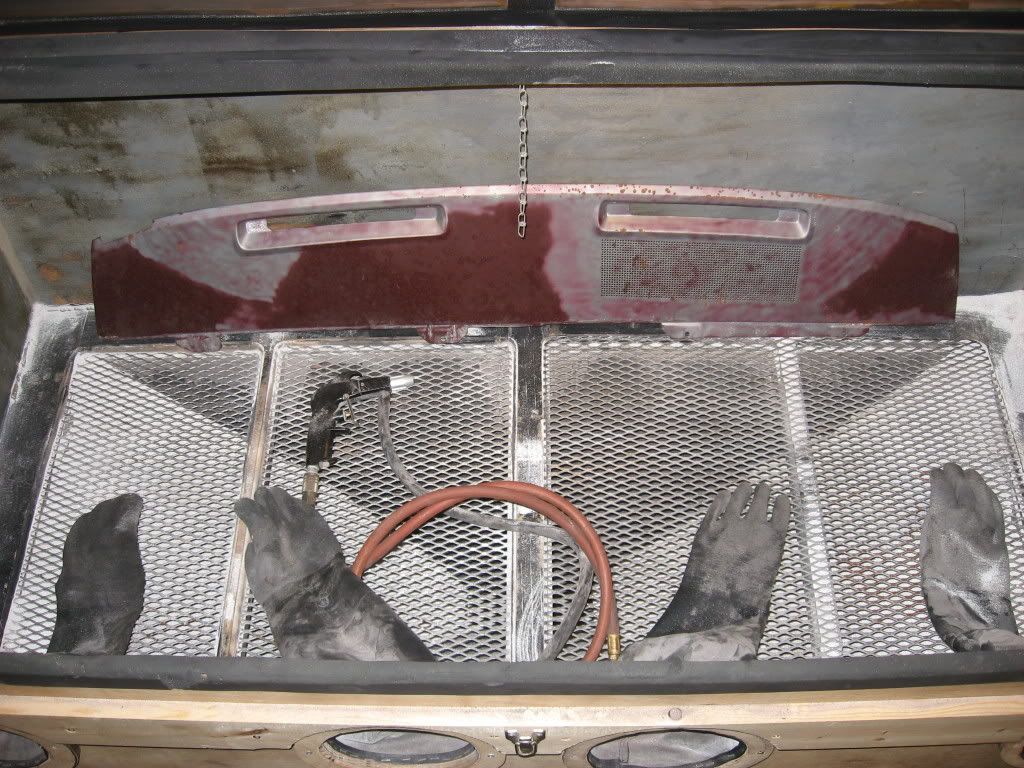
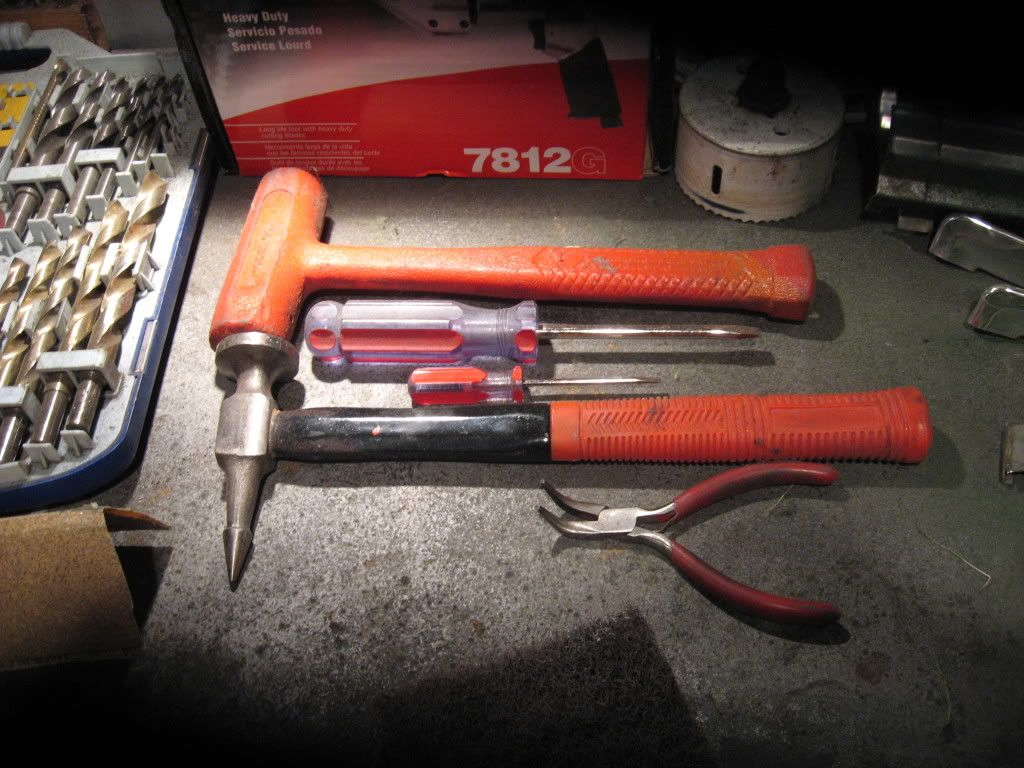
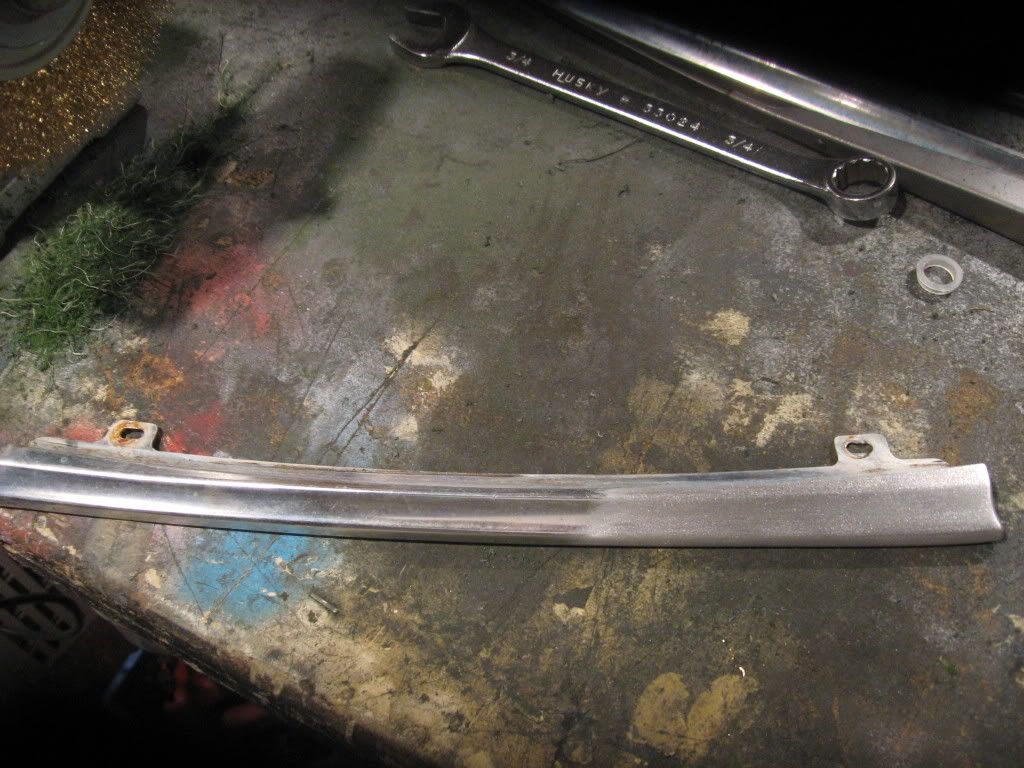
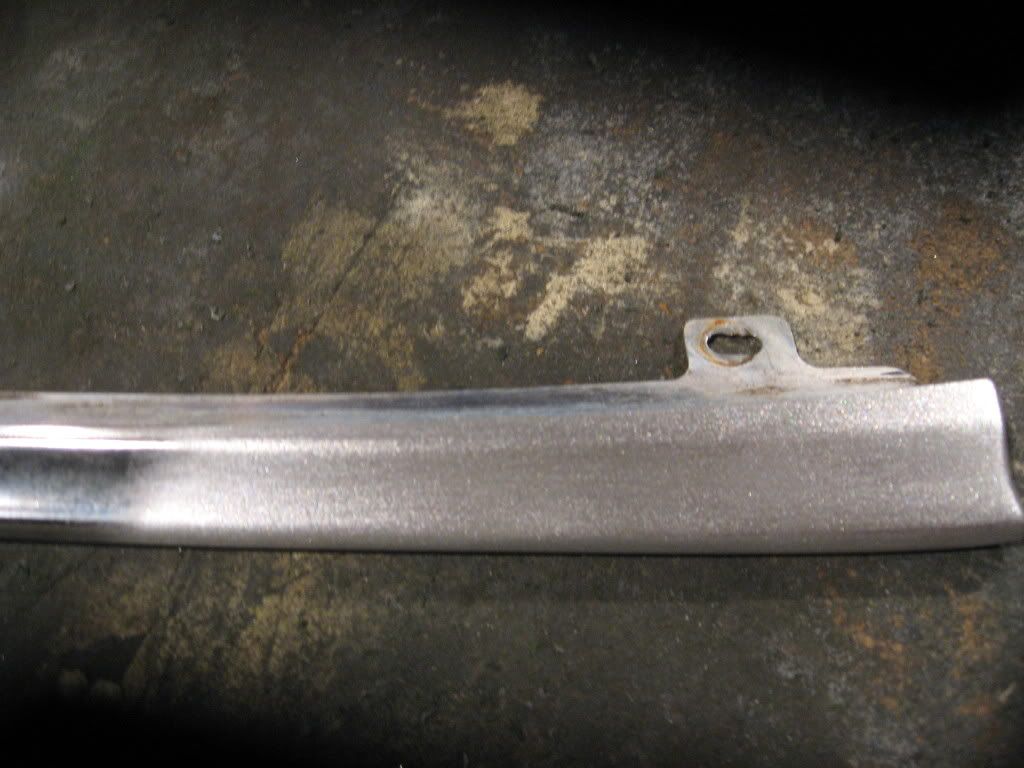
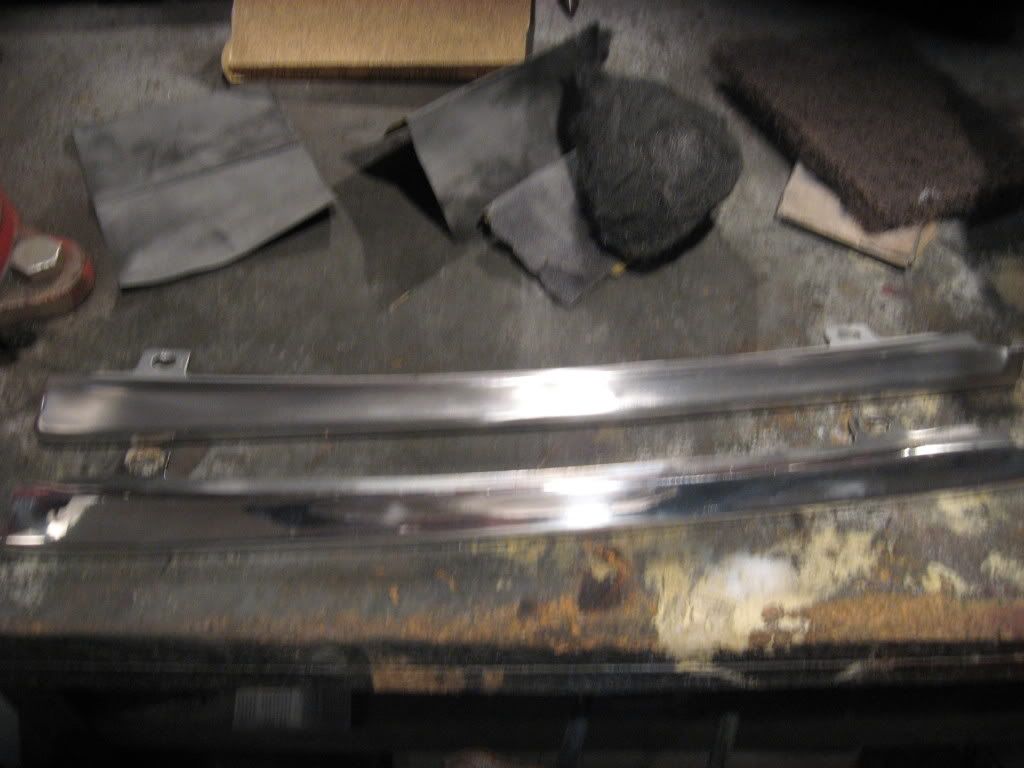
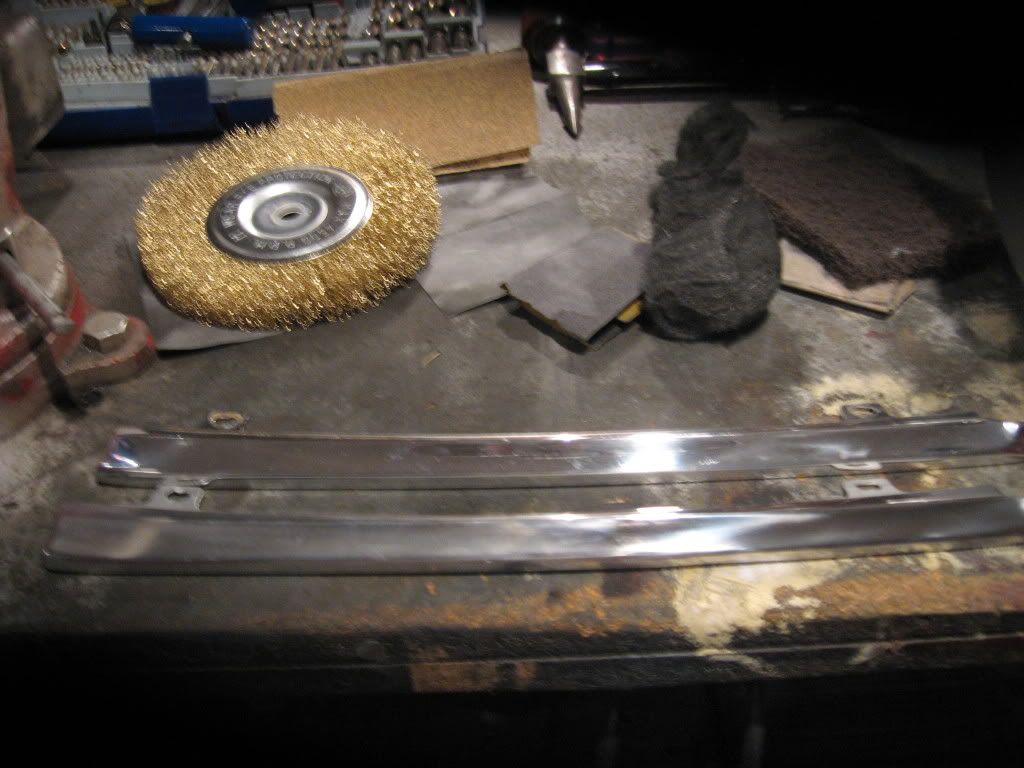
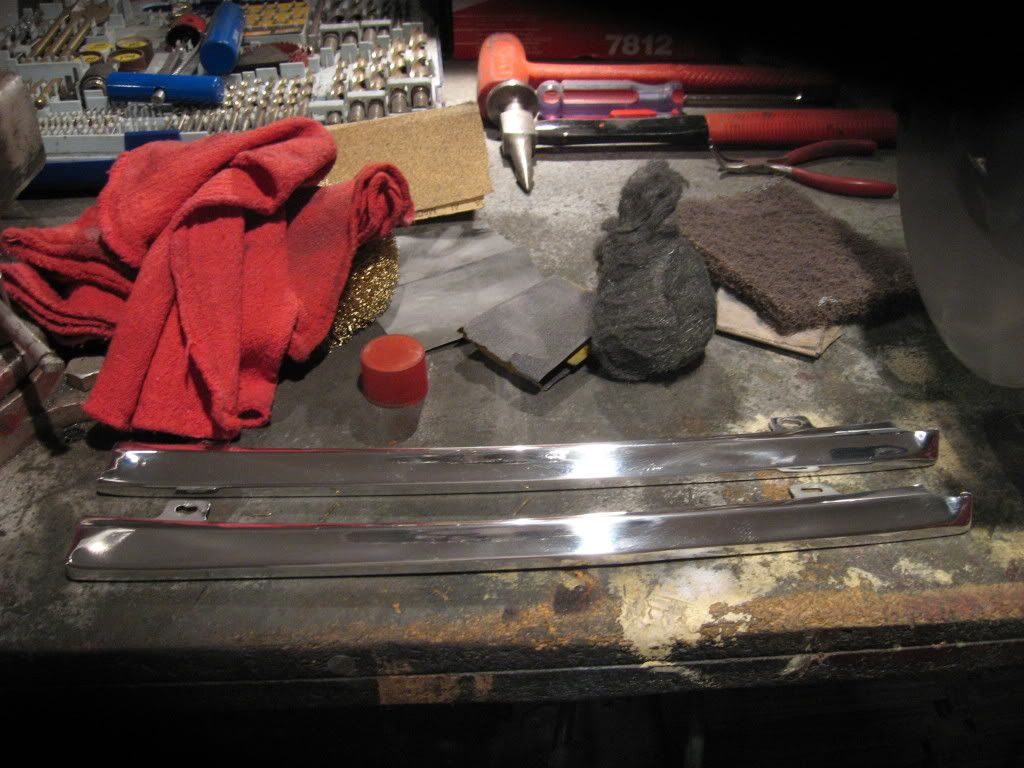
First you need to ether find a straight and non damaged part or one with the least amount of damage you can. If all you have are dented & dinged then you will have to tap those out very carefully. You do not have to have special tools to fix small dents and dings. A flat head screw driver, a hammer, and a shop rag are normally all you will need for most repairs. Always put the trim on the shop rag (not on your work bench) you don't want to pound new dents into the trim from imperfections on your work bench. Tap out the ding & dents very carefully the trim is thin it doesn't take much to pound out most dings. Then you need to take the top coating off of the trim. There are two ways that I found work very well one is sand blasting it off or a fine wire wheel. Both work just fine, I don't really have a preference.
My home made blasting cabinet.
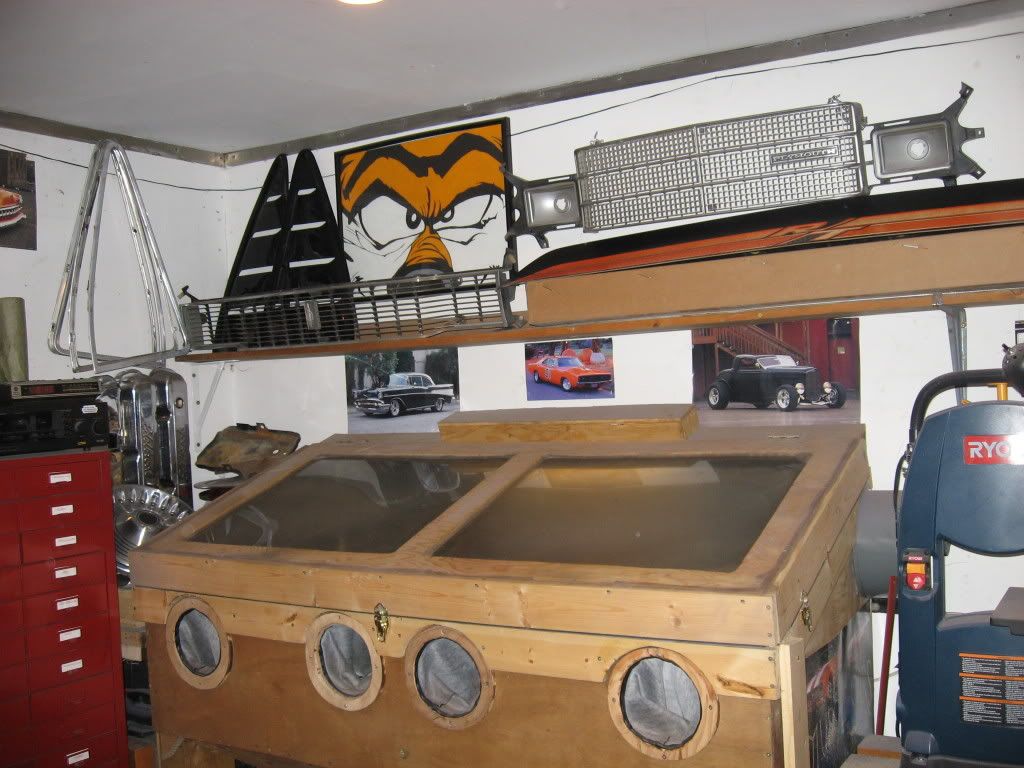
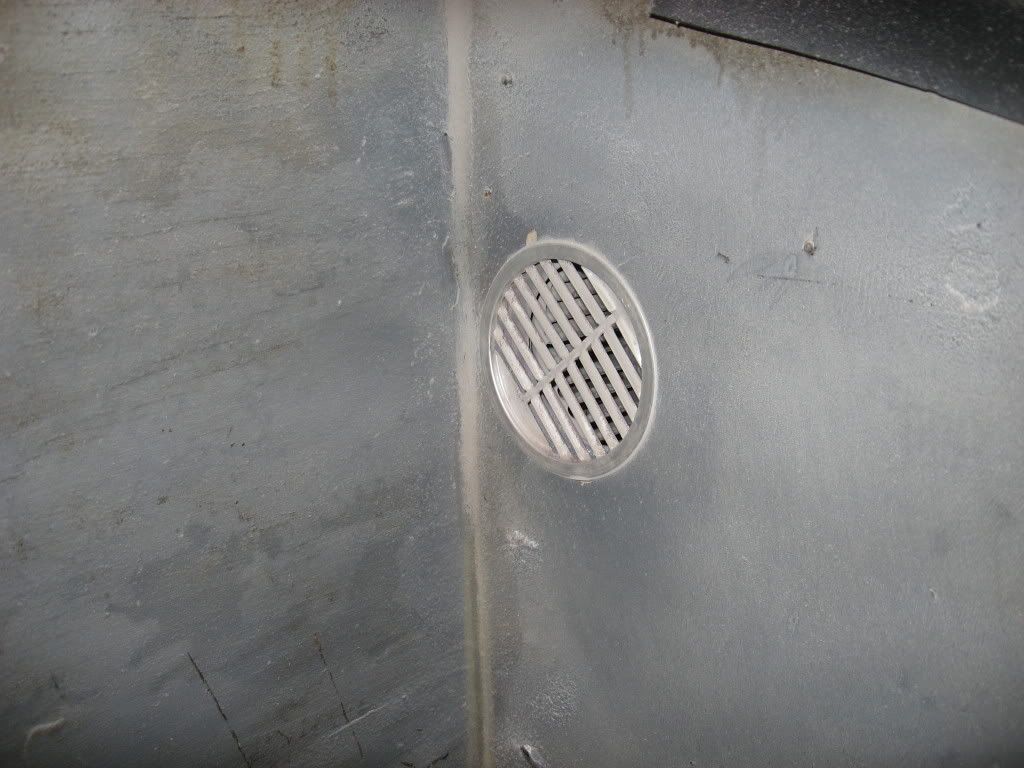
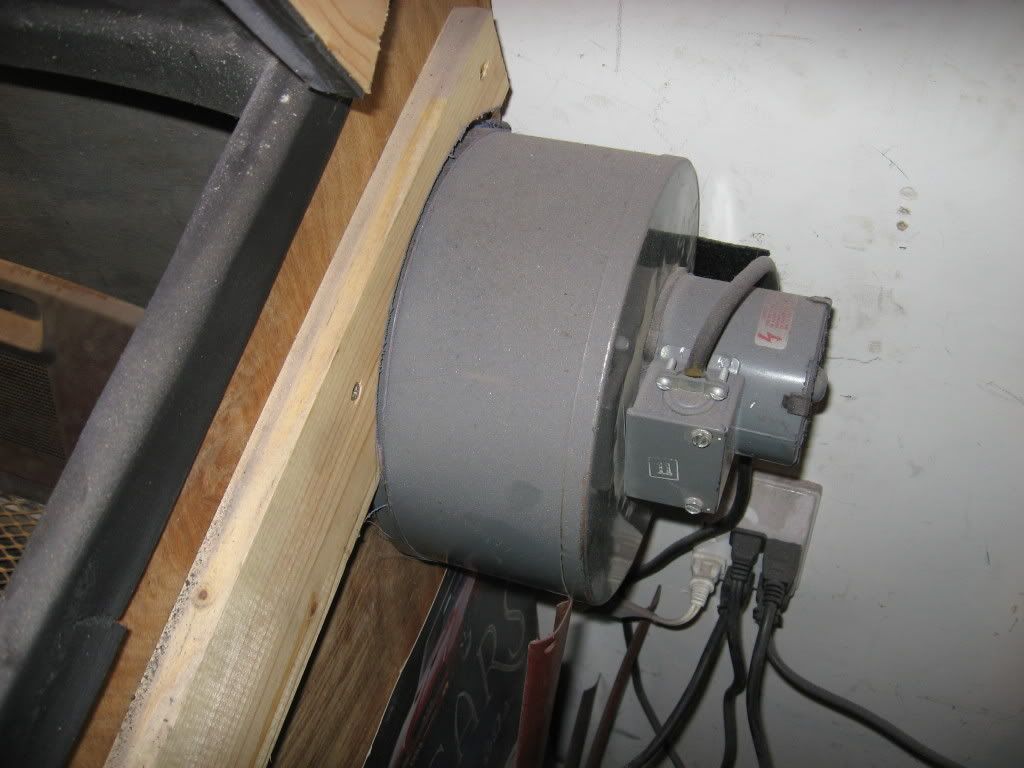
Squirrel fan venting (works great)
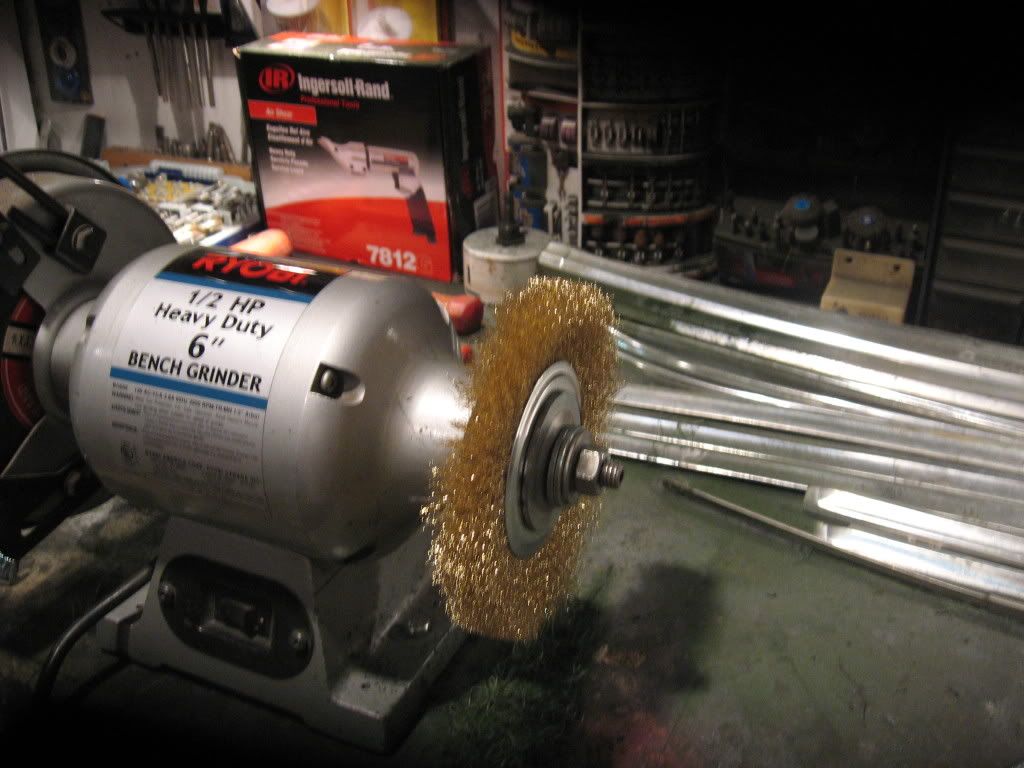
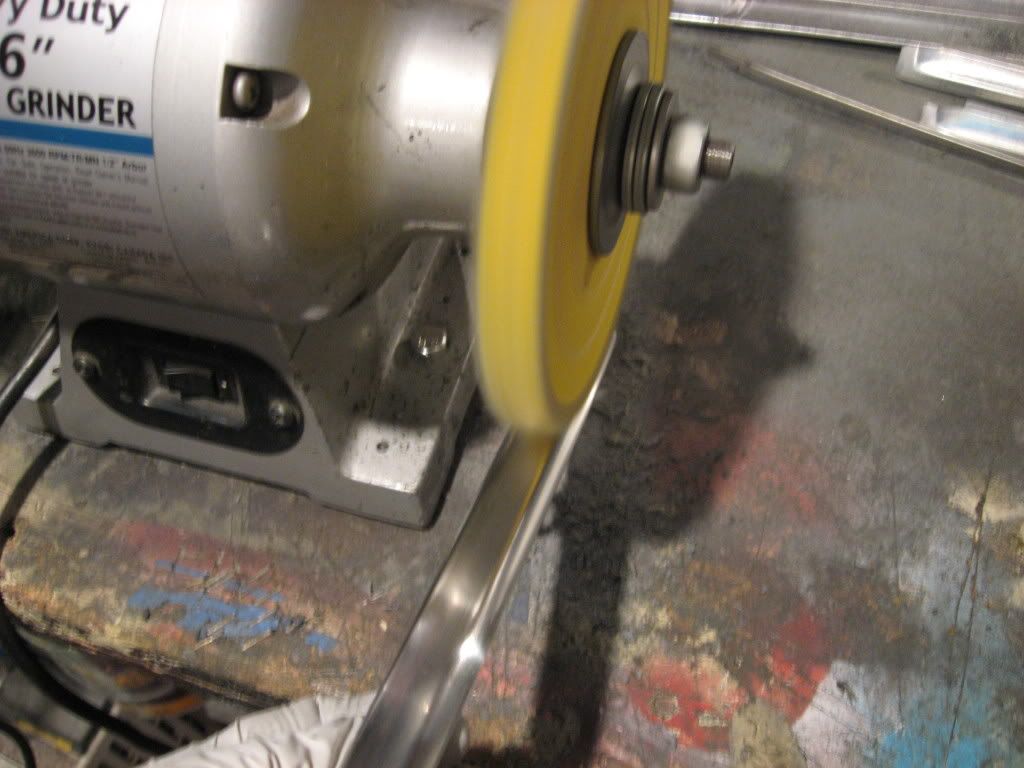
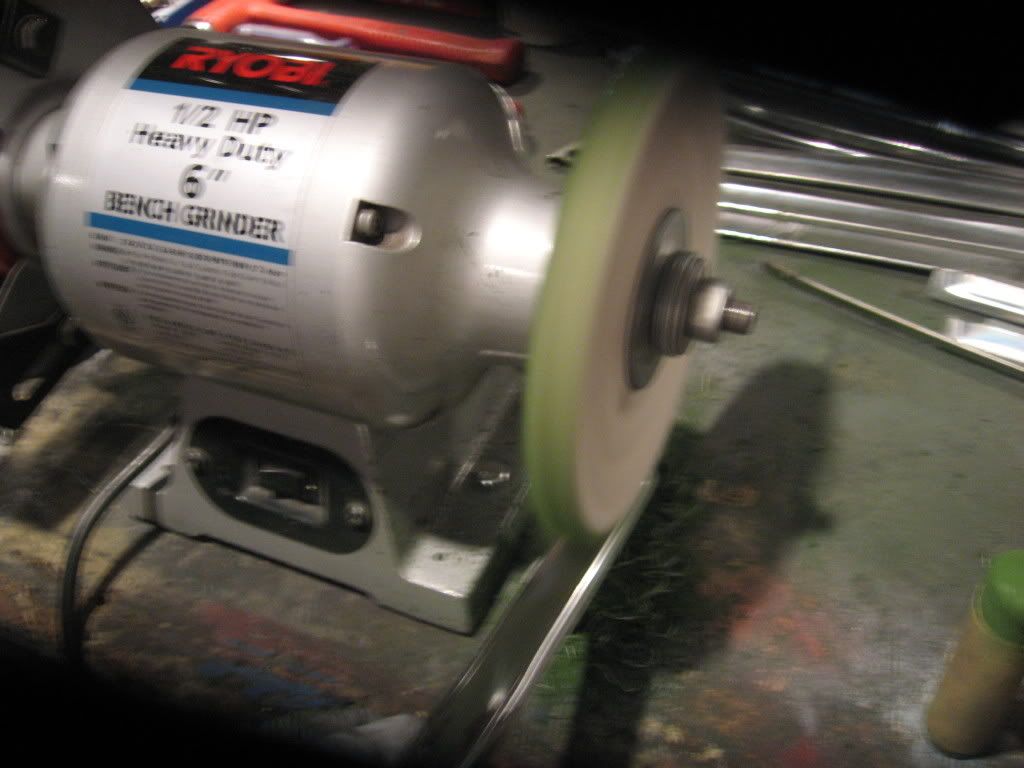
Or a bench grinder with a wire wheel
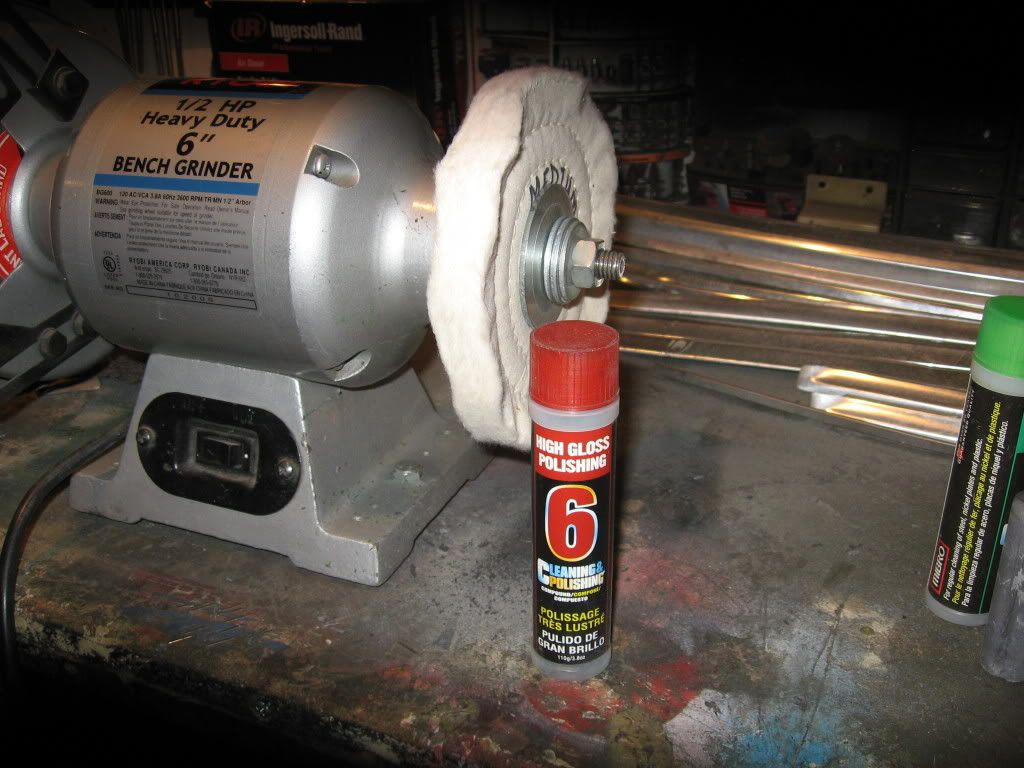
Tools needed.

Wire stripped
& sand blasted
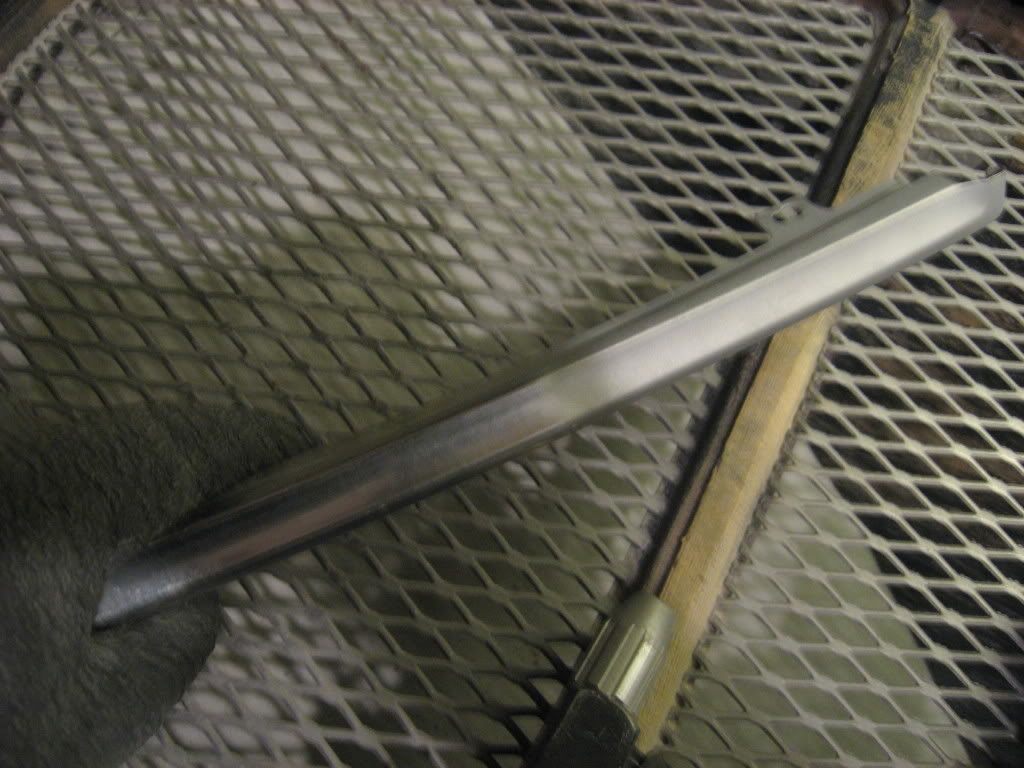


Any scratches or heavy dings that did not tap out will have to be sanded out or at least down to as small as possible. I recommend hand sanding, power sanders are to aggressive for the thin trim. If there are scratches and dings I would start with 180 grit & if its smooth (no scratches or dings) start with 220 grit and then work your way up to 2000 grit.
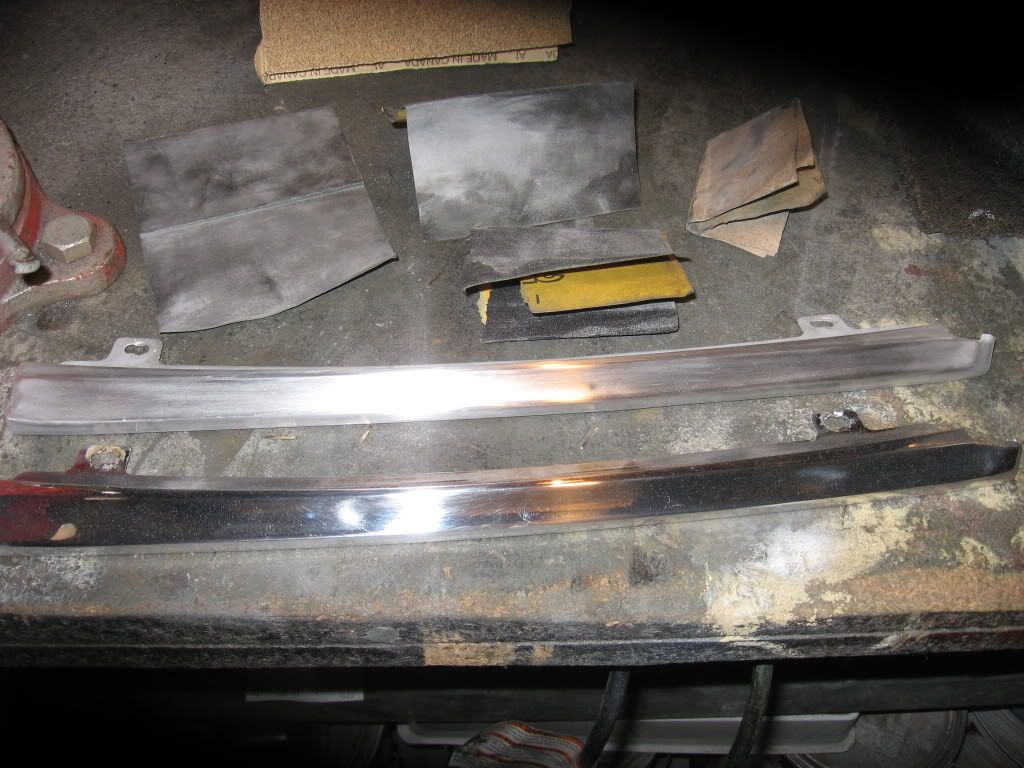
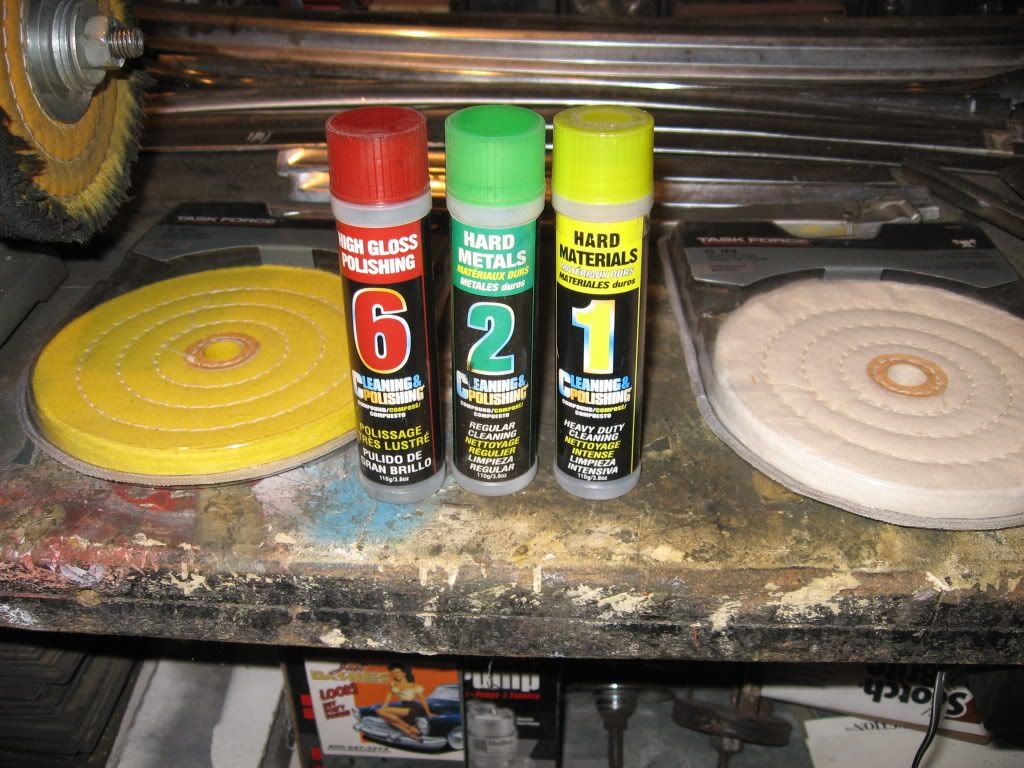
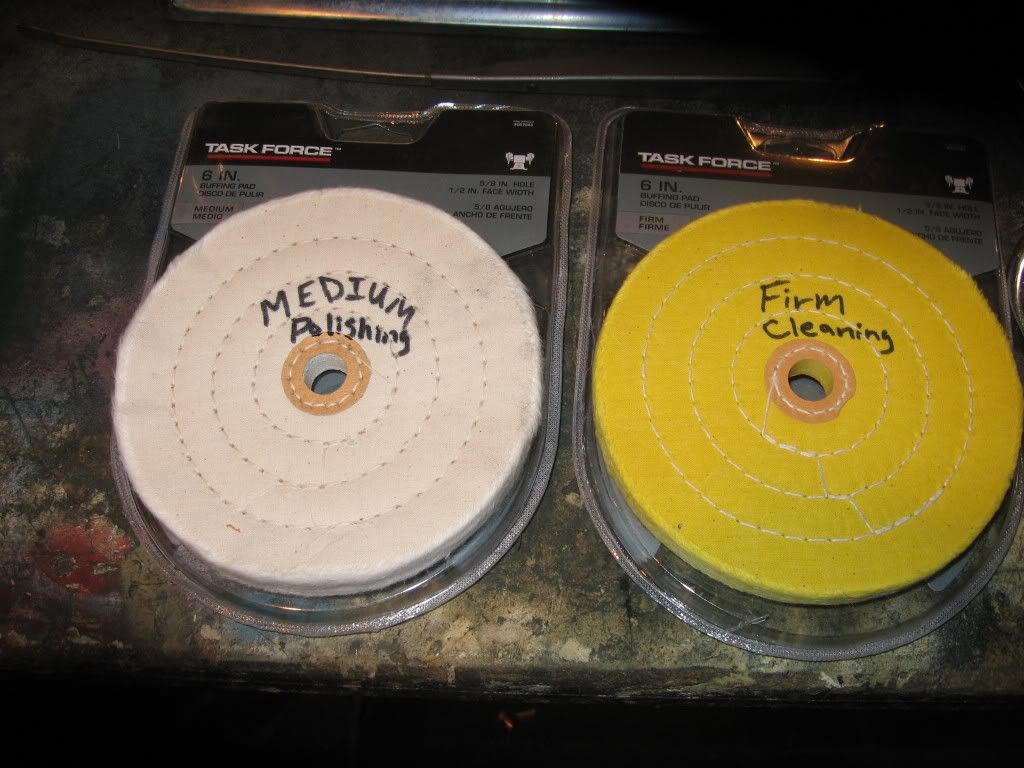
Now it is time to use a cleaning compound on the trim. You should not mix compounds on the same wheels so I recommend marking your wheels so you know what to use for later projects.
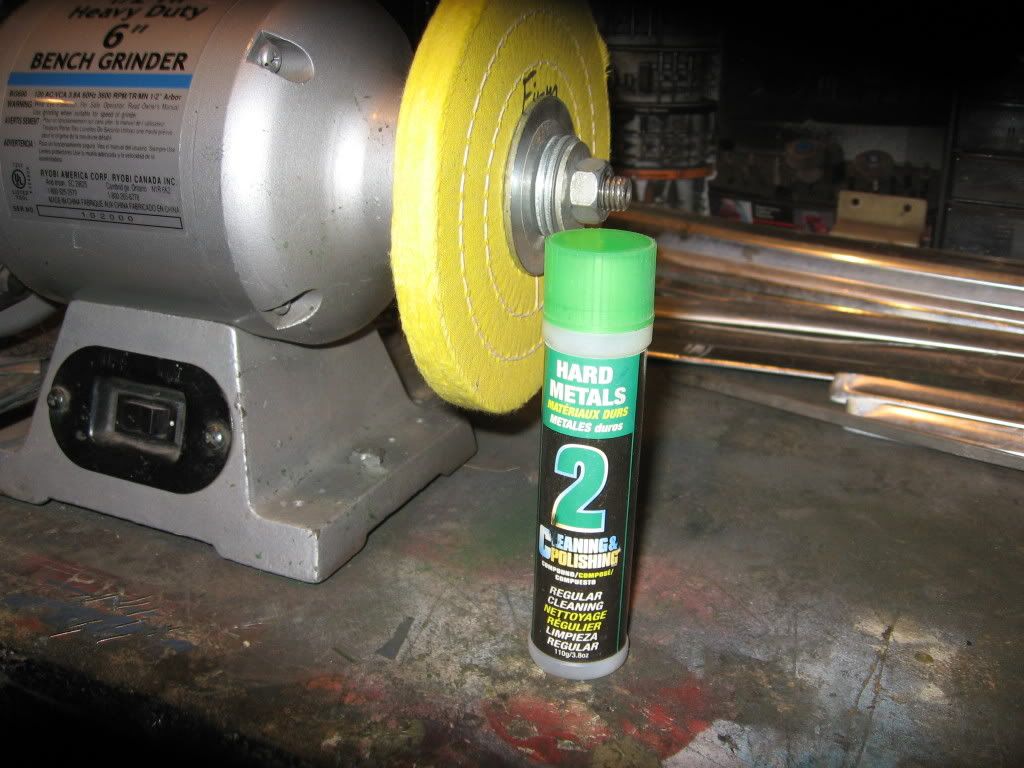
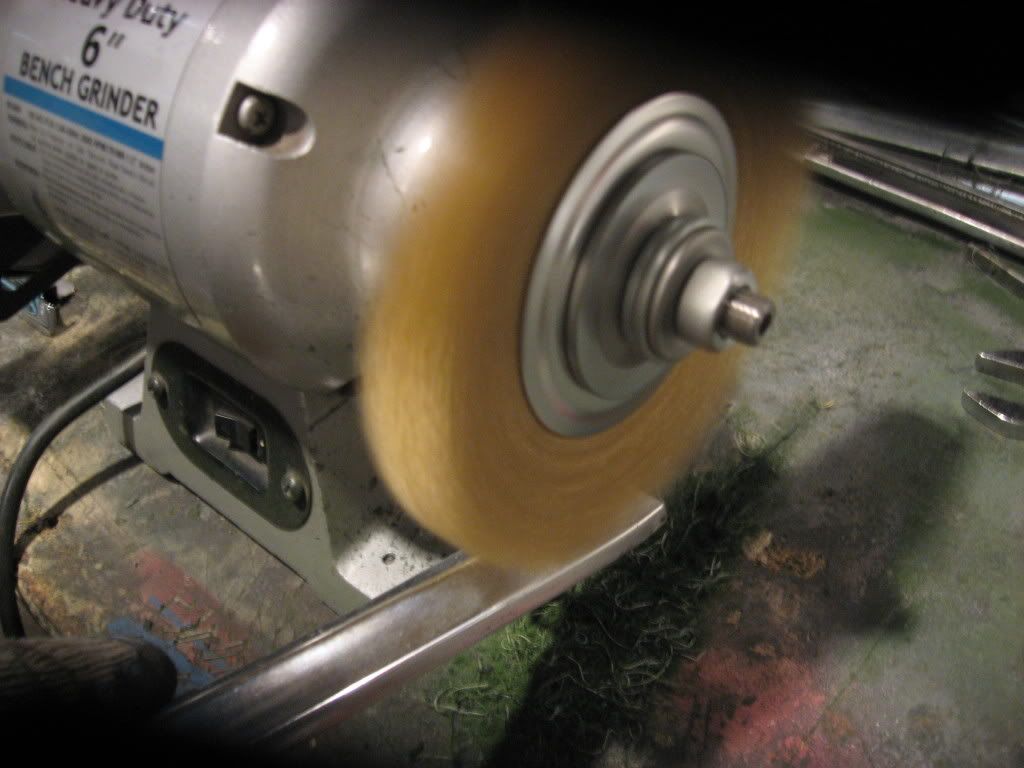
Start cleaning the trim by moving it around the wheel, do not stay in one place to long and keep a firm hold onto the part.
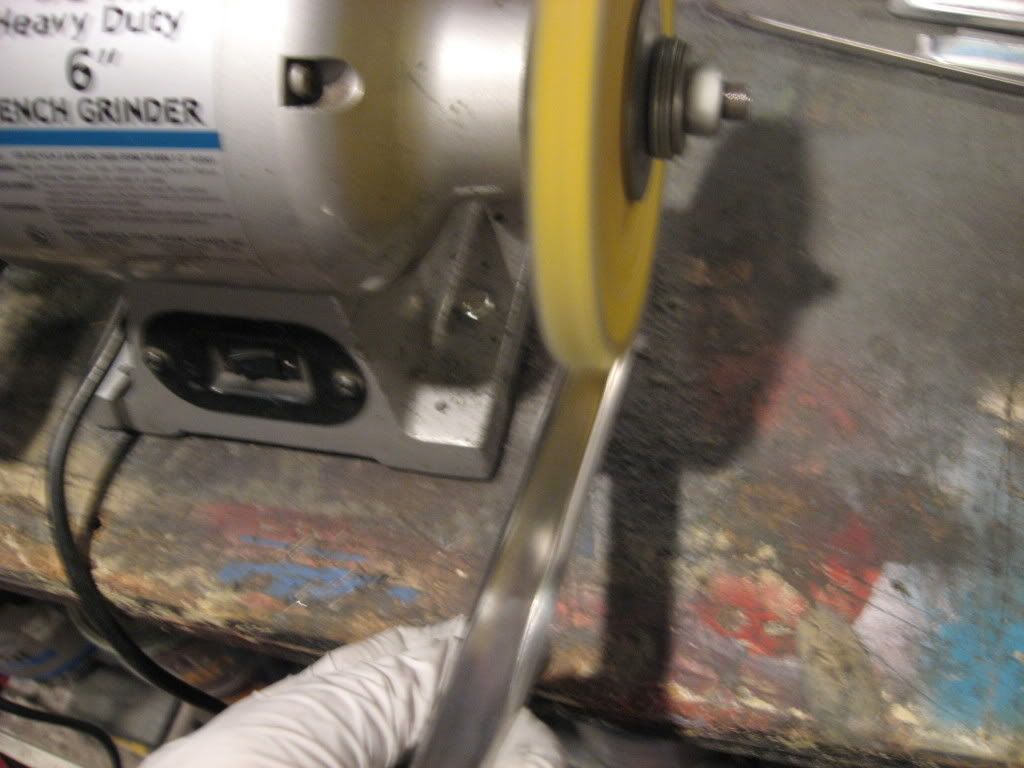
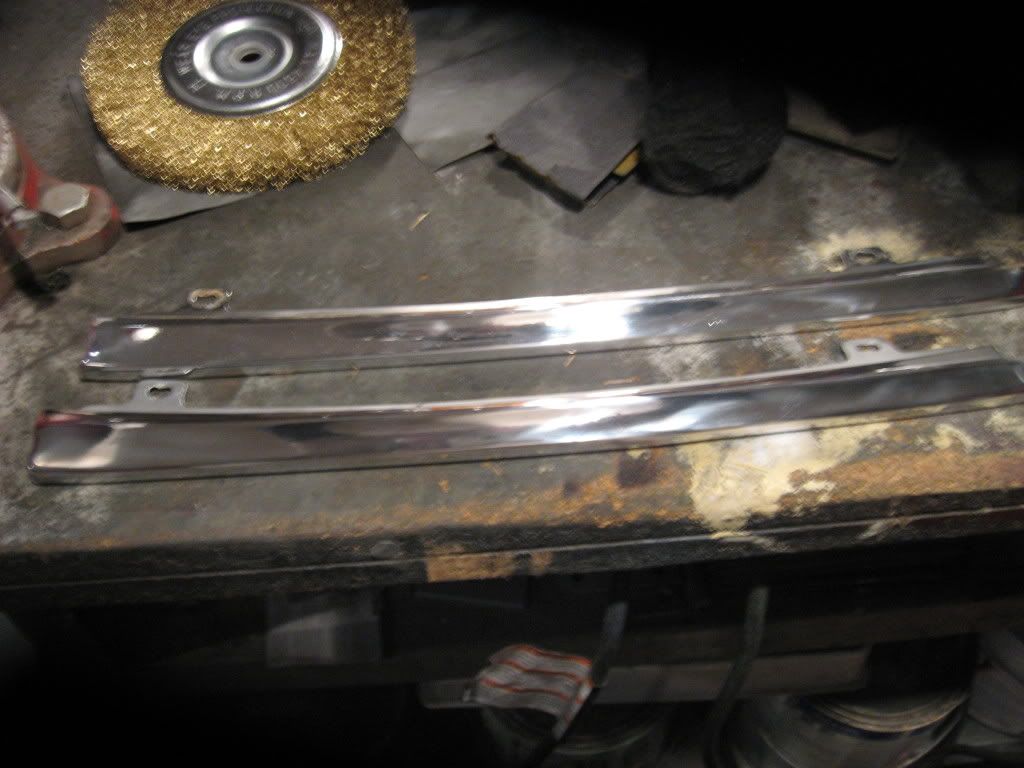
You will start to see a shine start to appear on it, keep going until the whole part looks the same.
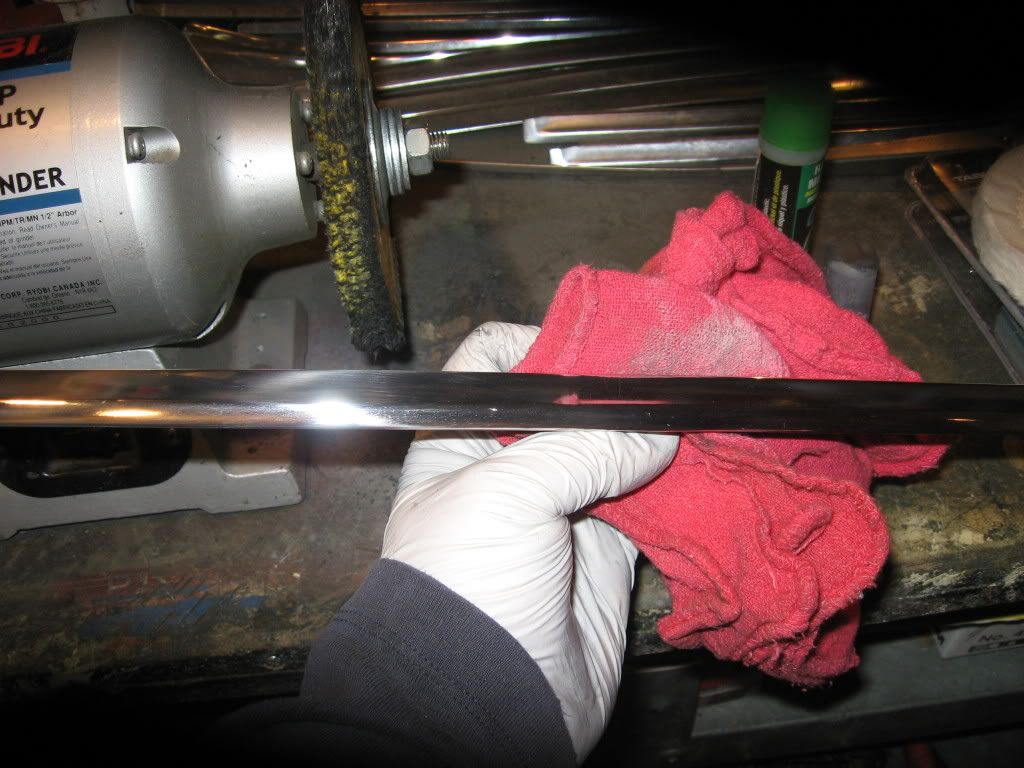
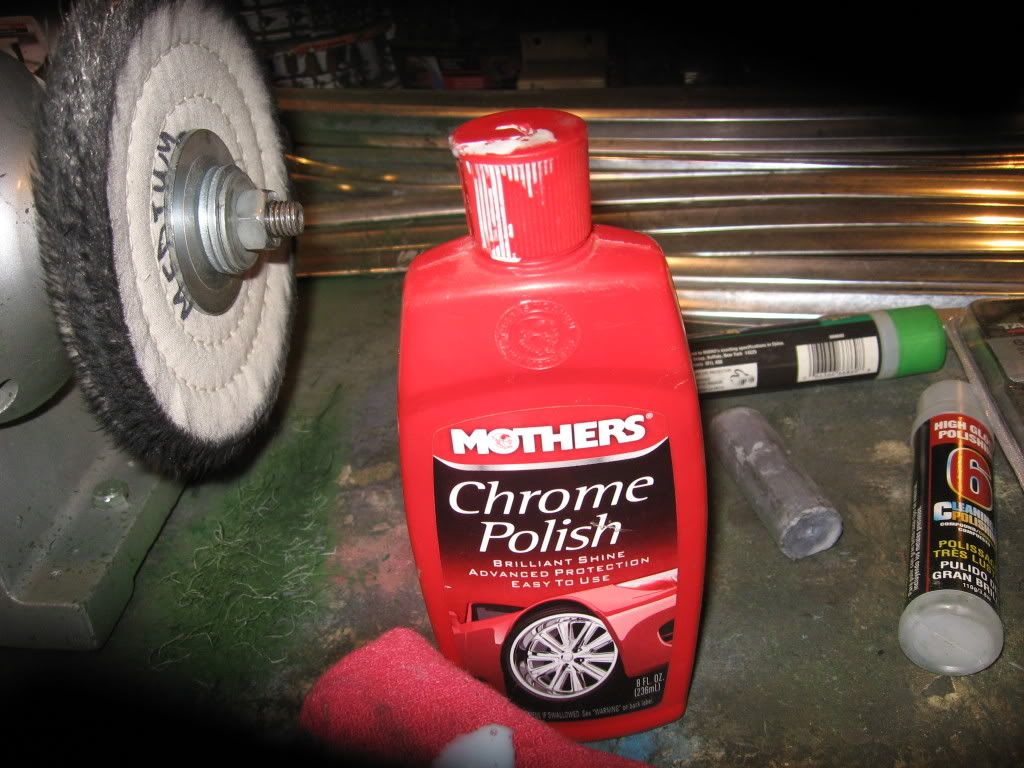
Then you will need to wipe it down and clean off all the compound so you don't contaminate your next wheel.
Now put on the polishing wheel, coat the wheel with a high gloss compound and repeat just like you did for the cleaning compound.
when you think your done take a chrome or metal polish and wipe down the part if you see foggy or milky looking spots put more polish compound on the wheel and keep going you may have to repeat this a few times until you get to your desired shine.
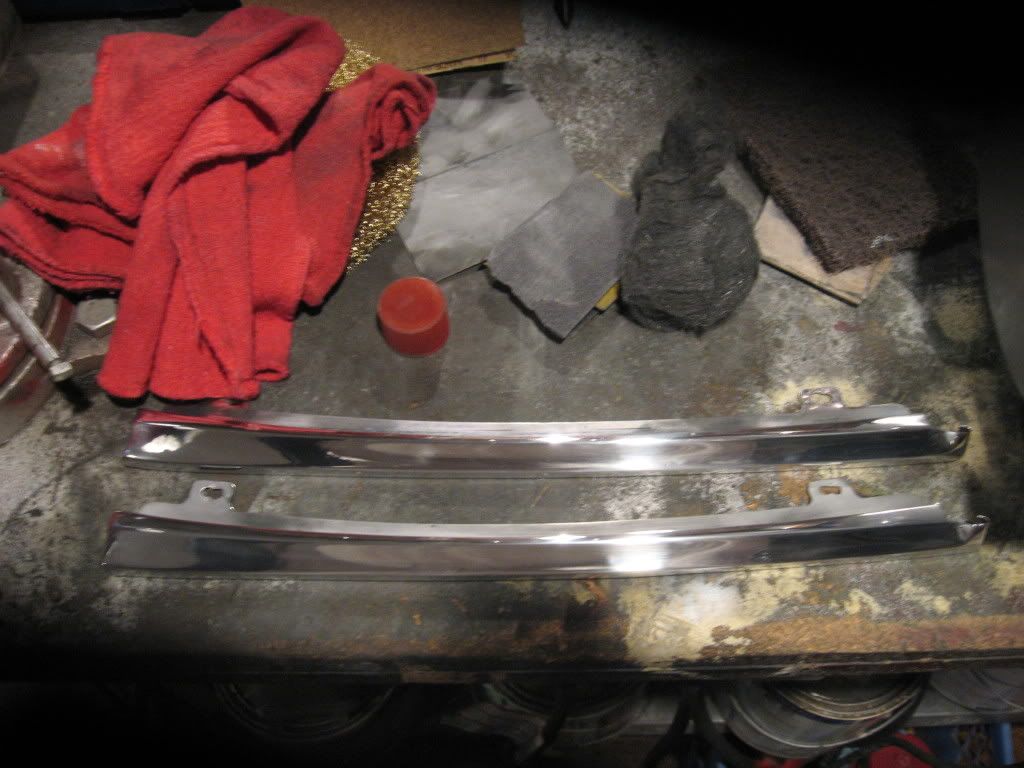
Hope this helps.
Restoring your trim. Many of us would like to have as many new parts as we can but if you can't find them or can't afford them here is another option for at least the trim.
First you need to ether find a straight and non damaged part or one with the least amount of damage you can. If all you have are dented & dinged then you will have to tap those out very carefully. You do not have to have special tools to fix small dents and dings. A flat head screw driver, a hammer, and a shop rag are normally all you will need for most repairs. Always put the trim on the shop rag (not on your work bench) you don't want to pound new dents into the trim from imperfections on your work bench. Tap out the ding & dents very carefully the trim is thin it doesn't take much to pound out most dings. Then you need to take the top coating off of the trim. There are two ways that I found work very well one is sand blasting it off or a fine wire wheel. Both work just fine, I don't really have a preference.
My home made blasting cabinet.
Squirrel fan venting (works great)
Or a bench grinder with a wire wheel
Tools needed.
Wire stripped
& sand blasted
Any scratches or heavy dings that did not tap out will have to be sanded out or at least down to as small as possible. I recommend hand sanding, power sanders are to aggressive for the thin trim. If there are scratches and dings I would start with 180 grit & if its smooth (no scratches or dings) start with 220 grit and then work your way up to 2000 grit.
Now it is time to use a cleaning compound on the trim. You should not mix compounds on the same wheels so I recommend marking your wheels so you know what to use for later projects.
Start cleaning the trim by moving it around the wheel, do not stay in one place to long and keep a firm hold onto the part.
You will start to see a shine start to appear on it, keep going until the whole part looks the same.
Then you will need to wipe it down and clean off all the compound so you don't contaminate your next wheel.
Now put on the polishing wheel, coat the wheel with a high gloss compound and repeat just like you did for the cleaning compound.
when you think your done take a chrome or metal polish and wipe down the part if you see foggy or milky looking spots put more polish compound on the wheel and keep going you may have to repeat this a few times until you get to your desired shine.
Hope this helps.