1952 Ford F-1 build
#46
 10-25-2013, 07:33 PM

After being delayed about 3 and half days waiting on parts I finally got the rear brakes rebuilt. Tomorrow I will fill the system, check for leaks and bleed it out. Install the shifter, mount the fuse box and start stretching out wires. Took three stops to find new lug nuts. Just about every parts store has stopped having the big open bin full of them. I finally the ones I needed with the extra long shank on it for the aftermarket rims that are on the truck.
#47
10-26-2013, 10:22 PM
Got the last brake line installed, need to fill the system and bleed it out still. I had to replace 3 more studs on the rear, got them cleaned and installed. The new lug nuts are torqued and setting right.
The shifter is sitting on top of the trans for mock mounting. I got the mid mount, I was thinking the tail mount would be too far back for the bench seat.
Started the wiring harness. Got the main harness in the truck, still got to stretch out wires and splice them into the existing Alternator harness I have started.
Got the front clip placed back on, still need to bolt it down. Need to tweak the holes for the front bumper some, they are just a hair off from when we put 1954 frame horns on the truck. Pull the Bumpers back off tomorrow and get them ready for paint.
Got dark, more pictures tomorrow, lol.
On line surfing for Aluminum Radiator, think I found one I like here. Anyone else use them?
ALUMINUM RADIATORS - FORD - PICKUP - 1942-1952 - Oscar's Radiators
Thinking of calling them Monday and pulling the trigger on one.
#48
10-27-2013, 08:19 PM
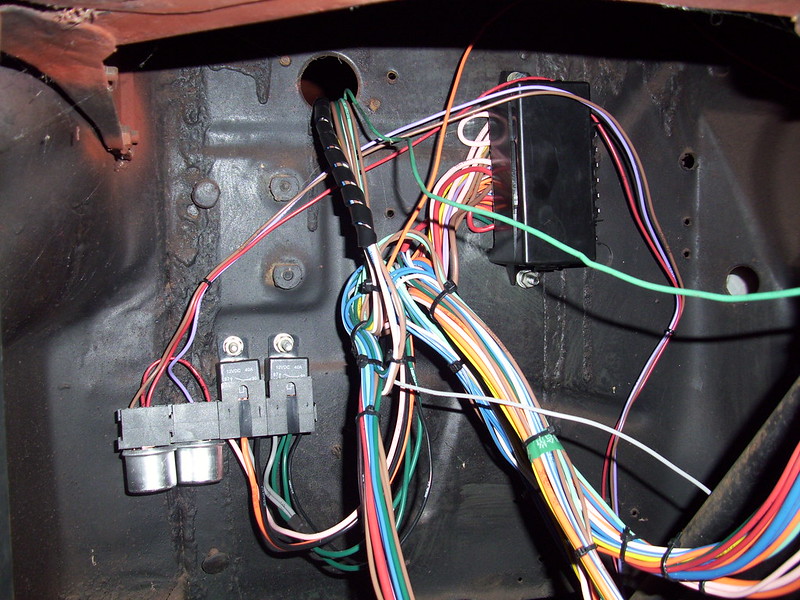
Working on it on and off today. Got the fuse box mounted, flasher box mounted, relays mounted. Started stretching out wires and sorting them. Then zip tied them into smaller groups where they go. Zip tied them about every 8 to 12" depending on how many it was. Used the spiral protector type covers and wrapped from the fuse harness to where the tail lights are. Wrapped two other sections then ran out of spiral wrap. Will have to get more from town tomorrow. Couldn't find the camera earlier, so the pictures are dark.


#49
10-27-2013, 10:56 PM
Elder User
Join Date: Feb 2012
Location: Central Oregon
Posts: 948
Likes: 0
Received 0 Likes
on
0 Posts
I didn't go through Oscar's, but did get a Champion radiator from "the cooling pros" on Ebay. Long story longer - they sent the wrong inlet/outlet style, immediately shipped me the correct one and then took a month to refund me my $$ to ship the original back.
Overall, I think the rad is good for the price. I have only driven mine down my 1/4 mile road a couple of times, and warmed it up in the garage several times without any issues. There were a few dented cooling fins, but overall I am happy with the radiator.
I ended up with the Chev V8 conversion model they had for the F1 (wanted like $60 more for one with the inlets correct for my 289) and was able to find some preformed radiator hoses at O'reilly's that fit well. Looking at Oscar's site, I doubt you can beat the price, especially with free shipping.
#50
10-28-2013, 10:43 AM
Got the Radiator ordered from Oscar's today. They were very nice and professional sounding on the phone. Made sure I said 302 inlet and out let. Then doubled checked that to make sure I wasn't running a early 302/289 water pump with the neck on the other side. I will let everyone know how it goes when it come in. I hope it's here before Friday because I will be headed back to work for a month then.
Picked up more split loom covering this morning, back outside to finish stretching wires.
Picked up more split loom covering this morning, back outside to finish stretching wires.
#51
11-04-2013, 10:35 AM
Well back at work. Got 26 more days not till I head back home and back at it.
The radaitor came in Friday, the day I left home. The Fedex man showed up just as I was putting the bags in my car to head to the airport. I took the time to open the box, inspect and test fit it. It came in a grey champion radiator box. It had been opened before, it looks like they added more bubble wrap in the box before shipping. The holes aligned up perfectly, have plenty of room to close the hood. I know for sure I have plenty of room to add a electric fan like I wanted too. Not sure about a Mechanical clutch type fan, standard mechanical fan should fit.
The radaitor came in Friday, the day I left home. The Fedex man showed up just as I was putting the bags in my car to head to the airport. I took the time to open the box, inspect and test fit it. It came in a grey champion radiator box. It had been opened before, it looks like they added more bubble wrap in the box before shipping. The holes aligned up perfectly, have plenty of room to close the hood. I know for sure I have plenty of room to add a electric fan like I wanted too. Not sure about a Mechanical clutch type fan, standard mechanical fan should fit.
#52
09-25-2014, 07:46 PM
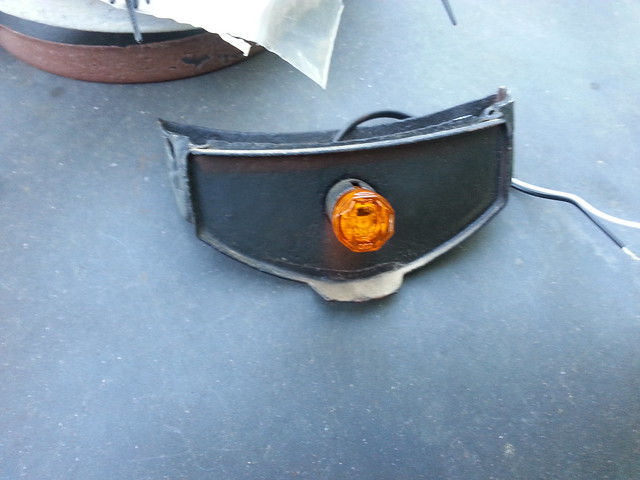
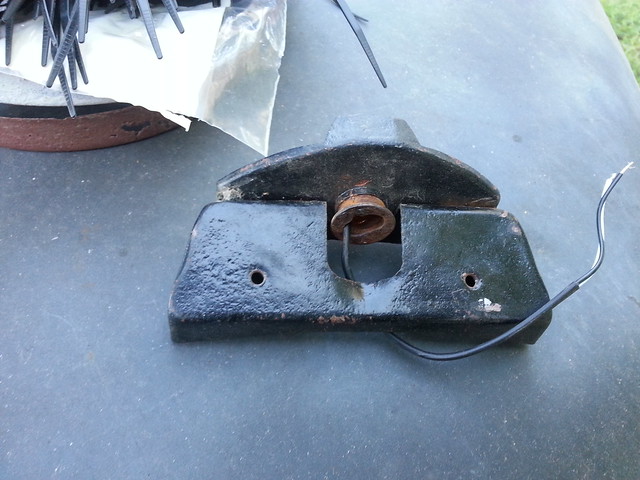
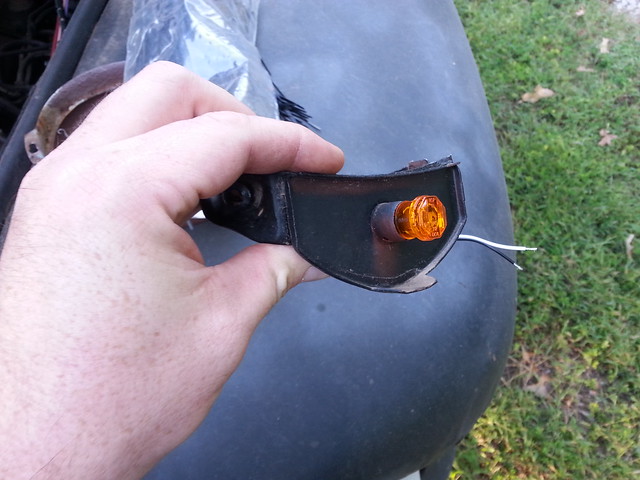
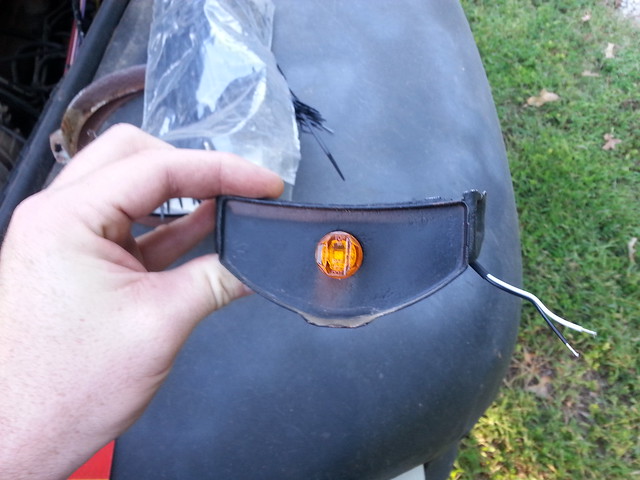
Finally back on it again. Got the tail lights in, head lights in, Ft park lights in, working in the cab to get the wiring straight.
I found these LED lights for the park lights in front of the truck. After taking out the original parts it slid right into place with enough tension to hold it into place.
 20140923_174412 by safjist_nipnog, on Flickr
 20140923_174415 by safjist_nipnog, on Flickr
 20140923_174420 by safjist_nipnog, on Flickr
 20140923_174428 by safjist_nipnog, on Flickr
 20140923_174431 by safjist_nipnog, on Flickr
I found these LED lights for the park lights in front of the truck. After taking out the original parts it slid right into place with enough tension to hold it into place.
20140923_174412 by safjist_nipnog, on Flickr20140923_174415 by safjist_nipnog, on Flickr20140923_174420 by safjist_nipnog, on Flickr20140923_174428 by safjist_nipnog, on Flickr20140923_174431 by safjist_nipnog, on Flickr
#54
11-07-2014, 09:56 AM
Back home from work and back on the truck one more time.
The day before I left I hooked a battery up to try and crank it. As soon as I did I heard a fuse pop. I decided to not worry about it at the moment and go ahead and try to crank it. It turned over fine, just didn't have any fire. Decided to just cover it up and worry about it when I got home next time.
Yesterday I started by tracking the blown fuse down. It turned out it was the head lights. I pulled the switch and started looking. I turns out the top part of the switch where the fuse goes was grounded up against the dash.

That is the type of switch I used, with the fuse changed out to a breaker for safety reasons. I see Now I will have to do that to the main fuse block as well now, lol.
Going though the wires under the dash I seen a big red wire with loop on it just hanging in the pile. Tracking it back it was from my MSD box. DOH. Didn't hook up the main power wire from the box to the Ing. side of the switch. After that I poured a little gas in the carb and it fired up. Even sounded like it wasn't 180 DEG out.
Today I will be working on hooking up the full line and a fuel tank. My original tank is damaged, so I will be using the early 60's chevy behind the seat gas tank I have or I will use one of the round tanks I have in the bed for now.
If I get all that done it's time to fill the brake system to see if my master cylinder choice will be up to snuff.
The day before I left I hooked a battery up to try and crank it. As soon as I did I heard a fuse pop. I decided to not worry about it at the moment and go ahead and try to crank it. It turned over fine, just didn't have any fire. Decided to just cover it up and worry about it when I got home next time.
Yesterday I started by tracking the blown fuse down. It turned out it was the head lights. I pulled the switch and started looking. I turns out the top part of the switch where the fuse goes was grounded up against the dash.
That is the type of switch I used, with the fuse changed out to a breaker for safety reasons. I see Now I will have to do that to the main fuse block as well now, lol.
Going though the wires under the dash I seen a big red wire with loop on it just hanging in the pile. Tracking it back it was from my MSD box. DOH. Didn't hook up the main power wire from the box to the Ing. side of the switch. After that I poured a little gas in the carb and it fired up. Even sounded like it wasn't 180 DEG out.
Today I will be working on hooking up the full line and a fuel tank. My original tank is damaged, so I will be using the early 60's chevy behind the seat gas tank I have or I will use one of the round tanks I have in the bed for now.
If I get all that done it's time to fill the brake system to see if my master cylinder choice will be up to snuff.
#56
11-19-2014, 10:09 PM
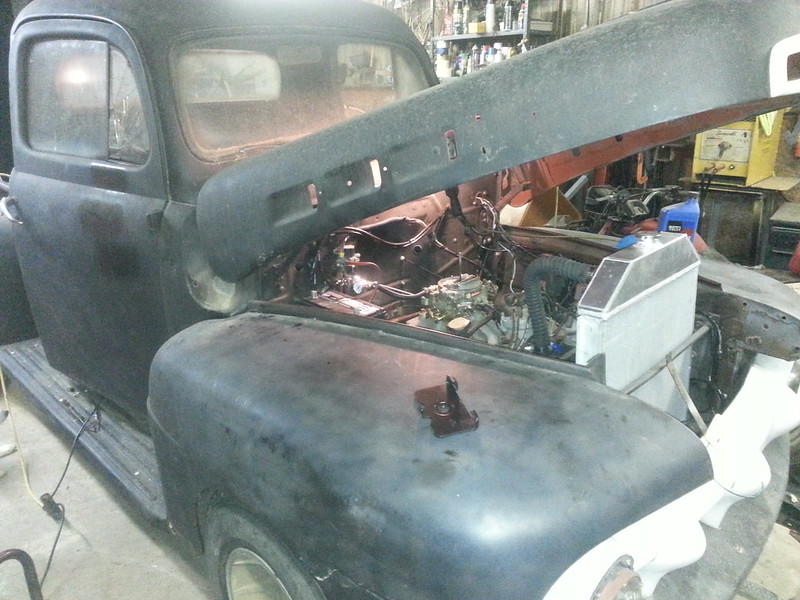
Getting a little more done. Moved the truck into Dad's shop to get out of the wind. Been working on getting the fuel system done. Got most of the 3/8" steel line run, fuel pressure regulator and gauge. Still got to mount the electric fuel pump.
Earlier today I went to swap out water neck on the intake from the angled one that was on it to a straight up and down neck so it wouldn't put the hose in a kink. The bottom bolt broke off and I was un-able to get it out on the truck. I had to pull the linkage back off for the carb, pull the carb, and then pull the intake. the gasket tore so I had to run to town to get a new one. The old one was a pain trying to get scrapped off while leaning over the front clip.
It's done now and I have it swapped out. I decided to swap the intakes while I was under the hood. Swapped the dual plane Holley street dominator I had on it to a Edelbrock single plane street Master intake.
#58
12-06-2014, 08:57 PM
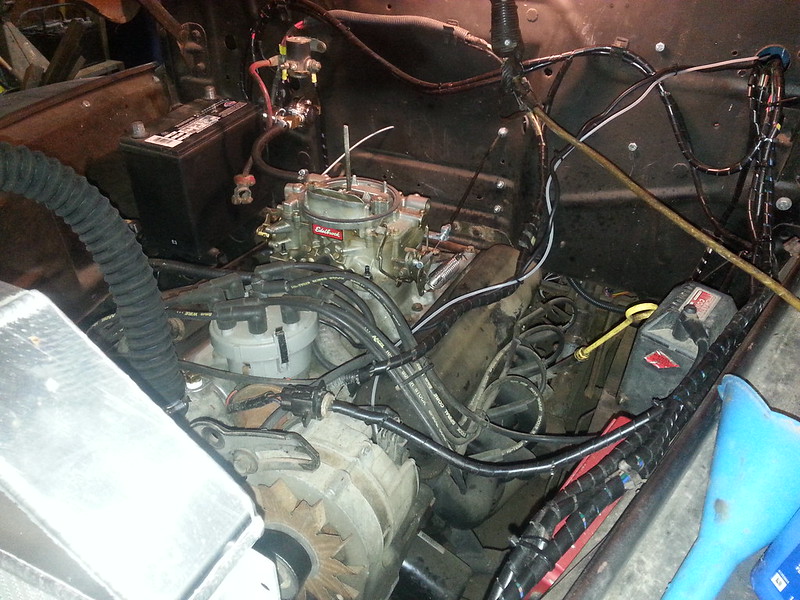
I am back at work on the rig, got a little over 3 more weeks till I make it home again. I did get it fired up,and ran it for a few minutes. But didn't get the cooling system filled like I wanted too. Couldn't find a new heater water neck like I wanted.
The intake I have on the truck now is a older Edelbrock 289 StreetMaster. It's a single plane intake. It looks about 2 inches or more taller than the Holley Street Dominator dual plane intake that was on the truck.
I replaced the tail lights with LED bulbs, but still need to get the secondary grounds tied into the fame.
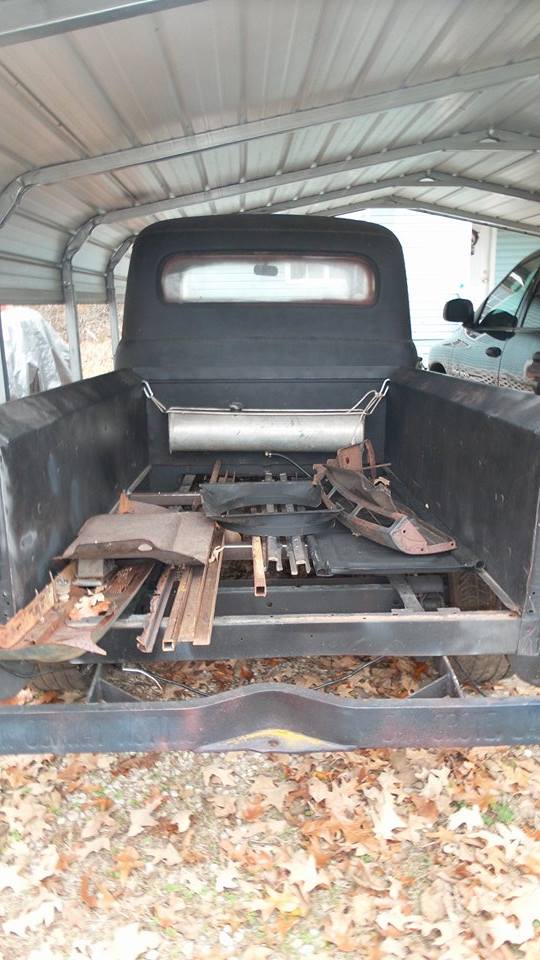
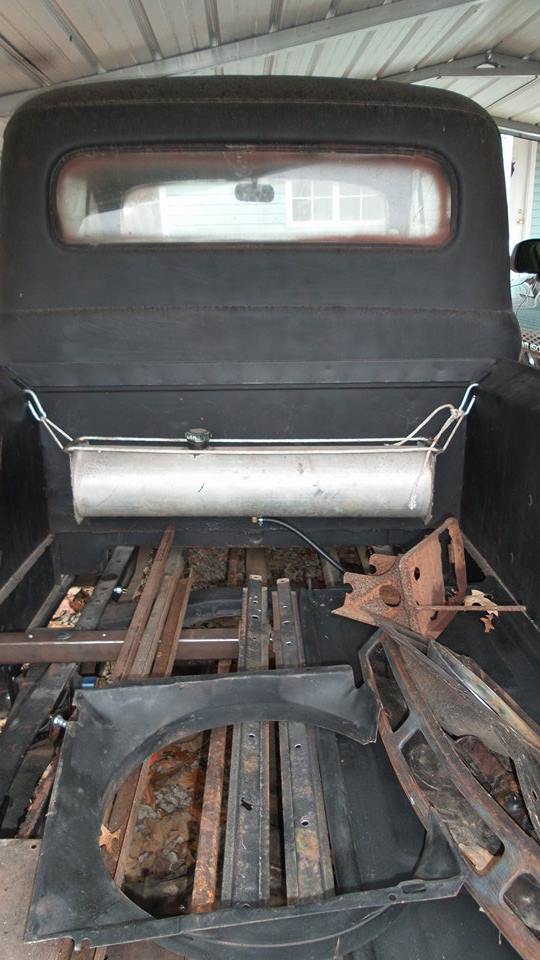
I also removed the half rotted cross beams for the pickup bed and replaced them with 2" square tube.
Here it is with the new intake on it when I started it up.
 20141126_214242 by safjist_nipnog, on Flickr
 20141126_214259 by safjist_nipnog, on Flickr
 20141126_214310 by safjist_nipnog, on Flickr
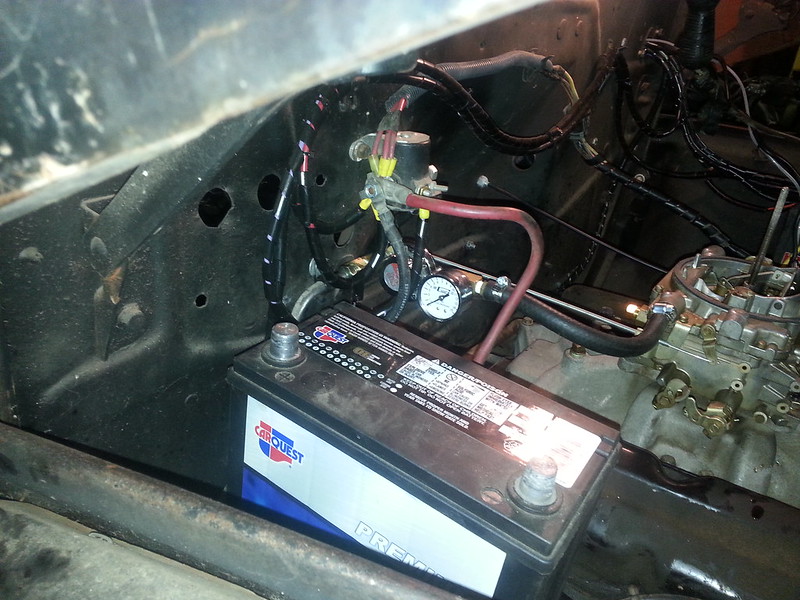
This is my current fuel line set up. In the pickup bed I have a small 8 and 1/4 gallon tank with 3/8" rubber hose going to the electric fuel pump on the passenger side frame rail where the cab meets the bed.
From the pump it goes into a 3/8" hard line run along the frame rail to the fire wall. It goes up to the engine. I will most likely need to re-run it later when I do put a heater into it later on, or will have to redo the rear part when I get a permanent tank.
The end of the hard line has a fuel pressure regulator and fuel pressure gauge. Then a rubber hose going to the carb.
 20141126_214249 by safjist_nipnog, on Flickr
I have asked for a few more pictures from home, these are from my phone. I will get them put up in a few days.
The intake I have on the truck now is a older Edelbrock 289 StreetMaster. It's a single plane intake. It looks about 2 inches or more taller than the Holley Street Dominator dual plane intake that was on the truck.
I replaced the tail lights with LED bulbs, but still need to get the secondary grounds tied into the fame.
I also removed the half rotted cross beams for the pickup bed and replaced them with 2" square tube.
Here it is with the new intake on it when I started it up.
20141126_214242 by safjist_nipnog, on Flickr20141126_214259 by safjist_nipnog, on Flickr20141126_214310 by safjist_nipnog, on FlickrThis is my current fuel line set up. In the pickup bed I have a small 8 and 1/4 gallon tank with 3/8" rubber hose going to the electric fuel pump on the passenger side frame rail where the cab meets the bed.
From the pump it goes into a 3/8" hard line run along the frame rail to the fire wall. It goes up to the engine. I will most likely need to re-run it later when I do put a heater into it later on, or will have to redo the rear part when I get a permanent tank.
The end of the hard line has a fuel pressure regulator and fuel pressure gauge. Then a rubber hose going to the carb.
20141126_214249 by safjist_nipnog, on FlickrI have asked for a few more pictures from home, these are from my phone. I will get them put up in a few days.
#59
12-07-2014, 08:33 PM
Here are a couple of more shots. I put everything in the back before I left. Yes that is rope holding the tank but it's just until I decide what tank I want to use permanently.
 10850923_1530204107232473_1076126282_n by safjist_nipnog, on Flickr
 10822492_1530204103899140_1483550786_n by safjist_nipnog, on Flickr
10850923_1530204107232473_1076126282_n by safjist_nipnog, on Flickr10822492_1530204103899140_1483550786_n by safjist_nipnog, on Flickr
#60
02-16-2015, 12:23 PM
I had just about forgot about this update. I have been at work for three weeks. Working on getting the 4th week done so I can head home and back on things.
I did more brake work before I left, A little tuning on the Carb. Fill the cooling system to find out the water pump was leaking like hell. Got a new one. Broke two bolts off in the timing cover. Couldn't get them with vice grips. Wound up doing the well the nut on the broken stud trick. One came right off. The other one took three tries, but I finally got it out and replaced.
Then I focused on one thing that gave me a lot of trouble. The shifter for the FMX. I got a Gennie shifter for it awhile back. It's a very nice shifter but there is a problem. It's made to only work with the factory floor shifter shift arm. My trans came out of a column shift vehicle.
After much research for what I needed and digging though my local junk yard I found a correct shift arm. The column shift arm points down is 2 3/4" (need to double check that measurement) center to center. The floor shift arm points up and is 2 1/8" center to center.
To change out the arm I would have to drop the pan and pull a lot of stuff out of the way, I am trying to stay out of the trans if I can. So I decided to make a adapter arm to go on.
When I can go back to the junk yard I am going to open up another dead FMX and pull the column shift arm off of it for a direct side by side compare for a tech article.
The arm I made is just like the original in thickness and basic shape. I will have to trim some of the end with the big hole so it will slide over and into place. then weld a little and let it cool so I don't burn the o-ring on the arm.
Once that part is in place hooking the rest of the shifter up will be like clockwork.
(Crap, pictures will be tomorrow. Tonight the internet isn't working like it should to get the link to post it)