
1977 F-100 restoration project


#64
 10-26-2011, 06:09 PM
Posting Guru
Join Date: Jul 2009
Location: shamokin pa
Posts: 1,098
Likes: 0
Received 0 Likes
on
0 Posts
#65
10-27-2011, 06:26 AM
Join Date: Jun 2005
Location: Atlanta
Posts: 321
Likes: 0
Received 0 Likes
on
0 Posts

#66
11-03-2011, 07:04 AM
Join Date: Jun 2005
Location: Atlanta
Posts: 321
Likes: 0
Received 0 Likes
on
0 Posts
I had an exhaust / intake leak that was causing the engine to miss enough to be really irritating. Found a small leak where the exhaust and intake manifolds mount together. Reason for the leak was that there was supposed to be a gasket in-between them and I didn't know it. What you don't know CAN hurt you. Went to tighten down the bolts that hold them together and here is what I got.
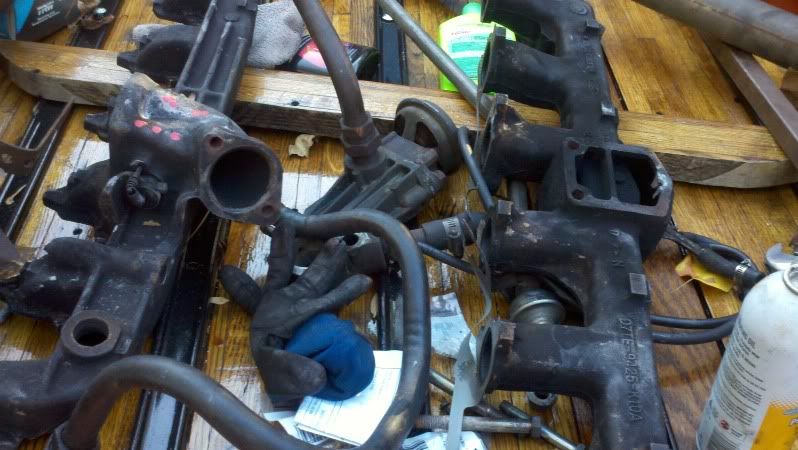
See the intake on the right? See where the silver glob of anti-seize compound is? The boss in the metal popped clean off. Yes, you could probably braze it back on, but if the braze didn't hold the thought of a big chunk of iron bouncing around in the intake didn't appeal to me. Off to the junkyard. Again.
Found another intake and exhaust manifold on an 85 (73-79s are hard to find). It is the set on the right in the picture below.

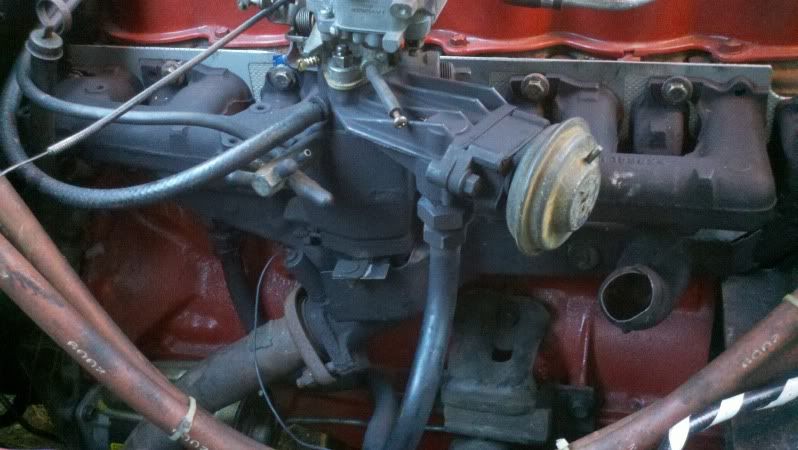
This set had three problems I didn't know about. First, the heat riser tube (between the manifold and EGR plate) was broken. No big deal, I'll just stick on the one I already have, right?? WRONG, the tapped hole for it on an 85 is on the bottom of the manifold; on the 77 it is on the side. Different pipes. Off to the junkyard again to find a pipe for a 85. Good thing Pull-A-Part is pretty close.
Found a pipe, but the 3rd Armored Division of the Army couldn't remove it in the truck, so I took the whole dad-blasted manifold. Again. This is now set #3.
Get home and decide that set #3 is substantially better than set #2 and I don't have to remove the EGR pipe. So I pull set #2 back off the engine and install set #3. Life is good.
Life was good until I realize that the exhaust pipe flanges are different on 77s and 85s. The 77 is an "inny" and the 85 is an "outty". At this point I start losing my religion and throwing tools. Time to quit for the day.

77 flange
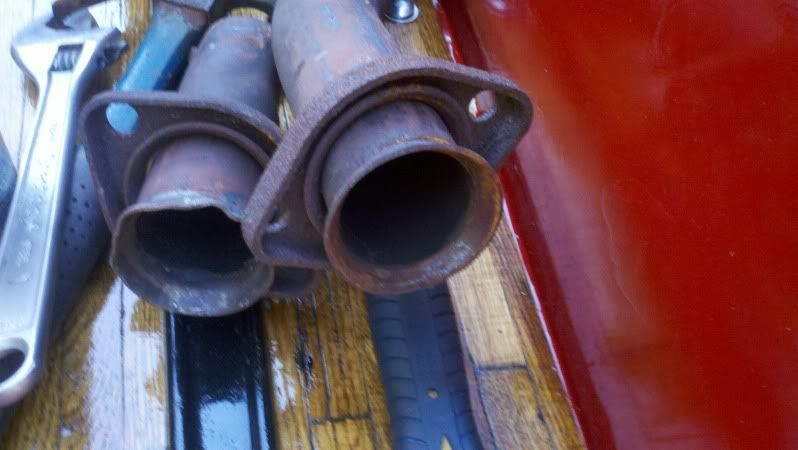
85 flange.
OK, so it is time for me to man up and buy a new pipe, right? Nope. Can't buy the $25 pipe without buying the $175 catalytic converter that comes with it. I don't need no stinking $175 converter. Called all the auto parts stores. No good. You know the auto parts store with the Nascar team that runs the commercials with them wiggling their butts and singing "Know How"? Called those guys. They didn't Know How either. They said they'd figure it out and call back. My phone is not ringing.
So now I am going to cut off the first 3' of the 85 pipe and weld it to the old 77 pipe. All because I didn't know about the stupid $1 gasket in the first place. As they say in Georgia "If you are going to be stupid, you'd better be tough."
WHY IS THIS STUFF NEVER EASY??
See the intake on the right? See where the silver glob of anti-seize compound is? The boss in the metal popped clean off. Yes, you could probably braze it back on, but if the braze didn't hold the thought of a big chunk of iron bouncing around in the intake didn't appeal to me. Off to the junkyard. Again.
Found another intake and exhaust manifold on an 85 (73-79s are hard to find). It is the set on the right in the picture below.
This set had three problems I didn't know about. First, the heat riser tube (between the manifold and EGR plate) was broken. No big deal, I'll just stick on the one I already have, right?? WRONG, the tapped hole for it on an 85 is on the bottom of the manifold; on the 77 it is on the side. Different pipes. Off to the junkyard again to find a pipe for a 85. Good thing Pull-A-Part is pretty close.
Found a pipe, but the 3rd Armored Division of the Army couldn't remove it in the truck, so I took the whole dad-blasted manifold. Again. This is now set #3.
Get home and decide that set #3 is substantially better than set #2 and I don't have to remove the EGR pipe. So I pull set #2 back off the engine and install set #3. Life is good.
Life was good until I realize that the exhaust pipe flanges are different on 77s and 85s. The 77 is an "inny" and the 85 is an "outty". At this point I start losing my religion and throwing tools. Time to quit for the day.
77 flange
85 flange.
OK, so it is time for me to man up and buy a new pipe, right? Nope. Can't buy the $25 pipe without buying the $175 catalytic converter that comes with it. I don't need no stinking $175 converter. Called all the auto parts stores. No good. You know the auto parts store with the Nascar team that runs the commercials with them wiggling their butts and singing "Know How"? Called those guys. They didn't Know How either. They said they'd figure it out and call back. My phone is not ringing.
So now I am going to cut off the first 3' of the 85 pipe and weld it to the old 77 pipe. All because I didn't know about the stupid $1 gasket in the first place. As they say in Georgia "If you are going to be stupid, you'd better be tough."
WHY IS THIS STUFF NEVER EASY??

#68
11-04-2011, 06:41 AM
#69
11-14-2011, 07:04 AM
Join Date: Jun 2005
Location: Atlanta
Posts: 321
Likes: 0
Received 0 Likes
on
0 Posts
update this weekend
Had two problems to work, improved one, screwed the second one up.
Steering was awful. Over 50 MPH the thing skated like Dorothy Hamel. Started looking and the left radius arm bushing was pretty much gone. Replaced that. Then remembered that in 77 these things were set up for bias ply tires and I'd just put radials on it. Radials required negative caster and bias ply want positive caster. Moved both radius arms forward to get closer to negative caster. The improvement was substantial.
Next problem was I had the '2-3 flare' in my rebuilt C4 transmission. Dropped the pan and pulled the valve body. Notice that the intermediate band was WAY loose and the reverse band was WAY tight. Don't know how I did that, I was pretty careful when I set them the first time.
Reset them both to what would appear to be right (torque wrench and back off the screw the appropriate turns). Then went to see what was binding in the valve body. Poking around the VB with a pick, I could feel the intermediate servo was sticking. That'd make sense with a 2-3 flare, right?
Pull the servo piston to buff out the scoring marks. Checked it and life was good. Went to buff the intermediate servo retainer (a little piece of aluminum the size of a pencil eraser) and, of course, it went shooting out of my hand when I pressed it on the buffer wheel.
I spent an hour scouring my basement on my hands and knees and I can't find that sucker anywhere.
Anybody have a clue where I can get a replacement? Or do I have to go to the JY and find a whole valve body to get a replacement??
#70
11-14-2011, 06:52 PM
Join Date: Jun 2005
Location: Atlanta
Posts: 321
Likes: 0
Received 0 Likes
on
0 Posts
Yippee-ky-yay! Found a c4 in the jy and snagged the valve body. Took the best of the two and got the vb back in the truck. Put a turn on the vacuum mod to tighten the shifts, oiled her up, and hit the road. First, second, third, nice firm shifts! No 2-3 flare! I had the reverse band tighter than Jack Benny and the intermediate band loser than Lindsay Lohan. Once I got them both set right and cleaned up the intermediate servo in the vb, she IS GOOD-TO-GO!
Only thing not working now is the windshield washer and the license plate lights.
I'll post a bunch of pics in a wrap-up post this weekend.
Only thing not working now is the windshield washer and the license plate lights.
I'll post a bunch of pics in a wrap-up post this weekend.
#71
11-14-2011, 07:34 PM
Sounds like you are moving right along with your project. I look forward to seeing the pictures and wrap-up.
#72
11-21-2011, 06:07 AM
Join Date: Jun 2005
Location: Atlanta
Posts: 321
Likes: 0
Received 0 Likes
on
0 Posts

#74
11-21-2011, 12:25 PM
Elder User
 !
!
#75
11-25-2011, 08:01 AM

Mountain Pass
Great job fixing it up. The first car I painted was about the same color. I used an airless sprayer meant for houses. It worked but my orange peal was WAY more than yours. Good thing is it was tough as nails like a hammered finish. Second one I painted (1976 F150) with same sprayer was better...like yours. Third thing I sprayed was a manure spreader for a friends dad. It was show quality glossy and smooth. Go firgure.