
Block heater problems
#1
 01-03-2016, 05:51 PM


#2
01-03-2016, 05:54 PM

Fleet Owner
Based on what Rich has said and what has been said in his recent thread the typical problem with the block heater not working is the cord itself. You can ohm out the element itself and it should read right around 15 if I recall correctly.
I verified mine is working simply by having it plugged in for about 15 minutes and then touching it with my hand. It was clearly much warmer than the surrounding metal.
I verified mine is working simply by having it plugged in for about 15 minutes and then touching it with my hand. It was clearly much warmer than the surrounding metal.
#3
01-03-2016, 06:08 PM

Junior User
Join Date: Feb 2013
Location: Bishop
Posts: 71
Likes: 0
Received 0 Likes
on
0 Posts
Based on what Rich has said and what has been said in his recent thread the typical problem with the block heater not working is the cord itself. You can ohm out the element itself and it should read right around 15 if I recall correctly.
I verified mine is working simply by having it plugged in for about 15 minutes and then touching it with my hand. It was clearly much warmer than the surrounding metal.
I verified mine is working simply by having it plugged in for about 15 minutes and then touching it with my hand. It was clearly much warmer than the surrounding metal.
I was unsure if mine was actually working as well. You can check the resistance to see if the heating element has failed or not. I have one of those cheap infrared thermometers and I just pointed it at the area right around the element after it was plugged in for a bit and you will see a definite difference in temperature. If I remember correctly it is isn't heating the oil directly, it heats the coolant. However by heating the coolant you do get some transfer to the oil also, so don't expect to see a huge difference in the oil temp when you start it up.
#4
01-03-2016, 06:09 PM
#5
01-03-2016, 06:14 PM
#6
01-03-2016, 06:23 PM
Fleet Owner
The cord has a special connector on the side that hooks up to the element. A member named William Mark Brown just installed this one in his truck and had good experience with it.
Zerostart 3500043 - Engine Heater | O'Reilly Auto Parts
As you can see, it is not a standard A/C 120v cord on the element side. Are you sure that it does not work? Can you get under the truck and feel the element with your hand after it has been plugged in for a while?
I know it can get cold up in Idaho, I have family in Challis, Boise and Orofino. Good luck to you and post back if you have any further questions or updates.
#7
01-03-2016, 06:31 PM

Senior User
Join Date: Aug 2015
Location: Iowa
Posts: 311
Likes: 0
Received 0 Likes
on
0 Posts
Trending Topics
#8
01-03-2016, 07:05 PM
Thank you guys for your help, I didn't have a multimeter to check it out, and I don't know how to use one. I did however feel the area of the element and it was not warm. So I think I will go to the parts store and buy a new setup. Sous, I live south of Nampa in Owyhee co. We don't get as cold as they do up to Challis, thank God. For the last two weeks it hasn't got above 30�.At night ben down to -1� Challis is much colder.l worked up ln that country last fall.
#9
01-04-2016, 08:32 PM
Postmaster
im going to try and test mine, as for testing with the multimeter, what setting should I use? (first time with something like this), I know how to test, just need to put the two probes (ok guys don't let your minds get in the gutter) onto the two nipples that are sticking out that go into the plug (orange piece), I also want to know what is the best way to test the cord?
I am going to try and figure out which piece (hoping its one not both) is bad, and just buy a new kit and replace whats needed, also decided to buy the external plug thing I kinda am liking that idea...
perhaps could someone post some pics for reference?
I am going to try and figure out which piece (hoping its one not both) is bad, and just buy a new kit and replace whats needed, also decided to buy the external plug thing I kinda am liking that idea...
perhaps could someone post some pics for reference?
#10
01-04-2016, 08:39 PM
Fleet Mechanic
im going to try and test mine, as for testing with the multimeter, what setting should I use? (first time with something like this), I know how to test, just need to put the two probes (ok guys don't let your minds get in the gutter) onto the two nipples that are sticking out that go into the plug (orange piece), I also want to know what is the best way to test the cord?
I am going to try and figure out which piece (hoping its one not both) is bad, and just buy a new kit and replace whats needed, also decided to buy the external plug thing I kinda am liking that idea...
perhaps could someone post some pics for reference?
I am going to try and figure out which piece (hoping its one not both) is bad, and just buy a new kit and replace whats needed, also decided to buy the external plug thing I kinda am liking that idea...
perhaps could someone post some pics for reference?
If your heater looks good, then you can try the same thing on the cord (the two straight blades) and you should get around the same reading. If you don't then you probably have a bad cord.
#11
01-04-2016, 09:13 PM
Postmaster
you will need to use the ohm (omega/horseshoe symbol) setting, you will place the two probes on the two connectors on the heater as you described and you should see around 14.4 ohms (or there abouts) if you meter just says OL or reads 0 then there is a problem with the heater. please make sure the cord is NOT plugged into the electrical supply (your house) when you do this.
If your heater looks good, then you can try the same thing on the cord (the two straight blades) and you should get around the same reading. If you don't then you probably have a bad cord.
If your heater looks good, then you can try the same thing on the cord (the two straight blades) and you should get around the same reading. If you don't then you probably have a bad cord.
then to test the cord do I reconnect it to the heating element, or leave it isolated by its self when testing?
I also see multiple selections for the Ohm setting, which would be the best?? I am guessing I want the 20k option?
#12
01-05-2016, 12:17 AM

#13
01-05-2016, 12:33 AM
Fleet Mechanic
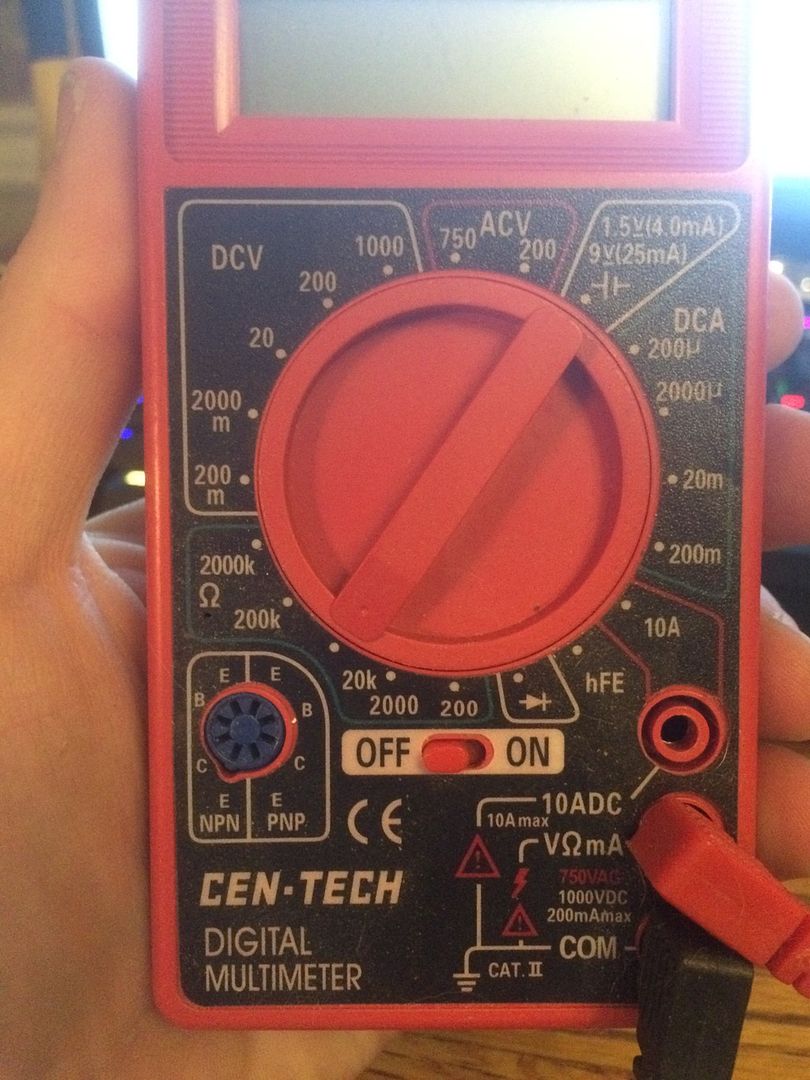
You can remove the leads from the nipples/connectors (and this is where you will take your readings), that way you can ensure it is just the heater element you're testing. You will be using the 200 setting (the 20k setting is for reading up to 20,000 ohms, which won't give you enough definition for what you're testing) once you have read the element itself then you can reconnect the leads and then read at the plug end. As mentioned early they should read about the same.
I was more concerned with you having the cord plugged into a 120v source, as doing this while reading ohms can damage your meter.
You should read 14-15 ohms on the meter if everything is functional (I don't know if that meter will read tenths of an ohm, it may just round up or down). Your test leads should be connected to the meter as shown (to those jacks) in the photo you posted.
To further explain the function of the meter (and this applies to all the different settings, AC volts, DC volts, amps, etc) the number you select should be the lowest number possible that exceeds the presumed value you are testing. For example, for AC volts, you would use the 200 volt setting to read your outlets in your house as they are 120v, but if you were trying to read your dryer outlet, you would have to select the 750 volt setting as your dryer outlet has 240v available which is higher than the 200v setting is rated for. If you are ever unsure of what value you will see, you start with the largest value and work your way down.
#14
01-05-2016, 12:39 AM
#15
01-05-2016, 12:48 AM
Fleet Mechanic
Originally Posted by fred2001
Thank you again. Is there a way you can test continuity with this multimeter?
I hope this makes sense?
You are more than welcome, this is what everybody is here for, to help each other out!