Tate's 72 Highboy Restoration.
#1
 12-18-2010, 11:32 PM

Tate's 72 Highboy Restoration.
I have had a few other threads about the work on this truck, My intentions when I got it was to do a minor clean up and have it painted. Well that didn't last long, so I'm going to combine it all here and maybe something I do will help someone else in their project.
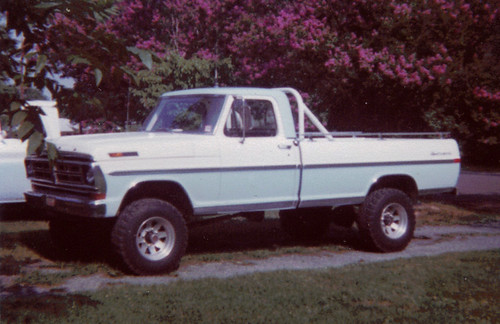
I bought it in Albuquerque New Mexico from the original owners widow. 128,000 miles, her husband was a mechanic and serviced it to death, that along with the dry desert environment is the reason this truck is in such good condition. I have made several hundred pictures so far, I will post progress as I go, I hope to be done by early summer 2011.
I will say right off that the brown on the bottom is history, It will be the deluxe two tone paint scheme, The center and inside will remain Wimbledon White and I am Highly leaning to 69 Ford Arcadian Blue, Here's what it looks like
All the pictures shown on here plus others of the work are located at 1972 Highboy - a set on Flickr
This is the truck when it arrived in North Carolina in August 2010

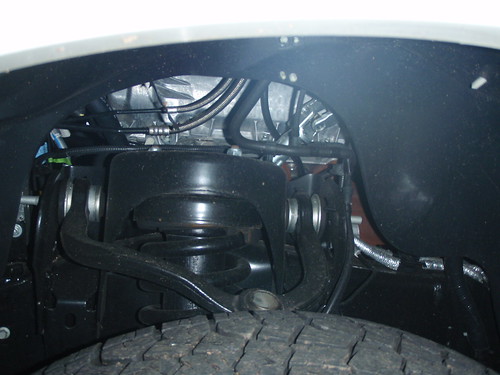
First work done, Added Power Steering, I did the 78/79 fully integrated system -- Here's a link to the complete Power Steering Conversion https://www.ford-trucks.com/forums/1...-pictures.html
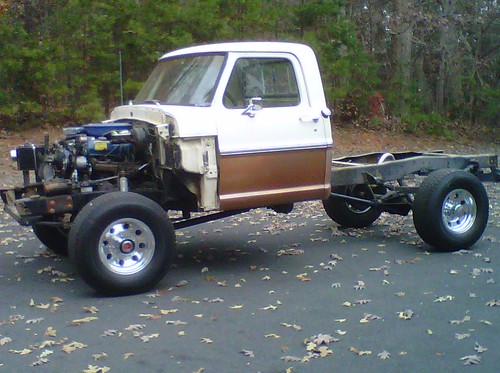
Start of Tear down, around the first of November The next two also show the wheels and tires that will go back on after all work is completed.
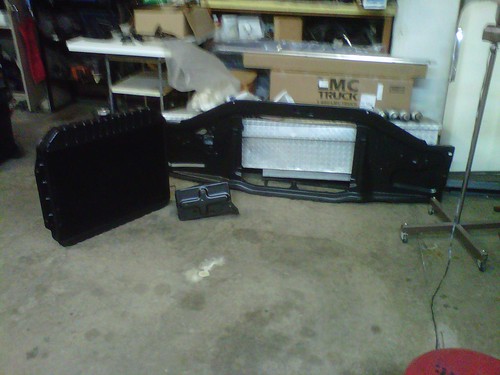
Front end removed and bed taken off. Just before the five hour power wash on the frame. (November 30)
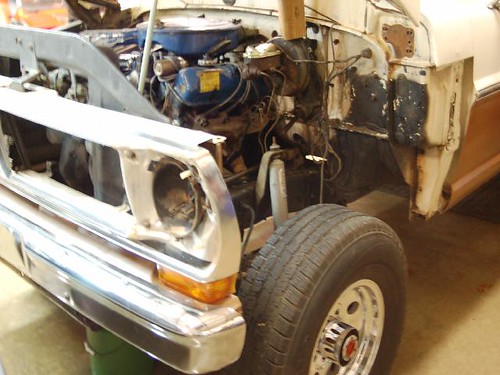
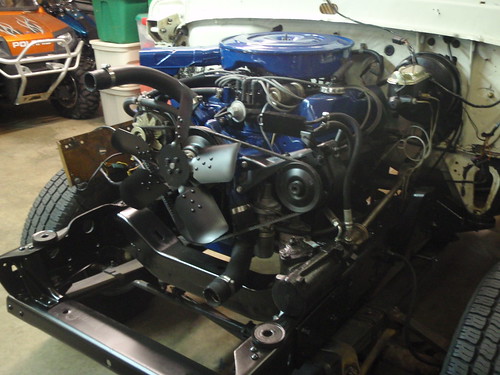
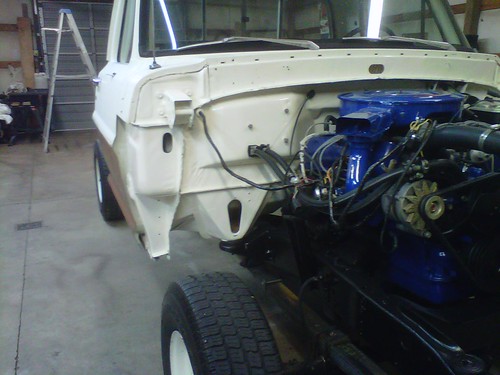
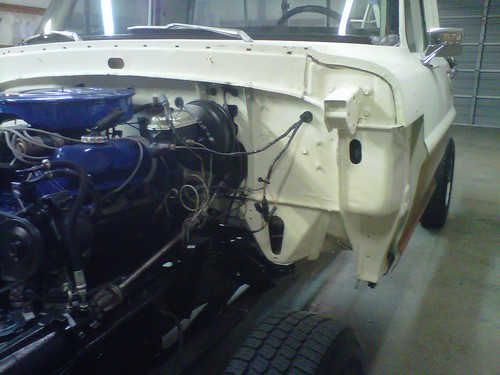
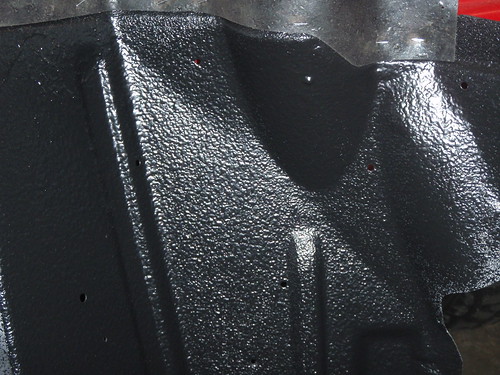
I don't have any good pictures of the frame prior to being painted, here is the motor after I repainted all the Blue and Black parts of the engine area. (December 10)
This is the rear frame after painting, the original spare tire is in the background, I am going to clean it like new, repaint the rim and remount under the truck (December 10)

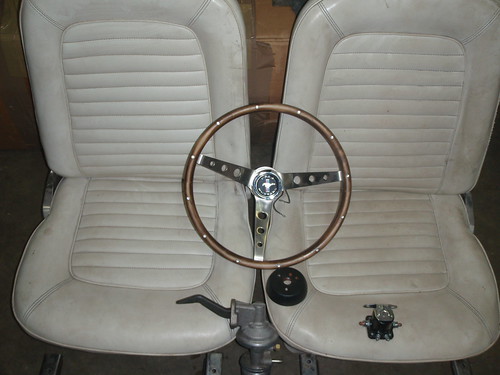
This is my best find so far, 66 Mustang seats and wood steering wheel, I ordered the seat mounts from another member on here, will be mounting for test fit and drilling holes in the next several weeks, going to leave bench seat in until after all work is completed, I'm going to recover them before final install and don't want to damage them. (December 16)
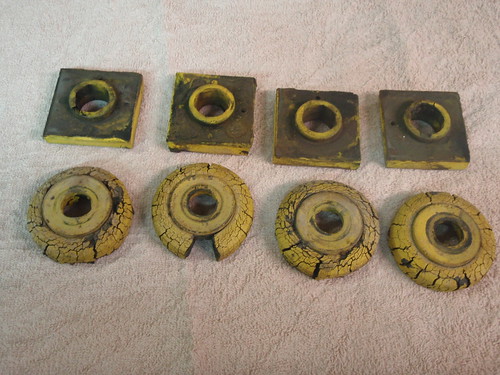
I sent my radiator support and front inner fenders last week to be sandblasted, got them back this week and painted them. I'm using a Sherwin Williams Low Luster Black metal paint on everything that's was black, I do it all with the paint gun, I get a much better job and a gallon of paint goes a long way. After painting the inner fenders, I got a undercoating kit and did the underside of the liners. I have not made a picture of the backside but I will soon. I put on the liner seals that mount with the staples, it took three hours to do two seals and 14 staples, I almost lost my religion over them, a few places on the passenger side did not fit tight so I used 1/8" pop rivets to tighten it up, they look good and can't be seen anyhow. My radiator is also in the picture, I power washed it and sprayed it the same as everything else. I bought a new battery box, the old one had corrosion on it and it was cheaper to get a new one that try to fix the old one.
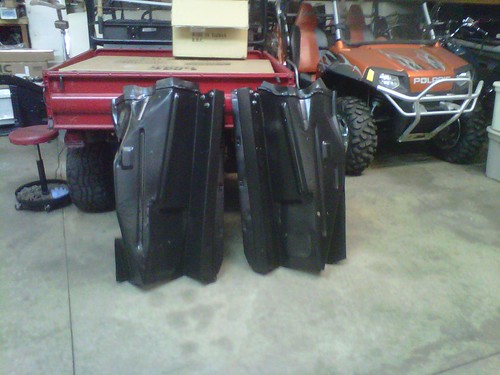
I worked on the firewall today, December 18, I cleaned and then painted everything white, It started snowing around 12 and I had to quit at 1 pm to go to church, we put together 600 Christmas treat bags to give out tomorrow during Sunday School. I'm going to work on the bottom of the cab next week, it would be easier to do off the frame but no more than it needs it's not worth all the work to remove it and put it right back on. Another reason is I'm doing this by myself, the only help so far is one other person helped me set off the bed onto my trailer, I put it there so it's mobile and I can move it in the shop when I'm ready to work on it.
I bought it in Albuquerque New Mexico from the original owners widow. 128,000 miles, her husband was a mechanic and serviced it to death, that along with the dry desert environment is the reason this truck is in such good condition. I have made several hundred pictures so far, I will post progress as I go, I hope to be done by early summer 2011.
I will say right off that the brown on the bottom is history, It will be the deluxe two tone paint scheme, The center and inside will remain Wimbledon White and I am Highly leaning to 69 Ford Arcadian Blue, Here's what it looks like
All the pictures shown on here plus others of the work are located at 1972 Highboy - a set on Flickr
This is the truck when it arrived in North Carolina in August 2010
First work done, Added Power Steering, I did the 78/79 fully integrated system -- Here's a link to the complete Power Steering Conversion https://www.ford-trucks.com/forums/1...-pictures.html
Start of Tear down, around the first of November The next two also show the wheels and tires that will go back on after all work is completed.
Front end removed and bed taken off. Just before the five hour power wash on the frame. (November 30)
I don't have any good pictures of the frame prior to being painted, here is the motor after I repainted all the Blue and Black parts of the engine area. (December 10)
This is the rear frame after painting, the original spare tire is in the background, I am going to clean it like new, repaint the rim and remount under the truck (December 10)
This is my best find so far, 66 Mustang seats and wood steering wheel, I ordered the seat mounts from another member on here, will be mounting for test fit and drilling holes in the next several weeks, going to leave bench seat in until after all work is completed, I'm going to recover them before final install and don't want to damage them. (December 16)
I sent my radiator support and front inner fenders last week to be sandblasted, got them back this week and painted them. I'm using a Sherwin Williams Low Luster Black metal paint on everything that's was black, I do it all with the paint gun, I get a much better job and a gallon of paint goes a long way. After painting the inner fenders, I got a undercoating kit and did the underside of the liners. I have not made a picture of the backside but I will soon. I put on the liner seals that mount with the staples, it took three hours to do two seals and 14 staples, I almost lost my religion over them, a few places on the passenger side did not fit tight so I used 1/8" pop rivets to tighten it up, they look good and can't be seen anyhow. My radiator is also in the picture, I power washed it and sprayed it the same as everything else. I bought a new battery box, the old one had corrosion on it and it was cheaper to get a new one that try to fix the old one.
I worked on the firewall today, December 18, I cleaned and then painted everything white, It started snowing around 12 and I had to quit at 1 pm to go to church, we put together 600 Christmas treat bags to give out tomorrow during Sunday School. I'm going to work on the bottom of the cab next week, it would be easier to do off the frame but no more than it needs it's not worth all the work to remove it and put it right back on. Another reason is I'm doing this by myself, the only help so far is one other person helped me set off the bed onto my trailer, I put it there so it's mobile and I can move it in the shop when I'm ready to work on it.
#2
12-18-2010, 11:35 PM

Senior User
Join Date: Jun 2010
Posts: 134
Likes: 0
Received 0 Likes
on
0 Posts
#3
12-19-2010, 05:32 AM
Elder User
Join Date: Feb 2010
Location: Thomaston, GA
Posts: 536
Likes: 0
Received 0 Likes
on
0 Posts

#4
12-20-2010, 05:44 AM
Logistics Pro
very nice looks like it's coming together quite nice for you. props to doing all the work yourself. i wish i had a garage to work in looks like my working on my truck is done until warm weather comes around was hoping it'd be drivable for winter but just didn't make it in time i'll keep an eye on this thread for updates
#5
12-20-2010, 07:15 AM
<a href="http://www.flickr.com/photos/tatedaniels/5277363040/" title="1972 ford blue color compare by tpdaniels, on Flickr"><img src="http://farm6.static.flickr.com/5206/5277363040_bc40c3cd25.jpg" width="500" height="324" alt="1972 ford blue color compare" /></a>
Last edited by tpdaniels; 12-20-2010 at 07:34 AM. Reason: add picture
#7
12-20-2010, 08:45 AM
Trending Topics
#8
12-20-2010, 10:30 AM
Senior User
Join Date: Aug 2010
Location: Highlands Ranch CO.
Posts: 444
Likes: 0
Received 0 Likes
on
0 Posts

#9
12-21-2010, 05:23 PM
Inner fender cutout & steering joint boot
I put the front sheet metal back on this afternoon and replaced the rubber boot on the steering shaft slip joint, the pictures show how much I had to cut off of my inner fender to clear the new power steering setup and the boot replacement.
The old and new boots, New boot was $8.00 at my local 4X4 center, it's for a jeep but was just like the Ford factory boot, if it works, use it.

Boot on the shaft, lots of WD-40 and a small screwdriver for persuasion over the stubs, there is more parts that go inside, just did not show them

All put together and ready to install
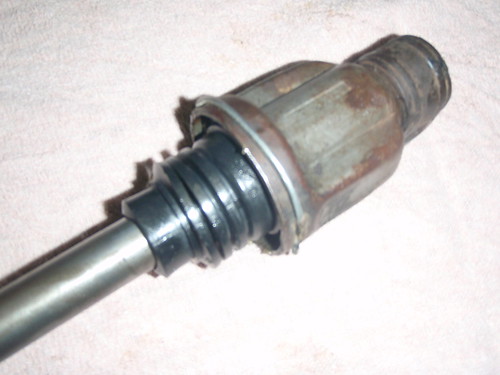
Installed and ready to go

This shows how much I had to cut out for the power steering setup, I could have gotten by with a little less but I would have had to bend the inner fender way out, looks better like this. I have a rubber cover I made for this cutout but I'm not sure if I'm going to use it. the second picture shows how open it is on my 2010

Today's progress


The old and new boots, New boot was $8.00 at my local 4X4 center, it's for a jeep but was just like the Ford factory boot, if it works, use it.
Boot on the shaft, lots of WD-40 and a small screwdriver for persuasion over the stubs, there is more parts that go inside, just did not show them
All put together and ready to install
Installed and ready to go
This shows how much I had to cut out for the power steering setup, I could have gotten by with a little less but I would have had to bend the inner fender way out, looks better like this. I have a rubber cover I made for this cutout but I'm not sure if I'm going to use it. the second picture shows how open it is on my 2010
Today's progress
#10
12-22-2010, 08:11 AM
Senior User
Join Date: Aug 2010
Location: Highlands Ranch CO.
Posts: 444
Likes: 0
Received 0 Likes
on
0 Posts
 and looks like a alum block........you must have mixed up this pic with another one?
#11
12-22-2010, 09:16 AM
Elder User
Join Date: Feb 2010
Location: Thomaston, GA
Posts: 536
Likes: 0
Received 0 Likes
on
0 Posts
Thanks for including the picture, The Wind blue is the correct 72 color, but it is a little darker than I want to go. Not that I am a Carolina fan but I want something a little lighter like Carolina Blue. The closest two colors I am considering are the late sixties Ford Arcadian Blue and Diamond Blue, It does not have to be year correct for me, It's 38 years old and no one will know the difference so I'm going to paint it what I like.

I just wanted you to see how one of the original colors looked on something other than a paint chip.
Enjoy making yours like YOU want it - doesn't matter how somebody else wants it.
MERRY CHRISTMAS
#12
12-22-2010, 09:26 AM

#13
12-22-2010, 10:29 AM
Fleet Mechanic
#14
12-22-2010, 04:51 PM
Last edited by tpdaniels; 12-22-2010 at 04:51 PM. Reason: spelling
#15
12-24-2010, 04:08 PM
Bucket Seats, Trail Install
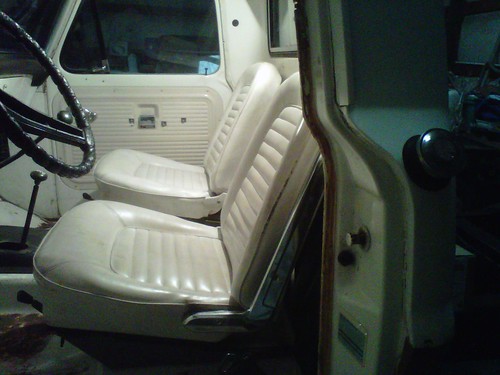
I can't believe I spent part of Christmas Eve working on the truck, The wife left early to go shopping and I was going to just take it easy. All that changed around 10 when UPS delivered my new bucket seat floor mounts. I thought I would just open them for a test fit on the seats, that looked so good, one thing led to another, next thing I know I have the seat out, floor mat removed and the bucket seats sitting in the truck. Being that they are in the truck, I might as well drill the holes needed for the inside brackets, that done I bolted them down, made a picture and decided to quit. Here's what they look like now, it will look a lot different when they have been recovered and the cab redone inside.
Merry Christmas
Merry Christmas

