
Fire Wall clutch plate 101
#1
 12-07-2010, 11:24 PM


Join Date: Mar 2008
Posts: 49
Likes: 0
Received 0 Likes
on
0 Posts
Fire Wall clutch plate 101
Hello,
A little history here about what happens with some of the Ford trucks and the clutch actuation and the inherent problems that can occur.
There are a few reasons behind clutch problems with 87-91 and up Ford trucks and Broncos with hydraulic master and slave cylinders for the poor operation of the clutch and listed below are some that I have personally encountered.
One of the primary concerns is the clutch actuating PIN on the cross shaft arm from the actual clutch pedal. Several different things at this point can go wrong.

As seen by the above points and pictures, I had almost every symptom, just no cracks around the mounting holes for the MC
With that being said I wrote this article and documented it with pictures to be used along with the factory�s TSB Technical Service Bulletin.
Major FIREWALL reinforcement kit install 101
Thanks to one of the members on www.oilburners.net freebird01 (Jason) we have the firewall reinforcement kits available to us, seeing as Ford no longer offers them. He has taken it upon himself to manufacture these reinforcement brackets and because of him; I was able to do this install and provide this information and pictures for everyone to view and use. Jason�s web site is located at Terrapin Manufacturing .
Thanks Jason for providing me one of your excellent major firewall re-enforcement kits.
The very first thing you will need to do is, to get a hold of the Ford TSB (Technical Service Bulletin) and read it thoroughly. Jason has it located at; http://www.terrapinmfg.com/TSB%2090167%20Clutch.pdf
I would suggest printing it off and for all intents and purposes, just follow it�s instructions for the �Large Reinforcement Installation Procedure� which is quite straight forward and has excellent point by point instructions along with some diagrams that may help along with these pictures here I have provided.
I removed the steering column and foot pedal assembly along with the instrument cluster and this is all covered in the TSB so I won�t get into the details on how to do this here. My concern is the actual plate and it�s installation.
Now for me, I had this way too easy because I had my whole front clip removed for an engine/trans swap and some other work I needed to get done. Most will not be so lucky and will have to work around a crowded engine compartment. Regardless of the situation, the work needed to be done needs to be done easy or not.
Upon the first �look see� to check how it�s going to fit I saw some miss alignment issues as seen here, no big deal though, as I didn�t even have my pedals out yet.
Once I had the column and instrument cluster out of the way, I could pull the speedo cable out from being threaded through the pedal assembly seen here by me pointing at it. Then undo the pedal assembly disconnect the two push-rods for clutch and brake and remove it. Remember to support your brake booster and clutch MC! As before this is in the TSB
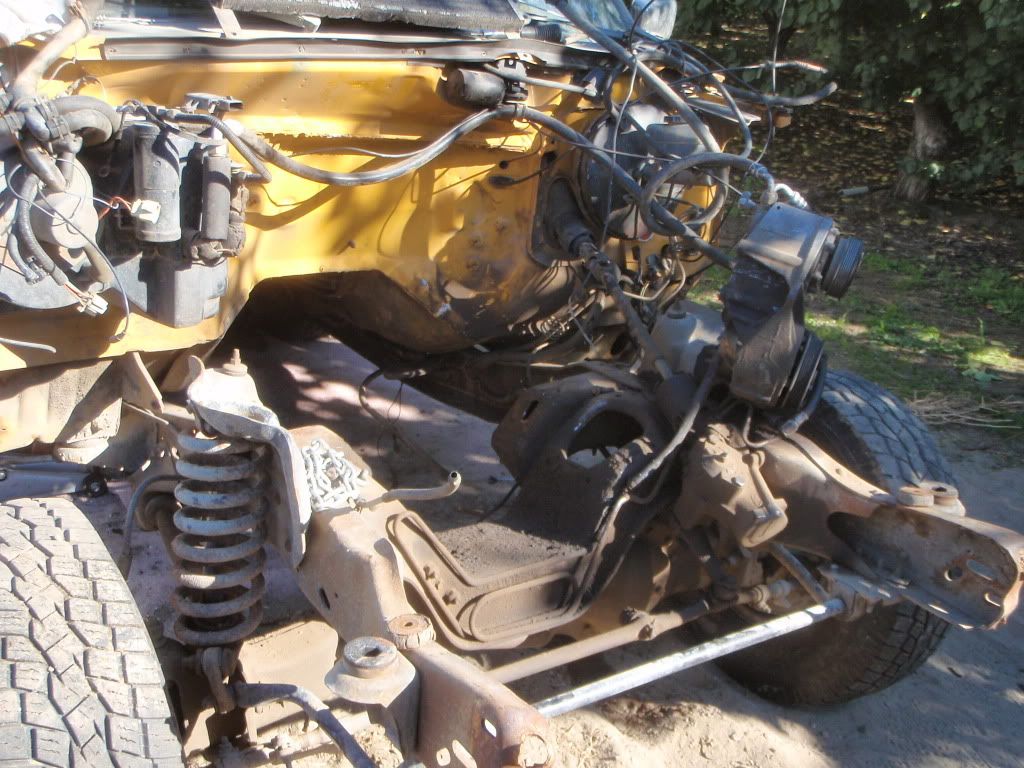
With everything out of the way (pedals and column)....and yes I did cut and remove some of the firewall insulation as opposed to just moving it out of the way. It as it was coming apart anyway which just makes it simpler for me. See, this is about what you should be looking at by now.
And this is the view outside the vehicle where the steering column, clutch MC and brake booster MC where.
With everything out of the way, it�s time for a �look see� once again. Take the plate and hold it in position to determine if the plate or firewall needs some minor adjustment. (read hammer the firewall and bending of the plate)
You will notice that the holes in the plate do not coincide with those in the firewall, not to worry, the TSB clearly states and I�ll repeat this here the TSB clearly states at; Instruction 11
NOTE: THE SHEET METAL VARIES FROM TRUCK TO TRUCK AND IT MAY BE NECESSARY TO BEND THE REINFORCEMENT PLATE TO GET A GOOD FIT.
Please, please, understand the above statement, as Jason has done his best to duplicate a product for us and I am here to tell you it only needed minor tweaking and so did the firewall but I do mean minor! Great product Jason.
As you can see here by the scuffing on the firewall/trans tunnel area, I did some minor massaging of the metal to let the plate sit correctly with a hammer.
Now I have made a few more minor tweaks, some more to the firewall and also subtle tweaks to the plate and now I have it right about where I want it.
Here you can see the clutch MC in place so I can begin to hold the plate for final drilling of the mounting holes.
I cleaned off some sealant above the MC and you can see the dimpling I did for the side on the trans tunnel area. Again not much, very subtle adjustment! No 12lb sledge used, a good ball pein was all it took.
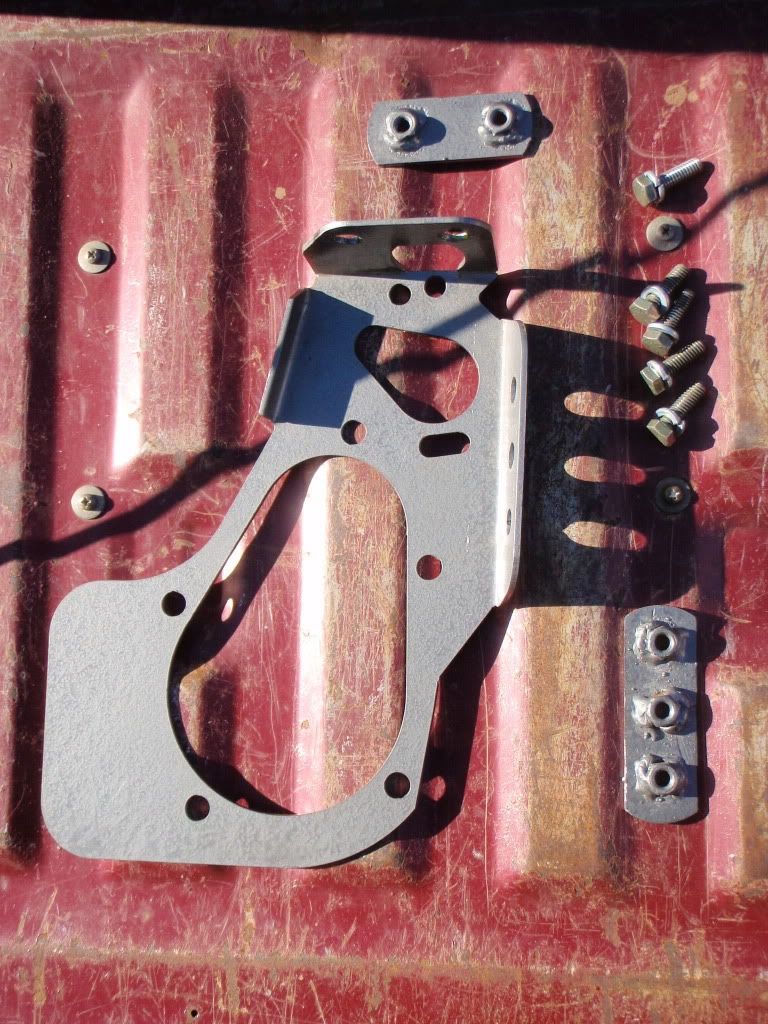
Here is the plate set just prior to drilling the 5 holes
You�ll notice the nice fit on the side and upper tabs, easy simple and very nice plate, took very little bending to get it to fit correctly. Kudos to Jason for fine craftsmanship!
Here we begin the drilling procedure, I would advise the use of a right angle drill if possible.

Getting the first 3 side bolts in here, along with what you�ll be seeing on the engine side of things. This took my wife Rose (thank you hon) helping me so you�ll likely need a helper too, to hold the plate or install the bolts.
Looking up towards the top tab you can see right through, and yes my cowl cover is still in place.
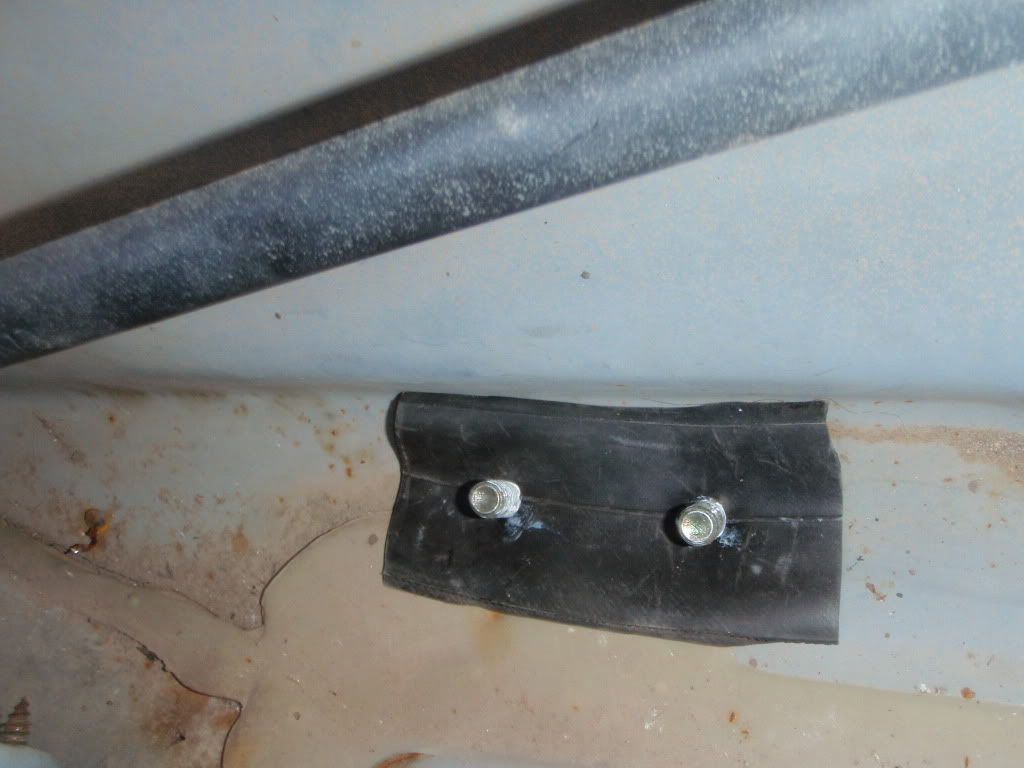
Now it�s time to install the upper bolts in the bracket and the external plate with nuts welded on. I made a gasket from an inner tube to sandwich between the wiper box cowl area and the plate with nuts.
I used some Permatex thread sealant on the bolts and the gasket and in the nuts too
Ok this is a two person affair here too. One holds the gasket while the person inside sticks the bolts through. Then the plate and thread the bolts in and tighten.
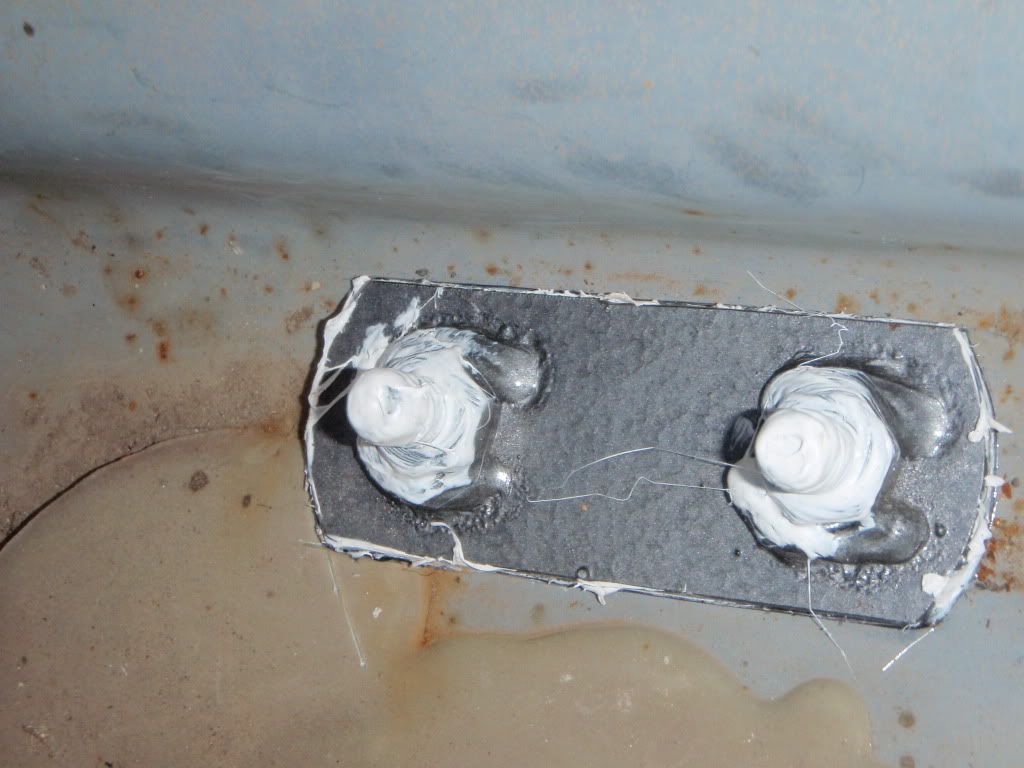
Here is a close up of the nutted plate installed, trimmed and more thread sealant swirled around the bolts down onto/into the nuts, I really hate leaks ;Sweet
At this point it's time to reinstall the cowl plate, and then back inside to begin the pedal install along with steering column and then clutch and brake MC and boosters also the re-assembly of all other parts removed to this point. Follow the TSB
This sums up and concludes my basic install of a major firewall reinforcement kit.
I would also suggest following the TSB�s suggestions about doing the final checking / measurements of pedal free play and making adjustments accordingly to get your clutch operating properly. Doing this prior to the installation of the instrument cluster and any of the finer items as they can be a pain to remove if you needed to a second time for some unforeseen reason.
Thanks for reading
Riotwarrior
Al
A little history here about what happens with some of the Ford trucks and the clutch actuation and the inherent problems that can occur.
There are a few reasons behind clutch problems with 87-91 and up Ford trucks and Broncos with hydraulic master and slave cylinders for the poor operation of the clutch and listed below are some that I have personally encountered.
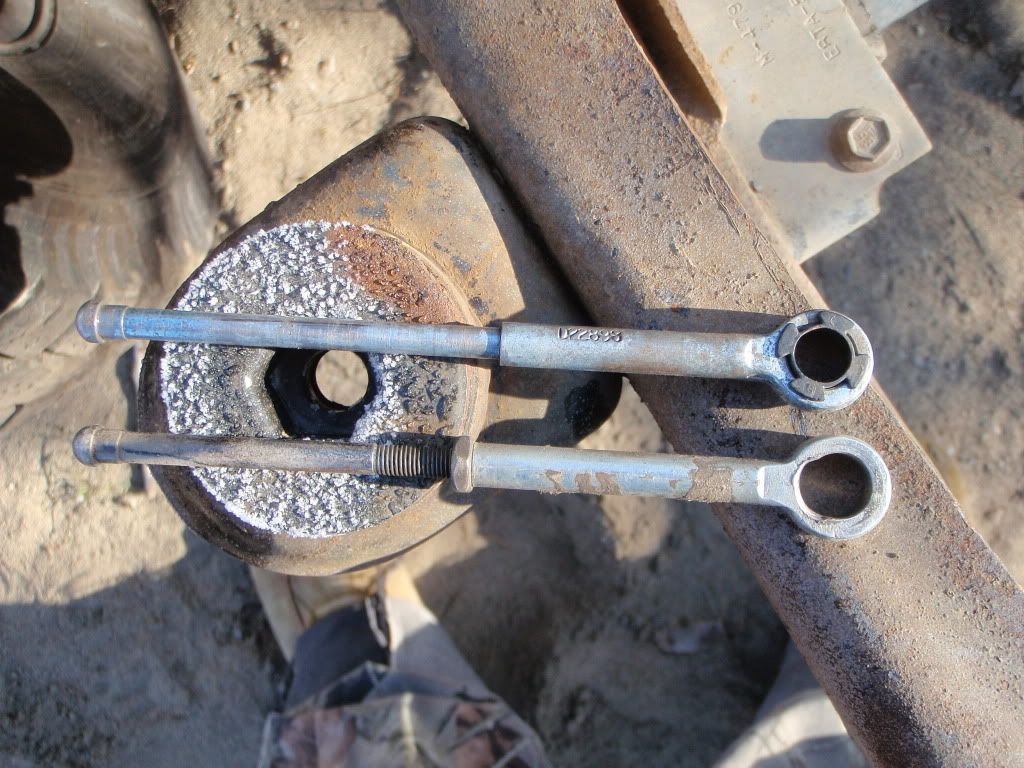
One of the primary concerns is the clutch actuating PIN on the cross shaft arm from the actual clutch pedal. Several different things at this point can go wrong.
- You have a worn bushing and the clutch actuating rod going into the MC falls off repeatedly. Buy a new bushing and install. 5 minute repair
- The worn bushing is missing from lots of neglect and now you have worn the clutch actuating rod eye into an oval and subsequently you have less and less ability to engage the clutch often thinking this is a worn clutch disc symptom.
- The clutch rod now very oval has now worn a massive amount from the pin and you have little to no clutch at this point and encounter grinding and poor shifts. My clutch pin was almost worn completely in half.
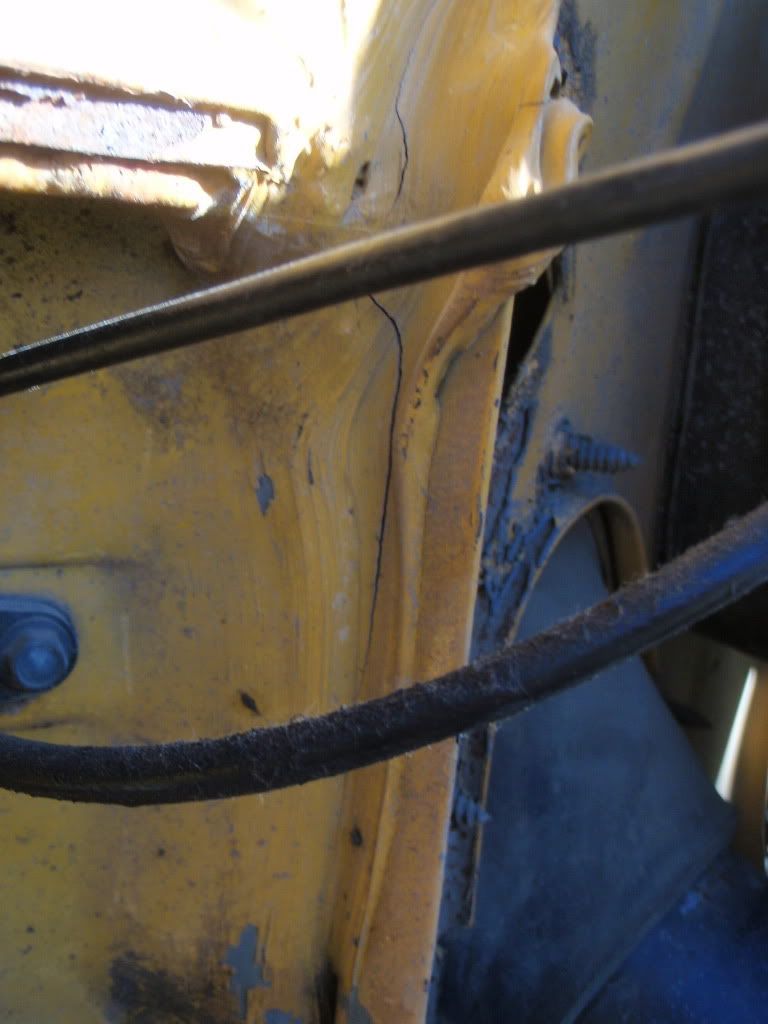
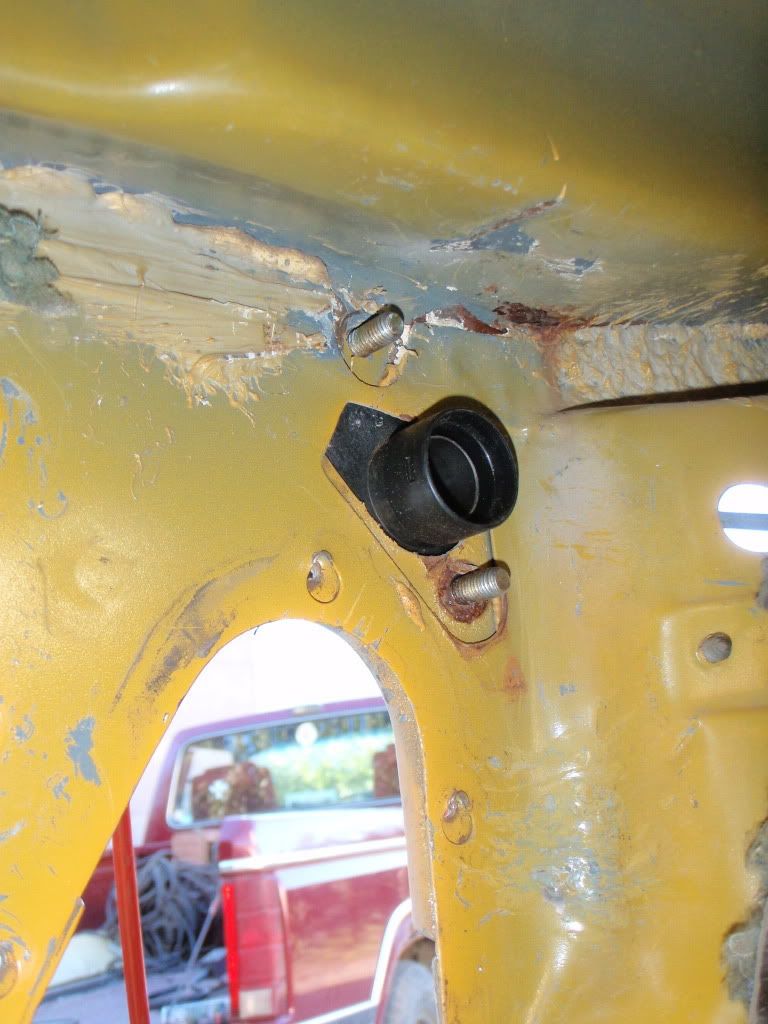
- The firewall has begun to crack around the Master Cylinder mounting holes, or the de-laminating of the outer piece of reinforcement plate in the engine compartment. Sometimes a combination of both or all of the described symptoms happen. These cracks and de-lamination are often caused by pressing hard on the clutch because of the aforementioned problems with pins and clutch rods. This �cracking� of the firewall is the reason for this particular tech article here today. You can see the seam sealant cracked and this is where my firewall flex was happening.
As seen by the above points and pictures, I had almost every symptom, just no cracks around the mounting holes for the MC
With that being said I wrote this article and documented it with pictures to be used along with the factory�s TSB Technical Service Bulletin.
Thanks to one of the members on www.oilburners.net freebird01 (Jason) we have the firewall reinforcement kits available to us, seeing as Ford no longer offers them. He has taken it upon himself to manufacture these reinforcement brackets and because of him; I was able to do this install and provide this information and pictures for everyone to view and use. Jason�s web site is located at Terrapin Manufacturing .
Thanks Jason for providing me one of your excellent major firewall re-enforcement kits.
The very first thing you will need to do is, to get a hold of the Ford TSB (Technical Service Bulletin) and read it thoroughly. Jason has it located at; http://www.terrapinmfg.com/TSB%2090167%20Clutch.pdf
I would suggest printing it off and for all intents and purposes, just follow it�s instructions for the �Large Reinforcement Installation Procedure� which is quite straight forward and has excellent point by point instructions along with some diagrams that may help along with these pictures here I have provided.
I removed the steering column and foot pedal assembly along with the instrument cluster and this is all covered in the TSB so I won�t get into the details on how to do this here. My concern is the actual plate and it�s installation.
Now for me, I had this way too easy because I had my whole front clip removed for an engine/trans swap and some other work I needed to get done. Most will not be so lucky and will have to work around a crowded engine compartment. Regardless of the situation, the work needed to be done needs to be done easy or not.
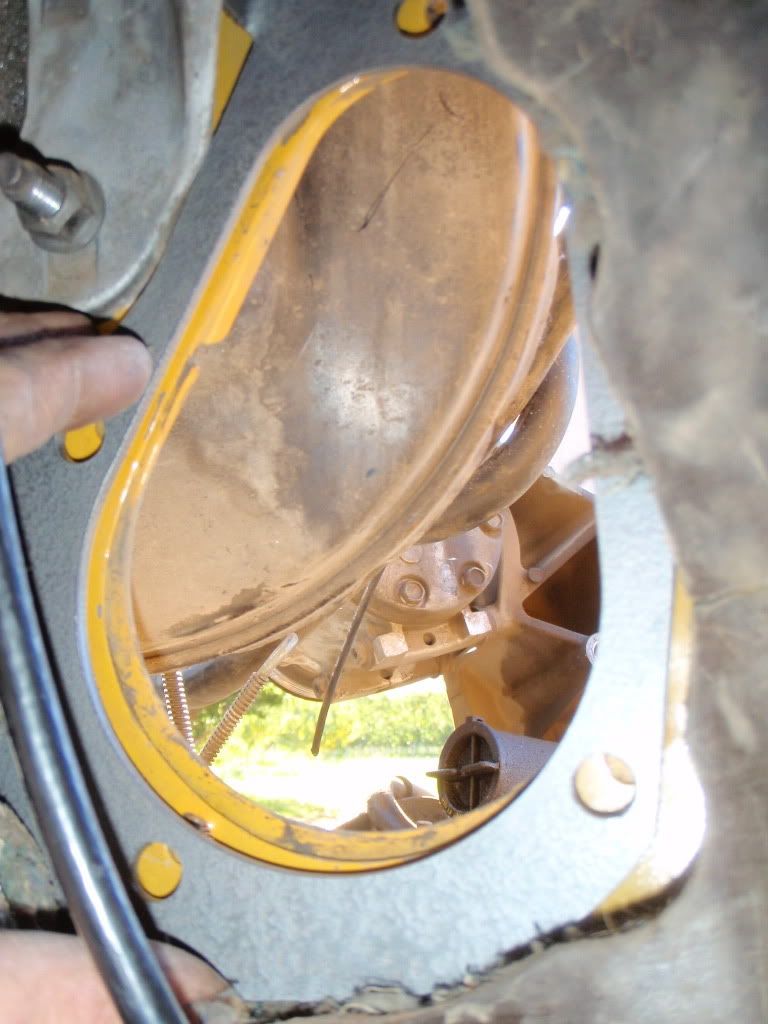
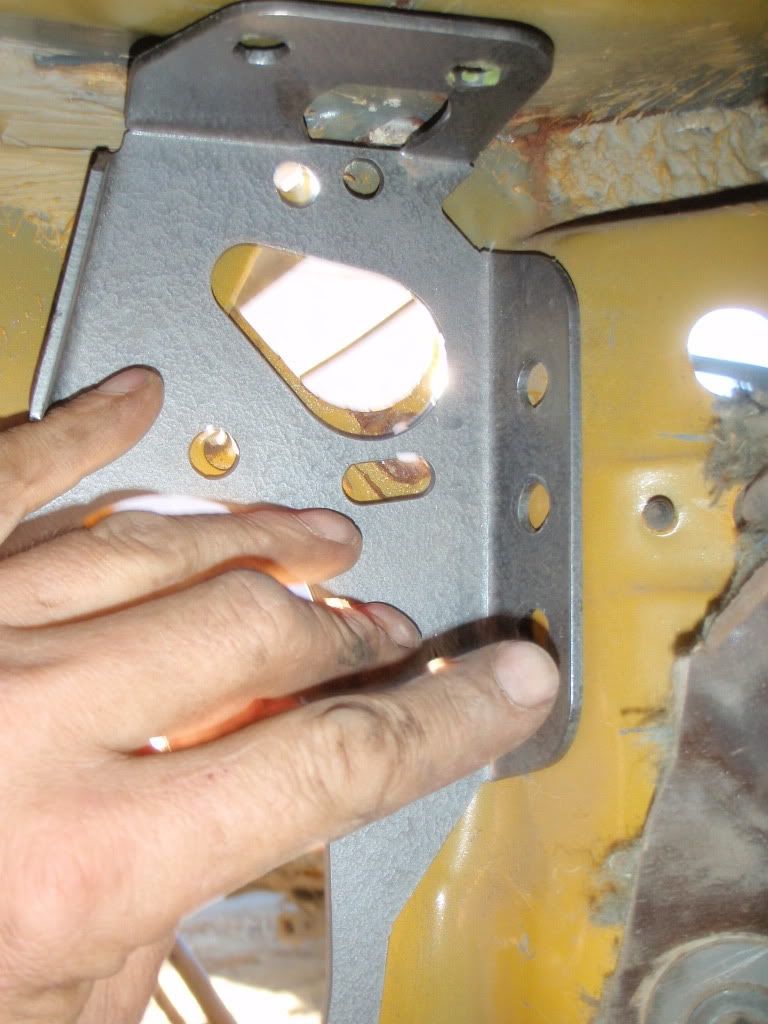
Upon the first �look see� to check how it�s going to fit I saw some miss alignment issues as seen here, no big deal though, as I didn�t even have my pedals out yet.
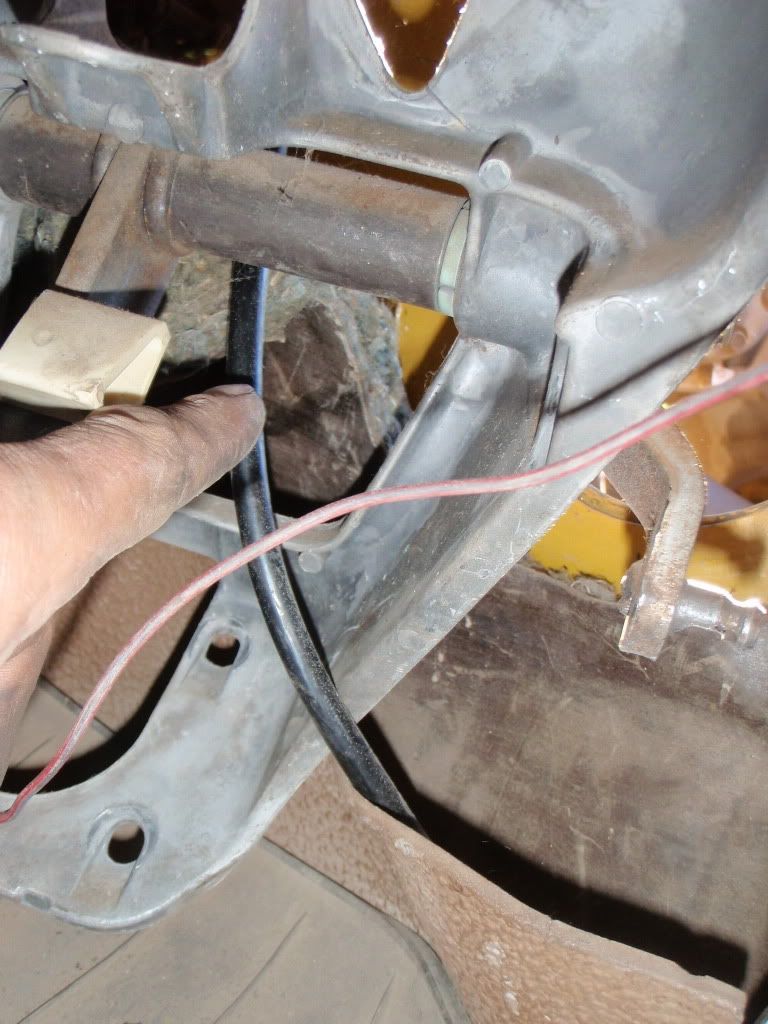
Once I had the column and instrument cluster out of the way, I could pull the speedo cable out from being threaded through the pedal assembly seen here by me pointing at it. Then undo the pedal assembly disconnect the two push-rods for clutch and brake and remove it. Remember to support your brake booster and clutch MC! As before this is in the TSB
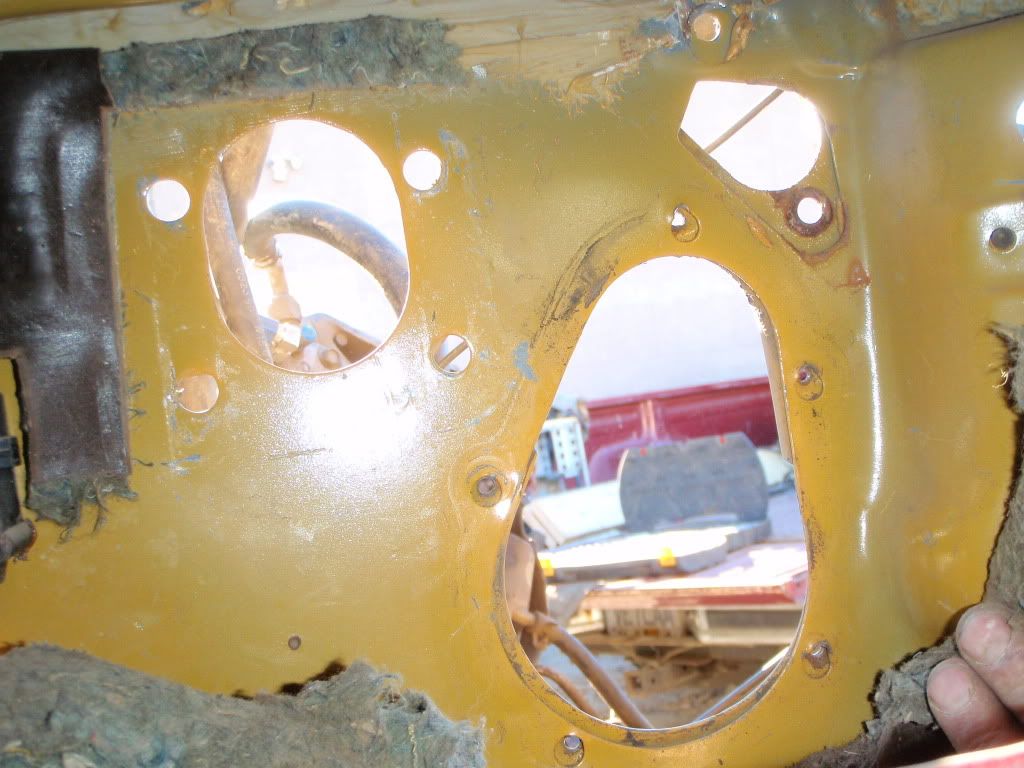
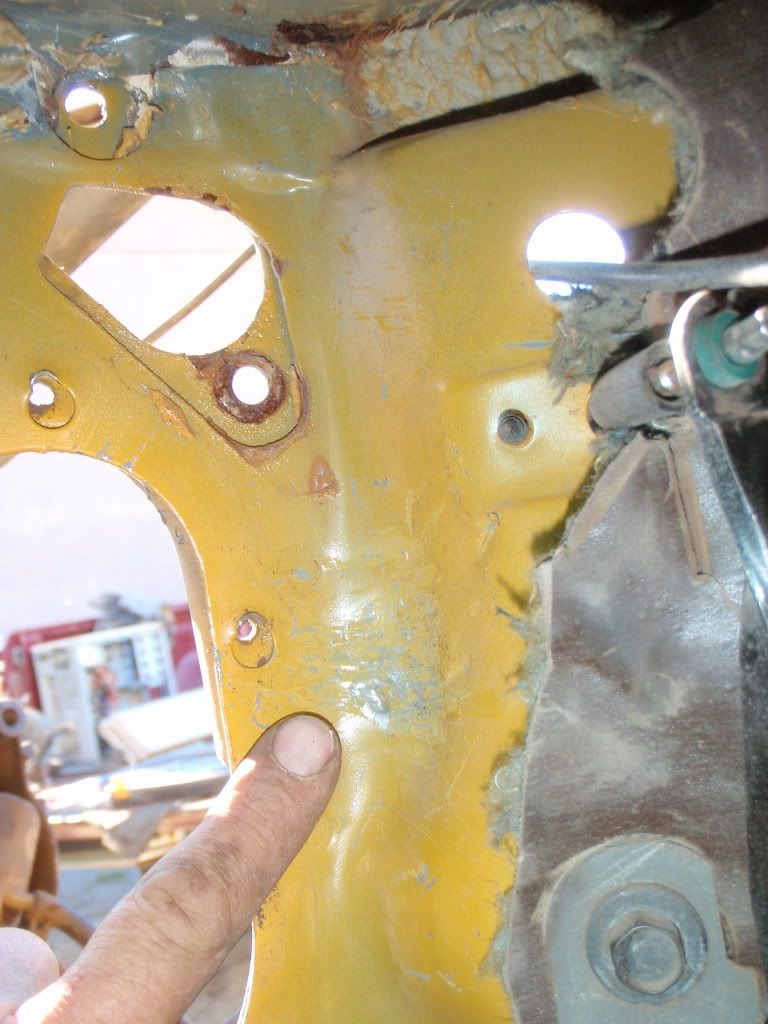
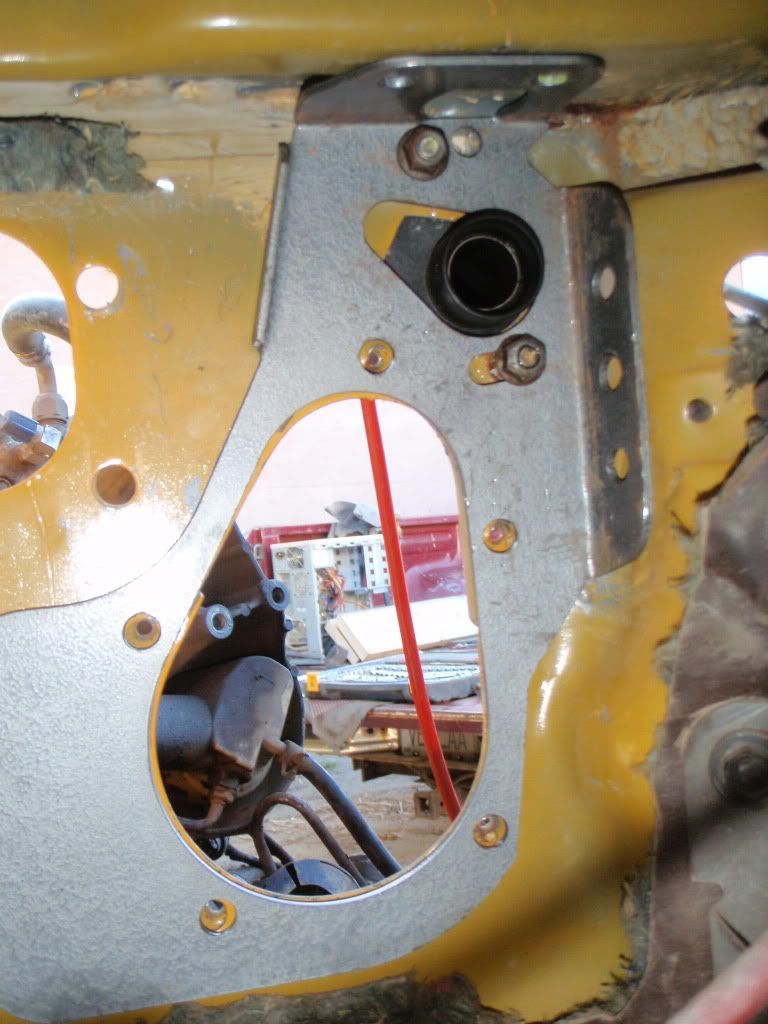
With everything out of the way (pedals and column)....and yes I did cut and remove some of the firewall insulation as opposed to just moving it out of the way. It as it was coming apart anyway which just makes it simpler for me. See, this is about what you should be looking at by now.
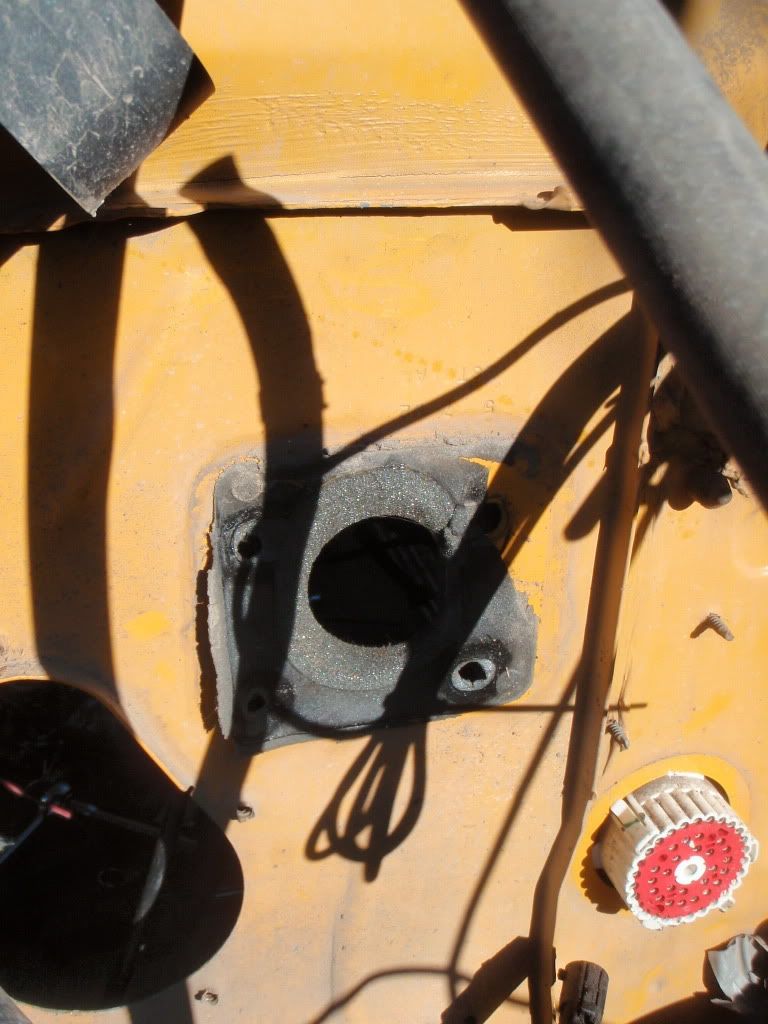
And this is the view outside the vehicle where the steering column, clutch MC and brake booster MC where.
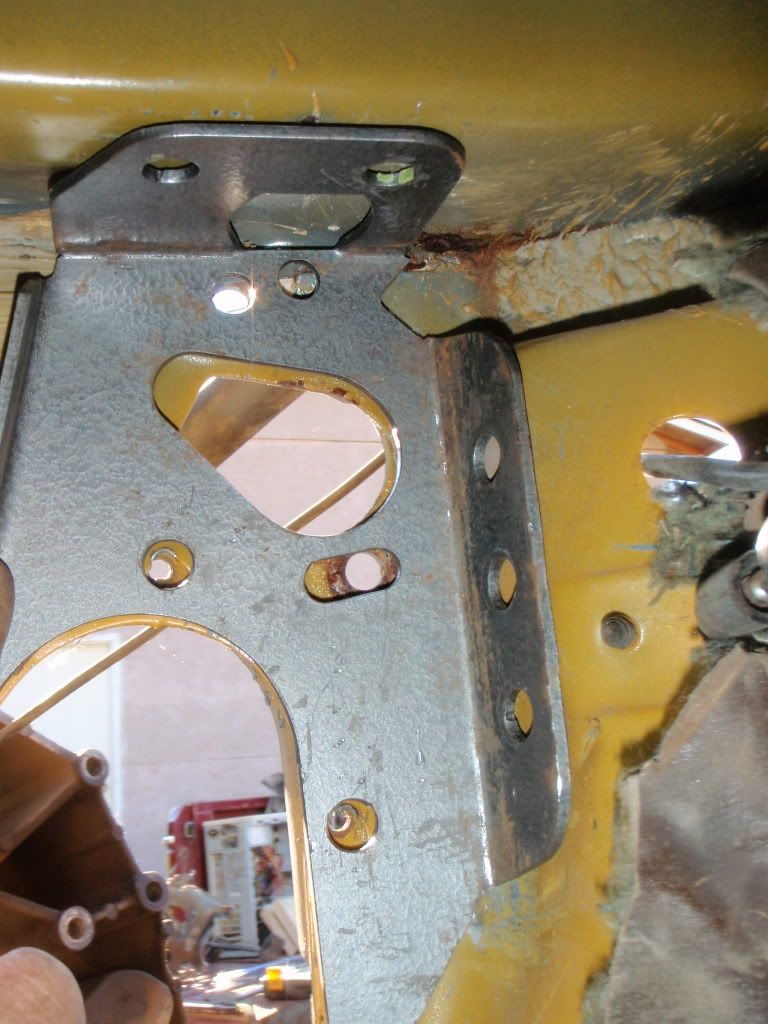
With everything out of the way, it�s time for a �look see� once again. Take the plate and hold it in position to determine if the plate or firewall needs some minor adjustment. (read hammer the firewall and bending of the plate)
You will notice that the holes in the plate do not coincide with those in the firewall, not to worry, the TSB clearly states and I�ll repeat this here the TSB clearly states at; Instruction 11
NOTE: THE SHEET METAL VARIES FROM TRUCK TO TRUCK AND IT MAY BE NECESSARY TO BEND THE REINFORCEMENT PLATE TO GET A GOOD FIT.
Please, please, understand the above statement, as Jason has done his best to duplicate a product for us and I am here to tell you it only needed minor tweaking and so did the firewall but I do mean minor! Great product Jason.
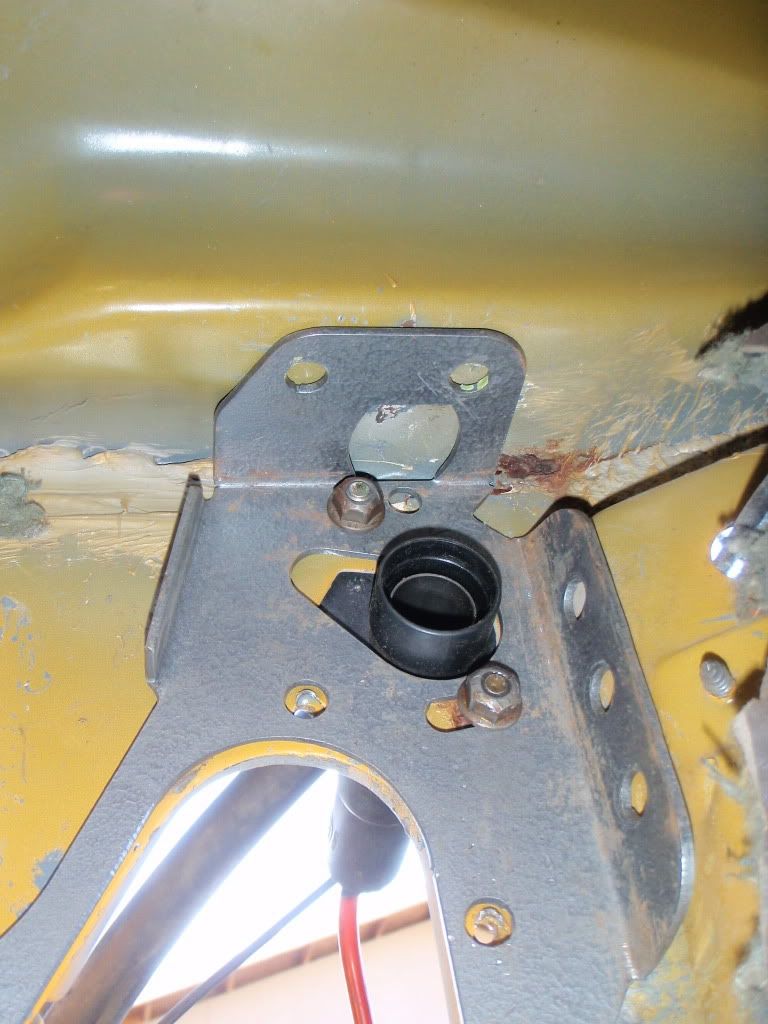
As you can see here by the scuffing on the firewall/trans tunnel area, I did some minor massaging of the metal to let the plate sit correctly with a hammer.
Now I have made a few more minor tweaks, some more to the firewall and also subtle tweaks to the plate and now I have it right about where I want it.
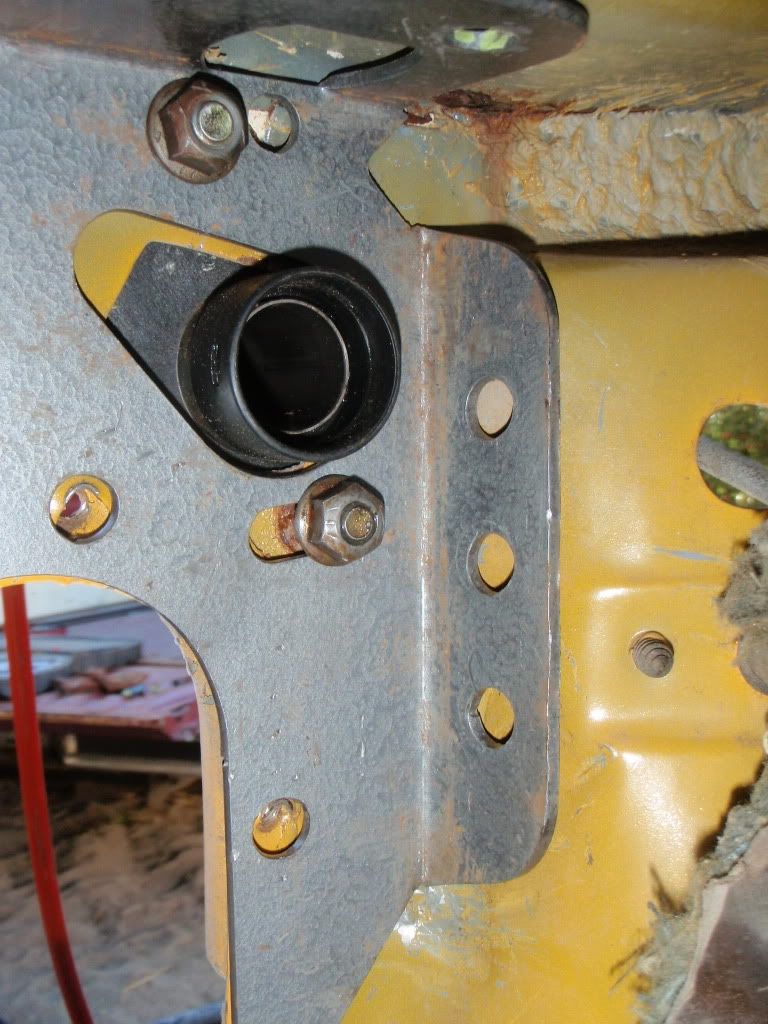
Here you can see the clutch MC in place so I can begin to hold the plate for final drilling of the mounting holes.
I cleaned off some sealant above the MC and you can see the dimpling I did for the side on the trans tunnel area. Again not much, very subtle adjustment! No 12lb sledge used, a good ball pein was all it took.
Here is the plate set just prior to drilling the 5 holes
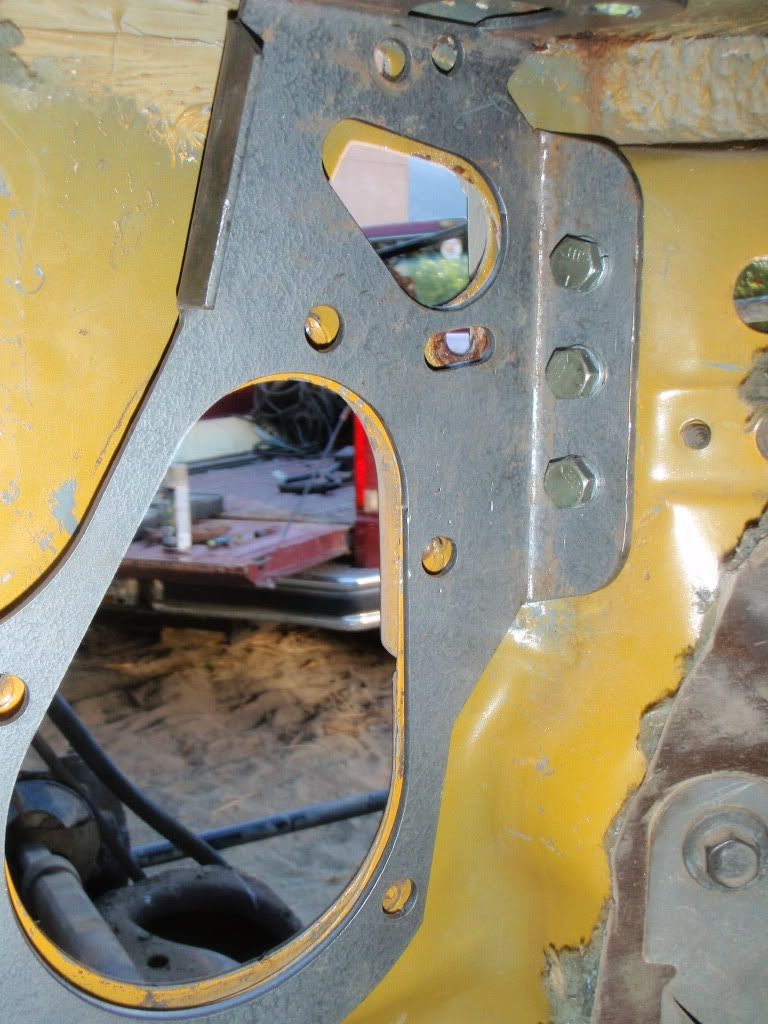
You�ll notice the nice fit on the side and upper tabs, easy simple and very nice plate, took very little bending to get it to fit correctly. Kudos to Jason for fine craftsmanship!
Here we begin the drilling procedure, I would advise the use of a right angle drill if possible.
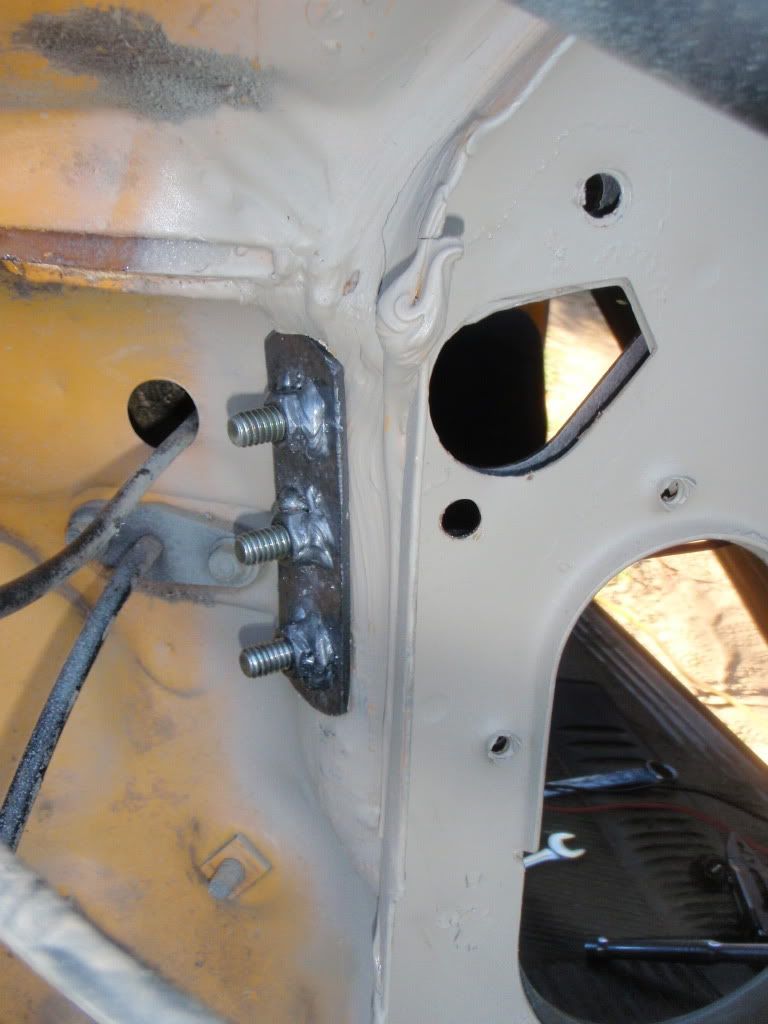
Getting the first 3 side bolts in here, along with what you�ll be seeing on the engine side of things. This took my wife Rose (thank you hon) helping me so you�ll likely need a helper too, to hold the plate or install the bolts.
Looking up towards the top tab you can see right through, and yes my cowl cover is still in place.
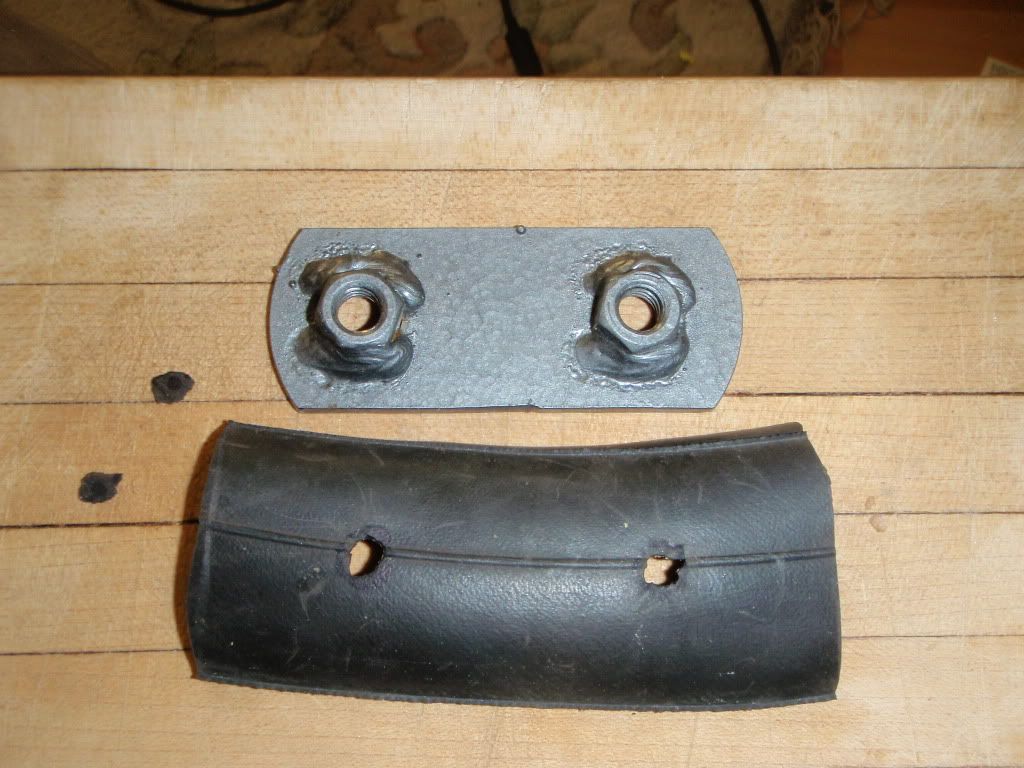
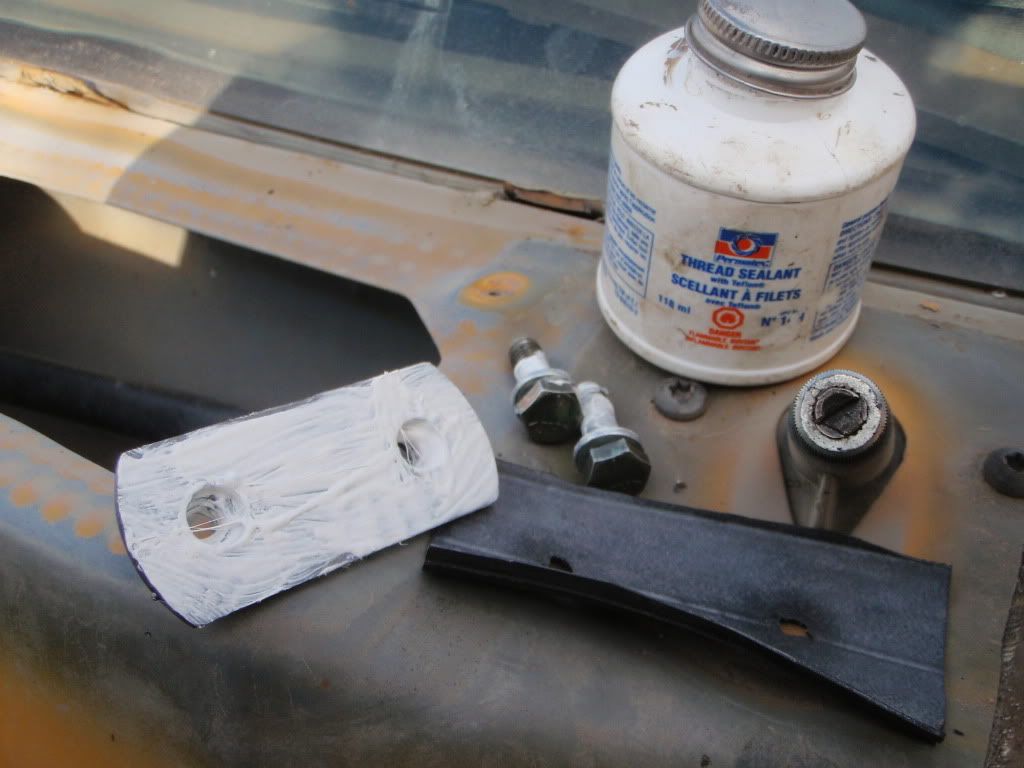
Now it�s time to install the upper bolts in the bracket and the external plate with nuts welded on. I made a gasket from an inner tube to sandwich between the wiper box cowl area and the plate with nuts.
I used some Permatex thread sealant on the bolts and the gasket and in the nuts too
Ok this is a two person affair here too. One holds the gasket while the person inside sticks the bolts through. Then the plate and thread the bolts in and tighten.
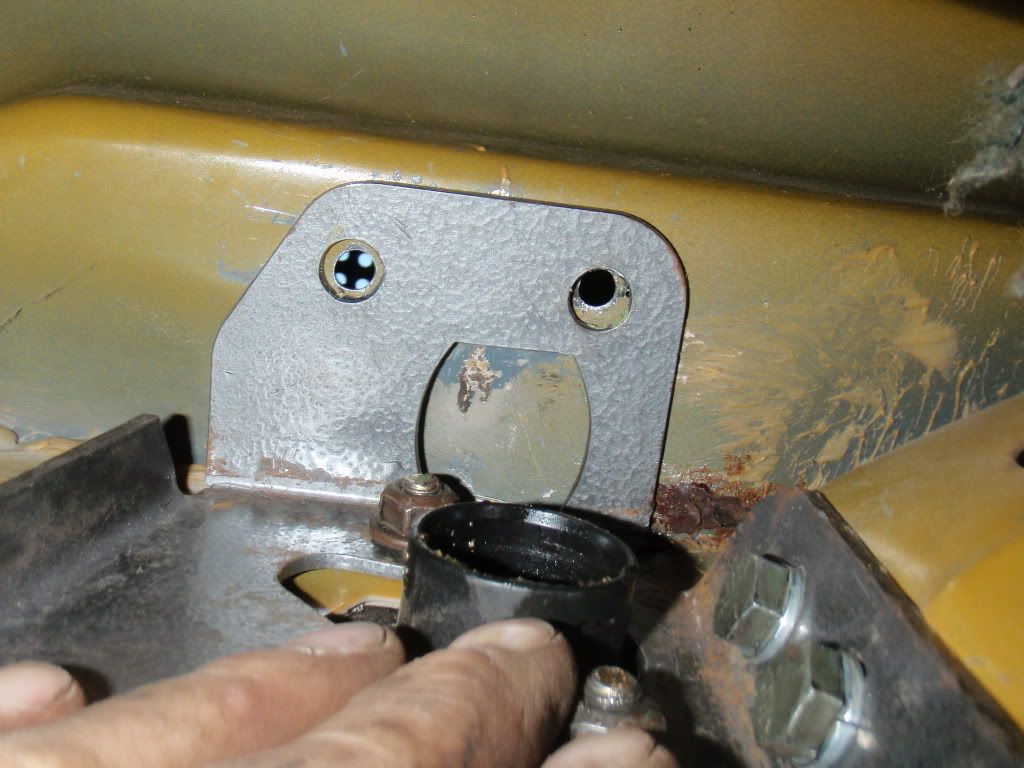
Here is a close up of the nutted plate installed, trimmed and more thread sealant swirled around the bolts down onto/into the nuts, I really hate leaks ;Sweet
At this point it's time to reinstall the cowl plate, and then back inside to begin the pedal install along with steering column and then clutch and brake MC and boosters also the re-assembly of all other parts removed to this point. Follow the TSB
This sums up and concludes my basic install of a major firewall reinforcement kit.
I would also suggest following the TSB�s suggestions about doing the final checking / measurements of pedal free play and making adjustments accordingly to get your clutch operating properly. Doing this prior to the installation of the instrument cluster and any of the finer items as they can be a pain to remove if you needed to a second time for some unforeseen reason.
Thanks for reading
Riotwarrior
Al

#3
12-08-2010, 01:39 PM
Nice write up, good job!! Gives me something else I will need to look at when I get back to working on my F350.
The pin that was worn in half, was that on the clutch pedal and how did you fix it? I'm guessing that the clutch rod and bushing can still be gotten from Ford, or did you get it somewhere else?
Again great write up!
The pin that was worn in half, was that on the clutch pedal and how did you fix it? I'm guessing that the clutch rod and bushing can still be gotten from Ford, or did you get it somewhere else?
Again great write up!
#4
12-08-2010, 04:18 PM
Join Date: Mar 2008
Posts: 49
Likes: 0
Received 0 Likes
on
0 Posts
Nice write up, good job!! Gives me something else I will need to look at when I get back to working on my F350.
The pin that was worn in half, was that on the clutch pedal and how did you fix it? I'm guessing that the clutch rod and bushing can still be gotten from Ford, or did you get it somewhere else?
Again great write up!
The pin that was worn in half, was that on the clutch pedal and how did you fix it? I'm guessing that the clutch rod and bushing can still be gotten from Ford, or did you get it somewhere else?
Again great write up!
Well I happened to have a complete second pedal assembly that has a good pin on it, as for the rod maybe but the bushing for sure can be had from Ford.
In Canada the fn bushing is about 16 dollars now that's a ****e load for a 3 cent piece of plastic eh?
#5
12-11-2010, 01:02 PM
Elder User


#7
12-11-2010, 07:54 PM
Join Date: Mar 2008
Posts: 49
Likes: 0
Received 0 Likes
on
0 Posts
Had you read the install thoroughly it would be clear.


Trending Topics
#8
12-01-2012, 02:30 AM
New User
Join Date: Nov 2012
Location: S.E. Alaska
Posts: 16
Likes: 0
Received 0 Likes
on
0 Posts
www.terrapinmfg.com
I realize this is an old thread, but is this guy still around? Does "Spring" mean this coming spring? 2013?
Dave
TMC has shut down temporarily due to moving to a new location.
I will re-open some time in spring. I apologize for the inconvenience.
I will re-open some time in spring. I apologize for the inconvenience.
Dave
#9
12-01-2012, 02:43 AM
#10
12-01-2012, 04:55 AM
New User
Join Date: Nov 2012
Location: S.E. Alaska
Posts: 16
Likes: 0
Received 0 Likes
on
0 Posts
Thanks, Grey! Yeh, I realize the thread is a couple years old.
The referred site www.terrapinmfg.com is not taking orders, is the clutch replacement plate available anywhere else? What are others doing, making their own plate?
Dave
The referred site www.terrapinmfg.com is not taking orders, is the clutch replacement plate available anywhere else? What are others doing, making their own plate?
Dave
#11
12-01-2012, 09:46 AM
Join Date: Mar 2008
Posts: 49
Likes: 0
Received 0 Likes
on
0 Posts
#12
12-01-2012, 12:36 PM
#13
12-02-2012, 03:02 AM
New User
Join Date: Nov 2012
Location: S.E. Alaska
Posts: 16
Likes: 0
Received 0 Likes
on
0 Posts
Well, I just got this '87 Bko and haven't really nailed the "clutch to the floor" problem down yet. I'm searching for answers and this seems to fit. At the moment it's a bit wicked outside and I don't have a heated garage to work in, but might find something. I am interested in the pricing of Jason's kit and also see if it's available.
Thanks,
Dave
BTW, what others said, great thread and information Al, good work and pic's!
Thanks,
Dave
BTW, what others said, great thread and information Al, good work and pic's!
#14
12-04-2012, 08:01 PM
Post Fiend
I've installed one my self a year ago in my restoration cab.
https://www.ford-trucks.com/forums/1...l#post11358654
I bought it from Jason in person at a IDI Diesel rally last year. Good man, he also makes some other hard to find stuff.
If any of you have trouble contacting him, hes still really busy right now. He hasn't been on much in the forum.
https://www.ford-trucks.com/forums/1...l#post11358654
I bought it from Jason in person at a IDI Diesel rally last year. Good man, he also makes some other hard to find stuff.
If any of you have trouble contacting him, hes still really busy right now. He hasn't been on much in the forum.

