
94 F350 semi-extreme Build with pics. *update 10-15-11* New Pro Comp Xtreme A/T Tires
#151
 07-01-2011, 11:49 PM

If you have followed along, you know that on the original F250 build, and this current one, I am running a carb conversion on the big-block. The original reasons were cost factors, combined with the parts I was/am using. Specifically, the 460 EFI system won't match up with the Trick Flow heads, and the cost to do an aftermarket EFI was more than I wanted to spend at the time. In this case here, it's still more than I want to spend, altho I do eventually want to convert back to an EFI setup. While a carb conversion is not that uncommon, there are some factors that had to be planned out for both now and in the future. Since I do want to go back to EFI, I did not want to remove the factory hi-pressure fuel pumps. I also did not want to mod the checkball inside the pumps as that helps with the pressure for the hi-pressure system. On the F250, we cut the factory fuel lines and then used a Dorman repair kit to hook steel lines up and run them to the bypass regulator. While it worked it was also not the best looking set up. On this one, I wanted to find a better way to do it, so into the land of Google I went. The end result was a fitting for the large male quick connect from Fragola, a fitting from Aeromotive for the small male quick connect, and a handfull of AN fittings from Summit racing to put it all together between the factory quick connects and the Aeromotive bypass regulator under the drivers side battery box. The stainless braid AN-6 hose is more than enough to feed the carb, and looks alot better than the bent steel lines This post goes thru the assembly of the hoses with the AN fittings in a step by step manner.
After following the old adage of measuring twice, wrap the line where it needs cut with electrical tape and place in a vise "snug" but not crushing the hose.
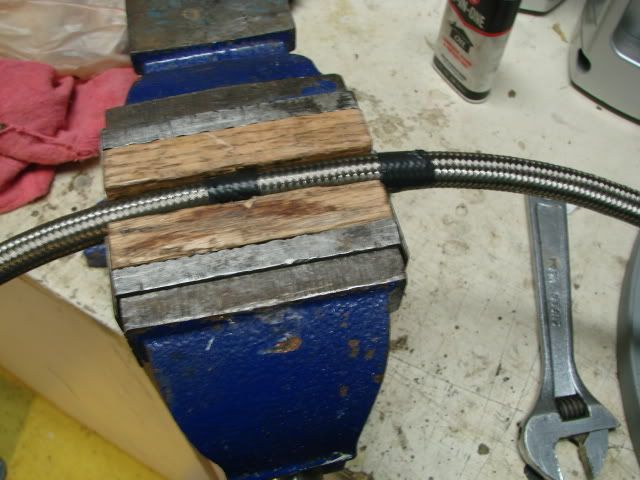
Using a sharp hacksaw or cut off tool (I used a hacksaw for these) carefully cut through the hose in the center of the tape.
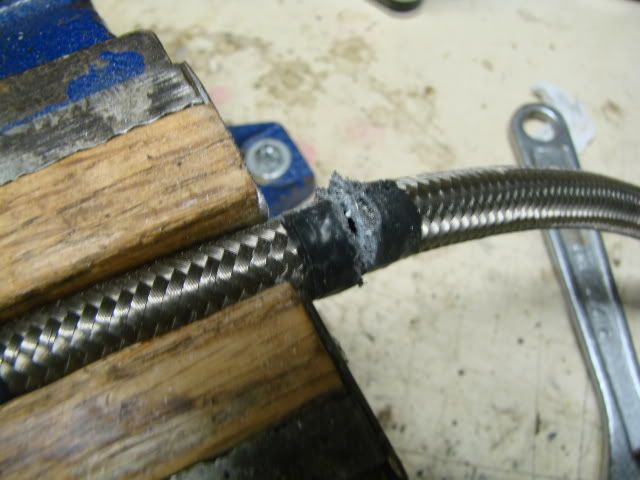
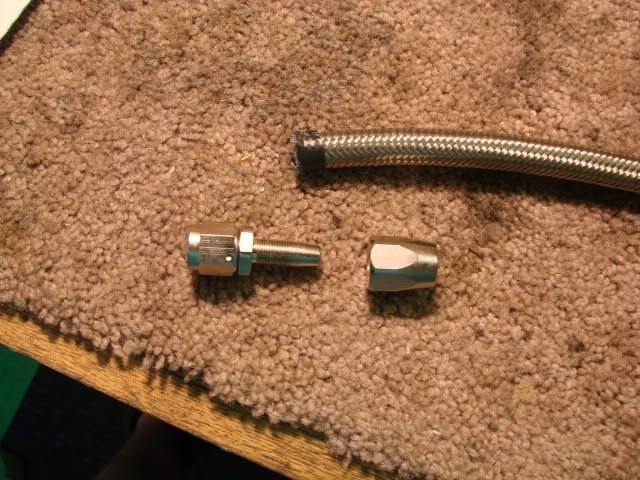
Once that is done, clean the end of the hose with compressed air to remove and loose particles and get the AN fitting ready for the end of the hose
Start by working the edge of the hose in by hand at roughly a 45d angle.
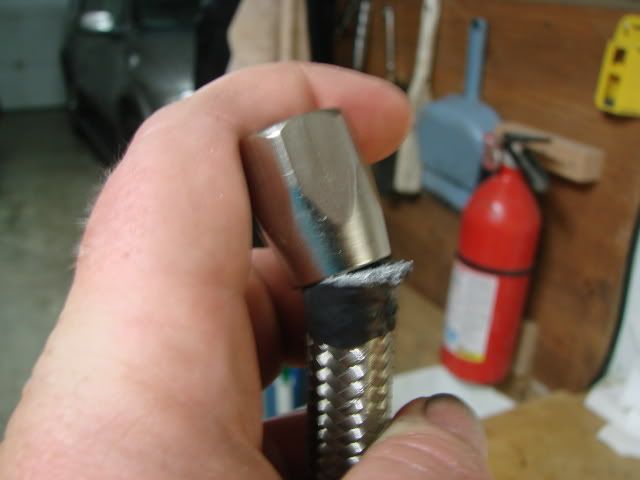
Once you have done that, CAREFULLY take the collar and place it in the vise, and feed the hose into it. While they make a special tool for this, it is NOT required. Patience will be a virtue though. It helps to pinch it while slowly pushing it in.
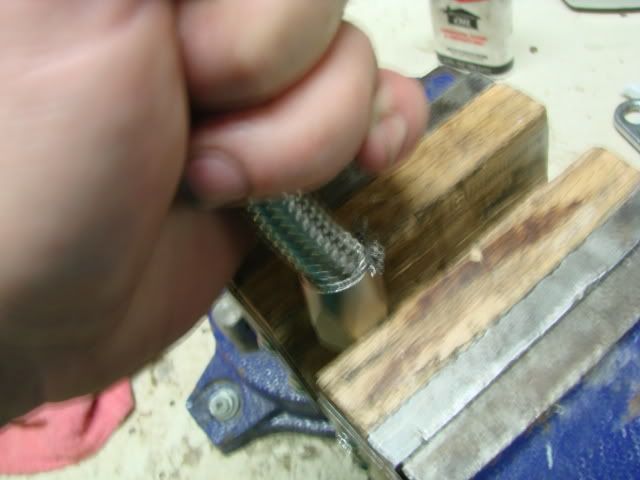
Once it is almost all the way in, you can then take a small screwdriver and feed the last part of the braid in. Once it is in, then twist/push on the hose to feed it all the way in.
Once it is in, check the hose to make sure it is in correctly. It should be just a hair off being bottomed out, with NO braid that can get into the hose when you insert the nipple. Also make sure the hose opening is in good shape for the nipple to get started. If you have braid in the way of the hose opening, you may be able to roll it out of the way with a small hook. If not, remove it and start over!
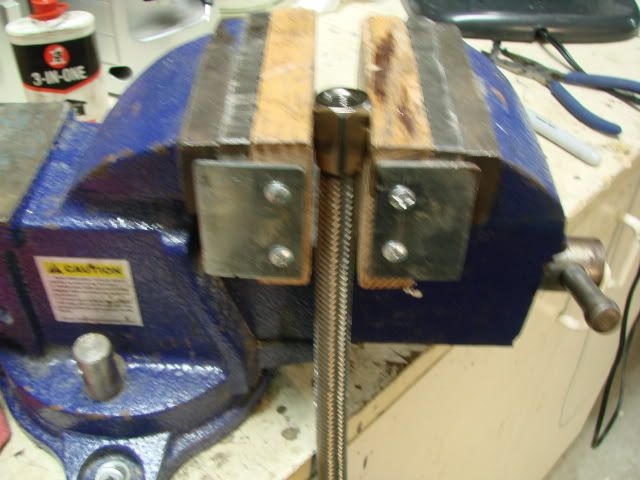
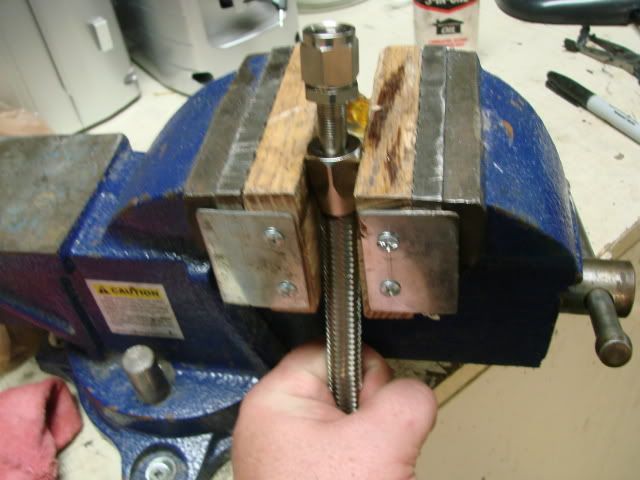
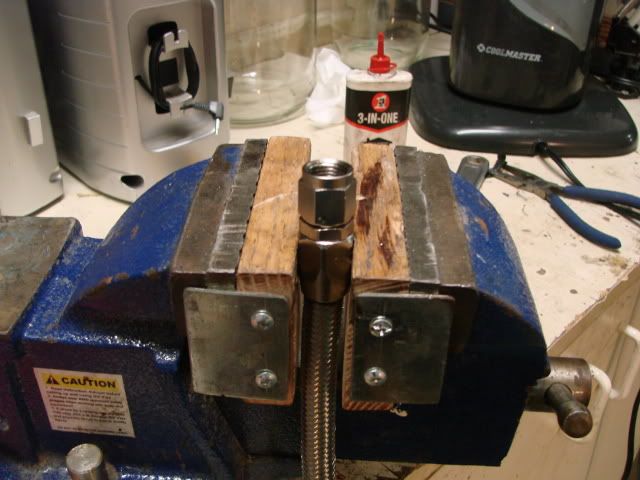
Once it is ready for the nipple, place it in the vise facing UP, now, using a magic marker, make a mark on the hose next to the collar. This will let you know if the hose has pushed out when you install the nipple.
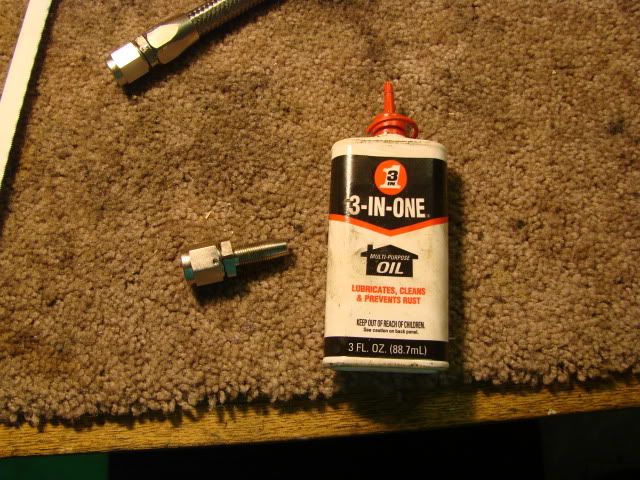
Now prep the nipple for installing. Apply some 3-1 oil, or 30w, or assembly lube to the nipple, and a couple drops inside the hose
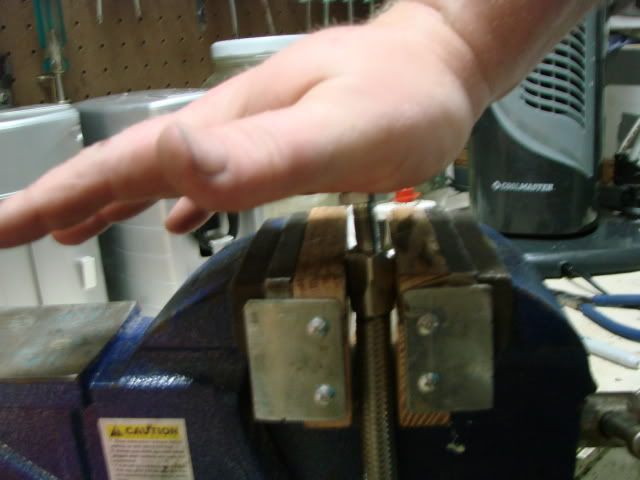
The next step is where a extra pair of hands will come in handy... Have your helper (if you have one, if not do it yourself) grab the hose and apply a SOLID UP pressure to it into the collar.
Now start the nipple in by pushing down to feed it into the hose. MAKE SURE IT IS NOT CROSS THREADING.
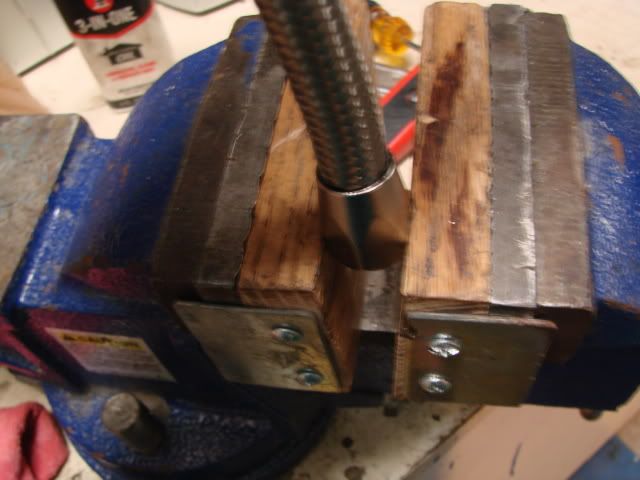
Once the nipple is started, keeping a pushing down pressure, start screwing the nipple into the collar. DO NOT LET THE HOSE PUSH BACK OUT THE COLLAR!!
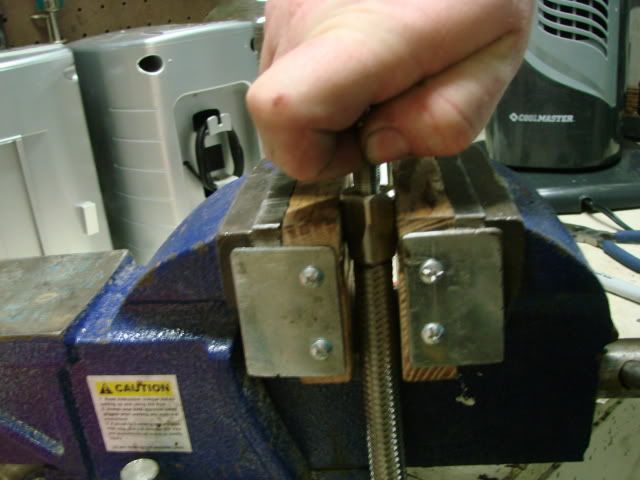
When it starts drawing in, switch over to a wrench to finish tightening it down until flush, and verify with the mark from earlier that it has not pushed the hose out.
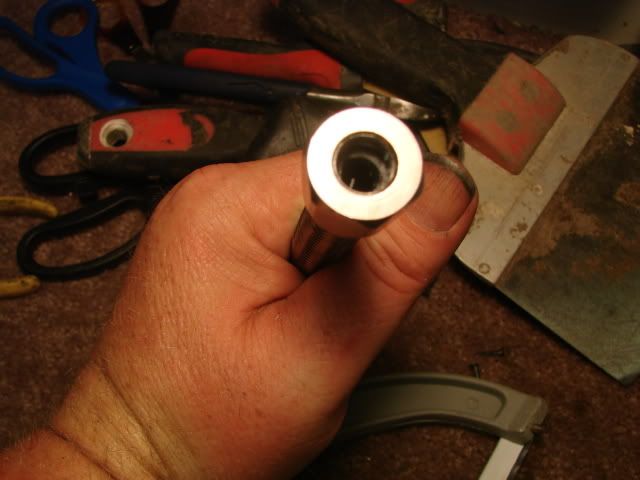
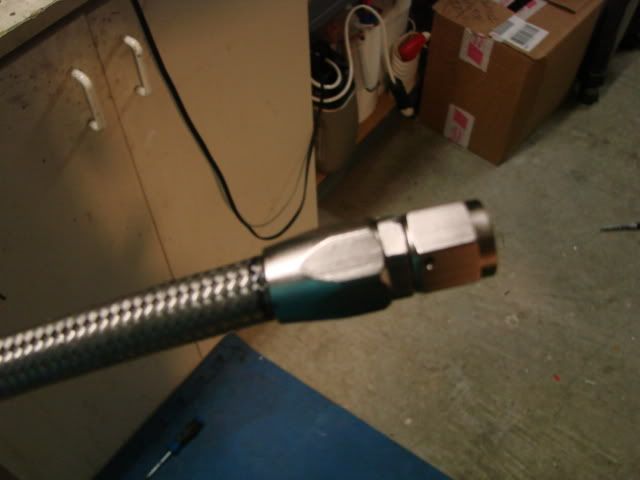
The finished product should look like this
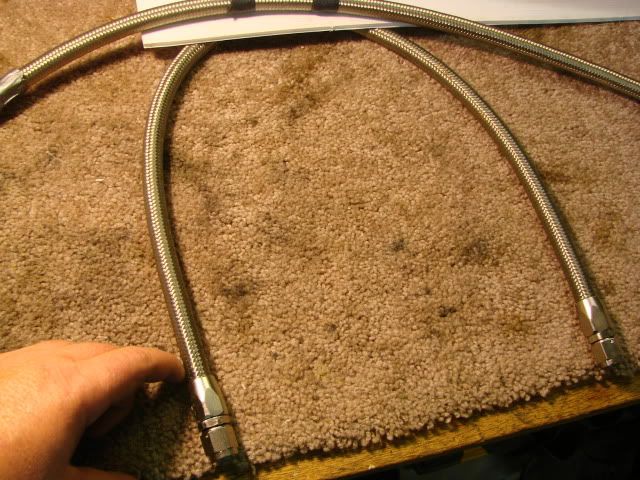
With both ends done, I now have this to run between the quick connect and bypass regulator
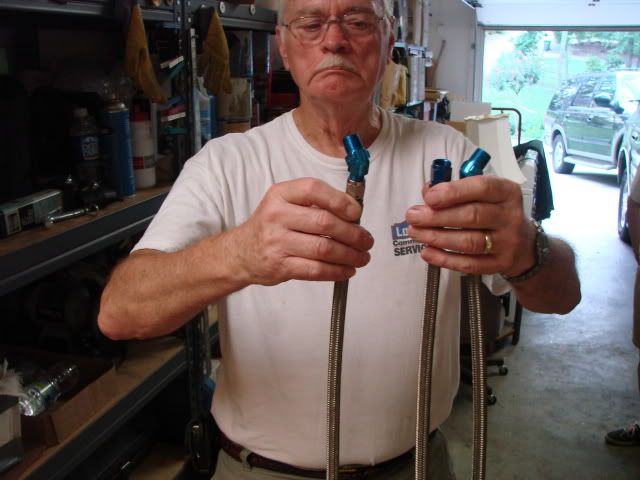
Total time was about 5 min per end. A 25' roll gave me enough for 2 fuel lines, plus the pressure line for the power steering. Including a smoke break, and BS'ing, it took me and Dad approx 45-50 min to make 3 lines (6 fittings) which not only look a heckuva lot better, but will make maintenance easier if I need to remove them.
Tomorrow, I will get these mounted and routed in place with adel clamps.
After following the old adage of measuring twice, wrap the line where it needs cut with electrical tape and place in a vise "snug" but not crushing the hose.
Using a sharp hacksaw or cut off tool (I used a hacksaw for these) carefully cut through the hose in the center of the tape.
Once that is done, clean the end of the hose with compressed air to remove and loose particles and get the AN fitting ready for the end of the hose
Start by working the edge of the hose in by hand at roughly a 45d angle.
Once you have done that, CAREFULLY take the collar and place it in the vise, and feed the hose into it. While they make a special tool for this, it is NOT required. Patience will be a virtue though. It helps to pinch it while slowly pushing it in.
Once it is almost all the way in, you can then take a small screwdriver and feed the last part of the braid in. Once it is in, then twist/push on the hose to feed it all the way in.
Once it is in, check the hose to make sure it is in correctly. It should be just a hair off being bottomed out, with NO braid that can get into the hose when you insert the nipple. Also make sure the hose opening is in good shape for the nipple to get started. If you have braid in the way of the hose opening, you may be able to roll it out of the way with a small hook. If not, remove it and start over!
Once it is ready for the nipple, place it in the vise facing UP, now, using a magic marker, make a mark on the hose next to the collar. This will let you know if the hose has pushed out when you install the nipple.
Now prep the nipple for installing. Apply some 3-1 oil, or 30w, or assembly lube to the nipple, and a couple drops inside the hose
The next step is where a extra pair of hands will come in handy... Have your helper (if you have one, if not do it yourself) grab the hose and apply a SOLID UP pressure to it into the collar.
Now start the nipple in by pushing down to feed it into the hose. MAKE SURE IT IS NOT CROSS THREADING.
Once the nipple is started, keeping a pushing down pressure, start screwing the nipple into the collar. DO NOT LET THE HOSE PUSH BACK OUT THE COLLAR!!
When it starts drawing in, switch over to a wrench to finish tightening it down until flush, and verify with the mark from earlier that it has not pushed the hose out.
The finished product should look like this
With both ends done, I now have this to run between the quick connect and bypass regulator
Total time was about 5 min per end. A 25' roll gave me enough for 2 fuel lines, plus the pressure line for the power steering. Including a smoke break, and BS'ing, it took me and Dad approx 45-50 min to make 3 lines (6 fittings) which not only look a heckuva lot better, but will make maintenance easier if I need to remove them.
Tomorrow, I will get these mounted and routed in place with adel clamps.
#152
07-02-2011, 10:38 AM
#153
07-02-2011, 03:32 PM
I use a Aeromotive bypass pressure regulator. Today ended up getting busy this afternoon on me, so all I got done today was mowing the lawn. Tonite I am going out on one of the engines to sit at a fireworks display, so it will be tomorrow evening before I get the lines installed. I will take pics when I do though and show the routing and regulator.
#154
07-02-2011, 08:17 PM

Elder User
I use a Aeromotive bypass pressure regulator. Today ended up getting busy this afternoon on me, so all I got done today was mowing the lawn. Tonite I am going out on one of the engines to sit at a fireworks display, so it will be tomorrow evening before I get the lines installed. I will take pics when I do though and show the routing and regulator.
 LOL Jk Do you have a family outside of the fire house? I have a few lil ones in the world and with the job and them not much time is left...
#155
07-02-2011, 09:23 PM
#156
07-03-2011, 01:23 PM
Elder User
Hows the price per line work out in this ? Hope your doing them as we speak. Other threads have been photo lacking as of late.... I need motivation. Pics seam to get me out of this chair and into the garage more.
#157
07-04-2011, 12:25 PM
The price per line works out to roughly $20 per line. This does not include the cost of the adapters, add those in and its closer to $30 per line.
And now for a mid-day update since its too freakin hot outside right now!!
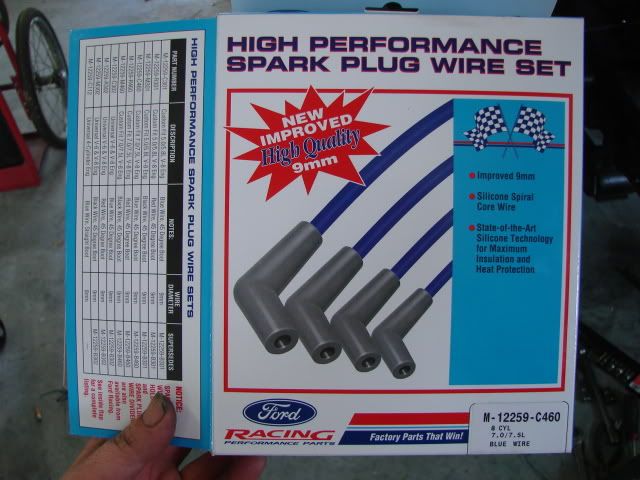
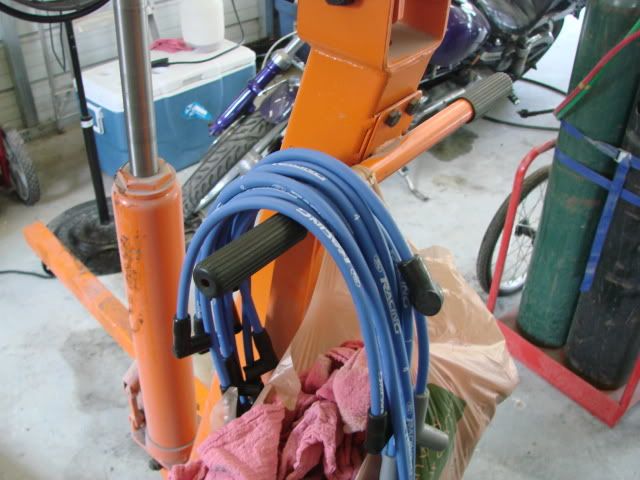
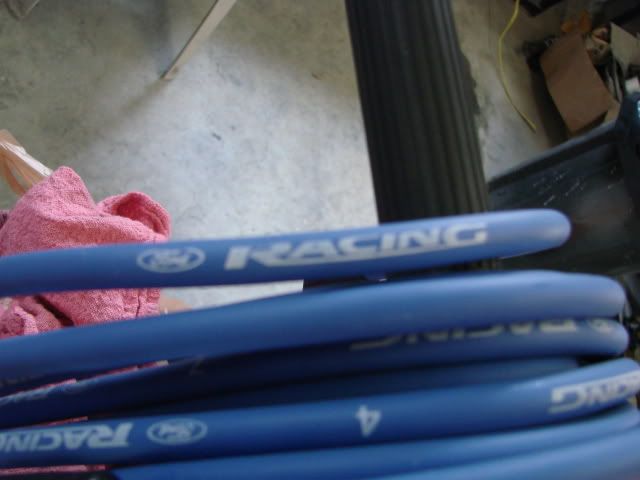
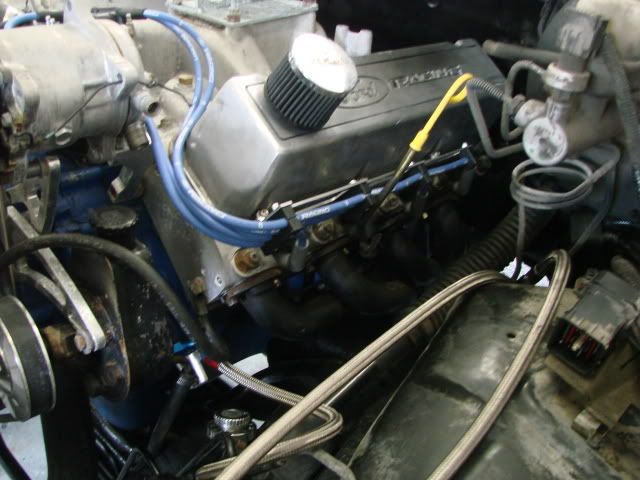
The lines in the earlier post are for the fuel supply and return to the bypass regulator for the carb conversion. I use a Aeromotive 13301 Bypass Regulator to cut the pressure down for the carb. The regulator is mounted under the drivers side battery box (I am using a diesel core support and radiator with dual batteries). To hook up to the factory quick connects, I am using a larger adapter from Fragola, and a small adapter from Aeromotive (Aeromotive also makes a large adapter, but its more $$ and has a hookup for a pressure gauge, which I don't need for what I am doing). The Fragola adapter (supply) is a -8 AN fitting, which I am stepping down to an -6 AN fitting (-6 AN = 3/8 hose) which is plenty enough to supply a carb. The bypass regulator is set to 6psi, and then I have a deadhead regulator on the carb supply line which is set at 4.5psi. With this setup, I did not have to change to a larger return line, and the pressure at the carb is rock steady at 4.5 all day long. The GPH rating of the hi-pressure pumps is enough that I have never run into an issue of running out of fuel for the carb. I also ran new plug wires (Ford Racing 9mm) mounted in R&M Horizontal brackets. Much cleaner and better looking than before. Anyways, on to the pics....
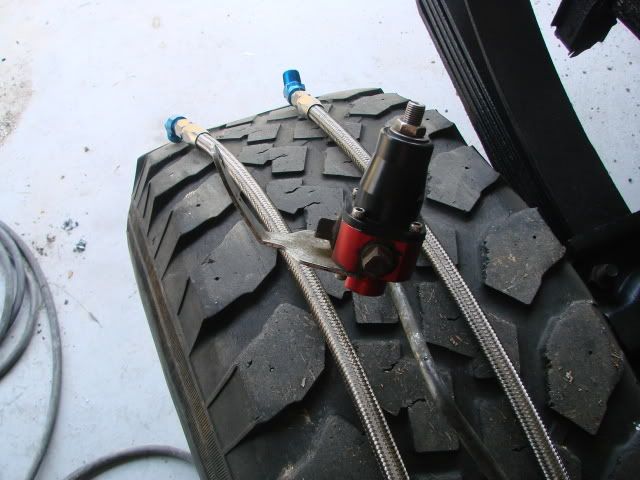
Aeromotive 13301 Regulator and stainless hoses
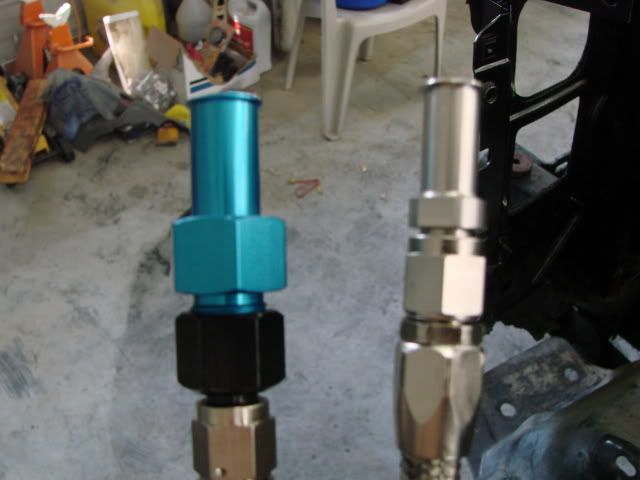
Fragola (blue) and Areomotive quick connect ends
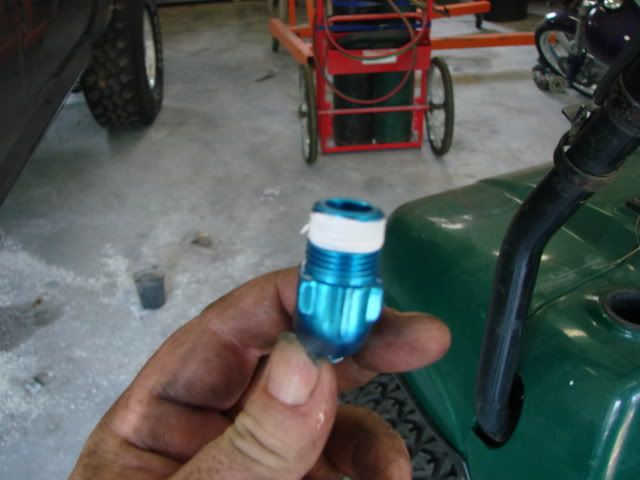
3/8 NPT to -6 AN adapter, with pipe tape, ready to install
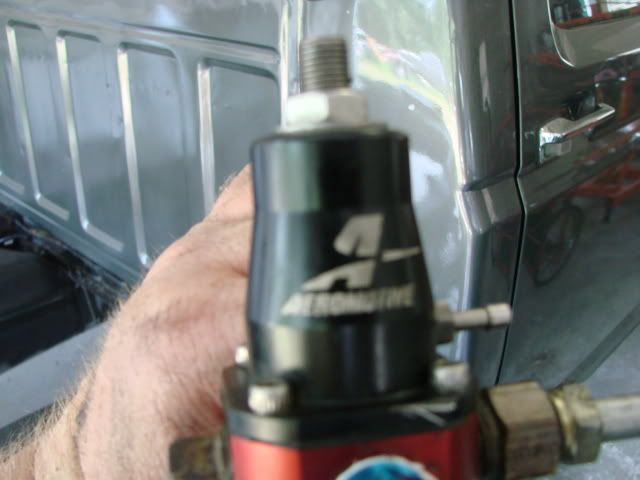
Regulator ready to mount

Shameless plug!! Aeromotive is the shnits!!
Supply and return lines hooked up
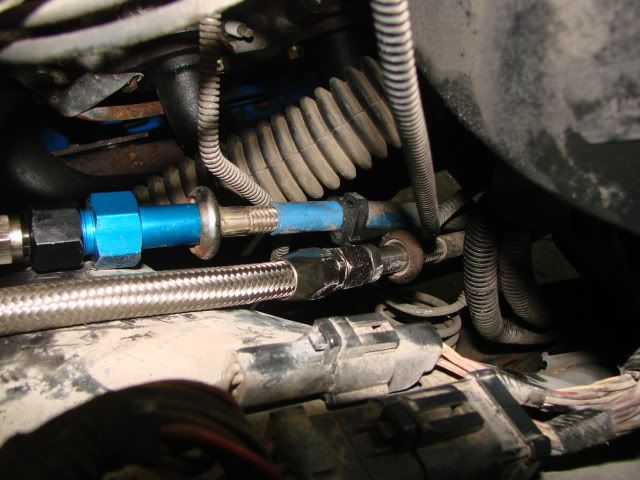
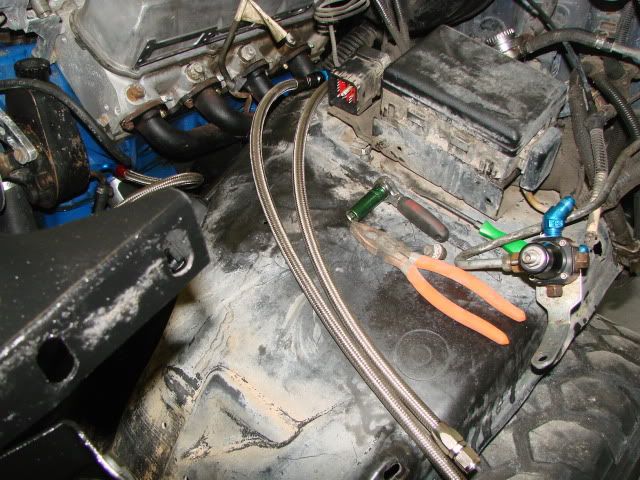
Bypass regulator mounted and lines hooked up

Once everything is mounted and set, I will clamp the lines down the inner fender with some adel clamps
BTW, how can something be NEW and IMPROVED at the same time????
Motor hoists... not just for lifting motors!
Shameless plug #2... these are some of the better wires on the market!!
Drivers side, mounted and routed!

Much better looking than the plastic separators!!
Thats it for now... time to rehydrate a bit and then head back out and get some more done!!
And now for a mid-day update since its too freakin hot outside right now!!
The lines in the earlier post are for the fuel supply and return to the bypass regulator for the carb conversion. I use a Aeromotive 13301 Bypass Regulator to cut the pressure down for the carb. The regulator is mounted under the drivers side battery box (I am using a diesel core support and radiator with dual batteries). To hook up to the factory quick connects, I am using a larger adapter from Fragola, and a small adapter from Aeromotive (Aeromotive also makes a large adapter, but its more $$ and has a hookup for a pressure gauge, which I don't need for what I am doing). The Fragola adapter (supply) is a -8 AN fitting, which I am stepping down to an -6 AN fitting (-6 AN = 3/8 hose) which is plenty enough to supply a carb. The bypass regulator is set to 6psi, and then I have a deadhead regulator on the carb supply line which is set at 4.5psi. With this setup, I did not have to change to a larger return line, and the pressure at the carb is rock steady at 4.5 all day long. The GPH rating of the hi-pressure pumps is enough that I have never run into an issue of running out of fuel for the carb. I also ran new plug wires (Ford Racing 9mm) mounted in R&M Horizontal brackets. Much cleaner and better looking than before. Anyways, on to the pics....
Aeromotive 13301 Regulator and stainless hoses
Fragola (blue) and Areomotive quick connect ends
3/8 NPT to -6 AN adapter, with pipe tape, ready to install
Regulator ready to mount
Shameless plug!! Aeromotive is the shnits!!
Supply and return lines hooked up
Bypass regulator mounted and lines hooked up
Once everything is mounted and set, I will clamp the lines down the inner fender with some adel clamps
BTW, how can something be NEW and IMPROVED at the same time????
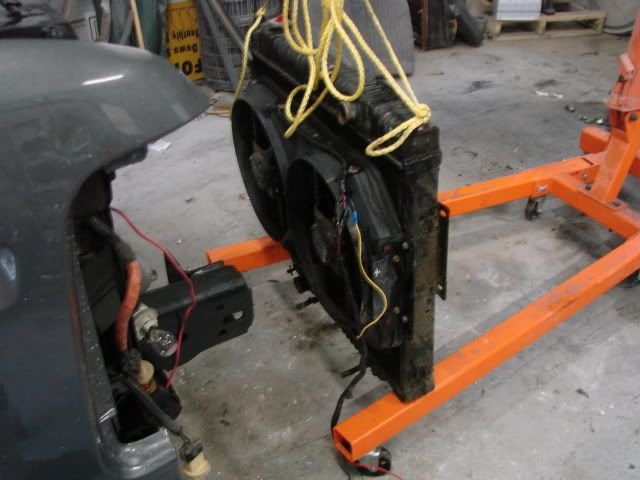
Motor hoists... not just for lifting motors!
Shameless plug #2... these are some of the better wires on the market!!
Drivers side, mounted and routed!
Much better looking than the plastic separators!!
Thats it for now... time to rehydrate a bit and then head back out and get some more done!!
#159
07-04-2011, 03:14 PM

#161
07-04-2011, 08:51 PM
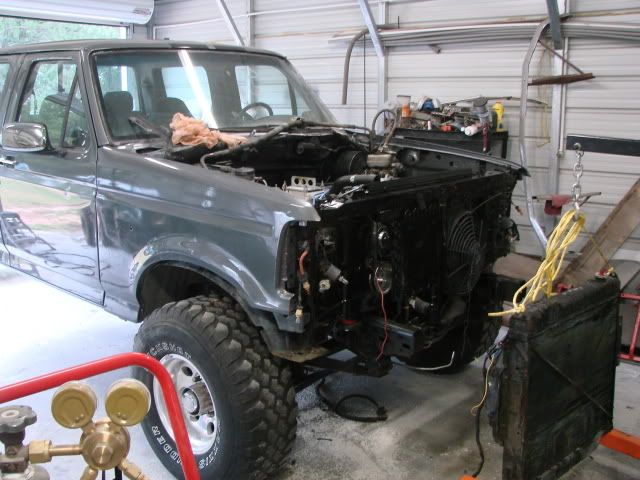
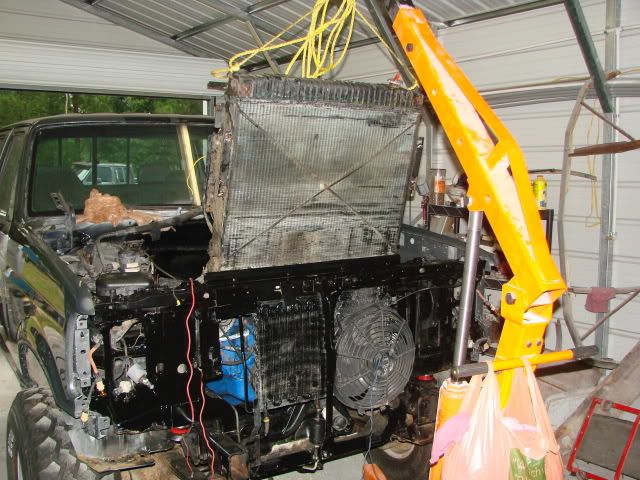
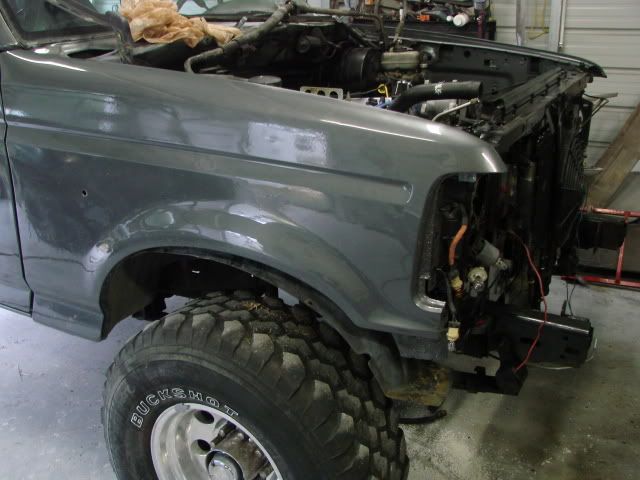
Just a few more pics from today... radiator is in, and front fenders are on. The diesel radiator is a royal B!TCH too. I put it in once by hand... ONCE. From then on out, its with the motor hoist. The bright side is, with the dual fans, it does NOT overheat. The fan on the front of the core is a secondary fan that I use in to assist the a/c. On the previous setup I had it wired with a relay that was triggered by the a/c clutch hot. This time I am going to set it up with a pressure switch from a semi hooked into the a/c line. That way in slow or stop/go traffic it will cycle as needed to regulate the a/c pressure, but going down the road with airflow thru the radiator, it will not be running.
Now for the truck ****...
Now for the truck ****...
#162
07-05-2011, 12:38 AM

#165
07-05-2011, 07:03 PM
