
BUILD THREAD - '95 F-350 460 4x4
#1
 11-01-2010, 03:51 PM

BUILD THREAD - '95 F-350 460 4x4
Since I noticed a trend in "personal official threads". Thought I would start an official thread to keep up to date. This is my project,
'95 F-350 xlt 4x4 7.5l 460, E40D, Singlecab, 3.55 rear. 250k miles. Work / play truck, the budget will reflect. No super high-end build here.
Current Plans: Small part repair. Functionality repairs, maintenance. Paint and body. Basic maintenance and high mileage repair. Reverse shackle kit (or lift kit) Plan to run 35's
List of DONE Items:
+ Front steering joints (tie rod ends, drag links)
+ Tranny fluid full flush
+ Front passenger manual hub needs rebuilt
+ U-Joints - Cardan Joint rebuilt
+ Rear Brakes
+ New water pump / timing chain
+ Broken Interior pieces
+ Remove purple tint
+ Rear Brakes new shoes...
+ 37" meats on new rims OZ tires
+ 16.5 PRO Comp rock crawler wheels -
+ Roll Pan
+ New Distributor
+ 3" Sky Reverse Shackle Kit
+ Sky-Jacker Add-a-Leaf
+ Front Fuel Pump
+ Cracked Timing Chain Cover fixed
+ Drop Pitman arm
+ In bed custom spare tire carrier
+ Fuel Door Delete
+ Ignition system, wires, plugs, cap.
+ Fixed electrical Cruize control / horn
+ AC vaccume leak for MAX fixed
+ New headliner
+ Explorer Overhead Console
+ Rear Lift Installed, pro comp shocks
Immediate To-Do's
Body Work
Future To-Do's
+ Body / Paint original grey color.
+ Cowl Hood
Here it is shortly after I bought it.
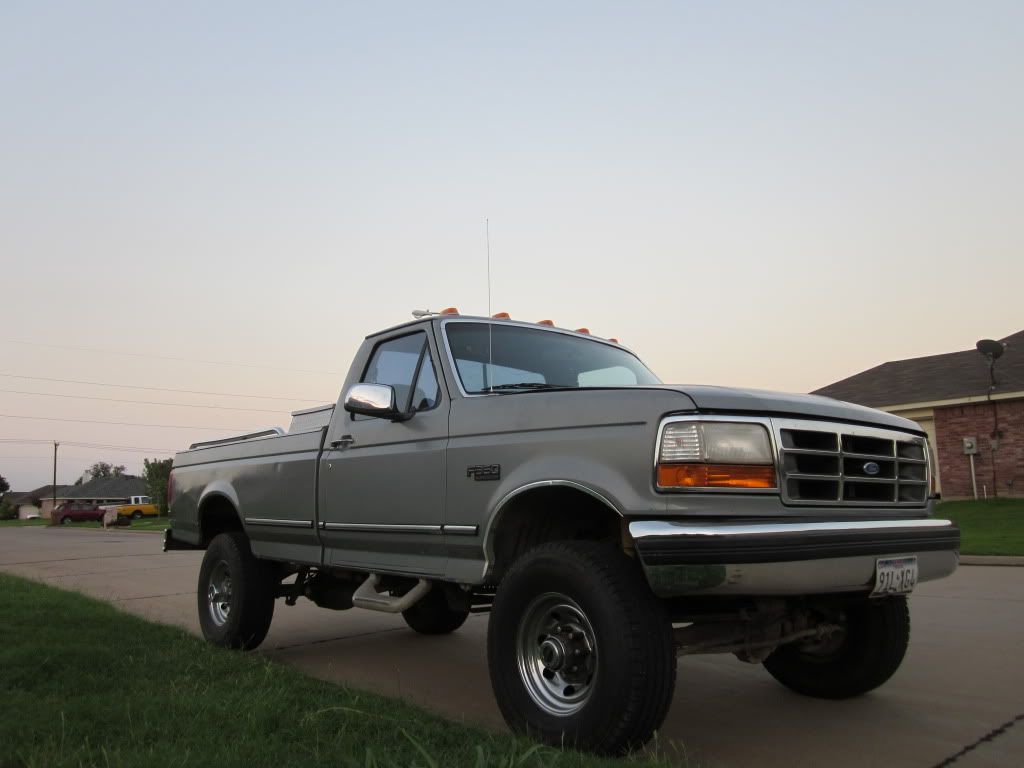
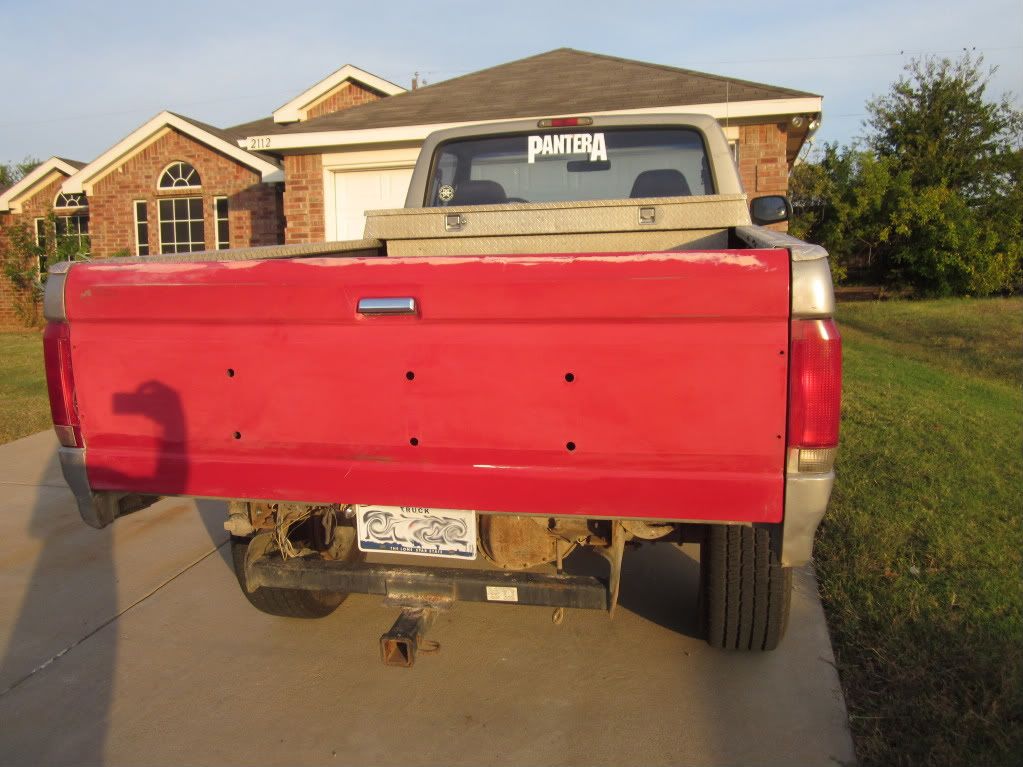
Hard to tell but the tailgate is trashed...

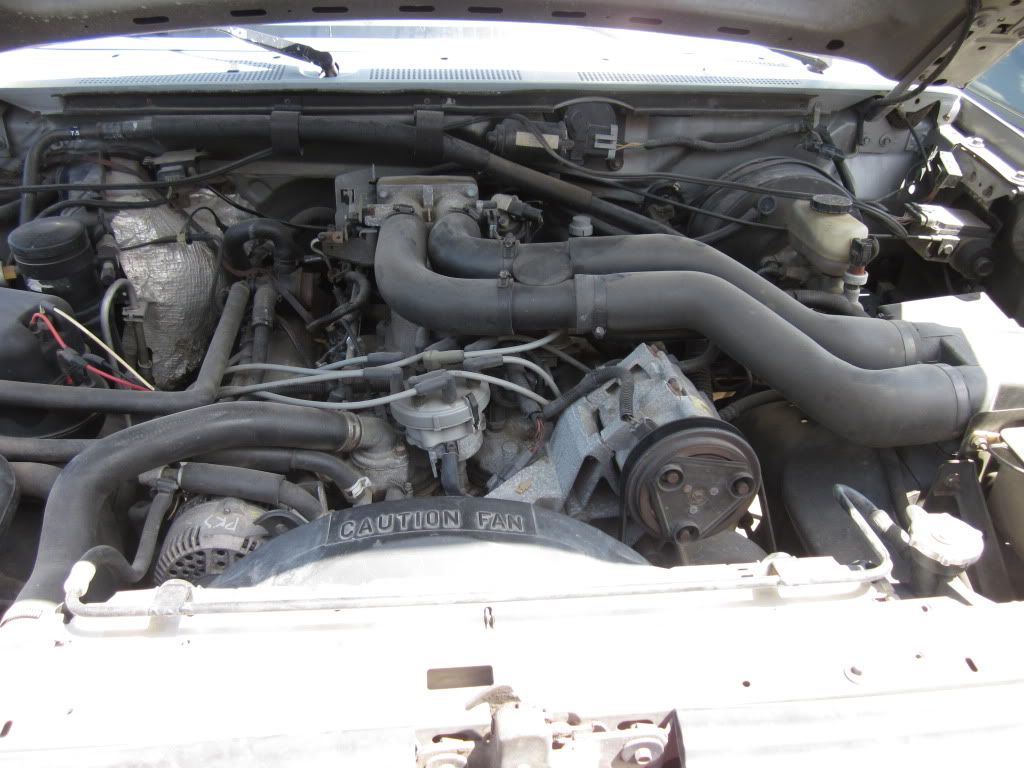
Motor is all stock.
'95 F-350 xlt 4x4 7.5l 460, E40D, Singlecab, 3.55 rear. 250k miles. Work / play truck, the budget will reflect. No super high-end build here.
Current Plans: Small part repair. Functionality repairs, maintenance. Paint and body. Basic maintenance and high mileage repair. Reverse shackle kit (or lift kit) Plan to run 35's
List of DONE Items:
+ Front steering joints (tie rod ends, drag links)
+ Tranny fluid full flush
+ Front passenger manual hub needs rebuilt
+ U-Joints - Cardan Joint rebuilt
+ Rear Brakes
+ New water pump / timing chain
+ Broken Interior pieces
+ Remove purple tint
+ Rear Brakes new shoes...
+ 37" meats on new rims OZ tires
+ 16.5 PRO Comp rock crawler wheels -
+ Roll Pan
+ New Distributor
+ 3" Sky Reverse Shackle Kit
+ Sky-Jacker Add-a-Leaf
+ Front Fuel Pump
+ Cracked Timing Chain Cover fixed
+ Drop Pitman arm
+ In bed custom spare tire carrier
+ Fuel Door Delete
+ Ignition system, wires, plugs, cap.
+ Fixed electrical Cruize control / horn
+ AC vaccume leak for MAX fixed
+ New headliner
+ Explorer Overhead Console
+ Rear Lift Installed, pro comp shocks
Immediate To-Do's
Body Work
Future To-Do's
+ Body / Paint original grey color.
+ Cowl Hood
Here it is shortly after I bought it.
Hard to tell but the tailgate is trashed...
Motor is all stock.
#2
11-01-2010, 03:54 PM
OFFICIAL BUILD - Project '95 F350 4x4 460 << Summit roll pan added >>
When I got the truck with very high miles I was concerned most about bearing and ring wear on the motor. Compression test shows the motor to be in fairly good shape. the truck was a fleet truck one time in its life so lets hope it kept regular maintenance intervals. I was also concerned with the tranny.
Shortly after I got it the check engine light was on. I decided to go through the codes and repair them first. It was only throwing two codes. PIP sensor, and AIR system. The engine was cutting during criusing so I replaced the distributor with a refurb to get another bad PIP sensor. The second one was a charm and it runs great.
<!-- / message -->
#3
11-01-2010, 04:07 PM
My philosiphy has always been clean and simple. So I first shimmed and re-aligned the bumper and stripped the wheel well trim off of it.
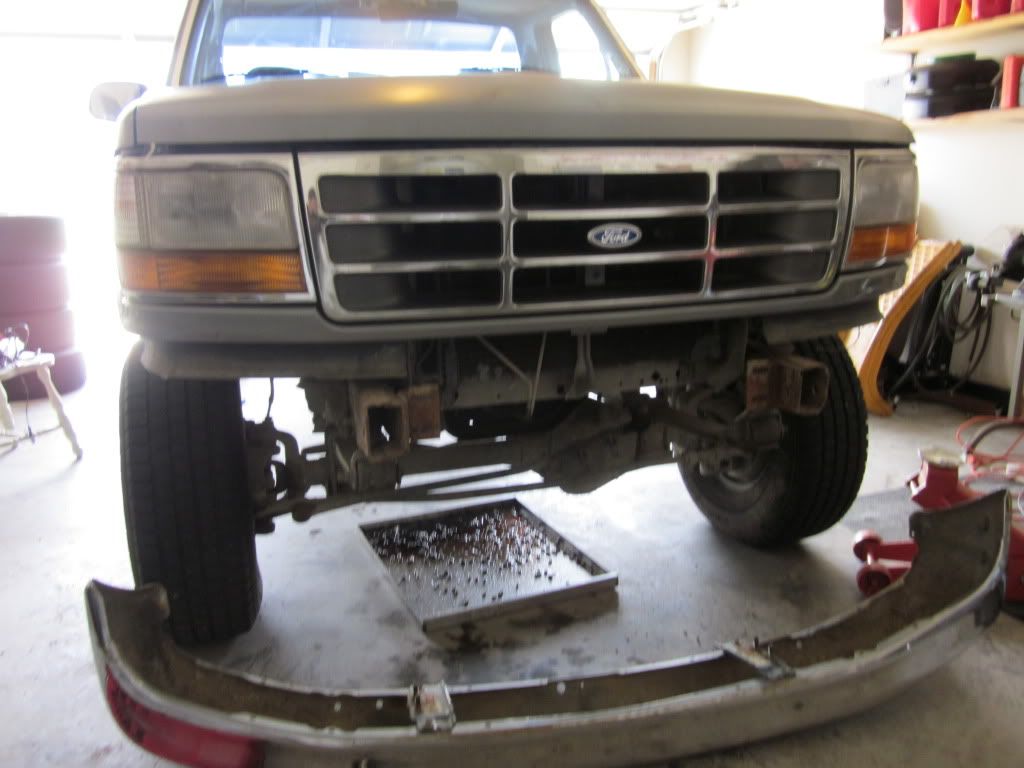
I also removed the bent up bed rails, and re-aligned the hood as best as I could untill I can get a cowl hood for it, and painted the old faded cab lights semi-gloss black.
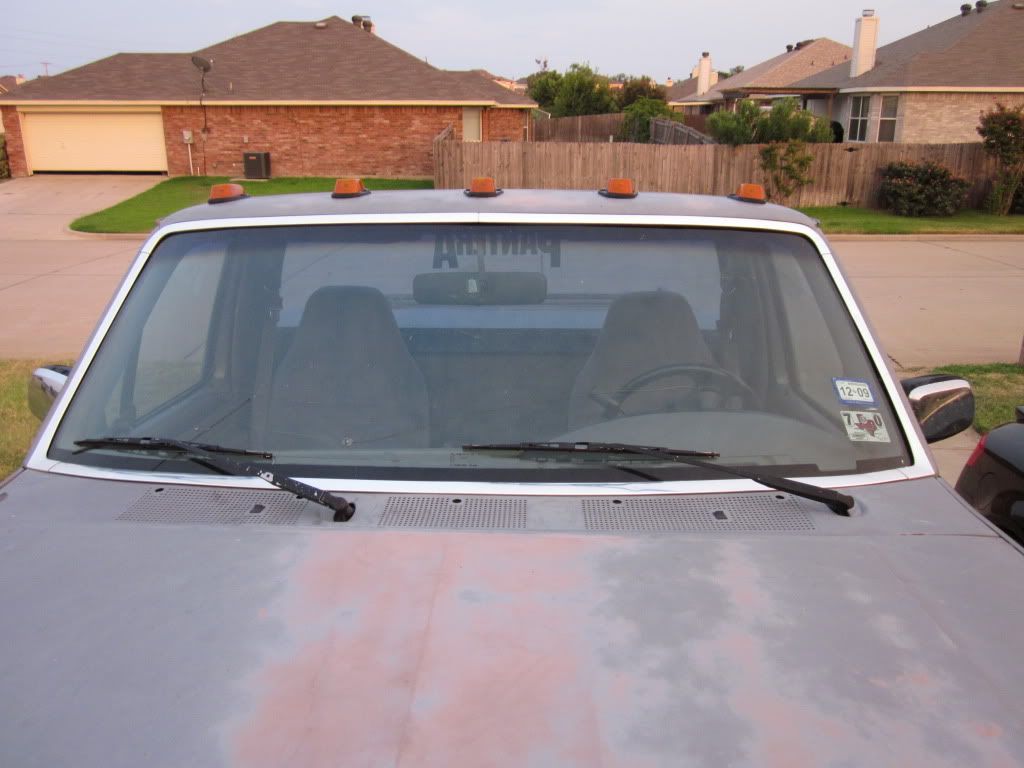
I also removed the bent up bed rails, and re-aligned the hood as best as I could untill I can get a cowl hood for it, and painted the old faded cab lights semi-gloss black.
#4
11-01-2010, 04:12 PM
Someone had ran the exhaust from the manifolds, cut out the cats, to a 3" glasspack. The glasspack was squeezed down to a 2.5" pipe that split to a rusted beat up dual system...I cut it out and 3" simple under cab dump with a weekend and a welder and some high temp paint.
When I get headers for it I'll add a high flow cat and quieter muffler. The glasspack and dump is too damn loud.
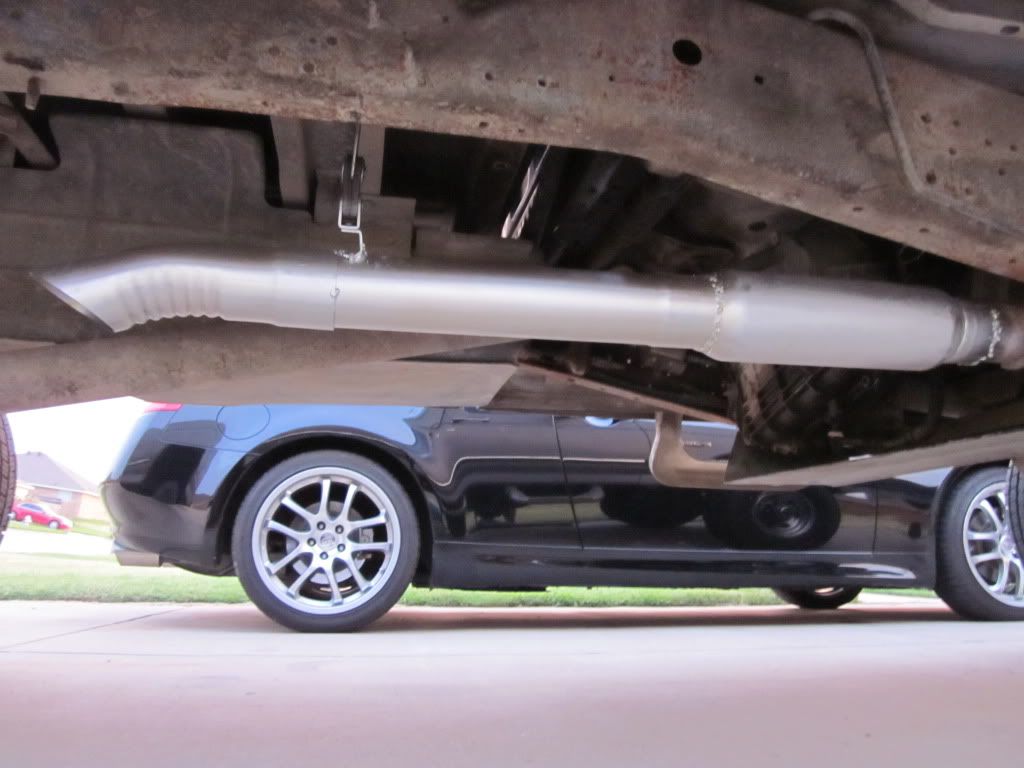
When I get headers for it I'll add a high flow cat and quieter muffler. The glasspack and dump is too damn loud.
#5
11-01-2010, 04:15 PM
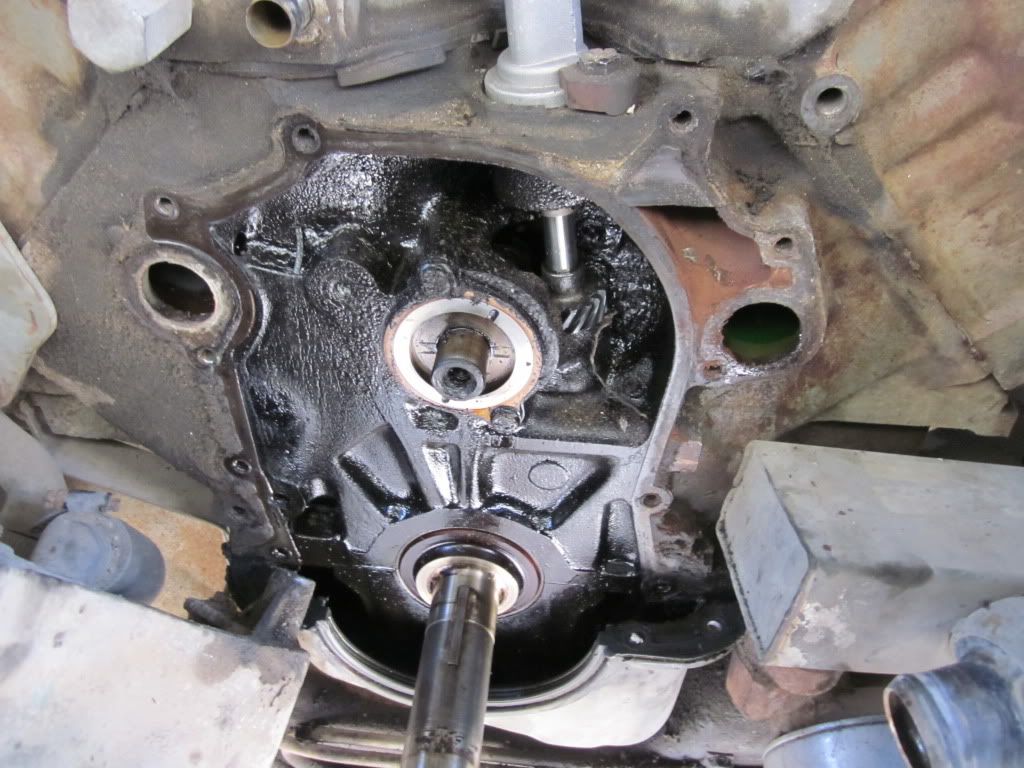
Ive been driving alot since I've had it for about 3 moths, and during this it had developed a nice coolant leak at the timing chain cover to block. I went ahead and fixed it and replaced the timing chain while I was there as well. The engine looks a little sludged...lets hope it last a little longer before I have to tear it down to do a rebuild.

Almost forgot...I'll be taking more pics in the future but the rear brakes we're SHOT, so I replaced the shoes on them as well. Front brakes needs new rotos and pads. I'll tackle that soon too.
Almost forgot...I'll be taking more pics in the future but the rear brakes we're SHOT, so I replaced the shoes on them as well. Front brakes needs new rotos and pads. I'll tackle that soon too.
#6
11-01-2010, 04:35 PM
So I decided to focus my attention on paint and body work. I am by no means a pro but I've been around to do some body work and paint so all I really need is time...lots of work and lots of klarge panels.
Luckily the truck has no rust. I havnt seen any spost anywhere on the body that would suggest rust yet.
So im almost certain I am going to shoot an acrylic enamel, but I have always been curious what the cheapo Duplicolor lacquor would look like, so I bought a quart of the brilliant silver and clear coat. I've read alot on it and it basically had no good reviews from painters...curiosity sometimes killed the cat but here is the results.
I wanted to do a test to see how it looked and shot, so I grabbed my trashed tailgate and picked a spot on it. No primer. Wetsanded the area with 1000 grit shot on the base in 3 coats. I used a harbor freight 1.7 tip HVPL gun with a 33 gal compressor @ 35-40 psi.
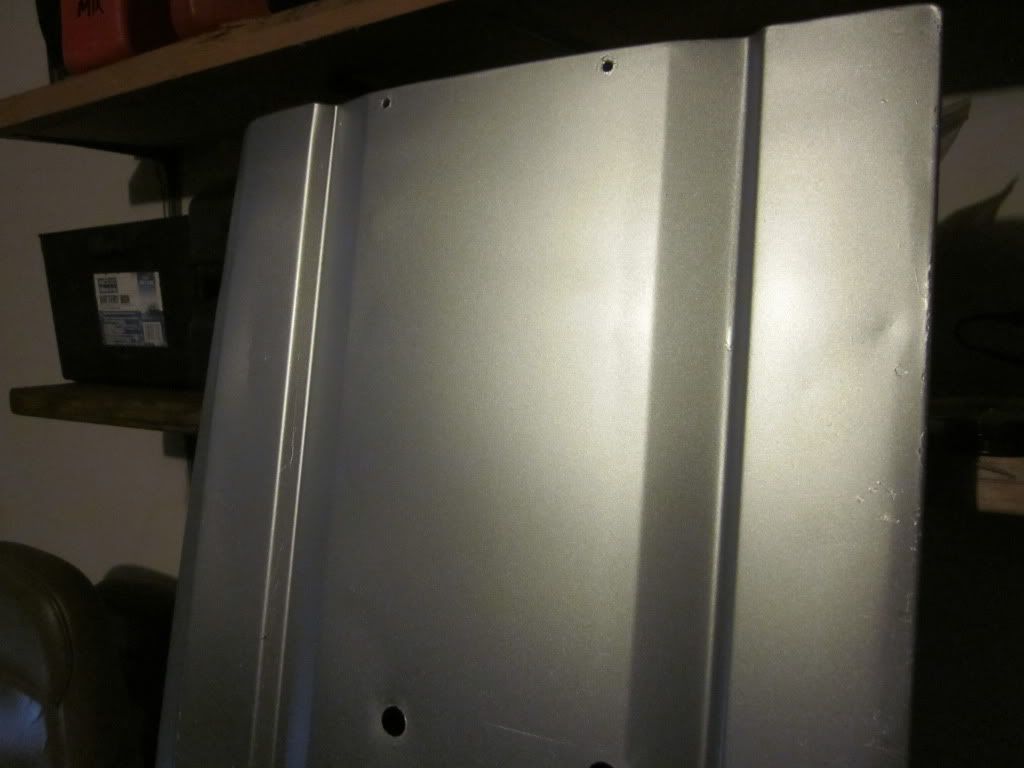
Next day I shot on clean. No sanding, noting, just wiped it down and shot.
I suspected orange peel, mainly from the high 40psi I ran the gun at (recommended by duplicolor) and the 1.7tip I was using on the gun. Also you get what you ay for, with this expect to wetsand and polish.
Here it is after 3 coats of clear.
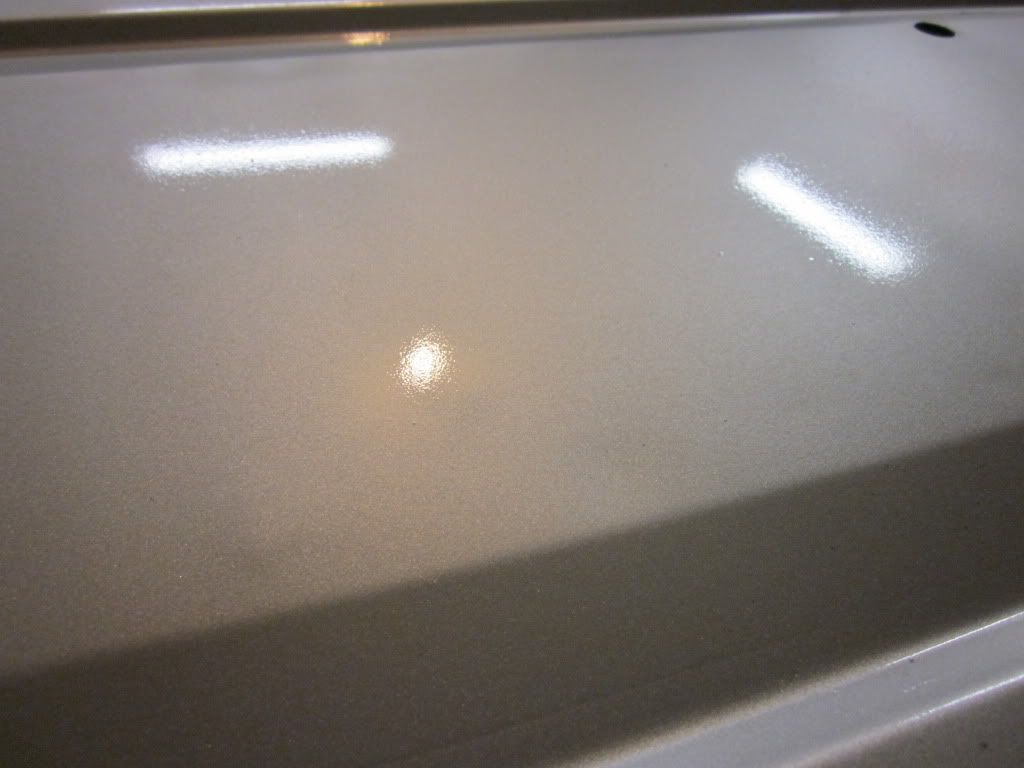
The diections say to wait 6 hours before wet sanding...I waited about 3. It seemed dry so I wetsanded with 1000 till smooth. And polished it with 3M perfect-it compunt and polish.
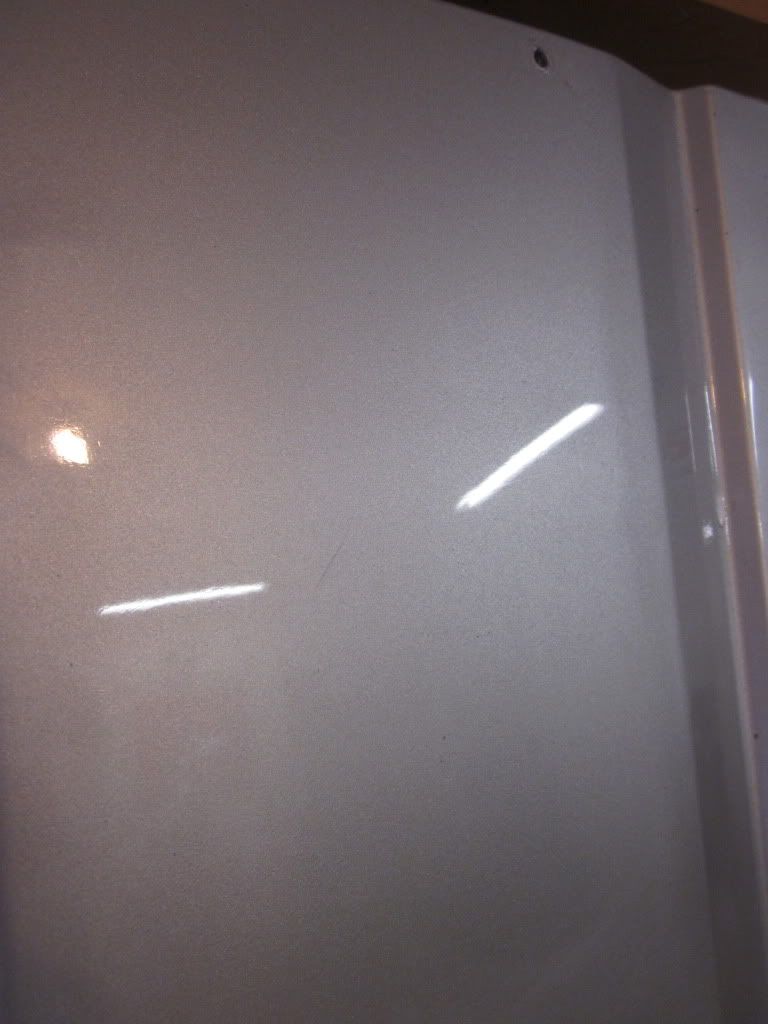
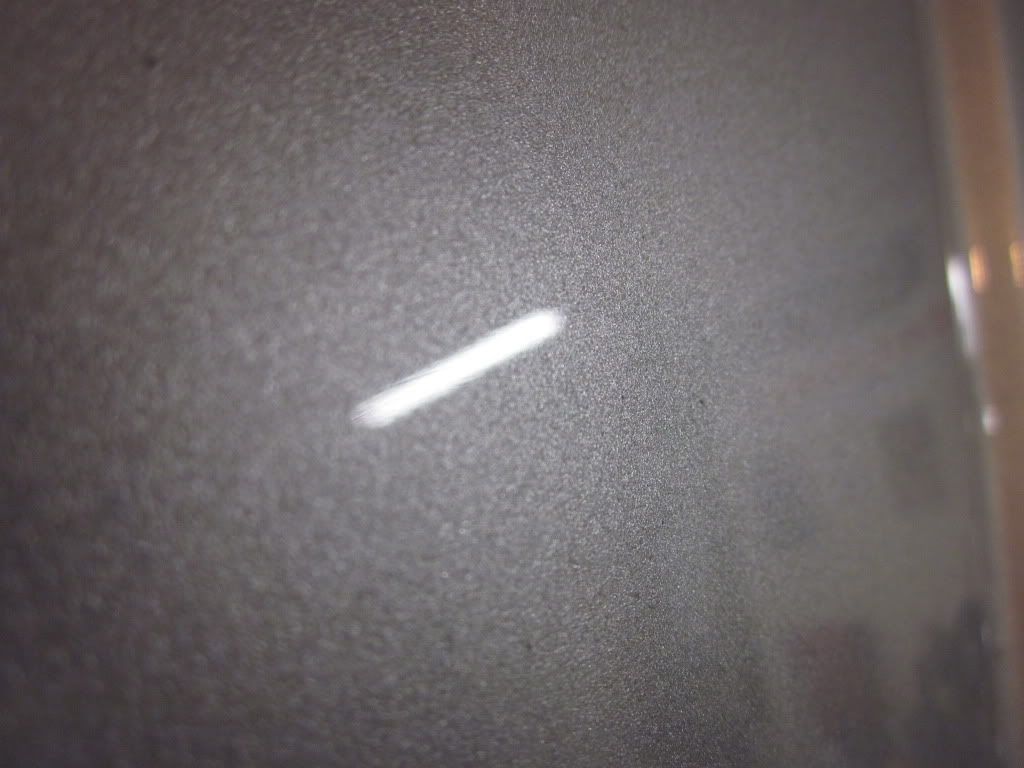
Final results. I was impressed on the glossiness, and the brilliant silver was VERY metallic. There are some metallic steaks but that was my fault in playing with the volume on the HVPL gun. But I question the duribility. Im still up in the air on using this stuff...I've never shot base / clear before so I want something user friendly but not junk either...When this dries up completely I'll bang it around abit and see how soft it is and how easy it scuffs and scrathes.
Luckily the truck has no rust. I havnt seen any spost anywhere on the body that would suggest rust yet.
So im almost certain I am going to shoot an acrylic enamel, but I have always been curious what the cheapo Duplicolor lacquor would look like, so I bought a quart of the brilliant silver and clear coat. I've read alot on it and it basically had no good reviews from painters...curiosity sometimes killed the cat but here is the results.
I wanted to do a test to see how it looked and shot, so I grabbed my trashed tailgate and picked a spot on it. No primer. Wetsanded the area with 1000 grit shot on the base in 3 coats. I used a harbor freight 1.7 tip HVPL gun with a 33 gal compressor @ 35-40 psi.
Next day I shot on clean. No sanding, noting, just wiped it down and shot.
I suspected orange peel, mainly from the high 40psi I ran the gun at (recommended by duplicolor) and the 1.7tip I was using on the gun. Also you get what you ay for, with this expect to wetsand and polish.
Here it is after 3 coats of clear.
The diections say to wait 6 hours before wet sanding...I waited about 3. It seemed dry so I wetsanded with 1000 till smooth. And polished it with 3M perfect-it compunt and polish.
Final results. I was impressed on the glossiness, and the brilliant silver was VERY metallic. There are some metallic steaks but that was my fault in playing with the volume on the HVPL gun. But I question the duribility. Im still up in the air on using this stuff...I've never shot base / clear before so I want something user friendly but not junk either...When this dries up completely I'll bang it around abit and see how soft it is and how easy it scuffs and scrathes.
#7
11-01-2010, 04:41 PM
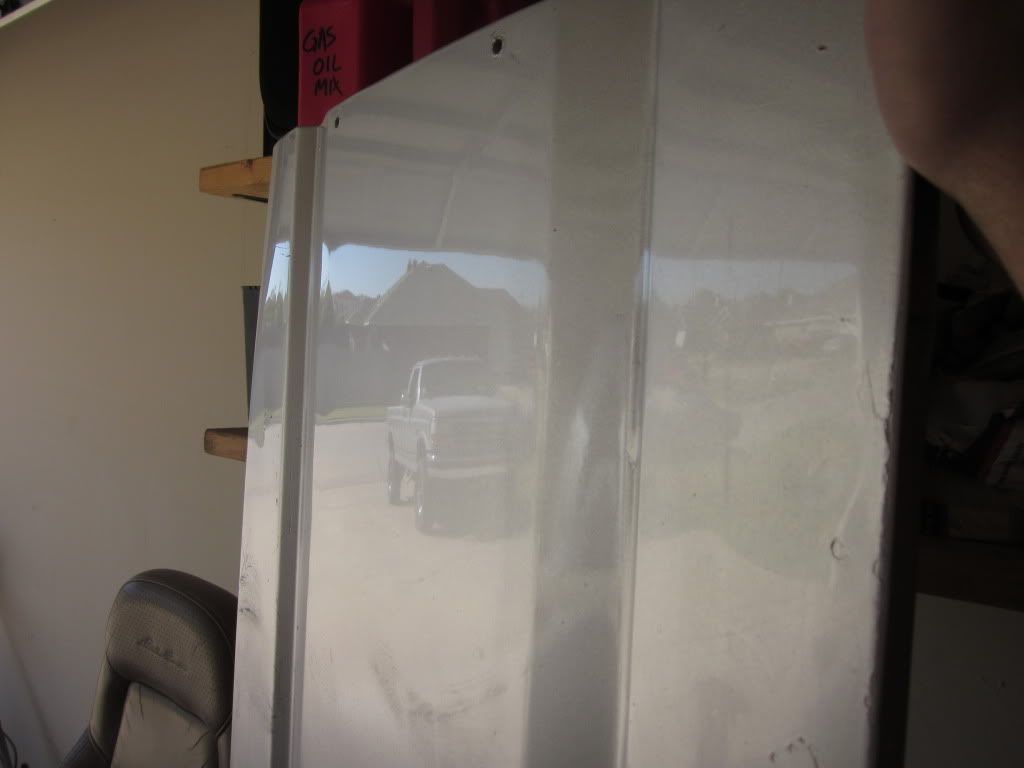
Since my other tailgate was bent to hell and being used as a paint test panel, I picked up this red tailgate on craigslist for cheap, very straight and not beat up. It also has the trim panel strip in real good shape.
I started doing some body work on it small dings at the top. The beat up rear bumper as of now is also gone, in favor for a roll pan. Im looking at the MAR-K ones.
I started doing some body work on it small dings at the top. The beat up rear bumper as of now is also gone, in favor for a roll pan. Im looking at the MAR-K ones.
Trending Topics
#9
11-02-2010, 09:29 AM
I've thought about painting it white just based on how good yours looks. These trucks look good in white, im up in the air on color.
I see our in Austin, im in Mansfield, just south of Arlington.
#10
11-02-2010, 02:49 PM
Post Fiend
White looks ok, but I'm a huge fan of the color on my F-150 and the bright blue that came on some of them also.. The silver looks great on that truck though. I'd just do the body work and paint it back the original color. Would save you quite a bit of time and money over changing colors if you were to change colors correctly. This way you wont have to mess with pulling the bed out, the interior and all that fun stuff, just spray it.

#12
11-02-2010, 03:09 PM
#13
11-02-2010, 03:12 PM
I can make what ever just pay shipping. My wife got me a cutter for christmas and I love using it.
Here is my 2011. My 95 was peppered with stickers but it got a little out of hand.
#14
11-02-2010, 03:14 PM
White looks ok, but I'm a huge fan of the color on my F-150 and the bright blue that came on some of them also.. The silver looks great on that truck though. I'd just do the body work and paint it back the original color. Would save you quite a bit of time and money over changing colors if you were to change colors correctly. This way you wont have to mess with pulling the bed out, the interior and all that fun stuff, just spray it.
I really have no issue spraying jambs and all. The bed has a liner and is (and will be) banged up, so I have no plans on spraying the inner bed. Also I'd like a spray on bed liner one day.
If the interior is a little off in the shade of silver I dont think the door jambs and under hood would be that big of deal...
#15
11-02-2010, 03:16 PM
Thats why I was playing with the silver laquor. Get a feel on how to spray metal flake. The stock color is that grey. Not very metallic. I'll likely go stock grey with added metalflake or a sliver like the color I tested above. I may even go more pewter, a little darker.
I really have no issue spraying jambs and all. The bed has a liner and is (and will be) banged up, so I have no plans on spraying the inner bed. Also I'd like a spray on bed liner one day.
If the interior is a little off in the shade of silver I dont think the door jambs and under hood would be that big of deal...
That gray metal flake you did looks really nice.