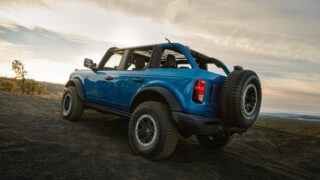
Complete Brake Upgrade for 1978 – 1979 Ford Broncos
By Danny Cabral
The objective of this article is to provide you with the knowledge and
identity of components needed to vastly improve the braking capability
of our ’78-’79 Ford Broncos. This upgrade will not require drilling,
cutting, grinding, welding or fabrication. We will be retaining the 5
lug, 15" wheels and the original axles. I have spent six months
researching brake fundamentals/hydraulic principals and investigating
the necessary components.
Let’s begin with the brake pedal and work our way down to the rear
brakes. The pedal arm is well suited for our upgrade project. What’s
important here is called pedal ratio. It is found by measuring the
distance from the pivot point (fulcrum) to the power booster rod
attaching point. (dim. A) Now measure the distance from the pivot point
(fulcrum) to the center of the brake pedal pad. (dim. B) Simply divide
dim. A into dim. B and we get a pedal ratio of 6.5:1 for a ’78 Bronco.
The fulcrum linkage (.526) is the opposite half of the calculation and
gives us a final pedal ratio of 3.41:1. (6.5 x .526 = 3.41:1) On a power
brake system, this is sufficient leverage, so do not modify the brake
pedal arm because too much pedal ratio will cause a spongy pedal because
of high mechanical leverage. In ’79 the pedal ratio was 3.5:1. This
becomes the final pedal ratio because they didn’t need to overcome the
fulcrum linkage. This is the only component we will not be upgrading.
The next part of the system is the vacuum booster. I’m sure you found
out by now, the OEM 11" vacuum booster is simply too weak to assist in
pressurizing the hydraulic system. The ’78-’79 Ford F350 tandem booster
(dual 9 1/4" diapragm) is a bolt in retrofit with twice the power
output.
If your Bronco is a ’78, then it is a short push rod booster
because of the fulcrum linkage (in between booster and pedal arm) used
in ’78 and earlier to reduce pedal travel. A ’78 Bronco will use the
booster from a ’78 F350 4WD or 2WD. If your Bronco is a ’79 then it is a
long push rod booster because it attaches directly across to the brake
pedal arm. A ’79 Bronco will use the booster from a ’79 F350 2WD only!
Also, the ’79 F350 with cruise control was yet a different booster.
There is a date code of 11/1/78 involved in distinguishing the different
length push rod boosters. Most auto part stores can order this booster
for you. The largest remanufacturing company is A-1 Cardone and it’s
part #54-73311 for a ’78 model and part #54-73350 for a ’79 model
(without cruise control).
I couldn’t find any information regarding
cruise control boosters, other than the eyelet on end of push rod is
triangular shaped. The price range varies from around $100-$165 with
core charge. There are other options in obtaining this booster, the
point is you will definately need it. One quick tip; if you own a ’78
Bronco with a 460 engine, you will be able to use tall valve covers (4
1/2") without a body lift, because the F350 tandem booster is smaller in
diameter than the Bronco booster and the ’78 fulcrum linkage (mounting
bracket) positions the booster up higher.
Now let’s discuss the master cylinder. The Bronco master cylinder has a
narrower bolt pattern, thus will not fit the F350 booster. We will be
using the matching F350 master cylinder. The increased 1 1/16" bore will
be beneficial to us when we install the larger front disc brake calipers
(later). The F350 master cylinder locates the brake lines toward the
fender rather than the engine, which provides more room around the
engine and looks neater. Simply twist the lines over to the opposite
side of new master cylinder. The only change needed here is replacing
the line nut fitting on the chamber for the front brakes. The Bronco
master cylinder uses a 9/16"-18 threaded nut and the F350 master
cylinder uses a 3/8"-24 threaded nut. The line nut fitting for the rear
brakes is the same on both at 7/16"-24. This is a simple task with a
double flaring tool kit.
A quick tip; when bench bleeding your new
master cylinder, the lines must be submerged in the brake fluid chambers
in order to effectively remove all air. Allow me to clear up a common
misconception about master cylinders. A larger bore provides more volume
but less pressure. A smaller bore provides less volume but more
pressure. So you should never increase master cylinder bore diameter
unless you’re also installing larger brake calipers to accept it. If you
do, your brakes will only feel better because the added volume shortened
your pedal stroke and made it more firm. In reality however, the same
calipers are receiving less pressure which just made your brakes worse.
I purchased a new master cylinder, Wagner part #F97938.
The front brake calipers on our Broncos are weak because of their small
2 7/8" pistons. The phenolic (plastic) piston is also undesirable. These
calipers are another major factor of our Broncos poor braking. The brake
calipers we want are off of ’73-’78 Ford fullsize cars. For the sake of
arguing, I will be calling these fullsize car calipers the Thunderbird
calipers. These calipers have a thicker casting, a huge 3 3/32" steel
piston and are a direct fit replacement on our Dana 44 axles! The
Thunderbird calipers even use the same brake pads. What will amaze you
more is the clamping force of these calipers. In order to put its power
in proper perspective, we need to understand what’s called a caliper’s
piston area. Caliper piston area is the measure of a brake calipers
clamping force. It is found by first finding the decimal equivalency of
the piston diameter and multiply it by itself to find its "squared"
value. Then multiply that figure by .785 and the result is the caliper
piston area. Let’s first compute the Bronco’s caliper piston area. 2.875
X 2.875 X .785 = 6.48 square inches of clamping force. If we compute the
dual piston caliper of an F350, the only difference is finding the
piston area and multiply it by 2, because this dual piston caliper uses
two smaller 2 3/16" pistons instead of one large one. 2.187 X 2.187 X
.785 X 2 = 7.50 square inches.
As you can see, the F350 dual piston
caliper has over one square inch of piston area and in terms of
hydraulic pressure, one square inch is a very potent difference in
clamping force. Now let’s compute the Thunderbird caliper with its 3
3/32" piston. 3.094 X 3.094 X .785 = 7.51 square inches of clamping
power! Remarkably, we have just swapped in a brake caliper equal in
strength to an F350 dual piston caliper and it fits inside the 5 lug,
15" wheel! The only implication is plumbing the Thunderbird caliper. It
has a 7/16"-24 inlet hole as oppose to a Bronco caliper having a 3/8"-24
hole. The Thunderbird caliper also never used a banjo bolt, the hose
itself threaded into the caliper with a crush washer. We need the ninety
degree angle a banjo bolt provides, in order to clear the upper ball
joint on our Dana 44 axle. Since a banjo bolt was never used and
7/16"-24 is unusual, we need to convert to a #3 AN fitting. Aeroquip
part #FCM2929 is the fitting adapter you’ll need along with the aluminum
crush washer part #FCM3513. Now you need a #3 AN stainless steel flex
hose with a real tight ninety degree bend on one end and straight on the
other. I chose Earl’s Performance part #630117-14 because it met the
criteria and is 14" long. On the opposite end of the flex hose you’ll
need Aeroquip part #FCM2936 to adapt it to the 3/16" inverted flare
steel line. Both Thunderbird and Bronco calipers use the same bleeder
screws and brake pads. I purchased a set of rebuilt calipers, King part
#6083 & #6084.
The rotors will need to be the cross drilled type because brake fade
will now become a problem on severe braking. The cross drilled rotors
weren’t needed on a stock Bronco because there wasn’t even enough
clamping force to induce brake fade. With the added pressure of the
larger booster and increased clamping force of the calipers, brake fade
would be prevalent. The cross drilled rotors will eliminate this
totally. I used Autospeciality Power Stop rotors part #AR-8513L &
#AR-8513R.
There’s a multitude of aftermarket performance brake pads on the market,
I chose Performance Friction part #0504. They’re a carbon metallic pad,
long lasting, rotor friendly and possess a high friction coefficient.
I’m happy with the brake pads although they need one hard brake
application to heat them up initially. They grip very well under severe
braking.
The combination valve that bolts to the inside of your frame rail can be
either removed or "gutted" out. The reason why we need to bypass the
combination valve is because the rear disc brake kit uses an adjustable
proportioning valve. The combination valve got its name from being three
valves in one. The front section is the metering valve, the middle is
the brake warning light switch and the rear section is the proportioning
valve. I chose to retain this valve because it serves as a juntion point
for the four lines that couple to it. I also wanted the brake warning
light switch to remain operational. Remove the valve and clamp it in a
vise. Remove the front cap nut, spring and plunger assembly of the
metering valve. You only need to discard the rubber washer toward the
center of the valve. We are doing this to render the metering valve
useless, because it only "holds off" pressure to the front disc brakes
until the slower rear drum brakes come into action. The metering valve
was designed to balance the actuation of disc and drum brakes. We will
not be using drum brakes so it’s function is not required.
Next remove
the bottom rear cap nut of the proportioning valve and discard the
spring. The proportioning valve was designed to substantially reduce
pressure to the small wheel cylinders. Again, its function is
detrimental to disc brakes which need to operate at a much higher
pressure. Bleeding brakes will no longer require pulling the bleed rod
outward.
As far as rear disc brakes go, they are absolutely necessary. To put it
in plain english, drum brakes suck! I’m not even going to waste the ink
in my pen explaining why. There are many rear disc brake conversion kits
on the market that all I can say is pick one you like and install it. I
used the Ford Motorsports SVO kit #M-2300-G because it was inexpensive
and powerful. A word of caution; this kit only fits the "new style" Ford
9" housing ends. (3.56" X 2" bolt pattern) I have a Dana 60, 35 spline
semi-floating rear axle made by DTS. It is made using a Dana 60 center
section with thick wall axle tubes and Ford 9" housing ends. (They use
Ford 9" housing ends because the original 5 lug semi-floating Dana 60’s
used in muscle cars long ago by Mopar & Ford, actually had smaller
bearings than the Ford 9" housing ends.) The adjustable proportioning
valve I used with this kit was a Wilwood unit sold by Summit Racing part
#G3905. I only needed to reduce full hydraulic pressure by two turns on
the adjustable proportioning valve.
Inline Tube part #FT1002 makes a complete stainless steel line and flex
hose kit for a stock Bronco. The stainless steel braided flex hoses can
be custom length for a lift kit and provide a firm brake pedal because
they resist expansion under pressure like rubber hoses do. (Expanding
rubber hoses cause pressure loss to calipers.) All the lines are
preformed and double flared as required by law. This kit is a great
starting point for this upgrade project.
When it comes time to bleed the brakes, I found the Speed Bleeders made
by Russell part #639590 were like a dream come true. They are bleeder
screws with a check valve machined into them. So you will be able to
pressure bleed your brakes by yourself! They work perfectly. All you
need to do is crack open each one 1/8 of a turn, attach a 5/32" hose
into a bottle and then enter the vehicle to pump the brakes. After, just
tighten the bleeder screw and move on to the next one closest to the
master cylinder. I absolutely love these things because my wife hated to
bleed the brakes with me. (She would pump the pedal.)
Brake fluid is not created equal. It is extremely hygroscopic meaning it
absorbs moisture very easily. Always use DOT 4 brake fluid because of
its higher boiling point. I used Castrol LMA (Low Moisture Activity) DOT
4 brake fluid and bleed the brakes twice a year to flush out the fluid.
I have personally performed this entire upgrade on my ’78 Bronco and the
results were incredible. I realize the cost of this entire upgrade is
expensive but well worth the ability to lock up my 35" Pro Comp Mud
Terrain tires. Anyone knows the larger tires render our vehicles unsafe
and dangerous in a panic stop. I purchased the OEM components at my
local auto parts store and the aftermarket parts from Summit Racing or
Jegs.
Disclaimer: I highly recommend that all work be accomplished by a
competent and licensed mechanic or automotive repair shop. I will not be
held liable for poor workmanship or inferior quality components.


